1
ALEXA Classic SUP 9.0
for ALEXA Classic models (SUP_Alexa_9.0_25486)
R E L E A S E
N O T E S
Date: December 17, 2013
A. Introduction
We are proud to announce that Software Update Packet (SUP) 9.0 for ARRI ALEXA Classic cameras is
now available for download.
Software Update Packet (SUP) 9.0 enables a number of new features for all ALEXA cameras. It adds new
recording capabilities and codec options and provides the basis for the use new ARRI accessories. This
SUP also contains software update 1.37 for the ALEXA Electronic Viewfinder EVF-1, which fixes an issue
that was discovered in EVF software 1.36.
This is an update to the original release notes, with a correction to the feature overview and some
modifications to the Update Information and Color Processing description.
Feature Overview
SUP 9.0 brings the following new features:
• Pre-recording for ProRes (loop recording)
• Improved DNxHD 4:2:2 recording up to 120 fps
• DNxHD 444 recording up to 60 fps
• Phase user button
• Improved color management
• Increased CC range for white balance
• LDS source switch
• Support for upcoming WCU-4 capabilities
• User Pixel Masking
• Support for 1.4x and 2x Alura LDS Extenders
This document contains a detailed description of these features, as well as other changes, a list of known
issues and instructions for upgrading. Please take your time to go through this information and familiarize
yourself with the changes. For more information, please visit www.arri.com.
Update Information
Cameras should always be running the latest SUP release version as this allows you to benefit from the
latest improvements, features and bug fixes. We do not, however, recommend to install a new SUP in the
middle of a production. If, for whatever reason, this step is necessary during an ongoing production,
everyone must be aware of the changes the new SUP will bring. All adjustments that may be required
along the production pipeline should be tested before they are put into action.
ALEXA Classic Software Update Packet (SUP) 9.0 can be installed on the classic version of ALEXA,
ALEXA M, ALEXA Plus, ALEXA Plus 4:3 and ALEXA Studio. This SUP is not compatible with any ALEXA
XT model, ALEXA cameras with an XR module upgrade, ALEXA HD, ALEXA HD Plus, ALEXA Fiber
Remote or ALEXA Fiber Remote Plus.
Please note that ALEXA Classic and an ALEXA XT/XR cameras use different SUP installation packages.
• Installation packages for ALEXA Classic cameras are named 'SUP_Alexa_[version-number]‘.
• Installation packages for ALEXA XT/XR models are named 'SUP_AlexaX_[version-number]'.
Warning: Do not attempt to install this SUP on ALEXA cameras with an XR module, an ALEXA HD,
ALEXA HD Plus, ALEXA Fiber Remote or ALEXA Fiber Remote Plus cameras! Doing so may cause
the camera to malfunction and become inaccessible, which requires that it is sent to an ARRI
Service Center for recovery.
Downgrading
It is possible to revert back to an 8.x SUP release.
Please note that once SUP 8.0 or later has been installed, downgrading to earlier SUP versions may
cause the camera to malfunction and become inaccessible, which requires that it is sent to an ARRI
Service Center for recovery. If you must downgrade a camera below SUP version 8.0, please contact an
ARRI service center BEFORE doing so and seek assistance!
ALEXA Classic SUP 9.0 for ALEXA Classic models (SUP_Alexa_9.0_25486)
Release Notes
Page 2 of 20
Table of Contents
A. Introduction .................................................................................................................. 2 Feature Overview ..................................................................................................... 2 Update Information ................................................................................................... 2 Downgrading ............................................................................................................ 2 B. New Features and Changes ........................................................................................ 5 Accessories .............................................................................................................. 5 Electronic Viewfinder and/or MON OUT ................................................................... 5 External Recording ................................................................................................... 5 General ..................................................................................................................... 5 Imaging ..................................................................................................................... 5 Image Processing ..................................................................................................... 5 Inputs ........................................................................................................................ 6 Internal Recording .................................................................................................... 6 Lenses ...................................................................................................................... 6 Media Access ........................................................................................................... 7 Metadata/Time Code ................................................................................................ 7 Optical Viewfinder ..................................................................................................... 7 Outputs ..................................................................................................................... 7 Remote Control/3D ................................................................................................... 7 User Interface ........................................................................................................... 7 ALEXA Classic SUP 9.0 for ALEXA Classic models (SUP_Alexa_9.0_25486)
Release Notes
Page 3 of 20
C. Known Issues ............................................................................................................... 8 Accessories .............................................................................................................. 8 Alexa M ..................................................................................................................... 8 Alexa Studio ............................................................................................................. 8 Audio ........................................................................................................................ 9 EVF ........................................................................................................................... 9 EVF/MON Out ........................................................................................................ 10 Frame grab ............................................................................................................. 10 Framelines .............................................................................................................. 11 Highspeed .............................................................................................................. 11 Imaging ................................................................................................................... 11 LDS/LDA ................................................................................................................. 11 Metadata ................................................................................................................. 11 Monitoring ............................................................................................................... 12 Playback ................................................................................................................. 12 Recording ............................................................................................................... 13 SD card ................................................................................................................... 13 Sync ........................................................................................................................ 14 Sync/Lens sync ...................................................................................................... 14 Sync/Settings sync ................................................................................................. 14 Test signal .............................................................................................................. 15 Time code ............................................................................................................... 15 Usability .................................................................................................................. 15 User setup .............................................................................................................. 16 Workflow ................................................................................................................. 17 D. Updating Instructions ................................................................................................ 17 Download and Registration Process ...................................................................... 17 How to get a Software Update Package ................................................................. 17 Camera Update Procedure via SD Card ................................................................ 18 Camera Update Procedure via Ethernet ................................................................ 19 Updating an Electronic Viewfinder EVF-1 via Ethernet .......................................... 19 Updating the V-Mount Top/Back Battery Adapter via Ethernet .............................. 20 ALEXA Classic SUP 9.0 for ALEXA Classic models (SUP_Alexa_9.0_25486)
Release Notes
Page 4 of 20
B. New Features and Changes
Accessories
Support for 1.4x and 2x Alura LDS Extenders: An Alura LDS Extender is essentially a PL mount with an
additional lens system, that is placed in the camera's own PL mount. The small and lightweight system
multiplies the focal length of a zoom or prime lens by a factor of 1.4 or 2 and transfers the lens metadata
from the ARRI Lens Data System (LDS) to the camera. ALEXA Studio, Plus, Plus 4:3 and M cameras can
identify the extender type automatically and show the corrected lens data.
Electronic Viewfinder and/or MON OUT
ALEXA Electronic Viewfinder EVF-1 software update: As noted in our customer information on
November 19, software version 1.36 for the EVF-1 contains a bug that can lead to a continuous on/off
power cycling of the viewfinder or, under certain circumstances, an inconsistent motion portrayal in the
recorded image. This EVF software version was distributed with ALEXA XT SUP 8.1.1 and ALEXA Classic
SUP 8.0.1.
Please note that the bug is connected to the viewfinder software, and can occur on viewfinders with
software 1.36, regardless of the SUP on the camera body. You can check the EVF-1 software version on
the camera menu by going to INFO > VERSION.
ALEXA XT and Classic SUP 9.0 both contain EVF-1 software 1.37, which fixes these issues. When the
viewfinder is connected to the camera body during the SUP update, it will also be automatically updated in
the process. It is also possible to update an EVF-1 separately with a computer connected to the Ethernet
port of an ALEXA. For instructions, please see "Updating an Electronic Viewfinder EVF-1" at the end of this
document.
MON OUT redesign: Some items of the status information were slightly changed to provide a cleaner view
of the monitored image in 4:3 sensor mode.
External Recording
No changes.
General
No changes.
Imaging
Phase button: The new USER button function called "Phase sensor" increases the sensor frame rate by
0.2 fps for as long as the assigned user button is pressed. When shooting e.g. a CRT monitor, you may
see a horizontal black bar (video blanking interval) across the CRT screen in the EVF or the MON OUT
image. The phase function allows you to move that black bar out of the frame. This function is only
available in standby and with time code set to REC RUN.
Image Processing
Camera Sensor: SUP 9 contains delicate adjustments to the sensor linearization, which result in a more
neutral rendering over a very limited range of grayscale values. While the overall color reproduction
remains the same, images shot with software versions before 9.0 will look slightly more magenta in certain
areas of the grey scale. Please note that the linearization data for ALEXA M and ALEXA XT M models is
not yet included in this update. Since the change is minimal, there is no problem intercutting between
ALEXA M or ALEXA XT M cameras and other ALEXA cameras. You should, however, double check that
your color pipeline (automated/prefabricated LUTs and other color adjustments) will produce consistent
colors for cameras with and without new sensor linearization. This also applies if you intend to switch SUP
versions during an ongoing production.
ALEXA Classic SUP 9.0 for ALEXA Classic models (SUP_Alexa_9.0_25486)
Release Notes
Page 5 of 20
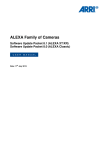
Increased CC range for white balance: The green/magenta shift
correction range has been extended from +/- 8 to +/- 12 steps which
allows balancing the camera for a larger range of light sources.
Please note that for ARRIRAW images with CC values beyond 8,
ARRIRAW Converter (ARC) 3.0 open beta 2 or later or a third party
tool that uses the ARRIRAW SDK 4.4.1 patch release or later are
required. Please check with the respective software developers
about compatibility.
User Pixel Masking: If an ALEXA starts to exhibit defect pixels that are not automatically corrected by the
internal static and dynamic pixel correction, SUP 9.0 enables uploading a User Pixel Mask into the camera,
that marks the pixels for correction. A User Pixel Mask can be created with ARRIRAW Converter (ARC) 3.0
open beta 2 or later, which is slated for release by the end of the year 2013.
Inputs
No changes.
Internal Recording
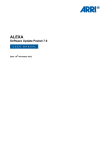
ProRes pre-recording: ProRes pre-recording allows you to roll the
camera before you press the REC button, so you won't miss the
shot. With pre-recording enabled and active, the camera will
continuously (PRE) record frames into a ring buffer. As the actual
take is started with a second press of the REC button, the camera
keeps the content of the ring buffer and appends frames into a
single clip, until the recording is stopped.
Optimized ProRes recording: We were able to improve the quality of the internal ProRes encoding, which
further reduces the occurrence of blocking artifacts.
DNxHD up to 120 fps: SUP 9.0 increases the stability and brings quality improvements for the internal
MXF/DNxHD 145 and 220x recording on an ALEXA Classic camera.
DNxHD 444 up to 60 fps: In addition to the 4:2:2 DNxHD codecs, SUP 9.0 also adds 10 bit DNxHD 444 as
a recording option to all ALEXA cameras. Avid DNxHD 444 offers a high color fidelity and image quality for
1920x1080 projects. With an absence of subsampling or averaging of chroma information, the 10 bit 4:4:4
RGB codec provides an excellent basis for color grading, color keying and multi-generational finishing and
mastering. DNXHD 444 clips can be recorded up to 30 fps on 32 GB SxS Pro cards and up to 60 fps on
64GB SxS Pro cards.
Clip Counter Fix: Under certain circumstances, the clip counter in an ALEXA Classic would continue to
increment the clip count across different SxS PRO cards instead of resetting to C001. SUP 9.0 contains the
fix for this bug, which already had been addressed in ALEXA XT maintenance release SUP 8.1.1.
Lenses
Cooke /i: ALEXA Classic cameras with an LDS PL mount (except ALEXA M, which is planned for a future
software update) offer basic Cooke /i support for direct lens metadata capture through the LDS contacts.
The cameras can store a subset of lens data (focus distance and lens iris settings) as dynamic camera
metadata. Running the camera outside the standard speeds of 23.976 to 30 fps, may produce an offset of
several frames. Certain lens settings will produce an offset lens data readout (e.g. iris open). This can be
corrected manually, after the metadata had been extracted (ARRI Meta Extract).
The basic /i compatibility has been tested and approved by Cooke Optics Limited. For support and
questions about /i Technology, please contact Cooke Optics directly.
LDS source switch: When using LDS lenses (or compatible lenses), the new 'LDS Source Switch' option
in the WRS menu lets you determine the information source for the lens ring positions. By default, the LDS
information comes from the encoders inside the lens. Sometimes, however, you may have to fall back on
the external encoder data from ARRI controlled lens motors (CLM), i.e. if you have an LDS lens with a
defective LDS encoder or if you require different/custom scale values.
ALEXA Classic SUP 9.0 for ALEXA Classic models (SUP_Alexa_9.0_25486)
Release Notes
Page 6 of 20
Media Access
Self-healing Metadata: When the camera's power supply is interrupted during recording, some metadata
cannot be properly written. In the past, this meant that the recording media had to be formatted before it
could be re-used. In SUP 9.0, the camera will now identify and repair inconsistent metadata, so you can
continue to record on the same recording media.
Metadata/Time Code
No changes.
Optical Viewfinder
Frameglow Illumination
The frameglow illumination on an ALEXA Studio (REC/BAT/FULL message and frame lines in the optical
viewfinder) no longer shows a pulsating brightness at certain frame rates. SUP 9.0 contains the fix for this
bug, which already had been addressed in ALEXA XT maintenance release SUP 8.1.1.
Outputs
No changes.
Remote Control/3D
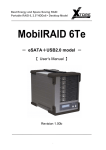
Read-only network access: Camera Ethernet access can now be
restricted to read only through the camera menu.
WCU-4 integration: SUP 9.0 unlocks additional settings, that will
become available with the next WCU-4 software update. Details will
be announced with the WCU-4 software update.
User Interface
Fiber connection: The ALEXA (XT) M now flags a 'signal strength' error, if there are problems with the
fiber connection.
ALEXA Classic SUP 9.0 for ALEXA Classic models (SUP_Alexa_9.0_25486)
Release Notes
Page 7 of 20
C. Known Issues
This is a list of known issues for this particular software update packet. For a listing of answers to
frequently asked questions please visit our website at www.arri.com/alexa/learn.
Accessories
• No power down countdown when RCU-4 is connected.
Occasionally the camera does not show a power down countdown on its display but the message "Turn off
remote control?" on a connected RCU-4. Press and hold the camera´s power button until the camera shuts
down.
• RS connectors output voltage not regulated above 24V.
An ALEXA accepts an input voltage from 10.5 to 34 V DC. For input voltages below 24V (BAT connector or
battery adapter), the RS connectors deliver a 24V output. For input voltages above 24V, the output on the
RS connectors is not regulated. Thus, it is possible that an accessory, when powered from an RS
connector, may not function as expected or even take damage.
• RS-4 LED not working at great shutter angles/record = green.
The RUN LED on an RS-4 only works up to about 340 degrees shutter angle. Also note that on the RS-4, a
red LED means "not yet recording/stopping" and green means "recording".
• WCU-3 does not display camera warnings.
On the WCU-3, camera warnings (i.e. battery warning, card full, etc.) are not displayed.
Alexa M
• Firmware update may take long.
Updating the firmware may take longer than for other camera models. Please let the update finish and do
not interrupt the process.
• Lens change not detected
Occasionally, the LDS system on an Alexa M may not detect, when the lens is changed. This may also
occur when the camera is used with an ALURA extender.
• Lenses sometimes not detected correctly
When changing a lens on ALEXA M it can happen that the change is not detected correctly by the camera.
The camera then displays the name of the last connected lens or the messages "Turn lens rings", "No
Lens" or "No LDS" permanently. To get LDS functionality working again you have to reboot the camera.
• Loss of EVF image.
Occasionally, an electronic viewfinder connected to the camera will loose the image. Disconnect and
reconnect the EVF to remedy this defect.
• Missing camera head.
If the camera menu shows asterisks in EI WB and other fields at boot time, there may be a problem with
the connection of camera body and head. However, the camera menu will not report "No M Head detected"
until after it is fully initialized.
Alexa Studio
• ARRIGLOW deactivated while mirror shutter = OFF.
Turning OFF the mirror shutter will also deactivate the ARRIGLOW, as this could cause faulty exposure of
the sensor.
• EVF smooth mode does not apply to the optical viewfinder
It is possible to enable the EVF smooth mode on an Alexa Studio, while an optical viewfinder is attached.
While the corresponding icon is then shown in the status information, the function is not available on the
OVF, as stated in the info screen ("EVF smooth mode not possible").
ALEXA Classic SUP 9.0 for ALEXA Classic models (SUP_Alexa_9.0_25486)
Release Notes
Page 8 of 20
• Slave Camera shows wrong shutter angle.
For a perfect working (3D) camera sync setup you have to use Setting and Sensor Sync. If only Sensor
Sync is active and only one camera has a running mirror shutter, the Slave camera will show a different
shutter angle than the Master camera. Depending on which of the mirror shutters is spinning, the displayed
value will be greater or smaller.
• Voltage Low Battery Warning.
ALEXA Studio may show a warning "Voltage level too low for mirror shutter" if the camera is set to > 30 fps
and an on-board battery is used. When using the mirror shutter at higher frame rates an external 24V
battery should be used.
Audio
• Adjusting input or output level gives distorted audio.
When adjusting audio input level a "clicking" noise can be heard on audio outputs. Adjustment of audio
levels therefore is disabled during recording. Please bear this in mind when recording audio on external
devices.
• An audio distortion can be heard at the end of clips
When playing back clips with embedded audio in camera, a slight distortion at the end of the clip can be
observed
• Audible click at the beginng of clips
When you change into playback after recording clips with audio, there will be an audible click.
• Audio pops when 10%-stepping through a clip in playback.
Using the +/- 10% buttons to step through a recorded clip during playback, the audio will pop. Pause the
playback before stepping forward/backward to avoid this behaviour.
• DNxHD audio is up to 3 frames ahead of video.
When the camera is recording MXF/DNxHD clips, audio is recorded up to 3 frames ahead of video,
depending on the project frame rate and codec.
• Loud noise at clip end if card was full.
When a clip is recorded with Audio and the recording is stopped because of a full card, playback of the clip
in camera will end with a very loud noise over the headphone output and embedded audio on HD-SDI.
Please try not to completely fill cards when also capturing audio in the camera.
• No audio in highspeed mode.
When the camera is set to high speed mode, audio playback is not available, even for clips that were
recorded including audio in normal speed mode.
• No sound/test tone via SDI embedded
In order to get a test tone or live audio embedded in the HD-SDI signal, audio recording must be enabled
and the frame rates for Sensor and Project need to match.
Please note that the headphone output will output a test tone even if audio recording has not been
enabled.
• Test tone output on phones is not adjustable.
Be aware when wearing headphones and enabling test tone.
EVF
• Changing FPS causes image to be disturbed.
Changing the FPS may momentarily exhibit a flickering image in the EVF.
ALEXA Classic SUP 9.0 for ALEXA Classic models (SUP_Alexa_9.0_25486)
Release Notes
Page 9 of 20
• EVF Smooth mode ineffective for low frame rates
Although it is possible to use EVF smooth mode at low frame rates (i.e. 10fps) it has little positive effect on
the motion portrayal. It is recommended no to use smooth mode when the EVF image is not perceived to
be better than without smooth mode.
• EVF Smooth mode not available above 24fps in 4:3 sensor mode
In 4:3 sensor mode, the maximum sensor frame rate for EVF smooth mode is 24 fps.
• EVF Smooth mode setting not blocked when unavailable.
The camera menu allows turning on the EVF smooth mode, whether the feature is available or not (i.e.
camera running > 30 fps). When unavailable, the status info in the EVF and MON OUT will not show the
smooth mode indicator and the INFO screen will display "EVF smooth mode not possible".
EVF/MON Out
• Return in image partially obscured by status info
When activating RET IN, the image is not scaled to fit inside the status info bars. Left, right, top and bottom
are partially obscured on MON OUT. On EVF only left and right are covered. Use Status info off to view the
complete RET IN image.
• Semi-transparent overlays obscure recorded image.
In 4:3 mode, the semitransparent status info overlays may obscure part of the recorded image on MON
OUT and EVF.
• Status info on active RETURN IN.
The camera shows its own status info (FPS, SHUTTER etc.) when RET IN is activated. These camera
parameters are not related to the RET IN signal.
• Thin flickering colored line at top of EVF/MON OUT.
A thin flickering colored line can be observed at the top of the EVF-1/MON OUT image with Surround View
on. This is not in the active image area, only at the very top edge of surround view.
Frame grab
• Camera exits play screen during frame grab
When no SD card is inserted into the camera, using the grab function during playback will fail and the
camera will exit the play screen.
• Do not change camera mode while frame grab is active.
Wait until frame grab has finished before changing camera modes.
• Frame grabs may take long.
Depending on the file format, frame grabs may take very long. It is recommended to use fast SD cards to
minimize the required time.
• Incorrect LDS data in ARRIRAW frame grab.
ARRIRAW frames stored to an SD-card with the frame grab function may contain false dynamic metadata,
including lens metadata from LDS lenses.
• No ARRIRAW frame grabs from SxS playback.
When playing back a ProRes or DNxHD clip in camera, REC OUT needs to be set to HD Video to be able
to grab frames from the playback. If the REC OUT is set to ARRIRAW, pressing grab will store a live image
instead.
• No frame grabs in high speed mode.
The camera cannot create frame grabs in high speed mode.
• No warning if frame grab failed.
If a frame grab is triggered with one of the User buttons (assignable to button 1-3) while no SD card is
inserted, the camera will not show a warning.
ALEXA Classic SUP 9.0 for ALEXA Classic models (SUP_Alexa_9.0_25486)
Release Notes
Page 10 of 20
• While frame grab is in progress loading highspeed mode will fail.
Wait until frame grab has finished. If this issue occurs the camera needs to be re-started. After re-start
please also notice that the camera will be still in standard speed and may have a different sensor frame
rate than before.
Framelines
• Framelines are resized according to internal recording resolution
When internal recording resolution [MENU > Recording > Internal > Resolution] is toggled between HD and
2K, frame lines will be resized. This also applies when internal recording is actually turned off. This is an
intended behavior since a slightly different sensor area is used for HD and 2K.
• Slow user rectangle setup.
Sometimes a non-active line of the User rectangle may stay red although adjustment of the line has been
finished. It will revert to the frame line color after a few seconds.
Highspeed
• Debayering Artifacts
When shooting highly saturated colors, high speed debayering, in some cases, may exhibit a faint
checkerboard pattern in the red and blue channel.
Imaging
• Do not change EI while recording.
Changing the EI setting during a recording may cause momentary image artifacts.
• Do not change white balance while recording.
Changing the white balance setting during a recording may cause momentary image artifacts.
• Pin hole effect
In scenes with high contrast and sharpness, a small focused highlight (like a pin hole) that activates only a
small region of about 2x2 pixels on the sensor, will be reproduced as a colored highlight. If the highlight
moves slowly, it will change its color from cyan to magenta and white. This is a limitation of the dynamic
defect pixel correction.
LDS/LDA
• Iris value T32
While using lens data from the LDA, a fully closed iris may be reported as "T32".
• Metadata from Cooke lens' running old FW will not report data correctly
Cooke lens' should be running FW 0.39 or higher in order for the LDS Data to be interpreted by the camera
correctly.
• No Cooke /i on Alexa M
ALEXA (XT) M currently does not support Cooke lens data.
• No lens data after toggling LDS source.
When the data source is switched from lens encoder to motor encorder and back (WRS > LENS DATA >
OPTIONS > DATA SOURCE), the communication between lens and camera cannot be re-established.
Either remove and attach the lens or reboot the camera to solve this issue.
Metadata
• ARRIMetaExtract v1.6.5 is not compatible with SUP 7.0 and higher.
Metadata cannot be extracted from SUP 7.0 (or higher) footage using ARRI META Extract prior to version
2.0.
ALEXA Classic SUP 9.0 for ALEXA Classic models (SUP_Alexa_9.0_25486)
Release Notes
Page 11 of 20
• Dual recording does not log recording media serial number for both media.
Dual recording writes two identical sets o data on both recording media. If something like a card error
would occur in dual recording mode, it therefore will not be possible to identify the defect card based on its
serial number in the metadata (e.g. from the ALE file).
• LDA produces "random" Lens_SN in metadata field.
When using the LDA (lens data archive) a random lens serial number is written to metadata. This does not
represent the actual serial number of the lens.
Monitoring
• HD-SDI outputs deliver a vertical phase offset.
The REC OUT and MON OUT HD-SDI timing is not exactly in sync, resulting in a vertical offset of >0 lines.
Activate "REC OUT fps sets sensor fps" to get a synchronized output.
• No "clean" REC OUT if SxS is deactivated in ProRes 2K mode.
Setting the ProRes recording resolution to 2K limits the options for REC OUT to ARRIRAW or MON OUT
clone. When SxS recording is deactivated in this state, the REC OUT limitation remains in effect. To get a
clean HD image (without status info, frame lines etc.) on the REC OUT, switch back to HD recording
resolution before deactivating the SxS module.
Playback
• "GraphicsInserter has terminated" during playback.
Very rarely, the error "GraphicsInserter has terminated" may be reported from the play screen. Please
reboot the camera.
• 2K 16:9 ProRes playback not showing full image.
When playing back 16:9 ProRes 2K material from the camera, the playback image is slightly
cropped/smaller. The recorded footage, however shows the same framing as indicated in the live
EVF/MON OUT image.
• ARRIRAW playback does not apply LOOK file
When playing back ARRIRAW footage in-camera the current LOOK is applied, not the one active when
recording the take.
• Playback errors for clips from different SUP versions
It may not be possible to play back ProRes/DNxHD footage that was recorded with older or newer camera
SUP versions. If play back works, the playback may exhibit image artifacts. When the camera detects clips
that were recorded with another SUP version, it reports "files not consistent" in the INFO screen.
• DNxHD clip does not play back in camera.
Occasionally, a DNxHD clip will fail to play back in the camera. Outside the camera, the clip plays back
normally. Exit and re-enter the play screen or reboot the camera will resolve the issue.
• DNxHD in-camera playback may show artefacts.
A bug in the internal decoder causes occasional image artefacts, when DNxHD footage is played back in
the camera. These artefacts are not present in the recorded footage, which can be verified by playing back
the clips outside the camera.
• Media from different SUPs cannot be accessed.
Using a card that was previously recorded to with a newer or older SUP version, may cause the camera to
report "invalid" media. This card has to be formatted with the current SUP in order to make it usable. Before
formatting, make sure that all data from that card has been backed up.
• Play function is less responsive for DNxHD footage.
Entering playback with DNxHD clips on a medium takes slightly longer than for ProRes recordings.
• Removing an SxS card during playback causes an error.
Always stop playback before removing an SxS card from the camera. Otherwise, the camera may show an
error and require a restart.
ALEXA Classic SUP 9.0 for ALEXA Classic models (SUP_Alexa_9.0_25486)
Release Notes
Page 12 of 20
• Stepping backwards 10 % not possible at beginning of long clips.
The "step back by 10%" soft button does not have any function until playback actually reaches 10% of the
duration of the clip that is currently playing. For example on a 10 minute clip, the button will not function for
the first 60 seconds of playback. Please use the menu wheel to jog backwards instead.
• Wrong sensor mode prevents playback.
Clips recorded in 16:9 2K cannot be played back in 4:3 mode and clips recorded in 4:3 mode cannot be
played back in 16:9 mode (this includes highspeed mode).
Recording
• "Could not deactivate rec flag".
In rare occasions, stopping a recording will prompt an error message "could not deactivate rec flag". Please
reboot the camera and check the last recorded clip. If you notice an error on the last recorded frames, you
should switch to a new drive for recording. When the data has been backed up, the drive can be used for
recording again.
• "Files not consistent" after power-loss during Prerecording
If there is a power-loss or if a card/drive is removed while the camera is PRE-recording, the camera cannot
fix the metadata and report "files not consistent". You then need to transfer any files from the medium and
reformat it in the camera, before it can be used for recording again.
• No start beeper when switching from pre-recording to recording.
With pre-record active, the start beeper goes off only when pre-recording is started (PRE). The beeper
remains silend when changing from PRE to REC. This is the intended behaviour. You can verify the current
recording status either in the EVF/MON OUT or on the HOME screen.
• Prerecord mode cannot be cancelled.
Once pre-recording has been started (PRE), there is no way to abort the loop recording, but to start and
stop recording a short clip. After the clip has been recorded, the camera will switch to standby.
• Pre-recording and jam sync to EXT time code may cause individual dark/bright frames.
If you jam sync the camera to an external time code while it is running in pre-recording mode, the phase
adjustment can affect the exposure time of an individual frame, leading to an under- or overexposed image.
The same can happen when a cable is disconnected (or faulty) while the camera uses REGEN/EXT TC
during pre-recording.
• Remaining recording time for compressed recordings.
The remaining recording time is re-calculated when a recording is stopped. This may cause the counter to
skip by a few seconds.
• Remaining recording time keeps counting down beyond set buffer size.
The pre-recording function reserves storage space on the recording media for loop recording, which is
actually larger than the set buffer size. This causes the remaining time counter to continue counting down
for some time after the buffer size has been reached. The extra space is freed up as soon as the camera
switches from pre-recording to record and the remaining recording time is corrected.
• System error when changing EI during recording.
Quickly scrolling through the EI setting while the camera is recording may cause an "Unexpected stop
recording 107". Reboot the camera to resolve the issue.
SD card
• No message if available space on SD card is insufficient.
Trying to save data (logfiles, grabs etc.) to SD card with insufficient free space results in a generic
message "Saving to SD card failed: SD card is ready". Make sure your cards have sufficient free space.
ALEXA Classic SUP 9.0 for ALEXA Classic models (SUP_Alexa_9.0_25486)
Release Notes
Page 13 of 20
Sync
• 'Camera ready' even if only one camera in sync setup contains media.
When only one of two synchronized cameras is loaded with storage media, there will be no warning that
recording cannot be initiated until pressing the record button.
• Adjusting the HD out phase may result in asynchronous HD outputs.
Unless a phase offset is required by certain monitoring equipment, there generally will be no need to adjust
the HD out phase. Use the "Send HD sync trigger" to bring the HD output of connected cameras back into
sync.
• EXT Sync does not work below 1 fps.
The sensors of two cameras cannot be synchronized with an EXT sync cable below 1 fps.
Sync/Lens sync
• Different focus ring classes may cause problems.
If lens-sync is used with non-LDS lenses, only lenses of the same focus classification should be used to
minimize positional errors. Deviating focus positions of non-matching lenses cannot be compensated.
• Focus settings may not match.
The lens-sync feature is subject to a systematic error which can cause a pair of lenses to have different
focus setting.
Sync/Settings sync
• AUTO WB cannot be triggered from slave to master camera.
Automatic white balance for two synced cameras can only be initiated on the master camera, not from
slave to master.
• Camera with and without DNxHD License.
A slave camera, that is synchonizes its settings from the master (settings sync active), can be set to
DNxHD recording, even if only the master camera has an installed license key. The cameras will not report
an error, but the slave camera will record the clips using a ProRes codec instead.
• Cannot sync cameras with different sensor modes.
It is not possible to synchronize a camera in sensor mode 16:9 with a camera in sensor mode 4:3.
• Entering and exiting HS mode in Sync Setup.
When using two cameras in a master/slave setup, wait until both cameras are fully booted before
loading/unloading HS mode.
• Inconsistent Setup when using Sensor Sync without Settings Sync.
When two cameras are used in a 3D setup, both Settings Sync and Sensor Sync must be activated.
Otherwise the cameras will have inconsistent settings.
• Licensed features
To be able to use features that require a license key, all cameras in a master/slave setup need to have the
licenses installed.
• No pre-recording on cameras using settings sync.
Although the pre-recording function can be activated when cameras are synchronised via Ethernet, this
feature is not functional and it is not possible to trigger (pre)recording.
• Slave recording stops with delay.
With 2 cameras in a master/slave setup, the slave recording will stop with a few frames delay, causing nonmatching clip-lengths. Syncing up the clips by time code will ensure matching master/slave footage.
ALEXA Classic SUP 9.0 for ALEXA Classic models (SUP_Alexa_9.0_25486)
Release Notes
Page 14 of 20
• Switching between 16:9 and 4:3 modes is not synchronized.
When the settings of two (or more) cameras are synchronized via Ethernet the sensor mode setting is not
synchronized automatically. This means that each camera must be manually set to the desired mode (16:9
or 4:3). Recording must not be started until all cameras have finished the mode switch.
• Sync ALEXAs with and without mirror shutter.
It is not possible to use Sensor sync in a setup where an ALEXA Studio with a running mirror shutter is
connected to an ALEXA without mirror shutter.
• Using different ALEXA camera models.
When you try to synchronize settings between different ALEXA models, some settings may not work as
expected. For instance, when synchronizing an ALEXA Studio with another model, the Studio should be set
to Master to ensure proper mirror operation. Mixed camera setups should be tested thoroughly before
shooting.
Test signal
• Loading time
After the camera is re-started, turning on the test signal (color bars) may take a few seconds. Once the test
signal has been loaded, it can be turned on and off without the delay.
Time code
• Do not use REC RUN TC if recording to external recorders.
Using REC RUN TC in combination with external recorders may result in frames with identical timecode but
plausible image information.
• LTC output does not match playback TC.
During playback, the LTC output (5pin Lemo connector) does not deliver the playback timecode.
• Pre-recording with REGEN EXT TC results in corrupt timecode.
Setting the camera to REGEN EXT TC in combination with pre-recording causes corrupt time code. You
can either jam sync the camera before starting to (PRE)roll the camera or use INT TC instead.
• Rec Run TC lost after power loss.
If a camera is set to Rec Run TC and the power is lost during recording, the camera powers up with a TC
that is different to when power was lost.
• Time Code INT Free Run reset to 00:00:00
With asynchronous recording, i.e. "Project frame rate" NOT EQUAL to "Sensor fps" and time code set to
INT FREE RUN, the time code will be reset to 00:00:00 after a reboot.
• Tuned TC clock values are lost after about 10 minutes without power.
When the camera is disconnected from power for about 10 minutes, any custom time code clock tuning
values (e.g. performed with an Ambient ACC 501) are lost and the camera reverts to it's default tune value.
• User bits remain set when changing sensor mode.
If you work with user bits make sure to check them when changing sensor mode.
Usability
• ARRI UDM-1 not fully supported.
The ARRI Ultrasonic Distance Measure UDM-1 can be powered via the EXT connector cable, but
communication between ALEXA and UDM-1 is not implemented yet.
• AUTO WB can be executed when test signal is on.
Even when a test signal is active on MON OUT/REC OUT, an automatic white balance is executed on the
image as shown in the EVF (camera live image).
ALEXA Classic SUP 9.0 for ALEXA Classic models (SUP_Alexa_9.0_25486)
Release Notes
Page 15 of 20
• Camera cannot start recording directly after booting.
When a camera is booted up, it briefly shows an error warning until the sensor reaches the proper
temperature level. This warning disappears almost immediately, but until it does, it is not possible to start
recording.
• Do not use "REC OUT fps sets sensor fps" and MON OUT Clone.
Activating "REC OUT fps sets sensor fps", followed by "HD-SDI format: MON OUT clone" will disable
control over the sensor fps. This could happen, for example, when the internal recording resolution is set to
2K and REC OUT is set to MON OUT clone.
• Image compare and identical file names.
When two frame grabs with the same file name are loaded subsequently, the first frame grab will not be
replaced by the second file (MENU > FRAME GRABS > COMPARE GRAB 2 LIVE IMAGE > COMPARE).
Repower the camera to clear the internal frame store.
• MON OUT/EVF gamma cannot be changed when in playback
It is not possible to change the MON OUT/EVF gamma (i.e. via User buttons) while in playback. If you need
to change gamma settings for playback, you need to exit the playback function.
• Sensor FPS not restored when entering/exiting high speed.
When the camera enters or exits high speed mode, the FPS setting for the sensor, REC OUT and MON
OUT always changes to default values. Please make sure to adjust the FPS settings to the desired values.
• SxS slot LEDs go GREEN before the REC LED.
The active card can be removed when the SxS slot LED is green even while the REC LED is still blinking
red. The REC LED indicates that the camera is still doing some internal processing during which recording
cannot be restarted. However the green slot LED indicates that the recorded data has been written and it is
safe to remove the card.
• User button function "CIRCLE CLIP" does not work in standby
The User button function "CIRCLE CLIP" only works during record or playback.
• Web remote - submitting LDA data may result in an HTTP error 404 "Bad request".
Alexa web remote is a beta implementation only.
• Web remote LDA
The LDA page of the ALEXA web remote is non-functional for any alexa without motor connectors.
• Web remote may show project frame rate 30 for DNxHD
Alexa web remote is a beta implementation only
• Web remote settings can't be applied.
If the ALEXA web remote seems to be non-operational/cannot be used to change camera settings, please
verify that MENU > SYSTEM > NETWORK ACCESS READ-ONLY is turned OFF.
• Web remote still in beta
The ALEXA web remote currently is a beta implementation with limited functionality.
User setup
• Additional configuration files
User setups do not contain, or reference look files, LDA files or custom frame lines. Recalling a user setup
therefore does not reactivate any of these settings, even if an SD card containing these files has been
inserted into the camera. This has to be done manually after loading the user setup.
• Custom look files
Loading a user setup will not re-assign custom look files to any output. The look file needs to be activated
and assigned manually. If a factory reset was performed, the look file also needs to be loaded back into the
camera before it can be activated.
ALEXA Classic SUP 9.0 for ALEXA Classic models (SUP_Alexa_9.0_25486)
Release Notes
Page 16 of 20
• Custom look not cleared when User setup loaded that does not contain a look
Always double-check that no unwanted look is applied when working with User setups.
• Custom userbit settings
A user setup will not restore custom userbit settings but defaults to 00:00:00:00. If userbits are set, the
entries have to be re-entered manually after loading a user setup.
• Internal ARRI LCC look file
Loading a user setup will not re-assign the internal LCC curve to any outputs. The LCC curve needs to be
activated and assigned manually.
Workflow
• Final Cut Pro Consolidate Error in Media Manager
FCP 7 does not correctly recognize ALEXA QuickTime clips without audio. These clips are not marked as
file type 'MooV' in the file structure. The ALEXA UDF file system does not allow changing the file type.
D. Updating Instructions
Download and Registration Process
You have to register your ALEXA camera by serial number to access the Software Update Packets (SUP)
in the ALEXA Downloads Section on the ARRI website. A SUP can be installed on the camera either by
using an SD card directly on the camera (described in detail below) or from a computer via the ALEXA
Ethernet Cable (K2.72021.0).
Please note that ALEXA Classic (SxS) and ALEXA XT/XR require different SUP installation packages.
•
•
Installation packages for ALEXA Classic models are named 'SUP_Alexa_[version-number]‘.
Installation packages for ALEXA XT/XR model are named 'SUP_AlexaX_[version-number]'.
How to get a Software Update Package
• If you have not registered yet, go to the ALEXA downloads page at http://www.arri.com/alexa/downloads
and scroll to the 'ALEXA Software Update Packet x.x' section (where ‘x.x’ is the version number of the
desired Software Update Packet). Click 'Please -> register to get an account.' The ALEXA customer
registration page will be opened.
• Fill in the relevant data and make sure to put in the serial number(s) of your camera(s) in the format of
K1.71000.0-2xxx, K1.71100.0-4xxx, K1.71200.0-6xxx, etc. Don't forget to agree to the registration terms
at the end of the page.
• When you hit the 'create account' button the system will send you an acknowledgement email with a link
for the activation of your account. After following the link a welcome mail is sent to you containing the
login credentials. Please login at http://www.arri.com/login/login.html and navigate to the download
section again.
• Upon access of the software package download you will be asked to agree to the terms and conditions of
this download. If you agree to these terms the download link is released.
ALEXA Classic SUP 9.0 for ALEXA Classic models (SUP_Alexa_9.0_25486)
Release Notes
Page 17 of 20
Camera Update Procedure via SD Card
Using the SD card for updating is the easiest method. It updates the ALEXA camera as well as the
Electronic Viewfinder (EVF-1) as long as the viewfinder is connected to the camera.
Precautions
• Make sure the power supply of the camera is stable. The best way to achieve this is by using a mains
power supply attached to the battery socket. We strongly recommend against updating an ALEXA that is
powered through a battery.
Preparing the SD Card
• Have a FAT16 or FAT32 formatted SD-Card ready.
• Cards larger than 4 GB are not supported. If you have a larger
SD card, you need to create one partition with max. 4GB so it
will be compatible with ALEXA.
• Go to MENU > SYSTEM > SD CARD and choose
- ‘Prepare SD card’ to create the ALEXA folder structure on
the SD card, and keep the existing data.
- ‘Format + prepare SD card’ to DELETE ALL DATA on the
SD card before creating the ALEXA folders.
• Copy the update package
SUP_AlexaX_x.x_zzzzz.pkg (for ALEXA XT/XR)
SUP_Alexa_x.x_zzzzz.pkg (for ALEXA Classic)
into the ‘Firmware’ folder on the SD card.
Performing the Update
• Turn the camera on.
• Perform a factory reset in MENU > USER SETUPS > FACTORY RESET.
• Insert the SD card into the SD card slot on the bottom of the camera. The slot is located below the
display, covered by a slider. A picture on the camera housing shows how the SD card is inserted.
• A card icon will show up in the notification area of the camera display. If not, the card is not recognized.
• Go to MENU > SYSTEM > FIRMWARE.
• The FIRMWARE screen shows you which packet is currently installed (Current version…).
• Use the jog wheel to select the update file from the list of firmware files that are available on the SD card.
• Click the jog wheel to select the update file and acknowledge the selection by pressing the two lower,
outer screen buttons simultaneously. This will start the update.
• Caution! Do not remove the SD card while the camera loads the packet from the SD card!
• When the ‘copying files’ message disappears, it is safe to remove the SD card.
• The update process may take 15 to 20 minutes, depending on the actual software packet. Wait until the
update process has finished. This is indicated by a green screen informing you that the update process is
completed.
• If the update process fails, which will be indicated by a red screen, please restart the camera and repeat
the update procedure.
• After the update, turn the camera off by holding down the power button for a few seconds.
• Turn the camera back on. The software is now updated and you can use the camera.
Please note that User Setup files cannot be used across software packet updates, i.e. a User Setup file
created with SUP 6.x is not compatible with SUP 7.x.
Please note that when updating from software package 1.0 to any later package, the camera’s display
shows ‘Success’ for APIC, CMC, and ACOM at the end of the update process. The camera must then be
rebooted manually even though the screen still says ‘Update in progress – do not power off the camera!’
This is done by pressing the ON/OFF button until the camera switches off, then pressing the button again.
This is not necessary anymore when updating from SUP 2.0 or later versions.
ALEXA Classic SUP 9.0 for ALEXA Classic models (SUP_Alexa_9.0_25486)
Release Notes
Page 18 of 20
Camera Update Procedure via Ethernet
How to connect ALEXA to a computer
• Turn the camera on.
• Connect the Ethernet port of the computer to the camera with the ALEXA Ethernet/RJ-45 Cable
KC 153-S (3.00m/9.8ft, order number K2.72021.0).
• Configure the computer’s network interface to which the camera is connected with the following settings:
IP address: 169.254.1.2 (static IP)
Subnet mask: 255.255.0.0
• Open a web browser on your computer.
• If you are using a Macintosh or a computer that uses the Apple Bonjour protocol, enter the following URL
into the address bar: http://alexaXXXX.local/update.cgi, where XXXX is the four-digit serial number of
your camera (e.g. for ALEXA 7123: http://alexa7123.local/update.cgi).
• If you are using a computer without Bonjour support, please use the camera’s IP address to connect, e.g.:
http://192.168.xxx.xxx/update.cgi, where xxx.xxx is the two last groups of your camera“s actual IP
address. You can see the camera's IP address by going to INFO > SYSTEM.
• If the network settings are configured correctly you will be presented the update page of the camera.
Performing the Update
• Have the Software Update Package ready on your computer.
• Perform a factory reset in MENU > USER SETUPS > FACTORY RESET.
• Re-connect to the camera following the instructions above.
• Go to the ‘Camera Update’ section and select the Software Update Package by clicking the ‘browse’
button and selecting the path to the downloaded SUP on your computer.
• Click the 'Update Camera’ button in the ‘Camera Update’ section.
• The file will be uploaded to the camera which takes about a minute. The browser will switch to the
‘Update Log’ page showing the update log of the three main boards. You can refresh this page to get
updated information. At the same time, the camera display will show the update screen.
• The update process may take 15 to 20 minutes, depending on the actual software packet. Wait until the
update process has finished. This is indicated by a green screen informing you that the update process is
completed.
• If the update process fails, which will be indicated by a red screen, please restart the camera and repeat
the update procedure.
• After the update, turn the camera off and on again. The software is now updated and you can use the
camera.
Updating an Electronic Viewfinder EVF-1 via Ethernet
In case an ALEXA electronic viewfinder EVF-1 has not been updated with the camera, it is possible to
update the viewfinder separately by using a computer. Please note that the EVF-1 will be updated to match
the SUP package that is installed on the camera.
• Connect the Ethernet port of the computer as described above in ‘How to connect ALEXA to a computer’.
• Connect the EVF-1 to the camera.
• Open a web browser on the computer and open the update web page of the camera (see above).
• Click the 'Update EVF' button in the ‘EVF Update’ section.
• You can watch the progress of the update on the screen.
• When the update is done, the last line on the screen reads ‘successfully updated EVF’. The update is
now finished even though the web browser continues to refresh the page. This is normal. The viewfinder
is up to date.
• Depending on its software version the camera will state a ‘software error – reboot camera’ on the camera
display. This is normal. Please reboot the camera.
ALEXA Classic SUP 9.0 for ALEXA Classic models (SUP_Alexa_9.0_25486)
Release Notes
Page 19 of 20
Updating the V-Mount Top/Back Battery Adapter via Ethernet
This procedure requires the ALEXA to be connected to a computer and SUP 4.0 or later. To update the
firmware of the V-mount battery adapters please perform the following steps:
• Connect the Ethernet port of the computer as described above in ‘How to connect ALEXA to a computer’.
• Attach a charged V-Mount battery to the mount.
• Open a web browser on the computer and open the update web page of the camera (see above).
• Click the 'Update VMOUNT' button in the ‘V-Mount Update’ section.
• The update will take approximately three minutes. You can watch the progress of the update on the
screen.
• If you get an error, you might have an old style V-mount battery adapter, which cannot be updated.
• When the update is done, the last line on the screen reads ‘successfully updated V-Mount Adapter’ and
the V-mount battery adapter’s firmware is up to date.
• If your V-mount battery adapter cannot be updated, please contact ARRI Service
http://www.arri.com/service.
All data subject to change without further notice.
ALEXA Classic SUP 9.0 for ALEXA Classic models (SUP_Alexa_9.0_25486)
Release Notes
Page 20 of 20