1
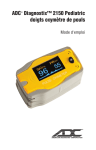
ADC Diagnostix™ 2150
Pediatric Fingertip
Pulse Oximeter
®
Directions for Use
®
ADC® Fingertip Pediatric Pulse Oximeter
Thank you for purchasing an ADC Diagnostix™ Brand Fingertip Pediatric Pulse Oximeter. We’re
proud of the care and quality that goes into the manufacture of every product that bears our name.
With proper care and maintenance your Diagnostix™ Fingertip Pediatric Pulse Oximeter will provide
many years of dependable service.
Device Description and Intended Use
This device is intended for medical diagnostic purposes only. It is used to indirectly measure the functional oxygen saturation (SpO2) of a pediatric patient’s blood. It is intended for use on fingers with a thickness of 7.64mm - 11.19mm (.3” to .44”). This is the distance between the fingernail (top), and the finger
pad (bottom). Functional oxygen saturation refers to the ratio of oxyhemoglobin to all hemoglobin that is
capable of carrying oxygen. This oximeter is not intended for continuous monitoring. The Pulse Oximeter requires no routine calibration or maintenance other than replacement of batteries.
Pulse oximetry combines the principles of optical plethysmography and spectrophotometry to determine arterial oxygen saturation values. Optical plethysmography uses light absorbance technology to
reproduce waveforms produced by pulsating blood. Spectrophotometry uses various wavelengths of
light to perform quantitative measurements about light absorption. Photoelectric Oxyhemoglobin Inspection Technology is combined with Capacity Pulse Scanning and Recording Technology, so that
two beams of different wavelengths of light (660nm glow and 940nm near infrared light) can be focused onto the human nail tip through a finger-tip sensor. These two LED’s are chosen because the
light absorption varies with the oxygen concentration of hemoglobin in these frequencies. The pulse
amplitudes of the red and near infrared signals are detected using photoelectric sensors and run
through a microprocessor which converts the readings to numerical values.
Contraindications:
•
•
•
•
•
•
•
•
The patient suffers from significant levels of dysfunctional hemoglobins (such as carbonxy-hemoglobin or methemoglobin).
Intravascular dyes such as indocyanine green or methylene blue have been injected into the patient.
Used in the presence of high ambient light (ie, direct sunlight). Shield the sensor area with a
surgical towel if necessary.
There is excessive patient movement.
The patient experiences venous pulsations.
The patient has hypotension, severe vasoconstriction, severe anemia, or hypothermia.
The patient is in cardiac arrest or is in shock.
Patients have fingernail polish or false fingernails as they may cause inaccurate SpO2 readings.
General Warnings
A warning statement in this manual identifies a condition or practice which, if not corrected or discontinued immediately, could lead to patient injury, illness, or death.
WARNING: Before use, carefully read the manual.
WARNING: Do not use the pulse oximeter in an MRI or CT environment.
WARNING: The operation of Pulse Oximeter may be affected by the use of an electrosurgical unit (ESU).
WARNING: Federal law restricts this device to sale by or on the order of a physician or licensed
healthcare practitioner.
WARNING: The pulse oximeter is intended only as an adjunct in patient assessment. It must be used
in conjunction with other methods of assessing clinical signs and symptoms.
WARNING: Follow local ordinances and recycling instructions regarding disposal or recycling of the
device and device components, including batteries.
WARNING: This product may contain a chemical known to the state of California to cause cancer,
birth defects, or other reproductive harm.
CAUTION: Do not use the pulse oximeter in an explosive atmosphere.
CAUTION: SpO2 and pulse rate data is displayed for informational purposes only and does not constitute a diagnosis or medical advice of any kind. Only a qualified healthcare professional should interpret the data obtained on this device.
CAUTION: Check the pulse oximeter sensor application site frequently to determine the positioning
of the sensor and circulation and skin sensitivity of the patient.
CAUTION: The pulse oximeter is not for continuous monitoring.
CAUTION: Prolonged use or the patient's condition may require changing the sensor site periodically.
Change sensor site and check skin integrity, circulatory status, and correct alignment at least every 4 hours.
CAUTION: Inaccurate measurements may be caused by autoclaving, ethylene oxide sterilizing, or
immersing the sensors in liquid.
CAUTION: The device should not be used on an extremity with a blood pressure cuff, arterial
catheter, or intravascular line.
CAUTION: Do not use this pulse oximeter in situations where alarms are required. This device has
no alarm.
Brief Description of Front Panel
PR Bargraph
Low Power Indicator
Pulse Rate
SpO2
SpO2
waveform
Power
Switch
SpO2
Pulse Rate
The PR Bar graph displays corresponding with the patient’s pulse beat. The height of the bar graph
shows the patient’s pulse strength.
Included Pulse Oximeter Accessories
•
•
•
•
•
One (1) lanyard
Two (2) AAA batteries
One (1) user manual
One (1) Safety Bumper
One (1) Carry Case
Battery Installation
1. Remove battery compartment top, by sliding cover in direction
of the arrow, until it pops open.
2. Insert two AAA batteries into battery compartment being sure to
observe the correct polarities. (Figure 1)
3. Replace the battery cover by reversing step 1.
Note: Be sure to observe correct battery polarity. Failure to do so might
damage the device. If device will not be used for an extended period of
time, remove batteries. Replace batteries when low battery symbol appears on display. Always replace BOTH batteries at the same time.
(Figure 1)
Operating Instructions
1. Be sure to insert two AAA batteries before attempting to operate.
2. Clean inside surface of oximeter and patient’s finger with 70% isopropyl alcohol before use.
3. Squeeze the end opposite the power switch between the thumb and forefinger in order to open the device
(there is a textured surface on the battery cover side to facilitate grip) (Fig 2)
4. Insert patient’s finger, nail side up into the device. (be sure to fully insert the patient’s finger so
that the sensors are completely covered by the finger.) Index or middle finger is recommended.
5. Release the device allowing it to clamp down on the patient’s finger.
6. Press the power switch on the front (top) panel to activate.
7. Have patient keep still for optimal accuracy.
8. Depending upon environmental and patient conditions, the device will begin to display readings
in about 4 seconds.
9. Note readings on the display.
10. Remove the patient’s finger from the device by squeezing between forefinger and
thumb as indicated in Figure 2.
11. The display will indicate finger out.
12. The unit will power off approximately 8
(Figure 2)
seconds after the patient’s finger is removed from
the device.
Changing Oximeter Display Mode
There are six different display modes. The display modes alter the orientation of the display to facilitate
reading by the observer. Horizontal modes display the pulse wave form along with SPO2 and pulse
rate while vertical modes display a pulse rate bar graph along with the SPO2 and pulse rate readings.
To alter the display mode:
After the unit is powered on each brief press of the power switch will cycle through to the next display
mode in the sequence shown.
Note: The default setting is display mode 1.
Display Mode Cycle
Normal Horizontal
Wave Display
(Default Setting)
Normal Horizontal
Wire Display
(2nd click)
Normal Horizontal
(3rd click)
Handstand Horizontal
(4th click)
Normal Vertical
(5th click)
Handstand Vertical
(6th click)
Changing the Display Brightness (10 adjustable brightness settings)
To change the brightness setting:
After the unit is powered on, depress and hold the power switch (for 2 seconds), the brightness will
then change by degrees. There are 10 levels of brightness.
Note: The default setting is level 4.
Lanyard Attachment
1. Thread thinner end of the lanyard through the hanging hole
at either side of the device.
2. Thread thicker end of the lanyard through the threaded end
before pulling it tightly.
Note: Unclasping the lanyard connector will facilitate threading thicker end through threaded loop.
Lanyard
Holes
Care and Maintenance
•
•
•
•
•
•
Replace the batteries promptly when low voltage indicator appears.
Clean surface of the fingertip and oximeter with 70% isopropyl alcohol before it is used in diagnosis of patients.
Remove the batteries if unit will not be operated for extended period of time.
It is best to store this product in a place where ambient temperature is -20°C -55°C (-4°F 131°F) and humidity is < 93%.
It is recommended that the product should be kept in a dry environment at all times.
Please follow local ordinances when disposing of batteries.
Cleaning the Pulse Oximeter
Clean the rubber touching the finger inside of the Oximeter with a soft dampened cloth with 70%
isopropyl alcohol, and clean the test finger using alcohol before and after each test.
Note: Do not pour or spray any liquids onto the Oximeter, and do not allow any liquids to enter any
openings in the device. Allow the Oximeter to dry thoroughly before reusing.
Troubleshooting Possible Problems
Problem
SpO2% or pulse rate do not display normally.
Possible Reason
1. Finger is not inserted correctly.
2. Patient SpO2 value is too low to
be measured.
Solution
1. Retry inserting the finger.
2. There is excessive illumination.
3. Measure more times. If you determine
the product is working correctly, see your
healthcare provider for an exact diagnosis.
SpO2% or pulse rate is shown
unstably.
1. Finger might not be inserted
deep enough.
2. Excessive patient movement.
1. Retry inserting the finger.
2. Sit calmly and retry.
The monitor cannot be powered
on.
1. No battery or low battery power.
2. Battery not installed correctly.
3. The monitor may be damaged.
1. Replace battery.
2. Remove and reinstall battery.
3. Contact customer service center.
Indication is
suddenly off.
1. The Oximeter is automatically
powered off, when no signal was detected after 8 seconds.
2. Battery power is too low to operate.
1. Normal.
2. Replace batteries.
“Err 3” or “Err 4”
1. Low Power.
1. Change batteries.
2. Recieving tube being shielded or dam- 2. Return to Service Center
aged together with broken connector.
3. Mechanical Misplace for recieveemission tube.
4. Amp Circuit malfunction
“Err 7”
1. Low Power
1. Change batteries.
2. Emission tube damaged
2. Return to Service Center
3. Current control circuit malfunction
Guidance and Manufacturer’s Declaration
Electromagnetic Emissions
Guidance and Manufacturer’s declaration - electromagnetic emission.
The Pulse Oximeter is intended for use in the electromagnetic environment specified below.
The customer or the user of the Pulse Oximeter should assure that it is used in such an environment.
Emission Test
RF Emissions CISPR11
Compliance Level
Group 1
RF Emissions CISPR11
Class B
Electronic Environment Guidance
The PULSE OXIMETER uses RF energy only for its internal
function. Therefore, its RF emissions are very low and are not
likely to cause any interference in nearby electronic equipment.
The PULSE OXIMETER is suitable for use in all establishments,including domestic establishments and those directly
connected to the public low-voltage power supply, network
that supplies buildings used for domestic purposes.
Technical Specifications
Display Type:
OLED Display
SPO2 display range: 70-100%
PR Display Range:
30-235 BPM
PR Display Mode:
Bargraph
Data Update Time:
< 15 s
LED Wavelengths
Red:
660nm
Infrared:
940nm
Measurement range:
SPO2:
70-100% - 100% ±3%; s ≤70%
no definition
Pulse Rate:
30-235 BPM, ±2 bpm during
the pulse rate range of 30-99
bpm and ±2% during the pulse
rate range of 100-235 bpm.
Accuracy:
±2% on the stage of 80%-100%
±3% on the stage of 70%-79%
Accuracy:
±2 BPM or ±2% (larger)
Pulse Intensity:
Bargraph Indicator
Power Requirements: Two AAA alkaline Batteries
Power consumption: Less than 40mA
Low power indication:
Battery Life:
(2) ”AAA” 1.5V, 600mAh
alkaline batteries could be
continuously operated as
long as 30 hours.
Dimension:
Length:
1.9” (50mm)
Width:
1.1” (28mm)
Height:
1.1” (28mm)
Weight:
1.2 - 1.7oz. (35 - 50g)
(Including 2 AAA batteries)
Environment:
Operation Temperature: 41°F - 104°F (5°C - 40°C)
Storage Temperature: -4°F - 131°F (-20°C - 55°C)
Relative Humidty:
15%-80% in operation /
10%-80% in storage
Finger Range:
Minimum Weight:
.3” - .44” (7.64mm-11.19mm)
33lbs. (15kg)
Symbol Definitions
Important Warning/Caution
Hemoglobin Saturation
Latex-Free
Heart Rate (BPM)
Equipment type is BF
Low Power Indication
Not for Continuous Monitoring
Conforms to EU Standards
Manufacturer’s Information
Serial Number
Authorized European Represenative’s Information
Declaration: EMC of this product comply with IEC60601-1-2 standard.
Measurement Performance in Low Perfusion Condition: required the test equipment (BIO-TEK
INDEX Pulse Oximeter tester) the pulse wave is available without failure when the simulation pulse
wave amplitude is at 6%.
Interference Resistance Capacity against Ambient Light: Device work normally when mixed noise
produced by BIO-TEK INDEX Pulse Oximeter tester.
Warranty
American Diagnostic Corporation (ADC®) warrants its products against defects in materials and
workmanship under normal use and service as follows:
1. Warranty service extends to the original retail purchaser only and commences with the date
of delivery.
2. Your Pulse Oximeter is warranted for two (2) years from date of purchase (all parts).
What is Covered: Replacement of parts, and labor.
What is Not Covered: Transportation charges to and from ADC®. Damages caused by
abuse, misuse, accident, or negligence. Incidental, special, or consequential damages. Some
states do not allow the exclusion or limitation of incidental, special, or consequential damages, so
this limitation may not apply to you.
To Obtain Warranty Service: Send item(s) postage paid to ADC®, Attn: Repair Dept., 55
Commerce Dr., Hauppauge, NY 11788. Please include your name and address, phone no., proof
of purchase, and a brief note explaining the problem.
Implied Warranty: Any implied warranty shall be limited in duration to the terms of this warranty and in no case beyond the original selling price (except where prohibited by law). This warranty gives you specific legal rights and you may have other rights which vary from state to state.
ADC
55 Commerce Drive
Hauppauge, NY 11788
U.S.A.
Inspected in the U.S.A.
Made in China
tel: 631-273-9600, 1-800-232-2670
fax: 631-273-9659
www.adctoday.com
ADC (UK) Ltd.
Unit 6, PO14 1TH
United Kingdom
IB p/n 93-2150-00 rev 4 english
email: [email protected]