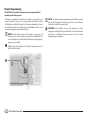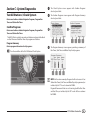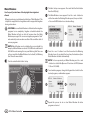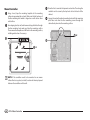
1
ESP-LX Basic Controller
Installation, Programming & Operation Guide
P/N: 639144-01
Symbols
Regulatory Information
NOTE: Symbol is intended to alert the user to important
bb
operating functionality, installation or maintenance instructions.
WARNING: Symbol alerts the user to the presence of electricity
cc
or electromagnetic energy which may constitute a risk of electric
shock, radiation exposure or other hazard.
CAUTION: Symbol is intended to alert the user to important
dd
instructions or conditions that could seriously affect irrigation
effectivity or controller operation.
gg
DIAL: Symbol indicates that the user is required to turn the dial
on the controller to the appropriate setting in order to follow
subsequent instructions as described in that section.
REPEAT: Symbol indicates that a repetition of previous steps
ee
or actions may be required in order to continue or complete the
controller programming process.
Safety Information
WARNING: A circuit breaker or cutoff switch must be provided
cc
in the fixed wiring to isolate the controller.
WARNING: The current date and time on the controller is
cc
retained by a long-life lithium battery, which must be disposed of
in accordance with local regulations.
This equipment has been tested and found to comply with the limits
for a Class B digital device, pursuant to Part 15 of the FCC Rules. These
limits are designed to provide reasonable protection against harmful
interference in a residential installation.
This equipment generates, uses, and can radiate radio frequency energy
and, if not installed and used in accordance with the instructions, may
cause harmful interference to radio communications. However, there is
no guarantee that interference will not occur in a particular installation.
If the equipment does cause harmful interference to radio or television
reception, which can be determined by turning the equipment off and
on, the user is encouraged to try to correct the interference by the
following measures:
llReorient or relocate the receiving antenna.
llIncrease the separation between the equipment and the receiver.
llConnect the equipment into an outlet on a circuit different from
that to which the receiver is connected.
llConsult the dealer or an experienced radio/TV technician for help.
Changes or modifications not expressly approved by Rain Bird
Corporation could void the user’s authority to operate the equipment.
This product was FCC certified under test conditions that included the
use of shielded I/O cables and connectors between system components.
To be in compliance with FCC regulations, the user must use shielded
cables and connectors and install them per instructions.
For technical assistance contact Rain Bird at 800 RAINBIRD (1-800-724-6247) U.S. and Canada
Visit us on the web at www.rainbird.com
Contents
Section A - Introduction & Overview.................... 1
Welcome to Rain Bird........................................................ 1
ESP-LX Basic Controller..................................................... 1
Controller Features...................................................................................1
Dual Language Interface.......................................................................2
Controls, Switches and Indicators.....................................................2
Basic Operation..........................................................................................3
ESP-LX Basic Modules....................................................... 4
Base Module................................................................................................4
ESPLXM-SM Station Modules..............................................................4
Programming Overview.................................................... 5
Irrigation Controller Definitions.........................................................5
Programs...................................................................................................5
Watering Days........................................................................................5
Watering Start Time.............................................................................5
Station Run Time...................................................................................5
Programming Chart.................................................................................5
Remote Programming............................................................................6
Programming Checklist.........................................................................7
Initial Startup.................................................................... 8
AUTO................................................................................10
Automatic Operation...........................................................................10
Alarm Conditions...................................................................................11
Resetting the Controller..................................................12
Section B - Basic Programming........................... 13
Program Select Switch....................................................13
Weather Sensor Bypassed/Active Switch.......................13
Set Current Date and Time..............................................14
Watering Day Cycles........................................................16
Watering Cycle Definitions................................................................16
Custom Days............................................................................................16
Odd, Odd no 31st, Even......................................................................18
Cyclical Days.............................................................................................19
Set Watering Start Times.................................................21
Set Station Run Times......................................................22
Section C - System Diagnostics........................... 23
Test All Stations / Check System.....................................23
Confirm Programs..................................................................................23
Program Summary............................................................................23
Review Program..................................................................................24
Program Run Time.............................................................................27
Station Run Time................................................................................28
Test All Stations.......................................................................................29
Wiring Diagnostics................................................................................30
Raster Wiring Test...............................................................................30
Weather Sensor Status.........................................................................31
Master Valve Status...............................................................................32
Section D - Advanced Programming................... 33
Seasonal Adjust %..........................................................33
Adjust Individual Program.................................................................33
Adjust By Month.....................................................................................35
Select Months to Adjust.................................................................35
Select Programs To Adjust.............................................................36
Delay Watering................................................................37
Rain Delay..................................................................................................37
Water Windows.......................................................................................38
Set Up Cycle+SoakTM .......................................................39
Program Station Delay....................................................40
SimulStations..................................................................41
Optional Settings............................................................42
Station Settings.......................................................................................42
ESP-LX Basic Controller
I
Section E - Options & Special Features............... 43
Backup and Recall Programs..........................................43
Store Default Programs.......................................................................43
Recall Default Programs......................................................................44
Delayed Recall.........................................................................................45
Clear Programs........................................................................................46
Clear Individual Program...............................................................46
Clear All Programs.............................................................................48
Restore Defaults.................................................................................49
Section F - Auxiliary Operation.......................... 51
Manual Watering.............................................................51
Start Station Manually.........................................................................51
Start Program Manually......................................................................52
Test All Stations.......................................................................................53
OFF...................................................................................54
Adjust Display Contrast.......................................................................54
Section G - Installation....................................... 55
Prepare For Installation..................................................55
Installation Checklist............................................................................55
Check Box Contents..............................................................................55
Gather Installation Tools.....................................................................56
Install the Controller.......................................................57
Select Location for Controller..........................................................57
Access Controller Cabinet..................................................................58
Remove Cabinet Door and Front Panel..................................58
Remove Modules...............................................................................59
Mount Controller....................................................................................60
Connect Power to the Controller.....................................61
Surge Protection and Grounding...................................................61
Connect Power Source........................................................................61
Re-install Front Panel............................................................................63
Install Modules................................................................64
Install Base Module...............................................................................64
Install Station Module..........................................................................65
Dynamic Station Numbering...........................................................66
Connect Field Wiring.......................................................67
Connect Valve Wires.............................................................................67
Connect Local Weather Sensor.......................................................68
Complete Installation......................................................70
Install Front Door...................................................................................70
Verify Field Installation........................................................................70
Programming Chart............................................ 71
Quick Reference Guide....................................... 74
II
ESP-LX Basic Controller
Section A - Introduction & Overview
Welcome to Rain Bird
Thank you for purchasing your new state-of-the-art Rain Bird ESP-LX
Basic controller.
For over seven decades Rain Bird has led the irrigation industry in
meeting water management needs by providing the highest quality
products and services available.
ESP-LX Basic Controller
Your new Rain Bird controller is designed to provide years of highly
manageable irrigation control.
The ESP-LX Basic is an irrigation controller designed for commercial
use. It accommodates 12 stations and through the addition of Station
Modules can easily be expanded to address up to 48 total stations.
Controller Features
The ESP-LX Basic controller has a variety of advanced features to help
you manage water efficiently, including:
llLarge variety of user-configurable irrigation program options to
meet the most demanding irrigation needs while still addressing
municipal mandates and restrictions.
llUpgrade with optional Station Modules.
llSupports one local weather sensor input.
llDual language interface, English and Spanish.
llOutdoor-rated plastic cabinet which can be upgraded to the optional
metal cabinet (LXMM) and pedestal (LXMMPED). Also available in a
Stainless Steel cabinet (LXMSS) and pedestal (LXMMSSPED).
llUL, CUL, CE and C-TICK certified.
ESP-LX Basic Controller
1
Controls, Switches and Indicators
Key operational features of the ESP-LX Basic Controller front panel:
AProgramming Dial
Used for programming and to turn the controller on and off.
BWeather Sensor Switch
Set the controller to obey or ignore input from an optional sensor.
See Section B, Weather Sensor Bypassed/Active Switch for more
details.
CProgram Select Switch
Select Watering Program A, B, C, or D. See Section B, Program
Select Switch for more details.
DDisplay
Displays time of day during normal operation; shows commands
during programming; shows active station and remaining run
time during watering.
EProgramming Buttons
Press buttons to enter and change program information.
llPress and HOLD buttons to accelerate settings for hours,
minutes and seconds, dates or percentages.
FAlarm Light
Illuminates to indicate various types of alarm conditions. See
Alarm Conditions for more details on how to review and clear
alarms.
Dual Language Interface
The ESP-LX Basic Controller can be programmed in both
English and Spanish.
4
The left side and right side of the programming dial have
the same functionality. Use the left side of the dial if
you prefer to program in Spanish, and the right side for
English. The display will change languages accordingly.
1
When the dial is turned to OFF or AUTO, the display will
show language that was last used. For example, if the dial
is turned from right side then OFF and AUTO will display
in English.
2
5
6
3
ESP-LX Basic Controller Front Panel Features
2
ESP-LX Basic Controller
The ESP-LX Basic lets you set a delay between stations. For example, if
you set a one minute delay, station 1 will run until finished, followed by
a one minute delay. Then station 2 will run, followed by another one
minute delay, and so on. See Section D, Station Delay for more details.
Basic Operation
Valves (or stations) operate at times as specified by irrigation programs.
The controller sends power to the first valve solenoid to open. When
finished, the controller signals the solenoid to shut off its valve and
then signals the second valve solenoid to open. Then when the second
valve is finished, the third valve will begin watering and so on.
The order in which stations are selected to operate depends on the
following settings:
llSimulStation settings
NOTE: The ESP-LX Basic’s Cycle+Soak feature may delay valve
bb
operation. See Section D, Set Up Cycle+Soak for more details.
llStation run times
llStation program assignment
Sprinklers
Power
Wires
Valves
1
Controller
Common
Wire
2
3
LX Basic System Wiring Diagram
ESP-LX Basic Controller
3
ESP-LX Basic Modules
ESPLXM-SM Station Modules
Base Module
ESPLXM-SM Station Modules install in module slots 1 through 4 and
provide wiring terminals for irrigation valves and a valve common.
The LXBASEMOD Base Module is the standard base module for ESPLX Basic Controller models.
The Base Module installs in module slot 0 and provides wiring terminals
for multiple controller inputs and outputs including valve common,
master valve, weather sensor, and 24 VAC.
LXBASEMOD Base Module
bb
NOTE: The Base Module includes a jumper wire connecting the
weather sensor (SEN) terminals. Do not remove the jumper wire
unless you install a weather sensor. See Section G, Installation,
Connect Local Weather Sensor for more details.
Each ESP-LX Basic controller comes standard with a 12 station module.
This can easily be expanded by adding one to three additional Station
Expansion Modules. Each station module adds 4, 8, or 12 additional
stations to increase capacity to a maximum of 48 stations. Station
Modules can be identified by the blue stripe on the middle of the
module.
ESP-LXM-SM8 Station Module
ESP-LXM-SM12 Station Module
4
ESP-LX Basic Controller
Programming Overview
Programming Chart
Irrigation Controller Definitions
Before you begin programming, fill out the Programming Chart on
page 71 of this user manual.
Programs
The process of telling the controller exactly when and for how long
you want to water. The controller opens and closes the remote control
valves according to a program you set.
Each program contains:
Watering Days
The days of the week or calendar dates on which irrigation is allowed.
For example, specific days such as Monday, Wednesday and Friday
could be designated as your “watering days”. Alternatively, the Cyclical
watering cycle can be used to water at a regular interval, such as every
third day.
Watering Start Time
ALocate the Programming Chart in the back of the manual.
Programming Chart
Program Info
Overview
Station Run Time
The length of time (in hours and minutes) that each individual station
is programmed to run.
Program B
Program C
Program D
M T W T F S S M T W T F S S M T W T F S S M T W T F S S
The process of telling the
controller exactly when and for
how long you want to water.
Select Days To Water
(Mon-Sun) For Custom
- OR Select Days Watering
Allowed For Non-custom
Each program contains:
Watering Days
The days of the week that
irrigation is allowed. Also, the
Cyclical watering cycle can be
used to water at a regular interval,
such as every third day.
Watering Start Times
The time(s) of day that irrigation
begins. All other stations in the
program then follow in sequence.
Station Run Times
The length of time (in hours and
minutes) that each individual
station is programmed to run.
The time(s) of day that irrigation begins; this is the time that the
first station in the program begins watering; all other stations in the
program then follow in sequence.
NOTE: The term “start time” refers to the time that a program
bb
starts, not to the time that each individual station begins to run.
Program A
Program Name
Programs
Monthly Seasonal
Adjust %
JAN
%
FEB
%
MAR
%
APR
%
MAY
%
JUN
%
JUL
%
AUG
%
SEP
%
OCT
%
NOV
%
DEC
%
Default Values for
Monthly Seasonal
Adjust = 100%
Set Watering
Start Times
Seasonal Adjust
Monthly Seasonal Adjust
Station Delay
Program Water Window
Start Time
Program Water Window
End Time
__Day Cycle
Even
Odd
__Day Cycle
Even
Odd
Odd 31
__Day Cycle
Even
Odd
Odd 31
__Day Cycle
Even
Odd
Odd 31
Odd 31
1
am / pm
am / pm
am / pm
am / pm
2
am / pm
am / pm
am / pm
am / pm
3
am / pm
am / pm
am / pm
am / pm
4
am / pm
am / pm
am / pm
am / pm
5
am / pm
am / pm
am / pm
am / pm
6
am / pm
am / pm
am / pm
am / pm
7
am / pm
am / pm
am / pm
am / pm
8
am / pm
am / pm
am / pm
am / pm
%
ON
%
ON
%
ON
%
ON
am / pm
am / pm
am / pm
am / pm
am / pm
am / pm
am / pm
am / pm
Fill Out Programming Chart
BFollow
the instructions to enter information about your
system hardware and settings in the appropriate fields on the
Programming Chart.
2
ESP-LX Basic Controller
5
Remote Programming
The ESP-LX Basic controller front panel can be programmed while
operating under battery power.
This feature is useful if the controller is installed in an area that is not
easily accessible. It also lets you enter program information before
installing the controller at the job site. All program information is stored
in nonvolatile memory so it will be preserved indefinitely in the event
of a power outage or removal of the battery.
NOTE: Under battery power, all programs in progress will
bb
continue to run in the controller memory, but irrigation will not
occur until power is restored. Without battery power, programs in
progress are cancelled.
AInstall a new 9-volt battery in the battery compartment in the
back of the front panel.
1
6
ESP-LX Basic Controller
NOTE: To perform remote programming under battery power,
bb
detach the front panel from the cabinet. See Access Controller
Cabinet in Section G for more details.
CAUTION: The controller can not run irrigation or system
dd
diagnostics with the front panel detached. Re-connect the front
panel to the controller’s AC power source as soon as remote
programming is completed.
Programming Checklist
When programming the ESP-LX Basic controller for the first time, it is
recommended that you complete the following steps in order.
For your convenience a check-off box is provided for each step.
NOTE: Use this checklist and the Programming Chart in the back
bb
of the manual as a guide to program your controller.
111
1
111
1
4
4
4
4
4
4
44
Set Up Hardware
111
1
11
Review Setup
Confirm program.......................................................................... Page 23
Test stations.................................................................................... Page 29
Complete Setup
Set controller to AUTO................................................................ Page 10
Install SM Station Modules........................................................ Page 65
Fill out Programming Chart....................................................... Page 71
Set date and time.......................................................................... Page 14
Set up stations .............................................................................. Page 42
Set Up Programs
ABCD
Select program (A, B, C or D).............................. Page 13
Select watering days *.......................................... Page 16
Set watering start times...................................... Page 21
Set station run time(s).......................................... Page 22
* Select by Custom Days, Odd, Odd31, Even or
Cyclical watering cycles.
111
1
111
1
11
Set Up Programs (Optional)
Set seasonal adjust.............................................................. Page 33
Create a water window...................................................... Page 38
Set Cycle+Soak...................................................................... Page 39
Set up a station delay......................................................... Page 40
Set up SimulStations........................................................... Page 41
ESP-LX Basic Controller
7
Initial Startup
CPress the + and – buttons to set the current minute; then press
When the ESP-LX Basic controller is powered on for the first time, a
series of startup screens is displayed.
DPress the + and – buttons to set the current day; then press Next.
Next.
When the controller is first started, you will need to enter the current
date and time and verify the current module configuration.
ASelect English or Spanish by turning the dial right or left; then
press Next.
3
4
BThe Set Date and Time screen appears. Press the + and – buttons
to set the current hour; then press Next.
NOTE: Be sure to set the hour correctly to either AM or PM.
bb
llPress and HOLD buttons to accelerate settings for hours and
minutes
EPress the + and – buttons to set the current month; then press
Next.
FPress + and – to set the current year; then press Next.
2
1
8
ESP-LX Basic Controller
5
6
GThe
Module Configuration screen is displayed. Press Next to
continue.
HThe Module Summary screen displays the module type detected
in each module slot. Press Accept to accept the module
configuration.
7
8
IThe Module Labels screen is displayed. Locate the Module Station
Numbering Labels that are provided on a separate foldout sheet.
Press Next to continue.
JThe Module Station Numbering Graphic displays a pair of letters
(example: Slot 1 = Label AB) for each installed module. Find the
station numbering label on the foldout sheet with the matching
letter pair and place it over the blue strip on the module. Press
Done to finish.
9
j
ESP-LX Basic Controller
9
AUTO
Automatic Operation
The controller will operate automatically with the controller dial set
to AUTO.
If you forget to return the dial to AUTO, the controller will automatically
continue to run programs, unless the dial is set to the OFF position
when all irrigation is canceled.
AThe Auto screen is displayed with the current day and time shown,
and will display in the language that was last used. If turned from
right it will display in English, and if turned from the left it will
display in Spanish.
BWhen a program is running in AUTO mode, the station number will
display on the screen. Press the + or – buttons to add or subtract
minutes from the run time for the currently running station. To
advance to the next station in a program, press the Adv button.
Turn the controller dial to AUTO.
gg
1
2
To cancel a currently running program, turn the controller dial to
gg
OFF for three seconds and then return the dial to AUTO.
10
ESP-LX Basic Controller
Alarm Conditions
An alarm condition can occur when programming omissions or other
issues prevent normal irrigation.
Review Alarm Messages
BWhen an alarm condition is present, the Alarm button label will be
present on screen. Press the Alarm button to view alarm details.
CAny current alarm conditions will then be displayed. Press the
Next button if necessary, to advance to the next page.
AWhen
an alarm condition is detected, the alarm light on the
controller front panel will illuminate.
2
3
1
NOTE: Take the appropriate action to address each alarm
bb
condition. When all alarms have been addressed, the alarm light
gg
Turn the controller dial to AUTO.
on the front panel will no longer be illuminated.
ESP-LX Basic Controller
11
Resetting the Controller
Sometimes you may want to reset (or reboot) the ESP-LX Basic
controller. Using the controller’s reset feature does not change or delete
the programs you have programmed into the controller.
Turn the controller dial to AUTO.
gg
AOpen the controller outer cabinet door and inner front panel.
BLocate the RESET button on the back of the front panel.
1
2
12
ESP-LX Basic Controller
CUse a pen or pencil to depress the RESET button.
DThe “Rain Bird” screen appears, confirming reset.
3
4
Section B - Basic Programming
Program Select Switch
Weather Sensor Bypassed/Active Switch
Always begin programming by setting the Program Select switch to
the desired program.
A weather sensor is not required for the ESP-LX Basic controller,
but can increase functionality by allowing you to prevent or pause
irrigation based on changing weather conditions.
Four independent Programs, A, B, C and D are available in the ESP- LX
Basic controller. Multiple programs allow you to set watering schedules
to meet different requirements for plant materials, soils, slopes, and
shady or sunny areas. Two programs can operate simultaneously.
Select Program
On the controller front panel, slide the Program Select switch under
the A, B, C, or D, then begin programming.
Program
Select
Switch
You can set the controller to ignore or obey input from one supported
weather sensor, which connects to the LX base module via a separate
wired or wireless connection. See Section G, Connect Local Weather
Sensor for more details.
Bypass or Activate Weather Sensor
On the controller front panel, slide the Weather Sensor switch to
Bypassed (to ignore) or Active (to obey).
Weather
Sensor
Switch
NOTE: When programming the controller, any program-specific
bb
information you enter, such as start times or watering days, will
affect only the selected program.
ESP-LX Basic Controller
13
Set Current Date and Time
gg
Turn the controller dial to Basic Setup.
BThe Set Date and Time screen appears. Press the + and – buttons
to set the current hour; then press Next.
NOTE: Be sure to set the hour correctly to either AM or PM.
bb
llPress and HOLD buttons to accelerate settings for hours and
minutes.
CPress the + and – buttons to set the current minute; then press
Next.
2
AThe Basic Setup screen appears with Set Date and Time selected;
press Next.
1
14
ESP-LX Basic Controller
3
DPress the + and – buttons to set the current day; then press Next.
EPress the + and – buttons to set the current month; then press
Next.
4
5
FPress + and – to set the current year.
6
GPress Back to return to the Basic Setup Menu.
ESP-LX Basic Controller
15
Watering Day Cycles
Custom Days
The ESP-LX Basic controller supports a variety of flexible
watering day cycle options.
Custom Days are specific days of the week on which irrigation
programs are allowed to start.
Watering Cycle Definitions
There are two methods to select Custom Days.
Custom Days: irrigation starts on selected days of the week.
Odd Dates: irrigation starts on all odd numbered calendar
Method 1:
Odd Dates no 31st: irrigation starts on all odd numbered
Turn the controller dial to MON.
gg
days, such as the 1st, 3rd, 5th, etc.
calendar days, such as the 1st, 3rd, 5th, etc., but not on the
31st.
Even Dates: irrigation starts on all even numbered calendar
days, such as the 2nd, 4th, 6th, etc.
Cyclical Dates: irrigation starts at regular chosen intervals
such as every 3rd or 5th day, regardless of the calendar date.
CAUTION: Regardless of the Watering Cycle, irrigation
dd
will start only on days of the week where program starts
are allowed. It’s important to select allowed irrigation days
carefully to avoid landscape damage in case irrigation delays
are lengthy.
NOTE: A watering cycle is selected as soon as it is highlighted
bb
with the cursor.
16
ESP-LX Basic Controller
Select Custom Days using the days of the week dial positions.
NOTE: If the desired program is not selected, use the Program
bb
Select switch to change it. See Section B, Program Select Switch
for more details.
AThe
Custom screen appears. Press the Allow button to allow
irrigation to start on a given day or press Prevent to prevent
irrigation from starting.
Method 2:
Select Custom Days using the Watering Day Cycle menu option.
Turn the controller dial to Basic Setup.
gg
NOTE: Watering day selections (Allow or Prevent) will carry over
bb
to the Watering Day Cycles menu option and vice versa.
BTurn the controller dial to TUE and repeat the process.
1
2
AThe Basic Setup screen appears. Press the Down Arrow button to
select Watering Day Cycles; then press Next.
Repeat this process for all other days of the week in the program.
ee
Then change the Program Select switch and repeat this process to
select Custom Watering Days for other programs as desired.
1
ESP-LX Basic Controller
17
BThe
Watering Cycle screen appears with Custom Days/Week
selected; press Next.
bb
NOTE: If the desired program is not selected, use the Program
Select switch to change it. See Section B, Program Select Switch
for more details.
Odd, Odd no 31st, Even
The process for setting up Odd, Odd no 31st, and Even Watering
Cycles is the same.
Turn the controller dial to Basic Setup.
gg
CThe
Custom screen appears. Press the Yes button to allow
irrigation to start on a given day or press No to prevent irrigation
from starting.
NOTE: Watering day selections (Yes or No) will carry over to the
bb
days of the week dial positions and vice versa.
2
3
AThe Basic Setup screen appears. Press the Down Arrow button to
select Watering Day Cycles; then press Next.
DPress the Next and Back buttons to navigate through the days of
the week and repeat the selection process as desired.
4
Change the Program Select switch and repeat this process to set
ee
Watering Cycles for other programs as desired.
18
ESP-LX Basic Controller
1
BThe
Watering Cycle screen appears with Custom Days/Week
selected. Press the Down Arrow button to select Odd Dates; then
press Next.
Cyclical Days
Turn the controller dial to Basic Setup.
gg
NOTE: If the desired program is not selected, use the Program
bb
Select switch to change it. See Section B, Program Select Switch
for more details.
CThe Odd screen appears. Press the Yes button to allow irrigation to
start on a given day or press No to prevent irrigation from starting.
NOTE: Watering day selections (Yes or No) will carry over to the
bb
days of the week dial positions and vice versa.
2
3
AThe Basic Setup screen appears. Press the Down Arrow button to
select Watering Day Cycles; then press Next.
DPress the Next and Back buttons to navigate through the days of
1
the week and repeat the selection process as desired.
4
Change the Program Select switch and repeat this process to set
ee
Watering Cycles for other programs as desired.
ESP-LX Basic Controller
19
BThe Watering Cycle screen appears. Press the Down Arrow button
to select Cyclical Days; press Next.
FPress the Next and Back buttons to navigate through the days of
the week and repeat the selection process as desired.
NOTE: If the desired program is not selected, use the Program
bb
Select switch to change it. See Section B, Program Select Switch
for more details.
CThe Day Cycle Settings screen appears. Press the + and – buttons
6
to set the watering day cycle (from 1 to 30 days). For example, set
to 03 if you want to water every third day; then press Next.
2
3
DPress the + and – buttons to set the first date for the Watering
Cycle to begin; then press Next.
llPress and HOLD buttons to accelerate settings for dates.
EThe Watering Day Cycle screen appears. Press the Yes button to
allow irrigation to start on a given day of the week or else press No
to prevent irrigation from starting.
NOTE: Watering day selections (Yes or No) will carry over to the
bb
days of the week dial positions and vice versa.
4
20
5
ESP-LX Basic Controller
Change the Program Select switch and repeat this process to set
ee
Cyclical Watering for other programs as desired.
Set Watering Start Times
Start times are the time(s) of day that the program begins.
You can assign up to eight Start Times per day to a single program.
Multiple Start Times allow you to run a program more than once on
each day. For example, if you’re growing new lawn seed, you may want
to water several times a day to keep the seedbed or top dressing damp.
NOTE: Start times apply to the entire program and not just to an
bb
individual station.
gg
Turn the controller dial to Basic Setup.
BThe Set Start Times screen appears. Press the + and – buttons to
set the 1st Start Time for the current program. If more Start Times
are desired, press Next.
llPress and HOLD buttons to accelerate settings for hours and
minutes.
NOTE: If the desired program is not selected, use the Program
bb
Select switch to change it. See Section B, Program Select Switch
for more details.
CPress Next again to select the 2nd Start Time. Repeat Steps 2 and
3 to set all desired Start Times (1 through 8).
2
3
DPress Back at any time to return to the Basic Setup Menu.
AThe Basic Setup screen appears. Press the Down Arrow button to
select Set Start Times; then press Next.
1
Change the Program Select switch and repeat this process to set
ee
up additional Watering Start Times for other programs as desired.
NOTE: Cycle+Soak is an alternative method of dividing the
bb
total Station Run Time into smaller cycle times. If you plan to use
TM
Cycle+Soak, only a single Watering Start Time is required for each
program. See Section D, Set Up Cycle+Soak for more details.
ESP-LX Basic Controller
21
Set Station Run Times
Run Times are the number of minutes (or hours and minutes) that
each station runs.
Station Run Times are particular to programs; so typically stations are
set for a single program.
Turn the controller dial to Station Timing.
gg
BThe Set Run Times screen appears. Press the + and – buttons on
the left to select the station to program.
NOTE: If the desired program is not selected, use the Program
bb
Select switch to change it. See Section B, Program Select Switch
for more details.
CPress the + and – buttons on the right to set the Station Run Time.
Range can be from 00 minutes (no Run Time) up to 24:00 hours.
llPress and HOLD buttons to accelerate settings for hours and
minutes.
2
AThe Station Timing screen appears with Set Run Times selected;
press Next.
3
Change the Program Select switch and repeat this process to set
ee
up additional Station Run Times for other programs as desired.
NOTE: Seasonal Adjust % adjustments will adjust the Station Run
bb
Time down to the second. For example, if the Run Time is set for 1
minute and the Seasonal Adjust % is set to 50% then the adjusted
Run Time equals 30 seconds.
1
22
NOTE: To return to the Station Timing menu, turn the dial to
bb
another position and then back to Station Timing.
ESP-LX Basic Controller
Section C - System Diagnostics
AThe
Test All Stations / Check System
BThe Confirm Programs screen appears with Program Summary
Review and confirm scheduled Irrigation Programs, Program Run
Times and Station Run Times
Confirm Programs
Review and confirm scheduled irrigation Programs, Program Run
Times and Station Run Times.
Check System screen appears with Confirm Programs
selected; press Next.
selected; press Next.
1
2
The ESP-LX Basic controller can make calculations and provide feedback
on Start Times and total Run Times for programs and stations.
Program Summary
Review program information for all programs:
Turn the controller dial to Test All Stations/Check System.
gg
CThe Program Summary screen appears, providing a summary of
Run Times, Start Times and Water Days for all programs.
3
NOTE: In the above example, Program A will run because it has
bb
Station Run Times, Start Times and Water Days all programmed, as
indicated by the “Y” in each column for PGM A.
Program B however will not run as it is missing both the Run Time
and Start Time, as indicated by the “N” in each of those columns
for PGM B.
ESP-LX Basic Controller
23
Review Program
Review program information for a station:
Turn the controller dial to Test All Stations/Check System.
gg
CThe Watering Start Times review screen appears with start times
displayed for the currently selected program. Press Next.
NOTE: If the desired program is not selected, use the Program
bb
Select switch to change it. See Section B, Program Select Switch
for more details.
DThe Watering Day Cycle review screen appears with the current
watering day cycle displayed. Press Next.
c
AThe
Check System screen appears with Confirm Programs
selected; press Next.
BThe Confirm Programs screen appears. Press the Down Arrow
button to select Review Program; then press Next.
a
24
b
ESP-LX Basic Controller
d
EThe Watering Days review screen appears with allowed watering
days displayed. Press Next.
FThe Run Times review screen appears with run times for each
station displayed. Press Next.
e
f
GThe
Seasonal Adjust review screen appears with seasonal
adjustment percentage displayed. Press Next.
KThe
HThe Seasonal Adjust by Month review screen appears with seasonal
LThe
adjustment percentage displayed for the first allowed month.
Press the + and – buttons to see Seasonal Adjust percentage for
other months as desired; then press Next.
Cycle+Soak Minutes review screen appears with the
Cycle+Soak times for each station displayed. Press Next.
Master Valve Assignment review screen appears with MV
information displayed. Press Next.
k
g
l
h
MThe
IThe
Rain Delay review screen appears with number of days
remaining until next watering date displayed. Press Next.
Weather Sensor Assignment review screen appears with
stations that use sensor override displayed. Press Next.
NThe Water Window review screen appears with water window
open time, close time and duration displayed. Press Next.
JThe Station Delay review screen appears with delay time between
stations displayed. Press Next.
m
i
n
j
ESP-LX Basic Controller
25
OThe Backup Programs review screen appears with the Contractor
Default backup program status displayed. Press Next.
o
26
ESP-LX Basic Controller
Program Run Time
Review total Run Time for an individual program:
Turn the controller dial to Test All Stations/Check System.
gg
CThe Total Run Time screen appears and total Run Time is displayed
for the currently selected program.
NOTE: If the desired program is not selected, use the Program
bb
Select switch to change it. See Section B, Program Select Switch
for more details.
3
AThe
Check System screen appears with Confirm Programs
selected; press Next.
BThe Confirm Programs screen appears. Press the Down Arrow
button to select Program Run Time; then press Next.
NOTE: For stations set up for Cycle+Soak, the Cycle Time (when
bb
irrigation is occurring) will be included in Program Run Time
calculations but Soak times will NOT be included. See Section D,
Set Up Cycle+Soak, for more details.
Change the Program Select switch and repeat this process to
ee
review and confirm Program Run Times for other programs as
desired.
1
2
ESP-LX Basic Controller
27
Station Run Time
Review total Run Time for all stations:
Turn the controller dial to Test All Stations/Check System.
gg
CThe Sta Run Time Per Day screen appears with total Run Time
displayed for the currently selected station in all four programs.
For programs where a particular station is not used no runtime
will show.
DPress the + and – buttons to advance and see additional stations.
3
AThe
Check System screen appears with Confirm Programs
selected; press Next.
BThe Confirm Programs screen appears. Press the Down Arrow
button to select Station Run Time; then press Next.
1
28
2
ESP-LX Basic Controller
4
NOTE: Soak times for stations set up with Cycle+Soak are not
bb
included in the Station Run Time calculations. See Section D, Set
Up Cycle+Soak for more details.
Test All Stations
You can test all stations connected to your controller by running each
of them in station number sequence.
Sometimes this is useful after installation, for general maintenance or
as a first step in troubleshooting your system.
CA confirmation screen appears.
DOnce Run is pressed, stations can be monitored and advanced by
turning the dial to the AUTO position and using the Adv button.
Press the + and – buttons to increase or decrease Run Time
minutes for the current station.
NOTE: Only stations with programmed run times are included in
bb
the Test All Stations operation.
Turn the controller dial to Test All Stations/Check System.
gg
3
4
AThe Check System screen appears. Press the Down Arrow button
to select Test All Stations; then press Next.
BThe Test All Stations screen appears. Press the + and – buttons to
adjust the Test Run Time (adjustable from 1 to 10 minutes) per
station; then press Run.
1
2
ESP-LX Basic Controller
29
Wiring Diagnostics
Although finding the exact location of issues in the field often requires
some amount of in-the-field troubleshooting, the controller has some
built-in features to help you narrow down the possible issues.
AThe Check System screen appears. Press the Down Arrow button
to select Raster Wiring Test; then press Next.
BThe
Raster Wiring Test screen appears.
automatically.
The test begins
Before beginning diagnostics, it may be helpful to run a Test All
Stations check to ensure valves are working properly.
NOTE: The Test All Stations manual test will take priority above
bb
pre-programmed irrigation and allow you to determine which
1
2
stations are working properly. See Test All Stations for more
details.
Raster Wiring Test
The ESP-LX Basic controller can quickly test to determine if any
stations have shorted or open wires or valve solenoids.
Turn the controller dial to Test All Stations/Check System.
gg
NOTE: During the test every installed station number is briefly
bb
displayed on the screen.
CWhen the test is complete, the results are displayed on the screen.
Press the + and - buttons to scroll through all stations that have
short circuits or open circuits.
3
30
ESP-LX Basic Controller
The sensor will display one of five status conditions:
Weather Sensor Status
Turn the controller dial to Test All Stations/Check System.
gg
a. Monitoring - sensor is active monitoring current weather
conditions.
b. <Inactive> installation has not been completed or the sensor is
not linked to any stations.
c. PAUSING - current weather condition has caused the sensor to
pause irrigation.
d. PREVENTING - current weather condition has caused the sensor
to prevent irrigation.
e. BYPASSED - sensor switch is in the Bypassed position and the
sensor is not monitoring current weather conditions.
NOTE: If current weather conditions are sufficient for the weather
bb
sensor to prevent or pause irrigation, then a message appears on
AThe Check System screen appears. Press the Down Arrow button
to select Wthr Sensor Status; then press Next.
the Auto screen. This is not considered an alarm, so the controller
alarm light will not illuminate.
BThe Weather Sensor Status screen appears, showing the status of
the installed weather sensor.
1
2
ESP-LX Basic Controller
31
Master Valve Status
Turn the controller dial to Test All Stations/Check System.
gg
AThe Check System screen appears. Press the Down Arrow button
to select Master Valve Status; then press Next.
BThe MV Status screen appears, showing the status of the installed
master valve.
1
32
2
ESP-LX Basic Controller
Section D - Advanced Programming
The ESP-LX Basic controller has a wide variety of advanced but
easy-to-use features designed to simplify irrigation.
Adjust Individual Program
Turn the controller dial to Basic Setup.
gg
Seasonal Adjust %
Seasonal Adjust % allows you to use the heaviest irrigation season as a
baseline and adjust to lesser amounts of watering at other times of the
year. For example, you could set July at 100% and set October to 50% so
there would be half as much watering in Fall than in Summer.
Seasonal adjustments can be managed in two ways:
llBy Individual Program - adjusting an individual program (A, B, C, or
D) affects all scheduled watering for that program, for all months of
the year.
llBy Month - affects watering for a selected month. Then you select
the individual programs that will be affected by the monthly
adjustment.
CAUTION: Multiple Seasonal Adjustment settings affect each
dd
other and can significantly impact irrigation. For example, if you
set a program-level Seasonal Adjustment of 10% and then a
monthly Seasonal Adjustment of 10%, irrigation will be reduced
to 1% of normal (10% of 10%). Consider using only one type of
Seasonal Adjustment setting.
AThe Basic Setup screen appears. Press the Down Arrow button to
select Seasonal Adjust; then press Next.
1
CAUTION: Setting a small number for the Seasonal Adjustment
dd
percentage will greatly reduce watering and setting to 0% will
cancel irrigation entirely. Use caution when making Seasonal
Adjustment settings.
ESP-LX Basic Controller
33
BThe Seasonal Adjust screen appears with Individual PGM selected;
press Next.
CPress
the + and – buttons to set the seasonal adjustment
percentage (from 0 - 300% ).
llPress and HOLD buttons to accelerate settings for percentages.
NOTE: If the desired program is not selected, use the Program
bb
Select switch to change it. See Section B, Program Select Switch
for more details.
2
3
Change the Program Select switch and repeat this process to set
Seasonal Adjustments for other programs as desired.
34
ESP-LX Basic Controller
Adjust By Month
Select Months to Adjust
Turn the controller dial to Basic Setup.
gg
BThe Seasonal Adjust screen appears. Press the Down Arrow button
to select By Month; then press Next.
CThe
Seasonal Adjust by Month screen appears with % Adjust
selected; then press Next.
2
3
DPress the + and – buttons to select the month you would like to
adjust; then press Next.
AThe Basic Setup screen appears. Press the Down Arrow button to
select Seasonal Adjust; then press Next.
1
EPress
the + and – buttons to set the Seasonal Adjustment
percentage (from 0 - 300% ); then press Next.
llPress and HOLD buttons to accelerate settings for percentages.
4
5
Repeat this process to set Seasonal Adjustments for other months
as desired. To apply these adjustments to one or more programs,
refer to the Select Programs to Adjust section.
NOTE: The % Adjust will automatically change to the new
bb
month’s percentage setting on the first day of the month.
ESP-LX Basic Controller
35
Select Programs To Adjust
gg
Turn the controller dial to Basic Setup.
BThe Seasonal Adjust screen appears. Press the Down Arrow button
to select By Month; then press Next.
CThe Seasonal Adjust by Month screen appears. Press the Down
Arrow button to select Select PGMs; then press Next.
2
AThe Basic Setup screen appears. Press the Down Arrow button to
select Seasonal Adjust; then press Next.
3
DPress the Yes or No buttons to set Monthly Adjust for the current
selected program.
ETo set another program, change the Program Select switch to the
desired program; a confirmation appears.
1
4
Repeat this process
programs as desired.
36
ESP-LX Basic Controller
5
to set Monthly Adjustments for other
Delay Watering
Rain Delay
The ESP-LX Basic controller’s Rain Delay feature lets you discontinue
irrigation for a few days after a period of heavy rain.
NOTE: If you have a rain sensor attached to your controller, it may
bb
be unnecessary to manually program a Rain Delay. Consult the
rain sensor device documentation for more details.
BThe Rain Delay screen appears. Press the + and – buttons to set
the number of days (from 0 to 14 days) for the Rain Delay. The
next irrigation date after the Rain Delay calculates and displays
automatically.
2
Turn the controller dial to Manual Watering / Rain Delay.
gg
AThe
Manual Watering screen appears. Press the Down Arrow
button to select Rain Delay; then press Next.
1
ESP-LX Basic Controller
37
Water Windows
Used to specify certain times of the day/night when irrigation is
allowed.
Otherwise watering is not allowed outside these “Water Windows”. This
is helpful to comply with local regulations which may prohibit irrigation
during certain hours.
CAUTION: Be sure a Water Window is sufficient to allow irrigation
dd
programs to run completely. Irrigation scheduled outside the
Water Window will not run but will resume when the Water
Window opens again. This can cause irrigation programs to “stack”
and eventually create an alarm condition if the controller stacks 8
or more programs.
NOTE: Water Windows can be scheduled to cross midnight. For
bb
example, a Water Window can start at 10:00 PM and continue until
4:00 AM the next morning. Be sure your Watering Start Times are
set to occur within the Water Window. See Section B, Set Watering
Start Times for more details.
Turn the controller dial to Basic Setup.
gg
AThe Basic Setup screen appears. Press and hold the third button
from the left (Key3).
BThe Water Window screen appears. Press the + and – buttons to
set the time when the Watering Window opens; then press Next.
llPress and HOLD buttons to accelerate settings.
1
2
CPress the + and – buttons to set the time when the Watering
Window closes. As you adjust the close time, the duration of your
Water Window calculates automatically.
NOTE: To clear a previously set Water Window, press the + and
bb
– buttons to set both the Open and Close times to OFF (between
11:59 and 12:00 AM).
DTo set another program, change the Program Select switch to the
desired program; a confirmation appears.
3
4
Repeat this process to set or clear Water Windows for other
programs as desired.
38
ESP-LX Basic Controller
Set Up Cycle+SoakTM
The ESP-LX Basic controller Cycle+SoakTM feature allows water to
be applied to stations intermittently and without creating complex
programs. It can apply to any station and is useful for locations such as
hillsides which can be difficult to irrigate effectively.
Cycle+Soak consists of two settings, the cycle time (how long a station
will run before soaking) and soak time (how long irrigation is paused
before applying another cycle). For example, a station can be set up to
receive 15 minutes of irrigation in three 5 minute cycles, with two 10
minutes periods of soak time in between waterings.
AThe Station Timing screen appears. Press the Down Arrow button
to select Cycle + Soak; then press Next.
1
NOTE: Cycle+Soak settings apply to stations no matter which
bb
programs it may be used in.
BThe Cycle+Soak screen appears. Press the + and – buttons to enter
Turn the controller dial to Station Timing.
gg
CPress the + and – buttons to set the Cycle time (between 1-60
the desired station number; then press Next.
minutes). Or to cancel Cycle+Soak on that station, set to 0 minutes;
then press Next.
llPress and HOLD buttons to accelerate settings for minutes.
2
3
ESP-LX Basic Controller
39
DPress the + and – buttons to set the Soak time (between 1-60
minutes). Or to cancel Cycle+Soak on that station, set to 0
minutes; then press Next.
Program Station Delay
The ESP-LX Basic controller can be programmed to include a delay
between stations.
This feature delays the start of the next sequential station in a program
after the previous station completes.
4
CAUTION: Consider using short Station Delay times, particularly
dd
if your watering schedule or Water Window is short. Long delay
times could prevent scheduled irrigation from completing prior
to the end of the Water Window. See previous Water Windows for
more details.
bb
NOTE: Consider using short Soak times, particularly if your
watering schedule or Water Window is short. Long soak times
could prevent irrigation from completing prior to the end of the
Water Window. See previous Water Windows for more details.
Turn the controller dial to Station Timing.
gg
Repeat this process to set up Cycle+Soak on other stations.
AThe Station Timing screen appears. Press the Down Arrow button
to select PGM Station Delay; then press Next.
1
40
ESP-LX Basic Controller
BThe Station Delay screen appears. Press the + and – buttons to
set the delay time (from 00:01 second to 10:00 minutes). To clear
Station Delay on that station, set the delay time to 00:00.
llPress and HOLD buttons to accelerate settings for minutes and
seconds.
bb
NOTE: If the desired program is not selected, use the Program
Select switch to change it. See Section B, Program Select Switch
for more details.
SimulStations
The ESP-LX Basic controller defaults to operating a single station at a
time. Systems with larger water sources may support operating two
stations simultaneously.
Turn the controller dial to Station Timing.
gg
2
Change the Program Select switch and repeat this process to set
ee
Station Delay for other programs as desired.
AThe Station Timing screen appears. Press the Down Arrow button
to select SimulStations; then press Next.
BThe SimulStations screen appears. Press the + and – buttons to
set the number of irrigation stations (1 or 2) that can operate
simultaneously.
1
2
ESP-LX Basic Controller
41
Optional Settings
CPress the + and – buttons to select Yes if the station requires a
Station Settings
DThe Weather Sensor Assignment screen lets you select whether a
master valve, otherwise select No; then press Next.
The Station Settings option tells the ESP-LX Basic controller how
to interact with other stations, the master valve, and the weather
sensor.
station obeys or ignores the installed weather sensor. Press the +
and – buttons to select Obey or Ignore; then press Next.
Turn the controller dial to Station Timing.
gg
3
4
NOTE: The weather sensor can be turned on (Active) or off
bb
(Bypassed) using the Weather Sensor switch on the controller
front panel.
Repeat this process to set up additional stations.
ee
AThe Station Timing screen appears. Press the Down Arrow button
to select Optional Settings; then press Next.
BThe Station Settings screen appears. Press the + and – buttons to
enter the desired station number; then press Next.
1
42
2
ESP-LX Basic Controller
Section E - Options & Special Features
AThe Basic Setup screen appears. Press the Down Arrow button to
Backup and Recall Programs
BThe
select Backup Programs; then press Next.
Backup Programs screen appears with Store Programs
selected; press Next.
The ESP-LX Basic controller comes standard with a simple to use
backup programs feature.
Backup Programs allows you to save your programs as Contractor
Default and then recall them at a later time. It also includes a Delayed
Recall feature that lets you save a normal irrigation schedule as the
Backup and then restore it later automatically. This may be useful for
new seed or sod where frequent irrigation can be programmed to
occur until a set date when Delayed Recall automatically returns the
controller programming to the normal irrigation schedule.
1
2
CAUTION: The Backup Programs feature saves and restores ALL
dd
irrigation programming in ALL programs (A, B, C & D).
CA confirmation screen appears. To Store Programs, press and hold
Store Default Programs
DA confirmation screen appears.
Turn the controller dial to Basic Setup.
gg
down the Yes button for four seconds. If you’re not sure, press No.
3
4
ESP-LX Basic Controller
43
CA confirmation screen appears. To Recall Programs, press and hold
Recall Default Programs
gg
Turn the controller dial to Basic Setup.
down the Yes button for four seconds. If you’re not sure, press No.
DA confirmation screen appears.
3
4
CAUTION: Once current programs have been replaced using
dd
Recall Programs they can not be restored.
AThe Basic Setup screen appears. Press the Down Arrow button to
select Backup Programs; then press Next.
BThe
Backup Programs screen appears. Press the Down Arrow
button to select Recall Programs; then press Next.
1
44
2
ESP-LX Basic Controller
CThe Recall Delay screen appears. Press the + and – buttons to
Delayed Recall
Use the Delayed Recall feature to automatically replace the currently
loaded programs with a previously stored program at a future date.
CAUTION: Once current programs have been replaced with the
dd
Delayed Recall feature, they can not be restored.
enter the number of days (from 0 to 90 days) before Contractor
Defaults are restored. For example, set it to 7 days if you want your
original programs to be restored in one week. If you want to clear
a previously Delayed Recall, set the number of days to 0.
Turn the controller dial to Basic Setup.
gg
3
AThe Basic Setup screen appears. Press the Down Arrow button to
select Backup Programs; then press Next.
BThe
Backup Programs screen appears. Press the Down Arrow
button to select Delayed Recall; then press Next.
1
2
ESP-LX Basic Controller
45
Clear Programs
The ESP-LX Basic controller allows you to clear an individual
Program, all of your Programs, or to Restore the controller to its
factory default condition.
Clear Individual Program
Turn the controller dial to Basic Setup.
gg
CAUTION: It’s recommended to back up your Programs before
dd
clearing them. The ESP-LX Basic controller’s built in Store Programs
feature can backup one set of programs. See Section E, Backup
and Recall Programs for more details.
NOTE: Irrigation start days, Start Times and station Run Times will
bb
no longer be present for the cleared Programs. If no Programming
exists then an Alarm will be displayed. See Section A, Alarm
Conditions for more details.
AThe Basic Setup screen appears. Press the Down Arrow button to
select Backup Programs; then press Next.
BThe
Backup Programs screen appears. Press the Down Arrow
button to select Clear Programs; then press Next.
1
46
ESP-LX Basic Controller
2
CThe
Clear Programs screen appears with Individual Program
selected; press Next.
DA confirmation screen appears. To clear the selected Program,
press and hold down the Yes button for four seconds. If you’re not
sure, press No.
NOTE: If the desired program is not selected, use the Program
bb
Select switch to change it. See Section B, Program Select Switch
for more details.
3
4
EA confirmation screen appears.
5
Change the Program Select switch and repeat this process to clear
ee
other Programs.
ESP-LX Basic Controller
47
CThe Clear Programs screen appears. Press the Down Arrow button
Clear All Programs
gg
Turn the controller dial to Basic Setup.
to select All Programs; then press Next.
DA confirmation screen appears. To Clear All Programs, press and
hold down the Yes button for four seconds. If you’re not sure,
press No.
3
AThe Basic Setup screen appears. Press the Down Arrow button to
select Backup Programs; then press Next.
EA confirmation screen appears.
BThe
Backup Programs screen appears. Press the Down Arrow
button to select Clear Programs; then press Next.
1
48
2
ESP-LX Basic Controller
4
5
Restore Defaults
Restore the ESP-LX Basic controller’s factory default settings.
Turn the controller dial to Basic Setup.
gg
CThe Clear Programs screen appears. Press the Down Arrow button
to select Restore Defaults; then press Next.
DA confirmation screen appears. To Restore Factory Defaults, press
and hold down the Yes button for four seconds. If you’re not sure,
press No.
3
AThe Basic Setup screen appears. Press the Down Arrow button to
4
EA confirmation screen appears.
select Backup Programs; then press Next.
BThe
Backup Programs screen appears. Press the Down Arrow
button to select Clear Programs; then press Next.
1
5
2
CAUTION: Be very careful about using the Restore Defaults
dd
option as all previous settings will be permanently cleared from
system memory. Consider using the Clear All Programs option
instead.
ESP-LX Basic Controller
49
this page intentionally left blank
Section F - Auxiliary Operation
AThe Manual Watering screen appears with Start Station selected;
Manual Watering
BThe Manual Watering screen appears. Press the + and – buttons
The ESP-LX Basic controller allows you to manually start a station or a
program.
Start Station Manually
NOTE: Manual Watering > Start Station will pause currently
bb
running programs.
press Next.
to enter the station you want to run manually; then press Next.
1
2
Turn the controller dial to Manual Watering / Rain Delay.
gg
CThe Station Run Time defaults to the Program Run Time. Press the
+ and – buttons to adjust the Run Time. Press the Run button to
start irrigation for that station.
llPress and HOLD buttons to accelerate settings for hours and minutes.
DA confirmation screen appears.
3
4
Repeat this process to manually water other stations.
ee
NOTE: Stations will run sequentially in the selected order.
bb
NOTE: To view the Station while running, turn the dial to AUTO.
bb
Use the Adv button to advance to the next station, and + and – to
increase or decrease the Run Time of the current station.
ESP-LX Basic Controller
51
Start Program Manually
Turn the controller dial to Manual Watering / Rain Delay.
gg
CA confirmation screen appears.
3
Repeat this process to manually start other Programs. Programs
ee
will run sequentially in the order in which they were selected.
NOTE: To view the Program while running, turn the controller
bb
dial to AUTO position. You can use the Adv button to advance to
AThe
Manual Watering screen appears. Press the Down Arrow
button to select Start Program; then press Next.
BThe Manual Watering Start Program screen appears. Press Run to
start the Program or else press Back to cancel.
NOTE: If the desired program is not selected, use the Program
bb
Select switch to change it. See Section B, Program Select Switch
for more details.
1
52
2
ESP-LX Basic Controller
the next station and the + and – buttons to increase or decrease
the Run Time of the current station.
Test All Stations
You can test all stations connected to your controller by running each
of them in sequence.
Sometimes this is useful after installation, for general maintenance or
as a first step in troubleshooting your system.
AThe
Manual Watering screen appears. Press the Down Arrow
button to select Test All Stations; then press Next.
BThe Test All Stations screen appears. Press the + and – buttons to
adjust the Test Run Time (adjustable from 1 to 10 minutes) per
station; then press Run.
NOTE: Only stations with programmed run times are included in
bb
the Test All Stations operation.
Turn the controller dial to Manual Watering / Rain Delay.
gg
1
2
CA confirmation screen appears.
DOnce Run is pressed, stations can be monitored and advanced by
turning the dial to the AUTO position and using the Adv button.
Press the + and – buttons to increase or decrease Run Time
minutes for the current station.
3
4
ESP-LX Basic Controller
53
OFF
Turns off irrigation.
Adjust Display Contrast
Adjust the contrast settings for the controller display for better
visibility.
Turn the controller dial to OFF.
gg
AThe
All Watering Off screen appears and the current contrast
adjustment setting will display for 10 seconds. Press the + and –
buttons to adjust contrast up or down.
1
54
ESP-LX Basic Controller
Section G - Installation
Check Box Contents
This section explains how to mount the ESP-LX Basic controller,
connect the wiring, and verify proper operation.
All components below are included with your ESP-LX Basic controller
and are required for installation. If anything is missing, please contact
your distributor before proceeding.
Prepare For Installation
AESP-LX Basic controller and modules
BMounting hardware (5 screws, 5 plastic wall anchors)
CController cabinet keys
DESP-LX Basic Controller Installation, Programming,
Installation Checklist
When installing the ESP-LX Basic Controller for the first time, it is
recommended that you complete the following steps in order.
111
1
111
1
111
1
111
1
For your convenience a check-off box is provided for each step.
Check box contents.........................................................................Page 55
Gather installation tools................................................................Page 56
Select a location...............................................................................Page 57
& Operation Guide
EMounting Template
FStation Numbering Labels
Mount the controller......................................................................Page 60
2
Connect source power...................................................................Page 61
Install base and station module(s).............................................Page 64
Connect field wiring.......................................................................Page 67
3
Complete the installation.............................................................Page 70
ESP-LX Basic Controller
1
6
Box Contents
45
ESP-LX Basic Controller
55
Gather Installation Tools
11
11
11
11
11
11
11
11
Before beginning installation, gather the following tools and materials:
Slotted Head Screwdriver
Phillips Head Screwdriver
Thin Blade Screwdriver
Lineman’s Pliers
Torpedo Level
Hammer
Grounding Strap
#8 AWG or #10 AWG Bare Ground Wire
56
ESP-LX Basic Controller
11
11
11
11
11
11
11
Waterproof Wire Connectors
Tape Measure
Wire Stripper
Wire Nuts (Provided)
Marking Pencil
Electric Drill (or Hammer Drill
if installing in masonry or
concrete wall)
Waterproof Caulking
Install the Controller
The ESP-LX Basic controller mounts to a wall (or suitable mounting
surface).
NOTE: An optional metal cabinet (LXMM) and pedestal
bb
(LXMMPED) are also available for the ESP-LX Basic controller. If you
intend to use those options, follow the installation instructions for
those products before installing the controller.
WARNING: This controller must be installed in compliance with
cc
local electrical codes.
Select Location for Controller
15 in.
(38,1 cm)
Cabinet Depth
5.5 in (14 cm)
llIs safe from potential vandalism
Eye Level
Field wiring
in conduit
llAllows for comfortable viewing
llNear 120 V AC power source
12.69 in.
(32,2 cm)
120 V AC
wiring in conduit
Select a location that:
llIs easily accessible
llHas a flat wall surface
14.32 in.
(36,4 cm)
Wall
Grade
llIs outside the range of operating sprinklers
Select Controller Location
ESP-LX Basic Controller
57
ETo open the controller front panel: grasp the crescent-shaped
Access Controller Cabinet
handle on the right-hand-side of the front panel.
Remove Cabinet Door and Front Panel
AThe controller comes with an outer door lock to deter vandalism
and prevent unauthorized access to controller operations. If
necessary, unlock the cabinet door using the supplied key.
5
BTo open the controller door: grasp the crescent-shaped handle on
the right-hand-side of the outer cabinet.
1
2
FPull it towards you to open the front panel, swinging it to the left.
CPull it towards you to open the door, swinging it to the left.
DTo remove the door, carefully pull the door away from the cabinet
until the door hinges separate from the plastic posts.
6 3 4 58
ESP-LX Basic Controller
GTo remove the front panel: disconnect the ribbon cable from the
front panel by gently pulling the connector out of the socket.
dd
CAUTION: Be careful not to bend the pins in the sockets when
attaching or detaching the ribbon cable.
HRock the front panel upward and nudge the bottom corner pin
out of the lower pin-hole to remove the front panel.
Remove Modules
Every ESP-LX Basic Controller ships with two modules packaged inside
the cabinet, one base module and one station module (SM12).
ARemove both the modules and cardboard packaging from inside
the controller and set the modules aside for installation later.
BThe top-most box contains the Base Module, with a multi-color
label visible through the box window.
CThe bottom-most box contains the 12 Station Module, with a
solid blue color label visible through the box window.
2
8
7
3
ESP-LX Basic Controller
59
CDrive the first screw into the topmost-center hole. Then hang the
Mount Controller
AUsing a level, tape the mounting template to the mounting
surface at approximately eye level. Make sure that at least one of
the five mounting hole marks is aligned on a wall stud or other
solid surface.
BUse a tapping tool (or nail) and hammer to tap pilot holes through
controller on the screw by the key-hole slot on the back of the
cabinet.
DLine up the controller cabinet mounting holes with the remaining
pilot holes and drive the four remaining screws through the
cabinet back plane into the mounting surface.
the five mounting hole marks and into the mounting surface.
Then remove the template and drill holes in the mounting surface,
installing wall anchors if necessary.
1
3
2 5X
NOTE: If the controller needs to be mounted on an uneven
bb
surface like stucco, place (or install) a section of exterior plywood
between the controller and the wall.
60
4 4X
ESP-LX Basic Controller
Connect Power to the Controller
Surge Protection and Grounding
The ESP-LX Basic controller is equipped with built-in electrical surge
protection. For this system to function, you must properly ground the
controller.
WARNING: The ESP-LX Basic controller must be properly surge
cc
protected and grounded. Doing so can help prevent damage to
the controller and irrigation system and also significantly reduce
troubleshooting, repair time and expense. Failure to do so could
result in failure of your controller and voiding the warranty.
Ensure that all grounding devices are compliant with local electrical
codes.
Connect Power Source
The ESP-LX Basic controller has an internal transformer that reduces
supply voltage (120 VAC) to 24 VAC. You will need to connect power
supply wires to the transformer’s three wires. (Line, Neutral, Ground)
WARNING: Electric shock can cause severe injury or death. Make
cc
sure power supply is turned OFF before connecting power wires.
WARNING: All electrical connections and wiring runs must be
cc
made according to local building codes.
ALocate
the transformer wiring compartment in the lower left
corner of the controller cabinet. Remove the screw on the righthand side and pull the cover off to expose the wiring compartment.
1
ESP-LX Basic Controller
61
BStrip
the insulation from the three incoming wires to expose
approximately 1/2 in (13 mm) of bare wire.
EUsing the provided wire nuts, connect the wires accordingly.
CRemove the knockout on the bottom of the cabinet below the
transformer and attach a 1/2 in (13 mm) conduit fitting to the
bottom entrance of the wiring compartment.
DFeed the three supply wires from the power source through the
conduit into the wiring compartment.
5 3X
WARNING: The ground wire MUST be connected to provide
cc
electrical surge protection. You will void the controller warranty if
you do not ground the controller.
FOnce
wiring is completed, fill top of conduit with waterproof
caulking to prevent insect intrusion into the controller cabinet.
3
2 3X
4 3 wires
6
GVerify that all connections are secure. Then replace the cover of
the transformer wiring compartment and secure it with the screw.
62
ESP-LX Basic Controller
BReconnect the ribbon cable to the front panel by gently pushing
Re-install Front Panel
cc
WARNING: To prevent electrical shock, make sure all supply
power is OFF before installing the front panel. Electrical shock can
cause severe injury or death.
AReinstall the front panel by inserting the top corner pin into the
top pin-hole; then push up and rock the bottom corner pin into
the lower pin-hole.
1
the connector into the socket.
CAUTION: Be careful NOT to bend the pins in the socket.
dd
2
CTurn on the power source.
NOTE: The first time you power up the controller, the display will
bb
prompt you to select the language you wish to use. See Section A,
Initial Startup Screen for more details.
Wiring Connections
120 VAC
Black supply wire (hot) to the black transformer wire
White supply wire (neutral) to the white transformer wire
Green supply wire (ground) to the green transformer wire
ESP-LX Basic Controller
63
Install Modules
Install Base Module
AOrient
the connector on the bottom of the module with the
connection socket in Slot 0 on the controller backplane.
Install the LXBASEMOD Base Module in Slot 0.
1
LXBASEMOD Base Module
dd
CAUTION: Be careful not to bend the pins in the sockets when
installing the module.
NOTE: The Base Module include a jumper wire connecting the
bb
weather sensor (SEN) terminals. Do not remove the jumper wire
BCarefully
fasten the module onto the controller backplane,
pressing firmly until it snaps into place. The red light on the module
will flash on and off once if the module is installed correctly. If the
light does not flash once, verify the module is seated correctly.
unless you install a weather sensor.
2
NOTE: To remove the module, press in on the (two) release
bb
buttons on either side of the module.
64
ESP-LX Basic Controller
Install Station Module
Install the station module in Slot 1 that was included with your ESPLX Basic controller. Additional station modules can be purchased
separately.
AOrient the connector on the bottom of the station module with
the connection socket in Slot 1 on the controller backplane. (An
ESP-LXM-SM8 is shown.)
1
ESP-LXM -SM8 Station Module
ESP-LXM-SM12 Station Module
BCarefully
fasten the module onto the controller backplane,
pressing firmly until it snaps into place. The red light on the module
will flash on and off once if the module is installed correctly. If the
light does not flash once, verify the module is seated correctly.
2
CAUTION: Be careful not to bend the pins in the sockets when
dd
installing a module.
NOTE: To remove a module, press in on the (two) release buttons
bb
on either side of a module.
ESP-LX Basic Controller
65
Dynamic Station Numbering
The ESP-LX Basic controller will automatically detect any new station
modules that have been installed. Follow the instructions on the front
panel LCD to configure a station module.
AA Module Configuration screen is displayed whenever the ESP-LX
CThe Module Labels screen is displayed. Locate the Module Station
Numbering Labels that are provided on a separate foldout sheet.
Press Next to continue.
DThe Module Station Numbering Graphic displays a pair of letters
(example: Slot 1 = Label AC) for each installed module. Find the
station numbering label on the foldout sheet with the matching
letter pair and place it over the blue strip on the module. Press
Done to finish.
Basic Controller detects a change in module configuration. Press
Next to continue.
BThe Module Summary screen displays the module type detected
in each module slot along with the new and old assigned station
numbers. Press Accept to accept the new module configuration.
(Reject will retain the current configuration.)
1
3
4
2
NOTE: The Module Status can be reviewed at any time by turning
bb
the dial to the Station/MV Settings dial position and selecting
Module Status. See Module Status in Section D for details.
4
66
ESP-LX Basic Controller
DStrip the wire jacket back by a maximum of 1/2 inch (12 mm) and
Connect Field Wiring
connect each valve wire to one of the numbered terminals on a
station module.
Connect Valve Wires
Field wires for valves are connected to module terminals using quick
connectors. Press the swing arm of the appropriate terminal and insert
the wire. When you release the spring arm, the clamp will hold the wire.
EConnect the common wire(s) to any one of the COM terminals on
ALocate
(or remove) the large knockout on the bottom of the
controller cabinet. Attach a conduit fitting to the bottom of the
cabinet; then attach conduit to the fitting.
NOTE: Complete the following step only if your system uses a
bb
master valve or a pump start relay. The controller does not provide
BFeed the field wires through the conduit and into the controller
FConnect the master valve or pump start relay wiring to the MV
cabinet.
the controller. Wires used to connect the valves must be codeapproved for underground installation.
main power for a pump.
and COM terminals.
4
6
5
1
2
Power
Wire
CField wires for valves are connected to module terminals using
quick connectors. Press the swing arm of the appropriate terminal
and insert the wire. When you release the spring arm, the clamp
will hold the wire.
Master
Valve
Common Wire
ESP-LX Basic Controller
67
GOnce
wiring is completed, fill top of conduit with waterproof
caulking to prevent insect intrusion into the controller cabinet.
Connect Local Weather Sensor
The ESP-LX Basic can accept input from a single weather sensor wired
directly to the controller or through a wireless receiver.
A local weather sensor can be bypassed with the sensor bypass switch
on the controller front panel.
To Enable a Local Weather Sensor:
AOn the controller front panel, slide the Weather Sensor switch to
Active.
7
a
NOTE: Follow the sensor manufacturer’s instructions to correctly
bb
install and make wire connections to the sensor. Ensure the sensor
installation is in compliance with all local codes.
68
ESP-LX Basic Controller
To Connect a Wired Local Weather Sensor:
To Connect a Wireless Local Weather Sensor:
ARun continuous sensor wire from the weather sensor to the ESPLX Basic controller.
BRoute wire through knockout on the bottom of the controller.
CRemove the yellow jumper wire (if present). Connect the two
sensor wires to the sensor (Sen) inputs. When finished, tug gently
on the wires to make sure the connections are tight.
1
2
3
ARun wire from the wireless receiver to the ESP-LX Basic controller.
BRoute wire through knockout on the bottom of the controller.
CRemove the yellow jumper wire (if present). Connect the two
sensor wires to the sensor (Sen) inputs, the power wire to the
24V input , and the common wire to the common (C) input. When
finished, tug gently on the wires to make sure the connections
are tight.
1
2
3
NOTE: Ensure that the configuration for your controller and
bb
irrigation programs are set up correctly for your sensor. For
example, if one of your programs is set up to manage your
landscape lighting you may want to ensure that it’s stations
ignore input from a local weather sensor. See Section C, Weather
Sensor, for more details.
ESP-LX Basic Controller
69
Complete Installation
Install Front Door
ALine
up the three door hinges with the plastic posts on the
controller.
BPress the hinges onto the posts until the front door snaps into
place.
1
2
Verify Field Installation
Once some or all valves have been wired and programmed into the
ESP-LX Basic controller you can check the electrical portion of the
installation even if water is not available to test the valves.
If water is available and you would like to test some or all of your
stations, the easiest way to do so is by using the Test All Stations feature
of the controller. See Section C, Test All Stations for more details.
70
ESP-LX Basic Controller
Programming Chart
Overview
Program Info
Program A
Program B
Program C
Program D
Programs
Program Name
The process of telling the
controller exactly when and for
how long you want to water.
Select Days To Water
(Mon-Sun) For Custom
- OR Select Days Watering
Allowed For Non-custom
Each program contains:
Watering Days
The days of the week that
irrigation is allowed. Also, the
Cyclical watering cycle can be
used to water at a regular interval,
such as every third day.
Watering Start Times
The time(s) of day that irrigation
begins. All other stations in the
program then follow in sequence.
Station Run Times
The length of time (in hours and
minutes) that each individual
station is programmed to run.
M T W T F S S M T W T F S S M T W T F S S M T W T F S S
Monthly Seasonal
Adjust %
JAN
%
FEB
%
MAR
%
APR
%
MAY
%
JUN
%
JUL
%
AUG
%
SEP
%
OCT
%
NOV
%
DEC
%
Default Values for
Monthly Seasonal
Adjust = 100%
Set Watering
Start Times
Seasonal Adjust
Monthly Seasonal Adjust
Station Delay
Program Water Window
Start Time
Program Water Window
End Time
__Day Cycle
Even
Odd
Odd 31
__Day Cycle
Even
Odd
Odd 31
__Day Cycle
Even
Odd
Odd 31
__Day Cycle
Even
Odd
Odd 31
1
am / pm
am / pm
am / pm
am / pm
2
am / pm
am / pm
am / pm
am / pm
3
am / pm
am / pm
am / pm
am / pm
4
am / pm
am / pm
am / pm
am / pm
5
am / pm
am / pm
am / pm
am / pm
6
am / pm
am / pm
am / pm
am / pm
7
am / pm
am / pm
am / pm
am / pm
8
am / pm
am / pm
am / pm
am / pm
%
%
%
%
ON
ON
ON
ON
am / pm
am / pm
am / pm
am / pm
am / pm
am / pm
am / pm
am / pm
71
Station
#
1
2
3
4
5
6
7
8
9
10
11
12
13
14
15
16
17
18
19
20
21
22
23
24
72
Description
Obey
No. of Requires
Weather
Valves
MV
Sensor
Station
Cycle Time
Station
Soak Time
Program A
Station Run Time
Program B
Station Run Time
Program C
Station Run Time
Program D
Station Run Time
Station
#
25
26
27
28
29
30
31
32
33
34
35
36
37
38
39
40
41
42
43
44
45
46
47
48
Description
Obey
No. of Requires
Weather
Valves
MV
Sensor
Station
Cycle Time
Station
Soak Time
Program A
Station Run Time
Program B
Station Run Time
Program C
Station Run Time
Program D
Station Run Time
73
Quick Reference Guide
74
Declaration of Conformity
Application of Council Directive: 2004/108/EC
Standards To Which
Conformity Is Declared:
EN55014-1: 2001 Class B
EN55022 Radiated Emissions
EN55022 Conducted Emissions
EN61000-3-2
EN61000-3-3
EN55014-2: 2001
EN61000-4-2
EN61000-4-3
EN61000-4-4
EN61000-4-5
EN61000-4-6
EN61000-4-8
EN61000-4-11
Manufacturer’s Name:
Manufacturer’s Address:
Rain Bird Corporation
9491 Ridgehaven Court
San Diego, CA 92123
619-671-4048
Equipment Description:
Equipment Class:
Model Numbers:
Irrigation Controller
Requirements for household
appliances, electric tools and
similar apparatus
ESP-LXME, ESP-LX BASIC
I the undersigned, hereby declare that the equipment specified
above conforms to the above Directive(s) and Standard(s).
Place:
Tucson, AZ USA
Signature:
Full Name:
Position:
Ryan L. Walker
Director
RAIN BIRD CORPORATION
6991 E. Southpoint Road
Tucson, AZ 85756
© 2014 Rain Bird Corporation
and “Cycle+Soak”are registered trademarks
® ”Rain Bird”, “SimulStations”
of Rain Bird Corporation. All rights reserved.
www.rainbird.com
14MAY07
P/N: 639144-01