1
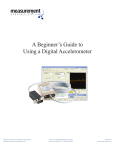
A Beginner’s Guide to
Using a 65210A
Inertial Measurement System
Beginners Guide to Inertial Measurement System
precisionsensors.meas-spec.com 2236 N. Cleveland-Massillon Road
Akron OH 44333 PH : 330-659-3312 8/21/2013
www.meas-spec.com
Introduction
This document guides new users through the basic setup of a Measurement Specialties 65210A Inertial Measurement
System. More in-depth information is available in the ICU User’s Manual and the ICU Reference Manual, both
available on the Measurement Specialties web site (precisionsensors.meas-spec.com). For any additional questions,
contact Measurement Specialties, Inc., Precision Inertial Products Division.
Step 1. Unpacking the box(es)
The 65210A is shipped surrounded by foam in a cardboard box. Accessories such as cables, activation plugs,
programming adapters, and battery chargers (if ordered) are typically shipped in a separate box. Before shipping,
each 65210A is calibrated, fully inspected, and the battery charged to 40% of capacity, so the unit is ready to set up
immediately upon removal from the box.
Step 2. Connecting the unit for setup
In order to program the 65210A, you need a software program called Instrument Configuration Utility (ICU). The
latest version of ICU software and installation instructions are available on the Measurement Specialties web site
(precisionsensors.meas-spec.com). You must install the software on your computer - it cannot be run directly from
the web site. ICU allows you to communicate with the instrument, as well as configure the sensor ranges, PCM data
stream, telemetry settings, and other parameters.
The following items are the accessories needed to set up a unit (included with the programming kit):
Included with the PC Interface kit:
65210A cable - This cable connects the 65210A to
the programming adapter for set up or data acquisition. The cable plugs into the connector on the
top of the 65210A by aligning the red dots. The
other end of the cable attaches to the programming
adapter.
Programming Adapter - The programming
adapter allows the user to connect a PC to the
65210A. It is a gray box with connectors on both
ends and a toggle switch on the side. The adapter
converts the RS485 output signal from the 65210A
into an RS232 signal so the computer can process
the information.
RS232 cable - The RS232 cable connects a computer to the programming adapter. One end of the
cable plugs into the RS232 port on the PC. The
other end connects to the programming adapter.
Note: If you are connecting to a laptop or PC with
only a USB port, you will need an RS232 to USB
adapter.
Once the 65210A cable, programming adapter,
and RS232 cable are connected to each other and
the unit (see Image 1), you are ready to set up the
65210A.
IMAGE 1: 65210A SETUP CONFIGURATION
Beginners Guide to Inertial Measurement System
precisionsensors.meas-spec.com 2236 N. Cleveland-Massillon Road
Akron OH 44333 PH : 330-659-3312 8/21/2013
www.meas-spec.com
Step 3. Turning on the unit
Press and hold the toggle switch on the programming adapter toward the LED until the LED holds a steady green.
The unit is now turned on and powered from the battery. To turn off the unit, hold the toggle button until it begins
blinking. The LED turns off when the toggle switch is released. The unit is now off.
After turning on the unit, start the installed ICU software by double-clicking the icon. At the About/Setup screen,
only two parameters need to be changed from the defaults (click the About/Setup button at the bottom of the screen
if you don’t see the screen shown below).
a. Set the Com Port box in the top left corner to the correct location for the computer’s port
b. Change the Program Function to On-Line Configuration
c. Click OK
On-Line Configuration is the mode of operation used most frequently by end users. This interactive mode allows
the user to change sensor and telemetry settings The other modes of operation and their uses are explained in the
ICU User’s Guide.
Measurement Specialties, Inc.
IMAGE 2: ICU ABOUT/SETUP SCREEN
Beginners Guide to Inertial Measurement System
precisionsensors.meas-spec.com 2236 N. Cleveland-Massillon Road
Akron OH 44333 PH : 330-659-3312 8/21/2013
www.meas-spec.com
Step 4a. Changing main tab settings for your application
Click the Configure button in the top left corner of the screen. The software scans for an attached unit. Once a
unit has been identified, ICU reads the configuration data which is stored in the unit’s nonvolatile memory. The
Configuration screen appears, filled with factory default settings. This section focuses on the Main tab of the OnLine Configuration mode.
# of channels
Encoding
Bit rate
Carrier
Frequency
Sync, etc.
Next Page (2)
10 channels are shown, however 16 channels are available on the 65210A. To turn off some of the
channels, select a new number in the Number of Channels box. The highest numbered channels
are removed first, so you may want to rearrange the channels by right clicking on the channel tab
of the correct channel. Choose Move Left or Move Right.
If you plan to collect data from the 65210A directly on to your PC, you must use the RS485
encoding format. If you are using a transmitter in a wireless test, you may use any of the encoding
formats. ICU supports many of the IRIG encoding formats.
The bit rate controls the speed at which samples are taken. The maximum value is 3.0 Mbit/sec.
However, the maximum direct connect speed via RS232 is 115.38K baud (limited by computer
capability). Note: a special transmitter is needed to achieve 3.0 Mbit/sec. Without it, 1.5 Mbit/
sec is the maximum bit rate.
For wireless tests, it is necessary to change the carrier frequency to match the receiver
frequency. Frequencies in the upper S band (2.2 - 2.3 GHz) are available.
The six boxes on Page 2 of the telemetry section provide the ability to adjust frame components.
You can set the length of the Sync, which marks the beginning of a frame, turn on the CRC to
detect lost bits, and add Pad bids to even out your frame rate. The Comm ID box lets you choose
the variation of commutation you would like to use.
Note: Adjusting the above settings can increase or decrease the effective sample rate. Viewing the Telemetry report
gives a visual representation of the frame as it is configured. See Step 6 for instructions on viewing reports.
IMAGE 3: ICU CONFIGURATION SCREEN
Beginners Guide to Inertial Measurement System
precisionsensors.meas-spec.com 2236 N. Cleveland-Massillon Road
Akron OH 44333 PH : 330-659-3312 8/21/2013
www.meas-spec.com
Step 4b. Changing channel tab settings for your application
Each sensor and channel can be configured to meet the needs of a specific application. All of the settings below
are found on each individual channel tab (see Image 4 below). Although it may appear complicated, much of the
information is redundant and therefore can be ignored initially. Here are the important fields for first time use:
Filter 3dB Cutoff
Range
IRIG Word Position
This field controls the filter for each channel. Recommended filter level is 1/10th
the frame rate. When the Bit rate (on the main tab) is changed, the filter level
may need adjustment. If the box is yellow, reduce the filter value until it is at
least 10 times less than the frame rate. Each channel’s filter needs to be changed
individually. Note: Hovering the cursor over a yellow field in ICU will provide an
explanation of the conflict.
The default ranges for accelerometers and gyros are ±30 g and ±1200°/sec.
respectively. You may change the range for each sensor by typing new numbers in
the Range Hi and Range Lo boxes on the sensor’s tab. The ranges are limited by
sensor limits and ICU will warn you by turning the box yellow if you have made
a selection outside of the sensor’s detectable range. Each sensor’s range must be
changed individually.
Set the order of the IRIG words for each channel by changing the number in the
box. Putting multiple channels on the same IRIG word can increase sample rates,
but keeping each channel on its own word is the simplest setup. As a default, each
channel will be assigned to one IRIG word when shipped from the factory.
IMAGE 4: ICU CONFIGURATION SCREEN, CHANNEL TAB
Beginners Guide to Inertial Measurement System
precisionsensors.meas-spec.com 2236 N. Cleveland-Massillon Road
Akron OH 44333 PH : 330-659-3312 8/21/2013
www.meas-spec.com
Step 5. Saving settings in the instrument memory
In order to permanently change any settings inside the 65210A, new values must be written to the instrument’s nonvolatile memory. Once you make a change to a parameter, the Write Values to Instrument button will turn yellow
(see Image 5 below). This is the indication that current ICU settings differ from those saved inside the instrument.
Click on the yellow button to save the current ICU settings in the instrument’s memory.
A password is necessary to complete the changes (“si” is the default - case sensitive). See the ICU User’s Manual
for instructions on changing the password. If you change the password, be sure to store it in a safe place since the
only way to reset the password is to return the unit to Measurement Specialties.
IMAGE 5: SAVING SETTINGS IN ICU
Beginners Guide to Inertial Measurement System
precisionsensors.meas-spec.com 2236 N. Cleveland-Massillon Road
Akron OH 44333 PH : 330-659-3312 8/21/2013
www.meas-spec.com
Step 6. Viewing reports
After making changes to parameters and saving changes to the instrument, click on the Reports button on the
bottom of the screen to preview the setup. A new screen opens which displays reports based on the parameters you
have saved to the instrument (see Image 6 below).
Click on the Telemetry check box at the bottom of the screen to view the data transmission report. This report
shows how the frames will be transmitted and gives sample rates for each channel. If the frames need adjustment,
close the reports screen and make changes to the setup (click on Exit in the Reports screen to return to the ICU
Configuration screen).
Six reports are available for view in ICU (TMATS is not available with RS485 encoding). Click on the respective
check box to choose a different report.
IMAGE 6: ICU REPORTS SCREEN
Beginners Guide to Inertial Measurement System
precisionsensors.meas-spec.com 2236 N. Cleveland-Massillon Road
Akron OH 44333 PH : 330-659-3312 8/21/2013
www.meas-spec.com
Step 7: Recharging the battery and care of the unit
Battery charging - Measurement Specialties sells battery chargers designed for the battery inside the 65210A. The
Li-Ion battery can be drained and charged at least 100 times before the battery performance begins to decline.
In addition to the two components of the battery charger, you will also need the programming adapter and 65210A
cable described in Step 2. The power supply plugs into an electrical outlet on one end and the charger on the other
(see Image 7 below). The other side of the charger connects to the side of the programming adapter opposite the
LED toggle switch. Finally, the 65210A cable plugs into the programming adapter and the connector on the 65210A
by aligning the red dots. The unit will begin charging automatically; it is not necessary to turn the unit on to charge.
A blinking LED on the charger indicates charging, while a solid green light indicates the unit is fully charged.
Storage - The unit should be stored in the original foam and box in which it was shipped. This precaution will
protect the unit from unnecessary electrostatic shock. In addition, the battery should be charged (to 40% for storage)
at least once a year to prevent over discharge.
Recalibration - Measurement Specialties recommends that 65210A units be recalibrated each year. Our NISTtraceable automated calibration system provides fast and accurate calibration results to ensure your Inertial
Measurement System will provide accurate data every time it is used.
IMAGE 7: BATTERY CHARGING SETUP
Problems? Questions? Contact us via phone 330-659-3312.
Beginners Guide to Inertial Measurement System
precisionsensors.meas-spec.com 2236 N. Cleveland-Massillon Road
Akron OH 44333 PH : 330-659-3312 8/21/2013
www.meas-spec.com
Copyright © 2002-2011
Measurement Specialties, Inc.
All Rights Reserved
Printing History
Edition 3.0, August 2013
Warranty
Measurement Specialties, Inc. warrants this product against defects in materials and workmanship for a period of
one year from date of shipment. During the warranty period, Measurement Specialties will, at its option, either
repair or replace products which prove to be defective.
Warranty Exclusions
This warranty does not apply to defects or damage resulting from:
• Improper installation or maintenance
• Customer supplied software or interfacing
• Unauthorized modification or misuse
• Operation outside of the product specifications
Limitation of Warranty
The warranty set forth above is exclusive and no other warranty, whether written or oral, is expressed or
implied. Measurement Specialties specifically disclaims the implied warranties of merchantability and fitness
for a particular purpose.
Some jurisdictions do not allow limitations on how long an implied warranty lasts, so the above limitation or
exclusion may not apply to you. However, any implied warranty of merchantability or fitness is limited to the oneyear duration of this written warranty.
Warranty Service
To obtain service during the warranty period products must be returned, transportation prepaid, to Measurement
Specialties.
Exclusive Remedies
The remedies provided herein are the Buyer’s sole and exclusive remedies. Measurement Specialties shall not
be liable for any direct, indirect, or consequential damages (including lost profit), whether based on warranty,
contract, tort, or any other legal theory.
Restricted Rights
The Software and Documentation have been developed entirely at private expense.They are delivered and
licensed as “commercial computer software”, as a “commercial item”, or as “restricted computersoftware”,
whichever is applicable.
Safety
Do not install substitute parts or perform any unauthorized modification to Measurement Specialties products.
Return the product to Measurement Specialties for service and repair to ensure that safety features are maintained.
Beginners Guide to Inertial Measurement System
precisionsensors.meas-spec.com 2236 N. Cleveland-Massillon Road
Akron OH 44333 PH : 330-659-3312 8/21/2013
www.meas-spec.com