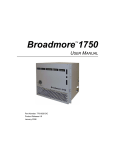
1
Vuldrick’s Universal Base Module
User Manual
VERSION 032407 with CEPv2
-
Feature packed base module for construction of SP/MP/PW/DMed/Non-DMed
modules
Allows people with little to no script experience to build a powerful and feature
packed module with persistence
HIGHLY CONFIGURABLE allowing those from any gaming and building style
to benefit from the power of this base module
With this complete, tested, and highly polished base module, you should be able to build
any type of module you want. The only scripting that will be ‘required’ of the builder
involves modifying constant variables in a few include files; its as easy as opening the
script and following the instructions on what numbers to change. If you do need to have
special “extraordinary” scripting for some part of your quests this system will not be able
to help you with that.
Report all bugs and suggestions to [email protected]
I want this to be the best and most universal base module available so please give
feedback on features you like, don’t like, and things you want to see changed.
Table of Contents
1. Foreword
2. Introduction
3. Systems
A. Death
B. Experience
C. Subraces
i. Idillicus Subrace System
ii. Vuldrick’s Vampire Subrace
iii. Vuldrick’s Werewolf Subrace
D. Resting
E. NPC and Placeable Spawning
i. Neshke's Extendable Spawning System (NESS)
ii. Random NPC Populator
F. The Riddling Sphinx
G. Artificial Intelligence
H. Player Guild Systems
I. Vuldrick’s Faction System
J. Start Locations and Persistent Saved Locations
K. Pantheon and Temples
L. Environmental Dangers and Traps
M. Migrating (Respawning) Traps
N. Universal Quest Manager
O. Random Quest Generator
P. DMFI
Q. Banking
R. Null & Wild Magic Controls
S. Communications
i. Party Loot Notification
ii. Persistent Quest Journals
iii. Persistent Message Boards
iv. Persistent Newspaper
v. Searchable Library
vi. Flavor Text
vii. Interactive Signs
T. Clean Up Mechanisms
i. Trash Cans
ii. Area Cleaner
iii. Merchant Cleaner
U. Vuldrick’s Flint and Steel Campfire System
V. PC Skills
i. Climb System
ii. Paladin
1. Detect Evil
2. Inspire Courage
W. Custom Items
i. Enchanting system
ii. Magical Bardic Instruments
iii. DM Item Manipulator
iv. Spell Storing Items
v. Item Namer
vi. Custom Drink Items
X. Interactive Doors
Y. Persistent Clock
Z. Persistent Player Item Storage
AA. Subdual Damage System
BB. Anti-Exploit Technology and Other Alterations
i. Bioware Books Replacement
ii. Armor and Racial Encumbrance
iii. Stop Item Swaping
iv. UMD Checks
v. Pick Pocket
vi. Rule Breaker’s Curse (Item)
vii. Real Torches (limited burn time)
viii. Familiars
CC. Spell Modifications
i. Spell Hooking
ii. LogMaxHP
iii. Caltrops
iv. Continual Flame
v. Light
vi. Timestop
vii. Tensors Transformation
viii. Mordenkainen’s Sword
ix. Knock
x. Find Trap
xi. Transformation Type Spells
Foreword
Vuldrick’s Universal Base Module began as a project to revamp the Kingdom of
Paramon PW for better performance and for easier “on the fly” configuration abilities for
DMs. After nearly five years of experience in working with the NWN toolset and
building and DMing KoP PW, I have come to understand the importance of having a
highly interactive, engaging, and feature packed module. I have also come to understand
the importance of ease and efficiency of building.
The end result of my cumulative experiences in playing NWN, using the toolset,
and DMing is this basemod. Seeing that this could be a very powerful tool for all
builders, and that it could open new doors for exciting game play and powerful module
builds for those who do not have any scripting ability, I have decided to release this base
module for public use.
With that said, if you do not like a long read then this document is not for you. A
highly configurable and feature packed base module requires a lot of documentation and
a long read for a user to understand how it all works. If you have already built a module,
then you likely understand the time factor involved in building. If you have not tried
your hand at module building, please note that it is a very long road to travel. This base
module and the systems within will save you countless hours in the end, so the long read
is time well invested.
Good luck and happy building!
Back to Table of Contents
Introduction
Vuldrick’s Universal Base Module and the systems within it are bug free as far as
I can tell. Although I did not build all of the systems myself, I spent countless hours play
testing the systems. For system specific bugs, please do not report them to me or for that
matter place blame on me for their faults. It would be more effective and more
reasonable to report system specific bugs to their authors and to do so respectfully.
The base module is powerfully feature packed and extensively configurable. The
code work to put all the systems together, not to mention the making of the systems
themselves, is extremely complex. Luckily, the end user does not have to worry about all
of that. Regardless, the many features provided are only useable if you become familiar
with the systems available and how to implement them. Also, configuration of the
options within those systems needs to be addressed.
This document will detail ALL the features that are available in this base module
and the configuration options available to the end user. I have made great efforts to make
this base module highly configurable with no “real” scripting required. At worst, a few
variables may need to be changed to the user’s liking followed by a module build to make
it all work. There may be some systems that can be configured via scripting, but those
issues will also be described in detail as appropriate.
In the end, it will become clear that this base module can be configured for use in
so many unique ways that every builder and player can find a combination they like. The
base module is pre-configured for play in a fairly “Hard Core Rules” type of game. This
is only one possible configuration. With very little effort, the builder can change rule
settings to make the module as easy or hard as they wish. Also, most systems can be
toggled on or off, or simply removed, with little trouble. Read the system details to see
specifics for settings on each system.
THANKS!
- To all the players and testers involved with KoP and this project
- To all the builders whose systems were put to great use in this project
(see specific system details for proper documentation of authors)
- The awesome NWN community in general . . .
Back to Table of Contents
Systems
Below are the specifications for each system utilized in this base module. You
will find the original author of the system as well as a link to their work (if available).
You will also find specifications for what can be configured for the system and how
configuration is dealt with in this base module. I will not put a copy of the entire original
document for each system here as you can download those yourself. Please keep in mind
that I have likely modified all of the systems to some degree.
PLEASE follow any special directions I give on implementation as it may differ from the
original system.
Back to Table of Contents
Death
HABD VERSION 1.3
- Robust configurable player/henchman bleed/death/respawn system for
SP/MP/DMed/Non-DMed
- by Demetrious, OldManWhistler and IntrepidCW
http://nwvault.ign.com/View.php?view=Scripts.Detail&id=2601
IMPLEMENTATION NOTES
- Basics: 5 scripts, 3 player items, 2 DM items, 1 placeable.
- The only NWN content modified is Raise Dead and Resurrection spells, and the
henchmen death scripts.
- Henchmen only bleed/respawn if they have a master. Potions can be used on
bleeding henchmen as well as any of the normal means of healing another
creature. Henchmen bleeding is implemented by "faking" to 0 to -9 HP bleed with
10 to 0 HP.
ITEMS:
- All items are stored under Custom5 or Tutorial in the palette or chooser.
- Creatures can be found under tutorial in the palette or chooser.
- Automatically given out to players who do not possess them on log in.
(configurable)
- All items have no weight, are worth no money and cannot be sold.
- Items cannot be transferred to other players or dropped.
-
-
-
There is a Skull item that displays the player's bleed/death/lost XP/lost GP
statistics.
There is a Bandages item that can stabilize a bleeding player on a DC 15 heal
check or make a respawned ghost follow the player using the bandages. There are
advanced bandages that can be sold, are not free, and could be placed at stores if
you wish.
There is a Rulebook item that displays how this system is configured for the
module. It displays the penalties as they would currently apply to the PC reading
the book.
There is a DM statistic item that can display the bleed/death/lost XP/lost GP
statistics for an entire party.
There is a DM force death item that can instant kill players/henchmen without
putting them through the bleeding state. You can tie this in with the prevent death
feature to make death only happen when the DM decides it should.
BLEEDING:
- Works for players as well as henchmen.
- 10% chance of self-stabilization to 1 HP (configurable)
- If going from living to -6 or lower you will be capped at -5 to give you a good
chance to be saved (configurable).
- If going from living to dead you will be set to -6 to -9 HP instead of dying
(configurable)
- You can declare some areas where death is hard: Monsters will be able to kill you
on a single hit, and you will start bleeding at appropriate number (configurable)
- Free DC15 heal check bandages can be used to stabilize other players to 1 HP.
- Any healing will stabilize another player.
- Casting raise/rez on a bleeding player stabilizes them to 1 HP or more. (It is a
waste of a spell, but it works).
- Immune to damage while bleeding. You have to bleed to death.
- Regeneration items always stabilize players and keep them from ever dying. It
can unequip these items. (configurable)
- Bleeding players are temporarily made invisible to make monsters change targets.
- Players can be made invisible for a configurable amount of time after bleeding to
give them a chance to heal or run away (configurable)
- Possessed familiars die instead of bleeding.
- First bleed message tells the total time until death.
- Nearby party members are notified of the bleeding player every round.
- All DMs are notified when players are bleeding/dying (configurable)
- Number of rounds between bleeding is based off of player level. (defaults to
giving low levels a long time between bleeding to reduce the chance of dying
since they can't afford Raise/Rez) (configurable)
- Fast 1sec bleed when playing solo without a party (configurable)
- There is an option for preventing player death until they reach a certain level.The
DM Force Instant Death widget can bypass this setting. (configurable)
DEATH:
- Now you can specify areas (by Resref) where death and bleeding is imposible.
- Now you can specify areas (by Resref) where Instant Death due to a single hit is
allowed.
- Force auto-respawn after being dead for a specified time. (configurable)
- Force auto-raise after being dead or respawned for a specific time. (configurable)
- Auto-raise can be configured to only work if the player possesses raise dead /
resurrection scrolls that are consumed in the process. If this is enabled then the
dying can never cause raise dead/resurrection scrolls to be dropped or destroyed.
(configurable)
- Additional force auto-raise timer for solo players only. (configurable)
- Henchmen have their own separate auto-respawn and auto-raise timers.
- DMs can bring dead players back to life with no penalty by using a DM heal.
HENCHMEN BLEEDING AND DEATH:
- The same bleeding/death/respawn system can be used for henchmen by modifying
your henchmen OnDeath scripts. Requires two additional lines to your henchmen
scripts and should be compatible with all henchmen AI provided that they use the
NW_ASC_BUSY condition properly.
- Henchmen support does not require any other modifications.
PENALTIES:
- Separate % GP/XP penalties for respawn, raise dead and resurrection.
(configurable)
- XP penalty can be configured to prevent level loss. (configurable)
- GP penalty can be configured to have a maximum amount to take. (configurable)
- If dropping/destruction of all gold is enable, then no gold will be lost to the
penalty (since the player drops the items before the penalty is applied).
(configurable)
- There is no penalty for henchmen bleed/death.
- User defined functions called at bleed, respawn, raise and rez that can be used to
apply other penalties without having to go deep into the internals of our code.
ITEM DROPPING ON DEATH:
- Item dropping on player death can be configured as any combination of the
following options. Any options can be configured to do nothing (0), drop item (1)
or destroy item (2). The conditions are evaluated in an order of precedence.
(configurable)
- Drop nothing.
- Drop all gold. (this will avoid any GP penalties since gold is dropped before
penalty applied)
- Drop equipped left-hand/right-hand items.
- Drop a random equipped item.
- Drop the most expensive equipped item.
- Drop all equipped items.
- Drop Raise Dead / Resurrection scrolls.
-
Drop a random backpack item.
Drop the most expensive backpack item.
Drop all backpack items.
Dropped items are NOT automatically re-equipped or picked up. (would create
lag if it did)
If players forget to pick up items they dropped, they are automatically reminded
every 30 seconds. (configurable)
The placeable created to store dropped items is automatically destroyed when it
empties.
If all of the drop settings are disabled then the placeable is not created.
There is an option to destroy dropped items rather than store them in a placeable.
(configurable)
PERSISTENCE:
- Persistence can be disabled with a flag. (configurable)
- Persistence only works with a multiplayer server. It has no effect in single player
(no OnClientLeave event in single player). Exception: Using BindStones.
- Statistics to keep track of how many times the player has bled/died in total, how
many times since the server was restarted, and how much gold/XP the player has
lost in total from penalties.
- Persistent DB functions for storing bleed/death/respawn state.
- Auto-respawn and auto-raise timers are stored persistently at various increments.
- Players remain in the same state over module restarts, even with local vault
characters.
- Persistent data is stored with one DB write at OnClientLeave and one DB read at
OnClientEnter. It is very fast with minimal DB size (less than 1kb per player
record).
- When bleed/death/respawn is restored at player log in, it does not reapply the
penalties or falsely increment the statistics.
RESPAWN:
- Can be used with other respawn systems (a custom fugue system was added)
(configurable)
- Option to disable death GUI to remove respawn. (configurable)
- Option to disable respawn button but leave death GUI (configurable)
- Additional system to respawn as a ghost with no player control. (configurable)
- Using bandages on respawned ghost makes them follow you if you are in the
same party (simulates carrying a corpse). (disabled with the current fugue system)
- Living players can barter with respawned ghosts (simulates search the players
corpse for scrolls, except corpse has a say in what is taken).
- Respawned ghosts cannot be DM moved by shift-click.
- Respawned ghosts cannot be recovered in single player by using the dm_heal
console command. So the respawn state could be used as permanent death in a
single player game by setting the auto-respawn timer to 0.1.
-
-
Permadeath for PWs is supported (requires you to script what leads the player to
permadeath, see the custom permadeath function at script "habd_onpcrespawn";
furthermore you must specify a waypoint in the options there)
Casting raise or rez brings respawn ghost back to life, but applies raise/rez penalty
on top of respawn penalty.
DMs can bring the "ghosted" PC back to life by toggling invulnerability (no
penalty). Casting raise or rez also works, but DM heal does not.
Respawned PCs can be moved to a waypoint or to a BindStone. (done in custom
fugue system) (configurable)
CONFIGURATION NOTES
All configuration is done in the script called “habd_include”. Full instructions are included in this script.
Back to Table of Contents
Experience
Knat’s PWFXP XP Distribution Script V2.0
- This is a more sophisticated XP distribution script geared towards PWs. It comes
with two dozen XP modifiers to fine tune XP output and is losely based on the old
but solid TTV XP script.
- by Knat
http://nwvault.ign.com/View.php?view=Scripts.Detail&id=1178
IMPLEMENTATION NOTES
- Basics: 2 scripts
CONFIGURATION NOTES
All configuration is done in the script called “pwfxp_def”. Full instructions are included in this script.
Back to Table of Contents
Idillicus Subrace Engine
Idillicus Subrace Engine
- This subrace engine comes with many preconfigured subraces. The subraces are
easily configurable and the engine allows the builder to add any subrace they can
imagine.
- by Idillicus
http://nwvault.ign.com/View.php?view=Scripts.Detail&id=2550
IMPLEMENTATION NOTES
- Basics: 12 scripts
CONFIGURATION NOTES
Nearly all configuration is handled in the script called “_cb_subrace”. If you wish to create new items to
give racial abilities, see the other “_cb” scripts. Refer to Idillicus’ documentation to learn how to make
new subraces. The Subrace Engine can be turned off by setting the local variable “Subraces” on the
module to “0” under the advanced tab of the module properties. Below is a list of preconfigured subraces
(you must type the name of the subrace exactly as it appears!).
Generic Pattern addable to all races and subaces:
CELESTIAL
FIENDISH
HALF-CELESTIAL
HALF-FIEND
HALF-DRAGON
DRACONIC
SKELETON
ZOMBIE
Subraces useable under HUMAN race:
ARCHON
AASIMAR
TIEFLING
AIR GENASI
EARTH GENASI
WATER GENASI
FIRE GENASI
GARGOYLE
JANNI
HILL GIANT
STONE GIANT
MINDFLAYER
aka ILLITHID
MINOTAUR
OGRE
OGRE MAGE
RAKSHASA
SATYR
TROLL
YUAN TI
DRAGONKIN
DOPPELGANGER
CENTAUR
ARMAND
CHANGELING
DRACOTAUR
SAND GIANT
GOATFOLK
HARSSAF
POISON DUSK
LUMI
NYCTER
Subraces useable under HALFORC race:
BUGBEAR
ORC
GNOLL
GRIMLOCK
LIZARDFOLK
TROGLODYTE
SKULLCRUSHER
Subraces useable under HALFELF race:
none yet
Subraces useable under HALFLING race:
GHOSTWISE
LIGHTFOOT
STRONGHEART
GOBLIN
KOBOLD
DEEP HALFLING
TALLFELLOW
HOBGOBLIN
FORESTKITH-GOBLIN
Subraces useable under DWARF race:
DEEP DWARF
GOLD DWARF
SHIELD DWARF
GRAY DWARF
aka DUERGAR
AZER
Subraces useable under ELF race:
DROW
aka DARK ELF
WILD ELF
MOON ELF
SUN ELF
WOOD ELF
GRAYELF
GITHYANKI
GITHZERAI
Subraces useable under GNOME race:
FOREST GNOME
ROCK GNOME
DEEP GNOME
aka SVIRFNEBLIN
PIXIE
Back to Table of Contents
Vuldrick’s Vampire Subrace
Vuldrick’s Vampire Subrace
- This is a sophisticated subrace engine designed exclusively to handle VAMPIRE
PCs. All PnP rules have been implemented as closely as possible.
- by Vuldrick
http://nwvault.ign.com/View.php?view=Scripts.Detail&id=2772
IMPLEMENTATION NOTES
- Basics: 9 scripts
CONFIGURATION NOTES
Simply type “VAMPIRE” in as a subrace and . . . you will be a vampire. The system can be customized to
some degree by tweaking variables in the script called “vamp_settings” The Vampire Subrace Engine can
be turned off by setting the local variable “Vampire” on the module to “0” under the advanced tab of the
module properties.
Back to Table of Contents
Vuldrick’s Werewolf Subrace
Vuldrick’s Werewolf Subrace
- This is a sophisticated subrace engine designed exclusively to handle
WEREWOLF PCs. All PnP rules have been implemented as closely as possible.
- by Vuldrick
http://nwvault.ign.com/View.php?view=Scripts.Detail&id=26441&id=2430
IMPLEMENTATION NOTES
- Basics: 6 scripts
CONFIGURATION NOTES
Simply get bitten by the custom werewolf creature provided in the custom palette under the Tutorial section
and if you fail your fortitude save you will be a lycanthrop. The system can be customized to some degree
by tweaking variables in the onmodule load script. The Werewolf Subrace Engine can be turned off by
setting the local variable “Werewolf” on the module to “0” under the advanced tab of the module
properties.
Back to Table of Contents
Resting
CS Resting
- The CS Resting subsystem is a set of scripts intended to make management of
player resting easier. The CS Resting subsystem provides a framework for setting
various popular forms of resting rules in a module though the standard toolset
interface, and allows these resting rules to be changed dynamically by DMs while
the module is running. No scripting knowledge is necessary to use this package as
all management of resting is performed through placement of special items into
containers..
- by Craig Smith (galap)
http://nwvault.ign.com/View.php?view=Scripts.Detail&id=245
IMPLEMENTATION NOTES
- Basics: 13 scripts, 3 triggers, 35 items
ITEMS:
-
All items are stored under Custom3 in the palette or chooser.
All triggers can be found under Custom5 in the palette or chooser.
CONFIGURATION NOTES
One of the design goals of the CS Resting Subsystem package is that the resting rules must be able to be
managed and configured completely through the standard toolset interface *without* the need to resort to
editing scripts. It is of course possible to extend the resting subsystem through writing your own resting
profiles or user scripts, however if you choose to do so, you will also need to manage any configuration for
your own resting extension. For most situations, however, the standard resting subsystem should be
sufficient.
To this end, configuration is handled through the use of containers and special items. I personally use
chests, but any placeable object with an inventory will work. The chests are currently in the “Rules Staging
Area.” Since the containers are accessed by tag, it may be placed anywhere in the module though it should
be placed somewhere that players cannot access.
The tag of the placeable representing any specific rest ruleset must be fashioned like **_REST_CONFIG
where the ** represents a two letter string identifier. Any rest rules housed in this placeable can be
implemented in any area or trigger you want by simply making sure the end of the tag of the area or trigger
ends with _**. Again the ** represents the two letter string identifier you chose for the rules container.
This is somewhat different than galap’s original code, but I needed to have unique tags for each area for the
persistent location saving system to work. By changing his code to check for specific strings on area or
trigger tags, I was able to achieve the desired effect easily.
Once you have placed the container with the correct tag, you now need to place the custom configuration
items into the container, and modify any of the item tags as required for your needs. Items that represent
integer values must have their tags set to the integer itself. Some other items require their tags to be set to
strings such as the names of scripts.
Once you have created the configuration container and put all of the desired configuration items into its
inventory, the resting subsystem will function as specified by the items. This particular container is referred
to as the global configuration container, but the resting subsystem allows the use of other configuration
containers as well (see the other configuration containers in the rules staging area for more details). The
custom configuration items are found under the "Special|Custom4" category of the Custom items palette.
See the script “cs_rest_readme” for details about what the items do.
Back to Table of Contents
Neshke's Extendable Spawning System
(NESS)
Knat’s NESS V8.1.3
- An alternative encounter spawn system giving the module builder many more
options when creating encounters than they do with the game toolkits' built-in
encounter system.
- This spawning system allows experienced developers to tailor their creature
spawns to their tastes, while also being easy enough to use for beginner designers
to include in their modules and get up and running quickly.
- by Neshke
http://www.lrjonline.net/swg/ness.html
IMPLEMENTATION NOTES
- Basics: 59 scripts, 1 Item, 2 placeables (you simply place, or destroy, these in the
area you want to change the spawn controls for)
- You must place waypoints in the areas you want spawns for. The tag of the
waypoint is the resref or group reference for the creature(s) you wish to spawn.
The name of the waypoint handles all spawn flags recognized by the system. See
configuration notes below . . .
- You must set an Integer called “Spawn” equal to one (1) on each area that you
want NESS to control spawns for.
CONFIGURATION NOTES
I highly recommend use of the Spawn Waypoint Generator found here:
http://www.lrjonline.net/swg/index.html
This handy program will allow you to make waypoint tags using all the features integrated in NESS. Very
easy to use and saves a ton of time!
You can also just make the names of your spawn points manually. See the script called “spawn__readme”
to figure out what spawn flags are available.
Back to Table of Contents
Random NPC Populator
Random NPC Populater
- An alternative NPC spawn system giving the module builder more options when
populating an area with generic/ambient NPCs.
- by Gaermish and Vuldrick
IMPLEMENTATION NOTES
- Basics: 1 script
CONFIGURATION NOTES
- You must set an Integer called “RandomNPC” equal to one (1) on each area that
you want to spawn in ambient NPCs
- You must set a String called “CommonerRace” equal to the race of commoners
you wish to spawn on the area. Put the race in as all lower case letters.
- You must set an Integer called “CommonerNum” equal to the base number of
commoners you wish to have in the area. This represents the minimum number
that will be spawned and will have a random number added to it.
- If you want to randomize the number of commoners, you must set an Integer
called “d10Commoners” equal to the number of d10 multiple commoners you
want to add to “CommonerNum” on the area. This represents how many d10
extra commoners you wish to spawn in.
- Keep in mind that the more commoners you spawn in, the more CPU you will be
using!
- You must create six female and six male commoners of the race you specified.
Their resrefs and tags should be set up so that they follow the following pattern:
“Race”female00“CommNum”
“Race”male00“CommNum”
where you replace “Race” with the race string you set on the area and
“CommNum” with a 1, then a 2, then a 3, etc until you make all six NPCs for that
gender.
- See the example of the variables set on the Starting Area in the base module.
Also see the resref and tag setup on the human commoner females and human
commoner males you find under Custom/NPCs/Humans in the palette.
Back to Table of Contents
The Riddling Sphinx
The Riddling Sphinx
- This is a collection of 200 riddles and answers from the online Riddle NetBook
(http://www.strolen.com/netbooks/riddles.txt). These were edited to only include
fantasy/medieval themed riddles and answers. Of course, this is also in usable
script form!
- by bloodsong
http://nwvault.ign.com/View.php?view=Scripts.Detail&id=2744
IMPLEMENTATION NOTES
- Basics: 4 script
CONFIGURATION NOTES
- Just place a copy of the riddling sphinx anywhere you want to use him ☺
- It is ready to plunk into your module, but you'll want to add any custom 'win'
routines (or, hey, 'lose' routines) to the riddler_g script. Naturally, it is easy to add
your own riddles (and answers) to the database.
Back to Table of Contents
Artificial Intelligence
Jasperre's Improved AI - v1.3
- This AI is a complete change to the default AI, but can easily be used as a
subsitute, an addition to some creatures, and so on.
- It basically tries to improve a creature's combat actions - including perception
(hearing), spell casting (choosing the right spells), and targeting (not always
going for the nearest...).
- By Jasperre
http://nwvault.ign.com/View.php?view=Scripts.Detail&id=2108
IMPLEMENTATION NOTES
- Basics: 18 scripts plus some script mergers, I will spare you the details ;)
CONFIGURATION NOTES
- Most configuration options the user needs are found in the script
“nw_c2_default9”. This is a well document script and following the instructions
and reading the info will suffice.
Back to Table of Contents
Player Guild Systems
Player Guild System - Build 4.1.5
- The Player Guild System, or PGS for short, allows for the creation and
management of player-run guilds! From recruiting additional members, to
starting guild wars, this system can handle it all!
- By Adamant
http://nwvault.ign.com/View.php?view=Scripts.Detail&id=3051
IMPLEMENTATION NOTES
- Basics: 99 scripts plus some script mergers, 2 Items
CONFIGURATION NOTES
- Configuration options the user needs are found in the script “pgs_inc_config”.
This is a well document script and following the instructions and reading the info
will suffice.
Back to Table of Contents
Start Locations and
Persistent Saved Locations
Vuldrick's Persistent PC Spawn Point System
- This very flexible system will allow a module designer to incorporate the use of
Bioware Databases in order to maintain persistent start locations for their PCs.
This way, the PC always starts off where they left off in the game.
- I have included a simple system that allows PCs to spawn to waypoints . . .
designated by racial type, class, church, etc. This allows the module designer to
-
-
make multiple spawn in zones for the various player races (homelands), class
bases, or . . . whatever.
You can also have up to 6 different starting “regions” where you can have each
of the start locations offered to each race, class, church, etc in each of the
regions. This allows for a great diversity in starting locations for PCs. The
region is tracked with a simple integer system. See configuration for details.
by Vuldrick
http://nwvault.ign.com/View.php?view=Scripts.Detail&id=2366
IMPLEMENTATION NOTES
- Basics: 5 scripts, 2 triggers, 1 Creature, 1 Item
- The PC – Persistent Location Saving Wand is found under Tutorial in the palette
or Chooser. The Messenger of the Gods NPC is found under Custom5 in the
palette or Chooser as are the two triggers.
CONFIGURATION NOTES
- Set the “Messenger of the Gods” NPC into your start area and she will make sure
PCs get to the place they need to get to when they first join the module and for
every time they come back in the future. She handles all race, class, church, and
saved location jumping via her conversation. The MOG also sets up the players
starting region by placing INTs on the Player Guild Journal in the PCs inventory.
- Place a PSL - Saving Trigger anywhere you want to save a PCs location in an
area. This is good for saving persistent locations in special places like boss lairs
so that PCs don’t rely on being saved by the next server restart.
- Place a PSL - Jumping Trigger if you want to use a trigger to allow the PC to
jump back to their last saved location. You could also put the same script found
in the onenter event handler of this trigger into a Portal’s (or any placeable)
onused event or in a doors onenter event. It will work in each case without any
need of code changing.
- If you do not want PC locations to be saved persistently at the end of a rest cycle,
simple set the Integer “RestSave” to zero (0) on the module.
- PCs receive a PC – Persistent Location Saving Wand when they first enter the
module. You can turn this feature off by setting the module Integer “PSLTool” to
zero (0).
- You can set up to six regions for the PC Start Locations. Simply edit the current
Messenger of the Gods conversation to reflect up to six regions in your module
where you want to have distinctive race, class, and church based start locations.
After changing the MOG’s conversation, make sure you place copies of all the
waypoints (except the Default_Start and Climb waypoints) you find under
Custom5 in that region of areas and place a value (01 through 06) that you
designated for that area in the MOG conversation.
- See the Starting Area for a demonstration of the setup of a region of waypoints. I
have placed all of the Region 01 waypoints in that area.
Back to Table of Contents
Pantheon and Temples
Vuldrick's Flexible Pantheon & Church System
- Gives the module designer the ability to make Players stay within the allowed
alignments by their deities (based on Pen and Paper DnD Rules).
- If PCs fall from faith, they can not do business with their church until they correct
their alignment. A tything system is in place so that they can spend 100 gold per
1 point alignment shift to help correct their alignments.
- For clerics, being of the wrong alignment will keep the PC from being recognized
by their church.
- An onlevelup script will keep them from leveling up as a cleric if their alignments
are wrong (Can be toggled off with an Integer set on the module)
- Gives the module designer the ability to make Players who play Clerics take the
right domains to match their deities (based on Pen and Paper DnD Rules). Being
of the wrong domain will keep the PC from being recognized by their church.
- An onlevelup script will even keep them from leveling up as a cleric if their
domains are wrong (Can be toggled off with an Integer set on the module)
- Gives the module designer the ability to control the taking of Prestige Classes.
(Can be toggled off with an Integer set on the module). The DM can either give
out tokens so players can take on Prestige Classes, or set a local variable on the
PC using the console.
- Gives the module designer the ability to force Players to stay within the right
alignment for their class (based on Pen and Paper DnD Rules). This is controlled
in the same onlevelup script as mentioned above. (Can be toggled off with an
Integer set on the module)
- Gives the module designer the ability to create any number of Cleric NPCs to run
churches of deities using only one conversation and this script set to manage
every single NPC cleric.
Gives the module designer a prefab altar that can be used for worship with any
deity. The single script and altar can be used for any church via a simple
variable and name change on the placeable.
- Comes with a set of holy symbols system for PCs and automatically issues them to
PC clerics at appropriate times.
- Comes with a trigger to deal out holy damage to PCs of conflicting alignments
that enter the “wrong” church . . . muhahahahahah
- by Vuldrick
http://nwvault.ign.com/View.php?view=Scripts.Detail&id=2915
IMPLEMENTATION NOTES
- Basics: 75 scripts, 24 Creatures, 4 placeables, 1 Trigger, 36 waypoints
CONFIGURATION NOTES
- If you do not want to use the pre-made Greyhawk Pantheon, you can change the
include script to represent any pantheon you like. There are only two other scripts
-
-
-
you will need to alter. After the include script is set up (see details below), the
rest of the scripts will work automatically.
If you choose to use the clerics/pantheon that are pre-made, an altar is included
that allows the Players to set their deities if they forgot to do so when creating
their PC. If you choose not to use the pre-made pantheon, this altar is of no use.
The following scripts to represent your preferred pantheon:
o deity_include
o deity_onlevelup
o deity_clerstart
Once these scripts are set up for your pantheon, no further script manipulations
are needed (assuming you do a 'build' on your module)
You have to set some variables on your module if you wish to force PCs to
maintain alignment, domains, and class restrictions.
o If you want to force Players to maintain PnP rule class alignment
restrictions, set the following variable on the module: “Class_Required”
as an Integer equal to 1.
o If you want to force Clerics to maintain deity based race, domain, and
alignment restrictions, set the following variable on the module (Please
note this only affects levelup ability. Clerics of the wrong race, domain, or
alignment will not be able to use their church resources regardless of this
setting): “Deity_Required” as an integer equal to 1.
o If you wish to control who can take on a prestige class, set the following
variable on the module: “Prestige_Allow” as an integer equal to 1.
Back to Table of Contents
Environmental Dangers and Traps
Vuldrick's Elemental Dangers and Traps
- This system will allow a module designer to add the Environmental Dangers
listed in the back of the DMG (Dungeon Master's Guide) to their modules with
little trouble. In this demo, there are scripted systems to handle dangers from
water (drowning), dehydration (heat), frostbite (cold), smoke inhalation, acid,
fire, and lava.
- The dehydration, frostbite, and fire systems are dramatically affected by the
clothing you wear (or don't wear as the case may be). I have commented the code
so if you really want to see the specifics just open the scripts to see what I have
done.
- Also provided is a trap script which handles any placeable trap I could think of.
This Universal Trap Script handles traps using variables set on a trigger.
-
-
The great thing about this script set is that they can be used together in one area.
For demonstration, please note that I have both the Fire system and the Heat
system running in the "Fiery Pit of Doom." This means that PCs dehydrate due to
the intense heat and can catch on fire too . . . basically you can stack this as you
need.
by Vuldrick
http://nwvault.ign.com/View.php?view=Scripts.Detail&id=3108
IMPLEMENTATION NOTES
- Basics: 30 scripts, 21 items, 3 triggers
CONFIGURATION NOTES
- If you want an acid environmental damage area, you need to set the following
Integers equal to one (1) on your area: AREA_ACID and LEAVE_ACID. You
also need to set the Integer NumDice equal to a number of d6 that you would like
to add as extra acid damage (to account for greater concentrations of acid).
- If you want a cold environmental damage area, you need to set the following
Integers equal to one (1) on your area: AREA_COLD and LEAVE_COLD. You
can also place a waypoint in the area with a tag of “COLD_INTENSITY” and its
name set to some numeric value equivalent to the extra cold damage you want to
give PCs if they fail their saves.
- If you want a fire environmental damage area, you need to set the following
Integers equal to one (1) on your area: AREA_FIRE and LEAVE_FIRE. You
also need to set an integer on the area called “FireDC” to establish the reflex save
DC to keep PCs items from catching on fire . . .
- If you want a heat environmental damage area, you need to set the following
Integers equal to one (1) on your area: AREA_DESERT and LEAVE_DESERT.
You can also establish water sources inside the area by placing a “Drinks – Water
Triger” in the area where you want PCs to be able to fill their canteens or splash
off for temporary hydration. These can further be changed to give the PCs
diseased or poisoned water by changing the name of the trigger to # and an
appropriate abbreviated string name from the following list:
o
o
o
o
o
o
o
o
o
o
o
o
o
o
o
o
DBS = DISEASE_BLINDING_SICKNESS
DBM = DISEASE_BURROW_MAGGOTS
DCF = DISEASE_CACKLE_FEVER
DDF = DISEASE_DEMON_FEVER
DDC = DISEASE_DEVIL_CHILLS
DDB = DISEASE_DREAD_BLISTERS
DFF = DISEASE_FILTH_FEVER
DGR = DISEASE_GHOUL_ROT
DMF = DISEASE_MINDFIRE
DMR = DISEASE_MUMMY_ROT
DRA = DISEASE_RED_ACHE
DRSE = DISEASE_RED_SLAAD_EGGS
DS = DISEASE_SHAKES
DSD = DISEASE_SLIMY_DOOM
DSS = DISEASE_SOLDIER_SHAKES
DVM = DISEASE_VERMIN_MADNESS
(Example Name: #DBS)
o
o
o
o
o
o
o
o
o
o
o
o
o
o
o
o
o
o
o
o
o
o
o
o
o
o
o
o
o
o
o
o
o
o
o
o
o
o
o
o
o
o
o
o
o
-
-
DZC = DISEASE_ZOMBIE_CREEP
PAV = POISON_ARANEA_VENOM
PAR = POISON_ARSENIC
PBV = POISON_BEBILITH_VENOM
PBAV = POISON_BLACK_ADDER_VENOM
PBLE = POISON_BLACK_LOTUS_EXTRACT
PBB = POISON_BLADE_BANE
PBR = POISON_BLOODROOT
PBW = POISON_BLUE_WHINNIS
PBOF = POISON_BURNT_OTHUR_FUMES
PCCBJ = POISON_CARRION_CRAWLER_BRAIN_JUICE
PCM = POISON_CHAOS_MIST
PCSV = POISON_COLOSSAL_SPIDER_VENOM
PDRP = POISON_DARK_REAVER_POWDER
PDB = POISON_DEATHBLADE
PDRB = POISON_DRAGON_BILE
PEV = POISON_ETTERCAP_VENOM
PGSV = POISON_GARGANTUAN_SPIDER_VENOM
PGWP = POISON_GIANT_WASP_POISON
PGBO = POISON_GREENBLOOD_OIL
PHSV = POISON_HUGE_SPIDER_VENOM
PIM = POISON_ID_MOSS
PIG = POISON_IRON_GOLEM
PLSCV = POISON_LARGE_SCORPION_VENOM
PLSV = POISON_LARGE_SPIDER_VENOM
PLD = POISON_LICH_DUST
PMRP = POISON_MALYSS_ROOT_PASTE
PMSV = POISON_MEDIUM_SPIDER_VENOM
PNS = POISON_NIGHTSHADE
PN = POISON_NITHARIT
POOT = POISON_OIL_OF_TAGGIT
PPSV = POISON_PHASE_SPIDER_VENOM
PPFI = POISON_PIT_FIEND_ICHOR
PPWP = POISON_PURPLE_WORM_POISON
PQV = POISON_QUASIT_VENOM
PSLR = POISON_SASSONE_LEAF_RESIDUE
PSE = POISON_SHADOW_ESSENCE
PSCP = POISON_SMALL_CENTIPEDE_POISON
PSSV = POISON_SMALL_SPIDER_VENOM
PST = POISON_STRIPED_TOADSTOOL
PTR = POISON_TERINAV_ROOT
PTSV = POISON_TINY_SPIDER_VENOM
PUD = POISON_UNGOL_DUST
PWSV = POISON_WRAITH_SPIDER_VENOM
PWP = POISON_WYVERN_POISON
If you make the name of the water trigger start with an “@” instead, then the
script with the name that follows the @ will be fired when the PC uses the
canteen to drink the water.
If you want a smoke environmental damage area, you need to set the following
Integers equal to one (1) on your area: AREA_SMOKE and LEAVE_SOKE.
If you want a water(drowning) environmental damage area, you need to set the
following Integers equal to one (1) on your area: AREA_UNDERWATER and
LEAVE_UNDERWATER. You can also set an integer called “Fly” equal to one
(1) on the area to make the PCs and NPCs seem to be swimming in the water.
-
If you want to have PCs take damage for being in lava, simple use the “Traps –
Lava Stream Trigger” in the places you want their to be lava.
If you want to use the Universal Traps Place an appropriate trap placeable and
draw the “Traps – Universal Trigger” as appropriate. Adjust the variables on the
Universal Trigger to set up the trap as you wish. The following is a brief outline
of the variables that control the trap system:
DamageBonus
INT
Ammount of bonus damage that will be done by the trap. This is a set
amount of damage added ontop of the roll
DamageStrength INT
Determines how many d6 get rolled for random damage
DamageType
INT
Determines if it is bludgeoning (1), Slashing (2), or Peircing (3)
Destination
STRING
Tells the code where to send the PC
DoorTag
STRING
Tells the code what door we will be working with in the "flood" trap
Flood
INT
Tells code the trap is a flood trap
NPCTrapSkill
INT
Tells code what skill the NPC had in making the trap. This adds to a
d20 to determine Spot DC
Pit
INT
Tells code the trap is a pit trap
ReflexDC
INT
Tells code what the save DC is to avoid trap
ResetTime
FLOAT
Tells code when to reset the trap
TrapTag
STRING
Tells code what the tag of the trap is
Setting up a trap:
1. Set down a placeable trap and give it a unique tag.
2. Decide if this is a "normal trap", a "pit trap", or a "flood trap".
3. If this is a Normal Trap
a. Use the tag and put it into the TrapTag String slot in the local variables on the trigger.
b. Set the damage bonus amount you like (10 will put an extra 10 damage on top of the
damage roll).
c. Set the damagestrength to the number of d6 you want for random damage.
d. Set DamageType to "1" for bludgeoning, "2" for slashing, or "3" for piercing
e. Leave Destination set to zero
f. Leave DoorTag set to zero
g. Leave Flood set to zero
h. Set NPCTrapSkill to the "skill" bonus you want to add to the Spot Check DC
i. Leave Pit set to zero
j. Set ReflexDC to whatever DC you think is appropriate for a reflex save
k. Set ResetTime to the amount of time you want until the trap resets again
4. If this is a Pit Trap
a. Use the tag and put it into the TrapTag String slot in the local variables on the trigger.
b. Leave DamageBonus set to zero
c. Leave DamageStrenght set to zero
d. Leave DamageType set to zero
e. Set Destination to the tag of your destination waypoint (place a waypoint with this tag
where you want the PC to go when they enter the pit)
f. Leave DoorTag set to zero
g.
h.
i.
j.
k.
l.
5.
-
Leave Flood set to zero
Set NPCTrapSkill to the "skill" bonus you want to add to the Spot Check DC
Set Pit to "1"
Set ReflexDC to whatever DC you think is appropriate for a reflex save
Set ResetTime to the amount of time you want until the trap resets again
Set down the custom placeable "The Only Way Out" in your pit trap. This provides a
means for the PC to escape.
m. Go to the variables on this placeable and set the DC to the Strength Check DC to climb
out.
n. Set the destination variable on this placeable to the tag of your destination waypoint
(place a waypoint with this tag where you want the PC to go when they escape the pit)
If this is a Flood Trap (If this trap is "sprung" by any PC, all PCs in the trigger area will be
affected)
a. Use the tag and put it into the TrapTag String slot in the local variables on the trigger.
b. Leave DamageBonus set to zero
c. Leave DamageStrenght set to zero
d. Leave DamageType set to zero
e. Set Destination to the tag of your destination waypoint (place a waypoint with this tag
where you want the PC to go when they enter the pit)
f. Set DoorTag to the tag of the door that will seal off your "flooded area"
g. Set Flood to "1"
h. Set NPCTrapSkill to the "skill" bonus you want to add to the Spot Check DC
i. Leave Pit set to zero
j. Set ReflexDC to whatever DC you think is appropriate for a reflex save
k. Set ResetTime to the amount of time you want until the trap resets again (I have found
300 seconds to be a good number)
l. Set an appropriate unlock DC on the door that will shut and lock when the flooding
occurs.
m. Put the script "vg_area_exit" in the door's OnOpen event
n. Set a Local Int "Flood" to 1 on the door
o. Set a Local Int "LEAVE_UNDERWATER" to 1 on the door
p. Set a Local String "TrapTag" to the tag of the trap placeable on the door
q. Put the script "vg_area_exit" in the trigger's OnExit event
Please see the demonstration areas in the base module for clarification of these
procedures.
Back to Table of Contents
Migrating (Respawning) Traps
Migrating (Respawning) Trap
- Fed up with players walking around traps they know exist, and memorized the
placement of? Want to convince players that a Rogue is more than just a fighter
with sneak attack and better AC? This is the trap package you want. Essentially,
-
this is a script that's configurable by setting Variables on the area. It will
randomize locations and other aspects of all traps in the area.
By Mask
http://nwvault.ign.com/View.php?view=Scripts.Detail&id=2941
IMPLEMENTATION NOTES
- Basics: 2 scripts plus some script mergers
CONFIGURATION NOTES
- These values determine the trap set to use. Place appropriate variables on the area
to be trapped. You must also place an integer on the area called “Traps” equal to
one (1) for the system to work.
VARNAME
TYPE
VALUE
NOTES
MMT_ACR
'''''''
'''''''
'''''''
'''''''
'''''''
'''''''
'''''''
'''''''
'''''''
'''''''
'''''''
'''''''
'''''''
'''''''
'''''''
int
'''
'''
'''
'''
'''
'''
'''
'''
'''
'''
'''
'''
'''
'''
'''
1-5
'''
'''
'''
'''
'''
'''
'''
'''
'''
'''
'''
'''
'''
'''
'''
1 = Weak/Minor
2 = Average/Moderate
3 = Strong
4 = Deadly
5 = Epic
10 = Spike
11 = Fire
12 = Frost
13 = Electrical
14 = Acid
15 = Sonic
16 = Negative
17 = Divine
18 = Gas
19 = Entangle
MMT_MPS
'''''''
int
'''
0
1
PC Friendly
Run for Each PC in area.
MMT_TRAP_BASE
MMT_TRAP_FLUX
MMT_DE_A
VARNAME
int
int
int
TYPE
1-255
1-255
0 = YES 1 =NO
VALUE
Base Number of traps
Flux Value in # of traps
Can traps be detected?
NOTES
MMT_DE_B
MMT_DE_F
MMT_DI_A
MMT_DI_B
MMT_DI_F
MMT_TDE
int
0-250
int
0-1/2
int
0 = YES 1 =NO
int
0-250
int
0-1/2
string
Trap Disarm Event
*** Area setting OVERRIDES module setting.***
MMT_TTE
MMT_TS
MMT_OVER
string
Trap Triggered Event
float
1.0-?
Trap Size (defaults to 1.5)
int
** Values below this Override int will allow the
builder to limit the spawn to a specific TRAP_BASE_TYPE **
Base detect score
of Above Detect Flux
Can traps be disarmed?
Base disarm score
of Above Disarm Flux
Set on Mod or Area
TRAP_BASE_TYPE_MINOR_SPIKE
TRAP_BASE_TYPE_AVERAGE_SPIKE
TRAP_BASE_TYPE_STRONG_SPIKE
TRAP_BASE_TYPE_DEADLY_SPIKE
1
2
3
4
TRAP_BASE_TYPE_MINOR_HOLY
TRAP_BASE_TYPE_AVERAGE_HOLY
TRAP_BASE_TYPE_STRONG_HOLY
TRAP_BASE_TYPE_DEADLY_HOLY
5
6
7
8
TRAP_BASE_TYPE_MINOR_TANGLE
TRAP_BASE_TYPE_AVERAGE_TANGLE
TRAP_BASE_TYPE_STRONG_TANGLE
TRAP_BASE_TYPE_DEADLY_TANGLE
9
10
11
12
TRAP_BASE_TYPE_MINOR_ACID
TRAP_BASE_TYPE_AVERAGE_ACID
TRAP_BASE_TYPE_STRONG_ACID
TRAP_BASE_TYPE_DEADLY_ACID
13
14
15
16
TRAP_BASE_TYPE_MINOR_FIRE
TRAP_BASE_TYPE_AVERAGE_FIRE
TRAP_BASE_TYPE_STRONG_FIRE
TRAP_BASE_TYPE_DEADLY_FIRE
17
18
19
20
TRAP_BASE_TYPE_MINOR_ELECTRICAL
TRAP_BASE_TYPE_AVERAGE_ELECTRICAL
TRAP_BASE_TYPE_STRONG_ELECTRICAL
TRAP_BASE_TYPE_DEADLY_ELECTRICAL
21
22
23
24
TRAP_BASE_TYPE_MINOR_GAS
TRAP_BASE_TYPE_AVERAGE_GAS
TRAP_BASE_TYPE_STRONG_GAS
TRAP_BASE_TYPE_DEADLY_GAS
25
26
27
28
TRAP_BASE_TYPE_MINOR_FROST
TRAP_BASE_TYPE_AVERAGE_FROST
TRAP_BASE_TYPE_STRONG_FROST
TRAP_BASE_TYPE_DEADLY_FROST
29
30
31
32
TRAP_BASE_TYPE_MINOR_NEGATIVE
TRAP_BASE_TYPE_AVERAGE_NEGATIVE
TRAP_BASE_TYPE_STRONG_NEGATIVE
TRAP_BASE_TYPE_DEADLY_NEGATIVE
33
34
35
36
TRAP_BASE_TYPE_MINOR_SONIC
TRAP_BASE_TYPE_AVERAGE_SONIC
TRAP_BASE_TYPE_STRONG_SONIC
TRAP_BASE_TYPE_DEADLY_SONIC
37
38
39
40
TRAP_BASE_TYPE_MINOR_ACID_SPLASH
TRAP_BASE_TYPE_AVERAGE_ACID_SPLASH
TRAP_BASE_TYPE_STRONG_ACID_SPLASH
TRAP_BASE_TYPE_DEADLY_ACID_SPLASH
41
42
43
44
TRAP_BASE_TYPE_EPIC_ELECTRICAL
TRAP_BASE_TYPE_EPIC_FIRE
TRAP_BASE_TYPE_EPIC_FROST
TRAP_BASE_TYPE_EPIC_SONIC
45
46
47
48
Back to Table of Contents
Universal Quest Manager
Vuldrick's Universal Quest Manager
- This system is designed to allow module builders to control all
basic quest management needs for all quests in their modules with
a single set of scripts.
- by Vuldrick
http://nwvault.ign.com/View.php?view=Scripts.Detail&id=3220
IMPLEMENTATION NOTES
- Basics: 15 scripts
CONFIGURATION NOTES
The entire system is demonstrated via an interactive tutorial demo in the Starting Area of
the base module. Just take your time and go through the tutorial, take some notes, then
check out the system in the toolset.
Back to Table of Contents
Random Quest Generator
Vuldrick's Random Quest Generator
- This system will allow a module designer to add random generated quests/jobs to
their module. The Task Master NPC will spawn in five (5) randomly generated
quests at a time. All quests must be completed before he will spawn in new
quests. DMs have special conversation options with the Task Master that allow
them to destroy all current quests or spawn new quests etc.
Mutiple Task Masters can be set in the module (see below) thus allowing the
module to have as many quests spawned as the builder desires.
-
There are six (6) possible quest types that spawn into six (6) randomly selected
areas. The NPC genders and racial types are chosen randomly as well. Random
names and clothing will be set on the NPCs and appropriate NPCs will be leveled
up to match a CR range based on the PC's party average level (Note: I assume the
PC is the player that initially got the Task Master to generate the quests). Each
quest has multiple conversation options and most have multiple ways to complete
the quest. Alignment shifts and awards are given as appropriate. XP gain and gold
given for completion of tasks is also randomized to some degree.
by Vuldrick
http://nwvault.ign.com/View.php?view=Scripts.Detail&id=26441&id=3085
IMPLEMENTATION NOTES
- Basics: 54 scripts
CONFIGURATION NOTES
Please see the readme file for the system found at the link above.
Back to Table of Contents
DMFI
DMFI HotU DM and Player Wand Package
- This package allows DMs to create over 1000 actions/effects/sounds etc that you
just can't do without extra scripting. All rolled up into a clean package. This is a
community resource that now includes major contributions from around 15
contributors. Designed to work with HotU version 1.59 and up.
- by Demetrious & Hahnsoo et. Al.
http://nwvault.ign.com/View.php?view=Scripts.Detail&id=2237
IMPLEMENTATION NOTES
- Basics: 18 scripts, 3 Conversations, 39 items, 1 Area
CONFIGURATION NOTES
- All PC items are given on player entering of the module. To disable this feature,
simply set an integer called “DMFITools” equal to zero (0).
-
All DMFI DM items can be found under Tutorial in the palette or Chooser. Use
the “Exploder” to give yourself all DMFI goodies with one shot.
Back to Table of Contents
Banking
Vuldrick’s Persistent PC Banking
- This system handles Persistent PC Banking and incorporates the Player Guild
System Banking into one streamlined NPC Bank Telling system.
- By Vuldrick
IMPLEMENTATION NOTES
- Basics: 4 scripts, 1 Conversation, 1 NPC
CONFIGURATION NOTES
- Place a “Vault Gnome” found under Tutorial in the palette in a place where you
want to allow all banking purposes including private accounts and PGS accounts.
Change the variable string on the NPC called “Bank” to whatever you want this
particular unique database to be called. That’s it! You can have as many
different banking institutions as you wish. The private bank accounts will be kept
in separate databases, but the guild account is accessible from any Vault Gnome
in your module.
Back to Table of Contents
Null & Wild Magic Controls
HotU Wild/Dead Magic System v1.04
- These scripts are based off the Wild/Dead magic zones found in the HotU offical
campaign. Modifications were made to make them more PW friendly. See
WDM_README and the demo module included for details.
- By CatScan
IMPLEMENTATION NOTES
- Basics: 2 scripts, and 2 placeables
CONFIGURATION NOTES
- Wild Magic Zones are created by the presence of the 'wdm_wildm_zone' variable
(type integer) placed on an area with a value of one (1).
There are two other variables that can be set to control how the magic area
behaves. These are:
o Variable Name
| Type
| Default if not defined
-----------------------------------------------------------------------o wdm_wm_percent
| integer
| 50
-----------------------------------------------------------------------o wdm_wm_script
| string
| x0_s3_rodwonder
-----------------------------------------------------------------------o wdm_wm_percent - Controls the percent chance of a wild magic
surge. Valid values are between 1 and 100.
o wdm_wm_script - Specifies the name of the script to execute
when a wild magic surge occurs.
- These two variables give some flexibility to the builder as they can create wild
magic areas with different probabilities of surges or can create custom wild magic
script for the particular situation.
- wdm_wm_percent, and wdm_wm_script do not have to be specified on the area.
If they are not, defaults are used (50% chance of a surge, and the
x0_s3_rodwonder script will be executed).
-
-
-
Dead Magic Zones are created by presence of the "wdm_deadm_zone' variable
(type integer) with a value of '1' on the area in question.
There are two other variables that can be set to control how the magic area
behaves. These are:
o Variable Name
| Type
| Default if not defined
-----------------------------------------------------------------------o wdm_dm_streffects | integer
|0
-----------------------------------------------------------------------o wdm_dm_stritems
| integer
|0
-----------------------------------------------------------------------wdm_dm_streffects - Specifies that all magical status effects (such as buffs) be
stripped from the player when they enter
wdm_dm_stritems - Specifies that all item properties should be
stripped from all magic items in a player's inventory when they enter
A few notes about the above properties. If *only* the 'wdm_deadm_zone'
variable is specified, then status effects and items will not be stripped. The only
effect in this case will be that cast spells will not work.
A null or wild magic area can be created on the fly by placing a “DM – Area
Magic Status Marker” and “DM – Area Magic Status Toggle” in the area and
using it.
Back to Table of Contents
Party Loot Notification
Party Loot Notification System 1.04
- By OldManWhistler
http://nwvault.ign.com/View.php?view=Scripts.Detail&id=1186
IMPLEMENTATION NOTES
- Basics: 2 scripts and 1 Item
- Does not display notification for DMs, NPCs or DM controlled NPCs.
- Does not display notification when PC is logging into the module.
- Does not display notification for dead players.
- Does not display notification for destroyed items (ie: used potions, scrolls)
- Displays identified items by name (configurable) and unidentified items
generically.
- Displays (magical) items (configurable)
- Displays armor type.
- Displays stack size.
- Displays identified name in DM/log.
- Displays GP value in DM/log.
- Displays plot flag in DM/log.
- Display can be toggled off on a per user basis.
- Can be configured to only display to party members who can see the looter.
- Differentiates between stores, players, and containers. (configurable)
- Uses LogMessage
CONFIGURATION NOTES
- Item given to PC when they first log in. This can be disabled by setting the
integer on the module called “PCLootTool” to zero (0).
- PCs can enable/disable the loot notification prompts they give off and see.
- DMs will see loot notifications for all players.
Back to Table of Contents
Persistent Quest Journals
PQJ - Persistent Quests & Journals
- You can use it to carry over journals from one module to another or for Persistent
Worlds. It also greatly simplifies the management of quest from a scripting
perspective.
- By Knat
http://nwvault.ign.com/View.php?view=Scripts.Detail&id=1166
IMPLEMENTATION NOTES
- Basics: 1 scripts
CONFIGURATION NOTES
- Integrated into the Universal Quest Manager
- Check the pqj_inc script header for more information if you plan to use this
outside of the Universal Quest Manager.
Back to Table of Contents
Persistent Message Boards
AnchorDeep Message Board System v1.21b
- A persistent Message Board System for players and DMs.
- By 69_Jeremy_69
http://nwvault.ign.com/View.php?view=Scripts.Detail&id=1166
IMPLEMENTATION NOTES
- Basics: 35 scripts, 2 placeables
- Features this message board has: - Persistent messages - Flood Control to stop
Spammers - You can Enable/Disable the showing of names - Players can delete
there own messages - There is a language filter to catch 'BAD WORDS' - DM's
can delete any post, board or the whole database from in game.
CONFIGURATION NOTES
- This is all very straight forward, drop a Message Board found in Custom5 in the
palette, in any area you want your players to have access to getting and sending
messages. Once the boards are in the code handles the rest.
-
There are a few Options you can edit in the file “mb_inc”. If you edit this file
though you will have to do a full recompile of the scripts.
Back to Table of Contents
Persistent Newspaper
Jasperre’s Newspaper
- This is a simple persistant Newspaper system, using the Bioware database. Easily
importable, and run in game, by DM's, or PC's who have the permission item.
- By Jasperre
http://nwvault.ign.com/View.php?view=Scripts.Detail&id=832
IMPLEMENTATION NOTES
- Basics: 34 scripts
CONFIGURATION NOTES
- Just speak to the editor for instructions :-) Stories are 1 title, 3 pages long. The
title is (Default) 50 letters long, and pages 200 each (Thats about 1 chat line on
1024x768 on small font, each) but can be changed. Should be now fully-tested,
and sutible for persistant worlds, especially as it only runs when it needs to, IE at
the users wishes.
Back to Table of Contents
Searchable Library
Vuldrick's Searchable Library
- Applying this system to your module will allow you to place a trigger and an
invisible object near any location you wish players to be able to search for custom
books (bookshelves in libraries for example).
- By Vuldrick
http://nwvault.ign.com/View.php?view=Scripts.Detail&id=2746
IMPLEMENTATION NOTES
- Basics: 4 scripts, 1 placeables, 1 trigger, 10 items
- The system includes the use of a search check and a random chance (d20 roll) to
find any of 8 common local books or 2 "special" books. Odds are 50% to find a
book at all, because half of the successful searches result in "Mundane" books that
are of no interest . . . thus not giving a book in actuality.
- A search success gives 5XP for finding a useful book and only 2XP for a
mundane search that yields no book worth keeping. Wizards and Bards of first
level are rewarded 5XP for each completed search regardless as a reward for incharacter activity. The Search Check is DC 15.
- If a Player moves out of the trigger or designated search radius, the search stops.
The trigger size is limited only by the builder, but the script limits the search
radius to 4 . . . which can of course be altered at the will of the builder.
CONFIGURATION NOTES
- You can have more than one library and each can have unique book sets. The
controls variables that enable specific books are placed on the invisible
“bookshelf” object. Change the variables “LocalBooks” and “SpecialBooks” to
unique strings and make your set of books with resrefs and tags following a
pattern such as this: sLocalBooks+"book001" through sLocalBooks+"book006"
as well as sSpecialBooks+"book001" and sSpecialBooks+"book002" for your 10
custom books. Place the unique string for the “LocalBooks” and “SpecialBooks”
in place of sLocalbooks and sSpecialBooks.
- To see how to set up a library system, see the example in the Start Area of the
base module.
Back to Table of Contents
Flavor Text
Vuldrick’s Flavor Text System
- A flavor text system used to build ambience and story telling devices.
- By Vuldrick
http://nwvault.ign.com/View.php?view=Scripts.Detail&id=3214
IMPLEMENTATION NOTES
- Basics: 1 script and 1 trigger
CONFIGURATION NOTES
- Simply place down a Flavor Text Trigger, found in Custom5 of the palette,
anywhere you want to send a “flavor text” message to a PC. Make the tag of the
trigger unique. Set a string on the area the trigger is in and make the name of the
string equal to the triggers tag. Make the string value equal to whatever message
you want to send.
- You can also change the color of the flavor text using the following color
designators in front of the text you place as the strings value
o Color used by saving throws (Blue) = <cfÌþ>
o Color used for electric damage (Dark Blue) = <c fþ>
o Color used for negative damage (Gray) = <c™™™>
o Color used for acid damage (Green) = <c þ >
o Color used for the player's name (Light Blue) = <c™þþ>
o Color used for system messages (Light Gray) = <c°°°>
o Color used for sonic damage (Light Orange) = <cþ™ >
o Color used for a target's name (Light Purple) = <cÌ™Ì>
o Color used for attack rolls (Orange) = <cþf >
o Color used for spell casts (Purple) = <cÌwþ>
o Color used for fire damage (Red) = <cþ >
o Color used for positive damage (White) = <cþþþ>
o Color used for healing (Yellow) = <cþþ >
Back to Table of Contents
Interactive Signs
Vuldrick’s Flexible Interactive Sings
- A sign that sends a message to the player when it is clicked.
- By Vuldrick
http://nwvault.ign.com/View.php?view=Scripts.Detail&id=2917
IMPLEMENTATION NOTES
- Basics: 1 script and 1 placeable
CONFIGURATION NOTES
- Simply place down a “Sign - Interactive: Click To Read”, found in Custom5 of
the palette, anywhere you want to have a sign that sends a message to a PC when
-
clicked. Change the variable on the sign so that its value is equal to the string you
want to send to the PC.
The same color designators listed in the Flavor Text system will work here.
Back to Table of Contents
Trash Cans
Vuldrick’s Trash Cans
- A simple trash can that will delete items place in it by PCs. Messages are sent to
DM channel so they can track what is thrown away (particularly useful for plot
items that may get thrown away).
- By Vuldrick
http://nwvault.ign.com/View.php?view=Scripts.Detail&id=2916
IMPLEMENTATION NOTES
- Basics: 2 scripts, 1 conversation, and 1 placeable
CONFIGURATION NOTES
- Simply place down a Trash Can, found in Custom5 of the palette, anywhere you
want.
Back to Table of Contents
Area Cleaner
LasCivious Area Clean Up Script
- It will clean any items (dropped or disarmed), any placeable inventories, any
stores, and any encounter creatures (standard or from Knat's PWFSE). The area
will only clean if the area is void of PCs. This will NOT destroy creatures placed
manually like merchants.
- By LasCivious (modified by Vuldrick)
http://nwvault.ign.com/View.php?view=Scripts.Detail&id=2264
IMPLEMENTATION NOTES
- Basics: 1 scripts
CONFIGURATION NOTES
- If you want to clear encounter creatures, set a local integer on the area called
“ClearEncounters” equal to one (1).
- If you want to clear dropped items, set a local integer on the area called
“ClearItems” equal to one (1).
- If you want to clear stores, set a local integer on the area called “ClearStores”
equal to one (1). This will totally delete the stores from the area!
- If you want to clear placeable inventories, set a local integer on the area called
“ClearPlaceInv” equal to one (1).
- Specify how long it takes for the cleanup to run after a PC exits the area by setting
a float on the area called “ClearDelay” equal to the amount of time you want the
delay to be. This value must have a decimal place since it is a float (example:
300.0 would be five minutes).
Back to Table of Contents
Merchant Cleaner
Merchant Clean 2.0
- Contains two scripts that work together to remove items sold to merchants by
player characters. This prevents excessive item buildup in merchant inventories,
and keeps PCs from being able to purchase items sold to the merchant by other
PCs. Item buildup can cause lag or even crash the game, so keeping merchant
inventories cleaned out is especially important for persistent worlds.
- By NWC Snake (modified by Vuldrick)
http://nwvault.ign.com/View.php?view=Scripts.Detail&id=990
IMPLEMENTATION NOTES
- Basics: 2 scripts
CONFIGURATION NOTES
- For any area you want your stores to be cleaned up so that PC sold items don’t
pile up and cause lag, simply set the integer “StoreClean” equal to one on that
area.
-
The items will stay in merchant inventories for three PC area exits of the
particular area the merchant is in. This can be configured by changing line 35 in
the scripts “vg_store_cleaner”. Instructions are in the script on what to change.
Back to Table of Contents
Vuldrick’s Flint and Steel Campfire System
Vuldrick’s Flint and Steel Campfire System
- This system enables PCs to build campfires and provide warmth (if used in an
area that uses my cold environment system) and light. PCs can make the fire last
longer by adding more wood and they can also extinguish the fire.
- By Vuldrick
IMPLEMENTATION NOTES
- Basics: 9 scripts
CONFIGURATION NOTES
- Set the local variable nCanBurn to equal 1 on each area you wish the PCs to be
able to start a fire with a flint and steel. If you fail to set this variable, found in
Module Properties, Advanced, the PC will get the message: "You can't start a fire
in here!" and nothing will happen.
- Set the invisible object named [name]Tree at the base of any tree, whether one
you've placed or one generated by the tileset. This will give the illusion that the
tree itself is usable, but won't interfere with gameplay like a real, full-size tree
placeable will. IMPORTANT! You need not leave the actual name of the
placeable so ugly! Change it to An oak tree or A maple tree, or whatever else is
suitable.
- I have added the possibility to make any placeable flammable. Make the
placeable useable, set the variable nFlammable = 1 on the placeable properties.
Now a PC can target the placeable with the flint/steel and ignite it, eventually
destroying the placeable with fire. Use discretion with this, of course. A
flammable object will still not be burnable unless the area it is in has nCanBurn
set.
- If desired, place some fallen wood placeables on the map so a PC need not chop
any from a tree. Note that I use a set of scripts to allow a PC to 'pick up'
placeables and 'drop' them wherever they wish. This is to avoid the ugly bag
placeable in lieu of a real stick of wood. These scripts are easily adaptable to
other placeable/item combinations such as picking up a bucket and moving it.
-
-
Change the delays in vg_wood_flint and vg_wood_feedfire to whatever you wish.
They are set small for testing purposes. Using a random delay might be even
better.
The further use of this system requires integration with other systems. For
instance, it is useful for cooking meat taken from animals or bought. It is useful
for casting light at night or in a cave. It could be useful for certain crafts, such as
curing a hide taken from an animal. Another craft could be to brew potions from
plants/herbs picked and gathered. Or poison!
Back to Table of Contents
Climb System
Climb System
- This system allows the builder the opportunity to force PCs to “climb” to a
destination. The climb skill is as close to PnP rules as we could make it
considering that NWN does not have a climb skill. All racial, class, and other
bonuses and penalties are in place (including armor encumbrances etc).
- by Vuldrick & Zelerian
IMPLEMENTATION NOTES
- 2 scripts, 4 items
CONFIGURATION NOTES
- Lay down two custom triggers called “Skill – Climb Description” for the places
you wish the PC to climb to and from. The trigger is found under
Special/Custom5.
- Lay two sets of the waypoints called “CLIMB_DEST” and “CLIMB_POINT”,
one in each of the two triggers you just placed.
- Change the variables in the “CLIMB_POINT” waypoints for each location in the
climb to have an appropriate DC, Destination, Direction, Height, and Climb
Description.
- Place whatever DESTINATION string you just set on the “CLIMB_POINT”
waypoint to a suffix to the destination “CLIMB_DEST” waypoint so that in the
end it looks like “CLIMB_DEST_***” where the *** is the string you placed for
DESTINATION on the “CLIMP_POINT”.
- See the script “s_climb_description” for details on typical climb DCs based on the
Pen and Paper Rule Books.
- Make sure the PC has a “PC- Climb Skill Tool” (found in Tutorial) to use when
they need to climb.
-
Allow the PC to have a set of Boots of Climbing (found in Special/Custom5) if
you want them to have a magic item that guarantees a success in a climb check.
Provide the PC a Rope or Silk Rope (found in Special/Custom5) to add bonuses to
their climb check if you wish.
See the example in the demo module if you need extra help.
Back to Table of Contents
Detect Evil
Detect Evil (Paladin Skill)
- This gives PC Paladins their rightful ability to detect evil as per Pen and
Paper Rules. It enables a Paladin to sense evil aura's in the surrounding area.
The amount of information depends on the number of rounds they use this power
for. This actually came from HCR code, I converted it over to be useable in a
non-HCR module ☺
- By Vuldrick
IMPLEMENTATION NOTES
- Basics: 1 script and 1 item (found in Tutorial)
CONFIGURATION NOTES
- Round 1 = presence or absence
- Round 2 = number of aura, strength of the strongest, may be overwhelmed
- Round 3 = power and location (or direction if out of Line of Sight) of each aura
-
Overwhelmed = strongest aura is overwhelming, aura strength is at least twice
PCs character levels = stunned for 1 round and spell ends.
-
Evil Power = the highest applicable value calculated using the following table:
-
Evil Source
----------Outsider
Elemental
Undead
Other Creature
Cleric
Evil Power
----------HD
HD / 2
HD / 2
HD / 5
Class Level
Other Object
-
-
-
VG_VAR_DETECT_EVIL_OBJECT_POWER
Aura Strength = calculated using the following table:
Evil Power
---------0-1
2-4
5-10
11+
Aura Strength
------------Faint
Moderate
Strong
Overwhelming
Known Issues:
Line of Sight condition cannot be implemented properly implemented however
creatures in the effect area but out of LoS can either be included or excluded
using the bUseLoS variable.
The phrase "cleric of an evil deity" is necessarily interpreted as an evil cleric.
Penetration of solid barriers is not implemented.
Detecting lingering auras is not implemented.
Evil items and spells detection is not implemented.
Back to Table of Contents
Paladin’s Badge of Courage
Paladin’s Badge of Courage
- This gives PC Paladins their rightful ability to inspire courage as per Pen and
Paper Rules. It enables a Paladin to boost the moral of comrades within a small
radius thus giving them increased will saves versus fear. This actually came from
HCR code, I converted it over to be useable in a non-HCR module ☺
- By Vuldrick
IMPLEMENTATION NOTES
- Basics: 1 script and 1 item (found in Tutorial)
CONFIGURATION NOTES
- I guess the only configuration with this system is that if you don’t want to use it,
don’t provide PC Paladins with the tool.
Back to Table of Contents
Enchanting System
Enchanting
- It allows wizards and clerics to enchant or bless items respectively. These are
permanent bonuses to items just as if they were made in the toolset. As characters
increase in power so too will the number and power of their enchantments
increase to attempt to keep things balanced.
- DMs have full access to all player enchants, as well as a number of DM-only
enchants. Not all item properties are available for enchanting using the rod,
though it does cover the most commonly used enchantments. Even if just used for
DMs, it can be a powerful tool to generate quest rewards for your PCs in-game
without needing to import items.
- By Durgin
http://nwvault.ign.com/View.php?view=Scripts.Detail&id=2678
IMPLEMENTATION NOTES
- Basics: 62 scripts, 8 items
CONFIGURATION NOTES
- Simply provide a Soul Stone, found under Custom5, and an enchanters rod, found
under tutorial, to any PC you want to give the ability to enchant items to. You
can give the “PC – Enchanter Token” to any PC you think should receive an
enchanting bonus (ie they join an enchanters guild or have the right feats etc).
- If you want to modify the scripts for a low-magic world, the easiest way to do so
would be to reduce the modifiers that determine how much power each level is
worth, and how much power the enchanting focus feats are worth in the
“ench_start” script. Look for lines 23, 25, and 27 and reduce those numbers. They
determine how many bonus points of power are received from the enchantment
focus feats. Then scroll down and look at lines 50, 51, 52, 67, 68, and 74. All of
those have fractions that determine how much power each level in a class gives
you.
- Enchanters and Clerics receive 4 power levels per 5 class levels, non-enchanter
wizards receive 1/2. If you reduce those fractions you slow down how quickly
characters get access to new enchantments, thus lowering the power of the magic
items they can enchant.
Back to Table of Contents
Magical Bardic Instruments
Vuldrick’s Magical Bardic Instruments
- This system allows the builder to provide magical instruments that can be played
by any class, but only Bards can get magical effects from the use of the items.
The magical effects decrements the number of bardic songs for the PC by one per
use.
- by Vuldrick
IMPLEMENTATION NOTES
- Basics: 1 script and 5 items (instruments found under Special/Custom5)
CONFIGURATION NOTES
- Check the script called “bard_song” if you wish to add more magical bardic
instruments. It should be easy enough to follow the examples seen there if you
want to add more.
- I have provided 5 instruments with various magical effects and DCs as a
demonstration for this module.
Back to Table of Contents
DM Item Manipulator
DM Item Manipulator
- This device allows DMs to modify the magical properties of items during game
play. This gives DMs almost unlimited ability to provide magical items with
whatever effects they wish for PCs during a quest.
- by Nordavind
http://nwvault.ign.com/View.php?view=Scripts.Detail&id=2095
IMPLEMENTATION NOTES
- Basics: 34 scripts and 1 items (found under tutorial)
Back to Table of Contents
Spell Storing Items
Spell Storing Items
- This script uses the new pseudo event ITEM_SPELL_CAST_AT and itemproperty
code to create a “Item” of Spell Storing. Cast a spell on the item and it stores it
for use later on.
- by Turanar
http://nwvault.ign.com/View.php?view=Scripts.Detail&id=1895
IMPLEMENTATION NOTES
- Basics: 1 script and a spell hook as well as any number of “Spell Storing Items”
you wish to create. The module currently has 1 item (Ring of Spell Storing under
Special/Custom5) for demonstration purposes.
CONFIGURATION NOTES
- You can make any item a “Spell Storing Item” by setting its tag to “spell_storing”
and placing a local float on the item with the name “Limit” equal to the number of
spell levels the item should be able to store.
Back to Table of Contents
Item Namer
Item Namer
- This is a fairly simple system that makes use of the SetName function Bioware
recently put out. It allows PCs to rename their items to anything they wish.
- by Ne0nx3r0
http://nwvault.ign.com/View.php?view=Scripts.Detail&id=3056
IMPLEMENTATION NOTES
- Basics: 5 scripts, 1NPC, and 1 Placeable (both the NPC and the Chest are located
in Special > Custom 5)
CONFIGURATION NOTES
- Essentially you drop an item in the chest, talk to the NPC which subsequently
locks the chest, then speak an item name to the NPC (who uses listening patterns),
-
and the NPC will, with a bit of flair, name the item placed in the chest using the
GetFirstItemInInventory function.
You could theoritically have as many NPCs/Chests as you want, as long as each
duo is placed nearby each other.
As is, there is no gold cost to this, but I'm sure one could be added very easily.
Back to Table of Contents
Custom Drink Items
Vuldrick’s Custom Drinks
- Contains one script that is fired by the tagbased item activation code built into
HoTU. This script and associated items give many more “tavern” drinks that will
add a bit of attitude to the pubs in a module
- Original concept by Feygan (Revamped by Vuldrick)
http://nwvault.ign.com/View.php?view=Prefabs.Detail&id=187
IMPLEMENTATION NOTES
- Basics: 1 scripts and 30 items
CONFIGURATION NOTES
- Custom drinks that are pre-made are found under miscellaneous/drinks in the
palette or chooser.
- If you want to make your own drinks, see the script “vg_drinks” to learn how to
add in new drinks. All custom drinks that you make must have the tag
“vg_drinks” so that they call the script that matches them. To call for a specific
drink, set an integer on the drink item called “Drink” and name it to whatever you
like. The script you modify to call to that drink will have to be made to check for
that integer.
Back to Table of Contents
Interactive Doors
Interactive Door System
- The goal of this system is give the players more options when faced with a door.
These options include: Opening, Listening, Knocking on the door, Locking and
Unlocking (with keys or skills), Spiking the door open or shut, and Knocking on
the door (which can -based on faction- cause an NPC to open the door and speak
with the PC), and Examining, Finding and Removing Traps. Note: In addition to
normal traps, this also supports magical traps which can only be found by rogues
and which can execute ANY script (not only BioWare trap scripts) with no
additional scripting. Support for BioWare and PHB-style Thieves' Tools and Hold
Portal items added as well.
- By Syrsuro
http://nwvault.ign.com/View.php?view=Scripts.Detail&id=802
IMPLEMENTATION NOTES
- Basics: 59 scripts and 5 items
CONFIGURATION NOTES
- This system runs on the fail to open event of doors.
o Door Event Scripts:
o Door Fail To Open: Dor_On_Fail2Open
o Door Close: Dor_On_Close
o Door User Defined: Dor_On_User
- Door Settings:
o Locked, DC to Unlock > 0.
o DC == 1: Door is 'unlocked'
o DC > 1: Door is locked with that DC to unlock.
o Lock Key Required == YES. (This prevents players
circumventing the system).
o Door Lock Key Tag: Used in magical traps (see below)
o Set the UnLock Door DC to whatever you want. Using a key will ignore
this number so it will only apply to door being locked with the Open locks
skill.
- Door Saving Throws:
o Reflex Save: This determines how difficult the door is to force open and
represents a Strength Check DC. Default is 5 (door opens easily) but
stuck doors as per the DMG are also supported.
o Fortitude Save: This represents the material from which the door is made
and thus how soundproof the door is (see below).
- Door Faction:
o The knock and answer script works by triggering the nearest non-enemy
and playable-race NPC of the same faction as the door on the opposite
side of the door to open it.
-
-
o If there are no eligible NPCs on the other side of the door to answer, the
closest eligible NPC (must be within 15m) will answer the door. Because
the default faction is hostile, this will only occur if you specifically set a
door to the relevant faction.
Door Keys:
o Putting the string K_nnn (where n is a number between 001 and 999)
will result in a Key with the tag Key_nnn being recognized.
o Keys will work to both lock and unlock the door and do not
disappear when used and do not require lock picking skill to be used. In
addition - a key with the tag K_999 will unlock any door. (the value of the
master key can be set as a switch to prevent exploits by PCs).
Trapped Doors:
o Standard BioWare trapped door.
- Set the DC to Detect the door to 100+the desired DC. Failure to
do so will result in the door glowing red due to a bug in the game
which causes the Detectable tab on door traps to have no effect.
The scripts automatically treat any Detect DC > 100 as being DC 100. Setting a door trap to a DC of 100 will result in it being
undetectable.
- Set the DC of the Disarm trap to whatever DC you want it to be.
- Set the door to be both Undetectable (unclick the tab) and
UnDisarmable (unclick the tab). Leaving the trap disarmable
allows the PCs to bypass this system.
o Magical Trap.
- Put the string T_nn (where nn is a two digit number between 01
and 99 and represents the DC of the trap) in the tag of the door.
- Put the name of a script in the Door Key Tag slot on the door.
This can be a custom script OR this can be one of the BioWare
trap scripts. Note: putting the prefix "R_" before the script string
will make the trap automatically reset after being activated.
o Door Tags:
- The following strings have significance when they occur anywhere
in the door's tag.
- T_nn: Indicates that they door may be magically trapped with a
DC = nn where nn is a number between 01 to 99.
- L_nnn: Indicates that the door has a special pre-defined listen
string to be heard when the PCs listen. This string is defined in
dor_inc_listen
- nnn indicates a number between 001 and 999 where 999 indicates
that nothing can be heard.
- K_nnn: Indicates that a key exists to open the door. The key
should have the tag Key_nnn where nnn (in both cases) is a
number between 001 and 999. By default (customizable),999
indicates a master key which can open any lock (for use by DMs).
- C_nnn: Indicates that a door has a special pre-defined
conversation that will be fired when the door is knocked on. If this
is the case, the creatures on the other side of the door will not
respond.
-
o Items:
- There are a few custom items; however, the blueprints and the tags
of these items can be set as switches. These items are the door
spikes, thieves' tools and masterwork thieves' tools.
- There are also items such as Keys and the Hold Portal wand which
work by having the appropriate tag.
SWITCHES:
o All configuration is dealt with in the script called “dor_inc_about”.
Back to Table of Contents
Persistent Clock
Persistent World Clock System
- This system maintains the current date and time through server reboots. Once it is
initialized the server date and time are stored and restored after each reboot.
- By Lord Delekhan
http://nwvault.ign.com/View.php?view=Scripts.Detail&id=2721
IMPLEMENTATION NOTES
- Basics: 1 scripts
CONFIGURATION NOTES
- If you want to use the persistent date and time system, set the integer
“PersistDate” equal to one (1) on the module. If you do not want persistent time,
set the integer to zero (0).
Back to Table of Contents
Persistent Player Item Storage
Persistent Player Item Storage 1.00
- This is a very simple script to allow players to efficiently store items using the
Bioware campaign database. It is easily extendable via the user defined functions.
- By OldManWhistler
http://nwvault.ign.com/View.php?view=Scripts.Detail&id=1214
IMPLEMENTATION NOTES
- Basics: 2 scripts, 2 placeables, 1 creature
CONFIGURATION NOTES
- Place a Player Storage Locker or the “Unique” version down in an area where you
want PCs to have item storage.
- The PPISUserDefinedAllowAccess function in "omw_ppis_start" can be
modified to prevent access unless the player meets specific conditions. Some
ideas:
o limit based on player level
o limit based on player class
o limit based on faction
o limit based on having paid a one time fee
o limit based on paying a fee to access the vault
- The PPISUserDefinedInventoryLimit function in "omw_ppis_disturb" can be
modified to prevent storing items unless the player meets specific conditions.
Some ideas:
o limit based on number of items
o limit based on item type (no gold, no armor, etc)
o limit based on specific item tags
o set up different amounts of storage space for different fees
Back to Table of Contents
Subdual Damage System
Subdual Damage
- It is meant for PvP battles only, and allows players to knock out other players, as
opposed to killing them. When a PC attacks another PC, and subdual damage is
-
on, unconsciousness will occur in place of death. Repeated attacks will cause the
player to proceed through various 'levels' of unconsciousness:
o Winded - Unconscious for 15 seconds, disabled(AC and speed
decreased) for 30 seconds after recovery
o Black out - Unconscious for 30 seconds, disabled for 60 seconds, drops
gold
o Knock out - Unconscious for 45 seconds, disabled for 120 seconds, drops
gold, weapon, and pack items.
o Concussion - Unconscious for 60 seconds, disabled for 240 seconds, drops
gold, all equipped items, and all inventory items.
If a player is subdued again while unconscious, or while disabled, he will proceed
down the list. Sparring mode will keep a PC at the Winded level.
By Rocc (modified by Vuldrick)
http://nwvault.ign.com/View.php?view=Scripts.Detail&id=1572
IMPLEMENTATION NOTES
- Basics: 3 scripts, 1 placeable, 1 item
CONFIGURATION NOTES
- The PC – Subdual Tool is automatically given to the PC when they enter the
module.
- If you do not want to use the subdual system nor give PCs a Subdual Tool, simply
set the integer called “PCSubdualTool” on the module equal to zero (0).
Back to Table of Contents
Stop Item Swaps
Sir Elric's Stop Swap v1.2
- Stop Swap simulates real time PnP style fighting by stopping players swapping
out certain items during combat for enhanced realism, similar to armor which is
already covered by Bioware.
- If the player is at a safe distance from the nearest enemy, this is set by the builder,
then they can swap items as normal.
- Items include amulets, belts, boots, cloaks, bracers, gloves, helmets & shields
(armor is already covered by Bioware).
- There is also the optional AOO toggle. If switched on and a player equips a new
weapon and they are not outside the safe item swapping distance it will cause an
-
attack of opportunity, similar to drinking a potion during combat(This also stops
the known weapon swapping exploit).
By Sir Elric
http://nwvault.ign.com/View.php?view=Scripts.Detail&id=2324
IMPLEMENTATION NOTES
- Basics: 1 script
CONFIGURATION NOTES
- If you want to keep PCs from exploiting item swapping when in threat range
during combat, place an integer called “NoSwap” equal to one (1) on the module.
- This system can be configured to some degree in the script called
“se_stopswap_inc”.
Back to Table of Contents
UMD Checks
UMD Checks
- This code will implement the Player Handbook rules (or very close) to the
UMD/Spellcraft checks that are done in HoTU. This fixes several weaknesses like
a level 25 fighter/level 1 sorc casting a level 9 scroll.
- By Demetrious
http://nwvault.ign.com/View.php?view=Scripts.Detail&id=751
IMPLEMENTATION NOTES
- Basics: 1 script
CONFIGURATION NOTES
- See the script “x2_pc_umdcheck” for configuration options.
- To remove the UMD check system, simply delete the script “x2_pc_umdcheck”
so that the Bioware default script can become active again.
Back to Table of Contents
Pick Pocket
Laymens method of Pickpocket(PVP) Prevention
- Essentially, by adding this to the Module "OnItemAcquire" event, many items a
PC picks up will be marked as "Non-Pickpocketable" thus preventing them from
being pickpocketed.
- Default this handles the following items:
o BASE_ITEM_ARMOR
o BASE_ITEM_BASTARDSWORD
o BASE_ITEM_BATTLEAXE
o BASE_ITEM_BOOTS
o BASE_ITEM_DIREMACE
o BASE_ITEM_DOUBLEAXE
o BASE_ITEM_DWARVENWARAXE
o BASE_ITEM_GREATAXE
o BASE_ITEM_GREATSWORD
o BASE_ITEM_HALBERD
o BASE_ITEM_HEAVYCROSSBOW
o BASE_ITEM_HEAVYFLAIL
o BASE_ITEM_HELMET
o BASE_ITEM_KATANA
o BASE_ITEM_LARGESHIELD
o BASE_ITEM_LIGHTCROSSBOW
o BASE_ITEM_LONGBOW
o BASE_ITEM_LONGSWORD
o BASE_ITEM_MAGICSTAFF
o BASE_ITEM_QUARTERSTAFF
o BASE_ITEM_RAPIER
o BASE_ITEM_SCYTHE
o BASE_ITEM_SHORTBOW
o BASE_ITEM_SMALLSHIELD
o BASE_ITEM_TOWERSHIELD
o BASE_ITEM_TWOBLADEDSWORD
o BASE_ITEM_WARHAMMER
o Anything Over >=3 LBS
- By Mask
http://nwvault.ign.com/View.php?view=Scripts.Detail&id=2894
IMPLEMENTATION NOTES
- Basics: 1 script
CONFIGURATION NOTES
- If you want to keep PCs from being able to pickpocket items that should be too
large or too difficult to pickpocket, place an integer called “PickPocketFix” equal
to one (1) on the module.
Back to Table of Contents
Bioware Books Replacement
Bioware Books Be Gone
- Overrides the 31 default FR books without having to touch a single script. You
can edit the 31 blank books to contain knowledge specific to your game world,
and they will automatically be used by Bioware bookcase/treasure generation
scripts without having to modify any scripts.
- By OldManWhistler
http://nwvault.ign.com/View.php?view=Prefabs.Detail&id=96
IMPLEMENTATION NOTES
- Basics: 31 items
CONFIGURATION NOTES
- Fill in your custom descriptions on the first 31 books found under
Miscellaneous/Books
- If you want to keep the bioware books instead of making your own, simply delete
the custom versions of the books.
Back to Table of Contents
Armor and Racial Encumbrance
Armor and Racial Encumbrance
- This system gives the builder the ability to place proper racial speeds on PCs as
well as provide movement rate reduction due to armor encumbrance.
-
By Vuldrick
IMPLEMENTATION NOTES
- Basics: 1 script
CONFIGURATION NOTES
- The racial movement rate system can be turned off by setting the module variable
“RacialMovement” equal to “0”.
- The armor encumbrance can be turned off by setting the module variable
“ArmorEncumbrance” equal to “0”
- See the script “vg_move_rates” to edit to your liking.
Back to Table of Contents
Rule Breaker’s Curse (Item)
Vuldrick’s Rule Breaker’s Curse
- Are you tired of players who come online only to break rules so they can
powerlevel their PC?
- Are you tired of PCs who don't care about your server guidelines . . . the rules you
worked so hard to establish to ensure fun for all your players and yourself?
- Are you tired of the Griefer that just won't leave any of your players alone?
- This is a way to get the point across to those folks that just won't listen to reason.
- By Vuldrick
http://nwvault.ign.com/View.php?view=Scripts.Detail&id=3109
IMPLEMENTATION NOTES
- Basics: 1 script and 2 items
CONFIGURATION NOTES
- Edit the book called "Rule Breaker's Curse", found under custom5 in the palette.
You need to add in your server rules or whatever you like where prompted in the
book's description.
- Simply give the *Jittery Fingers of Stupidity* to anybody who you think deserves
it. The gloves are found under custom5 in the palette or chooser.
- Remove the items from the PC (gloves and a book) to end the curse.
Back to Table of Contents
Real Torches
Real Torches
- I took this bit of code out of HCR because I thought it was nice. It basically
makes torches burn out and be used up after a configurable amount of time. Now
PCs will have to carry multiple torches and replenish them as they go bad.
- By HCR Staff (adapted by Vuldrick)
IMPLEMENTATION NOTES
- Basics: uses standard bioware torches and CEP lanterns.
CONFIGURATION NOTES
- If you want to use this system, set the integer called “RealTorch” on the module
equal to one (1). You also need to set an integer on the module called
“TorchBurn” equal to the number of “in-game” hours you want the torches to last.
Back to Table of Contents
Familiars
Real Familiars
- This little add-on will cause the PC to lose 200XP per level when their familiar
dies. The XP loss is cut in half if the PC passes a Fortitude Save DC 15. This
tries to bring back a bit of that Pen and Paper feel to familiars and also forces
PCs to be more careful about using them as tanks or meat shields.
- By HCR Staff (adapted by Vuldrick)
IMPLEMENTATION NOTES
- Basics: 1 script
CONFIGURATION NOTES
- If you do not want to use this system, simply set the local variable called
“RealFamiliar” equal to “0” on the module.
Back to Table of Contents
Spell Hooking
Vuldrick’s Spell Hook
- I have added a spell hook script that helps many of the systems integrated in the
basemodule work properly. The following are things that the spell hook does:
o Keeps torches from working in “underwater areas”.
o Keeps PCs from casting spells in “underwater areas” unless they have
silent spell feats.
o Makes fire based spells fail when cast in “underwater areas”.
o Makes the spell “Drown” not work on creatures that are already “under
water” as they likely are already dying or they can breathe just fine
underwater.
o Stops Call Lightning and Storm of Vengeance spells from working in
underground areas.
o Handles all Null and Wild magic effects on spell casting.
o Handles implementation of the system that enables the builder to make
items of spell storing.
- By Vuldrick
IMPLEMENTATION NOTES
- Basics: 1 script
CONFIGURATION NOTES
- If you want remove parts of the spell hook functioning or add your own spell
hooking functions, simply edit the spell called “vg_spell_hook”.
Back to Table of Contents
LogMaxHP
LogMaxHP
-
This is a little function that you can stick into your module (suggested spots:
OnLevelUp, OnClientEnter, OnClientLeave) to write the player HP to the log file.
It logs the maximum HP, the maximum HP possible, the HP from
CON+Toughness, the maximum HP from classes and the percentage of maximum
possible HP the character has. The information can be used to see if certain
players are abusing the ability to 're-roll' bad HP rolls by hitting cancel in the
level up process. But keep in mind that low Hit Die classes like
-
wizard/sorcerer/rogue/bard will most likely always be close to the maximum
possible HP because of NWN never rolls less than 50% when rolling HD. Also
remember that characters get 100% of their Hit Die for their first three levels.
By OldManWhistler
http://nwvault.ign.com/View.php?view=Scripts.Detail&id=933
IMPLEMENTATION NOTES
- Basics: 1 script
Back to Table of Contents
Caltrops
Caltrops
- This is a modification to the Bioware caltrops script so they will disappear after
some time. I modified this because we had many caltrops in our PW that would
lay around and clutter up the landscape until a server reset. They will still
disappear if the 25 damage limit is reached or the time limit is reached,
whichever comes first.
- By LasCivious
http://nwvault.ign.com/View.php?view=Scripts.Detail&id=2026
IMPLEMENTATION NOTES
- Basics: 1 script
CONFIGURATION NOTES
- You can set the duration yourself easily by changing line 25 of the script to
whatever time you wish. It is currently set to have the caltrops disappear after 5
minutes.
- You can remove this version of caltrops by simply deleting the script called
“x0_s3_caltrop” so that the Bioware default will take precedence again.
Back to Table of Contents
Continual Flame
Continual Flame Spell
- Spell fixed to prevent monetary exploitation
- The spell is not actually permanent now, but last a really long time. See below.
- By Brent Knowles
IMPLEMENTATION NOTES
- Basics: 1 script
CONFIGURATION NOTES
- Adjust line #66 of the script “x0_s0_clight” as needed.
- If you want the original spell back, just delete the above spell from within the
toolset. The original will come back as default.
Back to Table of Contents
Light
Light Spell
- Added decrease to hide skill
- The skill decrease max is 10 for casting on items and 50 for casting on creatures.
This script uses the max values, you can adjust them to suit you.
- By bloodsong
http://nwvault.ign.com/View.php?view=Scripts.Detail&id=2957
IMPLEMENTATION NOTES
- Basics: 1 script
CONFIGURATION NOTES
- Adjust the script “nw_s0_light” as needed.
- If you want the original spell back, just delete the above spell from within the
toolset. The original will come back as default.
Back to Table of Contents
Time Stop
Multiplayer Time Stop Deluxe
- A simple script that when imported into your module allows you to overcome the
annoyance of time stop being cast in a persistent world. This script allows a
customizable radius for time stop, and allows a customizable spell duration.
- By Voxelus 41
http://nwvault.ign.com/View.php?view=Scripts.Detail&id=1025
IMPLEMENTATION NOTES
- Basics: 1 script
CONFIGURATION NOTES
- Adjust the script “nw_s0_timestop” as needed.
- If you want the original spell back, just delete the above spell from within the
toolset. The original will come back as default.
Back to Table of Contents
Tensors Transformation
Improved Tensor's Transformation
- This script performs the spell as closely to the PnP version as I could get it. This
includes the following changes/additions:
o STR, DEX, and HP bonuses are now all properly maximized and
empowered.
o You no longer polymorph into a doom knight so you get to keep spell slots
gained via magic items that polymorphs unequip.
o AC bonus is now a +4 natural, not a +4 dodge.
o Simple and Martial Weapon Proficiencies are added to your character via
a temporary feat addition to the character's currently equipped armor.
o 100% Spell Failure for duration.
- By Alex Moskwa (original by Bitraiser)
http://nwvault.ign.com/View.php?view=Scripts.Detail&id=791
IMPLEMENTATION NOTES
- Basics: 1 script
CONFIGURATION NOTES
- Adjust the script “nw_s0_tenstrans” as needed.
- If you want the original spell back, just delete the above spell from within the
toolset. The original will come back as default.
Back to Table of Contents
Mordenkainen’s Sword
Improved Mordenkainen's Sword
- With pretty summoning visuals a shimmering greatsword will appear to smite
nearby hostiles.
- The duration is accurate to 3rd Ed. rules.
- The sword's attack bonus will be modified depending upon level/abilitiy scores of
the caster.
- The sword can not be harmed, but is susceptible to dispel or dismissal.
- There is no way to include the SR check, except through editing the on_attack of
every creature - so it was not included.
- Like the real spell, it doesn't last long (unless extended) - but does a good deal of
damage while keeping the caster in relative safety.
- By Invizible420
http://nwvault.ign.com/View.php?view=Scripts.Detail&id=787
IMPLEMENTATION NOTES
- Basics: 1 script
CONFIGURATION NOTES
- Adjust the script “nw_s0_mordsword” as needed.
- If you want the original spell back, just delete the above spell from within the
toolset. The original will come back as default.
Back to Table of Contents
Knock
Knock Spell
- Knock is supposed to unlock doors, not open it. I have removed the code that
opens doors so they only unlock as they are suppose to.
- By Vuldrick
IMPLEMENTATION NOTES
- Basics: 1 script
CONFIGURATION NOTES
- Adjust the script “nw_s0_knock” as needed.
- If you want the original spell back, just delete the above spell from within the
toolset. The original will come back as default.
Back to Table of Contents
Find Traps
Find traps Spell
- Find traps is supposed to only reveal the traps, not actually disarm them. I
adjusted the code so that the traps are found but not disarmed.
- By Vuldrick
IMPLEMENTATION NOTES
- Basics: 1 script
CONFIGURATION NOTES
- Adjust the script “nw_s0_findtrap” as needed.
- If you want the original spell back, just delete the above spell from within the
toolset. The original will come back as default.
Back to Table of Contents
Transformation Type Spells
Transformation Type Spells
- Here's a nasty fix I saw posted on the bio-forums ages ago. It involves illegal
chain spell casting.
- What happens is this, if a player puts into their action queue multiple spells, then
a polymorph type spell, and then a bunch more spells, every spell after the
polymorph is not erased from the PC memorized spells.
- By Vuldrick
IMPLEMENTATION NOTES
- Basics: 1 script
CONFIGURATION NOTES
- Adjust the scripts “nw_s0_polyself”, “nw_s0_shapechg”, “nw_s0_tenstrans”,
“nw_s2_elemshape”, and “nw_s2_wildshape” as needed.
- If you want the original spells back, just delete the above spells from within the
toolset. The originals will come back as default.
Back to Table of Contents