1
USER GUIDE
CONTENTS
Thuraya XT 01 Before you start
For your safety
1
Unpacking your Thuraya XT
7
Battery Information
3
Thuraya XT
7
Taking care of your Thuraya XT
3
The function of the keys
8
Precautions for Thuraya XT
4
Thuraya XT 02 Getting started
Introduction
11
Initial steps
Inserting the SIM Card
Inserting the Battery
Turning on the Thuraya XT
Enter your PIN (optional)
Emergency call (SOS)
Setup wizard
Lock/Unlock the keypad
12
12
13
13
13
14
14
Display
Display layout
Display symbols
Key action
Default shortcuts
Useful tips
15
15
16
16
16
Making and receiving calls
Making a call
During a call
High-Penetration alerting
Conference Calls
17
17
18
18
Write a new Message
Traditional text input
Predictive text input
Change language
Dictionary
19
20
20
20
Thuraya XT 03 Using the menu
1. Contacts
1.1
1.2
1.3
1.4
1.5
1.6
1.7
Search
Add Contact
Group
Speed dial
Copy
Delete
Memory Status
5. Messaging
23
23
24
24
25
25
25
2. Navigation
2.1
2.2
2.3
2.4
2.5
2.6
2.7
Current position
Continuous position
Waypoints
Location tracking
Setting
Helper
Qiblah & Prayer
26
27
28
29
29
30
31
3. Call logs
3.1 Call logs
3.2 Delete
3.3 Call Duration
32
32
32
4. Organizer
4.1
4.2
4.3
4.4
4.5
Alarm
Calendar
Calculator
Stopwatch
World time
33
35
35
36
36
5.1 New message
5.2 Inbox
5.3 Draft
5.4 Sent messages
5.5 Outbox
5.6 Templates
5.7 Settings
5.8 Info message
5.9 Memory status
5.10 Delete messages
6. Sound settings
37
38
39
39
39
39
40
41
42
42
42
7. Settings
7.1
7.2
7.3
7.4
7.5
7.6
7.7
7.8
Phone
Call
GmPRS
Language
Time/Date
Data connection
Setup wizard
My numbers
43
44
48
49
50
51
51
51
8. Network
8.1 Network mode
8.2 SAT Registration
8.3 Preference
52
52
52
Thuraya XT 03 Using the menu
9. Security
9.1
9.2
9.3
9.4
9.5
PIN1 code
Security code
Change codes
Fixed dialing
Closed User Group
53
53
54
54
55
9.6
9.7
9.8
9.9
IMEI Number
Software version
Soft reset
Factory reset
56
56
56
56
Thuraya XT 04 Additional Information
Security code
59
Troubleshooting
60
PIN & PUK
59
Certification information (SAR)
61
PIN2 & PUK2
59
FCC Compliance Statement
62
Barring code
59
Certification information (IP54, IK03)
63
01 Before you start
For your safety
1
Unpacking your Thuraya XT
7
Battery Information
3
Thuraya XT
7
Taking care of your Thuraya XT
3
The function of the keys
8
Precautions for Thuraya XT
4
01
02
03
04
01 Before you start
Please read carefully and make yourself familiar with the safety measures and user instructions in this manual before you start using
your Thuraya XT. This will help you to get the most out of your Thuraya XT.
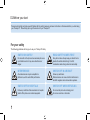
For your safety
The following guidelines will help you to use your Thuraya XT safely.
1
SWITCH ON SAFELY
ROAD SAFETY COMES FIRST
Do not switch on the phone where wireless phone use
is prohibited or when it may cause interference or
danger.
Obey all local laws. Always keep your hands free to
RSHUDWHWKHYHKLFOHZKLOHGULYLQJ<RXU¿UVW
consideration while driving should be road safety.
INTERFERENCE
SWITCH OFF IN AIRCRAFT
All wireless devices may be susceptible to
interference, which could affect performance.
Follow any restrictions.
Wireless devices can cause harmful interference to
aircraft’s navigation and communication systems.
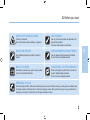
SWITCH OFF IN HOSPITALS
SWITCH OFF WHEN REFUELING
Follow any restrictions that are advised in a hospital.
Switch off the phone near medical equipment.
Do not use the phone at a refueling point.
Do not use near fuel or chemicals.
01 Before you start
SWITCH OFF NEAR BLASTING
USE SENSIBLY
Follow any restrictions.
Do not use the phone where blasting is in progress.
Use only in the normal position as explained in the
product documentation.
Do not touch the antenna unnecessarily.
QUALIFIED SERVICE
ENHANCEMENTS AND BATTERIES
01
2QO\TXDOL¿HGSHUVRQQHOPD\LQVWDOORUUHSDLUWKLV
product.
Use only approved enhancements and batteries.
Do not connect incompatible products.
02
BACK-UP COPIES
CONNECTING TO OTHER DEVICES
Remember to make back-up copies or keep a written
record of all important information.
When connecting to any other device, read its user
guide for detailed safety instructions.
Do not connect incompatible products.
03
04
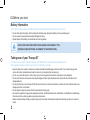
EMERGENCY CALLS
Ensure the phone function of the device is switched on and in service. Press the end key as many times as needed to clear
the display and return to the start screen. Enter the emergency number, then press the send key. Give your location to an
emergency call center. Do not end the call until given permission to do so.
2
01 Before you start
Battery Information
Use only the Thuraya approved battery pack and Thuraya approved chargers for your phone.
'RQRWVKRUWFLUFXLWWKHEDWWHU\6KRUWFLUFXLWLQJWKHWHUPLQDOVPD\GDPDJHWKHEDWWHU\RUWKHFRQQHFWLQJREMHFW
'RQRWH[SRVHWRWHPSHUDWXUHVH[FHHGLQJGHJUHHV&HOVLXV
3OHDVHGLVSRVHRIWKHEDWWHU\LQDFFRUGDQFHZLWKORFDOUHJXODWLRQV
Caution
RISK OF EXPLOSION IF BATTERY IS REPLACED BY AN INCORRECT TYPE.
DISPOSE OF USED BATTERIES ACCORDING TO THE INSTRUCTIONS.
Taking care of your Thuraya XT
Your device is a product of superior design and craftsmanship and should be treated with care.
The suggestions below will help you protect your warranty coverage.
.HHSWKHGHYLFHGU\/LTXLGVRUPRLVWXUHFDQFRQWDLQPLQHUDOVWKDWZLOOGDPDJHHOHFWURQLFFLUFXLWV,I\RXUGHYLFHGRHVJHWZHW
remove the battery immediately and allow the device to dry completely before replacing it.
'RQRWXVHRUVWRUHWKHGHYLFHLQGXVW\RUGLUW\DUHDV,WVPRYLQJSDUWVDQGHOHFWURQLFFRPSRQHQWVFDQEHGDPDJHG
'RQRWVWRUHWKHGHYLFHLQKRWDUHDVH[FHHGLQJGHJUHHV&HOVLXV+LJKWHPSHUDWXUHVFDQVKRUWHQWKHOLIHRIWKHGHYLFHDQG
damage batteries.
'RQRWVWRUHWKHGHYLFHLQFROGDUHDV:KHQWKHGHYLFHUHWXUQVWRLWVQRUPDOWHPSHUDWXUHPRLVWXUHFDQIRUPLQVLGHWKHGHYLFHDQG
damage electronic circuit boards.
'RQRWDWWHPSWWRRSHQWKHGHYLFHRWKHUWKDQDVLQVWUXFWHGLQWKLVJXLGH
8VHRQO\WKHVXSSOLHGRUDQDSSURYHGUHSODFHPHQWDQWHQQD8QDXWKRUL]HGDQWHQQDVPRGL¿FDWLRQVRUDWWDFKPHQWVFRXOGGDPDJH
the device and may violate regulations governing radio devices.
$OZD\VFUHDWHDEDFNXSRIGDWD\RXZDQWWRNHHSVXFKDVFRQWDFWVDQGFDOHQGDUQRWHVEHIRUHVHQGLQJ\RXUGHYLFHWRDVHUYLFH
facility.
3
01 Before you start
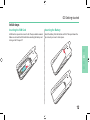
Precautions for Thuraya XT
%HIRUHXVLQJWKLVSKRQHFKHFNZKHWKHUWKHIROORZLQJSDUWVDUHDVVHPEOHGSURSHUO\
- Bottom cover
(DUSKRQHMDFNFRYHU
01
- Battery
02
$QWHQQDMDFNFRYHU
03
04
Note
Ɣ If these parts are not attached properly, this may cause water or dust ingress resulting
in a malfunction.
4
01 Before you start
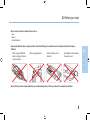
%HIRUHXVLQJWKLVSURGXFWPDNHVXUHWKHIROORZLQJSDUWVDUHFOHDQ,IWKHUHLVDIRUHLJQVXEVWDQFHVXFKDVGXVWRUKDLU
RQDSDUWLWPD\UHGXFHWKHZDWHUSURRISURWHFWLRQRUFDXVHDPDOIXQFWLRQ
- Bottom cover
(DUSKRQHMDFNFRYHU
$QWHQQDMDFNFRYHU
Note
Ɣ If the rubber on any the above parts is damaged, contact the Customer Service Center.
7KHIROORZLQJFLUFXPVWDQFHVPD\FDXVHWKHSKRQHWRPDOIXQFWLRQ
- Prolonged exposure to rain
- Immersing underwater
- Opening, closing, attaching or disassembling a cap or battery with wet hands
- Exposure to sand
5
01 Before you start
'RQRWXVHWKHSKRQHLQKXPLGSODFHVVXFKDV
- Spa
- Sauna
- Humid bathroom
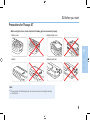
3D\VSHFLDODWWHQWLRQZKHQXVLQJWKHSKRQHXQGHUWKHIROORZLQJFLUFXPVWDQFHVDVWKHZDWHUSURRISURWHFWLRQPD\EH
DIIHFWHG
- When using a USB/Data
cable to charge the phone
or transmit data
- When using earphones
- When the battery is not
inserted
- Extending the antenna when
the phone is wet
01
02
03
04
'RQRWOHWWKHSKRQHEHGLVDVVHPEOHGE\DQXQDXWKRUL]HGSHUVRQDVWKLVPD\UHGXFHWKHZDWHUSURRISURWHFWLRQ
6
01 Before you start
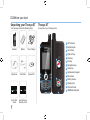
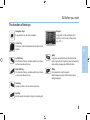
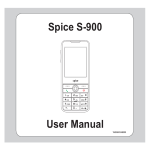
8QSDFNLQJ\RXU7KXUD\D;7
Thuraya XT
Your package contains the following items:
An overview of your Thuraya phone:
1
SAT antenna
(DUSKRQHMDFN
3 Left soft key
4 Right soft key
5 Send key
6 End key
7 Navigation keys
8 Center key
9 Alphanumeric keypad
10 Microphone
11 Battery release
12 &KDUJHUMDFN
13 SIM card holder
14 86%'DWDFDEOHMDFN
1
2
2
Handset
Battery
Travel Charger
11
Earphones
Data Cable
Support-CD
7
3
5
4
8
6
13
9
10
Quick Start
Guide
7
User Manual &
Warranty Card
12
14
01 Before you start
The function of the keys
Navigation Keys
4-way direction key for menu navigation.
Center Key
7KLVNH\LVXVHGWRVHOHFWXQVHOHFWDQGFRQ¿UPPHQX
options.
Left Soft Key
The function of the key correlates with the text shown
on the screen above the key.
Right Soft Key
The function of the key correlates with the text shown
on the screen above the key.
.H\SDG
Long press on 0 key will display the ‘+’
symbol (to enter country calling codes,
e.g. +971…)
01
Key
Long press will switch between Silent & Normal
mode. Opens the list of symbols (special characters)
when writing messages like SMS or E-Mails.
02
03
04
Key
Press and hold to lock the keypad.
Switch between numbers and characters when
writing messages.
6HQG.H\
Accept or initiate a call, access the call history.
(QG.H\
(QGWKHFXUUHQWFRQQHFWLRQRUUHMHFWDQLQFRPLQJFDOO
8
02 Getting started
Introduction
11
Initial steps
Inserting the SIM Card
Inserting the Battery
Turning on the Thuraya XT
Enter your PIN (optional)
Emergency call (SOS)
Setup wizard
Lock/Unlock the keypad
12
12
13
13
13
14
14
Display
Display layout
Display symbols
Key action
Default shortcuts
Useful tips
15
15
16
16
16
Making and receiving calls
Making a call
During a call
High-Penetration Alerting
Conference Calls
17
17
18
18
Write a new Message
Traditional text input
Predictive text input
Change language
Dictionary
19
20
20
20
02 Getting started
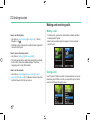
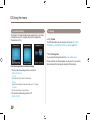
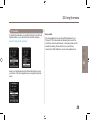
Introduction
Your Thuraya XT Satellite Phone is a powerful and compact phone offering total convenience and mobility across Thuraya’s coverage
DUHD,WVVXSHULRULW\LVUHÀHFWHGLQWKHLQWHJUDWLRQRIWZRWHFKQRORJLHVLQRQHKDQGVHWVDWHOOLWH6$7DQG*36RIIHULQJ\RXDQ
unmatched combination of quality and performance.
7KH7KXUD\D;7XVHVVDWHOOLWHFRPPXQLFDWLRQVZKLFKUHTXLUHVGLUHFWOLQHRIVLJKWWRD7KXUD\DVDWHOOLWH7RDFKLHYHWKHEHVWFRQQHFWLRQ
SOHDVHQRWHWKHIROORZLQJ
- Always keep the antenna fully extended when using the XT.
,QRUGHUWRFRQQHFWWRWKHVDWHOOLWHQHWZRUNWKH;7QHHGVWRUHFHLYHWKH*36ORFDWLRQGDWD¿UVW7KLVPD\WDNHVHYHUDOPLQXWHVLIWKH
product is used in a new location.
+LJKEXLOGLQJVWDOOWUHHVDQGPRXQWDLQVPD\REVWUXFWWKHOLQHRIVLJKWZLWKWKHVDWHOOLWH
Please check the Thuraya coverage map at www.thuraya.com.
11
02 Getting started
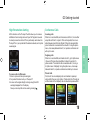
Initial steps
Inserting the SIM Card
Inserting the Battery
A SIM card is required to connect to the Thuraya satellite network.
Make sure to insert the SIM card before inserting the battery and
turning on the Thuraya XT.
,QVHUWWKHEDWWHU\IURPWKHERWWRPHQG¿UVW7KHQSXVKGRZQWKH
top end until you hear it click in place.
01
02
03
04
12
02 Getting started
Turning on the Thuraya XT
3UHVVDQGKROG
XT.
3UHVVDQGKROG
down for 3 seconds to power on the Thuraya
for 3 seconds again to turn the XT off.
Enter your PIN (optional)
7KH3,13HUVRQDO,GHQWL¿FDWLRQ1XPEHUWRGLJLWVLVLQLWLDOO\
supplied together with the SIM card by your service provider and
can be changed at a later stage (see page 54).
(QWHUWKH3,1FRGHXVLQJWKHNH\SDG
Each digit entered is displayed as an ( ).
3UHVVWKHFHQWHUNH\ WRFRQ¿UPWKH3,1
Note
Ɣ If more than 3 wrong PIN codes were entered the phone will be
locked and can only be accessed with the PUK code.
13
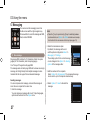
Emergency call (SOS)
Emergency calls are permitted when there is no SIM card in the
SKRQHZKHQWKH6,0FDUGLQWKHSKRQHLVQRWYDOLGRUZKHQ\RX
have a valid SIM card and are on roaming but is not possible with
the selected service provider.
7RPDNHDQHPHUJHQF\FDOO
(SOS) and dial the preset emergency
Press the left soft key
number.
Or:
(QWHUDVSHFL¿FHPHUJHQF\QXPEHUDQGSUHVVWKHFHQWHUNH\ .
The soft key SOS is available even:
Ɣ When the SIM card in your Thuraya XT is not valid.
Ɣ When you have a valid SIM card but no roaming with the
selected service provider is possible.
$IWHUHQWHULQJWKHFRUUHFW3,1FRGH\RXFDQPDNHDQHPHUJHQF\
call in the same way as you make a ‘normal’ call.
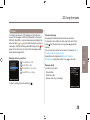
02 Getting started
Some common emergency numbers areDQG
Check with your service provider for local emergency numbers in
your area.
Setup wizard
Use the Setup wizard to set the basic details of the phone when you
initially switch on your Thuraya XT.
If you decide to skip the Setup wizard you can access it later in
WKH6HWWLQJVPHQX)RUPRUHGHWDLOVVHHSDJH
Lock/Unlock the keypad
The keypad may be locked so that a number cannot be
accidentally dialed.
Calls can be received while the phone is locked.
To lock the keypad
/RQJSUHVVWKHKDVK
key
.
01
02
03
04
To unlock the keypad
1. Press the right soft key
3UHVVWKHKDVKNH\
.
within 3 seconds.
14
02 Getting started
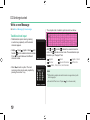
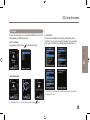
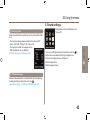
Display
Call status
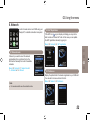
Display layout
Status bar
Network information
Available soft key functions
Status bar:
6KRZVVLJQDOVWUHQJWKEDWWHU\OLIHDQGRWKHULQGLFDWRUVRIWKH
operating condition of the Thuraya XT.
Active call
Mute
Ciphering (call encryption) is off
(This icon appears when encryption between the phone
and network is not available. Users should be cautious
when making calls while in this state.)
*P3563DXVHG
*P356&RQQHFWLQJ
EOLQNLQJLFRQGXULQJD*P356FRQQHFWLRQ
Sending and receiving data from an external device
Phone status
Unread SMS
Silent
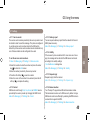
Display symbols
Schedule
Voice mail + SMS
Signal type
Voice mail
Alarm
SMS inbox full
Call divert
SAT
HPA
Soft key commands
Roaming
HPA strength (High-Penetration Alerting, see page 18)
–
15
HPA Low signal - HPA High signal
Ok
List
Speed dial
Edit
Save
Search
Undo
View
02 Getting started
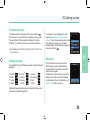
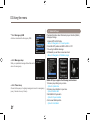
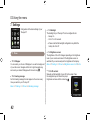
Key action
Useful tips
7KHDFWLRQVRQWKHVFUHHQIRUHDFKNH\SDGLQSXWDUHDVIROORZV
6HOHFW0HQX2SWLRQ
2.6DYH9LHZ6HDUFK«
%DFN&OHDU
How to add a contact
(QWHUWKHQXPEHURQWKHLGOHVFUHHQDQGSUHVVWKHFHQWHUNH\
(
). Choose your save location and add the contact
information.
Left / Right direction
How to delete a contact
Up / Down direction
*RWR0HQX!Contact!Search!6HOHFWWKHFRQWDFWWR
GHOHWH!*RWR2SWLRQPHQX!Delete!Yes (1)
To go back to idle screen while
in another menu
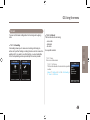
Default shortcuts
The following menus can be accessed directly from the idle
VFUHHQXVLQJWKHQDYLJDWLRQNH\V
2UJDQL]HU3UHVVWKHXSNH\
1DYLJDWLRQ3UHVVWKHOHIWNH\
&RQWDFWVHDUFK3UHVVWKHGRZQNH\
0HVVDJLQJ3UHVVWKHULJKWNH\
+RZWR¿QG\RXUFXUUHQWSRVLWLRQ*36LQIRUPDWLRQ
*RWR0HQX!Navigation!Current Position (1).
7RVDYHWKHFXUUHQW*36LQIRUPDWLRQ*RWR2SWLRQ!Save (1)
!(QWHUQDPH!Ok
7RVHQGWKHFXUUHQW*36LQIRUPDWLRQYLD606*RWR2SWLRQ!
Send via SMS!(QWHUQDPH!(QWHUUHFLSLHQWV!Send
How to set the Alarm
*RWR0HQX!Organizer!Alarm!Alarm1 !6HOHFW
Day and press the center key !(QWHU7LPH!6HOHFW$030
!6HOHFW5LQJWRQH!6HOHFW2Q2II!6DYH
16
01
02
03
04
02 Getting started
Making and receiving calls
Making a call
How to set the ringtone
*RWR0HQX!Sound settings!Ringtone!6HOHFW
5LQJWRQH!2N
1RWHWKDWDJURXSULQJWRQHZLOORYHUULGHWKHEDVLFULQJWRQHIRU
contacts in that group.
7RPDNHDFDOO\RXPXVWEHFRQQHFWHGWRDQHWZRUNDQGKDYH
an adequate SAT signal.
- Enter a phone number using the keypad or choose a saved
contact to call.
How to access the setup wizard
*RWR0HQX!Settings!Setup wizard (7)
7KHVHWXSZL]DUGFDQEHXVHGWRVHWVHYHUDOSKRQHVHWWLQJV
VXFKDV7LPH'DWH$XWRXSGDWHVHWWLQJV7LPH=RQH
/DQJXDJHDQGWRFRS\6,0FRQWDFWV
How to set the network
*RWR0HQX!Network!Network mode!Select
Automatic (1) or Manual!,I0DQXDOLVFKRVHQVHOHFWWKH
preferred network from the next screen.
17
During a call
Your Thuraya XT offers a number of options which are only availDEOHGXULQJDFDOO:KLOHRQDFDOO\RXFDQSXWWKHFDOORQKROGRU
mute the call through the option menu.
02 Getting started
High-Penetration Alerting
Conference Calls
HPA is a feature on the Thuraya XT which allows you to receive a
QRWL¿FDWLRQRIDQLQFRPLQJFDOOHYHQLI\RXU6$7VLJQDOLVWRRZHDN
to actually receive the call itself. This is particularly useful when the
7KXUD\D;7LVLQ\RXUSRFNHWZLWKWKHDQWHQQDVWRZHGDQGRQO\KDV
a weak signal.
Incoming calls
:KHQ$LVLQDFDOOZLWK%DQG$UHFHLYHVDFDOOIURP&$FDQHLWKHU
DFFHSWWKHFDOOIURP&RUUHMHFWLW,IWKHFDOOLVUHMHFWHGWKHFRQYHUVDWLRQEHWZHHQ$DQG%LVQRWDIIHFWHG,IWKHFDOOLVDFFHSWHG%LV
put on hold and A is connected to the call with C. Using the option
PHQX$FDQVZDSEHWZHHQ%DQG&RURSHUDWHDFRQIHUHQFHFDOO
with up to 6 users.
Outgoing calls
:KHQ$LVLQDFDOOZLWK%DQG$ZDQWVWRFDOO&JRWR2SWLRQPHQX
!1HZFDOO7KLVSXWVWKHFDOOZLWK%RQKROGDQG$FDQGLDO&¶V
SKRQHQXPEHU7RLQFOXGH%LQWKHFRQYHUVDWLRQZLWK&$FDQJR
WR2SWLRQPHQX!0XOWLSDUW\8VLQJWKHRSWLRQPHQX$FDQVZDS
EHWZHHQ%DQG&RURSHUDWHDFRQIHUHQFHFDOOZLWKXSWRXVHUV
To receive calls in HPA mode:
1. Move to a place with an improved signal.
2. Fully extend the antenna of your Thuraya XT.
3. As soon as the signal strength is strong enough the HPA
warnings disappear from the display.
.
Now you can accept the call as usual by pressing
Private Calls
,I$%DQG&DUHLQDPXOWLSDUW\FDOODQG$ZLVKHVWRVSHDNSULYDWHO\ZLWK%WKH\FDQJRWR2SWLRQ!3ULYDWHWRGRWKLV7KLVZLOOSXW
all other callers in the multiparty call on hold while A speaks with B.
18
01
02
03
04
02 Getting started
Write a new Message
*RWRMenu!Messaging!New message.
The complete lists of available symbols are shown below.
Traditional text input
7UDGLWLRQDOWH[WLQSXWLVGRQHE\SUHVVLQJ
a number key repeatedly until the desired
character appears.
&DSLWDO 6PDOO &DSLWDO6PDOO DQG
Number
are the available character modes.
Press
to switch between the different
character modes.
3UHVV
to insert a symbol. The most
common symbols can be easily inputted by
pressing the number 1 key.
ABC DEF DQG$EF indicate the selected character
indicates number mode. The available text input
mode. 123
IRUPDWVLQ\RXU7KXUD\D;7DUH
Capital
Small
Number
Special Character
$UDELF)DUVL8UGX+LQGL1XPEHU
Capital + Small
H=L7H[W2Q
Note
Ɣ Differentiating capital and small character is supported only with
Latin languages.
Ɣ 7RVZLWFKH=L7H[WRQRURIISUHVV
19
(for a few seconds).
02 Getting started
Predictive text input
7RDFWLYDWHSUHGLFWLYHWH[WLQSXWH=L7H[WSUHVVDQGKROG
.
This allows you to enter each letter by pressing a key only once.
7KHSKRQHWULHVWR¿QGWKHUHOHYDQWZRUGEDVHGRQDEXLOWLQ
dictionary. You can add up to 60 new words to the dictionary.
Ɣ )RUH[DPSOHWRZULWH³3KRQH´SUHVVIRU3IRUKIRUR
7RFRQ¿JXUHDQLQSXWODQJXDJHRWKHUWKDQ
(QJOLVKJRWRSettings!Language!Input
language2QFHWKHLQSXWODQJXDJHLVVHOHFWHG
ZKHQZULWLQJDPHVVDJH\RXFDQVZLWFK
between English and the selected language by
pressing and holding
.
01
for n and 3 for e.
Change language
7KHVWDQGDUG7KXUD\D;7¿UPZDUHVXSSRUWVV\VWHPDQGLQSXW
ODQJXDJHV
1. English
4. Italian
7. Turkish
10. Arabic
2. French
5. Spanish
8. Russian
11. Hindi
02
Dictionary
*HUPDQ
6. Portuguese
9. Farsi
12. Urdu
03
You can add up to 60 new words into the
H=L7H[WHQJLQHDQGWKHDGGHGZRUGVZLOO
EHFRPHSDUWRIWKHYRFDEXODU\WKDWH=L7H[W
searches and suggests.
The dictionary can be viewed by going to the
2SWLRQPHQXRI$GGFRQWDFW1HZPHVVDJH
RU$GGFDOHQGDU2QFHLQWKHGLFWLRQDU\JRWR
Option!Add to add a new word.
04
$GGLWLRQDOODQJXDJH¿UPZDUHYHUVLRQV6LPSOL¿HG&KLQHVHDQG
Japanese) are available separately.
20
03 Using the menu
1. Contacts
1.1
1.2
1.3
1.4
1.5
1.6
1.7
Search
Add Contact
Group
Speed dial
Copy
Delete
Memory Status
5. Messaging
23
23
24
24
25
25
25
2. Navigation
2.1
2.2
2.3
2.4
2.5
2.6
2.7
Current position
Continuous position
Waypoints
Location tracking
Setting
Helper
Qiblah & Prayer
26
27
28
29
29
30
31
3. Call logs
3.1 Call logs
3.2 Delete
3.3 Call Duration
32
32
32
4. Organizer
4.1
4.2
4.3
4.4
4.5
Alarm
Calendar
Calculator
Stopwatch
World time
33
35
35
36
36
5.1 New message
5.2 Inbox
5.3 Draft
5.4 Sent messages
5.5 Outbox
5.6 Templates
5.7 Settings
5.8 Info message
5.9 Memory status
5.10 Delete messages
6. Sound settings
9. Security
37
38
39
39
39
39
40
41
42
42
42
7. Settings
7.1
7.2
7.3
7.4
7.5
7.6
7.7
7.8
Phone
Call
GmPRS
Language
Time/Date
Data connection
Setup wizard
My numbers
43
44
48
49
50
51
51
51
8. Network
8.1 Network mode
8.2 SAT Registration
8.3 Preference
52
52
52
9.1
9.2
9.3
9.4
9.5
9.6
9.7
9.8
9.9
PIN1 code
Security code
Change codes
Fixed dialing
Closed User Group
IMEI Number
Software version
Soft reset
Factory reset
53
53
54
54
55
56
56
56
56
03 Using the menu
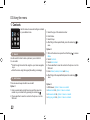
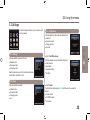
1. Contacts
8VHWKLVPHQXWRVDYHDQGFRQ¿JXUHFRQWDFWV
in your address book.
1.1 Search
Use the search function to look up names in your contact list.
You can either
Ɣ Scroll through the contact list using the up or down navigation
keys .
Ɣ Enter the name using the keypad (like writing a message).
1.2 Add Contact
There are several ways to add a new contact:
Option 1
1.Enter a number while in idle the screen and then save the
number in your contact list by pressing the center key .
2.Choose whether to save the contact on the phone or on the
SIM card.
23
3.Select the type of the entered number.
4.Enter Name.
5.Select Group.
$IWHU¿OOLQJDOOWKHUHTXLUHG¿HOGVSUHVVWKHFHQWHUNH\
save.
to
Option 2
to access
1.While in the idle screen press the left soft key
Menu.
2. Select Contacts.
3. Select Add contact.
4.Choose whether to save the contact on the phone or on the
SIM card.
5. Enter NameNumberE-mail and Group.
$IWHU¿OOLQJDOOWKHUHTXLUHG¿HOGVSUHVVWKHFHQWHUNH\ to
save.
Option 3
,Q606YLHZHUOption > Save as a contact
In Missed callsOLVWOption > Save to contacts
In Received callsOLVWOption > Save to contacts
In Outgoing callsOLVWOption > Save to contacts
03 Using the menu
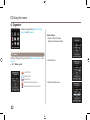
1.3 Group
1.4 Speed dial
An easy way to manage contacts in your
contact list is to use the Group function. This
ZLOODOORZ\RXWRVHWVSHFL¿FULQJWRQHVIRU
every Group and to send SMS to all Group
members.
Functions supported in Group:
1. To change the Group name use
Option > Edit Group Name
7RYLHZWKHFRQWDFWVLQFOXGHGLQDVSHFL¿F*URXSXVH
Option > Group Member
3. To change the Ringtone of the selected Group use
Option > Group ringtone
4. To send an SMS to all members of a Group use
Option > Send SMS
You can use the number keys
for speed dialing. A
phone number needs to be assigned to each number key for this
purpose.
1. Press the left soft key
IURPWKHLGOHVFUHHQVHOHFWContacts
and then select Speed dial.
0RYHWRWKHGHVLUHGVSHHGGLDONH\DQGDVVLJQWKHNH\E\
pressing Option or OK.
01
02
03
Select > Assign
04
3. Search the name or phone number using the menu navigation
NH\VDQGSUHVVOK.
,IPRUHWKDQRQHQXPEHULVVWRUHGVHOHFWWKHGHVLUHGQDPH
using the menu navigation keys.
$IWHUDVVLJQLQJWKHQXPEHUVWRWKHVSHHGGLDONH\V\RXFDQ
FDOOWKHQXPEHUFKDQJHWKHQXPEHURUUHVHWLWVDVVLJQPHQWWR
the speed dial keys.
24
03 Using the menu
To make a call using a speed dial key:
There are two ways of making a call when numbers are assigned
to the speed dial keys.
1. Press the Speed dial key and press
if you are in the Speed
dial menu mode.
2. Press the Speed dial key for at least 2 seconds in the idle
screen mode.
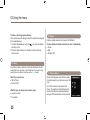
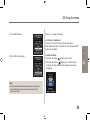
1.6 Delete
Deletes contacts saved on the phone or the SIM card.
Choose whether to delete all contacts at once or individually.
Ɣ Phone
Ɣ SIM
Ɣ Phone & SIM
1.5 Copy
Every time you save a contact you can choose whether to save the
number directly on the phone or on the SIM card. If you want to copy
entries from one location to the other use the Copy function.
Select if you want to use
Ɣ SIM to Phone
Ɣ Phone to SIM
After that you can choose if you want to copy
Ɣ Only one contact
Ɣ All contacts
25
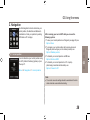
1.7 Memory Status
Shows the total space used and the number
of contacts saved in your phone and your SIM
card.
Up to 255 contacts can be saved in the
phone. The number of contacts that can be
saved in the SIM card varies depending on
the type of SIM card and the service provider.
03 Using the menu
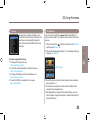
2. Navigation
Use the Navigation function to determine your
FXUUHQWSRVLWLRQWKHGLUHFWLRQDQGGLVWDQFHWR
a destination or track your position by sending
GPS data to a PC or laptop.
2.1 Current position
You can determine your current position using
the GPS (Global Positioning System) of your
Thuraya XT.
Menu > 2. Navigation > 1. Current position
After receiving your current GPS data you can use the
following options:
1. To save your current position as a Waypoint (see page 28) use.
Option > Save
2. To compare your current position with a previously saved
Waypoint (which will give you the relative position) use
Option > Relative position
3. To transmit your current position via SMS use
Option > Send via SMS
4. To transmit your current position to a PC or laptop
(while being connected via data cable) use
Option > Connect to PC
Note
Ɣ The correct connection settings should be selected and the data
cable should be connected before starting.
26
01
02
03
04
03 Using the menu
2.2 Continuous position
While moving with your Thuraya XT you can use the function
Continuous Position to continuously update your GPS position.
7KLVLQFOXGHVODWLWXGHORQJLWXGHDOWLWXGH87&VDWHOOLWHFRXQW\RXU
current speed PDOP (Position Dilution of Precision) and your current
compass direction.
By using the left or right navigation keys you can switch between
data view and compass view.
Menu > 2. Navigation > 2. Continuous position
While retrieving your Continuous Position you can use the
following options:
1. To save your current position as a Waypoint use
Option > Save
2. To compare your current position with a previously saved
Waypoint (which will give you the relative position) use
Option > Relative position
3. To transmit your current position via SMS use
Option > Send via SMS
4. To transmit your current position to a PC or laptop
(while being connected via data cable) use
Option > Connect to PC
Note
Ɣ The correct connection settings should be selected and the data
cable should be connected before starting.
27
03 Using the menu
2.3 Waypoints
You can create waypoints in order to save the GPS data of your
current position or you also can enter a waypoint manually if you
know the GPS data of a particular position.
These waypoints can be used to search for the reference point in
physical space. Up to 200 waypoints can be saved.
1. To show the information of the selected waypoint
Option > View
2. To search the waypoints
Option > Search
3. To generate a new waypoint by specifying the latitude and
longitude information
Option > New
4. To changes the name of the selected waypoint
Option > Rename
5. To delete the selected waypoint
Option > Delete
6. The waypoint and the current location will be compared when
one waypoint is selected.
Two waypoints will be compared when selecting two waypoints.
Option > Relative position
7. To navigate to a selected waypoint.
Option > Start navigation
8. To transmit the selected waypoint via SMS.
Option > Send via SMS
9. To transmit the selected waypoint to a PC or laptop
(while being connected via data cable)
Option > Connect to PC
01
02
03
04
28
03 Using the menu
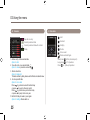
2.4 Location tracking
The function of location tracking shows waypoints in your phone
RUVHQGVWKHPWRD3&DWUHJXODULQWHUYDOVDVFRQ¿JXUHGLQ
Tracking time (2.5.2).
2.5 Setting
Ɣ 2.5.1 Format
The GPS information can be shown in six formats: DD.ddddd
DD/MM/SS.ss DD/MM/SS DD/MM.mm MGRSDQGUTM.
Ɣ 2.5.2 Tracking time
You can select tracking intervals from 1 Second to 1 Hour.
Functions supported in Location tracking:
1. To show the tracked waypoints on your phone
Start > ON (Phone)
1.1 Start
Starts tracking the location of the phone.
1.2 View
Shows the information of saved tracks (up to 10 tracks).
1.3 Delete
Deletes information of saved tracks.
2. To send the tracked way points to a PC
Start > ON (PC)
29
Please note that only 200 waypoints can be saved. (If you select 1
6HFRQGLQWHUYDOWKHWUDFNLQJZLOOVWRSDIWHUVHFRQGV
03 Using the menu
2.6 Helper
In case of an emergency you can send an SMS with your current
*36SRVLWLRQWRSUHGH¿QHGUHFHLYHUV
Ɣ 2.6.1 Activate
Long press the right soft key
to activate the Helper.
Ɣ 2.6.3 Edit
6HWWKHOLVWRISUHGH¿QHGUHFHLYHUVE\HQWHULQJWKHLUSKRQH
numbers. You can enter a number manually or you can select
from your contact list (if you already saved numbers there).
01
02
03
04
Ɣ 2.6.2 Deactivate
,I\RXVHOHFWDQDPHIURPWKHSKRQHERRNDQGVDYHLWWKHQDPHLV
displayed in the list.
To deactivate the HelperVKRUWSUHVVWKHULJKWVRIWNH\
again.
30
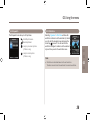
03 Using the menu
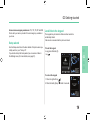
2.7 Qiblah & Prayer
Ɣ 2.6.4 Emergency SMS
Activate or deactivate the Emergency SMS.
Provides information about the Islamic prayer direction (Qiblah)
and prayer timings.
$FTXLUH*36LQ6$7PRGH
Menu > 2.Navigation > 1.Current position
2. Send the GPS position via SMS to 1400 or 1411.
3.You will get a Qiblah message.
4. Afterwards you will have a new menu item:
Menu > 2.Navigation > 7.Qiblah & prayer
Ɣ 2.6.5 Message setup
:ULWH\RXUSUHGH¿QHGPHVVDJHWKDWZLOOEHVHQWLQ
case of an emergency.
Ɣ 2.6.6 Timer setup
&KRRVHWKHIUHTXHQF\RIRXWJRLQJPHVVDJHVLQFDVHRIDQHPHUJHQF\
(every 3 minutes to every 2 hours).
31
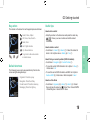
Qiblah & Prayer supports the following sub-functions:
1. Receive prayer timings in your area.
Option > Update time
2. Receive prayer direction in your area.
Option > Muslim faith
3.Set Qiblah & Prayer alarm
Option > Prayer reminder
4. Get a new Qiblah position
Option > Find Qiblah
03 Using the menu
3. Call logs
In the Call logs the history of your phone calls
can be viewed.
3.1 Call logs
Choose whether you want to view:
Ɣ Missed calls
Ɣ Received calls
Ɣ Outgoing calls
Each log can store up to 20 records and shows
call duration and time of call.
3.3 Call Duration
Choose whether to show the call duration for:
Ɣ Last call
Ɣ Received calls
Ɣ Outgoing calls
Ɣ All calls
01
02
Ɣ 3.3.1 GmPRS volume
Choose whether to view the data volume for:
Ɣ Last session
Ɣ Sent data
Ɣ Received data
Ɣ All data
03
04
3.2 Delete
Choose whether to delete:
Ɣ Missed calls
Ɣ Received calls
Ɣ Outgoing calls
Ɣ All
Ɣ 3.3.2 Reset
To delete the entries press Reset and choose if you want to
delete:
Ɣ Voice entries
Ɣ GmPRS entries
Ɣ All entries
32
03 Using the menu
4. Organizer
Contains the applications Alarm, Calendar,
Calculator and Stopwatch.
Alarm settings
1. Select a day of the week
(Multiple selections possible)
4.1 Alarm
:LWK\RXU7KXUD\D;7\RXFDQVHWDWake-up callAlarm 1 and
Alarm 2.
Ɣ 4.1.1 Wake up call
Current Time
Alarm Sound
Alarm Time
Shows the status of Alarm
Shows the status of Auto Power
33
2. Enter the time.
3. Select an alarm sound.
03 Using the menu
4. Turn On/Off the alarm.
6. Press Save to apply the change
Ɣ 4.1.2 Alarm 1 and Alarm 2
To set Alarm 1 or Alarm 2 follow the same instructions.
3OHDVHQRWHWKDWIRU$ODUPDQG$ODUPWKH$XWRSRZHU2Q2II
function is not available.
5.Turn On/Off the Auto Power.
To switch off Alarm:
1. Press the left soft key
01
02
(Stop) to end the alarm.
03
2. Press the right soft key
(Snooze) if you want the alarm
to repeat. The alarm repeat function remains as previously
FRQ¿JXUHG
04
Note
Ɣ ,I$XWR3RZHULVDFWLYDWHGWKHSKRQHZLOOWXUQRQDWWKHDODUP
time automatically to produce the alarm sound even if the
phone is turned off.
34
03 Using the menu
4.2 Calendar
4.3 Calculator
Day with an entry
Currently selected date
Currently selected date with content
Today
1. Add an entry at the selected date
Option > Add
2. View the entry on a selected date
Option > View or press the center key
3. Delete all entries
Option > Delete All
7RGHOHWHHQWULHVE\GDWHSOHDVHXVHWKH'HOHWHLQFDOHQGDUYLHZ
*RWRDVSHFL¿FGDWH
Option > Go to date
Press
to go back one month before today
to jump to the next month.
or press
to go back one year before today
Press
to jump to the next year.
or press
6HWWKH¿UVWGD\RIZHHNLQ\RXUUHJLRQ
Option > Settings Week starts on
35
Add
Subtract
Multiply
Divide
Show result
'HOHWHHQWHUHG¿JXUH
Short-press for Dot (decimal point)
Long-press for % Operation
Press for - (Minus) Operation
03 Using the menu
4.5 World time
4.4 Stopwatch
The Stopwatch can store up to 20 lap times.
Start/Stop/Resume
Back/Lap/Reset
Jump to previous lap time
(if there is any)
Jump to next lap time
(if there is any)
Selecting Organizer > World time will show the
world time in reference to the selected city. Select
your city with the navigation keys and press the
center key to save it. You will see that the
world time is aligned in reference to the selected
city next time you enter the world time menu.
01
02
Note
Ɣ World time is calculated based on the set local time.
Therefore incorrect local time will result in incorrect world time.
36
03
04
03 Using the menu
5. Messaging
You can access the messaging menu from
the idle screen with the right navigation key.
&KRRVHZKHWKHUWRVHQGWKHPHVVDJHDV606
)D[(PDLORU(50(6
5.1 New message
Single page SMS is limited to 70 characters (Arabic Group languages) or 160 characters (Latin Group languages).
Your Thuraya XT supports multi-page SMS.
The message sent with multi-page SMS will be shown as a single
PHVVDJHEXWLWPLJKWEHVSOLWLQWRPXOWLSOHPHVVDJHVLQVRPH
terminals that do not support the concatenated message.
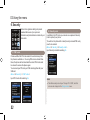
Sending messages
<RXFDQFRPSRVHDWH[WPHVVDJHDQGVHQGWKHPHVVDJHWR
more than one recipient at the same time.
1. Enter the message.
<RXFDQFRPSRVHDPHVVDJHZLWKRQHRILQSXWODQJXDJHV
symbols and numbers from the Option menu.
37
Note
Ɣ 3UHVVWKHNH\IRUV\PEROHQWU\NH\IRUVZLWFKLQJEHWZHHQ
QXPEHUDQGWH[WDQGOption > 9. eZiText automatic word completion function for the convenience of text input (see page 19).
2. Select the transmission option.
%\GHIDXOWWKHPHVVDJHZLOOEHVHQW
ZLWKWKHRSWLRQVFRQ¿JXUHGLQMenu > 5.
Messaging > 7. Settings.
The sending option for the current message
can be changed in the Option > 5. Sending
options of the message editor.
3. Add the numbers of the recipients.
Select Option > 2. Add recipients. The composed message
can be sent to up to 20 recipients simultaneously.
4. Select Option > 1. Send to transmit the
message.
03 Using the menu
5.2 Inbox
Your inbox can store up to 150 messages on the phone and
around 150+ messages on SIM card (depending on the type of
SIM card). New SMS or voicemail messages are indicated in the
status bar with a
or
icon (the latter showing the number of
will
messages). If both phone storage and SIM storage are full
appear on the idle screen (to receive further messages please
GHOHWHVDYHGPHVVDJHV¿UVW
Message status in your Inbox:
Unread SMS on SIM
Read SMS on SIM
Unread SMS in your phone
Read SMS in your phone
To open a message press the center key
Voicemail message
A message that indicates the arrival of a new voicemail.
7RFRQQHFWWRYRLFHPDLOER[WRFKHFNYRLFHPDLOHQWHUDQG
IURPWKHLGOHVFUHHQRUORQJSUHVV
(speed dial
press
number).
The voice mail box number can be saved or changed in Menu >
7. Settings > 2. Call > 4. Voice mail.
6SHHGGLDOFDQEHFRQ¿JXUHGLQMenu > 1. Contacts >
4. Speed dial to assign the number 1 key
to voice mail.
Message details
Use this menu to check
- Time and date
- Sender's number
- Delivery status of your message.
01
02
03
04
.
38
03 Using the menu
5.3 Draft
If you don't want to send a message immediately you can save it
in the Draft folder:
Press Save after writing your message.
Menu > 5. Messaging > 3. Draft
5.4 Sent messages
Successfully transmitted messages are saved in the Sent
messages folder.
You can save up to 150 sent messages on the phone. The
number of sent messages that can be stored on the SIM card
varies depending on the type of SIM card.
Menu > 5. Messaging > 4. Sent messages
39
5.5 Outbox
Messages that are currently sent or were not yet delivered
successfully will be shown in the Outbox$IWHUVHQGLQJWKH\ZLOO
be moved to the Sent messages folder. With the Outbox auto
UHVHQGIXQFWLRQ\RXU7KXUD\D;7DXWRPDWLFDOO\UHVHQGV
messages in your Outbox. Up to 50 messages can be stored in
your Outbox.
Menu > 5. Messaging > 5. Outbox
5.6 Templates
,I\RXDUHIUHTXHQWO\VHQGLQJPHVVDJHVXVLQJWKHVDPHWH[W\RX
FDQSUHGH¿QHPHVVDJHWHPSODWHV
Your Thuraya XT comes with 15 default templates. You can
SUHGH¿QHDGGLWLRQDORZQWHPSODWHV
Menu > 5. Messaging > 6. Templates
03 Using the menu
5.7 Settings
Ɣ 5.7.1 Service center
The service center number provided by the service provider must
EHVWRUHGLQRUGHUWRVHQGWKHPHVVDJH7KHSKRQHLVFRQ¿JXUHG
to use the service center number stored in the SIM card by
GHIDXOW8SWR¿YHVHUYLFHFHQWHUQXPEHUVFDQEHVWRUHGDQGRQO\
RQHRIWKHVHQXPEHUVFDQEHFRQ¿JXUHGWREHXVHG
To set the service center numbers
1. Menu > 5. Messaging > 7. Settings > 1. Service center.
2. Select the location to store the number and press the center
key to enter into Edit screen.
3. Enter the number provided by the service provider.
4. Press the left soft key
to save the number.
5. Move the cursor to the number to be used and press the left
to complete the setting.
soft key
Ɣ 5.7.2 Format
SMS can be sent through Text Fax E-mailRUERMES service
provided by the service provider by changing the SMS format.
Menu > 5. Messaging > 7. Settings > 4. Format
Ɣ 5.7.3 Delivery report
<RXFDQUHTXHVWDGHOLYHU\UHSRUWIURPWKHQHWZRUNIRUWKHVHQW
SMS (network service).
Menu > 5. Messaging > 7. Settings > 3. Delivery report
01
Ɣ 5.7.4 Validity
If the receiver's phone is switched off or in an area out of coverDJHWKHPHVVDJHZLOOEHVWRUHGDWWKH606VHUYHUDQGUHVHQW
according to the validity settings:
1 hour to Maximum storage time
Menu > 5. Messaging > 7. Settings > 4. Validity
Ɣ 5.7.5 Request reply
5HTXHVWDUHSO\IURPWKHUHFHLYHU
Menu > 5. Messaging > 7. Settings > 5. Request reply
Ɣ 5.7.6 Bearer selection
Your Thuraya XT supports two different transmission modes.
The transmission mode is set to SMS server by default. A large
606FDQEHVHQWPRUHHI¿FLHQWO\E\VHOHFWLQJ*P356PRGHRQ
a network that supports GmPRS.
Menu > 5. Messaging > 7. Settings > 6. Bearer selection
40
02
03
04
03 Using the menu
5.8 Info message
Info message is a network service. It offers wide topics such as
ZHDWKHUWUDI¿FQHZVÀDVKHWFLQWH[WPHVVDJHIRUP<RXFDQ
FKRRVHVSHFL¿FWRSLFVDFFRUGLQJWR\RXULQWHUHVW
To save a Topic
Info messages can be received by setting Topic.
1. Menu > 5. Messaging > 8. Info message > 4. Topics.
2. Option > Insert.
(QWHUWKHFKDQQHO,'WRSLFFDWHJRU\LGHQWL¿HUSURYLGHGE\WKH
VHUYLFHSURYLGHUDQGSUHVVWKHOHIWVRIWNH\ .
4. Enter topic title and select Option > 1. Save to save the topic.
41
To receive an Info message
In the Info message menu:
1. Status is set to Off by default. Set the Status to On.
2. Select Language and move the cursor over
WKHODQJXDJHWRUHFHLYHIURPWKHFRQ¿JXUHG
7RSLFDQGSUHVVWKHOHIWVRIWNH\
to make
a selection.
3. Select TopicsHQWHUWKHFKDQQHO,'DQG
WLWOHWRUHFHLYHDQGVDYH
6HOHFWIURPWKHOLVWRIJHQHUDWHG7RSLFVDQGFRQ¿UPWKHWRSLF
through Option > 5. Mark/unmark.
03 Using the menu
6. Sound settings
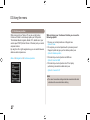
5.9 Memory status
Shows the total and the used memory of the phone and the SIM
card.
- The maximum storage space available in the phone is 450
,QER['UDIW6HQW2XWER[
- The maximum number of messages on the
SIM card depends on your SIM type.
Menu > 5. Messaging > 9. Memory status
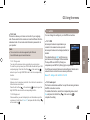
&RQ¿JXUDWLRQRIDOOVRXQGVHWWLQJVLQ\RXU
Thuraya XT.
1. Choose your Ringtone and select it with the center key
2. Adjust the volume with the left of right navigation key.
3. Choose the ringing type of your Ringtone.
4. Set the keypad tone.
5. Set the keypad volume.
.
01
02
03
04
5.10 Delete messages
Deletes all the messages in a selected folder. All messages can
be easily deleted by pressing the center key .
Menu > 5. Messaging > 7. Settings > 10. Delete messages
42
03 Using the menu
7. Settings
&RQ¿JXUDWLRQRIWKHEDVLFVHWWLQJVRI\RXU
Thuraya XT.
7.1 Phone
Ɣ 7.1.1 Wallpaper
You can select your choice of Wallpaper to use as the background
of your idle screen. Navigate with the left or right navigation key
and select your desired Wallpaper with the center key .
Ɣ 7.1.2 Greeting message
Set the Greeting message that will appear on the screen every
time you switch on your Thuraya XT.
Menu > 7. Settings > 1. Phone > 2. Greeting message
43
Ɣ 7.1.3 Backlight
7KHEDFNOLJKWRI\RXU7KXUD\D;7FDQEHFRQ¿JXUHGWREH
- Always On
- On for 15 or 30 seconds
Ɣ 3OHDVHQRWHWKDWWKHEDFNOLJKWFRQ¿JXUDWLRQPD\DIIHFWWKH
battery life of the XT.
Ɣ 7.1.4 Brightness sensor
The brightness of the LCD changes depending on the brightness
level of your current environment. If the Brightness sensor is
switched off you can manually set the brightness of the display.
Menu > 7. Settings > 1. Phone > 4. Brightness sensor > Off or On
Ɣ 7.1.5 LCD contrast
0DQXDOO\VHWWKHEDFNOLJKWRI\RXU/&'LQ¿YHVWHSV3UHVV
the navigation keys to choose the proper
brightness and save with the center key .
03 Using the menu
7.2 Call
<RXFDQVHWWKHEDVLFFRQ¿JXUDWLRQIRULQFRPLQJDQGRXWJRLQJ
calls.
Ɣ 7.2.1 Call waiting
Call waiting allows you to receive an incoming call during an
active call by either holding or ending the active call to receive the
ZDLWLQJFDOO,I\RXZDQWWRXVHWKLVIXQFWLRQ\RXPXVWVXEVFULEH
to the corresponding service provided by the service provider.
Ɣ 7.2.2 Call divert
This function diverts incoming:
- voice calls
- data calls
- fax calls
WRDVSHFL¿FQXPEHU
01
02
7.2.2.1 Voice
Set voice call diversions
7.2.2.1.1 All Voice:
7KLVIXQFWLRQGLYHUWVDOOYRLFHFDOOVWRDVSHFL¿F
number.
Menu > 7. Settings > 2. Call > 2. Call diverting >
1. Voice > 1. All voice
03
04
44
03 Using the menu
7.2.2.1.2 Busy:
Incoming calls will be diverted while engaging in another call.
Choose whether to divert the call to your voice mailbox or set a
VSHFL¿FQXPEHU
Menu > 7. Settings > 2. Call > 2. Call diverting > 1. Voice > 2. Busy
7.2.2.1.3 No reply:
Incoming calls will be diverted when you don't answer the call.
Select how long you want to wait until the call will be diverted
RUVHF&KRRVHZKHWKHUWRGLYHUWWKHFDOOWR\RXUYRLFH
PDLOER[RUVHWDVSHFL¿FQXPEHU
Menu > 7. Settings > 2. Call > 2. Call diverting > 1. Voice >
3. No reply
7.2.2.1.4 Unreachable:
Incoming calls will be diverted when your Thuraya XT is switched
off or outside of the coverage area. Choose whether to divert the
FDOOWR\RXUYRLFHPDLOER[RUVHWDVSHFL¿FQXPEHU
Menu > 7. Settings > 2. Call > 2. Call diverting > 1. Voice >
4. Unreachable
7.2.2.1.5 Clear divert:
Deactivates all divert functions for incoming calls.
Menu > 7. Settings > 2. Call > 2. Call diverting > 1. Voice >
5. Clear divert
45
7.2.2.2 All fax:
It diverts all incoming fax calls.
Menu > 7. Settings > 2. Call > 2. Call diverting > 2. All fax
7.2.2.3 All data:
Diverts all incoming data.
Menu > 7. Settings > 2. Call > 2. Call diverting > 3. All data
7.2.2.4 Deactivates all:
Clear all divert functions.
Menu > 7. Settings > 2. Call > 2. Call diverting > 4. Deactivates all
03 Using the menu
Ɣ 7.2.3 Call barring
7RXVHWKHEDUULQJVHUYLFH\RXPXVWNQRZWKHEDUULQJSDVVZRUG
for the corresponding SIM and you must be subscribed to the
corresponding service provided by the service provider.
7.2.3.1 Outgoing calls
This function is used to restrict all outgoing calls.
Menu > 7. Settings > 2. Call > 3. Call barring > 1.
Outgoing calls
7.2.3.2 International calls
This function is used to restrict international
outgoing calls. To activate or deactivate the funcWLRQHQWHUWKHIRXUGLJLWEDUULQJFRGHDQGSUHVV
to connect to the network to complete the setting.
the center key
Menu > 7. Settings > 2. Call > 3. Call barring > 2. International calls
7.2.3.4 Incoming calls
This function prevents all incoming calls.
7RDFWLYDWHRUGHDFWLYDWHWKHIXQFWLRQHQWHUWKHIRXUGLJLW%DUULQJ
FRGHDQGSUHVVWKHFHQWHUNH\ to connect to the network to
complete the setting.
Menu > 7. Settings > 2. Call > 3. Call barring > 4. Incoming calls
01
02
7.2.3.5 Incoming calls when abroad
This function prevents incoming calls from foreign countries.
Menu > 7. Settings > 2. Call > 3. Call barring >
5. Incoming calls when abroad
03
04
7.2.3.6 Clear barring
Clears call restriction functions.
Menu > 7. Settings > 2. Call > 3. Call barring > 6. Clear barring
7.2.3.3 International calls except to home country
This function restricts international calls except to an assigned home
country.
Menu > 7. Settings > 2. Call > 3. Call barring > 3. International calls
except to home country
46
03 Using the menu
Ɣ 7.2.4 Voice mail
Set a new voice mail number
Menu > 7. Settings > 2. Call > 4. Voice mail
Ɣ 7.2.5 Call answering
Set your preferred answering method when there is an incoming
call.
- Choose if you want to automatically accept a call after 5 or
10 seconds.
- Choose if you want to accept a call either with the center key
(default) or by pressing any key.
Menu > 7. Settings > 2. Call > 5. Call answering
Ɣ 7.2.6 DTMF tone
6HWWKH'70)WRQHIRU$56FDOO7RHQDEOHWKHIXQFWLRQVHOHFW
On and press the center key to complete the setting.
Menu > 7. Settings > 2. Call > 6. DTMF tone
47
Ɣ 7.2.7 Auto redial
If the number you are trying to call is busy you can activate to
automatically redial the number.
Menu > 7. Settings > 2. Call > 7. Auto redial
Ɣ 7.2.8 Send own number
Choose whether you want to send your own number to the
receiver when making a call.
Menu > 7. Settings > 2. Call > 8. Send own number
Note
Ɣ Please note that these settings cannot be changed with some
Service Providers.
03 Using the menu
7.3 GmPRS
Ɣ 7.2.9 Cost
This service allows you to have cost control of your outgoing
calls. Please note that the actual cost could be different from the
calculated costs. For accurate cost information please refer to
your operator.
Note
Ɣ The cost control is a function supported by the SIM card.
Some SIM cards may not have this function.
7.2.9.1 Charge rate
You can set the price per minute according to your price plan.
To enter the price you need your PIN2 code included with your SIM
card packagings. Press the left soft key
or the center key
and enter your four-digit SIM PIN2 code to use the corresponding
function.
7.2.9.2 Cost limit
Allow you to set a maximum cost limit. Once this limit is reached no
further calls can be initiated.
Press the left soft key
or the center key
and enter your four
digit SIM PIN2 code to use the corresponding function.
7.2.9.3 Display cost
Choose whether you want to display the cost information upon the
conclusion of calls. Select On or OffDQGSUHVVWKHOHIWVRIWNH\
or the center key .
You can change the settings of your GmPRS connections.
Ɣ 7.3.1 APN
$FFHVVSRLQWQDPHLVUHTXLUHGZKHQ\RX
connect to the network service provider.
$FFHVVSRLQWQDPHFDQEHFKDQJHGDGGHGRU
deleted.
The default setting is GETDQGWKLVDFFHVV
point name can be changed. Other available
Thuraya APNs are GETLC (offering low
compression) and GETHC (offering high compression).
8SWRWKUHHDFFHVVSRLQWQDPHVFDQEHFRQ¿JXUHG6HOHFWRQHWR
use when there is more than one access point name.
Menu > 7. Settings > 3. GmPRS > 1. APN
Ɣ 7.3.2 Auto reject
This function determines whether to reject the incoming call when
GmPRS connection is active.
7RDFWLYDWHWKLVIXQFWLRQVHOHFWWKHFRUUHVSRQGLQJPHQXVHOHFW
OnDQGSUHVVWKHOHIWVRIWNH\
or the center key to
complete the setting.
48
01
02
03
04
03 Using the menu
7.4 Language
You can set the:
Ɣ System language and the
Ɣ Input Language
of your Thuraya XT. The System language affects the menus in
\RXUSKRQHZKHUHDVWKH,QSXWODQJXDJHDOORZV\RXWRHQWHU7H[W
(e.g. when writing messages) in your preferred language style
and use the included dictionaries and the Predictive Text feature
eZiText.
Menu > 7. Settings > 4. Language
To change the language
Choose your desired language by navigating with the left or right
navigation keys and select with the center key .
Menu > 7. Settings > 4. Laguage
System language
[English]
49
Input language
[French]
03 Using the menu
7.5 Time/Date
7RVHWWKHWLPHDQGGDWH\RXFDQHLWKHUFKRRVHWRXVHWKH$XWR
Update function or you can set the time and date manually.
Menu > 7. Settings > 5. Time/Date
Auto update
The Auto update service uses the GPS information of your
7KXUD\D;7)RUVRPHDUHDVZLWKGHYLDWLQJWLPH]RQHVWKH
correct time cannot be determined. In this case please use the
manual time setting. Please note that you need to have
connection to GPS satellites to use the Auto update service.
01
02
03
04
Select your desired date and time format that shall be used in
your phone. Press the navigation keys to navigate through the
menu.
50
03 Using the menu
7.6 Data connection
7.8 My numbers
Data connection port for using GPS data or software upgrade can
EHFRQ¿JXUHG3RUWRSWLRQVDUHUSB port and Serial port. When the
USBSRUWLVVHOHFWHGWKHVSHHGLVVHWWRWKHGHIDXOWYDOXHDQGFDQQRW
be changed. The speed of the Serial port can be set to one of 10
DYDLODEOHVSHHGVDQGWKHGHIDXOWYDOXHLVAutomatic speed.
0\QXPEHUVIXQFWLRQLVWRUHJLVWHUWKH9RLFHQXPEHU)D[QXPEHU
and Data number on your current SIM card.
Menu > 7. Settings > 8. My numbers
Menu > 7. Settings > 6. Data connection
7RVHWWKH9RLFHQXPEHUHQWHUWKHQXPEHULQWKHHGLWRUDQGSUHVV
the left soft key
or the center key to complete the settings.
Press the navigation keys to select Data portDQGDOVRBaud rate
when Serial port is selected. Press the left soft key
or the
center key to complete the setting.
7.7 Setup wizard
:KHQWKHSKRQHLVVZLWFKHGRQIRUWKH¿UVWWLPHWKHVHWXSZL]DUG
DOORZV\RXWRFRQ¿JXUHWKHEDVLFSKRQHVHWWLQJVOLNHTime/Date
Location, Language and gives you the possibility to copy the
contacts stored on the SIM card to the phone memory.
Menu > 7. Settings > 7. Setup wizard
51
Ɣ 7.8.1 Voice
Ɣ 7.8.2 Fax
7RVHWWKH)D[QXPEHUHQWHUWKHQXPEHULQWKHHGLWRUDQGSUHVV
or the center key to complete the settings.
the left soft key
Ɣ 7.8.3 Data
7RVHWWKH'DWDQXPEHUHQWHUWKHQXPEHULQWKHHGLWRUDQGSUHVV
the left soft key
or the center key to complete the settings.
03 Using the menu
8. Network
In order to make calls or send SMS using your
7KXUD\D;7DVDWHOOLWHFRQQHFWLRQLVUHTXLUHG
8.2 SAT Registration
If the SAT icon
on your display is blinking you may not be
able to make or receive SAT calls. In this case you can update
the SAT registration manually by going to:
Menu > 8. Network > 2. SAT registration
01
8.1 Network mode
Choose if you want to select the network
automatically from a preferred list on the
SIM card or manually from a list of available
networks.
Menu > 8. Network > 1. Network mode >
1. Automatic or > 2. Manual
Note
02
03
04
8.3 Preference
Display the preferred list of networks registered on your SIM card.
You can add or remove entries in this list.
Menu > 8. Network > 3. Preference
Ɣ It is recommended to use the automatic mode.
52
03 Using the menu
9. Security
This function organizes settings to prevent
unwanted disclosure of your personal
information and protects basic contents of your
phone calls.
9.1 PIN1 code
Choose whether the PIN code needs to be entered every time
the phone is switched on. If a wrong PIN code is entered three
WLPHVWKHSKRQHZLOOEHORFNHGDQGWKHFRUUHFW38.FRGHPXVW
be entered to access the phone again.
<RXUHFHLYHG\RXU3,1DQG\RXU38.FRGHVWRJHWKHUZLWK\RXU
SIM card.
Menu > 9. Security > 1. PIN1 code >
Input PIN1 code after selecting On
9.2 Security code
In addition to the PIN code you can also use a personal Security
code to protect your phone.
To switch on the phone both codes (Security code and PIN code)
need to be entered.
Menu > 9. Security > 2. Security code >
Input Security code after selecting On
Note
Ɣ 7KHLQLWLDOVHFXULW\FRGHRI\RXU7KXUD\D;7LVµ¶DQGWKLV
code can be changed in the Change codes menu.
53
03 Using the menu
9.3 Change codes
Choose whether to change:
Ɣ PIN1 code
Ɣ PIN2 code
Ɣ Security code
Ɣ Barring code
(used for call barring functions, please check with your operator)
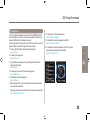
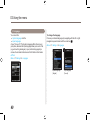
9.4 Fixed dialing
Fixed dialing is a function where only the
SUHGH¿QHGQXPEHUVFDQEHFDOOHG
01
02
Ɣ 9.4.1 Show list
03
Shows the numbers or names registered in the
Fixed dialing.
Menu > 9. Security > 4. Fixed dialing > 1. Show list
04
54
03 Using the menu
9.5 Closed User Group
Ɣ 9.4.2 Add new
To add a new number in Fixed dialing:
(QWHU3,1FRGHDQGFRQ¿UPE\SUHVVLQJWKH
center key .
2. Enter the name or phone number.
.
3. Save by pressing the left soft key
Menu > 9. Security > 4. Fixed dialing >
2. Add new
Ɣ 9.4.3 On/Off
To set the Fixed dialing function on or off.
Menu > 9. Security > 4. Fixed dialing > 3. On/off
55
Closed User Group is a function to form a
calling group.
7RXVHWKH&8*IXQFWLRQSOHDVHFRQWDFW\RXU
service provider for details.
Menu > 9. Security > 5. Closed user group
03 Using the menu
9.6 IMEI Number
(DFK7KXUD\D;7KDVLWVRZQXQLTXH,0(,
Number.
You can check the IMEI number of your
Thuraya XT by selecting
Menu > 9. Security > 6. IMEI number
9.8 Soft reset
You can reset your Thuraya XT without
losing your personal settings like contacts or
messages.
Menu > 9. Security > 8. Soft reset
01
02
03
9.7 Software version
You can check the Software version of your
Thuraya XT by selecting
Menu > 9. Security > 7. S/W version
9.9 Factory reset
04
The factory reset will restore the settings as
the phone was shipped. You will lose your
personal settings like contact and messages
saved on the phone.
Menu > 9. Security > 9. Factory reset
56
04 Additional Information
Security code
59
Troubleshooting
60
PIN & PUK
59
Certification information (SAR)
61
PIN2 & PUK2
59
FCC Compliance Statement
62
Barring code
59
Certification information (IP54, IK03)
63
04 Additional Information
PIN & PUK
There are several access codes that are used in your Thuraya
XT and your SIM card. These codes help you protect the phone
against unauthorized use.
Important! Avoid using access codes resembling emergency
numbers, such as 112, so that you do not accidentally dial an
emergency number.
Security code
The phone lock feature uses the security code to protect your
phone against unauthorized use. The phone password is supplied
with the phone and is preset to “0000” at the factory.
Security code: Security code (4-8 digits) is to lock the phone,
and the phone will be locked automatically after reboot when the
security is set to ON. You can use the phone after entering the
security code (see page 53).
Pin code: After Pin1 code (4-8 digits) is set to ON, Pin code lock
is set automatically after reboot. You can use the phone after
entering the Pin code (see page 53).
59
7KH3,13HUVRQDO,GHQWL¿FDWLRQ1XPEHULVWRGLJLWV,W
protects your SIM card against unauthorized use. It is usually
supplied with the SIM card. Entering wrong PIN code 3 times
will lock the SIM card and to unlock, PUK code must be entered.
Your PUK code is normally supplied with the SIM card.
(see page 53)
PIN2 & PUK2
These codes are required with settings related to PIN2 Network.
PIN2 must be entered for Fixed dialing. As with PIN code,
entering wrong PIN2 code 3 times will lock the SIM card and to
unlock, PUK2 code must be entered. The PUK2 code is normally
supplied with SIM card.
Barring code
It is a network code for call restriction functions. Barring code
varies with different service providers and should be supplied by
your service provider when you start using the phone. When the
barring code is lost, please contact your service provider.
04 Additional Information
Troubleshooting
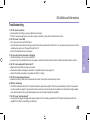
1. The XT doesn't switch on
Ɣ Check whether the battery is properly attached and charged.
Ɣ If the XT cannot be switched on even with a charger connected, contact the Customer Service Center.
2. The XT shows “Insert SIM”
Ɣ Try to remove and reinsert the SIM card.
Ɣ Your SIM card must be active. Entering a wrong PUK code may deactivate the SIM card. If you are abroad, roaming service must be
enabled when using a non-Thuraya SIM card in the XT.
Ɣ Check if the SIM card is dirty or damaged.
3. The security code has been lost or forgotten
Ɣ The factory setting of the security code is 0000.
Ɣ If you have lost your individual Security code, please contact the Customer Service Center. Warranty information will be needed.
4. The XT is not sending GPS data to the PC
Ɣ Make sure the data cable is properly connected.
Ɣ Check which data port settings are selected. For detailed instructions (see page 51).
Ɣ Check if the data baud setting is compatible with the PC or laptop.
5. The XT has been dropped in water
Ɣ Separate the battery. After all the components have dried, contact the Customer Service Center.
*36LFRQLVÀDVKLQJ
Ɣ 7KH*36LFRQÀDVKHVZKHQWKH;7¶VORFDWLRQLQIRUPDWLRQQHHGVWREHXSGDWHG7KLVLVGRQHDXWRPDWLFDOO\RQFHWKH;7LVSRZHUHG
on and an update is needed. Fully extend the antenna and ensure the line of sight to the satellite is not obstructed by high buildings,
WUHHVDQGPRXQWDLQV7KHLFRQZLOOVWRSÀDVKLQJDVVRRQDVWKHORFDWLRQXSGDWHLVFRPSOHWHG
7. The XT shows "position too old"
Ɣ <RXPD\VHHWKLVSRSXSPHVVDJHZKLOHWU\LQJWRPDNHDFDOO7KLVXVXDOO\PHDQVWKDWWKH;7¶VORFDWLRQLQIRUPDWLRQQHHGVWREH
XSGDWHG,IWKH*36LFRQLVÀDVKLQJVHHDERYH
60
01
02
03
04
04 Additional Information
&HUWL¿FDWLRQLQIRUPDWLRQ6$5
7+,6'(9,&(0((76,17(51$7,21$/*8,'(/,1(6)25(;32685(725$',2:$9(6
Your wireless Thuraya XT phone is a radio transmitter and receiver. It is designed and manufactured not to exceed the limits for
exposure to radio frequency (RF) recommended by international guidelines (ICNIRP). These limits are part of comprehensive guidelines
and establish permitted levels of RF energy for the general population. The guidelines include a substantial safety margin designed to
assure the safety of all persons, regardless of age and health.
7KHH[SRVXUHJXLGHOLQHVIRUPRELOHGHYLFHVHPSOR\DXQLWRIPHDVXUHPHQWNQRZQDVWKH6SHFL¿F$EVRUSWLRQ5DWHRU6$57KH6$5
limit stated in the ICNIRP guidelines is 2.0 watts/kilogram (W/kg) averaged over ten grams of tissue. Tests for SAR are conducted using
VWDQGDUGRSHUDWLQJSRVLWLRQVZLWKWKHGHYLFHWUDQVPLWWLQJDWLWVKLJKHVWFHUWL¿HGSRZHUOHYHOLQDOOWHVWHGIUHTXHQF\EDQGV7KHDFWXDO6$5
level of an operating device can be below the maximum value because the device is designed to use only the power required to reach the
network. That amount changes depending on a number of factors such as how close you are to a network base station. The highest SAR
value under the ICNIRP guidelines for use of the device at the ear is 0.324W/kg
This satellite mobile phone cannot be used in a body-worn position because in this position the phone cannot properly receive and
transmit the satellite signal therefore in this mode of operation is not practical and restricted in use.
Use of device accessories and enhancements may result in different SAR values. SAR values may vary depending on national
reporting and testing requirements and the network band. Additional SAR information may be provided under product information at
www.apsi.co.kr
61
04 Additional Information
)&&&RPSOLDQFH6WDWHPHQW
Your mobile device is also designed to meet the requirements for exposure to radio waves established by the Federal Communications
Commission (USA) and Industry Canada. These requirements set a SAR limit of 1.6W/kg averaged over one gram of tissue. Although
not intended to support operations when body-worn (in this position the phone cannot properly receive and transmit the satellite signal
therefore in this mode of operation is not practical) the use of body-worn accessories is limited to belt-clips, holsters, or similar accessories that have no metallic component in the assembly and which provide at least 0.5cm separation between the device, including its
antenna, and your body.
Caution
7KLVHTXLSPHQWJHQHUDWHVRUXVHVUDGLRIUHTXHQF\HQHUJ\&KDQJHVRUPRGL¿FDWLRQVWRWKLVHTXLSPHQWPD\FDXVH
KDUPIXOLQWHUIHUHQFHXQOHVVWKHPRGL¿FDWLRQVDUHH[SUHVVO\DSSURYHGLQWKHLQVWUXFWLRQPDQXDO7KHXVHUFRXOGORVH
WKHDXWKRULW\WRRSHUDWHWKLVHTXLSPHQWLIDQXQDXWKRUL]HGFKDQJHRUPRGL¿FDWLRQLVPDGH
RoHS
This product is in compliance with EU RoHS Directives and manufactured using lead-free solder paste and parts.
62
01
02
03
04
04 Additional Information
&HUWL¿FDWLRQLQIRUPDWLRQ,3,.
<RXU7KXUD\D;7KDVDFTXLUHGWKHGXVWSURWHFWLRQFHUWL¿FDWLRQ,3[ZDWHUSURRIFHUWL¿FDWLRQ,3[
DQGLPSDFWSURWHFWLRQFHUWL¿FDWLRQ,.WRJLYH\RXWKHPRVWUXJJHG7KXUD\DSKRQHHYHU
'XVW3URWHFWLRQ,3[
This unit is graded at dust protection level 5 which contributes to phone reliability in dusty environments.
:DWHUSURRI,3[
This unit is graded at waterproof level 4 providing protection against splashing water.
,PSDFW3URWHFWLRQ,.
This unit is graded at impact protection level 3 ensuring your Thuraya XT can withstand impact of up to 0.35 joule.
63
/,0,7(':$55$17<
7KXUD\D;76$7(//,7(+$1'+(/'3+21(
7KLV/LPLWHG:DUUDQW\LVSURYLGHGWRWKHRULJLQDOHQGXVHUSXUFKDVHUWKH¶Buyer¶RIDQ\QHZ7KXUD\D;76DWHOOLWH
Handheld Phone.
This Limited Warranty is non-transferable.
:DUUDQW\&RYHUDJHDQG6HUYLFH
7KXUD\DZDUUDQWVDOOQHZ7KXUD\D;76DWHOOLWH+DQGKHOG3KRQHVWKH¶Product¶XQGHUQRUPDOXVHDQGZHDUWREHIUHH
from defects in material and workmanship for a period of one (1) year from the date of purchase by the original Buyer
WKH¶:DUUDQW\3HULRG¶,IXQGHUQRUPDOXVHDQGZHDUWKH3URGXFWEHFRPHVGHIHFWLYHLQPDWHULDOVRUZRUNPDQVKLS
DQGLVUHWXUQHGDW%X\HU¶VH[SHQVHWRD7KXUD\D$XWKRUL]HG6HUYLFH&HQWHUGXULQJWKH:DUUDQW\3HULRGWKH3URGXFW
ZLOOEHUHSDLUHGRUUHSODFHGDW7KXUD\D¶VROHDQGH[FOXVLYHRSWLRQDQGDWQRFKDUJHWR%X\HU%X\HUZLOOEHUHTXLUHG
to provide reasonable proof of date of purchase. Reconditioned replacement components, parts, units or materials
may be used if the Product is repaired or replaced. Costs incurred in the removal, de-installation or reinstallation of the
Product are not covered.
7+,6/,0,7(':$55$17<'2(6127&29(5$1'7+85$<$:,//127%(5(63216,%/()257+(
)2//2:,1*
This Limited Warranty will be void in its entirety if the Product is serviced by anyone other than Thuraya or a Thuraya
$XWKRUL]HG6HUYLFH&HQWUH%X\HU¶VVROHDQGH[FOXVLYHUHPHG\VKDOOEHWKHUHSDLURUUHSODFHPHQWRIWKHGHIHFWLYH
SURGXFWDVVSHFL¿FDOO\GHVFULEHGDERYH7KXUD\DQHLWKHUDVVXPHVQRUDXWKRUL]HVDQ\$XWKRUL]HG6HUYLFH&HQWUHRU
any other person or entity to assume any other obligation or liability beyond that which is provided for in this Limited
Warranty.
This Limited Warranty is conditioned upon proper use of the Product and does not cover the following:
products or accessory equipment not manufactured or provided by Thuraya
failures or defects caused by misuse, abuse, accident, alteration, dampness, sand, unusual physical, electrical or
electromechanical stress or neglect
unauthorized installation, removal or repair
ailure to follow instructions
)LUHÀRRGRURWKHUQDWXUHFDXVHGDFFLGHQWV
spills of food or liquids; moisture
normal wear and tear
scratches, dents and cosmetic damage
improper installation, maintenance or improper storage
operation or repair; performance of the Product when used in combination with other products or equipment not
manufactured or provided by Thuraya
payments for labor or service to representatives or service centers not authorized by Thuraya.
This limited Warranty of the Product does not cover the operation, availability, coverage, range or grade of service
provided by the satellite systems.
/LPLWDWLRQRI/LDELOLW\
THIS LIMITED WARRANTY IS IN LIEU OF ALL OTHER WARRANTIES, WHETHER EXPRESSED, IMPLIED OR
STATUTORY, INCLUDING, WITHOUT LIMITATION, THE IMPLIED WARRANTIES OF MERCHANTABILITY AND
FITNESS FOR A PARTICULAR PURPOSE. THURAYA SHALL NOT BE LIABLE FOR DAMAGES IN EXCESS OF
THE PURCHASE PRICE OF THE PRODUCT, LESS REASONABLE AMOUNT FOR USE AND WEAR, OR FOR
ANY INCIDENTAL, SPECIAL, PUNITIVE OR CONSEQUENTIAL DAMAGES OF ANY NATURE WHATSOEVER,
OR FOR ANY DELAYS, LOSS OF USE, TIME, PROFITS, REVENUE OR SAVINGS, ANY COMMERCIAL LOSS,
,1&219(1,(1&( 0,/($*( '$0$*( 72 %8<(5¶6 25 72 27+(5 3(5621¶6 9(+,&/( 25 $1< 27+(5
PROPERTY, ARISING FROM THE USE OR INABILITY TO USE THE PRODUCT, OR OTHERWISE FOR ANY
FAILURE TO PERFORM.
All liability and obligations of Thuraya under this Limited Warranty shall terminate upon the expiration of the
applicable Warranty Period provided herein. This Limited Warranty sets forth the entire responsibility of Thuraya with
respect to the Product. There are no other liabilities of Thuraya arising from the sale of the Product whether based
on warranty, contract, negligence or other theories of liability. No employee, agent, dealer, representative, distributor,
service partner or reseller is authorized to modify or extend this Limited Warranty or to make binding representations,
whether in advertising, presentations or otherwise, in the name and/or on behalf of Thuraya regarding the Product or
this Limited Warranty.
In no event shall Thuraya liability exceed the cost of correcting defects as provided herein.
7KLV/LPLWHG:DUUDQW\JLYHVVSHFL¿FOHJDOULJKWVWR%X\HUDQG%X\HUDOVRPD\KDYHRWKHUULJKWVZKLFKPD\YDU\
IURPMXULVGLFWLRQWRMXULVGLFWLRQDVWKLV/LPLWHG:DUUDQW\GRHVQRWDIIHFWWKH%X\HU¶VOHJDOULJKWVXQGHUWKHUHOHYDQW
DSSOLFDEOHQDWLRQDOODZVLQUHVSHFWRIWKHVDOHRIFRQVXPHUJRRGVRUWKH%X\HU¶VULJKWVYLVjYLVWKHUHWDLOVHOOHU
dealer of the Product.
0984 $VLD3DFL¿F6DWHOOLWHFRPPXQLFDWLRQV,QF$36,DFRPSDQ\GXO\LQFRUSRUDWHGDQGYDOLGO\H[LVWLQJ
under the laws of South Korea, hereby declares that the Product is in compliance with the essential
requirements and other relevant provisions of Directive 1999/5/EC, Directive 2013/35/EC and EU RoHS
Directives, as well as any other applicable regulations, including but not limited to those related to (i)
telecommunications terminal equipment; (ii) use of hazardous substances in electrical and electronic
HTXLSPHQWDQGLLLVDIHW\UHTXLUHPHQWVLQUHVSHFWRIHOHFWURPDJQHWLF¿HOGVZKLFKDUHLQIRUFHLQWKHFRXQWULHVOLVWHG
in the Appendix A of the warranty service program for the Product at the moment this Limited Warranty is issued. In
DGGLWLRQWKH3URGXFWFRPSOLHVZLWKLQWHUQDWLRQDOVWDQGDUGVDQGVSHFL¿FDWLRQVDPRQJRWKHUVWKH&(PDUNLQJWKH
FCC compliance mark and the ITU GMPCS MoU mark).
The crossed-out wheeled bin means that within the European Union the product must be taken to separate collection
at the product end-of-life. Do not dispose of these products as unsorted municipal waste.
THURAYA trademark is the sole and exclusive property of Thuraya Telecommunications Company.
Copyright © 2013 Thuraya Telecommunications Company. All rights reserved.
This manual is published by Thuraya Telecommunications Company without any warranty. Thuraya
Telecommunications Company reserves the right to make changes and improvements to any of the products
described in this manual without prior notice.
1RUHSURGXFWLRQLQZKROHRULQSDUWDOORZHGZLWKRXW7KXUD\D¶VSULRUZULWWHQDSSURYDO
If any part of this Limited Warranty is held to be illegal or unenforceable, such partial illegality or unenforceability shall
not affect the enforceability of the remainder of the limited warranty.
Printed in South Korea