1
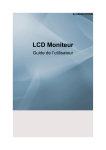
» TRACe-TR Family « Getting Started SD.DT.G40-1e - April 2015 TRACe-TR Family Getting Started Preface Revision History Publication Title: TRACe-TR Family Getting Started Doc. ID: SD.DT.G40-1e Rev. 0e Brief Description of Changes Initial Issue Date of Issue 04-2015 Copyright © 2015 Kontron AG. All rights reserved. All data is for information purposes only and not guaranteed for legal purposes. Information has been carefully checked and is believed to be accurate; however, no responsibility is assumed for inaccuracies. Kontron and the Kontron logo and all other trademarks or registered trademarks are the property of their respective owners and are recognized. Specifications are subject to change without notice. Page i SD.DT.G40-1e TRACe-TR Family Getting Started Preface Proprietary Note This document contains information proprietary to Kontron. It may not be copied or transmitted by any means, disclosed to others, or stored in any retrieval system or media without the prior written consent of Kontron or one of its authorized agents. The information contained in this document is, to the best of our knowledge, entirely correct. However, Kontron cannot accept liability for any inaccuracies or the consequences thereof, or for any liability arising from the use or application of any circuit, product, or example shown in this document. Kontron reserves the right to change, modify, or improve this document or the product described herein, as seen fit by Kontron without further notice. Trademarks This document may include names, company logos and trademarks, which are registered trademarks and, therefore, proprietary to their respective owners. Environmental Protection Statement This product has been manufactured to satisfy environmental protection requirements where possible. Many of the components used (structural parts, printed circuit boards, connectors, batteries, etc.) are capable of being recycled. Final disposition of this product after its service life must be accomplished in accordance with applicable country, state, or local laws or regulations. The Waste Electrical and Electronic Equipment (WEEE) Directive aims to: > reduce waste arising from electrical and electronic equipment (EEE) > make producers of EEE responsible for the environmental impact of their products, especially when they become waste > encourage separate collection and subsequent treatment, reuse, recovery, recycling and sound environmental disposal of EEE > improve the environmental performance of all those involved during the lifecycle of EEE SD.DT.G40-1e Page ii Preface TRACe-TR Family Getting Started Conventions Note: this notice calls attention to important features or instructions. Caution: this notice alert you to system damage, loss of data, or risk of personal injury. ESD: This banner indicates an Electrostatic Sensitive Device. This symbol indicates that product must be connected to earth ground prior making any other connections to the equipment. This symbol Indicates on the rating plate that the equipment is suitable for direct current only (24 VDC-110 VDC nominal). Identify relevant terminals The CE marking certifies that the product complies with the essential requirements of the Directive: 4 2011/65/EC of the European Parliament and of the Council of 8 June 2011 on the restriction of the use of certain hazardous substances in electrical and electronic equipment 4 2006/95/CE of the European Parliament and of the Council of 12 December 2006 on the harmonisation of the laws of Member States relating to electrical equipment designed for use within certain voltage limits. 4 2004/108/CE of the European Parliament and of the Council of 15 December 2004 on the approximation of the laws of the Member States relating to electromagnetic compatibility All numbers are expressed in decimal, except addresses and memory or register data, which are expressed in hexadecimal. The prefix '0x' shows a hexadecimal number, following the 'C' programming language convention. The multipliers 'k', 'M' and 'G' have their conventional scientific and engineering meanings of *103, *106 and *109 respectively. The only exception to this is in the description of the size of memory areas, when 'K', 'M' and 'G' mean *210, *220 and *230 respectively. When describing transfer rates, 'k' 'M' and 'G' mean *103, *106 and *109 not *2 10 *2 20 and *2 30. In PowerPC terminology, multiple bit fields are numbered from 0 to n, where 0 is the MSB and n is the LSB. PCI and CompactPCI terminology follows the more familiar convention that bit 0 is the LSB and n is the MSB. Signal names ending with an asterisk (*) or a hash (#) denote active low signals; all other signals are active high. Signal names follow the PICMG 2.0 R3.0 CompactPCI Specification and the PCI Local Bus 2.3 Specification. Page iii SD.DT.G40-1e TRACe-TR Family Getting Started Preface For Your Safety Your new Kontron product was developed and tested carefully to provide all features necessary to ensure its compliance with electrical safety requirements. It was also designed for a long fault-free life. However, the life expectancy of your product can be drastically reduced by improper treatment during unpacking and installation. Therefore, in the interest of your own safety and of the correct operation of your new Kontron product, you are requested to conform with the following guidelines. High Voltage Safety Instructions As a precaution, in case of danger, the power connector is the product’s main disconnect device and must be easily accessible. Warning! All operations on this device must be carried out by sufficiently skilled personnel only. Caution, Electric Shock! Before installing a not hot-swappable Kontron product into a system always ensure that your mains power is switched off. This applies also to the installation of piggybacks. Serious electrical shock hazards can exist during all installation, repair and maintenance operations with this product. Therefore, always unplug the power cable and any other cables which provide external voltages before performing work. Earth ground connection to vehicle’s chassis or a central grounding point shall remain connected. The earth ground cable shall be the last disconnected or the first connected during operations of cabling. Special Handling and Unpacking Instructions ESD Sensitive Device! Electronic boards and their components are sensitive to static electricity. Therefore, care must be taken during all handling operations and inspections of this product, in order to ensure product integrity at all times Do not handle this product out of its protective enclosure while it is not used for operational purposes unless it is otherwise protected. Whenever possible, unpack or pack this product only at EOS/ESD safe work stations. Where a safe work station is not guaranteed, it is important for the user to be electrically discharged before touching the product with his/her hands or tools. This is most easily done by touching a metal part of your system housing. It is particularly important to observe standard anti-static precautions when changing piggybacks, ROM devices, jumper settings etc. If the product contains batteries for RTC or memory backup, ensure that the board is not placed on conductive surfaces, including anti-static plastics or sponges. They can cause short circuits and damage the batteries or conductive circuits on the board. SD.DT.G40-1e Page iv Preface TRACe-TR Family Getting Started General Instructions on Usage In order to maintain Kontron’s product warranty, this product must not be altered or modified in any way. Changes or modifications to the device, which are not explicitly approved by Kontron and described in this manual or received from Kontron’s Technical Support as a special handling instruction, will void your warranty. This device should only be installed in or connected to systems that fulfill all necessary technical and specific environmental requirements. This applies also to the operational temperature range of the specific system version, which must not be exceeded. In performing all necessary installation and application operations, please follow only the instructions supplied by the present manual. Keep all the original packaging material for future storage or warranty shipments. If it is necessary to store or ship the product, please re-pack it as nearly as possible in the manner in which it was delivered. Special care is necessary when handling or unpacking the product. Please consult the special handling and unpacking instruction. Only TRACE-B304-TR variant of the TRACE-x304 TR family is supposed to be opened by qualified integrators for customization, following Kontron recommendations described in the specific “TRACe B304-TR Customization Guide - SD.DT.G46”. Then, any modifications performed on the unit render the guarantee void. Page v SD.DT.G40-1e TRACe-TR Family Getting Started Table Of Contents Table Of Contents Chapter 1 - Introduction . . . . . . . . . . . . . . . . . . . . . . . . . . . . . . . . . . . . . . . . . . . . . . . . . . . . . . . . . . 1.1 Manual Overview . . . . . . . . . . . . . . . . . . . . . . . . . . . . . . . . . . . . . . . . . . . . . . . . . . . . . . . . . . . . . . . . . 1.1.1 Objective . . . . . . . . . . . . . . . . . . . . . . . . . . . . . . . . . . . . . . . . . . . . . . . . . . . . . . . . . . . . . . . . . . . . 1.1.2 Audience . . . . . . . . . . . . . . . . . . . . . . . . . . . . . . . . . . . . . . . . . . . . . . . . . . . . . . . . . . . . . . . . . . . . . 1.1.3 Scope . . . . . . . . . . . . . . . . . . . . . . . . . . . . . . . . . . . . . . . . . . . . . . . . . . . . . . . . . . . . . . . . . . . . . . . 1.1.4 Structure . . . . . . . . . . . . . . . . . . . . . . . . . . . . . . . . . . . . . . . . . . . . . . . . . . . . . . . . . . . . . . . . . . . . . Chapter 2 - Getting Started with TRACe-TR Family . . . . . . . . . . . . . . . . . . . . . . . . . . . . . . . . . . 1 2 2 2 2 2 3 2.1 Receipt of the Equipment . . . . . . . . . . . . . . . . . . . . . . . . . . . . . . . . . . . . . . . . . . . . . . . . . . . . . . . . . . 2.1.1 Checking the Packages . . . . . . . . . . . . . . . . . . . . . . . . . . . . . . . . . . . . . . . . . . . . . . . . . . . . . . . . 2.1.2 Unpacking . . . . . . . . . . . . . . . . . . . . . . . . . . . . . . . . . . . . . . . . . . . . . . . . . . . . . . . . . . . . . . . . . . . 3 3 3 2.2 System Identification . . . . . . . . . . . . . . . . . . . . . . . . . . . . . . . . . . . . . . . . . . . . . . . . . . . . . . . . . . . . . . 4 2.3 At a Glance . . . . . . . . . . . . . . . . . . . . . . . . . . . . . . . . . . . . . . . . . . . . . . . . . . . . . . . . . . . . . . . . . . . . . . 5 2.4 Operational Side: I/O Connectors Pinout . . . . . . . . . . . . . . . . . . . . . . . . . . . . . . . . . . . . . . . . . . . . . 2.4.1 DC IN: External PSU M12 Connector, Male, 4 Pin, A coded. . . . . . . . . . . . . . . . . . . . . . . . . 2.4.2 LAN B, LAN C: Ethernet M12 Connectors, Female, 8 Pin, X coded. . . . . . . . . . . . . . . . . . . 2.4.3 USB C: M12 Connector Female, 5 Pin, A coded. . . . . . . . . . . . . . . . . . . . . . . . . . . . . . . . . . . 2.4.4 COM B, COM C: Serial SUBD9 Connectors, Male, 9 Pin. . . . . . . . . . . . . . . . . . . . . . . . . . . . 2.4.5 GPIO: SUBD25 Connector, Female, 25 Pin. . . . . . . . . . . . . . . . . . . . . . . . . . . . . . . . . . . . . . . 2.4.6 Audio: SUBD9 Connector, Female, 9 Pin. . . . . . . . . . . . . . . . . . . . . . . . . . . . . . . . . . . . . . . . . 7 7 8 9 10 11 12 2.5 Maintenance Side: I/Os Connector Pinout . . . . . . . . . . . . . . . . . . . . . . . . . . . . . . . . . . . . . . . . . . . . 2.5.1 2.5.2 2.5.3 2.5.4 2.5.5 2.5.6 2.6 13 COM A: RJ-12 Connector . . . . . . . . . . . . . . . . . . . . . . . . . . . . . . . . . . . . . . . . . . . . . . . . . . . . . . LAN A Gigabit Ethernet Port . . . . . . . . . . . . . . . . . . . . . . . . . . . . . . . . . . . . . . . . . . . . . . . . . . . . USB B: USB 3.0 Connector . . . . . . . . . . . . . . . . . . . . . . . . . . . . . . . . . . . . . . . . . . . . . . . . . . . . USB A: USB 2.0 Connector . . . . . . . . . . . . . . . . . . . . . . . . . . . . . . . . . . . . . . . . . . . . . . . . . . . . SIM CARDS: SIM Connectors . . . . . . . . . . . . . . . . . . . . . . . . . . . . . . . . . . . . . . . . . . . . . . . . . . DP: DisplayPort Connector . . . . . . . . . . . . . . . . . . . . . . . . . . . . . . . . . . . . . . . . . . . . . . . . . . . . . 13 14 15 16 17 18 Optional Cables Kits . . . . . . . . . . . . . . . . . . . . . . . . . . . . . . . . . . . . . . . . . . . . . . . . . . . . . . . . . . . . . . 19 2.6.1 2.6.2 2.6.3 TRACE-KIT-CAB-EVAL . . . . . . . . . . . . . . . . . . . . . . . . . . . . . . . . . . . . . . . . . . . . . . . . . . . . . . . . TRACE-KITSATA-1 . . . . . . . . . . . . . . . . . . . . . . . . . . . . . . . . . . . . . . . . . . . . . . . . . . . . . . . . . . . TRACE-STARTERKIT-1 . . . . . . . . . . . . . . . . . . . . . . . . . . . . . . . . . . . . . . . . . . . . . . . . . . . . . . . 19 19 19 2.7 Plug and Play with TRACe-TR Family . . . . . . . . . . . . . . . . . . . . . . . . . . . . . . . . . . . . . . . . . . . . . . . 2.7.1 Plug . . . . . . . . . . . . . . . . . . . . . . . . . . . . . . . . . . . . . . . . . . . . . . . . . . . . . . . . . . . . . . . . . . . . . . . . . 2.7.2 Play . . . . . . . . . . . . . . . . . . . . . . . . . . . . . . . . . . . . . . . . . . . . . . . . . . . . . . . . . . . . . . . . . . . . . . . . . 20 20 22 2.8 Device Management . . . . . . . . . . . . . . . . . . . . . . . . . . . . . . . . . . . . . . . . . . . . . . . . . . . . . . . . . . . . . . 2.8.1 Power status LED . . . . . . . . . . . . . . . . . . . . . . . . . . . . . . . . . . . . . . . . . . . . . . . . . . . . . . . . . . . . . 2.8.2 Status and User LEDs . . . . . . . . . . . . . . . . . . . . . . . . . . . . . . . . . . . . . . . . . . . . . . . . . . . . . . . . . 2.8.3 Computer Reset . . . . . . . . . . . . . . . . . . . . . . . . . . . . . . . . . . . . . . . . . . . . . . . . . . . . . . . . . . . . . . 25 25 25 27 2.9 Health Management Unit Use Cases . . . . . . . . . . . . . . . . . . . . . . . . . . . . . . . . . . . . . . . . . . . . . . . . 2.9.1 TRACe-TR as a Box PC . . . . . . . . . . . . . . . . . . . . . . . . . . . . . . . . . . . . . . . . . . . . . . . . . . . . . . . 2.9.2 TRACe-TR as a monitored Operational Computer . . . . . . . . . . . . . . . . . . . . . . . . . . . . . . . . . 28 28 29 SD.DT.G40-1e Page vi Table Of Contents TRACe-TR Family Getting Started 2.10 Linux . . . . . . . . . . . . . . . . . . . . . . . . . . . . . . . . . . . . . . . . . . . . . . . . . . . . . . . . . . . . . . . . . . . . . . . . . . . 30 2.11 Windows . . . . . . . . . . . . . . . . . . . . . . . . . . . . . . . . . . . . . . . . . . . . . . . . . . . . . . . . . . . . . . . . . . . . . . . . 34 Appendix A - References . . . . . . . . . . . . . . . . . . . . . . . . . . . . . . . . . . . . . . . . . . . . . . . . . . . . . . . . . . . A.1 Associated Documentation . . . . . . . . . . . . . . . . . . . . . . . . . . . . . . . . . . . . . . . . . . . . . . . . . . . . . . . . . Appendix B - List of Abbreviations . . . . . . . . . . . . . . . . . . . . . . . . . . . . . . . . . . . . . . . . . . . . . . . . . . . Page vii 35 35 36 SD.DT.G40-1e TRACe-TR Family Getting Started Table Of Contents List Of Figures Figure 1: TRACe-TR Family Overview . . . . . . . . . . . . . . . . . . . . . . . . . . . . . . . . . . . . . . . . . . . . . . . . . . . . . . 1 Figure 2: Identification Label Location . . . . . . . . . . . . . . . . . . . . . . . . . . . . . . . . . . . . . . . . . . . . . . . . . . . . . . . 4 Figure 3: TRACe-TR Family Dimensions . . . . . . . . . . . . . . . . . . . . . . . . . . . . . . . . . . . . . . . . . . . . . . . . . . . . 6 Figure 4: DC IN Connector . . . . . . . . . . . . . . . . . . . . . . . . . . . . . . . . . . . . . . . . . . . . . . . . . . . . . . . . . . . . . . . . 7 Figure 5: LAN B, LAN C Connectors . . . . . . . . . . . . . . . . . . . . . . . . . . . . . . . . . . . . . . . . . . . . . . . . . . . . . . . . 8 Figure 6: USB C Connector . . . . . . . . . . . . . . . . . . . . . . . . . . . . . . . . . . . . . . . . . . . . . . . . . . . . . . . . . . . . . . . . 9 Figure 7: COM B, COM C Connectors . . . . . . . . . . . . . . . . . . . . . . . . . . . . . . . . . . . . . . . . . . . . . . . . . . . . . . 10 Figure 8: GPIO Connector . . . . . . . . . . . . . . . . . . . . . . . . . . . . . . . . . . . . . . . . . . . . . . . . . . . . . . . . . . . . . . . . . 11 Figure 9: Audio Connector . . . . . . . . . . . . . . . . . . . . . . . . . . . . . . . . . . . . . . . . . . . . . . . . . . . . . . . . . . . . . . . . . 12 Figure 10: COM A Connector . . . . . . . . . . . . . . . . . . . . . . . . . . . . . . . . . . . . . . . . . . . . . . . . . . . . . . . . . . . . . . 13 Figure 11: LAN A Gigabit Ethernet Connector . . . . . . . . . . . . . . . . . . . . . . . . . . . . . . . . . . . . . . . . . . . . . . . . 14 Figure 12: USB 3.0 Connector . . . . . . . . . . . . . . . . . . . . . . . . . . . . . . . . . . . . . . . . . . . . . . . . . . . . . . . . . . . . . 15 Figure 13: USB 2.0 Connector . . . . . . . . . . . . . . . . . . . . . . . . . . . . . . . . . . . . . . . . . . . . . . . . . . . . . . . . . . . . . 16 Figure 14: SIM Connector . . . . . . . . . . . . . . . . . . . . . . . . . . . . . . . . . . . . . . . . . . . . . . . . . . . . . . . . . . . . . . . . . 17 Figure 15: DisplayPort Connector . . . . . . . . . . . . . . . . . . . . . . . . . . . . . . . . . . . . . . . . . . . . . . . . . . . . . . . . . . . 18 .................................................. 20 Figure 17: Power On LED . . . . . . . . . . . . . . . . . . . . . . . . . . . . . . . . . . . . . . . . . . . . . . . . . . . . . . . . . . . . . . . . . Figure 16: Connecting TRACe-TR Family 25 Figure 18: Status LEDs . . . . . . . . . . . . . . . . . . . . . . . . . . . . . . . . . . . . . . . . . . . . . . . . . . . . . . . . . . . . . . . . . . . 25 Figure 19: Computer Reset . . . . . . . . . . . . . . . . . . . . . . . . . . . . . . . . . . . . . . . . . . . . . . . . . . . . . . . . . . . . . . . . 27 Figure 20: TRACe-TR as a Box PC . . . . . . . . . . . . . . . . . . . . . . . . . . . . . . . . . . . . . . . . . . . . . . . . . . . . . . . . . 28 Figure 21: TRACe-TR as a monitored Operational Computer . . . . . . . . . . . . . . . . . . . . . . . . . . . . . . . . . . . 29 SD.DT.G40-1e Page viii TRACe-TR Family Getting Started Table Of Contents List Of Tables Table 1: DC IN Pin Configuration . . . . . . . . . . . . . . . . . . . . . . . . . . . . . . . . . . . . . . . . . . . . . . . . . . . . . . . . . . . 7 Table 2: LAN B, LAN C Connectors Pin Configuration . . . . . . . . . . . . . . . . . . . . . . . . . . . . . . . . . . . . . . . . . 8 Table 3: USB C Connector Pin Configuration . . . . . . . . . . . . . . . . . . . . . . . . . . . . . . . . . . . . . . . . . . . . . . . . . 9 Table 4: COM B, COM C Connectors Pin Configuration . . . . . . . . . . . . . . . . . . . . . . . . . . . . . . . . . . . . . . . 10 Table 5: GPIO Connector Pin Configuration . . . . . . . . . . . . . . . . . . . . . . . . . . . . . . . . . . . . . . . . . . . . . . . . . . 11 Table 6: Audio Connector Pin Configuration . . . . . . . . . . . . . . . . . . . . . . . . . . . . . . . . . . . . . . . . . . . . . . . . . . 12 Table 7: COM A Connector Pin Configuration . . . . . . . . . . . . . . . . . . . . . . . . . . . . . . . . . . . . . . . . . . . . . . . . 13 Table 8: Gigabit Ethernet Connector Pin Assignment . . . . . . . . . . . . . . . . . . . . . . . . . . . . . . . . . . . . . . . . . . 14 Table 9: USB 3.0 Connector Pin Assignment . . . . . . . . . . . . . . . . . . . . . . . . . . . . . . . . . . . . . . . . . . . . . . . . . 15 Table 10: USB 2.0 Connector Pin Assignment . . . . . . . . . . . . . . . . . . . . . . . . . . . . . . . . . . . . . . . . . . . . . . . . 16 Table 11: SIM Connector Pin Assignment . . . . . . . . . . . . . . . . . . . . . . . . . . . . . . . . . . . . . . . . . . . . . . . . . . . 17 Table 12: DisplayPort Connector Pin Assignment . . . . . . . . . . . . . . . . . . . . . . . . . . . . . . . . . . . . . . . . . . . . . 18 Table 13: Ethernet LEDs Status Definition . . . . . . . . . . . . . . . . . . . . . . . . . . . . . . . . . . . . . . . . . . . . . . . . . . . 26 Page ix SD.DT.G40-1e Introduction TRACe-TR Family Getting Started Chapter 1 - Introduction Kontron TRACe-TR Family is an EN50155 certified fanless Operational Computer designed to ensure stable operation in harsh environments. The "B" version is specifically designed to ease customization thanks to MiniP Cie slots and multiple configuration extentions to help integrators meet application-specific requirements. The B304-TR version is based on a CoM express© CPU module featuring Intel® Atom E3845 Bay Trail (quad core @ 1.91 GHz). Kontron COMe Intel® Atom E3845 Bay Trail CPU: http://www.kontron.com/products/computeronmodules/comexpress/com-express-mini/come-mbt10/specification Kontron TRACe-TR Family website page : http://www.kontron.com/products/systems-and-platforms/trans portation-systems-and-platforms/trace---intelligent-transportation-computer/ TRACe-G304-TR TRACe-M304-TR TRACe-V304-TR TRACe-B314-TR TRACe-B304-TR Non-contractual photographs Figure 1: TRACe-TR Family Overview SD.DT.G40-1e Page 1 Introduction 1.1 1.1.1 TRACe-TR Family Getting Started Manual Overview Objective This guide provides general information, hardware instructions, operating instructions and functional description of the TRACe-TR Family systems. The onboard programming, onboard firmware and other software (e.g. drivers and BSPs) are described in detail in separate guides (see section A.1 "Associated Documentation"). This hardware technical documentation reflects the most recent version of the product. Functional changes that differ from previous version of the document are identified by a vertical bar in the margin. 1.1.2 Audience This manual is written to cover, as far as possible the range of people who will handle or use the TRACe-TR system, from unpackers/inspectors, through system managers and installation technicians to hardware and software engineers. Most chapters assume a certain amount of knowledge on the subjects of single board com puter architecture, interfaces, peripherals, system, cabling, grounding and communications. 1.1.3 Scope This manual describes all variants of the TRACe-TR Family. 1.1.4 Structure This manual is structured in a way that will reflect the sequence of operations from receipt of the system up to getting it working. Each topic is covered in a separate chapter and each chapter begins with brief introduction that tells you what the chapter contains. In this way, you can skip any chapters that are not applicable or with which you are already familiar. The chapters are: 4 Chapter 1 - Introduction (this chapter) 4 Chapter 2 - Getting Started with TRACe-TR Family 4 Appendix A - References 4 Appendix B - List of Abbreviations Page 2 SD.DT.G40-1e TRACe-TR Family Getting Started Chapter 2 2.1 2.1.1 Getting Started with TRACe-TR Family Getting Started with TRACe-TR Family Receipt of the Equipment Checking the Packages Inspecting the packing cartons and verifying their condition is the responsability of the customer and should be carried out upon delivery. > Inspect the packing and check its condition: 4 no broken corners, 4 general state of the case (no rips or holes), 4 condition of the bands and the clips. > If you wish to report any damage in transit, you should make out a full report, and also note the damage on the packing list that accompanies the equipment. Ensure that the report and the packing list are signed by yourself and also by the transport agent, and send a copy of these documents to: 4 the transport company, 4 Kontron. 2.1.2 Unpacking Unpacking the equipment must be carried out under the supervision of an authorized technician. > Open the package and take out the items one by one. > Inspect each item and make a note of any possible defects (scratches, marks or blemishes, damaged cables, etc.). If necessary, make a report of any damage or defects. > Check the equipment against the packing list and report any missing items. It is recommended that you keep the package and the anti-shock protection. This will be required if you decide to move your system to a different site. SD.DT.G40-1e Page 3 Getting Started with TRACe-TR Family 2.2 TRACe-TR Family Getting Started System Identification An identification label is available on the left side of the system. Label data: 4 Model : TRACE-B304-TR 4 S/N : XXXX (4 digits chronologic Serial Number) 4 ECL : 10000 (5 digits Engineering Change Level) Figure 2: Identification Label Location Page 4 SD.DT.G40-1e TRACe-TR Family Getting Started 2.3 Getting Started with TRACe-TR Family At a Glance Processor > Intel® Atom™ Bay Trail-I Platform E3845 quad cores @ 1.91 GHz Memory > 2 GB DDR3 with ECC Storage > EMMC 8 GB SLC Flash soldered Connectivity > Operational side : 4 2x M12 GbE (10/100/1000BASE-T) 4 2 x Serial SUBD9 for RS232/422/485 4 1x Audio SUBD9 4 1x GPIO SUBD25 > Maintenance side: 4 1x USB (high speed) 4 1x USB 3.0 (3.0 only) port [BIOS configurable] 4 1x RJ-45 GbE (10/100/1000BASE-T) 4 1x RJ-12 RS-232 for processor and HMU Software 4 Linux: Refer to TRACe-TR Family User's Manual (SD.DT.G45), section “Linux (Live CD)”. 4 Windows: Refer to TRACe-TR Family User's Manual (SD.DT.G45), section “Windows (BSP” Specific TRACe-TR tools package and live demo image will be made available on TRACe-TR Family Kontron Web Site (download section). Management 4 Operational side status LED: Power status LED 4 Maintenance side Status an User LEDs: 4 L1: User1 4 L2: User0, 4 L3: Alarm/HMU, 4 L4: Sys/SATA, 4 L5: Power Status SD.DT.G40-1e Page 5 Getting Started with TRACe-TR Family TRACe-TR Family Getting Started Form Factor > Dimensions: 276 72.5 141.3 100 246 292 77.5 Figure 3: TRACe-TR Family Dimensions > Weight: 2.5 kgs Warranty > 2 years Page 6 SD.DT.G40-1e Getting Started with TRACe-TR Family TRACe-TR Family Getting Started 2.4 2.4.1 Operational Side: I/O Connectors Pinout DC IN: External PSU M12 Connector, Male, 4 Pin, A coded. View from Plug Side Figure 4: DC IN Connector Pin Configuration Pin Pin Name Signal Name 1 VIN+ POWER IN + (+VDC) 2 VIN- POWER IN- (GND) 3 IGN Ignition (IGN) 4 NC NC Chassis SHLD Chassis ground (Shield) Table 1: DC IN Pin Configuration To power-on the system, you need a power cable with M12 Connector Female 4 Pin A-Coded in one end (see Appendix A “Accessories References Examples” pages 35 to find some references) to fit the DC IN connector. The power cable is included in TRACE-KIT-CAB-EVAL cable kit to be purchased separately. According to the above pinout, free ends of this cable must be wired as follows (refer to section 2.6.1 page 19): 4 Brown: +VDC 4 White: -VDC 4 Blue: IGN (+VDC to Power On) IGN can be directly connected to VDC to have the system always on when VDC is applied, or connected to VDC through a switch to power the system on/off with VDC kept applied. A power off controlled by the IGN signal has the same impact than removing VDC: all PSUs are switched off including standby power supplies. However using IGN to power on/off is recommended because this enables some extra features such as an automatic system shutdown with a delayed power-off when the IGN signal is disabled, or a system wakeup from sleep by toggling the IGN signal. Even if IGN is expected to be connected to VDC, it can be alternatively connected to another voltage source with same GND(POWER IN-) and a voltage in the same range than the one required for VDC. VDC and IGN voltage range to GND: 24 VDC-110 VDC nominal (17 VDC min - 138 VDC max). Current on VDC for VDC = 24 VDC, when idle under BIOS or Linux OS: around 800 mA. Current on IGN for all IGN voltage range: around 4 mA SD.DT.G40-1e Page 7 Getting Started with TRACe-TR Family 2.4.2 TRACe-TR Family Getting Started LAN B, LAN C: Ethernet M12 Connectors, Female, 8 Pin, X coded. View from Receptacle Side Figure 5: LAN B, LAN C Connectors HMU 10/100 Ethernet interface can be routed to LAN-C (can be selected by the trace_config tool -refer to 2.7.2 “Play/TRACe Configuration” page 22-) Pin Configuration Pin Pin Name 1 DA+ 2 DA- 3 DB+ 4 DB- 5 DD+ 6 DD- 7 DC- 8 DC+ Table 2: LAN B, LAN C Connectors Pin Configuration Page 8 SD.DT.G40-1e Getting Started with TRACe-TR Family TRACe-TR Family Getting Started 2.4.3 USB C: M12 Connector Female, 5 Pin, A coded. Available on TRACe-B314-TR only. View from Receptacle Side Figure 6: USB C Connector Pin Configuration Pin Pin Name 1 D+ 2 5V 3 N.C. 4 D- 5 GND Chassis Shield Table 3: USB C Connector Pin Configuration SD.DT.G40-1e Page 9 Getting Started with TRACe-TR Family 2.4.4 TRACe-TR Family Getting Started COM B, COM C: Serial SUBD9 Connectors, Male, 9 Pin. 1 5 6 9 Figure 7: COM B, COM C Connectors Pin Configuration Pin RS-232 RS-422/RS-485 Full Duplex RS-422/RS-485 Half Duplex 1 N.C. N.C. N.C. 2 RX RX+ (A) N.C. 3 TX TX- (Z) TX-/RX- (Z/B) 4 N.C. N.C. N.C. 5 GND N.C. N.C. 6 N.C. N.C. N.C. 7 RTS TX+ (Y) TX+/RX+ (Y/A) 8 CTS RX- (B) N.C. 9 N.C. N.C. N.C. Table 4: COM B, COM C Connectors Pin Configuration Two naming conventions are used for RS-422/RS-485 differential signals, they match each other as follows : TX+ = Y, TX- = Z, RX+ = A, RX- = B The serial mode and duplex can be set using the trace_config tool (refer to 2.7.2 “Play/TRACe Configuration” page 22). When in 485 mode, the RTS signal from the UART is no more available on the connectors but is used as a "TX enable" (transmit enable): when RTS is high (logic 1 driven by UART), TX is enabled. TX is disabled by switching RTS low (under Linux OS, RTS can be managed by the TIOCMGET/TIOCMSET IOCTL, using the TIOCM_RTS flag) COM-B is muxed between UART (default) and HMU (can be selected by the trace_config tool). When in HMU mode, transmit is always enabled (RTS always at 1) so only RS-232 and RS-422 are supported. See COM-A for HMU serial line routing to COM-A or COM-B Page 10 SD.DT.G40-1e Getting Started with TRACe-TR Family TRACe-TR Family Getting Started 2.4.5 GPIO: SUBD25 Connector, Female, 25 Pin. 13 1 25 14 Figure 8: GPIO Connector Pin Configuration Pin Signal Name Pin Name Signal Name 1 GND_GPIO_ISO 14 GPIO_IN[0] 2 GND_GPIO_ISO 15 GPIO_IN[1] 3 GND_GPIO_ISO 16 GPIO_IN[2] 4 GND_GPIO_ISO 17 GPIO_IN[3] 5 N.C. 18 N.C. 6 N.C. 19 N.C. 7 N.C. 20 N.C. 8 N.C. 21 24 VISO (external) 9 GND_GPIO_ISO 22 GPIO_OUT[0] 10 GND_GPIO_ISO 23 GPIO_OUT[1] 11 GND_GPIO_ISO 24 GPIO_OUT[2] 12 GND_GPIO_ISO 25 GPIO_OUT[3] 13 GND_GPIO_ISO 26, 27 Shield Table 5: GPIO Connector Pin Configuration 24 VISO DC voltage (8 VDC min - 29 VDC max) must be applied to pin 21 to power the isolated GPIO logic. GPIO_OUT[n] are open-collector outputs, enabled (driven low to GND_GPIO_ISO) when a logic 1 is written from software. Each output can sink up to 20 mA. Maximum voltage on GPIO_OUT[n] (to GND_GPIO_ISO) is 29VDC. GPIO_IN[n] are inputs that are read at 1 from software when at logic level high (24V logic). Maximum voltage on GPIO_IN[n] (to GND_GPIO_ISO) is 29 VDC. These inputs have an hysteresis (around 1V); level high is above 17V; level 0 under 16V. GPIO_OUT[n] and GPIO_IN[n] can have a voltage greater than 24 VISO provided than this voltage does not exceed 29 VDC. SD.DT.G40-1e Page 11 Getting Started with TRACe-TR Family 2.4.6 TRACe-TR Family Getting Started Audio: SUBD9 Connector, Female, 9 Pin. 1 5 6 9 Figure 9: Audio Connector Pin Configuration Pin Signal Name 1 LINE_OUT_L (Headphone) 2 GND_AUDIO 3 LINE_OUT_R (Headphone) 4 GND_AUDIO 5 AUDIO LINE MICBIAS 6 5V (internal) 7 LINE_IN_L (Microphone) 8 GND_AUDIO 9 LINE_IN_R (Microphone) Table 6: Audio Connector Pin Configuration Page 12 SD.DT.G40-1e Getting Started with TRACe-TR Family TRACe-TR Family Getting Started 2.5 2.5.1 Maintenance Side: I/Os Connector Pinout COM A: RJ-12 Connector Figure 10: COM A Connector Pin Configuration Pin Signal Name 1 HMU TX 2 GND 3 COMe TX 4 COMe RX 5 GND 6 HMU RX Table 7: COM A Connector Pin Configuration HMU serial line on COM-A (default) can be routed to COM-B instead (can be selected by the trace_config tool -refer to 2.7.2 “Play/TRACe Configuration” page 22-). COM-B mode UART HMU SD.DT.G40-1e COM-A TX = HMU TX RX = HMU RX TX = HMU TX RX = -- COM-B TX = UART TX RX = UART RX RTS = UART RTS TX = HMU TX RX = HMU RX RTS = 1 Comments RTS is available on COM-B only in RS-232 mode TX output of HMU is available on both connectors RTS is available on COM-B only in RS-232 mode Page 13 Getting Started with TRACe-TR Family 2.5.2 TRACe-TR Family Getting Started LAN A Gigabit Ethernet Port The TRACe-TR have a Gigabit Ethernet port: Figure 11: LAN A Gigabit Ethernet Connector Pin Assignment PIN 10BASE-T 100BASE-TX 1000BASE-T I/O SIGNAL I/O SIGNAL I/O SIGNAL 1 O TX+ O TX+ I/O BI_DA+ 2 O TX- O TX- I/O BI_DA- 3 I RX+ I RX+ I/O BI_DB+ 4 - - - I/O BI_DC+ 5 - - - I/O BI_DC- 6 I RX- I I/O BI_DB- 7 - - - I/O BI_DD+ 8 - - - I/O BI_DD- Shell RX- Chassis Ground Table 8: Gigabit Ethernet Connector Pin Assignment The Ethernet transmission should operate using a CAT5 cable with a maximum length of 100 m. The Ethernet connectors are available as RJ-45 connectors with tab down. Page 14 SD.DT.G40-1e Getting Started with TRACe-TR Family TRACe-TR Family Getting Started 2.5.3 USB B: USB 3.0 Connector The TRACe-TR have a USB3.0 compliant connector. It can work as a USB 2.0 connector or as a USB 3.0 connector. 5 9 4 1 Figure 12: USB 3.0 Connector Pin Assignment: PIN SIGNAL DESCRIPTION I/O 1 +5V protected USB power - 2 DATA- Differential USB- I/O 3 DATA+ Differential USB+ I/O 4 GND Ground - 5 USBSS_RX- Differential USB Receive - I 6 USBSS_RX+ Differential USB Receive + I 7 GND Ground - 8 USBSS_TX Differential USB Transmit - O 9 USBSS_TX+ Differential USB Transmit + O Table 9: USB 3.0 Connector Pin Assignment SD.DT.G40-1e Page 15 Getting Started with TRACe-TR Family 2.5.4 TRACe-TR Family Getting Started USB A: USB 2.0 Connector The TRACe-TR have a USB 2.0 connector type A right angle 1 4 Figure 13: USB 2.0 Connector Pin Assignment PIN SIGNAL FUNCTION I/O 1 VCC (+5V Protected) VCC -- 2 USB_D- Differential USB- I/O 3 USB_D+ Differential USB+ I/O 4 GND GND -- Table 10: USB 2.0 Connector Pin Assignment All the signal lines are EMI-filtered. Page 16 SD.DT.G40-1e Getting Started with TRACe-TR Family TRACe-TR Family Getting Started 2.5.5 SIM CARDS: SIM Connectors The TRACe-TR have two SIM connectors SIM Card B SIM Card A Figure 14: SIM Connector Pin Assignment PIN NAME SIGNAL DESCRIPTION 1 VCC VCC 2 Reset RST 3 Clock CLK 4 SW1 SIM Detection 5 GND GND 6 VPP Not Connected 7 DATA DATA 8 SW2 GND Table 11: SIM Connector Pin Assignment SD.DT.G40-1e Page 17 Getting Started with TRACe-TR Family 2.5.6 TRACe-TR Family Getting Started DP: DisplayPort Connector The TRACe-TR have a DisplayPort Interface 2 20 1 19 Figure 15: DisplayPort Connector Pin Assignment PIN SIGNAL FUNCTION 1 ML_Lane 0 (p) 2 GND 3 ML_Lane 0 (n) Lane 0 (negative) 4 ML_Lane 1 (p) Lane 1 (positive) 5 GND 6 ML_Lane 1 (n) Lane 1 (negative) 7 ML_Lane 2 (p) Lane 2 (positive) 8 GND 9 ML_Lane 2 (n) Lane 2 (negative) 10 ML_Lane 3 (p) Lane 3 (positive) 11 GND 12 ML_Lane 3 (n) 13 GND Ground 14 GND Ground 15 AUX CH (p) 16 GND 17 AUX CH (n) 18 Hot Plug Hot Plug Detect 19 Return Return for power 20 DP_PWR Lane 0 (positive) Ground Ground Ground Ground Lane 3 (negative) Auxiliary Channel (positive) Ground Auxiliary Channel (negative) Power for connector Table 12: DisplayPort Connector Pin Assignment Page 18 SD.DT.G40-1e Getting Started with TRACe-TR Family TRACe-TR Family Getting Started 2.6 2.6.1 Optional Cables Kits TRACE-KIT-CAB-EVAL Set of Cables for TRACe-TR Family evaluation, consisting of: 4 1x CABLE ASSY: Power (M12-A coded to free end), 4 1x ETHERNET (M12-X coded to RJ45), 4 1x Serial (RJ-12 to dual DB9) Ethernet Cable M12 to RJ-45 Serial Cable for COM A 1 brown 3 2 white 3 blue 4 black 2 4 1 Power Cable Serial Cable for COM A: CPU_A to connect to COMe CPU, CPU_B to connect to HMU 2.6.2 TRACE-KITSATA-1 Set of SATA cables to install one 2,5'' SSD (for TRACe B304-TR only), consisting of: 4 1xSATA Power cable, 4 1x SATA Data cable, 4 4x screws and spacers 2.6.3 TRACE-STARTERKIT-1 Complete set of cables / accessories for TRACe evaluation, consisting of : 4 1x AC/DC converter cable assembly for DC IN 4 1x USB Key Fedora 21 TRACe Live Image 4 2x M12 to RJ45 Ethernet Cable 4 1x Display port to VGA adapter 4 1x Serial cable (RJ12 to dual DB9: CPU_A, CPU_B) : 1x KIT-2X-RJ12DB9 4 1x Wi-Fi antenna Dual Band 2,4GhZ-5GhZ , 1x 3G/LTE antenna 5dBi, 1x GPS antenna SD.DT.G40-1e Page 19 Getting Started with TRACe-TR Family 2.7 TRACe-TR Family Getting Started Plug and Play with TRACe-TR Family The following sections are valid for a Linux operating system with its TRACe BSP installed. A live CD Fedora image is available on the Kontron Web Site under TRACe B304-TR download section (http://www.kontron.com/ products/systems-and-platforms/transportation-systems-and-platforms/trace---intelligent-transportation-com puter/). 2.7.1 Plug Earth ground connection to vehicle’s chassis or a central grounding point shall remain connected. The earth ground cable shall be the last disconnected or the first connected during operations of cabling. To power-on the TRACe-TR Operational Box Computer, you need to attach a Power Supply Cable (refer to sec tion 2.6 page 19) to the DC IN connector (PSU wide range 24 VDC-110 VDC). On the other side, it has to be cabled to a DC power source (24 VDC minimum) following the pin-out description in the above section 2.4 “I/O Connectors Pinout” page 7. Two methods: 1. Graphical session (recommended): 4 Connect a display for graphical session (display and cables not provided) to the DisplayPort on Maintenance side. 4 Plug a USB hub for keyboard and mouse in USB A connector on Maintenance side. 2. Serial console: 4 Connect to the TRACe-TR via RJ-12 serial connector on maintenance side using a cable KIT-2X-RJ12DB9 (included in TRACE-KIT-CAB-EVAL) and use a serial terminal emulator as putty or minicom for example. Power Supply USB Key Serial Connector DisplayPort Figure 16: Connecting TRACe-TR Family Page 20 SD.DT.G40-1e TRACe-TR Family Getting Started Getting Started with TRACe-TR Family To start the system > Power on the DC power supply module via DC IN connector (section 2.4 “I/O Connectors Pinout” page7) and then turn on the ignition key. As long as the ignition signal is not connected to the +POWER IN (power supply connector pin 1) the system cannot start (refer to Figure 7 - Ignition Implementation page10). > A Linux login prompt should appear in a few seconds The system can also be configured to stay off when ignition signal is switched on, and start on assertion of GPIO_IN[0] or GPIO_IN[1] (configurable using trace_config -refer to 2.7.2 “Play/TRACe Configuration” page 22-) or on HMU request In this case, when waiting to start, the Power status LED is flashing twice every 2 seconds. To stop the system > Manual method : Shutdown the OS: with shutdown menu in graphical session, or «halt» command in a Linux terminal for example. When the Power status LED is flashing once every 2 seconds (shutdown completed), switch off the ignition signal. You can also optionally remove power on “POWER IN” > Automatic method (default): This requires the trace-poweroffd daemon to be started when the OS is booting in a Linux console. Just switch off the ignition signal: this automatically performs a shutdown, and once the shutdown is completed, a power-off Suspend the system Suspend the OS: with suspend menu in graphical session, or "systemctl suspend" in a Linux terminal (as root). The Power status LED is flashing once every 2 second. To resume, the following methods are supported : 4 Switch the ignition signal off and on fastly (less than 750mS). 4 Send a Wake-On-Lan Ethernet packet to the system on LAN-B or LAN-C interfaces 4 Assertion of a GPIO_IN[0] or GPIO_IN[1] (configurable using trace_config) 4 Reset switch on maintenance side 4 HMU request SD.DT.G40-1e Page 21 Getting Started with TRACe-TR Family 2.7.2 > > > > TRACe-TR Family Getting Started Play Plug the system for a graphical session as described in section 2.7.1 “Plug” page 20. Plug the live image support (DVD or USB) on the system. Power on the system then select the boot device by pressing <F5> on keyboard. A desktop workstation will appear in a few seconds: TRACe Configuration : Some configuration settings are available under BIOS setup, however TRACe specific settings are managed by the OS tool trace_config By default, this tool works on saved settings that are applied at power-on (ignition signal on). It is also possible to work on the current settings, to temporarily change some settings (changes are lost at poweroff). This command must be run as root user. To display saved settings: [root@trace-board ~]# trace_config Saved configuration : --serial 232 : RS232 mode on COM-B/COM-C serial lines --serial full : Full duplex on COM-B/COM-C serial lines --tpm on : Second TPM chip ON --poweron start : Start when ignition key is switched ON --dport maint : DisplayPort on maintenance plate connector --sata mini1 : SATA interface to mini socket #1 --sim 0a1b : mini socket #0 to SIM-A + socket #1 to SIM-B --gpi1wake off : Wakeup from GPI1 NOT enabled --gpi0wake off : Wakeup from GPI0 NOT enabled --lanc i210 : LAN-C connector for Intel i210 ethernet --comb uart : COM-B connector for PCIe UART [root@trace-board ~]# Page 22 SD.DT.G40-1e TRACe-TR Family Getting Started Getting Started with TRACe-TR Family To display current settings: [root@trace-board ~]# trace_config -c Current configuration : --serial 232 : RS232 mode on COM-B/COM-C serial lines --serial full : Full duplex on COM-B/COM-C serial lines --tpm on : Second TPM chip ON --poweron start : Start when ignition key is switched ON --dport maint : DisplayPort on maintenance plate connector --sata mini1 : SATA interface to mini socket #1 --sim 0a1b : mini socket #0 to SIM-A + socket #1 to SIM-B --gpi1wake off : Wakeup from GPI1 NOT enabled --gpi0wake off : Wakeup from GPI0 NOT enabled --lanc i210 : LAN-C connector for Intel i210 ethernet --comb uart : COM-B connector for PCIe UART --offdelay 3 : Power off delay in units of 1/4 seconds (0 to 255) --mini0 absent : Mini socket #0 PCIe device NOT present --mini1 absent : Mini socket #1 device NOT present (mPCIe or mSATA) --mini1sata absent : Mini socket #1 SATA device NOT present --mini2 absent : Mini socket #2 PCIe device NOT present --mode normal : System running in normal mode --ledsysr off : LED SYS red OFF --ledalarmr off : LED ALARM red OFF --ledusr1 off : LED USER1 is OFF --ledusr0 off : LED USER0 is OFF --sysstate 0 : Current system state code (0 to 15, updated by soft) --cpldrev 0x04 : cPLD revision/version on carrier board [root@trace-board ~]# The help gives the list of all possibles settings and their supported values: [root@trace-board ~]# trace_config -h To also see debug settings: [root@trace-board ~]# trace_config -d -h Some of them are read-only or/and only apply to the current or saved settings. Refer to TRACe-TR Family User's Manual (SD.DT.G45), section “Linux Tools” for full command output. > EXAMPLES : 4 Switch LED L2 (User0) to red right now: [root@trace-board ~]# trace_config -c --ledusr0 red 4 Get current LED L2 (User0) state: [root@trace-board ~]# trace_config -c --ledusr0 Current : --ledusr0 red : LED USER0 is RED [root@trace-board ~]# SD.DT.G40-1e Page 23 Getting Started with TRACe-TR Family TRACe-TR Family Getting Started 4 Set serial lines to 422/485 at next power-on (saved setting): [root@trace-board ~]# trace_config --serial 485 4 Set serial lines to 422/485 right now (current setting): [root@trace-board ~]# trace_config -c --serial 485 4 Get serial lines configuration for both saved and current settings: [root@trace-board ~]# trace_config -c -s Saved : --serial 485 : RS422/485 mode --serial full : Full duplex on Current : --serial 485 : RS422/485 mode --serial full : Full duplex on [root@trace-board ~]# Page 24 --serial on COM-B/COM-C serial lines COM-B/COM-C serial lines on COM-B/COM-C serial lines COM-B/COM-C serial lines SD.DT.G40-1e Getting Started with TRACe-TR Family TRACe-TR Family Getting Started 2.8 2.8.1 Device Management Power status LED Figure 17: Power On LED State Meaning OFF GREEN GREEN PULSE ONCE every 2 seconds GREEN PULSE TWICE every 2 seconds POWER SLOW BLINKING GREEN with period 1 second FAST BLINKING GREEN with period 0.5 second ORANGE (red+green) RED 2.8.2 System power off (Ignition key OFF or forced to OFF by REG_POWER) System running System in standby mode (S3,S4 or S5 state) System waiting for power-on event (GPI, uC command, ...) System about to power-off (power off delay) In debug mode System reset from COME (CB_RESET# asserted) Power error Power supplies are switched off and an error code is reported on USER0/1 LEDs Status and User LEDs L1 L2 L3 L4 L5 Ethernet LEDs Figure 18: Status LEDs SD.DT.G40-1e Page 25 Getting Started with TRACe-TR Family TRACe-TR Family Getting Started > Five Status User LEDs: L1 (User1), L2 (User0), L3 (Alarm/HMU), L4 (Sys/SATA), L5 (Power) These LEDs are bicolor (red and green), giving 4 possible states (off, red, green, orange) 4 L1 and L2 are controlled by the cPLD 4 L3 and L4 are controlled by the cPLD for red color (Alarm, Sys) but not for green color (HMU, SATA) 4 L5 (Power) has the same state than the Power status LED on operational side. To control the LEDs through the cPLD, the trace_config tool can be used (trace_config -c --ledXXXX YYYY) When L5 (Power) is red (power error), an error code is reported on L1 (User1) and L2 (User0) as follows: Error number Error name L1 (User1) L2 (User0) 0 ERR_NO_ERROR N/A N/A 1 ERR_STDBY_5V_3V3 OFF GREEN 2 ERR_SUS_S3 OFF RED 3 ERR_3V3_5V OFF ORANGE 4 ERR_12V GREEN OFF 5 ERR_2V5 GREEN GREEN 6 ERR_1V0 GREEN RED 7 ERR_1V5 GREEN ORANGE 8 ERR_UART RED OFF 9 ERR_PCIESW_LOCK RED GREEN 10 ERR_SUS_STAT RED RED 11 ERR_EMERGENCY_OFF RED ORANGE > Ethernet status LEDs Speed STATUS SPEED LED yellow ACT LED green OFF OFF Ethernet link establisehd OFF ON Ethernet Link Activity OFF BLINK Ethernet link establisehd ON ON Ethernet Link Activity ON BLINK Ethernet link is not established 10/100 Mbps 1000 Mbps Act Table 13: Ethernet LEDs Status Definition Page 26 SD.DT.G40-1e Getting Started with TRACe-TR Family TRACe-TR Family Getting Started 2.8.3 Computer Reset > RST button on Maintenance rear side Figure 19: Computer Reset SD.DT.G40-1e Page 27 Getting Started with TRACe-TR Family 2.9 2.9.1 TRACe-TR Family Getting Started Health Management Unit Use Cases TRACe-TR as a Box PC Figure 20: TRACe-TR as a Box PC Page 28 SD.DT.G40-1e TRACe-TR Family Getting Started 2.9.2 Getting Started with TRACe-TR Family TRACe-TR as a monitored Operational Computer Figure 21: TRACe-TR as a monitored Operational Computer Refer to TRACe-TR Family User's Manual (SD.DT.G45), section “Health Management Unit” for more detailed information about HMU. SD.DT.G40-1e Page 29 Getting Started with TRACe-TR Family TRACe-TR Family Getting Started 2.10 Linux The Linux BSP for TRACe-TR relies on two complementary BSP packages. > First BSP comes from COMe-mBT10 module Kontron support. It provides a full COMe module support and can be downloaded on the Kontron COMe product website: http://www.kontron.com/products/computeronmodules/com-express/com-express-mini//come-mbt10.html > Second Linux BSP is provided for TRACe-TR system support and can be downloaded on the Kontron TRACe website: http://www.kontron.com/products/systems-and-platforms/transportation-systems-and-platforms/trace---int elligent-transportation-computer/trace-b304-tr.html OS Installation This chapter will use Fedora 21 distribution as an example in order to describe a from scratch installation pro cedure to support the TRACe-TR system. From TRACe-TR live CD, you can easily install a pre configured Fedora image on your system by clicking on the desktop shortcut “Install to Hard Drive”. 1. Get the Fedora distribution : https://getfedora.org 2. Proceed to the OS installation from the Fedora media 3. Boot on your fresh installed system 4. Follow BSP installation instructions that follow As both BSP have to be compiled on your system in order to install our drivers, you will need as mandatory packages “kernel-devel” and “gcc”. These packages can be installed later with rpm or yum (recommended) commands. Concerning the “kernel-devel” package, it has to be as the same version as the current kernel (run “uname -r” to get the current one). If you install the kernel-devel with yum from internet repository, it will download the last version which will be newer than the installed kernel. In that case, you can run “yum update kernel” to get the kernel packages at the same version. MMC Boot Support You can skip this section if it does not apply to your system. Default initramfs that is installed by Fedora does not support the COMe MMC flash as a boot device. If you want to install your operating system on this MMC, it is recommended to get a live CD image to regenerate the initramfs after installation. Once booted on the live image, mount the whole installed device and add the MMC boot support to the initramfs with “dracut” command. Page 30 SD.DT.G40-1e TRACe-TR Family Getting Started Getting Started with TRACe-TR Family Example: $ sudo vgscan Reading all physical volumes. This may take a while... Found volume group fedora using metadata type lvm2 $ sudo vgchange -a y 2 logical volume(s) in volume group fedora now active $ sudo mount /dev/mapper/fedora-root /media/ $ sudo mount /dev/mmcblk0p2 /media/boot/ $ sudo chroot /media /sbin/dracut --add-drivers ”sdhci sdhci-pci sdhci-acpi mmc_block mmc_core usb-storage” /boot/initramfs-3.19.1-201.fc21.x86_64.img 3.19.1-201.fc21.x86_64 --force $ sudo umount /media/boot $ sudo umount /media To permanently add the drivers to your system, create the following dracut configuration file : # cat <<EOF > /etc/dracut.conf.d/mmc.conf #add drivers for boot support on mmc device add_drivers+=” sdhci sdhci-pci sdhci-acpi mmc_block mmc_core usb-storage ” EOF It will add the specific drivers each times you will update your initramfs with dracut command. COMe-mBT10 BSP Installation Official supported Linux distribution for the COMe is Fedora 20. RPM packages are provided for this OS release. For other, sources files of the drivers are provided. The COMe BSP is composed of three main drivers : 4 kempld-drivers.12 4 kontron-drivers.4 4 nct-drivers.3 For each of them, extract the archive then go to the driver's directory. Open the INSTALL file and follow instruc tions which usually are: $ cd XXX-modules $ make # make install You may encounter a compilation error for kempld-drivers.12 module. Since kernel 3.18, gpiochip_remove() function in the gpiolib library returns a void value instead of the status. To workaround, this problem, you can patch the source code as described here : # sed -i -e ”s/ret = gpiochip_remove(/ret = 0;gpiochip_remove(/g” gpio-kempld.c # sed -i -e ”s/ret = gpiochip_remove(/ret = 0;gpiochip_remove(/g” gpio-kempld_now1.c SD.DT.G40-1e Page 31 Getting Started with TRACe-TR Family TRACe-TR Family Getting Started For nct-drivers.3 driver, copy the COMe configuration “kontron-sensors3.conf” provided in the “misc” directory of the COMe-mBT10 BSP. Note that “lm_sensors” package has to be installed on your system. Update the sensors configuration of your system : # cat kontron-sensors3.conf >> /etc/sensors3.conf # cat <<EOF > /etc/sysconfig/lm_sensors BUS_MODULES=”trace_cpld_i2c” HWMON_MODULES=”coretemp lm73” EOF TRACe-TR BSP Installation Extract the BSP archive then go to the driver's directory. Open the INSTALL file and follow instructions which usually are: # make clean # make # make install TRACe-TR System Configuration > BSP modules support To automatically load the BSP modules during the boot process, create the following configuration file to your system: # cat <<EOF > /etc/modules-load.d/trace.conf i2c-dev i2c-kempld kempld-wdt gpio-kempld kontron-bootcounter kontron-eeep kontron-bl coretemp adt7475 nct7802 trace_cpld_i2c trace_cpld EOF Update the blacklist for a correct modules order loading # DRIVER=”blacklist iTCO_wdt” # BLACKLIST=”/etc/modprobe.d/blacklist.conf” # grep -q ”$DRIVER” $BLACKLIST || echo -e ”\n# kempld-wdt should be loaded first\n$DRIVER\n” >> $BLACKLIST Page 32 SD.DT.G40-1e TRACe-TR Family Getting Started Getting Started with TRACe-TR Family > UARTS support Append “8250.nr_uarts=6” to the boot arguments. This can be done by editing “/etc/default/grub” file then append this option to the GRUB_CMDLINE_LINUX variable. Run “grub2-mkconfig -o /boot/grub2/grub.cfg” to make the change effective. Depending on your system installation the “grub.cfg” file location may differ. In this case, just give the correct location. > Ethernet interfaces naming : You may want to keep a standard ethernet interfaces naming such as eth0, eth1 and eth2. To disable the current naming that depends on the controller PCI address, append to the boot arguments these two options “biosde‐ vname=0 net.ifnames=0” > Serial port login activation Create the service configuration file : # cat <<EOF > /etc/systemd/system/serial-getty\@ttyS0.service # This file is part of systemd. # # systemd is free software; you can redistribute it and/or modify it # under the terms of the GNU Lesser General Public License as published by # the Free Software Foundation; either version 2.1 of the License, or # (at your option) any later version. [Unit] Description=Serial Getty on %I Documentation=man:agetty(8) man:systemd-getty-generator(8) Documentation=http://0pointer.de/blog/projects/serial-console.html BindsTo=dev-%i.device After=dev-%i.device systemd-user-sessions.service plymouth-quit-wait.service After=rc-local.service # If additional gettys are spawned during boot then we should make # sure that this is synchronized before getty.target, even though # getty.target didn't actually pull it in. Before=getty.target IgnoreOnIsolate=yes [Service] ExecStart=-/sbin/agetty --autologin root --keep-baud %I 115200,38400,9600 Type=idle Restart=always RestartSec=0 UtmpIdentifier=%I TTYPath=/dev/%I TTYReset=yes TTYVHangup=yes KillMode=process IgnoreSIGPIPE=no SendSIGHUP=yes EOF Install the service : # ln -s /etc/systemd/system/serial-getty\@ttyS0.service /etc/systemd/system/getty.target.wants/ SD.DT.G40-1e Page 33 Getting Started with TRACe-TR Family TRACe-TR Family Getting Started 2.11 Windows In progress Page 34 SD.DT.G40-1e TRACe-TR Family Getting Started References Appendix A - References A.1 Associated Documentation The following documentation is available on the Kontron web site. > Datasheet TRACe B304-TR . . . . . . . . . . . . . . . . . . . . . . . . . . . . . . . . . . . TRACe-B304-TR#20150427MB > Datasheet TRACe G304-TR . . . . . . . . . . . . . . . . . . . . . . . . . . . . . . . . . . TRACe-G304-TR#20150427MB > Datasheet TRACe M304-TR . . . . . . . . . . . . . . . . . . . . . . . . . . . . . . . . . . TRACe-M304-TR#20150427MB > Datasheet TRACe V304-TR . . . . . . . . . . . . . . . . . . . . . . . . . . . . . . . . . . . TRACe-V304-TR#20150427MB > TRACe B304-TR Customization / Integration Guide . . . . . . . . . . . . . . . . . . . . . . . . . . . . . . . . . SD.DT.G46 > TRACe B304-TR User's Manual . . . . . . . . . . . . . . . . . . . . . . . . . . . . . . . . . . . . . . . . . . . . . . . . . . SD.DT.G45 SD.DT.G40-1e Page 35 List of Abbreviations TRACe-TR Family Getting Started Appendix B - List of Abbreviations AC Alternating Current DC Direct Current COMe Computer On Module Express CPU Central Processing Unit DP DisplayPort ESD Electrostatic Sensitive Device GND Ground HMU Health Management Unit LAN Local Area Network LED Light Emitting Diode OS Operating System PCI Peripheral Component Interconnect S3 Suspend to RAM S4 Suspend to Disk S5 Soft Power-Off SATA Serial Advanced Technology Attachment SIM Subscriber Identity Module USB Universal Serial Bus WEEE Waste Electrical and Electronics Equipment Page 36 SD.DT.G40-1e MAILING ADDRESS Kontron Modular Computers S.A.S. 150 rue Marcelin Berthelot - BP 244 ZI TOULON EST 83078 TOULON CEDEX - France TELEPHONE AND E-MAIL +33 (0) 4 98 16 34 00 Sales: [email protected] Support: [email protected] For further information about other Kontron products, please visit our Internet web site: www.kontron.com.