1
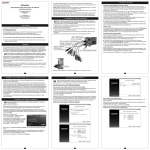
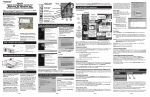
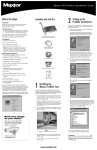
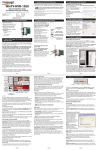
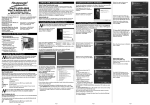
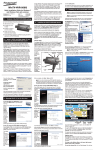
IMPACT-VCB-E
Quick Installation Guide for Windows 7,
Vista and Windows XP.
©2008-2011 Hauppauge Computer Works, Inc.
QI-IMPACT-VCB-E-V2.0-ENG February 08, 2011
Hauppauge Computer Works, Inc.
Corporate Headquarters
91 Cabot Court
Hauppauge, NY 11788
tel: 631.434.1600
fax: 631.434.3198
sales: [email protected]
tech support tel: 631.434.3197
www.hauppauge.com
Hauppauge Computer Works UK Ltd.
Crown House, Home Gardens
Dartford, Kent DA1 1DZ
Tel: +44 (0)203 405 1717
Tech Support: +44 (0)203 405 1717
sales: [email protected]
www.hauppauge.com
Hauppauge Digital Asia Pte. Ltd.
1093 Lower Delta Road #04-05
Tiong Bahru Industrial Estate
Singapore 169204
tel: +65 62769163
fax: +65 62769167
email: [email protected]
tech support: [email protected]
www.hauppauge.com.sg
Hauppauge Computer Works GmbH
Krefelder Straße 669
41066 Mönchengladbach, Germany
tel: (+49) 02161 69 488 0
tech support: (+49) 02161 69 488 40
email: [email protected]
www.hauppauge.de
Contents of the package:
•
•
•
Impact-VCB-E video capture PCI-E board
WinTV v7 installation CD-ROM* with Arcsoft ShowBiz
application
Half Height bracket for low profile system
* Make sure to keep the installation CD-ROM in a safe
place, it will be required for later software updates.
For the exact contents please refer to the packaging
description on the box.
How the IMPACT-VCB-E works
Impact VCB-E is a Windows video capture PCI Express card. It can be used for
digitizing and compressing video from video cameras, video tape recorders, Set-top
box’s and other devices which create analog video signals.
Included with Impact-VCB-E are two applications:
- WinTV v7, which is used for displaying live video on your PC screen and to create
video recordings,
- ArcSoft ShowBiz, to capture your analogue videos, edit them and burn to Video DVD.
When recording live video with the WinTV v7 application, Impact-VCB-E creates a .TS
(transport stream) file. Using options in the WinTV v7 application, you can also create
.MPEG files.
ArcSoft ShowBiz can capture your analogue videos to disk, edit them and burn to Video
DVD, also allow to post videos on YouTube.
Impact-VCB-E which uses BDA capture devices, which will be compatible with most
video applications which use WDM capture devices.
Installation Overview:
1. Install the IMPACT-VCB-E board in your PC and connect AV cables.
2. Install IMPACT-VCB-E Windows device driver.
3. Install the WinTV7 and ArcSoft ShowBiz application.
4. Begin setting up WinTV 7.
5. Using the WinTV7 Application.
6. Create Video DVD's with ArcSoft ShowBiz
1. Install the IMPACT-VCB-E board in your PC and connect AV cables.
To install, switch off the computer and remove the computer cover. The
manufacturer of your PC supplies instructions on removing the PC cover.
•
Locate a free PCIe slot
(a short white slot). Unscrew
and remove the metal cover
plate which covers the back of
the empty slot.
•
Plug the WinTV board into the
PCIe slot, and screw the
WinTV metal cover plate to
the PC’s chassis.
•
Connect your A/V source
(Composite or S-Video) to the
Impact-VCB-E board.
Note: Your PC could be damaged by electrostatic discharge. Avoid this by contacting
the earthed chassis of your PC, before you open it or touch the PCIe card.
Note: If you are using a low profile computer or chassis, you can replace the full height
bracket on the Impact-VCB-E with the supplied half height bracket to fix into your low
profile systems chassis.
2. Installing IMPACT-VCB-E Windows device driver.
For all versions of Windows:
Turn ON your PC and allows Windows to load fully. Insert the WinTV Installation CDROM in your PC’s CD-ROM drive. The “Hauppauge WinTV Installation CD” window will
appear on the screen. Select your preferred language.
Click the button labeled Step 1: Install drivers.
A blue screen will open and begin installing the
drivers for your WinTV. Once the drivers have
installed, click on the Finish bar to exit.
On Windows XP, after you install your WinTV
device and boot Windows, a 'Found New
Hardware' wizard will appear, please cancel it
and allow windows to load fully before
proceeding. After Windows loaded fully insert
the installation CD-ROM and proceed with
driver installation as mentioned above.
N
ote: if the CD does not autorun navigate to the CD and run the 'Setup' file.
3. Installing WinTV7 and ArcSoft ShowBiz Application.
Click the button labeled “Step 2: Install WinTV”, the
setup application will then open and begin
automatically installing the WinTV7 application
components.
After completion of the WinTV7 installation,
you will be prompted to install ArcSoft ShowBiz
application for video editing and creating DVD’s.
Once complete, click OK then Exit.
N
ote: The latest driver updates are available at: www.hauppauge.com.sg/support
4. Begin setting up WinTV7.
After the installation is complete, you will need to configure your AV input on
WinTV7 as part of the initial setup. Then you can start watching and recording
or playing them back on your PC.
You will see a WinTV v7 icon on your Windows desktop. Double click on it.
When you run WinTV for the first time, the WinTV Device Setup Wizard appears, select
External input and click Next to continue.
You will be presented with the option to add a Composite and S-Video Input. Please
select your country and click Next.
If you wish to connect a source not normally designed for operation in your country, you
can configure the Video Format manually from the drop down list. Change the value
from “AUTO”.
N
ote: PAL BGHIDK is the commonly used format in Europe/Asia. NTSC is the broadcast format used in North
America.
5. Using the WinTV7 application.
WinTV v7 is a powerful and intuitive TV application. There are many features in WinTV v7, including
live TV, recording and pausing live TV, a TV scheduler and a video player where you can playback
recordings in a window or full screen.
N
ote: If there is no WinTV plugged into your PC when you open the WinTV v7 application, WinTV v7 will start
in Playback recorded TV mode. In this mode, you can playback to your PC screen any TV programmes which have
been previously recorded
Watching Video
To watch your External video inputs like S-video or Composite video, click on the TV button. You can also
select Live TV from the Context Menu (a right click in the TV window brings up the Context menu), or press
ALT T on the keyboard.
Playback Recorded Video
To open a file for playback, click on the Folder button or select Open File from the Context Menu. The file
will then be played back in the WinTV window.
Changing Channel
To change your External video input channel (Composite or S-Video), click the Channel Up or
Channel Down buttons on the WinTV application, or press the + or - key on the keyboard. You
can also type a channel number (for example: 15) followed by the Enter key.
You can choose a TV channel from the complete list of available channels by opening the Context menu
(right clicking into the TV window) and select Find Channel, or press Ctrl + L to open the channel list. You
can now enter a channel name (or a part of it) to display only those channels which match the name. Select
a channel from the list with your mouse.
OSD button
Clicking the OSD button will bring up the On Screen Display with the current channel name.
Pause TV / Video
WinTV automatically generate a Pause file after changing channels. You can Skip
Back at anytime or click the Pause button to pause the TV program.
While watching Video, the following controls can be used:
- Press the Skip Back button to skip back 1minute.
- Press the Rewind button to skip back 10 seconds.
- Press the Fast Forward button to skip forward 30 seconds.
- Press the Skip Forward button to skip forward 1 minute.
N
ote: Changing the video channel will reinitialize the pause buffer. However, you can find the last pause
file (in a .TS Transport Stream format) in the Pause directory (by default: C:\temp\Pause Buffer)
Record Video
Click the Record button on the WinTV application to start recording current video channel.
WinTV will automatically generate a file name and start recording your TV program in original
Digital Quality. The format of the file name is [Programme title]_[Date]_[Time].ts While recording TV, you will
not be able to change other video channels. However, you can still Pause/Skip Forward/Skip Back. Also, the
recording for digital TV is stored in a digital *.ts Transport Stream format.
N
ote: If you would like to record in .MPG format or both .TS and .MPG format you can do it by selecting the
option Auto Convert MPEG-2 Recordings to .mpg under the Advanced Options of WinTV Settings.
Stop
Clicking the Stop button will stop live Video, or terminate a manual recording. Click the TV button
to start watching the video again.
The Context Menu
Right click inside the TV window to display the Context Menu. The Context menu
options are:
View Mode: Normal view, No title and Full screen are available. In Normal view, all
button and controls are visible. In No title mode only the Video image is displayed.
Full screen mode will fill your screen with the Video picture. You can also switch
between these modes by double clicking inside the TV window, or by pressing
CTRL W on the keyboard.
N
ote: The application size in No title mode and Normal view can be stretched and
shrunk independently and will retain their settings when you change mode.
Aspect Ratio: Selecting Auto will maintain the correct aspect ratio
(4:3 or 16:9) of the video image (recommended). Selecting Fill will make the TV image always fill out the
complete video window, regardless of the dimension of the application window.
Audio Stream: If the current broadcast offers more than one audio language, you can select a different
Audio Stream here (Applicable for TV only).
"Always On Top" Mode: The WinTV application window will remain in view over any other applications
even if it is not selected. To turn on, select Stay On Top (or ALT + O). To turn off, select this option again.
The Scheduler
The Scheduler allows you to record a TV or video program at a certain date and time on a specified channel.
The Scheduler lists all scheduled recordings added or
any manual recordings that have been set. From here
you can manually Add or Delete these schedule entries.
The Cancel button allows you to terminate a currently
recording program.
To schedule a recording, click on the Add button.
You will need to set the following information:
Name: The name of your recording task (this does not
specify the filename of the recording).
Channel selection: Choose the channel to record.
Start Time: Set to the desired start time.
Program Duration: The length of the recording, using
the arrows (steps of 30 minutes) or directly by the
keyboard.
Recurrence: You can choose to have the recording
repeat Once, Daily or Weekly. If you select the Weekly
option, select the day you wish have the show recorded on.
Start Date: The default is the current date.
Date to End: If you have selected the Every Day or Weekly option, you can specify the date at which to stop
this task. Once all the information is set, click OK to confirm. You can add more events by clicking Add after
each event is set. When you are finished, click OK to exit the scheduler.
N
ote: The WinTV application does not have to be running for a Scheduled Recording to work, but your PC will
need to be either turned on, in Standby or in Hibernate Mode. All scheduled recordings are performed in the
background by a task called “WinTV7Rec.exe”. If a recording is started while you are watching live TV, live TV is
stopped and WinTV automatically starts playback of the current recording.
Configuration button
Click the Configuration button to open the WinTV settings
window.
General: select the language and the preferred Audio and
subtitle languages (Applicable for TV). You can also specify
the video renderer to be used and the TV shape.
Capture: Specify where the movie record, pause files and
snap shot picture files will be stored.
Devices: To configure a Hauppauge TV tuner or video capture
device, first select the device you wish to configure from the
list, then click on Wizard to scan for new channels, or Settings
to scan or organize the channel list.
All Channels: You can enable or disable channels with the select box in the first column. The right click
context menu allows you to select all channels, to delete the selected channel(s), to watch the selected
channel or to display details about the channel.
Favorites: You can add/rename or remove a selected channels to the favorite list.
Parental Control: Not applicable for video capture models.
Advanced Options: you can set options such as Convert TV recordings to .MPG file type and Game mode,
rd
view the WinTV log files directory and allows 3 party decoders here.
6. Create Video DVD's with ArcSoft ShowBiz.
Create a DVD video with ArcSoft Showbiz
With ArcSoft ShowBiz you can digitize video from your analogue video sources, and burn it onto a video
DVD. ShowBiz also allows you to upload your video to your YouTube account.
After installation you will find the "ArcSoft ShowBiz" icon on your desktop. Click on this Icon to run the
application. The program is divided into three main steps Capture, Edit and Produce.
Capture
Switch your video source on. In ArcSoft ShowBiz application click on "Capture".
The capture module will open.
In Video Source:" Hauppauge WinTV 885 Video Capture” should now be selected.
In the "Video Input:" drop down menu select "Composite Video", if your video source is connected to the
yellow RCA connector on the A/V input cable.
Select "S-Video", if the video signal is connected to the black, 4-pin S-Video connector. You should now see
live video from your video source in the preview window, and also hear audio.
You can enter a recording duration in the "Duration:" field.
Click the "Record" button to start recording.
Edit
In the Edit step you define which recordings will be on the
final Video DVD. Drag the desired videos from the "Media"
area into the "Storyboard" at the bottom of the window.
You can also trim your videos, define transitions, and add
text and video effects.
Produce
After editing, click on "Produce"
to generate the final video file,
burn a Video DVD or upload
your video to your YouTube account.
Troubleshooting
Some notes on system compatibility
For recording analog channels you need a P4 2.8 CPU or higher speed. In some cases, either a faster
processor or more graphics memory might be required. Slow or jerky video and a noisy TV picture indicate
system performance problems.
Not getting proper display of TV programs.
Improper display or distorted video at the bottom of the display area can be caused by VGA overlay or video
buffering, in your PC or laptop: a graphics system which cannot keep up with the high data rates or video
overlay. Many times, improving the performance of the graphics display will fix the improper video display
analog TV. Here are some tips on improving graphics performance:
- Use the latest graphics driver: graphics drivers are often ‘tweaked’ to improve performance, especially the
built-in graphics on laptops.
Check the Microsoft Windows update site to download the latest graphics driver for your computer. Or check
your computers manufacturer website for the latest graphics driver.
- In the WinTV v7 Settings menu (click the “gear” icon), in the General tab change the Video Renderer. This
is used to change the display mode of a graphics card for TV watching. This does not affect any other
Windows program. The default mode used by WinTV is EVR. EVR uses your graphics card to move the
digital TV image into the graphics memory. If you chose Overlay, the processor moves the TV signal into the
graphics memory. It is more CPU intensive but often fixes display problems on some laptops or PC’s.
After setting up my video channel (Composite or S-Video) the WinTV7 shows a
black screen.
By default WinTV7 will look for the TV std depends on the country you set in your Windows Regional
Language and settings. For example if the Windows regional was set to US and your are trying to add PAL
video then you may a see a black screen window on WinTV7. Either you need to select the correct video
format (PAL BGHIDK is the commonly used format in Europe/Asia. NTSC is the broadcast format used in
North America.) or select the country your are in on your Windows regional and Language settings prior to
installing WinTV7.
Uninstalling the WinTV driver and applications
Run the hcwclear.exe from the installation CD. Select OK. A black screen will briefly appear and once it has
disappeared the software will have been removed. If you now restart the computer you reinstall the WinTV
driver in Step 1 above.
CE Statement: This equipment has been tested and complies with EN 55022, EN 55024 and IEC
801-3 part 3 standards. CAUTION: Changes or modifications not expressly approved by the party responsible for compliance to the
FCC Rules could void the user's authority to operate the equipment. Supplementary Television Broadcasting Receiving Apparatus Appareils supplémentaires de réception de télévision, Canada. Nordic note: Ma kun tilkoples kabel-TV nett via galvanisk isolator
Waste Electrical and Electronic Equipment (WEEE): The device may not be disposed of with household rubbish. This appliance is labeled
in accordance with European Directive 2002/96/EG concerning used electrical and electronic appliances (Waste Electrical and Electronic
Equipment - WEEE). The guideline determines the framework for the return and recycling of used appliances as applicable throughout the
EU. To return your used device, please use the return and collection systems available to you.