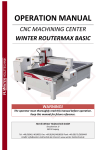
1
Leetro co., Ltd
MPC6610
Controller of CNC Router
User Manual
(V 1.0)
1
Copyright Statement
Leetro Co., Ltd Reserves all rights.
Leetro Co., Ltd (Hereinafter referred to as Leetro) reserves the right to make change
without further notice to any products herein to improve the design and specification.
Leetro shall not be liable to indemnify users against any direct, indirect, incidental or
consequential loss and liability caused by incorrect usage.
Leetro owns the product and its software patents, copyright and other intellectual
property rights. Without authorization, it is not allowed to directly or indirectly copy,
manufacture, process, or use this produce and its related parts.
c
Cautions: Moving Machine is dangerous. Do design he
mechanisms with effective error handling and security protection
mechanisms.
2
Contents
Chapter 1 Preface… … … … … … … … … … … … … … … … … … … … … … … … … … … … … … … .4
Chapter 2 Overview
2.1 MPC6610 Introduction… … … … … … … … … … … … … … … … … … … … … … … … … … ........5
2.2 Components of Controller… … … … … … … … … … … … … … … … … … … … … … … … … … 5
Chapter 3 MPC6610 Dimension … … … … … … … … … … … … … … … … … … … … … … … … ..6
3.1 Handle Dimension… … … … … … … ..… … … … … ..… … … … … … … … … … … … … … … … .6
3.2 P50 Connection Board Dimension… … … … … … ..… … … … … … … … … … … … … … … … .6
Chapter 4 MPC6610 Hardware Interface Introduction… … .… … … … … … … … … … … … … ..7
4.1 MPC6610 Hardware Interface Introduction… … … … … … … … … … … … … … … … … … … … .7
Chapter 5 MPC6610 Operation Interface… … … .… … … … … … … … … … … … … … … … … ..8
5.1 MPC6610 Panel Keypad… … … … … … … … … … … … … … … … … … … … … … … … … … 8
5.2 MPC6610 Main Interface… … … … … … … … … … … … … … … … … … … … ...… … … … … 8
5.2.1 Main Interface… … … … ..… … … … … … … … … … … … … … … … … … … … … … 8
5.2.2 Switch High/ Low… … ..… … … … … … … … … … … … … … … … … … … … … … 10
5.2.3 Modify High/ Low value… … ..… … … … … … … … … … … … … … … … … … … … .10
5. 3 Menu… … … … … … … … … … … … … … … … … … … … … … … … … … … … … … … … … .11
5.3.1 Menu Item Switch… … … … … … … … … … … … … … … … … … … … … … … … ...11
5.2.2 Modify Setting Parameter… … … … … … … … … … … … … … … … … … … … … ...11
5. 4 Machine Setup… … … … … … … … … … … … … … … … … … … … … … … … … … … … … .12
5.4.1 Pulse Equivalent...… … … … … … … … … … … … … … … … … … … … … … … … … 12
5.4.2 Table Size.....… … … … … … … … … … … … … … … … … … … … … … … … … … … 13
5.4.3 Home Setup..… … … … … … … … … … … … … … … … … … … … … … … … … … … 15
5.4.4 Spindle Setup… ..… … … … … … … … … … … … … … … … … … … … … … … … … 16
5.4.5 Voltage Setup… ..… … … … … … … … … … … … … … … … … … … … … … … … … 17
5.4.6 Tool Sensor… .… … … … … … … … … … … … … … … … … … … … … … … … … … 18
5.4.7 Backlash...… … … … … … … … … … … … … … … … … … … … … … … … … … … … 19
5.4.8 Z axis Max Speed… … … … … … … … … … … … … … … … … … … … … … … … .19
5.3 Motion Setup… … … … … … … … … … … … … … … … … … … … … … … … … … … … … … … 20
5.4 File Oprt(Operation) 【Run File】.… … … … … … … … … … … … … … … … … … … … … .21
5.4.1 Copy U-disk File… … … … … … … … … … … … … … … … … … … … … … … … … .21
5.4.2 Run memory File.… … … … … … … … … … … … … … … … … … … … … … … … … 22
5.4.3 Run U-disk File… … … … … … … … … … … … … … … … … … … … … … … … … .26
5.4.4 Stop Point and Adjust Z axis Height… … … … .… … … … … … … … … … … ...26
5.4.5 Stop Point..… … … … … … … … … … … … … … … … … … … … … … … … … … … ..29
5.4.6 Advance..… … … … … … … … … … … … … … … … … … … … … … … … … … … … ..31
5.4.7 Go Home Setup… … … … … … … … … … … … … … … … … … … … … … … … … … ..32
5.4.8 Power off Protection… … … … … … … .… … … … … … … … … … … … … … … … .....35
5.4.9 Read Processing File… … … … … … … … … … … … … … … … … … … … … … … … ..38
5.4.10 Key Combination.… … … … … … … … … … … … … … … … … … … … … … … … … 39
5.5 System Setup..........................................................................................................................40
5.5.1 Language.… … … … … … … … … … … … … … … … … … … … … … … … … … … … ...40
5.5.2 Update… .… … … … … … … … … … … … … … … … … … … … … … … … … … … … ...41
5.5.3 Backup...… … … … … … … … … … … … … … … … … … … … … … … … … … … … … 42
5.5.4 Restore… … … … … … … … … … … … … … … … … … … … … … … … … … … … … … 43
5.6 Revision… … … … … … … … … … … … … … … … … … … … … … … … … … … … … … … … ..44
3
Chapter 1 Preface
Thank you for the use of MPC6610 Controller of CNC Router!
Please read carefully User Manual before using MPC6610.
Please take full account of machine moving protection
measures to avoid machine damage or casualties.
Caution
Please do not use freely the controller before reading user
manual!
Prohibition
Please do not disassemble or replace chips and components
without authorization!
Prohibition
Please protect it from water, corrosive solution or gas!
Prohibition
4
Chapter 2 Overview
2.1 MPC6610 Introduction
MPC6610 Controller is a newly-developed type of motion controller, particularly
for Mechanical engraving and cutting technology. It can be fully realized work offline.
Standard G code file processed in the software of upper computer can be downloaded
to the controller by USB Disk or USB data cable. All machine setting parameters can
be input to the controller.
2.2 Components of Controller
MPC6610 Handle
U盘
Processing File
PC
USB
MPC 6610 Handle
PC
50-pin Cable
Connection Board
MPC6610 Components of Controller
1) Handle
2) Connection Board
3) 50-pin Cable
USB Interface
USB cable interface
50-pin cable Interface
5
Chapter 3 MPC6610 Dimension
3.1 Handle Dimension
3.2 P50 Connection Board Dimension
142.1
163.8
8
73.4
66.0
6
11.8
Chapter 4 MPC6610 Hardware Interface
4.1 MPC6610 Hardware Interface Introduction
Pin Definition
Name
1
2
3
4
5
6
POWER1
24V Power +
GND
X1
X Axis + limit
X Axis -limit
YAxis+limit
YAxis-limit
ZAxis+limit
Z Axis - limit
X2
X Axis Home
Y Axis Home
Z Axis Home
U Axis Home
GND
24V
X3
IN1
IN2
IN3
IN4
GND
Y1
X axis pulse
X Axis Dir
5V
Y2
Y axis pulse
Y Axis Dir
5V
Y3
Z axis pulse
Z Axis Dir
5V
Y4
U axis pulse
U Axis Dir
5V
Y5
OUT1
OUT2
OUT3
OUT4
GND
Y6
SP0
SP1
SP2
SP+
GND
50-pin cable connector
J1
1)POWER1:Power input Interface(24VDC)
2) Note:MPC6610 adopts 24VDC power supply. The other power pin is output
power from the controller
MPC6610 adopts 24VDC power supply. Please make sure
the correct and reliable power in order to avoid the part
damage, and abnormal work.
Caution
All power supply is only used to control signals. It is
prohibited to use is as the power supply of driver.
Prohibition
The 3rd Pin of Y1、Y2、Y3、Y4 is 5v power supply from
MPC6610. Please do not connect the exterior 5v power
supply to the 3rd Pin.
Caution
c
Both input and output adopt single end mode.
Notice
7
Chapter 5 MPC6610 Operation Interface
5.1 MPC6610 Panel Keypad
5.2 MPC6610 Main Interface
5.2.1 Main Interface
Turn on the controller, it will show the following screen:
Then 5 seconds later, it automatically enters “Datum”screen as follows:
8
Press
, the machine goes home, and the screen enters Main interface as follows, or Press
to enter Main interface.
1) X, Y, Z shows current absolute coordinate of three axes. For example: “X 10.997” shows
that current X axis absolute coordinate is 10.997
2) “Stop”shows the machine state is “Stop”. It shows different condition according to the
machine current state. For example, it shows “Run”while it is working. It shows “Pause”if
you suspend the machine while working. It shows “Home”if the machine goes to machinery
origin. It shows “Manl (Manual)”while operating manually and so on.
“Off” shows the spindle state is “off ”. It will show the spindle grade state No. while
3)
working.
“High”means that the current max speed depends on the user setup “Manual High”. Press
4)
, it switches to“Low”
,The current max speed depends on the user setup”Manual
Low”.
5) (Manual) Mode (Continuous mode, Step mode, DST(Distance) mode)
Press
Three Manual move modes switches as follows:
“Step”X, Y, Z axis move once 0.1mm while pressing
、
、
、
、
、
、
、
、
. 0.1mm is stable. Please contact the factory if you want to amend it.
“Continuous”: X, Y, Z axis begins to move while pressing
9
、
、
, and stop till the button releases
DST(Distance): In this mode, the machine move once according to the setup distance while
、
pressing once
、
、
、
、
,
Remarks: In the following mode, you can modify the distance.
Such state, you can input any distance you
want, and then press
to confirm it.
(Figure 1)
Such state, you can press
to switch
to the state of Figure 1 to amend distance.
(Figure 2)
5.2.2 Switch H Wigh (speed) / Low (Speed)
Press
to switch 【High】、【Low】
5.2.3 Modify High / Low value
Press
as follows:
10
While manual Mode, Low speed is
600mm/ min. High speed is 9000/min
Herein, DST (distance) is the same with
manual moving DST (distance)
Remarks:
The above two DST (Distance) settings are the same. While modifying one
setting number, the other setting number will change to the same automatically.
5.3 Menu
Press
to Enter Setting List
and
5.3.1 Menu Item Switch
1. Press
、
to move the cursor among the menu item in one page.
2. Press
、
to move the cursor to the next page.
3. Press
to enter Menu item. Press
to return main interface.
5.3.2 Modify setting parameter. (Modify the table size to illustrate:
)
Enter “Machine Setup”, and then press
to enter 【Table Size】
11
Second Step:Press
as follows:
Press
to modify the number
Third step:Input correct number value according to the actual size:
Press
to modify the
value if the input is wrong.
Fourth Step:Press
to confirm the table size setting.
Remarks:All modifying steps are the same as the above steps.
5.4 Machine Setup
5.4.1 Pulse Equiv (Equivalent)
First Step: Press
to enter as follows:
12
Second Step:Press
Third Step:Press
to enter as follows:
to enter as follows:
1、 Pulse Equivalent means the driver pulse
number when the axis moves 1mm.
2、 Pulse Unit:Pulse/mm
3、 Please press
to modify the number
If the working size in X Y axis is not correct, please modify the pulse equivalent as follows:
(Please Note: Pulse equivalent is certain according to the machine hardware, such as driver,
and machine structure. Random change will lead to incorrect work and wrong speed) Please
contact the manufacturer before modifying.)
1、 For example, the theoretical cutting square size is 100 X100mm
2、 But the actual cutting square size is 90×90 mm
3、 Correct pulse equivalent =(101.86×100)/ 90
4、 Then input the correct pulse equivalent.
5.4.2 Table size
First Step: Press
to enter【Machine Setup】as follows:
13
Second step: Press
to enter【Table Size】as follows:
1、 X Y Z Size unit:mm
2、Press
to modify the number
Remarks:
1、 The number value means the max moving size in X、Y、Z axis after the machine
go home. For example: “X:1200” means the max moving area in X axis
direction is 1200mm.
2、 In manual moving, it stops moving while it exceeds table size, and the limit error
report will shows as follows:
1、Limit error reports begins from Z axis,
then X Y axis error.
2、 This function is valid only after
MPC6610 controller goes home.
Problem Solution:
1. Please check Pulse Equivalent is correct or not
2. Please check the file size to make sure the size does not exceed the table size.
3. Please contact with the manufacturer.
14
5.4.3 Home Setup
First Step: Press
to enter【Machine Setup】 as follows:
、or
Step 2:Press
to choose【Home Setting】,:
to enter 【Home Setting】 as follows:
Step 3:Press
1、 Speed Unit:mm/min, Max Home speed
2、 Dir(Direction) : - refers to Negative
Direction, + refers to Positive Direction
3、 Outward Move::It refers to the backward
moving distance after going home.
1、 Press
、
to move the cursor among the menu item in one
page. Press
、
to move the cursor to the next page.
5.4.4 Spindle Setup
2、 Speed ( Max Home speed) is set up according to the machinery
15
5.4.4 Spindle Setup
1)
Spindle startup/ stop( the current spindle start to rotate at the lowest setting
speed). The spindle rotational speed can be adjusted after pressing
、
after the spindle starups and processing work stops
2)
First Step: Press
Second Step:Press
to choose【Machine Setup】
、or
to choose【Spindle Setup】:
1、 Generally there is no need to modify the
default spindle setup.
2、 Spindle Grade State: Low, Medium, and
high. There are 8(state speed. Every state
speed depends on the Inverter setup.
Third Step:Press
to enter【Spindle Setup】 as follows:
1.
Wait time:It refers to the waiting time to move after press
.(It depends on the inverter setup)
2、Please press
16
to modify the number value.
Fifth Step:Press
Sixth Step:Press
, and input 【8】as follows:
to enter the following interface. (Remarks: There is no need to modify
the following interface)
5.4.5 Voltage Setup
First step: Press
to enter
Third Step:press
to enter 【Voltage Setup】as follows
17
It means that limit sensor signal, home signal, input
signal, and output signal work at effective high
voltage ( about DC0.6V) or effective low voltage
( about DC24V) .
5.2.6 Tool sensor
First Step: Press
to choose【Machine Setup】
Second Step:press
、or
to choose【Tool Sensor】 as follows:
(Press
、
to enter the next page)
Third Step:Press
to enter 【Tool Sensor】as follows:
1、 Input the number value according to the tool sensor
thickness supplied by the manufacturer. Unit:mm
2、 Press
Remarks:After press
+
+
automatic tool setting
to set tool automatically, please do not press
make Z axis origin setting.
18
to
5.2.7 Backlash
First Step : Press
Second Step:Press
to choose【Machine Setup】
choose 【Backlash】
(Press
or
or
next page.)
Third Step:Press
to enter 【Backlash】
There is no need to change the number
value. Unit: mm
r
5.2.8 Z axis Max speed
First Step : Press
to choose【Machine Setup】
19
to enter
Second Step:Press
or
choose 【Z Max Speed】
(Press
or
enter next page.)
Third Step:Press
to enter【Z Max Speed】as follows:
1. Speed Unit: mm/min
2. At manual Mode, it limits【High】、
【Low】.
In normal processing, it limits Z axis max
speed.( Remarks: Z ball screw lead generally
is 5mm. 10mm.
3. Z axis max speed is normally set up 1200
5.3 Motion Setup
First Step : Press
, and press
、or
20
, to choose【Motion Setup】
,
to
Second Step:Press
to enter as follows:
1、 Acceleration Unit::mm/S²
2、 【Curve Acc(Acceleration)】is two times as much as
【Work Acc (Acceleration)】
3、 The number value is empirical value.
4、 Please subject to the actual debugging to adjust
Curve Acc and Work Acc.
Third Step: Press
to next page as follows:
1、 Speed Unit:mm/min
2、 Please press
to modify the setting number.
3、 Idle speed is set up according to the mechanism.
Remarks:
Please contact the manufacturer to open the hidden interface if you have any problem!
5.4 File oprt(operation)【Run File】
5.4.1 Copy U-disk file
First Step: Insert U-disk
Second Step: Press
Third Step:Press
and press
or
to enter as follows:
21
to choose 【 File Oprt 】
Forth Step:Press
Fifth Step: Press
to enter.
、or
, to choose【Sel U-Disk File:File1.mmg】,and press
to enter the following interface.
Remarks:It will take some minutes if the file is too big.
Sixth Step:Press
to return 【Main Interface】
5.4.2. Run Memory file
Operation 1:
First Step:Press
and press
or
to choose【File Oprt】as follows:
22
Third Step:Press
Forth Step: Press
or
or
to choose【View Memory File】as follows:
to choose【Sel Memory File:File1.mmg】, and press
Run the file
Fifth Step:Press
to enter Run( Operation) interface as follows:
1、 Work Spd(Speed) Unit:mm/min
2、 Idle Spd(Speed) Unit:mm/min
3、 Spd State(Spindle grade State):It refers
to the spindle motor speed per minute.
4、Down Rate:Z axis Max speed× Down
rate = Z axis down speed of working.
23
1、 Spd(Speed) Rate:Work speed×Spd Rate = the
actual processing speed of X Y axis.
2、 Up DST( Distance):It refers to Z axis up
distance while pressing
. The number
value is set up in edit software.
Sixth Step:Press
again. If the file is processed for the first time, the following interface
will appear. If the file is not processed for the first time, the following interface will not appear.
It will enter Seventh Step.
Seven Step:After Processing 100%, the following interface appears:
1、
【Speed Rate】、
【Line No.】、
【spd】、
【Counter】automatic
switching display
2、
+ Digit(1~6):Switch to multiple workpiece
origin(coordinates) 【Up to 6 coordinates】
3、Spindle grade state:off、F1、F2、F3、F4、F5、F6、
1、 While processing, press
+
、
to
change the spindle state.
2、 While processing, only 【Step】 mode works,and every
manual move default distance is 0.1mm. Please contact
the manufacturer if you want to modify this number
value.
24
1 、 Herein, it shows 【 Run 】 while
processing. While pause, it shows
【Pause】
1、 While processing, press
、
to
adjust the speed. The speed change 5% times every
press.
to run the memory file.
Operation 2:Press
First Step:Press
and
or
to choose【Memory File】
Second Step:Press
to enter as follows:
Third Step:Press
、or
(Press
or
to choose【Sel Memory File:File1.mmg】
to the next page).
25
to enter the following interface. The following step is the same with
Forth Step:Press
above Operation 1.
5.4.3. Run U-Disk File
First Step: Insert U-disk.
Second Step : Press
Third Step:Press
Forth Step:Press
,and press
or
to【U-Disk File】
to enter as follows:
、or
,
or
to choose【Sel U-Disk File:
File1.mmg】The following step is the same with above Run Memory File or
5.4.4. Stop point and Adjust Z axis height
26
First Step:Press
Second Step:Press
two times and enter the following interface:
to enter【Pause】interface,then press
、
to adjust
Z axis height as follows:
Press
to stop the work if the
material is not flat during processing, and
then adjust Z axis down deepness.
r
Third Step:Press
to adjust Z axis height as follow:
1、 Under the mode of【Manual】,
default manual move distance is
0.1mm,
Please contact the manufacturer if you
want to modify the distance.
Forth Step:Press
to enter as follows after adjusting Z height in Pause state.
27
1 、 Press
to continue to run the file
according to old Z height.(New Z height setting is
canceled). Press
to run the file according
to new Z height,
Fifth Step:After press
Sixth Step:Press
Seven Step:Press
or
, the interface is shows as follows:
to enter 【Pause】 state:
to enter as follows:
1、Current Stop point line is at the 19th G-code.
Please press
to modify this number.
Press
to save Start line, and then press
to continue to run the file.
28
Eighth Step:Press
Ninth Step:Press
to enter the following interface.
,and then press
to enter the following:
Tenth Step: Input any number among 1-6 , and then press
5.4.5 Stop point
29
to save Stop point.
First Step:Press
,and press
、or
,
or
to choose【Stop
Point】as follows:
Second Step:Press
to enter as follows:
Third Step:Input the previous saved Stop point 1:
Forth Step:Press
to enter the following interface.
Fifth Step: Press
to enter the following interface if you want to continue to run the file
from Start Line No.19,
30
Sixth Step: Press
to continue to run and enter the normal interface as follows:
Remarks:
1. In the case of going home, continue to run the file from the saved Stop Point at any time
2. In the case of no going home, only while the tool head does not work can the saved Stop Point
be available.
5.4.6
Advance
First Step:Press
Second Step : Press
,and press
、or
, and press
31
, to choose【Advance】as follows:
、 or
to choose 【 Milling 】
Third Step:Press
1、This function is only for milling flat
table.
Forth Step:Press
、or
choose【Matrix】
It is only used for processing the
same graphics file.
ri
5.4.7 Go Home Setup
Go home Setup decides if the power-off protection and Stop-point are valid or not.
Setup 1.:
【Hint home:No】、【Home on Start:No】
【Home on start:Yes】
:Go home automatically
after MPC6610 controller turn on.
【Home on Start:No】:Do not go home after
MPC6610 controller turn on.
Then enter the following interface while MPC6610 controller turns on.
32
Remarks:
1、
2、
Stop-point and Power-off protection are not valid in this manner of such
setting.
Only after going home, stop-point and power-off protection are not valid.
Setup 2:
【Hint home:No】
、【Home on Start:No】
【Home on Start:Yes】
:Go home automatically
after MPC6610 controller turn on.
【Home on Start:No】:Do not go home after
MPC6610 controller turn on.
Then enter the following interface while MPC6610 controller turns on.
33
Herein, Hint 【Hint】
,
After going home, stop-point and power-off
protection are both valid.
Setup 3:
【Hint Home:Yes】
【Hint Home:Yes】:After MPC6610 controller turn on, it
hints【Datum?】,Press
to go home. Otherwise press
to enter Main interface instead of going home.
【Home on Start:No】:Enter Main interface after turning on.
Then enter the following interface while MPC6610 controller turns on.
Herein,Hint【Datum】
34
Operation 1: Press
to go home and enter the following interface.
Stop-point and Power-off protection are valid in this manner of such setting.
Operation 2 :Press
to enter the following Main interface instead of going home.
Remarks:
1.
Stop-point and Power-off protection are not valid in this manner of such
setting.
2.
If 【Hint home:Yes】
,and press
, and 【Home at start:Yes】, stop-point
and power-off protection are not valid in this manner of such setting.
5.4.8 Power off Protection
First Step:Turn on the handle to enter the following interface:
35
Second Step:Press
, then the machine go home automatically and enter as follows:
Third Step:Run file to enter the normal processing interface:
Forth Step:Suddenly the power is off. Then turn on the handle to enter the following:
Fifth Step:Press
, the machine go home automatically, the handle shows as follows:
36
Power-off Protection / Continue?
Sixth Step:Press
、or
to choose if Continue work or not
1、 Press
to enter the following to continue the processing work.
1. Press
to cancel 【Power off Protection】
37
5.4.9 . Read processing file.
1. Wentai saved file format. ( Wentai is also called Ucancam, Artcut)
1、Press “Save Tool path”after editing the file in Wentai software.
The saved file format in Wentai is G-Code Files(*.nc)
1、 Read Type 3 software file
First Step:Save the file tool path after finishing the edit.
38
】,
Second Step:The saved file format in Type 3 is *.UOO
2、 ArtCAM Software
First Step:Save tool path in ArtCAM after editing the file as follows:
Second Step:Output the file and save the file in the format“Model Master 3 Axis Flat (*.mmg)”
Third Step:Please use U-disk to download the file to the controller after the tool path is saved.
Remarks:
1、 Please make the U-disk format in Fat.
2、 Garbled processing file code will make the controller MPC6610 also garbled after
downloading.
5.4.10 Key Combination.
+
:Run the latest memory file.加工最近一次的内存文件
+Digit(1~6):Switch to multiple workpiece origin(coordinates)
+
:Absolute coordinate of Mechanical origin.(Only after the machine go home,
will this coordinate value be accurate.)
+
:Automatic tool setting (Remarks:please do not press singly
Tool setting)
+
:Go to workpiece origin.
Please contact the manufacturer if you want to correct the hidden parameters.
39
after auto
5.5 System Setup
5.5.1 Language
First Step : Press
, and press
Second Step:Press
to enter【Language】:
Third step:Press
、or
or
to choose 【 System Setup 】
to choose【English】and press
language
40
to enter English
5.5.2 Update
First Step:Insert U-disk of Update file.
Second Step : Press
, and press
、 or
to choose 【 System Setup 】,
Third Step:Choose【Update】
Forth Step:Press
Please observe the light state of
U-disk. Flash indicates the file
downloading. Light on indicates the
file downloaded.
41
5.5.3 Backup
First Step : Press
Second Step:Press
、 or
, and press
to choose【Backup】
Third Step :press
42
to enter 【 System Setup 】
5.5.4 Restore
First Step:Press
Second Step:Press
Third Step:Press
、or
and press
to choose【Restore】
to backup the file:
43
to choose【System Setup】,
5.6 Revision
First Step:Press
Second Step:Press
and press
、or
to choose【Revision】
as follows:
It is to check the current Version for
management and maintenance.
Remarks:
Please check the Revision, and contact the manufacturer while there is some wrong with
MPC6610 controller.
44