Download Legacy Kit Manual - The Barcode Software Center
Transcript
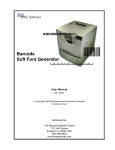
PCL Barcode Font Kit for Legacy Systems - User Manual
MEC Software
*MEC_SOFTWARE*
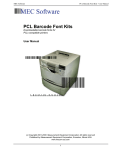
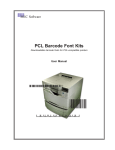
PCL Barcode Font Kit
for Legacy Systems
User Manual
Downloadable barcode fonts for laser printers.
Compatible with applications designed for HewlettPackard’s “Bar Codes and More” Font Product.
1234567890SLKFJ
*MEC*
*1234567890*
1
PCL Barcode Font Kit for Legacy Systems - User Manual
PCL Barcode Font Kit for Legacy Systems - User Manual
Contents
PCL Barcode Font Kit for Legacy Systems
Downloadable barcode fonts for laser printers
User Manual
(c) Copyright 2003, 2004 Measurement Equipment Corporation
All rights reserved
MEC Software
Published by:
Measurement Equipment Corporation
1113 Hull Terrace
Evanston, IL 60202 USA
Tel. (847) 866-7940
www.mecsw-usa.com
2
End User License Agreement ...................... 4
Introduction ................................................... 5
Installing the Fonts ....................................... 6
Loading Fonts using Command Line ......... 7
Loading Fonts using FontLoader .............. 10
Automating Font Loading .......................... 14
Technical Information ................................. 16
Adding Readable Text ................................ 18
Formatting Barcode Strings ...................... 18
Code 39 ..................................................................... 19
Extended Code 39 .................................................... 21
Code 39 Modulo 43 Checksum ............................... 23
UPC-A ........................................................................ 25
Format UPC-A with C ............................................... 27
Format UPC-A with Basic........................................ 28
USPS ZIP ................................................................... 29
FIM (Facing Identification Marks) ........................... 31
Business Reply Mail Horizontal Bars .................... 31
3
PCL Barcode Font Kit for Legacy Systems - User Manual
PCL Barcode Font Kit for Legacy Systems - User Manual
End User License Agreement
Introduction
YOU MAY:
1. Install and use each font kit on only one printer.
2. Make one additional copy of the font kit for back-up purposes.
3. Transfer the complete font kit package to someone else only if you assign all of
your rights under this license, cease all use of the fonts, remove all copies of the
fonts from your printer and computers, and if the person to whom the font kit
package is transferred agrees to the terms of this license.
Modern laser printers can print barcodes for legacy systems, even
if the software was originally designed to use specific hardware
that is now obsolete. This compatibility offers system administrators the option of upgrading to newer, more productive printers
without making changes to the application software.
YOU MAY NOT:
1. Use or make copies of the fonts except as permitted by this license.
2. Rent, sell, lease, assign or transfer the font kit package or any of its components except as set out above.
3. Modify the fonts or merge all or any part of the fonts into another software
package.
Early laser printers accepted plug-in font cartridges, including the
“Bar Codes & More” cartridge from Hewlett-Packard that included
several barcode fonts. The specific control codes required to print
barcodes using this cartridge were embedded in many data
processing applications. System administrators who want to
upgrade to new printers must either restrict their choices to
printers which can recognize the Bar Codes & More control codes
or change the control codes embedded in their software.
This license shall continue for as long as you use the product. However, it will
terminate if you fail to comply with any of its terms or conditions. You agree, upon
termination, to destroy all copies of the product.
We warrant that the storage media for the fonts will be free from defects in
materials and workmanship for 90 days from the date you acquire it. If such a
defect occurs, return the product to us and we will replace it for free. This remedy
is your exclusive remedy for breach of this warranty. It gives you certain rights and
you may have other legislated rights which vary from jurisdiction to jurisdiction.
LIMITATION OF WARRANTIES AND LIABILITY: Except for the express warranties of merchantable quality, merchantability or fitness for a particular purpose, or
those arising by law, statute, usage of trade or course of dealing, the entire risk as
to the results and performance of the FONTS is assumed by you. Neither we nor
our dealers or suppliers shall have any liability to you or any other person or entity
for any indirect, incidental, special or consequential damages whatsoever
including but not limited to loss of revenue or profit, lost or damaged data or other
commercial or economic loss, even if we have been advised of the possibility of
such damages or they are foreseeable, or for claims by a third party. Our
maximum aggregate liability to you, and that of our dealers and suppliers shall not
exceed the amount paid by you for the FONTS. The limitations in this section
shall apply whether or not the alleged breach or default is a breach of a fundamental condition or term, or a fundamental breach. Some states/countries do not
allow the exclusion or limitation of liability for consequential or incidental damages, so the above limitation may not apply to you.
4
This PCL Barcode Font Kit includes downloadable barcode fonts
that emulate the “Bar Codes & More” font product. The fonts can
be downloaded to most laser printers, multi-function printers, and
PCL-5 compatible inkjet printers. The fonts respond to the same
control codes used by the “Bar Codes & More” cartridge/SIMM/
DIMM, so no changes to existing applications are needed.
Each kit includes the following fonts:
Name of Font
File
Code 3 of 9, 8.11 pitch
BC_3of9_8pitch.dsf
Code 3 of 9, 4.69 pitch
BC_3of9_4pitch.dsf
UPC 10 mil
UPC_10mil.dsf
UPC 13 mil
UPC_13mil.dsf
USPS ZIP
USPS_ZIP.dsf
5
PCL Barcode Font Kit for Legacy Systems - User Manual
PCL Barcode Font Kit for Legacy Systems - User Manual
Installing the Fonts
Loading Fonts using the Command Line
Copy the fonts from the release CD to a convenient location on
your computer’s hard disk, then store the release CD in a safe
place.
copy
If you are using Windows, double-click on My Computer, browse to
the C: drive, and create a new folder called “BarcodeFonts” (this is
an example; you can name the folder anything you like). Then
browse to the CD and drag the fonts over to C:\BarcodeFonts.
The procedure is essentially the same if you are using an XWindow graphical interface on Unix or Linux.
If you are using a non-graphical operating system, use the appropriate commands to create a folder and copy the font files. For
example, it might look something like this in Unix or Linux (this
example assumes that the CD is mounted as ‘cdrom’):
> mkdir /usr/BarcodeFonts
> cp /cdrom/* /usr/BarcodeFonts
Once the fonts are on your computer, the next step is to load them
onto your printer. The FontLoader utility included with the kit is
generally the most convenient way to load fonts. FontLoader can
load the fonts directly from a Windows computer or can create
batch files or scripts to load fonts from Unix, Linux, and other types
of operating systems. You can also load fonts with standard OS
commands like copy, cat, lpr, or ftp.
If you are using MS-DOS or Windows, you can simply Copy the
font file to the printer port. In Windows, open a MS-DOS command line window. Use the /b (binary) command line option:
C:\> COPY /B BC_3of9_4pitch.dsf LPT1:
Note: If your system does not support long filenames you will
need to rename the files. For example: C39_4PIT.DSF.
If you are in a MS-DOS command prompt under Windows and the
destination printer is on the network, using the printer’s network
name may not work depending on your version of Windows. For
example, this command should send the font to the printer under
Windows/98 and Windows/2000, but may simply make a copy of
the file on disk with Windows/95:
C:\> COPY /B BC_3of9_4pitch.dsf \\MAIN\LASER
You may first have to assign the printer to a local printer port with
the NETUSE command. The port does not have to physically exist,
and you should not use a port that actually has a local printer
attached to it. For example, if you have local printers attached to
LPT1 and LPT2 and a network printer named “\\Main\Laser,” you
could assign LPT3 to the network printer:
C:\> NETUSE LPT3: “\\MAIN\LASER”
C:\> COPY /B BC_3of9_4pitch.dsf LPT3:
6
7
PCL Barcode Font Kit for Legacy Systems - User Manual
PCL Barcode Font Kit for Legacy Systems - User Manual
cat
use the PUT command to send each font file to the printer. Here
is a sample ftp session:
In Unix or Linux you can use the cat command to copy the file to
the printer raw device. The “raw device” usually has the same
name as the device you commonly use, but with an “r” on the end.
Using the raw device avoids the possibility that a print driver will
insert formatting codes as the font is sent to the printer:
#cat /usr/myfiles/BC_3of9_4pitch.dsf /dev/lpt1r
lpr
The lpr command can be an effective method for downloading
fonts. Unix and Linux support lpr; Windows/NT, 2000, and XP also
support lpr, but it may not be installed by default (lpr may be called
Unix printing by the Windows setup process). The general form of
the lpr command is:
# lpr -S<server> -P<printer> [-C<class>] [-J<job name>]
[-O<option>] <filename>
As an example, let’s assume that the destination printer is available at IP address 192.168.100.40 and the file BC_3of9_4pitch.dsf
contains the downloadable PCL barcode font. We must use -O
(option) followed by a lower case letter “L” to specify binary mode:
C:\> ftp 192.168.100.40
Connected to 192.168.100.40
220 Laser Printer Model xxx FTP server
ready.
User (xxx.xxx.xxx.xxx:(none)):_
331 Password required for (none)
Password: _
230 User (none) logged in.
ftp> put BC_3of9_4pitch.dsf
200 PORT command successful.
150 Opening ASCII mode data connection for
‘BC_3of9_4pitch.dsf’
226 Transfer complete.
ftp: xxxxx bytes sent in xx.xSeconds
xxxx.xxKbytes/Sec.
ftp> bye
After you have transferred the files, use the printer’s control panel
to print a PCL Configuration Page to verify that the fonts have
been successfully installed.
# lpr -S192.168.100.40 -P192.168-100.40 -Ol
BC_3of9_4pitch.dsf
ftp
This method can be used on Unix, Linux, and Windows systems.
At a command line prompt enter the ftp command and IP address
of the printer:
C:\> ftp <IP address of printer>
You will be prompted for a user name and password; press the
Enter key for each of these (no user name or password). Then
8
9
PCL Barcode Font Kit for Legacy Systems - User Manual
PCL Barcode Font Kit for Legacy Systems - User Manual
Loading Fonts using FontLoader
and click Save. This will add the fonts to the list on FontLoader’s
main display.
The FontLoader utility provides a convenient way to download
fonts to your printer. FontLoader runs on 32-bit versions of
Windows (95/98/Me/2000/NT/XP). With FontLoader you can:
• Load fonts onto a local or network printer
• Create scripts to load fonts on Windows, MS-DOS, Unix, Linux,
and other systems
• Add commands to store fonts on the printer’s Flash memory or
internal hard disk
Click on one of the three options on the main screen to select an
action. Depending on your choice you can then select fonts,
printers, and other options. When ready, click the Go button to
execute the action.
Note: Please remember that font kits are licensed per printer; do
not violate the terms of the license by loading the fonts to more
printers than permitted by your licenses.
To install FontLoader, run SetupFontLoader.exe (included on the
release CD). This will install the program on your system and put
a copy of the complete FontLoader manual in the C:\Program
Files\FontLoader folder. To run FontLoader, click on Start ->
Programs -> MEC Software -> FontLoader.
Download fonts to printers now
This action downloads the selected font(s) to the selected printer.
If you check Print Test Page, FontLoader will create and print a
test page after downloading the fonts. You may also choose a
printer-specific option.
Combine selected fonts into single download file
This action combines the selected font files, creating a single
download file with multiple fonts. You can also use this action to
create a file with PJL (Printer Job Language) commands added to
the font by using a Printer-Specific option.
The Fonts list will be blank. Click the Add button, browse to the
location where the fonts from the kit are stored, select them all,
10
11
PCL Barcode Font Kit for Legacy Systems - User Manual
PCL Barcode Font Kit for Legacy Systems - User Manual
Create script to download fonts to printers later
The action creates a script file that can be executed later to
download fonts. You can choose the target operating system for
the script (Windows, Unix, Linux, MS-DOS); this affects the syntax
of the script. You can also choose the method used to download
the fonts (copy, cat, lpr, or cp).
(C:\Program Files\FontLoader) and uses a .pjl extension to identify
them. When FontLoader starts, it builds a list of .pjl files and
displays them in the Printer-Specific Options field. The first choice
on the list is always “None”, indicating that no template should be
used.
The .pjl template files are plain text files and can be easily created
using a text editor such as Notepad; you can use one of the
existing .pjl files as a guide. To have a new template file appear
on the list, save it with a .pjl extension in the FontLoader program
directory. If you create a template for a specific printer or situation,
we would welcome the opportunity to include it with FontLoader;
just email us a copy.
If you check Print Test Page, FontLoader will create the test file
and include an instruction in the script to download it to the printer.
To use the finished script, copy it along with the fonts and test file
(if you asked for one) to the system that will be doing the downloading. You can execute the script (batch) file manually, or you
can schedule it to run automatically at specific intervals.
Printer-Specific Options
This option will add additional information to a font using a template file; it is intended primarily to add PJL (Printer Job Language)
commands to the font. PJL instructions can be used to direct the
printer to store the font in flash memory or on an internal hard disk
(the default is to store the downloaded fonts in RAM).
Template files are used to define the desired format of the output;
FontLoader stores template files in its program directory
12
The template file should contain all of the commands to be sent to
the printer along with keywords that mark the places where
FontLoader should automatically insert variable data. Keywords
are enclosed within <angle brackets>. Note that keywords are
found even if enclosed in quotation marks. Here is a list of the
supported keywords with the information that FontLoader inserts in
their place:
<UEL>
<RESET>
<FONTNAME>
<FONTSIZE>
<FONTDATA>
Universal Exit Language (printer to known state)
Printer reset command
Name of the font file
Size of the font file, in bytes
The content of the font file
For example, here is the entire content of Lanier_SaveToDisk.pjl
which directs the printer to store the downloaded font on its
internal hard disk drive (drive 0) in the 0:\pcl\fonts directory:
<UEL>@PJL
@PJL FSMKDIR NAME=”0:\pcl\fonts”
@PJL FSDOWNLOAD FORMAT:BINARY NAME=
“0:\pcl\fonts\<FONTNAME>” SIZE=<FONTSIZE>
<FONTDATA>
<UEL>
13
PCL Barcode Font Kit for Legacy Systems - User Manual
PCL Barcode Font Kit for Legacy Systems - User Manual
Automating Font Loading
Troubleshooting
If your printer is equipped with Flash memory or a hard disk drive,
the fonts can be loaded once; after that they will be permanently
available in the printer (until explicity erased). FontLoader can add
the commands required to direct the font to the printer’s permanent storage.
Data which should appear as a barcode prints as plain text:
•
use the printer’s control panel to print a configuration page
and verify that the required fonts are installed.
•
check the data being sent to the printer and verify that the
font selection escape sequence is correct.
If your printer does not have Flash or a hard disk, the fonts will be
loaded to the printer’s RAM and will stay there until the printer’s
power is turned off. To insure that the barcode fonts are available
whenever needed it is recommended that you load the fonts just
ahead of each print job or at regular intervals.
Data which should appear as a barcode prints as plain text along
with extra characters, like (s0p4.69h12.0v0b0T:
•
check the data being sent to the printer and verify that the
font selection escape sequence is correct.
•
if possible, print the report to a file and use a text editor to
verify that the escape code at the beginning of the font
selection sequence has not been stripped off by the oper
ating system.
FontLoader can be used to create a font loading script (batch file).
You can execute the script or use it as a guide for writing your own
script. As an example, let’s say that we routinely use a program
called GenInvoices.exe to create our weekly batch of invoices, and
we typically save the resulting output as WeeklyInvoices.txt. We
load the printer with special paper and then copy the file
WeeklyInvoices.txt to the printer. We want to send one of the
barcode fonts to the printer just before printing starts. Our script to
do this whole process automatically might look like this:
GenInvoices > WeeklyInvoices.txt
copy /B C:\Fonts\C_3of9_4pitch.dsf \\Server\MainLaser
copy WeeklyInvoices.txt \\Server\MainLaser
If you prefer to download the fonts at regular intervals, a script
created by FontLoader (or by hand) can be executed automatically. In Windows, click on Start -> Settings -> Control Panel ->
Scheduled Tasks and then click Add New Task.
In Unix and Linux, crontab is typically used to maintain the list of
scheduled tasks to be automatically executed by the cron daemon.
14
The barcode prints, but does not scan:
•
for Code 3 of 9 verify that the barcode data begins and
ends with an asterisk.
•
for other types of barcodes, verify that the start and stop
characters are included, and that the checksum
calculation is correct.
Getting Help
If you need further assistance with installation of these fonts on
your laser printer, contact the dealer from whom you purchased
the product or:
The Barcode Software Center
Telephone:
847-866-7940
Email:
[email protected]
15
PCL Barcode Font Kit for Legacy Systems - User Manual
PCL Barcode Font Kit for Legacy Systems - User Manual
Technical Information
Code 39 8.11 pitch
Code 39 4.69 pitch
UPC 10 mil
UPC 13 mil
USPS ZIP
If you will be using your laser printer with application software that
already uses the “Bar Codes & More” font cartridge/SIMM/DIMM,
no further steps are required. The fonts in the PCL Font Kit for
Legacy Systems respond to the same control sequences, so the
output from your new laser printer should match the results from
your previous printer.
The following pages include technical information and sample
code to assist programmers who need to create new code or
modify existing programs.
Selecting Fonts with Escape Sequences
PCL-compatible printers understand and respond to HewlettPackard’s Printer Command Language (PCL). The fonts in this kit
are compatible with PCL Version 5 and higher (higher being PCL-6
as of this writing). PCL uses Escape Sequences to control the
printer. An escape sequence always begins with the ASCII
Escape code, which has a decimal numeric value of 27 (33 in
octal). The Escape code (shown in the samples below as <esc>)
is followed by a series of parameters which tell the printer what to
do.
An escape sequence may include more than one parameter.
Each parameter generally consists of a value followed by a letter
which identifies the type of parameter. If the parameter letter is
lower case, it means that another parameter follows it. If the
parameter letter is upper case, it means that it is the last parameter and it marks the end of this particular escape sequence.
Once a barcode font has been downloaded to the printer, you can
select it by embedding a PCL command in the data being sent to
the printer. The following escape sequences select the various
fonts by characteristic:
16
<esc>(0Y<esc>(s0p8.11h12.0v0b0T
<esc>(0Y<esc>(s0p4.69h12.0v0b0T
<esc>(8Y<esc>(s1p12.0v0s0b0T
<esc>(8Y<esc>(s1p12.0v0s3b0T
<esc>(15Y<esc>(s1p12.0v0s0b0T
To switch back to the printer’s default font, send this command:
<esc>(3@
So we can print a barcode in our sample report just by adding a
few simple escape sequences to the data we send to the printer:
Monthly Statement
Account No. 123456
<esc>(0Y<esc>(s0p4.69h12.0v0b0T*123456*<esc>(3@
The printed result should look something like this:
Monthly Statement
Account No. 123456
*123456*
Here is a snippet of C program code to do this:
printf(“Monthly Statement\n”);
printf(“Account No. %d\n”, AccNo);
printf(“\033(0Y\033(sop4.69h12.0v0b0T*%d*\033(3@\n”,
AcctNo);
The \033 is an octal representation of the escape code. In Basic,
character codes are specificed with their decimal value, so an
escape can be printed with a CHR(27) function call.
17
PCL Barcode Font Kit for Legacy Systems - User Manual
PCL Barcode Font Kit for Legacy Systems - User Manual
Adding Readable Text
Code 39
The barcode fonts in this kit do not include readable text characters. Adding the text with a separate print command is easy to do
and gives the programmer complete freedom in choosing the style
and position of the text.
Code 3 of 9 (also known as Code 39) is a widely-used alphanumeric barcode. The character set includes the upper case letters
A-Z, the digits 0-9, and several symbols: hyphen (-), period (.),
doffar sign ($), forward slash (/), plus sign (+), and percent (%). To
print a barcode character that will be scanned as a space, use the
underscore (_); to print a blank white space use the space character (ASCII 32)
The simplest way to print text below a barcode is to print the
barcode, start a new line, and then print the data again using a
plain text font. Here is an example in C that uses the fprintf
function to send formatted data to the printer (lp). In practice, the
programmer would probably write this as one or two lines of code;
we have used several lines for clarity:
fprintf(lp,
fprintf(lp,
fprintf(lp,
fprintf(lp,
fprintf(lp,
“\033(0Y\033(s0p4.69h12.0v0b0T”);
“*123456*”);
/* data */
“\033(3@”);
/* default font */
“\n”);
/* new line */
“123456”);
/* text line */
By using PCL cursor positioning commands, selecting specific
typefaces, and controlling type size and boldness the programmer
can create virtually any finished appearance desired. Details on
the PCL commands are beyond the scope of this manual, but are
discussed at length in Hewlett-Packard’s publication PCL5 Printer
Language Technical Reference Manual.
Formatting Barcode Strings
Applications designed to use the Hewlett-Packard “Bar Codes &
More” Font Product already perform the required formatting and
checksum calculations. Use of the PCL Barcode Font Kit for
Legacy Systems requires no changes to existing applications. To
assist with development of new software or modification of existing
applications, this manual includes information and sample code
that illustrates how to do the formatting.
18
Code 39 barcodes are variable length, and may include any
number of characters. In practice, the number of characters in a
single barcode is limited by the maximum physical space available
on the document. Also, many barcode scanners in common use
(CCD scanners) cannot read barcodes over a specific width,
typically about 3 inches.
Each Code 39 barcode must begin and end with a special start/
stop character which is represented by an asterisk (*). Formatting
of the data prior to printing requires only that you add an asterisk
at the beginning and at the end of the data. For example, let’s say
that the data to be encoded is PN334958. The finished string
ready for printing as a Code 39 barcode would be *PN334958*
Here is a complete set of escape sequences to print the data as a
barcode and then print the information again as text using the
printer’s default font below the barcode:
<esc>(0Y<esc>(s0p4.69h12.0v0b0T*PN334958*
<esc>(3@PN334958
The result:
*123456*
PN334958
19
PCL Barcode Font Kit for Legacy Systems - User Manual
PCL Barcode Font Kit for Legacy Systems - User Manual
Here is a C function that illustrates how the escape sequences
might be generated in code. The caller passes the data (partno)
and a pointer to the output file or device (prn). The code \033 in C
represents Octal 33 which is the escape character.
Extended Code 39
int SendBC(char *partno, FILE *prn)
{
fprintf(prn, \033(0Y\033(s0p4.69h12.0v0b0T”);
fprintf(prn, “*%s*”, partno);
fprintf(prn, “\033(3@\n”); /*default font*/
fprintf(prn, “%s\n”, partno); /* text */
return(0);
}
Here is Visual Basic code that will return a string with similar
results; Chr(27) is the escape code:
Function SendBC(partno as String) as String
Dim ms as String
ms = Chr(27) & “(0Y”
ms = ms & Chr(27) & “(s0p4.69h12.0v0b0T”
ms = ms & “*” & partno & “*”
ms = ms & Chr(27) & “(3@” & vbcrlf
ms = ms & partno
SendBC = ms
End Function
20
In some applications it may be necessary to encode characters which are not part of the normal Code 39 character set.
“Extended Code 39” (also known as “Full ASCII Code 39”) is
a method that allows encoding of all 128 ASCII characters.
These barcodes must be read using a scanner which has
been configured for Extended Code 39. Use of Extended
Code 39 is not recommended if there is a possibility the
barcodes will be read, and possibly misinterpreted, by
scanners which have not been appropriately configured.
The letters A-Z, the digits 0 through 9, space, dash (-), and
period (.) are encoded just like standard Code 39. All others
are encoded with a pair of barcode characters beginning
with the percent sign (%), dollar ($), slash (/), or plus sign
(+). For example, the pair $M will be scanned as a carriage
return code. The scanner must be configured to read
Extended Code 39.
A complete chart of Extended Code 39 codes appears on
the next page.
21
PCL Barcode Font Kit for Legacy Systems - User Manual
PCL Barcode Font Kit for Legacy Systems - User Manual
Extended Code 39 Chart
Code 39 Modulo 43 Checksum
ASCII
C39
ASCII
C39
ASCII
C39
ASCII C39
NUL
SOH
STX
ETX
EOT
ENQ
ACK
BEL
BS
HT
LF
VT
FF
CR
SO
SI
DLE
DC1
DC2
DC3
DC4
NAK
SN
ETB
CAN
EM
SUB
ESC
FS
GS
RS
US
DEL
%U
SP
$A
!
$B
“
$C
#
$D
$
$E
%
$F
&
$G
‘
$H
(
$I
)
$J
*
$K
+
$L
,
$M
$N
.
$O
/
$P
0
$Q
1
$R
2
$T
4
$T
4
$U
5
$V
6
$W
7
$X
8
$Y
9
$Z
:
%A
;
%B
<
%C
=
%D
>
%E
?
%T, %X, %Y, %Z
_
/A
/B
/C
/D
/E
/F
/G
/H
/I
/J
/K
/L
.
/O
0
1
2
4
4
5
6
7
8
9
/Z
%F
%G
%H
%I
%J
@
A
B
C
D
E
F
G
H
I
J
K
L
M
N
O
P
Q
R
S
T
U
V
W
W
Y
Z
[
\
]
^
_
%V
A
B
C
D
E
F
G
H
I
J
K
L
M
N
O
P
Q
R
S
T
U
V
W
W
Y
Z
%K
%L
%M
%N
%O
‘
a
b
c
d
e
f
g
h
i
J
k
l
m
n
o
p
q
r
s
t
u
v
w
w
y
z
{
|
}
~
22
%W
+A
+B
+C
+D
+E
+F
+G
+H
+I
+J
+K
+L
+M
+N
+O
+P
+Q
+R
+S
+T
+U
+V
+W
+W
+Y
+Z
%P
%Q
%R
%S
A checksum is an extra character which is added to the end of a
barcode just before the stop character. The value of the
checksum is computed from the preceding characters in the
barcode, so it will change depending on the data contained in the
barcode. The software that creates the barcode is responsible for
performing the calculation and adding the checksum character.
The scanner reads the barcode, performs the same checksum
calculation, and compares the result of this calculation to the
checksum at the end of the barcode. If the two do not match, the
scanner presumes that something is wrong and does not accept
the scan.
In practice, the Modulo 43 checksum is seldom used. While it
does provide an additional level of reliability, Code 39 has other
checks built into its structure that assure a level of accuracy more
than adequate for most applications. A Code 39 barcode is
presumed not to include a checksum unless explicitly required.
To calculate a Modulo 43 checksum, first assign each character in
the barcode a numeric value according to the table on the following page. Sum the numeric values of the characters in the
barcode (exclude the start/stop characters) and divide the result by
43; the remainder is the checksum value. Convert this to a
character using the table above and add that character to the end
of the barcode, just before the stop character.
In programming parlance, dividing and taking the remainder as the
result is a Modulo division. In Basic, it would be expressed as:
Checksum = MySum Mod 43
In C/C++ it would be:
Checksum = MySum % 43.
23
PCL Barcode Font Kit for Legacy Systems - User Manual
PCL Barcode Font Kit for Legacy Systems - User Manual
UPC-A
Table of Code 39 Values for Modulo 43 Checksum
Char Value
Char Value
Char
0
0
F
15
U
1
1
G
16
V
2
2
H
17
W
3
3
I
18
X
4
4
J
19
Y
5
5
K
20
Z
6
6
L
21
7
7
M
22
.
8
8
N
23
Space
9
9
O
24
$
A
10
P
25
/
B
11
Q
26
+
C
12
R
27
%
D
13
S
28
E
14
T
29
Value
30
31
32
33
34
35
36
37
38
39
40
41
42
UPC-A is used in the United States and Canada to identify retail
products for checkout scanning. The code is fixed-length (12
digits), numeric only. The Uniform Code Council (located in
Dayton, Ohio) assigns identification numbers to manufacturers.
The barcode begins with a leading “number system” digit followed
by the manufacturer’s identification; both are assigned by the
UCC. This is followed by digits, assigned by the manufacturer,
which identify each of the manufacturer’s products. The final 12th
digit is a check digit used to insure scanning accuracy. The
barcode also includes left, center, and right guard characters.
The length of the manufacturer identification number assigned by
the UCC may vary from 5 to 8 digits, depending on the anticipated
number of products the manufacturer needs to identify. The
longer the manufactuer ID, the fewer digits available for identifying
products.
Position
1
2
3-7
8
9-13
14
15
Function
left guard
number system digit
5 digits (manufacturer ID)
center guard
5 digits (manufacturer ID/product ID)
check digit
right guard
The left guard and right guard characters are identical and can be
printed using an asterisk or left and right parentheses or square
brackets: * ( ) [ ]. The center guard character may be printed
using a hyphen or a vertical “pipeline” symbol: - |.
The bar pattern for digits in the left half of the barcode is different
from the pattern used on the right side. In the PCL font, left-side
digits are represented in the normal way by the characters 0
through 9. Right-side digits are represented by the letters A
through J. For a programmer, encoding the right-side digits is
24
25
PCL Barcode Font Kit for Legacy Systems - User Manual
PCL Barcode Font Kit for Legacy Systems - User Manual
simply a matter of adding the numeric value of each digit to the
ASCII value for the character A (41).
Format UPC-A with C
Left
0
1
2
3
4
5
6
7
8
9
Right
A
B
C
D
E
F
G
H
I
J
Let’s say we wish to encode the number 0-00123-45678-4 (dashes
are shown for clarity). Each of the following examples would
produce the same result:
*000123-EFGHIE*
(000123-EFGHIE)
[000123|EFGHIE]
static char upc_string[20];
char *format_upc(char *instring)
{
char
*cpin, *cpout;
int
check, i;
memset(upc_string, 0, sizeof(upc_string));
check = upc_check(instring); // check digit
cpin = instring;
// point at instring
cpout = upc_string;
// point at outstring
*cpout++ = ‘*’;
// insert left guard
for (i = 1; i <= 6; i++)
// insert 6 digits
*cpout++ = *cpin++ - ‘0’;
*cpout++ = ‘-’;
// center guard
for (i = 1; i <= 5; i++)
// next 5 digits
*cpout++ = ‘A’ + (*cpin++ - ‘0’);
*cpout = ‘*’;
// right guard
return(upc_string);
// return to caller
}
int upc_check(char *instring)
{
int
mysum=0, mycheck;
char
*cp;
Applications designed to use the Hewlett-Packard “Bar Codes &
More” Font Product already perform the required formatting and
checksum calculation. Use of the downloadable UPC-A font
requires no changes to existing applications.
cp = instring;
while (*cp != ‘\0’) {
mysum += *cp - ‘0’;
cp += 2;
}
mysum = mysum * 3;
cp = instring + 1;
while (*cp != ‘\0’) {
mysum += *cp - ‘0’;
cp += 2;
}
mycheck = 10-(mysum % 10);
if (mycheck == 10) mycheck=0;
return(mycheck);
To assist with the creation of new code or the modification of
existing applications, sample code that illustrates how to calculate
the checksum and format the data for a UPC-A barcode is provided on the following pages.
Note: The UPC-A font supports all of the common retail barcode
symbols: UPC-A, UPC-E, EAN-13, EAN-8, 2-digit supplemental,
and 5-digit supplemental.
}
26
27
//
//
//
//
point at start
go until end
add numeric value
next odd position
//
//
//
//
//
multiply sum by 3
1st even position
go until end
add numeric value
next even position
// calculate Mod 10
// force 10 to 0
// return the result
PCL Barcode Font Kit for Legacy Systems - User Manual
PCL Barcode Font Kit for Legacy Systems - User Manual
Format UPC-A with Basic
USPS ZIP
Function format_upc(instring As String) As String
Dim check As Integer
Dim i As Integer
Dim MyString as String
Dim MyChar as Integer
MyString = “*”
‘ left guard
MyString = MyString & Left$(instring, 6)
MyString = MyString & “-”
‘ center guard
for i = 7 to 11
‘ next 5 digits
MyChar = Val(Mid(instring, i, 1))
MyChar = MyChar + Asc(“A”)
MyString = MyString & Chr(MyChar)
next i
MyChar = upc_check(instring) + Asc(“A”)
MyString = MyString & Chr(MyChar)
MyString = MyString & “*”
‘ right guard
format_upc = MyString ‘ return to caller
End Function
Function upc_check(instring As String) As Integer
Dim MySum As Integer
Dim i As Integer
mysum = 0
‘ start with a zero
for i = 1 to 11 Step 2 ‘ add odd positions
mysum = mysum + Val(Mid(instring, i, 1))
next i
mysum = mysum * 3
‘ multiply result by 3
for i = 2 to 10 Step 2 ‘ add even positions
mysum = mysum + Val(Mid(instring, i, 1))
next i
MySum = MySum Mod 10
‘ calculate Modulo 10
MySum = 10 - MySum
‘ subtract from 10
if MySum = 10 then
‘ force 10 result to 0
MySum = 0
endif
upc_check = MySum
End Function
28
The USPS ZIP barcode (also known as “Postnet”) is the row of tall
and short bars that often appear below or above an address on a
letter. USPS ZIP encodes the Zip Code so that it can be read by
automatic sorting equipment. A USPS ZIP barcode can include
the 9-digit Zip+4 code or the 11-digit Delivery Point Code, which is
the same as Zip+4 with two extra digits to define the destination in
more detail. Each digit is represented by five bars, two tall and
three short, and the complete barcode is constructed as follows:
•
•
•
•
Guard bar (represented by asterisk or vertical pipe symbol)
Numeric data (5 , 9, or 11 digits)
Check Digit
Guard bar
For example, the following text string will produce a complete
USPS ZIP barcode. The data (Zip+4) is 123456789 and the check
digit is 5. Adding astereisks the text would be *1234567895*
and it will look like this when printed:
*1234567895*
The check digit is used to insure accuracy when the barcode is
scanned. The check digit is calculated using the 5, 9, or 11 digits
of Zip Code data and must be calculated USPS ZIP
The check digit is used to insure accuracy when the barcode is
scanned. The check digit is calculated using the 5, 9, or 11 digits
of Zip Code data and must be calculated for each barcode. When
the barcode is read, the scanning equipment performs the same
calculation and compares its result with the check digit that was
read from the barcode. If the two do not match, the scanner
knows that there is something wrong with the data and can eject
the letter for manual sorting.
Applications designed to use the Hewlett-Packard “Bar Codes &
More” Font Product already perform the required formatting and
29
PCL Barcode Font Kit for Legacy Systems - User Manual
PCL Barcode Font Kit for Legacy Systems - User Manual
checksum calculation. Use of the downloadable USPS ZIP font
requires no changes to existing applications. Here is the general
method for calculating the checksum. Starting from the left, sum
all of the digits in the barcode. Using the example above:
FIM (Facing Identification Marks)
Facing Identification Marks (FIM) are patterns of vertical bars
printed in the upper right portion of reply mail pieces. The FIM
tells automatic sorting equipment how to handle the piece and
speeds up routing. There are four FIMS:
1 + 2 + 3 + 4 + 5 + 6 + 7 + 8 + 9 = 45
For the next step, we need the units column of the sum. You can
extract this information using Modulo 10 division, which is the
same as dividing by 10 and taking the remainder. Subtract this
result from 10 to obtain the check digit; if the final result is 10,
change it to zero. In the example above, the check digit would be
5. Here is a bit of sample code written in Basic:
ZipString = “123456789”
Sum = 0
FOR x = 1 to LEN(ZipString)
Sum = Sum + VAL(MID$(ZipString, x, 1))
NEXT x
Check = 10 - (Sum MOD 10)
IF Check = 10 THEN
Check = 0
ENDIF
PrintString = “L”+ZipString+Str$(Check)+”R”
Name
FIM A
Print
A
FIM B
B
FIM C
C
FIM D
D
Intended use
Courtsy reply mail (CRM)
and Meter reply mail (MRM)
Business reply mail without
ZIP+4 Postnet barcode
Business reply mail with
ZIP+4 Postnet barcode
Information based indicia
(IBI) postage
To print any of the FIMs just select the USPS ZIP font and print the
an upper case A, B, C, or D as appropriate.
Business Reply Mail Horizontal Bars
Business reply mail must include a series of horizontal bars below the
“no postage necessary” endorsement. A single horizontal bar can be
printed using the pound sign ( # ) with the USPS ZIP font.
Here is the same function in C:
char ZipString[20], PrintString[20], *cp;
int Sum=0, Check;
strcpy(ZipString, “123456789”);
cp = ZipString;
while (*cp != ‘\0’)
Sum += (*cp++) - ‘0’;
Check = 10 - (Sum % 10);
if (Check == 10)
Check = 0;
sprintf(PrintString,“L%s%1dR”,ZipString,Check);
30
31
PCL Barcode Font Kit for Legacy Systems - User Manual
32


