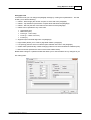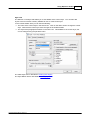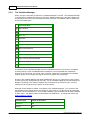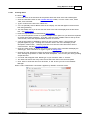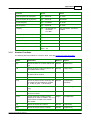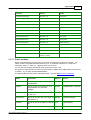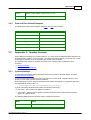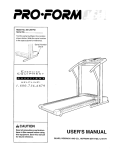
1
Rapidocs Author
User Manual
Rapidocs Author
User Manual (version 1.1.0)
Author: S. Robinson
This manual is © 2012 Epoq Group Ltd.
Rapidocs Author User Guide
Copyright ©2012 Epoq Legal Ltd
This user guide and related software is copyright © Epoq Legal Ltd, 2012
All rights reserved. No part of this user guide may be reproduced, stored in a retrieval system, or transmitted in any
way or by any means, including photocopying or recording without the written permission of the copyright holder,
application for which should be addressed to the publisher.
Trademark
The Rapidocs logo is a registered trademark of Epoq Legal Ltd.
The wordmarks RAPIDOCS and EPOQ are trademarks of Epoq Legal Ltd.
Terms of Use
This user guide and all accompanying documents and materials form part of the 'software' as defined in the
relevant Rapidocs software licence or supply of software agreement, and as such is subject to the terms and
limitations of liability detailed in such licence or supply agreement. The content of this user guide is provided for
informational use only, is subject to change without notice, and should not be construed as a commitment by
Epoq Legal Ltd. Epoq Legal Ltd assumes no responsibility or liability for any errors or inaccuracies that may
appear in this user guide.
Publisher
Epoq Legal Ltd
Middlesex House
29-45 High Street
Edgware
Middlesex
HA8 7UU
Editor
Stuart Robinson
Date
May 2012
4
Rapidocs Author User Guide
Table of Contents
Part I Introduction
9
1 About
...................................................................................................................................
Rapidocs
9
2 Rapidocs
...................................................................................................................................
Intelligent Templates
9
3 Authors
...................................................................................................................................
and Assemblers
9
4 Forms
...................................................................................................................................
and Documents
9
5 Rapidocs
...................................................................................................................................
Document Types
10
6 Getting
...................................................................................................................................
Help
10
7 Getting
...................................................................................................................................
Started
10
8 Setting
...................................................................................................................................
Rapidocs Options
11
Part II Using Rapidocs Author
14
1 Editing
...................................................................................................................................
Documents
14
The Editing
..........................................................................................................................................................
Toolbar
14
Cut, Copy..........................................................................................................................................................
and Paste
15
Undo and..........................................................................................................................................................
Redo
16
Find and Replace
.......................................................................................................................................................... 17
Extending
.........................................................................................................................................................
Find
18
Replacing
.........................................................................................................................................................
Text
18
Extending
.........................................................................................................................................................
Replace
19
Page Setup
.......................................................................................................................................................... 19
Spell Check
.......................................................................................................................................................... 20
Spell Check
.........................................................................................................................................................
Options and Dictionaries
20
Using Tables
.......................................................................................................................................................... 21
Clause Library
.......................................................................................................................................................... 22
Using Styles
.......................................................................................................................................................... 23
The Styles
.........................................................................................................................................................
Pull-dow n
23
Applying
.........................................................................................................................................................
Styles
23
Editing.........................................................................................................................................................
Styles
25
Style Settings
......................................................................................................................................................... 26
Creating
.........................................................................................................................................................
New Styles
32
Deleting
.........................................................................................................................................................
Styles
32
Inserting ..........................................................................................................................................................
objects
32
Inserting
.........................................................................................................................................................
Pictures and Special Characters
32
Numbering
.........................................................................................................................................................
Reset
33
Page Breaks
......................................................................................................................................................... 33
Using .........................................................................................................................................................
Markers
33
Using .........................................................................................................................................................
Footnotes
34
Using Hyperlinks
.......................................................................................................................................................... 34
Protecting
..........................................................................................................................................................
Text
35
2 Printing
...................................................................................................................................
Documents
36
Print Preview
.......................................................................................................................................................... 36
3 Authoring
...................................................................................................................................
Documents
38
The Authoring
..........................................................................................................................................................
Screen
39
The Variables
..........................................................................................................................................................
Manager
40
Im porting..........................................................................................................................................................
and Exporting Text
41
Using Questions
.......................................................................................................................................................... 43
Inserting
.........................................................................................................................................................
Questions
43
Copyright ©2012 Epoq Legal Ltd
Contents
5
Deleting
.........................................................................................................................................................
Questions
44
Copying
.........................................................................................................................................................
Questions
45
Editing.........................................................................................................................................................
Question Settings
45
Using .........................................................................................................................................................
Variables Within Question Settings
45
Common
.........................................................................................................................................................
Question Settings
46
Name Tab ......................................................................................................................................... 47
Prompt Tab ......................................................................................................................................... 48
Explanation Tab
......................................................................................................................................... 49
Validators Tab
......................................................................................................................................... 50
Stats Tab ......................................................................................................................................... 51
Text Question
.........................................................................................................................................................
Settings
51
Number
.........................................................................................................................................................
Question Settings
51
Number Input.........................................................................................................................................
Tab
52
Number Format
.........................................................................................................................................
Tab
52
Date Question
.........................................................................................................................................................
Settings
52
Date Input Tab
......................................................................................................................................... 52
Date Format.........................................................................................................................................
Tab
53
Multiple-Choice
.........................................................................................................................................................
Question Settings
53
Multiple-Choice
.........................................................................................................................................
Input Tab
53
Multiple-Choice
.........................................................................................................................................
Values Tab
54
Alternative Document
.........................................................................................................................................
Text
55
Flag Question
.........................................................................................................................................................
Settings
55
Flag Input Tab
......................................................................................................................................... 55
Flag Values .........................................................................................................................................
Tab
56
Using Groups
.......................................................................................................................................................... 57
Creating
.........................................................................................................................................................
a New Group
57
Editing.........................................................................................................................................................
Group Settings
58
Putting.........................................................................................................................................................
Questions into a Group
58
Validating
.........................................................................................................................................................
Groups
58
Unasked
.........................................................................................................................................................
Questions
58
Using Loops
.......................................................................................................................................................... 59
Creating
.........................................................................................................................................................
a New Loop
59
Editing.........................................................................................................................................................
Loop Settings
60
Putting.........................................................................................................................................................
Questions into a Loop
60
Loop Settings
......................................................................................................................................................... 60
Name Tab for
.........................................................................................................................................
Loops
60
Menu Item Tab
......................................................................................................................................... 61
Numbering
.........................................................................................................................................................
Paragraphs in a Loop
61
Counting
.........................................................................................................................................................
the Total Loop Repetitions
61
Consecutive
.........................................................................................................................................................
Loop-Controlled Paragraphs
62
Non-Consecutive
.........................................................................................................................................................
Loop-Controlled Paragraphs
62
Using .........................................................................................................................................................
Loops and Tables
62
Using Conditions
.......................................................................................................................................................... 62
The Conditions
.........................................................................................................................................................
Toolbar Button and Menu
62
Applying
.........................................................................................................................................................
a Condition to a Paragraph
63
Deleting
.........................................................................................................................................................
a Condition from a Paragraph
63
Types.........................................................................................................................................................
of Conditions
63
Single.........................................................................................................................................................
and Multiple Conditions
64
The Conditions
.........................................................................................................................................................
Manager
65
Using .........................................................................................................................................................
Conditions w ith Tables
66
Using Rules
.......................................................................................................................................................... 66
Creating
.........................................................................................................................................................
Rules
67
Writing.........................................................................................................................................................
Rules
68
Sample
.........................................................................................................................................................
Functions
69
Sample Text.........................................................................................................................................
Functions
69
Sample Number
.........................................................................................................................................
Functions
70
Sample Date.........................................................................................................................................
Functions
70
Sample Flag.........................................................................................................................................
Functions
70
Copyright ©2012 Epoq Legal Ltd
5
6
Rapidocs Author User Guide
Hidden Rules......................................................................................................................................... 71
Re-formatting
.........................................................................................................................................
Date and Number Questions Using Rules
71
Inserting
.........................................................................................................................................................
Rules
71
Editing.........................................................................................................................................................
Rules
71
Using Validators
.......................................................................................................................................................... 73
Creating
.........................................................................................................................................................
Validators
73
Using .........................................................................................................................................................
Validators in a Question
75
Using .........................................................................................................................................................
Validators in a Group
75
Using .........................................................................................................................................................
Validators in a Loop
75
Web Events
......................................................................................................................................................... 76
Using Bookm
..........................................................................................................................................................
arks and Cross-References
76
Inserting
.........................................................................................................................................................
Bookmarks
76
Inserting
.........................................................................................................................................................
Cross-References
77
Cross-Reference
.........................................................................................................................................................
Settings
77
Using PDF..........................................................................................................................................................
Form s
77
Importing
.........................................................................................................................................................
PDF Forms
78
Working
.........................................................................................................................................................
w ith PDF Forms
78
PDF Fields
.........................................................................................................................................................
Manager
80
PDF Pages
.........................................................................................................................................................
Manager
82
Test Assem
..........................................................................................................................................................
bly
84
Editing.........................................................................................................................................................
Prompts from Assembly
84
The Answ
.........................................................................................................................................................
ers Manager
85
Dependency
..........................................................................................................................................................
Check
85
Deleting Unused
..........................................................................................................................................................
Variables
87
Saving Tem
..........................................................................................................................................................
plates
87
Inserting ..........................................................................................................................................................
Docum ent Notes
88
4 Using
...................................................................................................................................
Rapidocs Document Properties
89
General Docum
..........................................................................................................................................................
ent Properties
89
Ow nership
..........................................................................................................................................................
Docum ent Properties
90
Docum ent..........................................................................................................................................................
Description
91
5 Next
...................................................................................................................................
Steps
91
Part III Appendices
93
1 Appendix
...................................................................................................................................
A: Functions for Rules
93
If Statem ents
.......................................................................................................................................................... 93
Nested If ..........................................................................................................................................................
Statem ents
94
Text Functions
.......................................................................................................................................................... 94
Text Functions
..........................................................................................................................................................
Exam ples
94
Num ber Functions
.......................................................................................................................................................... 95
Num ber Functions
..........................................................................................................................................................
Exam ples
96
Operators.......................................................................................................................................................... 97
Com parisons
.......................................................................................................................................................... 97
Num ber Form
..........................................................................................................................................................
atting Functions
98
Num ber Form
..........................................................................................................................................................
atting Functions Exam ples
98
Date Functions
.......................................................................................................................................................... 99
Date Functions
..........................................................................................................................................................
Exam ples
100
Loop Functions
.......................................................................................................................................................... 101
2 Appendix
...................................................................................................................................
B: Date and Time Formats
101
Date Form
..........................................................................................................................................................
at Masks
102
Tim e Form
..........................................................................................................................................................
at Masks
102
Date and..........................................................................................................................................................
Tim e Form at Exam ples
103
3 Appendix
...................................................................................................................................
C: Number Formats
103
Custom ..........................................................................................................................................................
Num bers
103
Custom ..........................................................................................................................................................
Num bers Exam ples
104
4 Appendix
...................................................................................................................................
D: Keyboard Shortcuts
104
Copyright ©2012 Epoq Legal Ltd
Contents
Index
7
107
Copyright ©2012 Epoq Legal Ltd
7
Part
I
Introduction
1
9
Introduction
Welcome to Rapidocs Author
Rapidocs Author provides the tools to create dynamic document templates with built-in 'intelligence'
which allows others to generate complex documents and forms.
Click here to skip straight to the guide to Using Rapidocs Author. Alternatively, you may find it more
convenient to search the index for the item you wish to find.
If you need any assistance with Rapidocs Author, see Getting Help.
1.1
About Rapidocs
Rapidocs Author is a powerful document automation application that enables you to prepare
documents based on logic and rules. It is a complete solution for Authoring intelligent documents
and forms. Rapidocs is now in its 4th generation, and has been continually developed and enhanced
since 1997.
Rapidocs can be applied to a wide range of documents across many different industry sectors and
diverse organisations. Despite its power, the application is simple to use. Assembling a document
from a Rapidocs intelligent template requires no training.
Rapidocs templates are intelligent documents that can save time spent on repetitive document
production, increase accuracy, and empower anyone to complete documents that would normally
require the skills of a trained professional. For example, people with no legal knowledge are using
Rapidocs every day to create binding legal documents and contracts.
Rapidocs is ideally suited for any type of document whether simple, or long and complex - in fact
most of the documents you are probably using today. It can just as easily be used to produce
precise electronic replicas of forms where accuracy and ease of use is vital, such as with statutory
government forms e.g. Court Service or Companies House forms.
1.2
Rapidocs Intelligent Templates
A Rapidocs template is a single compact file containing everything needed to produce all possible
variations of a document. Based on the decision logic and rules within this file, questions are
presented to the user. To make the template easier to use, the file also contains explanations and
notes to help the user answer the questions and complete their personalised document.
1.3
Authors and Assemblers
In Rapidocs terminology, an Author (or Originator) is the person who creates Rapidocs intelligent
templates and then publishes them so that they are available for use by others. An Assembler is
the person who uses Rapidocs intelligent templates to prepare individual, personalised documents.
Typically, assembly will take place online using the Rapidocs Web platform. This user guide deals
only with Authoring.
Authoring captures the process that someone would normally go through when preparing a
document. Where decisions have to be made to personalise the document, the Author will insert
simple questions with explanations and validation to ensure the appropriate answers are given.
Assembly is the process of producing an individual document based on the intelligent template by
answering the questions created by the Author. In some cases, the draft document may also be
edited using the built-in Rapidocs editor.
1.4
Forms and Documents
Rapidocs Author offers the same ease of use for creating both forms and documents; the same
intelligence can be applied in both cases.
Where a standard electronic form already exists or where a specific page appearance must be
Copyright ©2012 Epoq Legal Ltd
10
Rapidocs Author User Guide
enforced, Rapidocs allows you to import a PDF (Adobe Acrobat) form. Consequently, you can take
advantage of the many existing standard forms that are available in this format, for example many
court forms, or other statutory forms. See Using PDF Forms for more information.
Documents can be created in Rapidocs Author or alternatively can be built from your existing
Microsoft Word files. Rapidocs Author allows you to import these existing files, and add to them the
intelligence needed to turn them into Rapidocs templates.
1.5
Rapidocs Document Types
There are three main types of Rapidocs document that you will work with. Each type is colourcoded for easy identification:
Colour
Type
File name
Black
Unpublished Template, or Work In Progress (WIP)
filename.rawx
Red
Published Template
filename.ratx
Blue
Individual Document
filename.rapx
Black templates are created during the Authoring process and cannot be assembled (except
during Test Assembly) until they have been converted to another type. This conversion can't be done
using Rapidocs Author, though it's possible to obtain other types when importing from a 'briefcase'
file from a previous version of Rapidocs - see Getting Started for more information.
Red templates are published templates from which Assemblers can create one or more individual
documents. The actual logic within the Rapidocs template is hidden to protect the intellectual
property of the Author.
Blue documents are created automatically when assembling from a red template. A blue
document is an instance an individual document using the intelligence that is built-in based upon the
answers the Assembler has given.
With Rapidocs Author you will usually be working with black, unpublished templates (WIP) therefore
where we use the term ‘Documents’ in this guide, we are referring to this type of document.
1.6
Getting Help
This comprehensive online help explains everything you need to use Rapidocs Author. For additional
information please use the contact details below.
Ø UK: Call Epoq UK on 0845 644 8966 between 10:00 and 17:00, Monday to Friday, or email
[email protected]
Ø USA: Call Epoq US on 1-800-481-1025 (toll free) between 9 am and 5 pm EST, Monday to
Friday, or email [email protected]
Further information on the full Rapidocs product family is available on the website www.rapidocs.co.
uk
1.7
Getting Started
When you first open Rapidocs Author, you will reach the Home page of the application (shown with
the Home tab). From here you can do the following:
Ø Start a new document
Ø Open an existing document
Ø Open a copy of an existing document
Ø Exit from Rapidocs Author
Copyright ©2012 Epoq Legal Ltd
Introduction
11
By default, all Rapidocs documents are saved in a 'Rapidocs Files' folder in your 'My Documents'
folder. You can change the location in which files are stored by changing the File Location shown in
the 'Authoring' tab within the 'Options' box. Options is accessed from the 'Tools' menu.
Extracting Documents from a Previous Version of Rapidocs
If you've previously used an older version of Rapidocs (either Rapidocs Professional or Rapidocs
Solo) and still have this installed on your PC, you may extract documents into your nominated
Rapidocs folder by selecting 'Tools' and 'Extract from previous version briefcase'. Old file format (.rap)
files will be converted to the new formats, as described in Rapidocs Document Types.
Document tabs
By default, when you open existing documents or start a new one, they will be shown in separate
tabs. These tabs will be labeled with the name of the document. Sometimes it is more convenient
not to have the documents displayed in this way, for example, if you wish to tile two documents side
by side. In this instance, you should select the option 'One form per document' from the 'View' menu
on the Home tab. You can revert back to the default later by selecting 'One tab per document' from
the same menu.
1.8
Setting Rapidocs Options
By setting options you can configure certain aspects of Rapidocs Author. To access this feature
choose ‘Options’ on the ‘Tools’ menu on the Rapidocs Author Home screen. This displays the
Options window. This dialog box is also available when authoring a Rapidocs document, though in
this instance only the Assembly, Origination and Prompts tabs are shown.
The Options window is divided into a number of tabs. These are described below.
Name
User details may be inserted here.
Assembly
Display defaults are set in the ‘Assembly’ tab as follows:
Ø Use popup explanation windows: By default, the explanation text for each question is shown
in a popup immediately to the left of the question that is being answered. Alternatively, by
unchecking this option, each explanation will appear in a panel on the bottom left of the
assembly screen.
Ø Show paragraph and other markers: Paragraph and other markers will by default not be
shown. If you want them to appear, tick this option.
Ø Show popup hints for controls: By default the name of the toolbar button is displayed if the
mouse is pointed at it. Uncheck the box to disable this feature.
Ø Flat toolbar buttons: By default each toolbar button appears in a box. If you enable this option,
the toolbar buttons will be shown without the surrounding boxes, giving them a flat appearance.
The box shape then only appears when you hover over the button.
Rapidocs Web Settings
Within the Assembly tab, this section enables you to configure the web test assembly functionality
as follows:
Ø Compiler URL: This is used to specify the URL of the Rapidocs Web compiler. Your Rapidocs
supplier will be able to advise you of the appropriate address to insert here.
Ø Assembler URL: This is used to specify the base URL that the compiled document will be
accessed from when test assembling in Rapidocs Web. Your Rapidocs supplier will be able to
advise you of the appropriate address to insert here.
Copyright ©2012 Epoq Legal Ltd
12
Rapidocs Author User Guide
Ø Currency format: Enables you to select whether you wish to have a different currency shown
when test assembling in Rapidocs Web. The default is '£0'. To change to dollars, use '$0'.
Ø Date format: Enables you to select whether you wish to have a different date format used when
test assembling in Rapidocs Web. The default is the European standard 'dmy'. To change to the
US standard, use 'mdy'.
Origination (Authoring)
Display defaults are set in the ‘Origination’ tab as described below:
Ø Start test assembly from fresh (discard all answers): When filling in answers in the test
assembly screen, you might at any point decide to return to the Variables Manager and editing
screen. On returning to the test assembly screen, your previous answers will not be shown if
you have this option ticked. To retain your answers in the test assembly screen, uncheck this
option. See also The Answers Manager.
Ø Show white Assembler screen: During assembly, the screen can be switched from the usual
grey background to a white background if it makes for easier reading.
Ø Field colours: Double-clicking on any of the field colour boxes allows you to change the default
colour setting for that field type.
Ø Auto create [fields] when importing from Word and RTF: By default, Rapidocs will
automatically create fields when you import a MS Word or RTF document if they're enclosed in
square brackets. Uncheck this option if you do not require this feature. See Importing and
Exporting Text for more information.
Ø File Location: This is the location in which any documents you Originate (Author) will be saved.
You may specify a location or select the 'My Documents' folder. By default, the location is C:
\Documents and Settings\[username]\My Documents\Rapidocs Files
Prompts
This allows you to set display defaults for question prompts. Here you can assign a font type and
size for particular styles. Then, when you go into the ‘Prompt’ setting for an individual question in a
document, simply choose the required style which will have the new settings already applied.
New Template
This allows you to set default attributes (i.e. Document Properties) that will be applied to each newly
created unpublished (WIP) template.
Publication
This allows you to set default attributes for your document. There are two tabs within the Publication
tab: ‘Name’ and ‘Ownership’. In both of them, simply check the items you wish to make a default
setting, and insert your required text. The default attributes you set will then appear in the
appropriate fields in Rapidocs Document Properties.
New Document
This allows you to set default attributes that will be applied each time a document is created from a
template.
Copyright ©2012 Epoq Legal Ltd
Part
II
14
2
Rapidocs Author User Guide
Using Rapidocs Author
There are two main components of Rapidocs Author; Editing Documents and Authoring Documents.
The section on Editing explains how to use the word processor-like features of Rapidocs to insert,
format and edit text and other items.
The Authoring section deals with the process of adding questions and conditional logic to the
document to turn it into an intelligent and dynamic template.
There's also a short section on Printing Documents, including guidance on using Print Preview.
Furthermore, the process of using Rapidocs Document Properties to add meta-data to your template
(s) is explained in detail.
Finally, there's a series of Appendices that provide reference information and examples that will
assist with Authoring templates using Rapidocs.
2.1
Editing Documents
Rapidocs contains sophisticated, built-in editing functionality. This is designed to be familiar to
anyone who has used a word processor in the past. All the normal features that you'd expect in a
word processor are supported, including copying/pasting, formatting text, find and replace, spell
checking and much more.
Editing takes place in the Editor Window, which is the main panel located to the right of the
Variables Manager.
This section contains the following topics:
Ø The Editing Toolbar
Ø Cut, Copy and Paste
Ø Undo and Redo
Ø Find and Replace
Ø Page Setup
Ø Spell Check
Ø Using Tables
Ø Clause Library
Ø Using Styles
Ø Inserting Objects
Ø Using Hyperlinks
Ø Protecting Text
2.1.1
The Editing Toolbar
The toolbar gives you access to common format features. The name of a toolbar button will be
displayed when you hover over it with the mouse. The toolbars are draggable.
See Keyboard Shortcuts for the shortcuts to some of these features.
Text formatting
Text may be made bold or italic by selecting the text and pressing one or more of these buttons.
You may also change the style of the paragraph of text by selecting from the 'Styles' pull-down
Copyright ©2012 Epoq Legal Ltd
Using Rapidocs Author
15
menu. A paragraph of text may be aligned, centred or justified by placing the cursor in the desired
paragraph and using one of these buttons.
Additionally, you may use the Conditions bar to set the condition for the paragraph that the cursor
currently resides in.
Paste, User Revisions, Export/Import Answers and Clause library
Text may be cut or copied to the clipboard and pasted as with typical word processors. See Cut,
Copy and Paste for more information. The paste icon always pastes text unformatted.
Undo and redo allow you to reverse or reinstate edits.
The three adjacent icons allow you to save selected text to the clause library, show the clause
library panel, and paste from the clause library respectively. See Clause Library for more information.
Printing/Print Preview/Test assembly
A document may be printed using this icon. To preview the printed document, click on the Print
Preview icon. See Printing Documents for more information.
The 'Q&A mode' and 'Edit mode' buttons allow you to switch between test assembly (Q&A mode)
and Authoring mode (Edit mode).
The 'Q&A mode (Web)' icon enables you to test assemble your document in Rapidocs Web. Note:
The various web assembly settings will need to have been configured first. See Setting Rapidocs
Options for more information.
Saving/Zooming
To save your document, using the Save button.
The zoom slider can be used to zoom in or out of the document you're working on. Click on 100% to
reset this to normal zoom.
2.1.2
Cut, Copy and Paste
Cut, Copy and Paste allow you to copy formatted text from one document to another. Text can be
copied between any external source, such as Microsoft Word documents, and Rapidocs Author.
Paragraph Marker
The paragraph marker appears as a space at the end of a paragraph when you are selecting text. It
is important to select it if you want Rapidocs Author to keep the style or condition of the paragraph
when you paste it.
If a selection goes across a paragraph boundary, the paragraph marker will be selected
automatically. Alternatively you can use Shift and the left or right arrows to extend the selection to
include the current paragraph marker. For example, use Shift+End to select to the end of the
current paragraph, then use Shift+Right Arrow to add the paragraph marker to the selection.
The illustrations below show the difference between selecting the paragraph marker (above) and not
selecting it (below).
Copyright ©2012 Epoq Legal Ltd
16
Rapidocs Author User Guide
Paste Formatted
If you copy a paragraph, including its paragraph marker, Rapidocs Author will generally discard the
style of the paragraph when you paste it. If you wish to paste text including the style, you should
use 'Paste Formatted'.
Variables
Rapidocs is unique in its ability to copy variables between templates. If you copy some text
containing a variable, and then paste it into another template, the variable will automatically be
recreated in the second template if you wish it to be. Any other variables on which it depends will
also be copied with it.
For example, you might copy a sentence that contains a rule. If the rule used a question that was in
a loop, Rapidocs would automatically recreate the question and loop in the second template, as well
as the rule. Rapidocs remembers all of your document logic.
You can also use Rapidocs to automatically create question variables when you paste text into it. To
do this, in the source text you should enclose any word/s which you wish to use as a variable in
square brackets, e.g. [VariableName]. Once pasted, text questions will be created for all of the
variables marked in this way. See Importing and Exporting Text for more information.
Note
This only applies if you use the Paste Formatted option. By default, pasting
will not retain Rapidocs variables in this way.
Conditions
This feature only applies during Authoring.
You may wish to copy a paragraph that has conditions attached to it. When you paste it, Rapidocs
will keep the conditions you have set, as long as you include the paragraph marker when you copy
the paragraph. If you are copying between two templates, Rapidocs will also automatically recreate
any variables on which the condition depends.
Note
This only applies if you use the Paste Formatted option. By default, pasting
will not retain conditions in this way.
Rapidocs and Other Applications
You can copy and paste between Rapidocs and other text applications such as Notepad, Internet
Explorer and Microsoft Word. In the case of Microsoft Word, Rapidocs will retain most of the
formatting of the text being copied, where it is appropriate to the way that Rapidocs manages styles,
but only if 'Paste Formatted' is used.
2.1.3
Undo and Redo
Rapidocs enables you to repeatedly undo or redo editing changes. These features are available as
buttons on the toolbar, as shown in The Formatting Toolbar, on the ‘Edit’ menu, as well as standard
keyboard shortcuts (CTRL+Z and CTRL+Y respectively).
Copyright ©2012 Epoq Legal Ltd
Using Rapidocs Author
2.1.4
17
Find and Replace
This tool allows you to search for specific text in a document. It is enabled by clicking ‘Find’ on the
‘Edit’ menu or by using the keyboard shortcut Ctrl+F. This displays the ‘Find’ tab of the ‘Find and
Replace’ window.
To find the required text:
Ø Type the text to be searched for in the ‘Find what’ box at the top of the window. Clicking on the
arrow to the right of the box allows you to see the most recent search requests and choose one
of them if you wish.
Ø You can search for special characters and fields by clicking on the 'Special' pull-down menu and
making your selection from the list, such as 'Any letter', 'Hyperlink', 'Question/Field' etc. The
appropriate abbreviation will then be inserted into the 'Find what' box.
Ø By default, Rapidocs will ignore the case of the text you enter. If you would prefer the case not
to be ignored, tick the ‘Case sensitive’ box.
Ø By default, Rapidocs will search for the exact text you type in, whether it is part of a word or a
complete word. If you wish the search to only apply to complete words, tick the ‘Whole words
only’ box.
Ø Clicking the ‘Find in fields’ box will apply the search to include the parts of the document
containing answers the Assembler had supplied whilst assembling the document.
Ø Click the ‘Find’ button to carry out the search.
Ø If the text was not found, you will see a message ‘End of document - word not found’
Ø To close the ‘Find’ window, click ‘Close’.
Ø If the text was found, the first instance of your search following the current cursor position will be
highlighted in the text.
Ø Click the ‘Find’ button again and the next instance of the search text will be highlighted.
Ø Continue to click the ‘Find’ button to find every instance of the search text within the document.
When every instance has been found, you will see the message ‘End of document - find
complete’.
Ø By default, Rapidocs will search for the text only in the main document, as shown by the tick in
the ‘Main document’ box.
See also:
Ø Extending Find
Ø Replacing Text
Ø Extending Replace
Copyright ©2012 Epoq Legal Ltd
18
2.1.4.1
Rapidocs Author User Guide
Extending Find
While Authoring you may also extend Find to include ‘Intro, notes, licence’, and ‘Captions & control’.
To extend the search to all areas:
Ø Tick the boxes to select the appropriate search areas.
Ø Click the ‘Find’ button and keep doing so until the search has been completed in all three areas.
Rapidocs shows the search results in the following order: first the ‘Main document’, then, if
applicable, an extended window will appear showing the results of the ‘Intro, notes and licence’
search; and finally the results of the ‘Captions & control’ search.
Ø When all results in all three areas have been found, you will see the message ‘End of document
- find complete’.
See also:
Ø Replacing Text
Ø Extending Replace
2.1.4.2
Replacing Text
This tool allows you to search for specific text in your document and replace it with other text. It is
enabled by clicking 'Replace’ on the ‘Edit’ menu or by using the keyboard shortcut Ctrl+H. This
displays the ‘Replace’ part of the ‘Find and Replace’ window. Note that you can conveniently switch
between ‘Find’ and ‘Replace’ by clicking on the appropriate tab.
To replace text:
Ø Type the text to be searched for in the ‘Find what’ box. Clicking on the arrow to the right of this
box allows you to see the most recent ‘Find’ requests and choose one of them if you wish.
Ø You can search for special characters and fields by clicking on the ‘Special’ pull-down menu and
making your selection from the list, such as ‘Any letter’, ‘Hyperlink’, ‘Question/Field’ etc. The
appropriate abbreviation will then be inserted into the ‘Find what’ box.
Ø By default, Rapidocs will ignore the case of the text you enter. If you would prefer the case not
to be ignored, tick the ‘Case sensitive’ box.
Ø By default, Rapidocs will search for the exact text you type in, whether it is part of a word or a
complete word. If you wish the search to apply only to complete words, tick the ‘Whole words
only’ box.
Ø In the ‘Replace with’ box, type the text with which you would like to replace the text you are
searching for. Clicking on the arrow to the right of this box allows you to see the most recent
‘Replace’ requests and choose one of them if you wish.
Note
Also included in the ‘Replace with’ pull-down menu is the full list of variables
in the document.
You can use this feature to replace text with the answer to a question. For
example, you can replace references to the word ‘beneficiary’ with the answer
to the existing question ‘Who is the beneficiary?’. This is particularly useful
when converting a new document into a Rapidocs template.
If the question does not already exist, you can create one using the ‘Replace
as question’ option described below.
Ø Ticking the ‘Replace as question’ box changes your ‘Replace’ text into a question, meaning that
a variable will then appear as an ungrouped question in the Variables Manager. This option is
supported in the main document. When replacing text in a licence or in other document
components the text is replaced in a literal form rather than as a question.
Ø Click ‘Find’. Note that ‘Replace’ and ‘Replace all’ are disabled until the first instance of the text
is found and highlighted.
Ø If the text was not found, you will see a message ‘End of document - word not found’.
Ø If the text was found, the first instance of your search following the current cursor position will be
highlighted in the text.
Copyright ©2012 Epoq Legal Ltd
Using Rapidocs Author
19
Ø You can replace a single instance, selected instances or all instances of the text.
Ø To replace a single instance, click ‘Replace’.
Ø To replace specific instances, continue to click on the ‘Replace’ button only on those you wish
to replace. If you find an instance you don’t want to replace, simply click on the ‘Find’ button
again to go to the next instance.
Ø To replace all remaining instances, click ‘Replace all’.
Ø When the replace is complete, you will see the message ‘End of document - Find complete’.
Ø By default, Rapidocs will replace the text in the main document only - as shown by the tick in
the ‘Main document’ box.
See also:
Ø Extending Replace
2.1.4.3
Extending Replace
While Authoring templates, you can also extend the ‘Find and Replace’ to include 'Intro, notes,
licence’, and ‘Captions & control’. To extend this to all areas:
Ø Tick the boxes to select the appropriate search areas.
Ø Click the ‘Find’ button and keep doing so until the search has been completed in all three areas.
Then click ‘Replace’ or ‘Replace All’ as required. Rapidocs shows the search results in the
following order: first the ‘Main document’, then, if applicable, an extended window will appear
showing the results of the ‘Intro, notes, licence’ search; and finally the results of the ‘Captions &
control’ search.
Ø When all results in all three areas have been found, you will see the message ‘End of document
- find complete’.
2.1.5
Page Setup
Page Setup is used to set the header and footer of the printed page if required.
Headers and footers can be customised and will be displayed when the document is printed.
Select ‘Page Setup’ on the ‘File’ menu, then click on the ‘Header’ and ‘Footer’ tabs to specify their
respective contents. You can edit the following settings:
Ø You can align text to the left, middle or right of the header or footer. Use the down arrow on the
‘Inserts’ boxes to choose the contents and format, such as time or date. This will insert the
appropriate abbreviation. You can also type in your own custom text.
Ø You can insert variables in the header or footer by enclosing the variable name in % symbols. E.
g. %Name of Applicant% will insert the answer to the Name of Applicant question.
Ø Click on the appropriate ‘Font’ button to change the font properties of text in the header and/or
Copyright ©2012 Epoq Legal Ltd
20
Rapidocs Author User Guide
footer.
To return to the default settings, click on the ‘Reset to defaults’ button.
2.1.6
Spell Check
A Spell Check is included in Rapidocs Author. This tool is found by selecting ‘Spell Check’ on the
‘Tools’ menu, or by pressing ‘F7’.
Ø If no misspelt words are found, or when Rapidocs has finished checking the main document, you
will get a message saying ‘Main document check complete. Check remaining document text
too?’ Click ‘No’ to close the dialog and ‘Yes’ if you want the Spell Check to extend to other
areas of the document. If no misspelt words are found in the other areas, you will see a
message saying ‘Spell check complete’. Click ‘OK’ to close the dialog.
Ø If a word is found that is misspelt or not recognised, the word will be displayed in the ‘Not in
dictionary’ box. In the ‘Suggestions’ box, alternative spelling suggestions may be displayed.
Ø If you do not wish to replace the word reported as misspelt, click ‘Ignore’, or ‘Ignore All’ if there is
more than one instance of the word in your document.
Ø To replace the word with one of the suggested spellings, simply click on your chosen spelling in
the ‘Suggestions’ box, then click ‘Change’, to change one instance, or ‘Change All’, to change
all instances in your document.
Ø You can also replace the word with a spelling of your own. To do this, type the new spelling in
the ‘Change to’ box, then click ‘Change’ or ‘Change All’.
Ø If you inadvertently change a spelling and wish to undo the change, you can click 'Go Back!' to
reverse the change.
Ø You can add the word to your custom dictionary by clicking ‘Add’. You must have configured a
custom dictionary for this feature to be available. See Spell Check Options and Dictionaries.
Once added to the custom dictionary, this word will no longer be reported as misspelt.
2.1.6.1
Spell Check Options and Dictionaries
To set up Spell Check options or customise your dictionaries, click on the ‘Options’ box in the
Spelling Check window. This displays the 'Spelling Options' window, which enables various
choices. Simply tick any required options to refine your Spell Check.
Note
You can access the Spelling Options window directly by holding the ‘Ctrl’ key
down while selecting ‘Spell Check’ on the ‘Tools’ window.
The 'Spelling Options' window also shows the dictionaries that may be used during the Spell Check.
You can select which dictionaries are active by ticking the appropriate boxes. Changes to these
settings will be saved and applied to all documents you work with.
To locate a dictionary to be used for the Spell Check, tick the ‘Locate Dictionaries’ box. You can
then browse for the folder containing the appropriate dictionary.
Copyright ©2012 Epoq Legal Ltd
Using Rapidocs Author
21
As you check the spelling of a document you might identify words you wish to add to your custom
dictionary. To select which dictionary these words will be added to, use the ‘Custom Dictionary’
pull-down on the 'Spelling Options' window. A word will be added to the selected dictionary when
you click the ‘Add’ button.
Custom Dictionaries
Rapidocs Author allows you to configure multiple custom dictionaries, for example to store businessspecific terms. By default Rapidocs is configured with a personal custom dictionary (which will be
named after your login ID) for any words you wish to add as you work within Rapidocs. You can also
choose to include words from any existing ‘CUSTOM.DIC’ file from your Microsoft Word installation.
To configure the custom dictionaries available, click the ‘Dictionaries’ button on the Spelling Options
window.
In the 'Dictionaries' window, you will see a ‘CUSTOM.DIC’ box. CUSTOM.DIC is a special entry that
links Rapidocs to your existing custom dictionary in your Microsoft Word environment. You cannot
select this as your default dictionary in Rapidocs, but if you tick the check-box Rapidocs will include
the words in CUSTOM.DIC in its dictionary. You can edit entries in CUSTOM.DIC by selecting it
and clicking the ‘Edit’ button.
To create a new custom dictionary click on the ‘New’ button and enter an appropriate name.
Additional custom dictionaries may be useful to store words within specific categories, such as
‘Legal Terms’ or ‘Computer Terms’. These dictionaries can then be enabled or disabled depending
on the type of document being worked on. Also, these dictionaries can be shared with other users if
required by placing them in shared areas on your computer network.
To delete a custom dictionary, click the ‘Delete’ button. Note that this will remove the dictionary file.
If you wish to stop using a dictionary but leave it available for others, simply un-tick the entry in the
‘Dictionaries’ window.
In the case of Rapidocs custom dictionaries (other than CUSTOM.DIC) advanced features are
available. To edit entries in a Rapidocs custom dictionary, select the dictionary name and click the
‘Edit’ button to display the dictionary editor. This is divided into three tabs:
Added Words is used to add and remove words from the selected custom dictionary.
Auto-Correct Pairs allows you to define word pairs so that when the first word is encountered it will
always be replaced automatically by the second during Spell Check. This could be used to
automatically correct common mis-spellings or to encourage consistency, e.g. ‘teh’ could be
replaced with ‘the’, or ‘rapidocs’ replaced with ‘Rapidocs’ to enforce the capitalisation.
Excluded Words allows you to define words that will always be considered incorrect during a Spell
Check. This may be useful for words that are no longer in common use, for example old product
names.
2.1.7
Using Tables
Rapidocs Author allows you to insert and edit tables.
To insert a table:
Ø Click in the document where you wish your table to appear.
Ø Select ‘Table’ on the ‘Tools’ menu, then ‘Insert’ via the right arrow.
To select a table:
Ø Click anywhere in the table.
Ø Select ‘Table’ on the ‘Tools’ menu, then ‘Select’ via the right arrow.
To edit the table margins and column widths:
Ø Click anywhere in the table.
Ø Select ‘Table’ on the ‘Tools’ menu, then ‘Edit’ via the right arrow.
Ø This displays the ‘Table Editor’ window. Here you can change the margins of the current row,
and the margins and column width of the current column.
Note
Copyright ©2012 Epoq Legal Ltd
Column widths are relative rather than an absolute size. If you want one
22
Rapidocs Author User Guide
column to be twice as wide as another, set the value for the column width of
the first column to be twice the value of the second. It does not matter if
these values are 1 and 2, or 20 and 40, the effect will be the same.
Ø Click into the box whose value you wish to change and type in the new value.
Ø These changes can be applied to the whole table by clicking the ‘Apply values to all rows and
cols’ box.
Ø Click ‘OK’.
To set the table borders:
Ø Click anywhere in the table.
Ø Select ‘Table’ on the ‘Tools’ menu, then ‘Edit’ via the right arrow.
Ø Choose the style and thickness of edge, vertical, and horizontal table borders.
To delete a table:
Ø Click anywhere in the table.
Ø Select ‘Table’ on the ‘Tools’ menu, then ‘Delete’ via the right arrow.
To insert a column:
Ø Click in the column to the right of where you wish your new column to appear.
Ø Select ‘Table’ on the ‘Tools’ menu, then ‘Column Insert’ via the right arrow.
To add a column:
Ø Click in the column to the left of where you wish your new column to appear.
Ø Select ‘Table’ on the ‘Tools’ menu, then ‘Column Append’ via the right arrow.
To delete a column:
Ø Click in the column you wish to delete.
Ø Select ‘Table’ on the ‘Tools’ menu, then ‘Column Delete’ via the right arrow.
To insert a row:
Ø Click in the row below which you wish your new row to appear.
Ø Select ‘Table’ on the ‘Tools’ menu, then ‘Row Insert’ via the right arrow.
To add a row:
Ø Click in the row above which you wish your new row to appear.
Ø Select ‘Table’ on the ‘Tools’ menu, then ‘Row Append’ via the right arrow.
To delete a row:
Ø Click in the row you wish to delete.
Ø Select ‘Table’ on the ‘Tools’ menu, then ‘Row Delete’ via the right arrow.
2.1.8
Clause Library
The Clause Library is for building up a library of clauses so that they can be reused elsewhere in the
document you are Authoring, or in other documents.
The Clause Library Panel
To enable the clause library panel use ‘Edit’ and ‘Show Clause Library’ or use the icon in the toolbar.
This will display the panel docked on the right-hand side of the Rapidocs window.
Using the Clause Library
To add a clause to the library, simply highlight the clause or sentence you wish to store, then use
‘Edit’, ‘Add to Clause Library’ or right mouse click and select to add the clause library in this way.
You will be prompted to provide a title for the clause and then the clause will appear in the list of
Copyright ©2012 Epoq Legal Ltd
Using Rapidocs Author
23
recent items and all items. ‘Recent items’ shows the three most recently added clauses, and ‘All
items’ shows all clauses in alphabetical order.
To find a clause from those previously added to the library, either scroll through the clauses shown in
the panel, or alternatively, use the search box to find a word or phrase in the clause you’re looking
for.
When you have found the clause you wish to insert into your document, simply highlight it, right
click, and choose ‘Paste’. This will paste the clause at the current location of the cursor. You can
also paste clauses by selecting the clause from the library, locating the cursor in the appropriate
place in the document and selecting 'Paste from Clause Library' from the 'Edit' menu.
To delete a clause from the library, highlight it, right click, and choose ‘Delete’.
Note
2.1.9
Clauses pasted from the clause library are always pasted unformatted, i.e.
without any inherent styling and without associated Rapidocs variables.
Using Styles
Rapidocs offers complete control over paragraph styles, and ensures consistency across all of your
documents. An existing style can be quickly applied by selecting it from the 'Styles Button' menu.
Styles can be edited, created and deleted using the style settings as described in the sections
below.
Note that if you change the settings of a particular style, it will be reflected in all of your Rapidocs
documents where that style is used. Details of all styles used in a document are stored within that
document. However, when you receive and open a Rapidocs document from another user, your own
style definitions will override any styles of the same name in that document.
This section contains the following topics:
Ø The Styles Pull-down
Ø Applying Styles
Ø Editing Styles
Ø Style Settings
Ø Creating New Styles
Ø Deleting Styles
2.1.9.1
The Styles Pull-down
The ‘Styles’ pull-down menu to the right of the toolbar allows you to select a style to be applied to
the current paragraph, or to selected paragraphs. By clicking here, you may choose from any of the
styles in the list. This list is sub-divided into All Styles and Used Styles, the latter being those styles
already applied to paragraphs in the document. All Styles shows all the styles available, including
any custom styles you've created, according to the style family.
You may change the format of styles using the ‘Style’ option on the ‘Format’ menu, see Style
Settings.
2.1.9.2
Applying Styles
A style is applied to everything between two hard returns, i.e. to an entire paragraph.
To apply a style to a paragraph, either:
Ø Place the cursor in the paragraph to be formatted, or highlight part or all of the paragraph.
Ø Click on the large ‘Styles’ toolbar pull-down button to show the ‘Styles’ menu. The ‘Styles’ menu
will show the current style of the paragraph where the cursor is.
Copyright ©2012 Epoq Legal Ltd
24
Rapidocs Author User Guide
Ø Select a new style.
Or:
Ø Choose ‘Style’ on the ‘Format’ menu and click the ‘Style’ tab.
Ø In the Current Details ‘Name’ box, select the new style from the pull-down menu. See Style
Settings for how to add more styles to this list.
Ø Click ‘OK’.
Ø Note that the current style is shown in the header of the ‘Style’ window.
To apply a style to multiple paragraphs:
Ø Select part of or all of the text within paragraphs you wish to change.
Ø Click on the large ‘Styles’ toolbar button to show the ‘Styles’ menu. If the text you have
selected is not all in the same style, it will show the current style as <Styles>.
Ø Select a new style, which will then be applied to all selected paragraphs.
Copyright ©2012 Epoq Legal Ltd
Using Rapidocs Author
2.1.9.3
Editing Styles
To edit the properties of a style, either:
Ø
Click on any paragraph that uses the style you wish to change.
Ø
Choose ‘Style’ on the ‘Format’ menu or press ‘F4’.
Ø
Make any required changes to the style properties in the appropriate tabs.
Ø
Click 'OK'
Or, if the style you want to change is not selected:
Ø
Choose ‘Style’ on the ‘Format’ menu, then select the ‘Style’ tab.
Ø
In the Current Details ‘Name’ box, select the style you wish to modify.
Ø
Make any required changes to the style properties in the appropriate tabs.
Ø
Click 'OK'
Copyright ©2012 Epoq Legal Ltd
25
26
2.1.9.4
Rapidocs Author User Guide
Style Settings
Format Tab
To access style settings, select ‘Style’ on the ‘Format’ menu where you will see the ‘Style’,
‘Format’, and ‘Numbering’ tabs.
The Format tab provides a summary of the paragraph settings and character format of the style. To
change these click on one of the ‘Edit’ buttons.
Clicking on the (top) Edit button in the Paragraph Settings box will open the Paragraph tab.
Clicking on the (lower) Edit button in the Character Format box will open the Character tab.
Copyright ©2012 Epoq Legal Ltd
Using Rapidocs Author
27
Paragraph Tab
In the Format tab you can change the paragraph settings by clicking the top Edit button. This will
enable you to edit the following:
Ø Indents - left and right (the amount of space on each side of the paragraph).
Ø Indents - top and bottom (the amount of space above and below the paragraph).
Ø Indents - first line (the size of the indent for the first line of the paragraph).
Ø Indents can be specified in any of five units:
·
·
·
·
·
Centimetres (cm)
Millimetres (mm)
Points (pt - 1/72 inches)
Picas (pi - a sixth of an inch)
Inches (in)
Ø Alignment (the horizontal alignment of a paragraph).
Ø Page breaks (allows you to insert a page break before a paragraph).
Ø Line spacing (sets the amount of vertical space between each line in the paragraph).
Ø Create Indent (automatically creates a hanging indent for use with numbered or bulleted styles).
Ø Reset to Normal (reverses the action of the Create Indent button)
Below these settings is a preview window that allows you to view the effects of any changes as you
are making them.
Copyright ©2012 Epoq Legal Ltd
28
Rapidocs Author User Guide
Character Tab
In the Format tab you can change the character settings by clicking the lower Edit button. This will
enable you to edit the following:
Ø Font name
Ø Font size
Ø Font style
Ø Font effect
Below this is a preview window that allows you to view the effects of any changes as you are making
them.
Copyright ©2012 Epoq Legal Ltd
Using Rapidocs Author
29
Tabs
From here you can set the tab divisions of the style. Clicking on the magnifying glass symbol
expands the width of the ruler. Alternatively, you can set the tab separations manually by entering
the widths in cm.
Copyright ©2012 Epoq Legal Ltd
30
Rapidocs Author User Guide
Numbering Tab
On the Numbering tab you can enable automatic numbering for the selected style. To do this tick
the ‘Automatically number the paragraph text’ box. This applies the numbering to all paragraphs of
the style named in the header. It also enables the following settings:
Ø Number Format - enables you to customise the number formatting. First select the numbering
level relating to the current style. For example, a style called ‘Heading1’ may use level 1, and
‘Heading2’ use level 2, etc.
Ø Next select the ‘Number style’, ‘Delimiter’ and ‘Separator’ that will be used when displaying the
number for the current level. For example, for your first level you might choose: ‘1. ’ (1,2,3; full
stop, space); then for your second level: ‘(i). ’ (i,ii,iii; brackets; space); etc.
Ø By default, 'Show all levels' is selected which causes all levels of numbering to be displayed.
Alternatively you can select 'Hide some levels' to hide any of the numbering levels.
Ø Style Level control - allows you to specify how many levels of numbering you want.
Ø Sample - displays an example of the number format you have specified.
Advanced numbering
Click the 'Advanced' button to display the 'Advanced Numbering' dialog. Here you can specify
additional number sequences.
To create a new number sequence, select the 'Custom sequence' option and enter a name for your
new sequence. You can then change the settings for this sequence using the main Numbering tab
display.
Copyright ©2012 Epoq Legal Ltd
Using Rapidocs Author
31
Style Tab
The features on the Style tab enable you to view details of the current style. You can also add
styles to the list of those currently available for use or create a new style.
In the ‘Current Details’ area you can see the following:
Ø The name of the current style in the ‘Name’ box. Click on the down arrow to change the current
style. Note that the current style name changes in the window header.
Ø The style of the paragraph that follows in the ‘Next’ box. This defaults to the current style, but
can be changed using the pull-down menu.
The 'New Style' area is described in Creating New Styles.
The 'Style Delete' area is described in Deleting Styles.
Copyright ©2012 Epoq Legal Ltd
32
2.1.9.5
Rapidocs Author User Guide
Creating New Styles
To create a new style:
Ø Choose 'Style' on the Format menu and click the 'Style' tab.
Ø Either select a master style on which to base your new style from the list on the right , or
select 'Create based on the current paragraph' paragraph' to create a new style using the
formatting of the currently selected paragraph.
Ø Enter a name for your new style in the ‘New style name’ box.
Ø Click the ‘Create New’ button.
Details of all styles used in a document are stored within it. When you receive and open a Rapidocs
document from another user, your own style definitions will override any styles of the same name in
that document.
Note
2.1.9.6
If you receive a warning message about creating new Enterprise styles,
please ignore this and select 'No' to create a style for this document only.
Enterprise styles are not used in this edition of Rapidocs (version 4.0).
Deleting Styles
To delete a style from the available style list:
Ø Choose ‘Style’ on the ‘Format’ menu and click the ‘Style’ tab.
Ø In ‘Style Delete’ select a style name in the ‘Document Style’ field.
Ø Click on the ‘Delete’ button to remove the style from the list.
You cannot delete the style of the currently selected paragraph as this style name will not appear in
the list.
If you delete a style that is currently in use in a document, the style button will display the style
name ‘(Deleted)’ for any paragraphs that previously used that style. The text of those paragraphs
would then appear in the ‘Normal’ style in italics. The deleted style will no longer be available in new
documents.
2.1.10 Inserting objects
This enables you to insert objects such as images, special characters and footnotes. The options
are generally found from the 'Insert' option on the 'Tools' menu.
2.1.10.1 Inserting Pictures and Special Characters
Inserting Pictures
Rapidocs Author allows you to insert a picture from a graphics application into your document. For
example, this may be used to insert a company logo.
Supported formats include jpg, bmp, emf, and wmf file types.
To insert a picture:
Ø Place your cursor in the position you want your picture to appear.
Ø On the ‘Tools’ menu, select ‘Insert’ then ‘Picture’. This displays the ‘Insert Picture’ browser,
which allows you to select an image stored on your computer.
Ø Make your selection, then click ‘OK’.
Inserting Special Characters
Rapidocs Author allows you to insert symbols or accented character that are not directly available
on a standard QWERTY keyboard.
To insert a special character:
Copyright ©2012 Epoq Legal Ltd
Using Rapidocs Author
33
Ø Place your cursor in the position at which you want your special character to appear.
Ø On the ‘Tools’ menu, select ‘Insert’ then ‘Special Character’. This displays the ‘Insert Special
Character’ window, with two tabs ‘Symbols’ and ‘Accents’.
Ø Select the character you require from the appropriate tab, and click ‘Insert’.
2.1.10.2 Numbering Reset
Numbering Reset
The 'Numbering Reset' feature enables you to force the auto numbers to restart numbering from ‘1’.
To reset the numbering:
Ø Place your cursor in the position at which you want your numbering to restart.
Ø On the ‘Tools’ menu, select ‘Insert’ then ‘Numbering Reset’.
2.1.10.3 Page Breaks
The 'Page Break' feature allows you to force a page break in your document, as follows:
Ø Place the cursor in the position at which you wish your page break to appear.
Ø On the ‘Tools’ menu, select ‘Insert’ then ‘Page Break’.
2.1.10.4 Using Markers
Rapidocs allows you to insert a series of place markers in your document. To do this:
Ø Place the cursor in the position at which you wish your marker to appear.
Ø On the ‘Tools’ menu, select ‘Insert’ then ‘Marker’. This shows 'Place Marker' in the document.
(This will not appear to the end user in the published document)
Markers are used to navigate quickly between pages or clauses in a long document during
Authoring. To move between markers, use the 'Go To Next Bookmark' option in the Tools menu.
Copyright ©2012 Epoq Legal Ltd
34
Rapidocs Author User Guide
2.1.10.5 Using Footnotes
You can insert footnotes into a document by placing the cursor where the footnote reference should
be inserted, then choose ‘Tools’, ‘Insert’, ’Footnote’. The Footnote Number editor will appear:
Ø This enables you to set the reference number (or other character) for the footnote. If the
document contains existing footnotes, you may use the pull-down list to refer to these. This
enables you to insert multiple references to the same footnote should you wish.
Ø Once you have selected the footnote reference, press ‘OK’. This will open the footnote editor (if
it’s not already open) and enable you to enter the footnote.
Ø The footnote reference is inserted as superscript within the document. Footnotes may be
deleted by simply deleting the reference from the document and the text from the footnote editor.
Ø Hovering over a footnote reference will show the footnote associated with it as a hover-hint. Also,
clicking on the reference itself takes you directly to the associated footnote in the footnote editor
at the bottom.
Ø The footnote editor may be toggled by using ‘Tools’, ‘Show footnotes’.
2.1.11 Using Hyperlinks
Rapidocs enables you to insert hyperlinks into your document. This allows the Assembler to click
on the link within the document, which opens a web browser and locates the relevant web site.
To create a hyperlink:
Ø On the ‘Tools’ menu, select ‘New’, then ‘New Hyperlink’
Ø Insert the following details:
·
Name: This should be a meaningful name, as it will be shown in the Variables Manager.
Copyright ©2012 Epoq Legal Ltd
Using Rapidocs Author
35
·
Display text: This is the text to be displayed as a hyperlink in the document.
·
URL: The web site to be linked to. If you wish to link to an email address, then prefix the
email address with mailto:
Ø The ‘Stats’ tab will show how many times the hyperlink has been inserted into your template.
Ø Click ‘OK’ to add it to the Variables Manager, or ‘Insert’ to insert it into your document.
Note
Rapidocs also allows you to insert hyperlinks into other areas of text, such
as explanation text. See Using Variables Within Question Settings.
2.1.12 Protecting Text
When Authoring a document, you may wish to protect certain clauses and paragraphs to prevent
anyone else using the template from editing or deleting sections of the document. This is done by
placing the cursor in the area of text to be protected and choosing ‘Format’ and ‘Lock Paragraph’.
The paragraph will be highlighted in yellow to show it is protected. You may un-protect the
paragraph by repeating the process.
Copyright ©2012 Epoq Legal Ltd
36
2.2
Rapidocs Author User Guide
Printing Documents
To print a document, select ‘Print’ on the ‘File’ menu. You can either print the whole document or a
selected page range.
You can select which parts of your Rapidocs document are printed. If the relevant component is not
available, the option will be greyed out:
Ø Highlight fields: The printed document will show your answers highlighted, with a grey
background.
Ø Include main document: This is enabled by default, but can be deselected if you do not wish
to print the main document.
Ø Include answers at end: Allows you to print the list of your answers on a separate page after
the main document has been printed.
Ø Include document notes: Allows you to print any document notes after the main document
has been printed.
Ø Include annotations: Allows you to print any annotations that may have been added to any
questions.
Ø Include Intro: Allows you to print the document introduction after the main document has been
printed.
See also: Print Preview
2.2.1
Print Preview
Click the ‘Preview’ button to view your document before printing it. Note that the entire document will
be shown in Preview mode, even if you have specified a particular page range for the print itself. The
‘Print Preview’ window is described below.
The toolbar at the top of ‘Print Preview’ gives you the following options:
Ø Close: Closes ‘Preview’ and returns you to the document.
Ø Print: Returns you to the print options window.
Ø Page Setup: Takes you to the ‘Page Setup’ window, allowing you to edit headers and footers.
Ø Left and right arrows: Allow you to move backwards and forwards through the pages of the
Copyright ©2012 Epoq Legal Ltd
Using Rapidocs Author
37
document. The double left and right arrows take you to the first and last pages of the document.
Ø Zoom: Allows you to view a larger or smaller area of the document by clicking on the up or down
arrows.
Ø Full size: Returns the document to its normal size of 100%.
Ø Fit to window: Zooms the whole page to fit in the current window.
Ø Document: Allows you to switch between the various components of your document using the
down arrow. For example, if you have ticked ‘Include user notes’ on the ‘Print’ menu, this box
allows you to preview either the document or the notes.
Copyright ©2012 Epoq Legal Ltd
38
2.3
Rapidocs Author User Guide
Authoring Documents
Authoring (or Origination) is the process of creating templates using Rapidocs Author. You are
provided with the ability to easily prepare ‘intelligent’ templates containing all the questions,
instructions and notes for the person assembling the document. The template will also contain all
the possible document paragraphs, and the logic that controls the insertion of these paragraphs.
Once you've opened a new (blank) document or an existing document (see Getting Started), you will
be presented with the Authoring screen, enabling you to edit your document and create the
questions and business-logic you require.
This section contains the following topics:
Ø The Authoring Screen
Ø The Variables Manager
Ø Importing and Exporting Text
Ø Using Questions
Ø Using Groups
Ø Using Loops
Ø Using Conditions
Ø Using Rules
Ø Using Validators
Ø Using Bookmarks and Cross-References
Ø Using PDF Forms
Ø Test Assembly
Ø Dependency Check
Ø Deleting Unused Variables
Ø Saving Templates
Ø Inserting Document Notes
Copyright ©2012 Epoq Legal Ltd
Using Rapidocs Author
2.3.1
39
The Authoring Screen
When you open a document you will see the following:
Ø The Variables Manager on the left: This is where every variable (questions, rules, etc.)
created for the template is stored, and where you manage the structure of your template and
control what happens when the document is assembled.
Ø The Editor Window on the right: When you first open your template, the editor window will be a
blank screen. This is where you will enter the text of your document. You also use this area to
enter document notes and other information.
Ø The Menus and Toolbars at the top: These provide access to the functions available whilst
editing.
A summary of the number of Questions, Groups/Loops, Rules/Validators and Conditions appears in
the status bar at the bottom of the window.
Copyright ©2012 Epoq Legal Ltd
40
2.3.2
Rapidocs Author User Guide
The Variables Manager
When you open a template you will see the Variables Manager on the left. The Variables Manager
is fundamental to Origination/Authoring. It lists every variable created for the template, allowing you
to manage the structure of your template’s assembly with ease. The different types of variable are
shown in the table below.
Icon Description
New Question
New Group
New Loop
New Rule
New Validator
New Bookmark
New Cross-Reference
New Hyperlink
Edit currently selected variable
Copy currently selected variable
Delete currently selected variable
Insert currently selected variable to document
The interface of the Variables Manager is that of a standard tree-view menu structure. Categories
(including Groups, Loops and Multiple-Choice Questions) can be expanded and collapsed by
clicking on the small ‘plus’ and ‘minus’ signs on the left. Questions can be dragged and dropped
between groups, thus changing the page on which they appear during assembly.
Groups in the Variables Manager are listed alphabetically and do not represent the order in which
question groups are displayed during assembly - this is controlled intelligently and automatically by
Rapidocs according to the order the variables are encountered in the document (as if you were
reading from left to right and top to bottom in the document).
Whenever a new variable is created, it will appear in the Variables Manager. You can then insert
that variable into the editing window on the right as many times as you like (except for bookmarks
which can only be inserted once). Once inserted, different types of variable may be easily identified
by their colour. The default colours are described in the table below. To change the colours see
Setting Rapidocs Options.
Variable Type
Colour in document
Questions
Red
Groups
N/A
Copyright ©2012 Epoq Legal Ltd
Using Rapidocs Author
2.3.3
Loops
Loop counter and total appear in Red
Rules
Teal
Validators
N/A
Bookmarks
Green
Cross-References
Purple
Hyperlinks
Blue and underlined
41
Importing and Exporting Text
Importing Text from Other Applications
Rapidocs allows you to import the text of a complete document from your file system. The following
formats are currently supported: Text File (*.txt); Microsoft Word Document (*.doc); Word Perfect
Document (*.wpd); or Rich Text Format File (*.rtf).
During Authoring you can also import a PDF form. For more information on this option see Using
PDF Forms.
During assembly you can also import an Answer File which contains previously created answers to
your template (this only applies to published templates and documents, not unpublished 'WIP'
documents - see Rapidocs Document Types).
To import text:
Ø Select the appropriate format from within the ‘Import’ option on the ‘File' menu.
Ø This displays the appropriate import window, where you can browse to the file you wish to
import.
Ø Click ‘Open’.
The text of the selected file will be imported into your document, starting at the current cursor
position.
Note
To import a Word document (.doc format), you must have Microsoft Word
installed on your PC.
Automatic creation of fields after import
To speed up the process of adding variables and logic after importing text, Rapidocs enables the
automatic creation of fields. Fields must be defined in the source document by enclosing the
appropriate text in square brackets, e.g. [fieldname]. You should also enable the 'Auto create [fields]
when importing from Word and RTF' function in Rapidocs Options.
This feature can be used for both Microsoft Word (.doc) and Rich Text Format (.rtf) files. All fields will
be created as Text questions and listed as Ungrouped questions in the Variables Manager.
Exporting Rapidocs Text to Other Applications
Rapidocs allows you to export text from Rapidocs to your file system in Microsoft Word (.doc), Rich
Text (.rtf), XML, HTML or Plain Text (.txt) formats.
To export text:
Ø Select ‘Export’ on the ‘File' menu.
Ø Select the format into which you would like to export the file.
Ø This displays the appropriate export window, where you can browse to the location where you
would wish to export the file.
Ø Type in a name for the file.
Ø Click ‘Save’.
A copy of the main text of your document is exported, leaving the original text intact.
Copyright ©2012 Epoq Legal Ltd
42
Rapidocs Author User Guide
Note that if you choose to export your text to Microsoft Word format, you will not be prompted to
enter a file name. Rapidocs will simply run Word and export the text to a new document. You can
then save this document in Word in the usual manner.
Copyright ©2012 Epoq Legal Ltd
Using Rapidocs Author
2.3.4
43
Using Questions
To create a question, choose one of the following methods:
Ø Click on the ‘New Question’ button in the Variables Manager.
Ø On the ‘Tools’ menu select ‘New’ then ‘New Question’.
Ø Right click with the mouse anywhere in the Variables Manager and select ‘New Question’.
The question settings dialog is then displayed so that you can configure your question.
By default, the new question is inserted into the Variables Manager as an 'Ungrouped question'.
Note
If you select a group name before creating a new question, the question will
be inserted into the selected group rather than ‘Ungrouped Questions’. See
Using Groups.
See also:
Ø Inserting Questions
Ø Deleting Questions
Ø Copying Questions
Ø Editing Question Settings
2.3.4.1
Inserting Questions
For a question to appear during assembly, you must do one of the following:
Ø Insert it into the document during Authoring.
Ø Insert it into a question prompt or explanation.
Ø Refer to it in a rule that is inserted into the document.
Ø Base a condition on it.
A question may appear greyed out if it is dependent on a condition. A question may not appear at
all if the question can have no effect on the document, even if the question is part of a group that
does get displayed. Rapidocs manages this intuitively for you.
Inserting a New Question
Copyright ©2012 Epoq Legal Ltd
44
Rapidocs Author User Guide
To insert a new question:
Ø In the Editor Window, place the cursor in the position where you want your question to be (i.e.
where you wish the answer to your question to appear in the assembled document).
Ø Click ‘New Question’ on the Variables Manager toolbar.
Ø Type in a name for the question. This name will be displayed in the Variables Manager, and
also in the Editor Window. It is best to keep the name short but easily identifiable.
Ø Select the type of question (Text, Number, Date, Multiple-Choice or Flag/Information Only).
Ø Change any desired settings for the question.
Ø Click the ‘Insert’ button on the toolbar. The currently selected question will be inserted in red
into the document. This is to indicate that it is a variable rather than just normal text.
Note
If you do not want the question to be inserted into the document, click ‘OK’
instead of ‘Insert’. It will then be stored in the Variables Manager, ready
either to be inserted, or to be used at a later stage within a condition or rule.
Inserting an Existing Question
To insert an existing question:
Ø Ensure that your cursor is in the right place in the Editor Window and that the question is
selected in the Variables Manager.
Ø Then either click the ‘Insert’ button on the Variables Manager toolbar, or right click on the
question in the Variables Manager and select ‘Insert’.
You can insert the same question into the document any number of times, but it will only be asked
once during assembly. During assembly the answer will appear at each point that the question was
inserted into the document.
To see how many times a question has been inserted into a document, rule or other part of a
template, click on the Stats tab of the question settings. To see specifically which questions, rules,
or conditions are affected, and where it's been inserted into the template, use the Dependency
Check.
Note
2.3.4.2
A question cannot have the same name as any other variable. It may contain
any alphanumeric character but cannot be blank, or contain a square bracket
or any extended ASCII characters such as accented letters.
Deleting Questions
To delete a question that has been inserted into the Origination Window:
Ø Select the red text that represents the question, and press ‘Delete’ on the keyboard. The
question will still exist in the Variables Manager.
To completely delete a question from the template:
Ø Either select the question in the Variables Manager and click ‘Delete’ (‘minus’ button) on the
Variables Manager toolbar, and click ‘Yes’ to confirm,
or
Ø Right click on the question, select ‘Delete’, and click ‘Yes’ to confirm.
Note
If the question has been inserted into the Editor Window, deleting it from the
Variables Manager will have the following consequences:
- All occurrences of the question will be converted from red text into plain text.
- All conditions that refer to the question will be removed.
- All rules containing the question will be removed. Rapidocs will inform you of
which rules (if any) would be deleted as a result of deleting the question.
Copyright ©2012 Epoq Legal Ltd
Using Rapidocs Author
2.3.4.3
45
Copying Questions
You may wish to copy an existing question with the same settings as the currently selected one.
This is very useful when you need to ask the same question more than once, but to support different
answers. A common example is an insurance application form covering the lives of two people, and
where a large number of questions are duplicated for the second person.
To copy a question:
Either
Ø Select the question and click ‘Copy’ (the ‘plus’ button) on the Variables Manager toolbar.
or
Ø Right click on the question and select ‘Copy’. A new copy of the question will appear in the
Variables Manager.
You can then rename the new question appropriately.
Note that this is not the same as copying text in the Editor Window using ‘Copy’ on the ‘Edit’ menu for the latter see Cut, Copy and Paste.
2.3.4.4
Editing Question Settings
To edit the settings for a question:
Either
Ø Double-click on the question in the Origination Window or the Variables Manager,
or
Ø Right-click on the question in the Variables Manager and select ‘Edit’,
or
Ø Select the question in the Variables Manager and click the ‘Edit’ button on the Variables
Manager toolbar.
Ø Make the desired changes to the question’s settings.
Ø Click ‘OK’.
See also:
Ø Common Question Settings
Ø Text Question Settings
Ø Number Question Settings
Ø Date Question Settings
Ø Multiple-Choice Question Settings
Ø Flag Question Settings
Ø Using Variables Within Question Settings
2.3.4.5
Using Variables Within Question Settings
Variables can themselves be inserted into various areas of the question settings. This can be used
to dynamically change on-screen information to help the Assembler.
For example, the answer the Assembler gives to one question could be used in the prompts of
successive questions to make the context clearer. To insert a variable into the prompt of another
question, use the 'Insert Variable' icon in the 'Prompts' tab of the question settings.
This technique can be applied to many areas including explanations, prompts, and even the values of
multiple-choice answers. You can insert a variable anywhere that the ‘Insert Variable’ icon is
present.
Using the 'Insert Variable' toolbar button you can insert questions, rules, hyperlinks and crossreferences by selecting the appropriate variable from the pull-down menu.
Copyright ©2012 Epoq Legal Ltd
46
2.3.4.6
Rapidocs Author User Guide
Common Question Settings
The assembly process is driven by questions, and the job of the author is to make the process as
intuitive as possible for the Assembler by providing question-sensitive guidance and validation to
reduce errors. This is achieved through the configuration of question settings.
When creating a question, the first consideration is the choice of question type. By choosing the
appropriate type you can ensure that the Assembler can only enter valid characters, or select an
appropriate answer from a pre-defined list.
The different types of questions, and the icons used to represent the questions in the Variables
Manager, are as follows:
Question type
Text question
Number question
Date question
Multiple-choice question
Flag question
Information Only question
Copyright ©2012 Epoq Legal Ltd
Using Rapidocs Author
47
2.3.4.6.1 Name Tab
The name tab settings are as follows:
Ø Name: The name of the question should be inserted here. All variable names must be unique
within a template.
Ø Display Name: This is the text that will be displayed in the Origination Window during assembly
in place of the name of the question. If this is left blank, then the question name is displayed by
default. This is a useful feature when the Author wants a short question name, for example for
ease of use within rules, but wants a longer, more descriptive name to appear in the document
for the benefit of the Assembler. You can have duplicate ‘Display Names’ whereas the question
name must always be unique within the document.
Ø Required: By default this check-box is ticked, indicating that this question should be answered.
During test assembly, this is indicated by a blue dot next to the question. If you un-tick this
box, the question will be optional during assembly and no dot will appear beside the question.
Ø Required to Continue: If this check-box is ticked, it indicates that the question must be
answered before you can continue to the next question. During assembly, this is indicated by a
bright red dot next to the question. By default this box is un-ticked.
Ø Group or Loop: Allows you to move the question into a specific group or loop. Click the down
arrow to select the group into which you want to move your question.
See also:
Ø Common Question Settings
Ø Editing Question Settings
Copyright ©2012 Epoq Legal Ltd
48
Rapidocs Author User Guide
2.3.4.6.2 Prompt Tab
The 'Prompt' tab allows you to set the actual wording of the question to be asked during assembly.
If you do not enter any text here, then by default the question name itself will be displayed during
assembly.
The text you enter can be formatted using the format buttons. The ‘Insert Variable’ button allows you
to insert the answer to a previously asked question within your text. See Using Variables Within
Question Settings.
See also:
Ø Common Question Settings
Ø Editing Question Settings
Copyright ©2012 Epoq Legal Ltd
Using Rapidocs Author
49
2.3.4.6.3 Explanation Tab
The 'Explanation' tab enables you to give advice on how to answer the question. Any text that you
enter here will appear during assembly in the explanation popup directly to the left of the current
question (unless you've chosen to show explanation panels in the bottom left of the screen).
This text can be formatted using the format buttons. The ‘Insert Variable’ button allows you to insert
the answer to a previously asked question within your text. See Using Variables Within Question
Settings.
See also:
Ø Common Question Settings
Ø Editing Question Settings
Copyright ©2012 Epoq Legal Ltd
50
Rapidocs Author User Guide
2.3.4.6.4 Validators Tab
The 'Validators' tab allows you to select one or more validators to be applied to a question during
assembly.
A validator is a test similar to a text rule that can be set up on a question, group, or loop, to check
that criteria you have specified have been met. It can be used to provide a message for information
or confirmation, or to warn of an invalid answer.
See Using Validators for a full explanation of how to use validators.
See also:
Ø Common Question Settings
Ø Editing Question Settings
Copyright ©2012 Epoq Legal Ltd
Using Rapidocs Author
51
2.3.4.6.5 Stats Tab
The ‘Stats’ tab shows where a question has been used or ‘inserted’ in a template. This is a useful
feature, for example to identify any dependencies on a question before you delete it.
When you select Stats for a question or a rule, you also activate the Dependency Check facility.
By right mouse clicking on the stats, you are able to copy the details to the clipboard if you desire.
See also:
Ø Common Question Settings
Ø Editing Question Settings
2.3.4.7
Text Question Settings
These are questions that will allow the Assembler to enter an answer using any combination of
letters, numbers and other characters. The text question 'Input' tab is unique to these question
types, and provides the following options:
Default Value Allows you to optionally set a default value - either a fixed value or one which is
based on a rule.
Format Allows you to specify the case of the answer.
Minimum characters Allows you to set the minimum length of the answer.
Maximum characters Allows you to set the maximum length of the answer.
Number of lines Sets the number of lines of text that will be visible at once. The default value is ‘1’.
The Assembler can only enter multiple lines separated by a return if ‘Number of lines’ is set to more
than one.
Word wrap When enabled, a multi-line answer is re-formatted to appear on a single line when
inserted into the document. This option only appears if ‘Number of lines’ is set to more than one.
For example, when the Assembler enters an address on multiple lines, it would appear in the
document on a single line with spaces between each part of the address.
See also:
Ø Common Question Settings
2.3.4.8
Number Question Settings
These are questions requiring numerical answers. The following sections contain settings that are
unique to number questions:
Copyright ©2012 Epoq Legal Ltd
52
Rapidocs Author User Guide
Ø Number Input Tab
Ø Number Format Tab
2.3.4.8.1 Number Input Tab
The number question 'Input' tab contains the following settings:
Default value: Allows you to optionally set a default value - either a fixed value or a value based on
a rule.
Minimum value: The smallest number that is allowed as an answer.
Maximum value: The largest number that is allowed as an answer.
See also:
Ø Common Question Settings
2.3.4.8.2 Number Format Tab
The number question 'Format' tab contains the following settings:
Style: Allows you to choose the way a number will appear in your document.
Custom (Style): Allows you to specify a format for displaying numbers. When defining a format, use
‘#’ to show where digits may optionally appear, and ‘0’ to show where they must appear. Insert any
other characters such as commas or brackets, around the numbers.
The format for ‘Custom’ is: PositiveNumberFormat;NegativeNumberFormat;ZeroFormat
For example: #,###.00;-#;NOTHING
will give, for example:
‘5,555.00’ for a positive number
‘-5555’ for a negative number
‘NOTHING’ for a zero
For a complete explanation of custom number formats, see Appendix C: Number Formats.
Words (Style): Allows you to display the number in words. By clicking on the down arrow, you can
choose from a number of formats.
Negative numbers: Allows you to set the way negative numbers are displayed.
Zero Un-ticking ‘Display zero’ allows you to specify the text to be inserted into the document if the
answer to the question is zero, for example ‘Nought’ or ‘Nothing’.
Precision: Allows you to set the number of decimal places that are displayed. The minimum is zero
and the maximum is six.
You can immediately see the result of changing these settings, because Rapidocs shows a preview
of each of your number settings at the bottom of the window.
See also:
Ø Common Question Settings
2.3.4.9
Date Question Settings
These are questions requiring a date as an answer. The following sections contains settings that are
unique to date questions:
Ø Date Input Tab
Ø Date Format Tab
2.3.4.9.1 Date Input Tab
The date question 'Input' tab contains the following settings:
Default Value: Allows you to optionally set a default value - either a fixed date value to be selected
with the down arrow, or one that is based on a rule.
May be left blank: Allows the Assembler to leave the field blank. This gives the Assembler the
option not to insert the date during assembly, but instead to insert a space in the document to write
Copyright ©2012 Epoq Legal Ltd
Using Rapidocs Author
53
in the date later by hand.
Earliest date and Latest date: Allows you to specify an earliest or latest date (or both) by clicking
on the date button and selecting your required date. Alternatively you can click on the ‘Days’ button
and specify the number of days earlier or later than the current date.
See also:
Ø Common Question Settings
2.3.4.9.2 Date Format Tab
The date question 'Format' tab contains the following settings:
Style: Allows you to set the format in which the date is displayed. There are four pre-set options for
this, of which the first three follow the conventions defined within the Assembler’s Windows
environment. These can be modified through Windows’ ‘Control Panel’. The fourth displays the year
in words, such as ‘two thousand’.
Custom: This option allows you to display the date and time in whatever format you require. For
example, dd/mm/yy would appear as 03/02/99.
See Appendix B: Date and Time Formats for more information.
You can immediately see the result of changing the style, because Rapidocs shows a preview of the
date at the bottom of the window.
See also:
Ø Common Question Settings
2.3.4.10 Multiple-Choice Question Settings
These are questions requiring an answer to be chosen from a pre-set list. The following sections
contain settings that are unique to multiple-choice questions:
Ø Multiple-Choice Input Tab
Ø Multiple-Choice Values Tab
Ø Alternative Document Text
2.3.4.10.1 Multiple-Choice Input Tab
The multiple-choice 'Input' tab contains the following settings:
Default Value: Allows you to optionally set a default value - either a fixed value or one which is
based on a rule.
Style: Allows you to define the method for displaying the possible answers to the question. The
options are::
Ø Radio buttons
Ø Combo box
Copyright ©2012 Epoq Legal Ltd
54
Rapidocs Author User Guide
2.3.4.10.2 Multiple-Choice Values Tab
The multiple-choice 'Values' tab allows you to set the multiple-choice answer options. Each
multiple-choice value has three elements: an option name that is used in the Variables Manager and
within rules; dialog text that appears when the question is asked; and finally, text that is displayed in
the document.
Setting your Multiple-Choice Values
Names box: Your multiple-choice answer options are listed here. You can create them as follows:
Ø In the Name box on the right, type in a name for your first option, in place of the default setting
‘New multi item 1’. You will see that your text is also automatically inserted into the ‘Names’
box on the left. In addition to being displayed within the question in the Variables Manager, this
name will be used to identify use of a specific option within rules and conditions when originating
a template.
Ø To add a second option, click the plus sign beneath the ‘Names’ box on the left, then type your
next option into the ‘Name’ box on the right. Again, this adds the new option to the list on the
left. Repeat this step to add further options.
Ø Use the plus and minus buttons to add and delete options.
Ø Use the up and down buttons to change the order of the options.
Note
To change any aspect of a specific multiple-choice option, you need to
highlight that option name in the left hand ‘Names’ box.
Ø Dialog text: Insert here the text which will appear for the current option when the Assembler
answers the question.
Ø Document text: Insert here the text to be inserted into the document when this option is
selected during assembly.
Ø You can format your text using the format buttons. The ‘Insert Variable’ button allows you to
insert the answer to a previously asked question within your text. See Using Variables Within
Question Settings.
See also:
Ø Alternative Document Text
Copyright ©2012 Epoq Legal Ltd
Using Rapidocs Author
55
2.3.4.10.3 Alternative Document Text
In some cases you may want different items of text to be inserted into the document depending on
the context in which it is used. This is often used to ensure that options are grammatically correct in
a sentence.
For example, you may have a question name ‘Male/Female’ for which your options are ‘Male’ and
‘Female’. In different parts of the document, you may need to use ‘He’ and ‘She’, ‘his’ and ‘hers’, or
‘him’ and ‘her’ to reflect the answer that the Assembler has chosen.
The following example demonstrates how to insert ‘he’ or ‘she’ into the assembled document:
Ø In the multiple-choice 'Values' tab, click on the plus sign below the ‘Alternative document text’
box. This highlights the ‘New alternative text 1’ option.
Ø Type in a name for your new alternative text value set in the field below the ‘Alternative document
text’ box. For example ‘he/she’. As you type, this value will be reflected in the list of alternative
document text sets.
Ø Click on the plus sign to add further alternative text sets if required.
Ø Add the individual answer options for your new alternative document text sets. Continuing the
example, with the text set ‘he/she’ selected, highlight the ‘Male’ option in the ‘Names’ box.
Then enter ‘he’ into the ‘Document text’ box.
Ø With the ‘he/she’ alternative document set still selected, highlight the ‘Female’ option in the
‘Names’ box and enter ‘she’ into the ‘Document text’ box.
Ø Click ‘OK’ to save these changes and close the settings window.
Ø During Authoring if you wish to use ‘he’ or ‘she’ in the document, you should select the
appropriate document text set from the Variables Manager and insert it into the document:
See also:
Ø Common Question Settings
2.3.4.11 Flag Question Settings
Flag questions require the Assembler to answer yes or no, by checking or unchecking a box. The
result is a Boolean TRUE or FALSE output. The following sections contain settings that are unique
to flag questions:
Ø Flag Input Tab
Ø Flag Values Tab
Information Only Questions
Information only questions (IOQ) are a special type of flag question that don't actually prompt the
user to check any input box. These questions are used to allow information to appear in the question
panel without the requirement for an associated question to be answered. This is useful for providing
guidance and assistance to the Assembler.
2.3.4.11.1 Flag Input Tab
The flag question 'Input' tab contains the following settings:
Default Value: A flag question always has a default value. This can be set either as a specific
value or according to the result of a rule. When you create a new question, the default value will be
set to ‘No’, which will result in the check-box being initially un-ticked.
If you want to set the default to be the result of a rule, click the ‘Rule’ radio button and use the down
arrow to select from the list of rules available. See also Flag Functions.
Caption by check-box: Allows you to input text to appear by the check-box when the Assembler is
answering the question. This text can be formatted using the format buttons. The ‘Insert Variable’
button allows you to insert the answer to a previously asked question within your text. See Using
Variables Within Question Settings.
Copyright ©2012 Epoq Legal Ltd
56
Rapidocs Author User Guide
Note
Information Only Questions are the same as flag questions in this respect
except that they only have a Default Value option. No caption by check-box
can be shown, since no check-box is displayed to the user.
See also:
Ø Common Question Settings
2.3.4.11.2 Flag Values Tab
The flag question 'Values' tab contains the following settings:
Ø Text when ‘No’: The text to be inserted into the document if the Assembler answers ‘No’.
Ø Text when ‘Yes’: The text to be inserted into the document if the Assembler answers ‘Yes’.
The text can be formatted using the format buttons. The ‘Insert Variable’ button allows you to insert
the answer to a previously asked question within your text as explained in Using Variables Within
Question Settings.
Note
A field in a PDF document may use a toggle that is dependent on a
configurable value. In Rapidocs this value can be entered in the above dialog
to switch the toggle on or off. See Using PDF Forms.
See also:
Ø Common Question Settings
Copyright ©2012 Epoq Legal Ltd
Using Rapidocs Author
2.3.5
57
Using Groups
Groups enable more than one question to be displayed on the same page during assembly. This
means that the person assembling the document can answer several questions at once, instead of
having to press ‘Next’ after each question has been answered. This can be conveniently used to
group together related questions, such as ‘Name’, ‘Address’, ‘Date of Birth’, etc. The ordering of
groups during assembly is controlled automatically and intelligently by Rapidocs. Note that
ungrouped questions are asked individually when appropriate.
See also:
Ø Creating a New Group
Ø Editing Group Settings
Ø Putting Questions into a Group
Ø Validating Groups
Ø Unasked Questions
2.3.5.1
Creating a New Group
To create a new group:
Ø Click 'New Group' on the Variables Manager toolbar or on the ‘Tools' menu select 'New' and then
'New Group'. This displays the ‘Name’ tab of the new group.
Ø Type in a name for your group.
Ø In the ‘Text’ box, you can optionally type in any text that you wish to be displayed at the top of
the page, above the group of questions, during assembly. This text can be formatted using the
format buttons. The ‘Insert Variable’ button allows you to insert the answer to a previously
asked question within your text. See Using Variables Within Question Settings for a full
explanation.
Ø Click ‘OK’.
Copyright ©2012 Epoq Legal Ltd
58
2.3.5.2
Rapidocs Author User Guide
Editing Group Settings
To edit the settings for a group:
Ø Double-click on the group in the Variables Manager.
Ø Make the desired changes to the group’s settings.
Ø Click ‘OK’.
2.3.5.3
Putting Questions into a Group
Having created your group, you will now want to put questions into it. One way to do this is as
follows:
Ø Click on the ‘Group’ tab, where there are two boxes ‘Grouped’ and ‘Ungrouped’. These show
which questions are already in your group, and which ones are available for selection.
Ø Select your questions from the ungrouped box and move them to the grouped box. To do this,
either double-click on the question, or click once and click the ‘plus’ sign, or simply drag and
drop the question into the grouped box.
Ø To change the order in which the questions appear within the group, you can either drag and
drop the questions, or click the ‘up’ and ‘down’ buttons. See below for descriptions of how the
other icons allow you to manipulate the grouping of questions.
From left to right, the icons provide the following functions:
Icon Description
Show all questions
Show ungrouped questions
Add currently selected question to the group
Remove currently selected question from the group
Clear the group
Move the currently selected question up one in the group
Move the currently selected question down one in the group
2.3.5.4
Validating Groups
A validator is a test similar to a rule that can be set up on a group to check that any criteria you have
specified have been met. It can be used to provide a message for information or confirmation, or to
warn of an invalid answer.
For detailed information on the ‘Validators’ tab see Using Validators.
2.3.5.5
Unasked Questions
This is special group of questions that never get asked during assembly. As with other groups, any
question may be moved into this group if required.
This allows the Author to use questions as variables that aren’t shown to the Assembler, and
therefore cannot be changed. The only way these questions may be altered is by using the
Rapidocs API to populate the answer programmatically.
Copyright ©2012 Epoq Legal Ltd
Using Rapidocs Author
2.3.6
59
Using Loops
A loop is a group of questions that can be asked repeatedly. For example, in a ‘Power of Attorney’
document you might ask the Assembler to enter the name and address of each attorney appointed.
See also:
Ø Creating a New Loop
Ø Editing Loop Settings
Ø Putting Questions into a Loop
Ø Loop Settings
Ø Numbering Paragraphs in a Loop
Ø Counting the Total Loop Repetitions
Ø Consecutive Loop-Controlled Paragraphs
Ø Non-Consecutive Loop-Controlled Paragraphs
Ø Using Loops and Tables
2.3.6.1
Creating a New Loop
The stages below assume that you have already created the questions that you would like to put into
a loop. If not, see Creating Questions.
By creating a new loop, you create the means to control the repetition of questions within a loop.
To create a new loop:
Ø Click 'New Loop' on the Variables Manager toolbar or on the 'Tools' menu, select 'New' and then
'New Loop'.
Ø Type in the name of the loop.
Ø Change any desired settings for the loop.
Ø Click ‘OK’.
Copyright ©2012 Epoq Legal Ltd
60
2.3.6.2
Rapidocs Author User Guide
Editing Loop Settings
To edit the settings for a loop:
Ø Double-click on the loop in the Variables Manager.
Ø Make the desired changes to the loop’s settings.
Ø Click ‘OK’.
2.3.6.3
Putting Questions into a Loop
When you insert a question into a loop it will be controlled by that loop. This means that whenever
the loop-controlled question is inserted into a paragraph, that paragraph will be repeated as many
times as necessary for the Assembler to complete the answers.
There are three different ways of putting questions into a loop, as follows:
Ø Drag the question into the loop in the Variables Manager.
Ø Double-click on the question, either in the Variables Manager or in the Origination Window, click
on the ‘Group’ drop down list, select the loop, and click ‘OK’.
Ø Double-click on the loop name in the Variables Manager, click on the ‘Group’ tab, and drag the
question into the ‘Grouped’ box. See Putting Questions into a Group.
Note
2.3.6.4
If a question in a loop is to be asked, it must first be inserted into the
template, as described in Inserting Questions.
Loop Settings
After creating a new loop, the Author can set various attributes for the loop by using the following
tabs:
Ø Name: An explanation is given in Name Tab.
Ø Before: Allows you to optionally insert introductory text to be shown during assembly before the
loop is processed. You can use the formatting buttons to format the text.
Ø Menu Text: Allows you to insert the text that appears during assembly above the list of
answers that you see when you click on the ‘Menu’ button.
Ø Explanation: This can be used to provide the Assembler with advice on how to answer the
questions in the loop during assembly. It appears immediately above the question(s) in the
panel.
Ø Group: Allows you to insert questions into the loop. See Putting Questions into a Loop.
Ø Validators: A validator is a test similar to a rule that can be set up on a group to check that
criteria you have specified have been met. It can be used to provide a message for information
or confirmation, or to warn of an invalid answer. For detailed information on the ‘Validators’ tab
see Using Validators.
Ø Menu Item: An explanation is given in Menu Item Tab .
Ø Stats: Shows where a loop counter has been used or ‘inserted’ into a template. This is a useful
feature, for example to identify any dependencies on a loop before you delete it.
2.3.6.4.1 Name Tab for Loops
The 'Name' tab in the loop settings contains the following attributes:
Name: The name of the loop.
Minimum number: You can optionally enforce the minimum number of times to process the loop.
Tick the ‘Enforce a minimum number’ box and use the up and down arrows to state the required
minimum.
Required; If this option is ticked, the Assembler will not be given the choice to avoid completing the
questions in the loop. At the start of the loop the Assembler will only be offered the ‘Back’ and
‘Next’ buttons if ‘Required’ is ticked. Otherwise the Assembler will be offered ‘Back’, ‘No’ and ‘Yes’
Copyright ©2012 Epoq Legal Ltd
Using Rapidocs Author
61
buttons. If the Assembler clicks the ‘No’ button, the loop will be skipped.
Maximum number: You can optionally enforce the maximum number of times to process the loop.
Tick the ‘Enforce a maximum number’ box and use the up and down arrows to state the required
maximum.
Show introduction before: The tick-box allows you to state whether or not to provide some
introductory text before the Assembler enters the loop. Ticking this box enables the ‘Before’ tab.
Sorted (menu item order): If this box is ticked the repetitions of the loop will be sorted into
alphabetical order. The order is determined according to how you have chosen to display this
information on the Menu item tab. [Note: This feature is not currently supported in Rapidocs
Web]
2.3.6.4.2 Menu Item Tab
The Menu Item tab in the loop settings only appears if questions have been inserted into the loop. It
allows you to control the text the Assembler will see once they have completed all the loop answers
and clicked on the ‘Menu’ button. The answers for each repetition of the loop are displayed on one
line, with all the repetitions displayed in a list.
If there are many questions in each loop repetition there may not be enough space for all the
answers to be displayed. Therefore the Author can select which answers are displayed in this list.
Note that the Assembler only has to double-click on any line to edit the full set of answers within one
repetition, whether or not they are displayed on this list.
In the Menu Item tab, the first column allows you to change the order in which the fields are
displayed, by clicking on the down arrow to the right of the first column. Select 'None' to take a field
out of the display. The second column should contain any punctuation required between the fields.
The text beneath the boxes shows a sample of how each line will be displayed during assembly.
2.3.6.5
Numbering Paragraphs in a Loop
You can number each paragraph containing loop-controlled questions by inserting the ‘Value’ of the
loop into the template. To do this:
Ø Position your cursor in the text where you want the numbering to appear (usually at the
beginning).
Ø Click on the loop ‘Value’ in the Variables Manager, then click the ‘Insert’ button on the toolbar.
Ø Note that when inserted, ‘Value’ is indicated by ‘LoopName.Value’.
Alternatively, you can use Rapidocs' auto-numbering. By inserting a loop-controlled question or
paragraph and then adding a numbering style, the paragraph will automatically number correctly as
multiple iterations of the question(s) are answered.
2.3.6.6
Counting the Total Loop Repetitions
To show the total number of repetitions of the loop during assembly:
Ø Position your cursor in the document where you want the loop total to appear.
Ø Click on the appropriate loop in the Variables Manager.
Ø Click ‘Insert’.
You may want to see the total displayed just once, for example at the end of the document.
Alternatively you can use the total as part of the numbering, so that you have ‘1 of 2’ ‘2 of 2’ etc.
Note
Copyright ©2012 Epoq Legal Ltd
Unlike loop questions or the loop counter, inserting the loop count total into a
paragraph does not make it loop-controlled.
62
2.3.6.7
Rapidocs Author User Guide
Consecutive Loop-Controlled Paragraphs
Where two or more consecutive paragraphs contain variables controlled by the same loop, they will
be repeated as a group. However, there must not be more than one hard return separating each
paragraph.
If you want your paragraphs to be consecutive, but want to insert text between them, you must make
sure that there is not more than one hard return after any paragraph. A ‘soft return’ (entered using
‘Shift-Return’) allows you to insert any amount of text or blank lines into your document without
breaking up the paragraphs.
Note
2.3.6.8
An alternative to using blank lines to separate loop-controlled paragraphs, is
to increase the bottom margin settings on the paragraph. This is done by
choosing ‘Style’ on the ‘Format’ menu and changing the appropriate
‘Paragraph’ settings. See Style Settings for more information.
Non-Consecutive Loop-Controlled Paragraphs
Where loop-controlled paragraphs are separated by two or more hard returns, they are considered to
be non-consecutive. This means that they will be repeated individually (rather than as part of a
group).
2.3.6.9
Using Loops and Tables
It is often convenient to insert loop-controlled questions or paragraphs into a table cell. Provided
every cell in a particular row is controlled by the same loop, then that row will be repeated for each
iteration of the loop.
2.3.7
Using Conditions
A condition is used to make a paragraph appear during assembly only if a certain condition is met,
and to disappear if it is not. It is a simple and convenient way of inserting the appropriate choice of
text into a document without having to use a rule. A condition cannot be applied to part of a
paragraph, but must be applied to one or more whole paragraphs.
See also:
Ø The Conditions Toolbar Button and Menu
Ø Applying a Condition to a Paragraph
Ø Deleting a Condition from a Paragraph
Ø Types of Conditions
Ø Single and Multiple Conditions
Ø The Conditions Manager
Ø Using Conditions with Tables
2.3.7.1
The Conditions Toolbar Button and Menu
Paragraphs can be made conditional on the answer given to a question. The Conditions button,
which is on the right hand side of the toolbar, will always display the condition that applies to the
current paragraph. The default setting is ‘Unconditional’. You can select a condition to be applied to
the current paragraph by clicking on the Conditions button to reveal the 'Conditions' menu.
The 'Conditions' menu is split into two sections: Existing Conditions and Available for Conditions.
The former lists all conditions that are already in use in the current document, enabling them to be
conveniently re-selected. The latter lists the questions and rules in the template, arranged in their
groups, loops and flag rules, all of which may be used to form conditions.
If a selection includes multiple paragraphs with different conditions applied, the toolbar button will
display ‘<Conditions>’.
Copyright ©2012 Epoq Legal Ltd
Using Rapidocs Author
2.3.7.2
63
Applying a Condition to a Paragraph
To make a paragraph appear if a condition is met:
Ø Place the cursor somewhere in the paragraph.
Ø Click on the ‘Conditions’ toolbar button to reveal the Conditions Menu.
Ø Select the condition from the menu.
To apply a condition to more than one paragraph at once, select the paragraphs and then apply the
condition. Note that the entire paragraph does not need to be selected - if any text in the paragraph
is selected the entire paragraph will be made conditional.
You will notice a blue marker appears in the left hand margin to show that the paragraph is
conditional.
2.3.7.3
Deleting a Condition from a Paragraph
To remove any condition that applies to the current paragraph or selected area of text, select the
‘Unconditional’ item on the Conditions menu. If the condition is no longer used anywhere in the
current document, it will automatically be removed and will no longer appear in the Conditions menu.
2.3.7.4
Types of Conditions
The different types of variable that can be used in conditions are described in this section.
Paragraphs can be made conditional on a specific answer to a multiple-choice question. For
example, a paragraph might only appear if the answer given to a multiple-choice question about
marital status is ‘Married’. Multiple-choice questions appear in the 'Conditions' menu as an
additional menu level, so you can easily select the specific option you want. The Conditions button
will display the chosen question and value names separated by a dot, e.g. ‘Marital Status.Married’.
Paragraphs can be made conditional on a text question or a number question, so that they only
appear if the question is answered. Note that if the question has a default value, the paragraph will
only disappear if the Assembler deletes this value and the answer is left blank.
You can make a paragraph conditional on a loop being processed, by selecting the loop name
from the 'Conditions' menu. In this case, the paragraph will only appear in the document once the
Assembler has entered the loop.
A paragraph can be made conditional on Booleans i.e. flag rules and questions. These are rules
and questions that evaluate to True or False. When you select one of these for use in a condition,
Copyright ©2012 Epoq Legal Ltd
64
Rapidocs Author User Guide
you will be given the option of choosing whether the condition should be met if the Boolean is True or
False using an additional pull-down menu that will appear.
It is also possible to make a paragraph conditional on more than one question, as described in
Single and Multiple Conditions.
2.3.7.5
Single and Multiple Conditions
When you make a paragraph conditional on the answer to a single question, a condition is created
and named after the selected question.
It is important to distinguish between conditions that are listed above the separator line on the
'Conditions' menu, and questions that appear below the line.
Note
If there are a large number of conditions, then the Conditions menu will be
split into two separate sub menus - 'Existing conditions' and 'Available for
conditions'. This simply makes the list more manageable and is equivalent to
the conditions shown above and below the separator line.
Selecting a condition from above the line will replace any existing condition that is applied to the
current paragraph. However, selecting a question from below the line will add that question to any
existing condition applied to the current paragraph. By default this will require all elements of the
condition to be true for the paragraph to appear. This is known as a Boolean AND condition.
You can change the logic that applies to multiple conditions by choosing 'OR' or 'AND' from the
Conditions menu. This can also be done using the Conditions Manager. A Boolean OR implies that
the paragraph will appear if any of the elements of the condition are true.
Copyright ©2012 Epoq Legal Ltd
Using Rapidocs Author
2.3.7.6
65
The Conditions Manager
The Conditions Manager gives you a convenient way to manage conditions in a template, particularly
multiple conditions. Using the Conditions Manager you can give a meaningful name to any condition
, and change the Boolean logic that is applied to multiple conditions. You can also influence the
order in which questions may be asked during assembly. Furthermore, you can delete the condition,
thus removing all instances of it in the template.
To access the Conditions Manager, select ‘Conditions Manager’ on the 'Tools' menu, or press ‘F8’.
By default the Conditions Manager shows all conditions in use in the current document. If you want
to list only multiple conditions un-tick the ‘Show Single Conditions’ box.
Renaming a Condition
You can rename any single or multiple condition by selecting it in the list and changing the value in
the ‘Name’ box.
Changing the Logic of a Condition
By default a multiple condition will cause a paragraph to appear only if all elements of the condition
apply. This is known as a Boolean AND.
Using the Conditions Manager you can change the logic of the selected condition to use a Boolean
OR instead. This will cause a paragraph to appear if at least one of the elements of the condition
apply.
Changing the Order of Questions in a Condition
It is possible to influence the order in which the condition logic is evaluated (and consequently, the
order in which the questions are asked during assembly) by changing the order of the questions/
rules in the multiple condition. To do this, select the question in the ‘Order’ box and move it up or
down using the arrows.
Deleting a Condition
Select the condition to be removed, and then use the 'Delete' button. If you want to remove part of a
condition in a multiple condition, select the question/rule to be removed from the 'Order' box, and use
the
button.
Note
Copyright ©2012 Epoq Legal Ltd
The Conditions Report tab shows the conditions index of each condition
66
Rapidocs Author User Guide
applied to the document. This is for information purposes, and not expected
to be of use to most authors.
2.3.7.7
Using Conditions with Tables
It is possible to make individual table cells conditional. To do this, place the cursor in the cell in
question, and use the conditions toolbar button to apply the condition, as with any other paragraph.
If an entire row of a table is to be hidden as a result of a condition, then the borders will also be
hidden and the whole row will be 'collapsed'.
The conditions marker on the left of a table row will show which cells are conditional - for example if
all cells in a three column table are conditional, then the marker will show three lines side by side i.
e. |||. If only the two outer cells are conditional, then two lines will be shown with the middle blank i.e.
| |.
2.3.8
Using Rules
While questions and conditions allow you to develop your intelligent documents quickly and easily,
sometimes it may be necessary to perform more advanced operations. You can create a rule by
writing a formula using functions from a comprehensive range available within Rapidocs.
Rules may be used for the following purposes:
Ø Inserting text: You can insert an appropriate piece of text within a paragraph according to the
result of a formula. A simple example of this would be to make a word plural depending on the
number of items in a loop.
Note
In many cases it is quicker to add alternative text values in a multiple-choice
question than to use a rule. For example, you can insert ‘him’ or ‘her’ in a
sentence depending on whether the Assembler selects ‘Male’ or ‘Female’.
See Alternative Document Text.
Ø Calculation: You can perform mathematical functions on number or date questions. For
example, you might use a rule to insert the age of a person into the document calculated from
the person’s date of birth.
Ø Formatting: You can insert text, numbers or dates in different formats. An example of this
would be to convert a number into words.
Ø Conditions: You can create a complex condition using a flag rule that can then be applied
directly via the 'Conditions' menu. For example, you may wish a paragraph only to appear if a
person is over 21 years old. Based only on a date of birth, a Boolean (or flag) rule could
calculate the person’s age and make the comparison, to 21 in this case. This flag rule would
then be available for use via the Conditions Menu.
Ø Forcing questions: You can force the order in which groups of questions are asked during
assembly by using a hidden rule.
See also:
Ø Creating Rules
Ø Writing Rules
Ø Sample Functions
Ø Inserting Rules
Ø Editing Rules
Copyright ©2012 Epoq Legal Ltd
Using Rapidocs Author
2.3.8.1
67
Creating Rules
To create a rule:
Ø Place the cursor in the document at the position where the result of the rule should appear.
Ø Click the ‘New Rule’ button on the Variables Manager toolbar, or on the ‘Tools’ menu, select
‘New’, then ‘New Rule’.
Ø Type in a name for the rule in the ‘Name’ box.
Ø You can optionally enter a different name in the ‘Display’ box that will appear in the document
text during assembly.
Ø Tick the ‘Hidden’ box if you do not want the result of the rule to be displayed in the document
text. See Hidden Rules.
Ø Enter the required formula as described in Writing Rules.
Ø You can insert question names or a specific multiple-choice option into your formula to represent
an answer given during assembly. To do this, click the ‘Insert Variable’ button at the top of the
‘Formula’ box, select the required variable and then click ‘Insert’.
Ø A full list of functions is available by clicking on the ‘Functions’ button. The functions are
grouped together by type. Hovering over a function name in the menu will display a brief
description of the function . Selecting a function name from the menu will insert it into the
current formula. See also Functions for Rules.
Ø Click the ‘Check’ button to identify any errors in the formula, and to calculate and display the
‘Result type’. More information on 'Types' is given in Writing Rules.
Ø Clicking the ‘Test’ button first checks the formula and then lets you see how your formula will
work, showing the questions on which the result will depend. You can test your rule by providing
sample answers.
Ø A ‘Format’ tab will appear if the ‘Result type’ of your formula is ‘date’ or ‘numeric’.
Ø The ‘Stats’ tab shows how many times the rule has been used in the current template.
Ø Click ‘Insert’ to insert the rule into a document, or ‘OK’ to save your rule in the Variables
Manager.
When a rule is inserted into a document it appears by default in a teal font colour.
Copyright ©2012 Epoq Legal Ltd
68
2.3.8.2
Rapidocs Author User Guide
Writing Rules
The formula for a rule is written using functions from the many provided by Rapidocs. A full list of
functions is given in Appendix A: Functions for Rules.
Types
It is important to be aware of the different types recognised by Rapidocs. Most functions require one
or more parameters of a specific type, and will also return a value that has a specific type. The rule
itself will also have a ‘Result type’ that is the type of value that the whole formula will return.
Parameters may be either: the value of a question; a literal value (one that you specify); or the result
of another function. Rapidocs supports the following types:
Ø Text: This can comprise any combination of letters, numbers and characters. If specified as a
literal value text must be shown with single quotes around the value, such as ‘Here is a text
value’.
Note
To insert an apostrophe, you must type two apostrophes (e.g. John’’s rather
than John’s).
Ø Number: This is a numeric value that can include whole numbers or decimals. For example: 1;
4; 7.5; 9.7746.
Ø Date: The date value uses an internal Rapidocs format that may be passed between different
functions.
Ø Flag/Boolean: These can be either TRUE or FALSE.
Syntax
Most functions require one or more parameters to perform its task.
'Types' in functions
For example, the syntax of the function ‘CardinalLC’ is shown as ‘(text) CardinalLC(Number)’. This
shows that it requires a single number parameter, which can be either the value of a number
question, the result of another function returning a number, or a literal value. As it is a text function,
it returns the result i.e. a number, as a ‘text’ value.
Some functions, such as an ‘If’ statement, require more than one parameter. The syntax of a basic
‘If’ statement is made up of three parts:
If(condition, then clause, else clause)
The ‘condition’ is a test that should either result in a flag (true or false), or be a specific value of a
multiple-choice question. The ‘then clause’ is what will happen if the condition is met, otherwise the
‘else clause’ will be used.
Each parameter must be separated by a comma, and there must always be three parameters. The
values returned by the ‘then’ and ‘else’ clauses must be of the same type.
Nested Functions
A parameter can also contain functions.
For example,
If(ageof(DateofBirth) > 16, uppercase(Name), ‘MINOR’)
In other words, the age of the person is calculated from their date of birth using the ‘ageof’ function,
and tested to see if they are over 16. If they are, their name is converted into uppercase and this
value returned as the result of the ‘If’ function. If they are 16 or under, the function returns the literal
text ‘MINOR’ instead.
Copyright ©2012 Epoq Legal Ltd
Using Rapidocs Author
69
In a similar way, ‘If’ statements can be nested so that a parameter of one ‘If’ statement is derived
from another.
If(MaritalStatus.Married, ‘Permit Granted’,
If(HomeOwner.Yes, ‘Further Tests’, ‘No’))
The example above first checks to see if an applicant is married by testing the value of the answer to
the MaritalStatus question. If yes, then the text ‘Permit Granted’ is returned. The ‘else’ clause has
a further ‘If’ statement that further checks to see if the applicant is a home-owner before returning the
appropriate text value.
You can keep nesting functions in this way as you wish, making sure that brackets and commas are
used correctly. In the example above, each ‘If’ statement has a single bracket to start and end it,
and has three parameters separated by commas. The whole of the second ‘If’ statement is treated
as a single parameter of the first.
2.3.8.3
Sample Functions
The sample functions described in this section are as follows:
Ø Sample Text Functions
Ø Sample Number Functions
Ø Sample Date Functions
Ø Sample Flag Functions
Ø Hidden Rules
Ø Re-formatting Date and Number Questions Using Rules
See also:
Ø Functions for Rules
2.3.8.3.1 Sample Text Functions
It is often useful to be able to insert a word or phrase depending on an answer given.
An example would be a text rule that inserts details of a second executor only when there is more
than one executor. In this case, the following formula could be inserted into a rule:
if(Multiple Executors, ' and '+Name of Executor two+' of '+Address of Executor two,'')
The formula will always return a text value. If there is only one executor, an empty text value will be
returned. This is denoted by two single quotes with nothing inside them.
The plus sign is used in this case to ‘add’ two text strings together. There are spaces inside the
quotes around the word ‘and’ to ensure that the resulting phrase will have correct spacing.
Rules can also be used to manipulate text questions. This example inserts ‘Mr’ before the person’s
name if it does not already start with ‘Mr’:
If(Pos(‘Mr ’, Name) = 1, Name, ‘Mr ’ + Name)
The ‘Pos’ function above looks through the text question called Name for the word ‘Mr’, and returns
the position of the first character of ‘Mr’ in Name. In this case, the If function checks to see if the
answer to the Name question starts with ‘Mr’, and if it does not, ‘Mr ’ will be inserted before the text
answer. Note there is a space after the ‘Mr’ in the example above, to ensure correct spacing in the
inserted text.
Rules that evaluate to a text value are indicated by a red icon in the Variables Manager.
For other examples of functions, see Sample Functions.
Copyright ©2012 Epoq Legal Ltd
70
Rapidocs Author User Guide
2.3.8.3.2 Sample Number Functions
When Rapidocs determines that a rule will result in a numeric value, the ‘Format’ tab will be enabled.
This allows you to determine the way in which the result of the rule will be displayed in the
document. See Format Tab for Number Questions for more information about formatting numbers.
Rapidocs can perform complex calculations on number questions. The following example shows
how a numeric question called ‘Days’ can be automatically converted into text showing the number
of weeks and days:
Trunc(Days/7) +‘ Weeks ’ +
(Days - Trunc(Days / 7) * 7) + ‘ Days’
The ‘Trunc’ function above rounds down the result of the calculation in the brackets. For example, if
Days had the value 26:
26 / 7 = 3.714, so Trunc(26/7) = 3
26 - 3 * 7 = 26 - 21 = 5
so this rule would return ‘3 Weeks 5 Days’.
Note
Rapidocs uses the following order of precedence when evaluating numeric
formulae:
Brackets, Multiplication/Division, Addition/Subtraction
Therefore the formula ‘3+4*2’ would evaluate to 11 not 14. You could instead
use ‘(3+4)*2’ to get the result of 14
Rules that evaluate to a numeric value are indicated by a blue icon in the Variables Manager.
For other examples of functions, see Sample Functions.
2.3.8.3.3 Sample Date Functions
When Rapidocs determines that a rule will result in a date value, the ‘Format’ tab will be enabled.
This allows you to determine the way in which the result of the rule will be displayed in the
document. See Format Tab for Date Questions for more information about formatting dates.
There are several functions that can be used to manipulate dates. The following example returns the
day of the week of the date held in the question StartDate:
dayname(StartDate)
Rules that evaluate to a date are indicated by a yellow icon in the Variables Manager.
For other examples of functions, see Sample Functions.
2.3.8.3.4 Sample Flag Functions
Flag functions (also known as Boolean functions) are straightforward to use, consisting of a
statement that could either be true or false. For example:
Percentage>=50
This flag statement would be true if the answer to the number question, ‘Percentage’, is greater than
or equal to 50.
You can make paragraphs conditional on flag rules via the 'Conditions' menu. See Types of
Conditions.
Another example of a flag rule is:
(Forename = ‘John’) and (Surname = ‘Smith’)
This will be true if the question called ‘Forename’ is answered ‘John’ and the question called
‘Surname’ is answered ‘Smith’. Note that these answers are case sensitive.
Although you could use a flag rule to make a paragraph conditional on a single option in a multiplechoice question, this is unnecessary since it is also possible (and easier) to do this directly from the
'Conditions' menu.
Rules that evaluate to a flag are indicated by a purple icon in the Variables Manager.
For other examples of functions, see Sample Functions.
Copyright ©2012 Epoq Legal Ltd
Using Rapidocs Author
71
2.3.8.3.5 Hidden Rules
Hidden rules are used to force a question to be asked at a certain point. To use a hidden rule:
Ø Insert the question, or multiple questions, into the rule.
Ø Tick the ‘Hidden’ box.
Ø Insert the rule where you would like the question to be asked.
You would not usually need to use hidden rules, as Rapidocs orders questions automatically and
intelligently. However, this feature enables you to override the pre-determined order.
Note
Hidden rules can be used to force a question to be asked even if there is no
visible effect on the document. This may be useful to collect general
information from the Assembler that does not go into the document: For
example, to collect a contact telephone number that might be useful when a
document is emailed to someone else.
For other examples of functions, see Sample Functions.
2.3.8.3.6 Re-formatting Date and Number Questions Using Rules
A useful feature of rules is that they can be used to re-format answers to questions. Although you
can specify the format of a numerical or date question in the question’s settings, if you want to insert
it again later in a different format, a rule must be used.
For example, you might have a date of birth question which is shown formatted as a full date.
However, the rule could be used at another point in the document to display only the year of birth in
words. In both cases the result is based on the same question but is displayed in the final
document in a different format.
Once the question has been inserted into the document in the required format, you can use a rule to
insert an alternative format as follows:
Ø Create a new rule.
Ø Select the required question using the ‘Insert Variable’ button.
Ø Click the ‘Check’ button so that Rapidocs can confirm the ‘Result type’.
Ø Provided that the selected question is a date or number, the 'Format' tab will appear.
Ø Set the required format using the options on the ‘Format’ tab. This will not affect the format of
the original question.
Ø Click ‘Insert’ to put the rule into your document.
For other examples of functions, see Sample Functions.
2.3.8.4
Inserting Rules
A rule only ever takes effect if it has been inserted into the template or, in the case of a flag rule, if it
is used in a condition.
To insert a rule at the current position in the document:
Ø Either double-click on the rule in the Variables Manager, then click the ‘Insert’ button in the rule
settings window.
or
Ø Select the appropriate rule in the Variables Manager, and click the ‘Insert’ button on the toolbar.
Inserted rules are shown by default in teal text in the Origination Window. On the ‘Stats’ tab you
can see the number of times that the rule is inserted into the template.
2.3.8.5
Editing Rules
If you want to edit a rule that you have already inserted:
Ø Double-click on the rule, either in the Origination Window or in the Variables Manager.
Copyright ©2012 Epoq Legal Ltd
72
Rapidocs Author User Guide
Ø Make the desired changes to the rule.
Ø Click ‘OK’.
Copyright ©2012 Epoq Legal Ltd
Using Rapidocs Author
2.3.9
73
Using Validators
A validator is a test similar to a rule that can be set up on a question, group, or loop, to check that
criteria you have specified have been met by the Assembler when answering a question. It can be
used to provide a message for information or confirmation, or to warn of an invalid answer. Validators
always result in a text output, for example ‘Must add up to 100’, or ‘Invalid name’.
See also:
Ø Creating Validators
Ø Using Validators in a Question
Ø Using Validators in a Group
Ø Using Validators in a Loop
Ø Web Events
2.3.9.1
Creating Validators
You can create a validator in two ways: either by creating one directly in the Variables Manager; or
on the ‘Validators’ tab of the settings window for questions, groups or loops.
To create a validator in the Variables Manager:
Ø On the ‘Tools’ menu, select ‘New’, then ‘New Validator’, or click the ‘New Validator’ button on
the toolbar.
Ø Decide what ‘Type’ of validator you require, depending on how serious you want the warning to
be. The choices are ‘Information’, ‘Confirmation’, ‘Warning’, ‘Error’ and ‘Serious error’. 'Web
Event' is also an option - this is dealt with separately in this manual. In most cases the
Assembler will have to click ‘OK’ to confirm that the message has been read. A ‘Confirmation’
message displays ‘Yes’ and ‘No’ buttons and the response is used to determine whether to
continue or not. Only the ‘Serious error’ message actually prevents the Assembler from
continuing until a valid answer has been supplied. It is essential that the user be able to correct
the condition otherwise they may not be able to continue with assembly of the document.
Ø Insert your validation rule into the ‘Formula’ box. See Using Rules for more information. The
result of your formula should be a text message that will be displayed to the Assembler. If the
result of the formula is empty text (denoted in your formula by two single quotes with nothing
between them), no validation message will be displayed.
Ø Click ‘Test’ to test the rule.
Ø Click ‘OK’.
Having created the validator, it will then appear in the Variables Manager. Validators that already
appear in the Variables Manager can be applied to a question, group or loop via the ‘Validators’ tab
of their respective settings windows.
To create a new validator directly from the ‘Validators’ tab of the settings window, click on the ‘plus’
button to display the window for a new validator. You can then create your validator, which will
subsequently appear in the Variables Manager in the usual way.
The validator itself will be activated when the Assembler completes either the question, group or loop
respectively and moves their cursor from the field.
To see where a validator has been used in your template, click on the ‘Stats’ tab in the validator
settings window.
Copyright ©2012 Epoq Legal Ltd
74
Rapidocs Author User Guide
Copyright ©2012 Epoq Legal Ltd
Using Rapidocs Author
2.3.9.2
75
Using Validators in a Question
To prompt validation to occur at the point the Assembler completes and exits a specific question,
you should apply the validator to the question as follows:
Ø In the Variables Manager, double-click on the appropriate question to display the settings
window.
Ø Click on the ‘Validators’ tab. In the left box, you will see all of the validators available in the
document.
Ø To select a validator for use in the question, select it and then click the right arrow button, to
move it into the right hand box called ‘Question Validators’. Validators are activated in the order
in which they are listed in the ‘Question Validators’ box.
Ø Click ‘OK’.
The buttons between the two boxes enable you to do the following:
Icon Description
Add a validator to the question, moving it to the ‘Question
Validators’ box.
Remove a validator from the question, returning it to the ‘Available’
box. However, the validator is not deleted from the document.
Move the validator up so that it is activated earlier.
Move the validator down so that it is activated later.
Create a new validator.
Delete a validator from the document altogether.
Edit the currently selected validator.
2.3.9.3
Using Validators in a Group
You can apply a validator to a group in the same way as described in Using Validators in a Question
, except that you double-click on the group name in the Variables Manager, rather than on a
question.
During assembly, any warning message will appear when the Assembler clicks on the ‘Next’ or
‘Back’ buttons to leave the group, rather than after an individual question.
2.3.9.4
Using Validators in a Loop
You can apply a validator to a loop in the same way as described in Using Validators in a Question,
except that you double-click on the loop name in the Variables Manager, rather than on a question.
It is possible to apply both group validators and loop validators to a loop. A group validator can be
activated after each repetition of the question group if required. A loop validator can be activated
when the Assembler leaves the loop. This occurs when the Assembler clicks the ‘Next’ or ‘Back’
buttons on the loop menu.
Note that group and loop validators can be applied in the same settings window by moving the
chosen validator into the appropriate box.
During assembly, the warning message for the group validator will appear when the Assembler clicks
on the ‘Next’, ‘Add’, ‘Menu’, or ‘Back’ buttons to leave the group.
The warning message for a loop validator will appear when the Assembler clicks on the ‘Next’ or
‘Back’ buttons on the loop menu display.
Copyright ©2012 Epoq Legal Ltd
76
2.3.9.5
Rapidocs Author User Guide
Web Events
Rather than returning a warning message or information, a Web Event results in a URL which will
open in the Assembler's browser.
Web Event validators are created and attached to questions in exactly the same manner as other
validators. The key difference is that the output must contain a valid URL.
An example of a Web Event validator is shown below. In this example, if a user ticks ‘Yes’ to a
question asking whether they would like more information from the Court Service, a browser window
will open pointing to the Court Service website. If they select No, then nothing happens.
2.3.10 Using Bookmarks and Cross-References
A bookmark is used to mark a point in a document so that it can be referred to later. Crossreferences are then created to refer to a specific bookmark. A bookmark may be referred to by more
than one cross-reference using different format settings, such as by page or by clause number.
A bookmark may be inserted anywhere in a paragraph. A cross-reference is then linked to the
bookmark, and inserted where required. Each cross-reference may be re-used many times in a
document. Bookmarks are invisible to an Assembler.
See also:
Ø Inserting Bookmarks
Ø Inserting Cross-References
Ø Cross-Reference Settings
2.3.10.1 Inserting Bookmarks
To insert a bookmark:
Ø Place the cursor in the paragraph that you want to reference later.
Ø On the ‘Tools’ menu, select ‘New’ then ‘New Bookmark’, or click ‘New Bookmark’ on the toolbar.
Ø Type in a meaningful name for your bookmark.
Copyright ©2012 Epoq Legal Ltd
Using Rapidocs Author
77
Ø You can redefine an existing cross-reference to point to the new bookmark by selecting it in the
‘Reference’ field.
Ø Click ‘Insert’ or ‘OK’.
2.3.10.2 Inserting Cross-References
To insert a cross-reference:
Ø Place the cursor where you require the reference to appear.
Ø On the ‘Tools’ menu, select ‘New’ then ‘New Cross-reference’ or click ‘New Cross-reference’ on
the toolbar.
Ø Type in a meaningful name for your cross-reference.
Ø In the ‘Reference’ box select the bookmark you wish to refer to from the pull-down list.
Ø Change any desired settings for the cross-reference.
Ø Click ‘Insert’ or ‘OK’.
2.3.10.3 Cross-Reference Settings
In a cross-reference's settings, you can set the following attributes:
‘Text before’ and ‘Text after’: These allow you to insert text to appear before and/or after the
reference itself. Note that you may need to enter a space both after your ‘Text before’ text and
before your ‘Text after’ text to ensure that the spacing in your reference is correct.
Note that if a cross-reference relates to a bookmark in a conditional paragraph, the reference will
appear to be incomplete if the bookmark is not visible.
Show: This allows you to select the type of reference:
Ø ‘Paragraph’: Allows you to refer to the number of a paragraph which has been dynamically
numbered using Styles. See Numbering Tab in Style Settings.
Ø ‘Page’: Allows you to refer to the page number on which the bookmark appears.
Ø ‘Text’: Allows you to refer to the text of the paragraph in which the bookmark appears.
Reference: This allows you to select the bookmark to which the cross-reference will refer.
Required: This makes the cross-reference a required reference. This means that if the bookmark is
in a conditional paragraph where the condition is not met, the cross-reference will still appear during
assembly showing a ‘bookmark undefined’ error message. This is a useful feature for checking that
all cross-references have values.
Stats: On the ‘Stats’ tab of the settings window, you can see the number of times the bookmark or
cross-reference has been inserted into the template.
Note
A cross-reference in the Document Notes can be linked to a bookmark in
either the document or the Document Notes.
2.3.11 Using PDF Forms
Rapidocs Author allows you to create form templates as well as document templates, by importing
Adobe Acrobat PDF forms. Many common forms, such as those from government bodies, already
exist in this format.
Importing your forms into Rapidocs gives you many benefits, including:
Ø Saving answers: Rapidocs enables you to save answers at any time and return to your
document later.
Ø Intelligent questioning: Rapidocs controls the logic relating to insertion of questions, meaning
that only necessary questions will be asked and others will be left out if appropriate.
Ø Guidance: You can add context-sensitive guidance to help Assemblers answer each question.
Ø Validation: Comprehensive validation of Assembler input can also be added, for example
ensuring that a list of percentages entered add up to 100.
Copyright ©2012 Epoq Legal Ltd
78
Rapidocs Author User Guide
Ø Calculations: You can insert calculations, for example a value inserted into a form can be
automatically calculated based on answers already given.
Ø Continuation sheets: These are automatically created if the contents of a field is too large to fit
in the allotted space. Alternatively, statutory continuation sheets can be used instead if required
as part of the form.
Ø Conditional Pages: If extra pages of the PDF form should be inserted then this can be done
using the conditional pages feature of Rapidocs.
Using Rapidocs makes forms easy to use, whilst minimising errors. In order to use this feature,
your form must be in Adobe Acrobat PDF Form format.
See also:
Importing PDF Forms
Working with PDF Forms
PDF Fields Manager
PDF Pages Manager
2.3.11.1 Importing PDF Forms
To import Acrobat PDF forms into Rapidocs, you need to do the following:
Ø From the 'Home' tab click on the 'New document’ icon - see Getting Started. This takes you into
the Authoring Screen with a blank template.
Ø On the ‘File’ menu, select ‘Import’, then ‘PDF Form File’. This brings up the ‘Import PDF’
window.
Ø Browse your files and select the PDF file you wish to import.
Ø Click ‘Show Fields’ to preview the field names present in the form (this is optional). Click ‘Close’
to close this window.
Ø To show the PDF file with the field names highlighted, click on the ‘Preview’ button (this is also
optional). You may find it useful to print this for reference. Close this window when you have
finished viewing the form.
Ø Click on ‘Open’ and then ‘Yes’ to confirm. This imports the PDF file into Rapidocs.
Extracting the PDF form from Rapidocs
On many occasions you may find it useful to be able to extract the PDF form that was previously
imported into Rapidocs. This is done by selecting ‘File’, ‘Extract PDF’ then browsing to the folder in
which you wish to save the PDF file.
2.3.11.2 Working with PDF Forms
Having imported your PDF file as described in Importing PDF Forms, you will see that a question is
created for each field in the Editor Window on the right. All the questions can also be found in the
Variables Manager on the left, as ungrouped questions. Note the following:
Ø You can now use Authoring tools in the normal way (as explained throughout this section on
Authoring Documents) to group questions together, and add explanations and validation. See
also Using Questions.
Note
As PDF forms treat every field as a text field, you will probably wish to
change the types of some of the imported questions in the Variables Manager
.
Ø The question names in the Variables Manager should match the field names in the PDF file. If
you wish to change the names of questions in Rapidocs, you need to map the question onto the
appropriate PDF form field. See PDF Fields Manager.
Ø You may wish to calculate the value of a field from answers already given, rather than ask a
question. To do this, you can create a rule and map it to the field that the question was initially
Copyright ©2012 Epoq Legal Ltd
Using Rapidocs Author
79
mapped to. You will then need to insert it into the Editor Window since no field entry will be
passed to the PDF unless it is inserted into the underlying document.
Ø To make a question conditional, you need to make the question name conditional in the
Origination Window in the same way as you would make paragraphs conditional in a normal
Rapidocs document, i.e. by using the ‘Conditions’ toolbar. See Using Conditions.
Note
A field in a PDF document may use a toggle that is dependent on a
configurable value. In Rapidocs this can be implemented as a flag question,
with the appropriate values set in the question settings to switch the toggle on
or off. See Values Tab for Flag Questions.
Ø To test assemble as normal, click the ‘Assemble’ icon, or press ‘F9’. See Test Assembly. The
PDF will open in the built-in PDF viewer.
Ø You can toggle between the PDF view and the document view by clicking on the Acrobat icon
(the red ‘A’). To extract a copy of the assembled PDF file, click on 'Save a copy' in the bottom
left corner of the window.
Ø To update the PDF during Test Assembly, hit the refresh symbol at the bottom middle of the
window.
Copyright ©2012 Epoq Legal Ltd
80
Rapidocs Author User Guide
2.3.11.3 PDF Fields Manager
The PDF Fields Manager allows you to map Rapidocs questions onto fields in a PDF form. In the
majority of cases Rapidocs will handle this mapping automatically by using the same name for the
question as for the field name in the PDF form. However, you may prefer to use alternative names
for your question names to make your template easier to maintain, to comply with another naming
convention, or to map the output of a rule to a PDF field.
Also, if you wish to control questions in a loop you will need to map the loop questions onto the
appropriate PDF fields.
By default, fields are mapped alphabetically from A - Z. You can reorder them from Z - A by clicking
on the column heading. Alternatively, you can reorder the mappings alphabetically according to the
Rapidocs variable name by clicking on this column heading.
To map a PDF field onto a different Rapidocs question:
Ø Select ‘PDF Fields Manager’ on the ‘Tools’ menu.
Ø This displays the PDF Fields Manager table. This lists all the field names in the associated
PDF form on the left.
Ø Double click on the mapping to be edited.
Ø Select the appropriate Rapidocs Variable Name from the pull-down list and click 'OK'.
Ø A mapping may be blank. If so, nothing will be inserted into that PDF field.
Ø Click ‘OK’ to save your mappings and close the PDF Fields Manager.
Note
When mapping a loop-controlled Rapidocs question onto a PDF field, the
question name in the PDF Fields Manager will be followed by an iteration
number in brackets. The loop-controlled question name will be repeated for
every possible iteration of the loop.
Alternatively, you can map multiple loop entries to a single field by creating a
rule containing the LoopList function, and then mapping this rule to the PDF
field. See Loop Functions.
Copyright ©2012 Epoq Legal Ltd
Using Rapidocs Author
81
The 'Overflow page' column enables you to specify if a particular field is to be associated with a
continuation sheet. This is useful where statutory continuation sheets are needed. See PDF Pages
Manager for more information about how to make the continuation page appear conditionally.
In general, if a field overflows the available space in the form, then it will be moved to the automatic
continuation sheet.
Note
Copyright ©2012 Epoq Legal Ltd
When you choose to insert a variable there are three additional 'PDF-specific
variables' that may be mapped. These are 'None (clear mapping)', 'Current
page number' and 'Section page count'. The first of these is self explanatory.
The latter two will insert either the current page number of the section that the
field exists in or the total number of pages in that section. See PDF Pages
Manager for information on creating sections in the PDF form.
82
Rapidocs Author User Guide
2.3.11.4 PDF Pages Manager
The PDF Page Manager enables you to make certain pages within the PDF form itself appear
conditionally. By default all pages will appear unconditionally, however, you may decide you only
require a page to be shown according to the answer to a question or rule, or only if a particular field
overflows.
To change the condition associated with a page, simply click on the page number to reveal the
dialog box for the particular page condition.
Copyright ©2012 Epoq Legal Ltd
Using Rapidocs Author
83
You may then choose to either make it conditional on the outcome of a rule (note, it must be a Flag
Rule) or on a particular field overflowing.
Creating Sections
By right mouse clicking on the page number in the Pages Manager dialog box, you can insert a
numbering reset. This is useful for creating sections, where the number of pages in that section are
to be inserted within the PDF form. This is required in certain government forms. See PDF Fields
Manager for more information on inserting the current page number and section page count.
Copyright ©2012 Epoq Legal Ltd
84
Rapidocs Author User Guide
2.3.12 Test Assembly
For convenience while Authoring, you can easily view the document as the Assembler will see it.
This allows you to test your questions and the effect the answers will have on your document.
To see how the template will look and work during assembly:
Ø Either select ‘Assemble’ on the ‘File’ menu, or use the ‘Q&A mode’ icon on the toolbar, or
simply press ‘F9’.
Ø Test the assembly process by providing sample answers to each of the questions.
Ø When you reach the end, click ‘Finish’ to return to the Authoring Screen.
Ø You can return to the Authoring Screen at any point simply by pressing ‘F9’ or by using the ‘Edit
mode’ icon on the toolbar.
Some features that are normally available while assembling documents may not be available while
testing templates. Note the following:
Ø You cannot save a document that includes answers to questions. Clicking ‘Save’ will simply
save your template.
Ø When assembly is complete, you return to the Authoring Screen rather than the document view
that an Assembler will see.
There are additional features to help the Author whilst testing templates. These are described in
Editing Prompts from Assembly and The Answers Manager.
Note
When test assembling a PDF form, you will have the option of testing it in the
PDF viewer. See Working with PDF Forms for more information
Test Assembly in Rapidocs Web
When your document is near to completion and you wish to test it as the end user will see it in
Rapidocs Web, you can select 'Q&A mode (web)'. This will upload and compile your document to a
temporary website. Note: There's usually a delay whilst the upload process takes place.
Once uploaded, Rapidocs will present you with the URL you should click on in order to go to the
webpage.
If you right click on this URL, you may copy it to your clipboard to enable you to test in a non-default
browser if you wish.
See Rapidocs Web Settings under Setting Rapidocs Options for more information on configuring this
feature.
2.3.12.1 Editing Prompts from Assembly
While testing your template, you can conveniently edit question prompts. This feature saves you
having to return to the Variables Manager to make changes to a question’s settings.
To edit a prompt, right click on it and select ‘Edit Prompt’. This displays the ‘Edit caption’ window,
which allows you to edit the text and change the formatting.
Explanations can also be edited in a similar way. However, this feature can only be used if
explanations are being displayed in an explanation panel, rather than as an explanation popup. For
more information on selecting the explanation panel option, see Setting Rapidocs Options.
If you're in test assembly and you wish to change some of the other Question Settings, you can
quickly jump to these by right clicking on the question and selecting 'Edit Question'. This will exit
test assembly, and open the question dialog box immediately.
Copyright ©2012 Epoq Legal Ltd
Using Rapidocs Author
85
2.3.12.2 The Answers Manager
While working with a new template you are likely to be switching frequently between authoring and
test-assembling your template. Normally, this will mean answering each question from the start of
the assembly process each time you start testing.
The Answers Manager has been designed to speed up the testing process by remembering your
answers each time you test-assemble a document. By default this feature is enabled.
To activate the Answers Manager:
Ø Select ‘Answers Manager’ on the ‘Tools’ menu, or press ‘F6’, either while originating your
document or when testing it. The ‘Answers Manager’ window is then displayed.
Ø If you want Rapidocs to remember your answers, make sure that the ‘Always start from fresh’
box is left blank.
Ø The ‘Answer groups’ box shows groups, loops and ungrouped questions for which answers have
been recorded while testing your template. The answers are shown in the order in which you
gave them.
A likely situation is that after giving your answers and finishing your testing, you go back to the
Origination window to make further changes. If you then return to testing your template, you will find
yourself at the point at which you finished testing previously. The answers in the groups shown in
Answers Manager will be re-applied, thereby saving you from having to answer those questions
again.
If you want to re-test a group or loop, and therefore want to provide new answers, you can clear the
answers from that point onwards by selecting the appropriate group in Answers Manager and
clicking ‘Truncate’. Note that subsequent groups of answers will also be removed, as changing
answers in one group may affect which group of questions is presented next.
2.3.13 Dependency Check
When Authoring a Rapidocs document, it's often very helpful to be able to find out how a particular
variable is deployed in that document. Most variables have a 'Stats' tab, which lists where the
variable is being used, however this does not give the whole picture.
By using the Dependency check, the Author is able to identify exactly which other questions, rules
or validators are dependent on variable, as well as showing all instances of the variable itself in the
document.
To show dependencies:
Ø Select the variable (e.g. a question) from the Variables Manager and right click.
Ø Choose 'Highlight dependencies' from the menu.
All questions, rules, validators, groups and other variables that are dependent on the variable you've
selected, will be highlighted in green in the Variables Manager. Similarly, all instances of dependent
variables in the document will be highlighted in the Editor Window.
Copyright ©2012 Epoq Legal Ltd
86
Rapidocs Author User Guide
To remove all highlighting:
Ø Select any variable from the Variables Manager and right click.
Ø Choose 'Clear highlights' from the menu.
The dependency check will also be invoked whenever the Author views 'Stats' tab of any variable.
Copyright ©2012 Epoq Legal Ltd
Using Rapidocs Author
87
2.3.14 Deleting Unused Variables
During Authoring of most templates, and particularly when working with PDF forms, you will find that
you are left with a number of variables in your document which are no longer needed. Either they
were created and then found to be unnecessary, or perhaps were created to test part of the
document and then deleted from it.
Generally speaking, such variables will remain listed in the Variables Manager and won't
automatically be removed from the document. Using the 'Delete Unused Variable' tool in the 'Tools'
menu enables you to remove these variables automatically and tidy up your template ready for
deployment. You can select some or all of the unused variables to be deleted however it's worth
noting that once removed, there is no way to undo this action (other than reverting to a previous
version - see Saving Templates).
2.3.15 Saving Templates
There are two options for saving your template - 'Save' and 'Save As'. ‘Save As’ always takes you to
the Document Properties screen where you can edit the properties.
To save your document:
Ø Click ‘Save’ on the toolbar or ‘Save As’ on the ‘File’ menu.
Ø The first time you do this, the ‘Document Properties’ screen will be displayed, where information
about the document is stored.
Ø You must provide a unique name in the ‘Document Name’ box.
Ø Providing appropriate values for other properties will help you to organise and manage your
documents later.
Ø Click ‘OK’.
Copyright ©2012 Epoq Legal Ltd
88
Rapidocs Author User Guide
By default, Rapidocs files are saved in the File Location specified in the Rapidocs Options, though
you can browse to a different location to save your document if you prefer.
Revert to Previous
If you wish to discard the most recent set of changes you've made to your template and revert to a
version saved previously, you can use the 'Revert to previous' feature to do so. By selecting 'Tools',
'Revert to previous', it will list all previously saved versions of your template. You can select which
version to restore: however, you should be aware that doing so will lose all subsequent edits and
changes to any newer version(s) you've saved.
If you wish to purge all previous versions of documents, use 'Clear saved revisions' from the 'File'
menu on the Home tab.
2.3.16 Inserting Document Notes
You may wish to provide some notes to help the Assembler. These notes might include important
background information or simply be an overview of the document. The notes are created in the
Authoring Window and will then be available for selection during assembly.
To create your document notes:
Ø On the ‘View’ menu, click on ‘Document Notes’. This enables tabs in the Authoring Window for
‘Document’ and ‘Document Notes’.
Ø In the ‘Document Notes’ tab, insert your required text.
You can then conveniently tab between ‘Document’ and ‘Document Notes’, to edit either screen.
Ø To hide the ‘Document Notes’ tab, simply un-tick ‘Document Notes’ on the ‘View’ menu. This
does not prevent the ‘Document Notes’ tab being available during assembly when you publish
your document, nor do you lose the text you have already inserted, as re-enabling the tab will
display your text.
Paragraphs of text in ‘Document Notes’ can be made conditional in the same way as they can in the
main template: see Using Conditions. This means that notes can be written which will only appear
during assembly if certain answers are chosen. You can insert variables into your document notes,
but the question will only be asked if it is also used in the main document.
Having created your document notes they will be available for selection as a tab during assembly.
To see this, click the ‘Assemble’ button, or press ‘F9’.
To print the document notes, place the cursor in the document notes window and select ‘Print’ on
the 'File' menu. Document notes can also be printed along with the main document at any time
during assembly by ticking ‘Include document notes’ on the ‘Print’ menu. For more details of how to
preview and print document notes, see Printing Documents.
Further tabs can be enabled in which appropriate notes can be inserted for different purposes. These
include a 'Licence' which might include terms and conditions relating to the use of a document, for
example a disclaimer. If included, then this will need to be accepted by the Assembler before they
are able to proceed to the questionnaire.
Copyright ©2012 Epoq Legal Ltd
Using Rapidocs Author
2.4
89
Using Rapidocs Document Properties
Rapidocs document properties are divided into a number of categories, each shown as a separate
tab on the properties dialogue. The first two tabs contain ‘General’ and ‘Ownership’ properties, which
can be used to categorise your documents in various ways. They are often referred to collectively as
‘attributes’ or ‘meta data’. The 'Description' tab enables the Author to enter a description of the
document to help potential users understand its purpose. The remaining tabs - 'History' and 'Transfer
History' - are not used in this version of Rapidocs.
Whilst Authoring a document, you can access the document properties using the ‘Properties’ option
on the ‘File’ menu.
The Rapidocs Document Properties tabs are described in the following sections:
Ø General Document Properties
Ø Ownership Document Properties
Ø Document Description
2.4.1
General Document Properties
The most obvious property of a document is the name (which will also be the filename when saved),
but there are many others available. You may provide some of the properties yourself at the time
you first save your document. Rapidocs Author also sets some properties automatically, including
the date on which the document was created.
Most of these properties are available as Windows file properties, therefore you can sort your
documents using these properties, helping you to organise your working environment.
The properties on the ‘General’ tab relate to details of the document itself and the version. Each
‘General’ property is described in the following table:
Property Name
Purpose
Document Type
For Rapidocs documents this displays ‘WIP’ for a black
Copyright ©2012 Epoq Legal Ltd
90
Rapidocs Author User Guide
Property Name
Purpose
work-in-progress template, ‘Rapidocs template’ for a red
document template, and ‘Rapidocs document’ for a blue
document.
Document Name
The name of the document.
Template Name
Documents derived from a Rapidocs template will show the
original template name here. This cannot be modified.
Subject
These three properties may be used to categorise
documents.
Category
Project
2.4.2
Language
The language in which the document is written.
Version
Optional version number of the template/document.
Creation Date
Rapidocs Author sets this date automatically.
Completed Date
You can set this date value when the document is
considered to be complete.
Checked By
Name of the person who checked or reviewed the
document.
Comment
Any user-defined comment.
Key Words
Key words are useful for search purposes.
Ownership Document Properties
The properties on the ‘Ownership’ tab relate to the origins of the document. Each ‘Ownership’
property is described in the following table:
Property Name
Purpose
Author
Name of the Author or organisation that created the
document or template.
Owner
Name of the person who owns the document.
Publisher
Name of the individual or organisation that published the
template used.
Copyright
Name of copyright owner.
Received From
This value may be set by any user to indicate who the
document was sent from.
For The Attention Of
This value may be set by any user to indicate who the
document is bound for.
Copyright ©2012 Epoq Legal Ltd
Using Rapidocs Author
2.4.3
Property Name
Purpose
Department
This may be used to record the department where the
document was created.
Office
A brief description of the office location can be recorded
here.
Member Group
If the company is a member of a group, the group name can
be recorded here.
Jurisdiction
The legal jurisdiction of the template.
Client Contact
The name of any client contact.
Client Company
The name of any client company.
91
Document Description
The ‘Description’ tab allows you to include a description of your document. This is useful to provide
the end-user with additional information about the document without having to open it.
2.5
Next Steps
Once you have completed the Authoring of your template (or templates), and have test assembled it
to the point where you're happy that it's ready for general use, it can be converted for final
deployment on websites using Rapidocs Web.
Rapidocs Web is the perfect solution for both the layman and lawyers alike to utilise the power of
Rapidocs to generate legal documents in a simple and convenient manner using only a web browser.
No additional software downloads are required. For more information, see www.rapidocs.co.uk.
To have your templates compiled for Rapidocs Web, you should contact your Rapidocs supplier who
will be able to advise you on what to do next.
Copyright ©2012 Epoq Legal Ltd
Part
III
Appendices
3
93
Appendices
The following appendices provide information and examples that will assist with using Rapidocs
Author in general and Authoring documents in particular.
Ø Appendix A: Functions for Rules
Ø Appendix B: Date and Time Formats
Ø Appendix C: Number Formats
Ø Appendix D: Keyboard Shortcuts
3.1
Appendix A: Functions for Rules
The following functions may be used in rules and validators within Rapidocs Author:
Ø If Statements
Ø Nested If Statements
Ø Text Functions
Ø Number Functions
Ø Operators
Ø Comparisons
Ø Number Formatting Functions
Ø Date Functions
3.1.1
If Statements
Some functions, such as an ‘If’ statement, require more than one parameter. The syntax of a basic
‘If’ statement is made up of three parts:
If(condition, then clause, else clause)
In other words:
If(condition to test, what to do if condition is true, what to do if
condition is false)
The ‘condition’ is a test that should either result in a flag (true or false), or be a specific value of a
multiple-choice question. The ‘then clause’ is what will happen if the condition is met, otherwise the
‘else clause’ will be used.
Note
Text should be enclosed in single quotes. To insert nothing type two single
quotes with nothing between them: ‘’.
Each parameter must be separated by a comma, and there must always be three parameters. The
values returned by the ‘then’ and ‘else’ clauses must be of the same type.
Example
The following example inserts ‘s’ if the number is greater than 1, otherwise it inserts nothing.
If(Number of Days>1, ‘s’, ‘’)
A parameter can also use functions. For example:
If(ageof(DateofBirth) > 16, uppercase(Name), ‘MINOR’)
In other words, the age of the person is calculated from their date of birth using the ‘ageof’ function
and tested to see if they are over 16. If they are, their name is converted into uppercase and this
value returned as the result of the ‘If’ function. If not, the literal text ‘MINOR’ is returned instead.
See also Nested If Statements.
Copyright ©2012 Epoq Legal Ltd
94
3.1.2
Rapidocs Author User Guide
Nested If Statements
‘If’ statements can be nested so that a parameter of one ‘If’ statement is derived from another.
If(MaritalStatus.Married, ‘Permit Granted’,
If(HomeOwner.Yes, ‘Further Tests’, ‘No’))
The example above first checks to see if an applicant is married. If so, then the text ‘Permit
Granted’ is returned. The ‘else’ clause has a further ‘If’ statement that further checks to see if the
applicant is a home-owner before returning the appropriate text value.
You can keep nesting functions in this way as you wish, making sure that brackets and commas are
used correctly. In the example above, each ‘If’ statement has a single bracket to start and end it,
and has three parameters separated by commas. The whole of the second ‘If’ statement is treated
as a single parameter of the first.
Example
This inserts ‘ and’ at the end of the penultimate loop item and a comma at the end of each previous
loop item.
If(New loop 1.Value<New loop 1, if(New loop 1.Value=New loop 1-1, ‘ and’,
‘,’), ‘’)
3.1.3
Text Functions
The following functions are used to manipulate text. See also Text Functions Examples.
3.1.4
Name
Explanation
Returns
Syntax
lowercase
Returns the text in lower case.
Text
lowercase(text)
uppercase
Returns the text in upper case.
Text
uppercase(text)
mixedcase
Returns the text with the first letter of each Text
word in upper case.
mixedcase(text)
firstcase
Returns the text with the first letter of the
first word in upper case.
Text
firstcase(text)
csv
Returns the text with commas in place of
line breaks.
Text
csv(text)
length
Returns the total number of characters in
the text.
Number
length(text)
string
Returns a non-text question as text.
Text
string(any)
copy
Returns the part of the text starting from
Text
‘start’ letters from the beginning of the text
for ‘count’ letters.
copy(text, start, count)
pos
Returns the number of letters from the
beginning of the text that ToFind first
appears.
Number
pos(ToFind, Text)
+
Adds all the text together.
Text
Text1+Text2+Text3 etc
Text Functions Examples
The following table shows examples for some of the functions listed in Text Functions.
Copyright ©2012 Epoq Legal Ltd
Appendices
3.1.5
95
Formula
Values
Result
lowercase(Text) or lower(Text)
Text = ‘Mr Smith’
‘mr smith’
uppercase(Text) or upper(Text)
Text = ‘Mr Smith’
‘MR SMITH’
mixedcase(Text)
Text = ‘mr SMITH’
‘Mr Smith’
firstcase(Text)
Text = ‘Mr Smith’
‘Mr smith’
csv(Text)
Text = ‘123 Somewhere
Sometown
A12 3BC’
‘123 Somewhere, Sometown,
A123BC’
length(Text)
Text = ‘Mr Smith’
8
string(Any)
Any = 100
‘100’
copy(Text, 1, 2)
Text = ‘Mr Smith’
‘Mr’
pos(‘Mr’, Text)
Text = ‘Mr Smith’
1
Text1 + ‘ and ’ + Text2
Text1 = ‘Jack’
Text2 = ‘Jill
‘Jack and Jill’
Number Functions
The following functions evaluate to a numeric value. See also Number Functions Examples.
Name
Explanation
Returns
Syntax
abs
Returns the value of a number without the
sign.
Number
abs(Number)
ceil
Returns the given number rounded to the
next highest whole number.
Number
ceil(Number)
floor
Returns the given number rounded down to Number
the nearest whole number.
floor(Number)
frac
Returns the fractional part of a number.
Float
frac(Number)
mod
Returns the whole number remaining after
one integer has been divided by another,
e.g. ‘mod(7,3)’ gives ‘1’ as the result.
Number
mod(Number1,
Number2)
number
Returns the numeric value contained in a
string.
Number
number(String)
power
Returns the first number to the power of
the second number.
Number
power(Number, Power)
round
Converts decimals to whole numbers,
Integer
rounding up or down as needed. Any ‘x.5’
number will be rounded to the nearest
even number.
round(Number)
sqr
Returns the square of a number.
Number
sqr(Number)
sqrt
Returns the square root of a number.
Number
sqrt(Number)
Copyright ©2012 Epoq Legal Ltd
96
3.1.6
Rapidocs Author User Guide
trunc
Converts decimals to whole numbers, by
discarding the fractional part.
Integer
trunc(Number)
alog10
Returns 10 raised to the power of the given Number
number.
alog10(Number)
arccos
Returns the arccosine of the given number Number
in radians.
arccos(Number)
arcsin
Returns the arcsine of the given number in Number
radians.
arcsin(Number)
arctan
Returns the arctangent of the given
number in radians.
Number
arctan(Number)
cos
Returns the cosine of the given number in
radians.
Number
cos(Number)
sin
Returns the sine of the given number in
radians.
Number
sin(Number)
tan
Returns the tangent of the given number in Number
radians.
tan(Number)
exp
Returns e raised to the power of the given
number.
Number
exp(Number)
ln
Returns the natural logarithm of the given
number.
Number
ln(Number)
log10
Returns the number to which 10 must be
raised to result in the given number.
Number
log10(Number)
pi
Returns the constant pi.
Number
pi
Number Functions Examples
The following table shows examples for some of the functions listed in Number Functions.
Formula
Values
Result
abs(Number)
Number = -6
6
frac(Number)
Number = 3.2
0.2
frac(Number)
Number = -7.6
-0.6
sqr(Number)
Number = -6
36
sqrt(Number)
Number = 121
11
sqrt(Number)
Number = -81
‘ERROR’
power(Number, 4)
Number = 3
81
round(Number)
Number = 2.3
2
round(Number)
Number = -2.7
-3
round(Number)
Number = 1.5
2
Copyright ©2012 Epoq Legal Ltd
Appendices
3.1.7
round(Number)
Number = 2.5
2
trunc(Number)
Number = 1.9
1
trunc(Number)
Number = -1.6
-1
97
Operators
Operators are used with numeric values to calculate results using simple equations:
3.1.8
Operator
Purpose
+ (plus sign)
Adds numbers.
- (minus sign)
Subtracts one number from another.
* (asterisk)
Multiplies numbers.
/ (forward slash)
Divides one number by another.
^
Returns one number to the power of another.
not
Logical NOT.
and
Logical AND.
or
Logical OR.
xor
Logical Exclusive OR.
Comparisons
Comparisons can be used in a formula to compare values and return a Boolean or flag value (TRUE
or FALSE).
Operator
Purpose
‘=’ (Equals sign)
Compares two numbers as equal.
‘<>’ (Less than and
greater than signs)
Compares two numbers as unequal.
‘>’ (Greater than sign)
Compares one number as greater than
another.
‘<’ (Less than sign)
Compares one number as less than another.
‘>=’ (Greater than and
equals signs)
Compares one number as greater than or
equal to another.
‘<=’ (Less than and
equals signs)
Compares one number as less than or equal
to another.
Copyright ©2012 Epoq Legal Ltd
98
3.1.9
Rapidocs Author User Guide
Number Formatting Functions
The following functions are used to display numbers in different formats. See also Number
Formatting Functions Examples.
Name
Explanation
Returns
Syntax
CardinalFC
Returns the number as text with the
first letter in upper case.
Text
CardinalFC(Number)
CardinalLC
Returns the number as text in lower
case.
Text
CardinalLC(Number)
CardinalMC
Returns the number as text with the
first letter of each word in upper case.
Text
CardinalMC(Number)
CardinalUC
Returns the number as text in upper
case.
Text
CardinalUC(Number)
LetterLC
Returns the number represented as a
lower case letter (a=1).
Text
LetterLC(Number)
LetterUC
Returns the number represented as an
upper case letter (A=1).
Text
LetterUC(Number)
OrdinalFC
Returns the number as an ordinal as
text with the first letter in upper case.
Text
OrdinalFC(Number)
OrdinalLC
Returns the number as an ordinal as
text in lower case.
Text
OrdinalLC(Number)
OrdinalMC
Returns the number as an ordinal as
text with the first letter of each word in
upper case.
Text
OrdinalMC(Number)
OrdinalUC
Returns the number as an ordinal as
text in upper case.
Text
OrdinalUC(Number)
ShortOrdinal
Returns the number as a numeric
ordinal.
Number
ShortOrdinal(Number)
RomanLC
Returns the number as lower case
Roman numerals.
Text
RomanLC(Number)
RomanUC
Returns the number as upper case
Roman numerals.
Text
RomanUC(Number)
Currency
Returns the number formatted as a
currency number.
Text
Currency(Number)
Text
CustomNumber(Number,
Format)
CustomNumber Returns the number in the specified
format.
3.1.10 Number Formatting Functions Examples
The following table shows examples for some of the functions listed in Number Formatting Functions
.
Copyright ©2012 Epoq Legal Ltd
Appendices
Formula
Values
Result
CardinalFC(Number)
Number = 25
‘Twenty five’
CardinalLC(Number)
Number = 25
‘twenty five’
CardinalMC(Number)
Number = 25
‘Twenty Five’
CardinalUC(Number)
Number = 25
‘TWENTY FIVE’
LetterLC(Number)
Number = 25
‘y’
LetterUC(Number)
Number = 25
‘Y’
OrdinalFC(Number)
Number = 25
‘Twenty fifth’
OrdinalLC(Number)
Number = 25
‘twenty fifth’
OrdinalMC(Number)
Number = 25
‘Twenty Fifth’
OrdinalUC(Number)
Number = 25
‘TWENTY FIFTH
ShortOrdinal(Number)
Number = 25
‘25th’
RomanLC(Number)
Number = 25
‘xxv’
RomanUC(Number)
Number = 25
‘XXV’
CustomNumber(Number, Format)
Number = 25
Format = ‘#.000’
’25.000’
99
3.1.11 Date Functions
Dates are represented by numbers and can be used with arithmetic operators accordingly. The
values used are compatible with Microsoft Excel, so ‘0’ represents December 31, 1899, and ‘1’
represents January 1, 1900, etc. Negative values may be used.
You can use the constant NULLDATE which represents July 9th, 1215.
The number of days between two dates is just Abs(Date1 - Date2) where ABS makes sure the value
is positive - or you could use DaysBetweenDates.
The following functions are used to manipulate dates. See also Date Functions Examples.
Name
Explanation
Returns
Syntax
ageof
Returns the age of a person born on the
given BirthDate.
Number
ageof(BirthDate)
ageofat
Returns the age of a person born on a
date ‘BirthDate’ at a given date
‘TestDate’.
Number
ageof(BirthDate, TestDate)
customdate
Returns the date in the given format in a
non-date rule.
Text
customdate(Date, Format)
dayofweekno
Returns the numeric day of the week of a Number
date (Sunday=1).
dayofweekno(Date)
dayname
Returns the day of the week of a date as Text
text.
dayname(Date)
dayno
Returns the day of the month of a date.
dayno(Date)
Copyright ©2012 Epoq Legal Ltd
Number
100
Rapidocs Author User Guide
Name
Explanation
Returns
Syntax
daysbetweend
ates
Returns the number of whole days
between two given dates.
Number
daysbetweendates(Date1,
Date2)
longdate
Returns the date as a text value using
the long date format specified by your
Windows environment.
Text
longdate(Date)
monthname
Returns the month of a date as text
Text
monthname(Date)
monthno
Returns the month of a date as a
number.
Number
monthno(Date)
weekdays
betweendates
Returns the number of week-days
between two given dates (ignores
weekends).
Number
weekdaysbetweendates
(Date1, Date2)
yearno
Returns the year of a date.
Number
yearno(Date)
now
Returns the current date.
Date
now
shortdate
Returns the date as a text value using
the short date format specified by your
Windows environment.
Text
shortdate(Date)
ymdtodate
Constructs a date from the numeric
Text
values ‘Year’, ‘Month’, and ‘Day’. Note
that if any of the three values are zero,
the function uses the current day, month
or year value.
ymdtodate(Year,
Date)
nulldate
Returns the value of an empty date –
useful for comparison tests such as:
nulldate
Date
Month,
or
nulldate()
If(DOB=NullDate,’No Date Given’,’’)
3.1.12 Date Functions Examples
The following table shows examples for some of the functions listed in Date Functions.
Formula
Values
Result
ageof(BirthDate)
BirthDate = 22/11/1963
37
(assuming today is 01/01/2001)
ageofat(BirthDate,Date)
BirthDate = 22/11/1963
Date = 01/01/2000
36
customdate(Date,Format)
Date = 22/11/1963
Format = ‘d mmm yy’
‘22 Nov 63’
dayofweekno(Date)
Date = 22/11/1963
6
dayname(Date)
Date = 22/11/1963
‘Friday’
dayno(Date)
Date = 22/11/1963
22
longdate(Date)
Date = 22/11/1963
‘22 November 1963’
monthname(Date)
Date = 22/11/1963
‘November’
Copyright ©2012 Epoq Legal Ltd
Appendices
monthno(Date)
Date = 22/11/1963
11
shortdate(Date)
Date = 22/11/1963
‘22/11/63’
yearno(Date)
Date = 23/11/1963
1963
ymdtodate(Year,Month,Day)
Year = 1963
Month = 11
Day = 22
22/11/1963
101
3.1.13 Loop Functions
Functions can be performed on looped variables. These can be used to sum together all numeric
loop entries, or concatenate a series of text loop answers. Loop functions are as follows:
Name
Explanation
Returns
Syntax
loopsum
Returns the sum of the answers given
to a loop-controlled question across all
loop iterations.
Number
loopsum(NumberQuestion)
loopaverage
Returns the average value of the
answers given to a loop-controlled
question across all loop iterations.
Number
loopaverage
(NumberQuestion)
looplist
Returns a single string containing all
answers to a loop-controlled question,
with each entry separated by the
separator string.
String
looplist(Question,
Separator)
loopflagcount
Counts the number of times in a loop
that a loop-controlled flag question is
TRUE.
Number
loopflagcount
(FlagQuestion)
Examples
3.2
Formula
Values
Result
loopsum(Salary)
Loop1 Salary = 25,000
Loop2 Salary = 27,000
Loop3 Salary = 23,000
75,000
loopaverage(Salary)
Loop1 Salary = 25,000
Loop2 Salary = 27,000
Loop3 Salary = 23,000
25,000
loopflagcount(Retired)
Loop1 Retired = TRUE
Loop2 Retired = FALSE
Loop3 Retired = TRUE
2
Appendix B: Date and Time Formats
When defining the settings of a date question or in some date-related formulae, Rapidocs can
generate date and time values in custom formats. To specify the required format you need to use a
mask to describe to Rapidocs how you would like the date value to appear.
The possible mask values for date and time elements are shown in the sections below, followed by
some examples.
Copyright ©2012 Epoq Legal Ltd
102
Rapidocs Author User Guide
Ø Date Format Masks
Ø Time Format Masks
Ø Date and Time Format Examples
3.2.1
Date Format Masks
The possible mask values for date elements are shown in the table below, followed by some
examples.
3.2.2
Mask
Result
d
Date of month without leading zeros, e.g. 7
dd
Date of month with leading zeros, e.g. 07
ddd
Abbreviated day of week, e.g. Thu
dddd
Day of week, e.g. Thursday
D
Date of month as a short ordinal, e.g. 7th
m
Month as number without leading zeros, e.g. 1
mm
Month as number with leading zeros, e.g. 01
mmm
Abbreviated month name, e.g. Jan
mmmm
Month name, e.g. January
yy
Last two digits of year, e.g. 99
yyyy
All digits of year, e.g. 1999
Time Format Masks
The possible mask values for time elements are shown in the table below, followed by some
examples.
Mask
Result
h
Hour without leading zeros, e.g. 9
hh
Hour with leading zeros, e.g. 09
n
Minute without leading zeros, e.g. 8
nn
Minute with leading zeros, e.g. 08
s
Second without leading zeros, e.g. 6
ss
Second with leading zeros, e.g. 06
Copyright ©2012 Epoq Legal Ltd
Appendices
3.2.3
am/pm
Before or after midday in lower case, e.g. am
AM/PM
Before or after midday in upper case, e.g. AM
103
Date and Time Format Examples
The table below gives some examples using date and time format masks.
3.3
Mask
Result
dd-mm-yy
07-01-99
ddd d mmm yy
Thu 7 Jan 99
ddd D mmm yyyy
Thu 7th Jan 1999
dddd dd mmmm yyyy
Thursday 07 January 1999
dd/mm/yy h:nn:ss AM/PM
07/01/99 9:08:06 AM
Appendix C: Number Formats
When defining the settings of a number question, or in some number related formulae, Rapidocs can
generate numeric values in custom formats. To specify the required format you need to use a mask
to describe to Rapidocs how you would like the numeric value to appear.
The possible mask values for numbers are shown in the sections below, followed by some
examples.
Ø Custom Numbers
Ø Custom Numbers Examples
3.3.1
Custom Numbers
The possible mask values used for formatting numbers are shown in the table below. See also
Custom Numbers Examples.
A numeric value can be greater than zero, less than zero, or zero itself. Rapidocs allows you to
specify a format mask for each of these situations.
When specifying a custom number format the format masks are entered on a single line with each
part separated by a semi-colon, i.e.:
PositiveNumberFormat;NegativeNumberFormat;ZeroFormat
If you do not specify all three format masks, the following rules apply:
Ø One mask - The format mask applies to all values.
Ø Two masks - The first section applies to positive values and zeros, and the second section
applies to negative values.
The following table shows the symbols used to create format masks:
Mask
Result
‘0’ (zero)
Represents digits that must appear.
Copyright ©2012 Epoq Legal Ltd
104
3.3.2
Rapidocs Author User Guide
Mask
Result
‘#’ (hash)
Represents digits that will appear if the number
being formatted uses it.
‘.’ (full stop)
Used to locate the decimal point.
‘,’ (comma)
Used to specify the use of a thousands
separator.
‘;’ (semi-colon)
Used to separate the sections for positive,
negative, and zero numbers.
Custom Numbers Examples
The table below shows some sample custom number formats and the results produced when the
formats are applied to different values:
3.4
Format string
1234
-1234
0.5
0
0
1234
-1234
1
0
0.00
1234.00
-1234.00
0.50
0.00
#.##
1234
-1234
.5
#,##0.00
1,234.00
-1,234.00
0.50
0.00
#,##0.00;(#,##0.00)
1,234.00
(1,234.00)
0.50
0.00
#,##0.00;;Zero
1,234.00
-1,234.00
0.50
Zero
0.000E+00
1.234E+03
-1.234E+03
5.000E-01
0.000E+00
#.###E-0
1.234E3
-1.234E3
5E-1
0E0
Appendix D: Keyboard Shortcuts
Rapidocs has many keyboard shortcuts built into the application for efficiency. Regular users of the
software will find these shortcuts an invaluable productivity aid.
When using a shortcut, note the conventions used below. For example, ‘Ctrl+F’ means that you hold
down the key normally labelled ‘Ctrl’ on your keyboard, and press the letter ‘F’.
In some cases the shortcut may only be enabled in certain parts of the Rapidocs application.
Restrictions are indicated where appropriate.
Familiar Microsoft Windows keyboard conventions are normally supported within Rapidocs.
Editing Features
Ctrl+A
Select all
Ctrl+C
Copy selection to clipboard
Ctrl+V
Paste from clipboard
Copyright ©2012 Epoq Legal Ltd
Appendices
Ctrl+Alt+V
Paste formatted from clipboard
Ctrl+X
Cut selection to clipboard
Ctrl+Z
Undo last action
Ctrl+Y
Redo last undone action
Ctrl+B
Toggle bold mode
Ctrl+U
Toggle underline mode
Ctrl+I
Toggle italic mode
Ctrl+L
Left align current paragraph
Ctrl+E
Centre align the current or selected paragraphs
Ctrl+R
Right align current paragraph
Ctrl+J
Justify the current or selected paragraphs
Ctrl+Space
Remove any paragraph style overrides for the
current paragraph, and any character overrides
for selected text
Ctrl+F
Find text
Ctrl+H
Replace text
Shift+Ctrl+G
Goto Next Bookmark (marker)
Ctrl+P
Display print window
Ctrl+N
Display new document window
Ctrl+S
Save current document
Function Keys
Activates
F4
Format style window
F6
Answers Manager window
F7
Spell Check
F8
Conditions Manager window
F9
Switch between assembly screen and
document
Ctrl+F4
Close edit form
Shift+F4
Styles pull-down menu
Copyright ©2012 Epoq Legal Ltd
105
106
Rapidocs Author User Guide
Shift+F8
Conditions pull-down menu
Authoring
Ctrl+Alt+Q
Create new question
Ctrl+Alt+G
Create new group
Ctrl+Alt+L
Create new loop
Ctrl+Alt+R
Create new rule
Ctrl+Alt+V
Create new validator
Ctrl+Alt+B
Create new bookmark
Ctrl+Alt+C
Create new cross-reference
Ctrl+Alt+H
Create new hyperlink
Copyright ©2012 Epoq Legal Ltd
Index
Index
-Aabout Rapidocs
9
accepting document changes
104
answers
85
Answers Manager
11, 85, 104
assemblers
9
assembly
test
11, 84
authoring
authoring templates
14
authoring window
39
documents
38
templates
38
authors
9
auto numbers
33
autonumbers
33
-Bblack documents
blue documents
bookmarks
76
10
10
-Ccells
21
clause library
14, 22
clauses
22
common question settings
45, 46, 51, 52, 53, 55
comparisons
66, 69, 73, 93, 94, 95, 97, 98, 99
conditional page break
33
Conditional pages
80, 82
conditions
15, 62, 63, 64, 65, 66, 104
Conditions Manager
15, 62, 63, 64, 65, 104
copy and paste
14, 15
copying questions
15, 45
creating
14
document templates
14
forms templates
14
groups
57
questions
43
rules
67
styles
32
validators
73
cross-references
76, 77
cut copy and paste
14, 15
Copyright ©2012 Epoq Legal Ltd
-Ddate and time formats
71, 101, 103
date format
53
date functions
70, 99
date input
52
date question settings
52
default values
52, 53, 55
deleting conditions from a paragraph
63
deleting questions
44
deleting styles
32
dependency check
85
Description
91
description document properties
89
dictionaries
20, 104
document
10, 36, 104
editing
14
history
104
printing
36, 104
properties
89
saving
104
document notes
88
accessing
36
Document Properties
90
document types
10
Documents
9
-Eediting documents
14
editing group settings
58
editing loop settings
60
editing prompts
84
editing question settings
45
editing styles
14, 23, 25, 26, 32
editor window
39
explanation panel
11
explanation popup
11
explanations
defining
49, 60
exporting text
41
extending find
18
extending replace
19
-FFields manager
78, 80
Fields managers
77
finding markers
33
finding text
17
107
108
Rapidocs Author User Guide
flag questions
46, 55, 56, 63, 70
footnotes
34
editing
34
inserting
34
formats
71, 101, 103
date
71, 101, 103
numbers
71, 98, 103
time
71, 101, 103
formatting
11
formatting toolbar
14, 15
Forms
9, 14, 77, 78, 80
function keys
104
functions
66, 69, 73, 93, 94, 95, 97, 98, 99
-GGeneral Document Properties
89
getting started
9, 10
group
57, 75
groups
57
creating
57
editing settings
58
putting questions into
58
using validators in
58
-Hhelp
10
hidden rules
71
history
document changes
hyperlinks
34
104
library
22
locking text
35
loop settings
49, 60
loops
59, 60, 61, 62, 75
-Mmarkers
33
menu tab
61
multiple-choice questions
46, 53, 54, 55, 63
-Nname tab
60
nested if statements
93, 94
next steps
91
notes
accessing document
36
number format
52
number functions
70
numbering
33
numbers
51, 52, 71, 98, 103
custom formats
71, 98, 103
default values
51, 52
formatting functions
71, 98, 103
numbering reset
33
question settings
51, 52
reformatting using rules
71, 98, 103
-O-
-Iif statements
93, 94
importing and exporting text
41
information only questions
55
inserting automatic dates
71, 101, 103
inserting hyperlinks
34
inserting markers
33
inserting objects
32
inserting questions
43
inserting rules
71
introduction
9
introduction to Rapidocs
9
-Kkeyboard shortcuts
-L-
104
objects
32
operators
97
options
11
spell check
20
origination
14
originators
9
ownership document properties
89
-Ppage break
33
page setup
19
Pages Manager
82
panel explanations
11
paragraph markers
11, 15
paste
14, 15
Copyright ©2012 Epoq Legal Ltd
Index
PDF
77, 78, 80, 82
PDF Forms
82
pictures
32
popup explanations
11
print preview
14, 36
printing
14
printing documents
36, 104
product support
10
products
10
prompts
11, 84
properties of documents
89
protecting text
35
-Qquestion settings
45, 46, 51, 52, 53, 55
questions
14
controlling the order
40, 71
copying
15, 45
creating
43
deleting
44
grouping
58
inserting
43
locate in document (Stats)
46, 51, 77
putting into a loop
60
required
47
using validators in
75
-RRapidocs
10, 11
Rapidocs about
10
Rapidocs document types
10
Rapidocs Intelligent Templates
9
Rapidocs Web
11, 14, 84, 91
red documents
10
redo
14, 16
rejecting document changes
104
replacing text
18
required questions
47
row
66
rows
21, 62
rules
creating
67
editing
71
inserting
71
sample functions
69
writing
68
-Ssave
14
saving documents
104
saving templates
87
shortcuts (keyboard)
104
special characters
32
spell check
20, 104
starting
9, 10
stats
46, 51, 77, 85
styles
11, 23, 61, 104
applying
23
copying
14, 15
creating new
32
deleting
32
editing
25, 104
numbering
33
settings
26
the styles button
23, 104
system variables
63
-Ttables
21, 62, 66
template
14
creating
14
creating forms templates
14
importing text into
41
inserting text into
14
originating
14
saving
87
text
41, 51, 63
answers
51, 63
exporting
41
finding
17
functions
94
importing
41
questions
51, 63
replacing
18
text functions
69
time formats
71, 101, 103
toolbar
document formatting
14
tracking changes made to a document
-Uunasked questions
58
undo
16
undo and redo
14, 16
Copyright ©2012 Epoq Legal Ltd
109
104
110
Rapidocs Author User Guide
unused variables
deleting
87
user notes
36
using author
38
-Vvalidators
50, 58, 60, 73, 75, 76
variables manager
39, 40, 87
-WWeb events
writing rules
76
68
Copyright ©2012 Epoq Legal Ltd