1
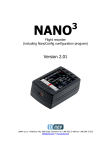
NANO
Flight recorder
(including NanoConfig configuration program)
Version 2.12
LXNAV d.o.o. • Kidričeva 24a, 3000 Celje, Slovenia • tel +386 592 33 400 fax +386 599 33 522
[email protected] • www.lxnav.com
NANO Version 2.12
1
2
3
4
Important Notices
4
Packing Lists
Basics
7
8
1.1
Limited Warranty
1.2
Battery information
1.2.1 Disposal of Old Electrical & Electronic Equipment
1.2.2 Disposal of waste batteries
3.1
3.2
3.3
3.4
3.5
6
7
NANO at a glance
Technical data
Rocker button
LEDs
NanoPower cable
4
5
5
6
8
9
9
10
11
Operation
4.1
4.2
4.3
4.4
4.5
4.6
4.7
4.8
4.9
4.10
4.11
5
Januar 2015
13
Powering on
Normal operation
Battery status
Press Powering off
Security void
Charging battery
Connecting to a computer
Downloading flights
Bluetooth pairing
Storing Nano
Replacing battery
13
13
14
14
14
14
14
15
16
16
17
Configure NANO
18
Troubleshooting
Revision History
25
27
5.1
Uploading flight declaration
5.1.1 Using the Nanoconfig program
5.1.1.1
Pilot information
5.1.1.2
Task declaration
5.1.2 Using Bluetooth or serial interface
5.2
Changing parameters
5.2.1 Flight recording interval
5.2.2 Automatically finish flight
5.2.3 Start recording on power on
5.2.4 Automatically turn off Nano, when flight is finished
5.2.5 Bluetooth
5.2.6 NMEA output
5.3
Nano config for Android devices
5.3.1 Connecting and pairing NANO
5.3.2 Main page
5.3.3 Downloading flights
5.3.4 Editing pilot info
5.3.5 Editing task for declaration
5.3.6 Configuring nano
Page 3 of 27
18
18
19
19
19
20
20
20
20
21
21
21
22
22
22
22
23
23
24
NANO Version 2.12
1
Januar 2015
Important Notices
Information in this document is subject to change without notice. LXNAV reserves the right
to change or improve their products and to make changes in the content of this material
without obligation to notify any person or organization of such changes or improvements.
A Yellow triangle is shown for parts of the manual which should be read very
carefully and are important for operating the NANO flight recorder.
Notes with a red triangle describe procedures which are critical and may result in
loss of data or any other critical situation.
A bulb icon is shown when a useful hint is provided to the reader.
1.1 Limited Warranty
This NANO product is warranted to be free from defects in materials or workmanship for two
years from the date of purchase. Within this period, LXNAV will, at its sole option, repair or
replace any components that fail in normal use. Such repairs or replacement will be made at
no charge to the customer for parts and labour, provided that the customer pays for
shipping costs. This warranty does not cover failures due to abuse, misuse, accident, or
unauthorized alterations or repairs.
THE WARRANTIES AND REMEDIES CONTAINED HEREIN ARE EXCLUSIVE AND IN LIEU OF
ALL OTHER WARRANTIES EXPRESSED OR IMPLIED OR STATUTORY, INCLUDING ANY
LIABILITY ARISING UNDER ANY WARRANTY OF MERCHANTABILITY OR FITNESS FOR A
PARTICULAR PURPOSE, STATUTORY OR OTHERWISE. THIS WARRANTY GIVES YOU
SPECIFIC LEGAL RIGHTS, WHICH MAY VARY FROM STATE TO STATE.
IN NO EVENT SHALL LXNAV BE LIABLE FOR ANY INCIDENTAL, SPECIAL, INDIRECT OR
CONSEQUENTIAL DAMAGES, WHETHER RESULTING FROM THE USE, MISUSE, OR
INABILITY TO USE THIS PRODUCT OR FROM DEFECTS IN THE PRODUCT.
Some states do not allow the exclusion of incidental or consequential damages, so the above
limitations may not apply to you. LXNAV retains the exclusive right to repair or replace the
unit or software, or to offer a full refund of the purchase price, at its sole discretion. SUCH
REMEDY SHALL BE YOUR SOLE AND EXCLUSIVE REMEDY FOR ANY BREACH OF WARRANTY.
To obtain warranty service contacts your local LXNAV dealer or contact LXNAV directly.
September 2011
© 2011 LXNAV. All rights reserved.
Page 4 of 27
NANO Version 2.12
Januar 2015
1.2 Battery information
NANO is powered by a rechargeable battery. The battery can be charged and discharged
hundreds of times, but it will eventually wear out. Only use the approved battery and
recharge your battery only with approved chargers.
Unplug the charger from the electrical plug and the device when not in use. Do not leave a
fully charged battery connected to a charger as overcharging may shorten its life. If left
unused, a fully charged battery will lose its charge over time. Use the battery only for its
intended purpose. Never use any charger or battery that is damaged.
If the battery pack is mishandled, the battery pack can burst, cause a fire or even chemical
burns. Observe the following precautions.
1.2.1
•
Do not disassemble.
•
Do not crush and do not expose the battery pack to any shock or force
such as hammering, dropping or stepping on it.
•
Do not short circuit and do not allow metal objects to come into contact
with the battery terminals.
•
Do not expose to high temperature above 60°C (140°F) such as in direct
sunlight or in a glider parked in the sun.
•
Do not incinerate.
•
Do not handle damaged or leaking lithium ion batteries.
•
Be sure to charge the battery pack using supplied battery charger or a
device that can charge the battery pack.
•
Keep the battery pack out of the reach of small children.
•
Keep the battery pack dry.
•
Replace the battery pack only with the same or equivalent type
recommended by LXNAV.
•
Dispose of used battery packs promptly as described in these instructions.
Disposal of Old Electrical & Electronic Equipment
(Applicable in the European Union and other European countries with separate
collection systems)
This symbol on the product or on its packaging indicates that this product shall
not be treated as household waste. Instead it shall be handed over to the
applicable collection point for the recycling of electrical and electronic
equipment. By ensuring this product is disposed of correctly, you will help
prevent potential negative consequences for the environment and human
health, which could otherwise be caused by inappropriate waste handling of
this product. The recycling of materials will help to conserve natural resources. For more
detailed information about recycling of this product, please contact your local Civic Office,
your household waste disposal service or the shop where you purchased the product.
Page 5 of 27
NANO Version 2.12
1.2.2
Januar 2015
Disposal of waste batteries
(Applicable in the European Union and other European countries with separate
collection systems)
This symbol on the battery or on the packaging indicates that the battery
provided with this product shall not be treated as household waste. By
ensuring these batteries are disposed of correctly, you will help prevent
potentially negative consequences for the environment and human health
which could otherwise be caused by inappropriate waste handling of the
battery. The recycling of the materials will help to conserve natural resources.
In case of products that for safety, performance or data integrity reasons require a
permanent connection with an incorporated battery, this battery should be replaced by
qualified service staff only. To ensure that the battery will be treated properly, hand over the
product at end-of-life to the applicable collection point for the recycling of electrical and
electronic equipment. For all other batteries, please view the section on how to remove the
battery from the product safely. Hand the battery over to the applicable collection point for
the recycling of waste batteries. For more detailed information about recycling of this
product or battery, please contact your local Civic Office, your household waste disposal
service or the shop where you purchased the product.
(Applicable for Customers in the U.S.A. and Canada)
Lithium-Ion batteries are recyclable. You can help preserve our environment by
returning your used rechargeable batteries to the collection and recycling
location nearest you. For more information regarding recycling of rechargeable
batteries, call toll free 1-800-822-8837, or visit http://www.rbrc.org/
Do not handle damaged or leaking Lithium-Ion batteries.
Page 6 of 27
NANO Version 2.12
2
Januar 2015
Packing Lists
In the box you will find:
• NANO flight recorder with preloaded Nanoconfig program and user manual
•
NanoPower cable
•
USB cable
•
Wall charger
•
•
Barogram calibration chart
Quick reference chart
Page 7 of 27
NANO Version 2.12
3
Januar 2015
Basics
3.1 NANO at a glance
The NANO flight recorder is the smallest flight recorder designed in accordance with “All
Flights” IGC specification. It has an IGC approval for all flights including world records. It
features an integrated 66-channel GPS receiver with built-in antenna, altitude sensor, ENL
sensor, security micro-switch, Bluetooth module and 1700mAh battery.
The built-in battery allows up to 35 hours of stand-alone operation. The battery is charged
when the flight recorder is connected to a computer, NanoPower or wall charger.
Die Betriebstemperaturen für den Nano reichen von -20°C(68°F) bis
+60°C(140°F). Höhere Temperaturen sind unbedingt zu vermeiden, die .Li-Ionen
Batterie kann beschädigt werden (“Aufblasen” der Batterie)
Bluetooth is used for easy data exchange with a PDA.
The housing is made of robust ABS plastic. On the left side there is a micro-SD card slot,
rocker button and five status LEDs. LEDs display the operational status.
A 2 GB SD card is used for flight data storage. Flights are stored directly in IGC format and
are downloadable through a USB connection which is compatible with all operating systems
(MS Win, Linux and Mac OS).
On the right side there is small hole with a reset button. Use a pin to press the reset button.
In normal operation, this button should never be used.
At the back there is a mini USB connector, which is used for charging and data transfer.
The SD card is preloaded with the Nanoconfig program, which is used for uploading flight
declaration and changing the settings of the NANO. Flight declarations can be also uploaded
using a serial interface cable or Bluetooth (See chapter 5.1 for more details).
Page 8 of 27
NANO Version 2.12
Januar 2015
3.2 Technical data
Hardware
• ARM7 core processor
• 2GBytes memory storage
• Three direction rocker button
• 66-channel GPS receiver
• Engine noise level sensor
• Pressure altitude sensor measuring up to 16000m
Input and output
• USB interface (mass storage device)
• Integrated SD card reader
• Serial RS232 interface for PDA connection
• Bluetooth interface for PDA connection
Size and weight
• Outline dimension: 65x41x20mm
• Weight: ~66g
3.3 Rocker button
The rocker button has several actions; you can press it or move it up or down.
Press it and NANO flight recorder will power on. Press or move the rocker button for a long
time and the NANO flight recorder will switch off. When flying press or move the button for
a short time and a pilot initiated event will be recorded and the flight recorder will then log
30 fixes with a recording rate of one second.
At the same time the LEDs will indicate the battery status.
If you move rocker button twice in direction towards SD card, Nano will toggle on
and off Bluetooth.
Page 9 of 27
NANO Version 2.12
Januar 2015
3.4 LEDs
On the left side there are five LEDs; four green and one red. The LEDs show the status of
the NANO flight recorder. During normal operation, the first LED blinks when NANO is
powered on. The second LED blinks when GPS status is ok. The third LED blinks when
recording of flight is started. The fourth LED blinks when the Bluetooth module is switched
on.
LED sequence after powering up NANO with rocker button is following
PWR
GPS
LOG
BT
Err
Description
After pressing rocker button
One second later
Startup sequence 1 OK
Startup sequence 1 OK
Power led blinks
After short pressing of rocker button up or down battery
level is indicated
After long pressing of rocker button, Nano will turn off. Red
and green LED will blink isophasic.
When Nano is communicating with PC through USB, LEDs will blink like shown on next table.
PWR
GPS
LOG
BT
Err
Description
Nano is off
Connected to USB
Next second
Next second (Nano is in USB mode)
When USB is disconnected, off sequence will follow
(SD card error) Nano is powered on via USB– only reset button can turn off Nano
PWR
GPS
LOG
BT
Err
Description
SD card error
Page 10 of 27
NANO Version 2.12
Januar 2015
(SD card error) Nano is powered on with rocker button
PWR
GPS
LOG
BT
Err
Description
After pressing rocker button
One second later SD card error (for 5 seconds)
Startup sequence 1 OK
Startup sequence 1 OK
Power led blinks
After short pressing of rocker button up or down battery
level is indicated
After long pressing of rocker button, nano will turn off. Red
and green LED will blink isophasic.
3.5 NanoPower cable
The NanoPower is a special device, which converts 12V to 5V power supply for NANO and
PDA. It also translates levels of serial signal to match NANO signal level and PDA or
computer signal level.
Connect the red and black wire to 12V power supply.
Maximum input voltage is 24 Volts.
The NanoPower has two plugs. On one side there is a standard USB-A connector. Use
included USB-A to mini-USB cable and plug NANO to this side. Any standard USB-A to miniUSB cable is suitable. On the other side there is a RJ45 plug. This plug is designed for a PDA
or a computer.
RJ45 plug is NOT designed in accordance with IGC standard. It can be used only
with dedicated cable. Do not plug unknown cable to it as it may damage
NanoPower circuit.
Pin description on the NanoPower RJ45 is given on a picture below.
Page 11 of 27
NANO Version 2.12
Januar 2015
12345678
Pin numbers
Pin number
1,2
Description
Ground
3
(output) Transmit from NANO RS232 (e.g. Computer, LX7000)
4
(input) Receive to NANO RS232 (e.g. Computer, LX7000)
5
(output) Transmit from NANO TTL (e.g. Oudie, HP302)
6
(input) Receive to NANO TTL (e.g. Oudie, HP302)
7,8
5V OUTPUT (maximum 1A)
Available cables for the RJ45-port
device
order nr.
OUDIE
CC-NP-OUDIE
Allg. RS232
CC-NP-232
IPAQ 310/314
CC-NP-IPAQ310
IPAQ 38/39xx und kompatible
CC-NP-38
MiniMap
CC-NP-LX
Butterfly Connect
CC-NP-BFC
Page 12 of 27
NANO Version 2.12
4
Januar 2015
Operation
There are two modes of operation: Data transfer mode and Normal operation mode.
When in data transfer mode, flight can be downloaded and NanoConfig can be run. Normal
operation mode is when logger is ready for recording flights.
The mode in which the NANO is operating can be determined from the LEDs.
In data transfer mode the last two or three green LEDs will be permanently lit whereas in
normal operation mode up to four LEDs will be blinking. See chapter 4.2 for a detailed
explanation of each LED.
4.1 Powering on
There are three ways to power on NANO flight recorder.
Press the rocker button and NANO will power on. It will go directly to normal operation
mode. The LEDs will first perform a self-test blinking from left to right and then the NANO
will go to normal operation mode and indication on the LEDs.
Connect the NANO to a computer using a USB cable. It will automatically power on
and the last two or three LEDs will light up. This indicates that the NANO flight recorder is in
data transfer mode. You may now run NanoConfig or copy flights using standard methods
for copying files.
Connect the NANO to NanoPower. It will automatically power on and after
approximately 20seconds the NANO will perform a self-test with blinking LEDs from left to
right and then it will go to normal operation mode and indication of LEDs.
If you press or move rocker button, when in data transfer mode, NANO will revert
to normal operation mode
4.2 Normal operation
During normal operation the first LED blinks when NANO is powered on. The second LED
blinks when GPS status is ok. The third LED blinks when flight recording is started. The
fourth LED blinks when the Bluetooth module is switched on.
GPS OK Bluetooth OK
Power ON
Logger Started Error
The fifth LED is red and indicates an error. See chapter 6 for more details.
Page 13 of 27
NANO Version 2.12
Januar 2015
4.3 Battery status
When you press the rocker button for a short time the LEDs will show the battery status. If
all the LEDs are on it means that the battery is fully charged. During operation as each LED
goes out it means 20% less battery capacity remains. Detailed explanation of LEDs is given
in table below.
PWR
GPS
LOG
BT
Err
Description
100% full, approximately 28hours of operation
95% full, 27hours remaining
80%, 22hours remaining
60%, 17hours remaining
40%, 10hours remaining
20%, 5hours remaining
5%, 1hour remaining
4.4 Press Powering off
Press the rocker button for a long time and the red LED and the adjacent green LED will
start blinking. Once you see this blinking you may release the button.
4.5 Security void
When security (secret key) is lost at power on, the red light will be on and the remaining
four green LEDs will start blinking. To continue press or move the rocker button for a longer
period.
In order to produce IGC-certified files, the NANO flight recorder must be returned
to the dealer or manufacturer for resealing.
4.6 Charging battery
Battery is charging when nano is connected to external power through usb port. It can be
charged from wall adapter, or directly from PC or from nano power.
If you want charge faster, you must connect nano to power supply, wait to but up, then
press rocker button to switch off. In this mode all nano functions (GPS, Bluetooth, Memory)
are off, which increase charging speed. In this mode nano indicates the charged level of
battery. More you can see in chapter 4.3.
4.7 Connecting to a computer
Before connecting the NANO to a computer, you must turn it off.
Connect it to a computer using the supplied USB cable or any other standard USB-A to miniUSB cable. The NANO flight computer will be identified automatically and a new removable
storage device will be indicated. The name of device will be NANO_<SERIALNUMBER>.
Page 14 of 27
NANO Version 2.12
Januar 2015
Open this device to see its content.
In the root folder you will find flights created by the NANO and the NanoConfig program.
The NanoConfig program will run only on Microsoft Windows operating systems. Double click
to run it.
On first connection of the NANO to a computer it may not be recognized
immediately. Disconnect the NANO from the computer and connect it again in
order for it to be recognized.
4.8 Downloading flights
Turn off the NANO and connect it to a computer using a USB cable. Navigate to the root
folder of the NANO and use your preferred method of copying files.
We recommend that you always copy your flights to a hard disk in order to have
a backup of it in case of SD card failure.
Page 15 of 27
NANO Version 2.12
Januar 2015
Flights are stored in files with the IGC standard filename. If you find it difficult to decode this
standard, we recommended that you switch to detailed view to see the date of the file.
In detailed view, file date and time show the landing time of the glider.
It is strongly recommended that you do not remove the SD card from the NANO
to download flights. Use the USB cable to download flights from the NANO.
The SD card should only be removed if it is malfunctioning.
Flights can be also downloaded using NanoConfig for Android devices. More details are in
Ch.5.3.
4.9 Bluetooth pairing
In order to connect to the NANO via Bluetooth you have to search on a PDA for devices in
range. (See chapter 5.2 to enable Bluetooth) The Nano will be identified as LXNAV-NANO<SERIALNUMBER>. Click PAIR or CONNECT to connect to the NANO. A security pin must be
entered. The pin code for the NANO is 1234 and cannot be changed.
4.10 Storing Nano
The Nano must be stored in a dry enviroment with temperature lower than 25°C (77° F).
If the NANO will not be used for an extended time, it’s recommended, that you charge the
battery fully beforehand.
In the NANO and in the BATTERY are protection circuits, which protect the battery from
being overcharged or overly discharged. If the NANO is stored with empty battery,
eventually the battery will be discharged so far that will not be possible to charge it. The
reason is internal circuitry, which protect the battery against being overly discharged.
Page 16 of 27
NANO Version 2.12
Januar 2015
4.11 Replacing battery
The battery can be replaced by user. You will need a screwdriver with cross head (Phillips).
Unscrew three screws.
Open the cover and remove the battery.
Insert a new Nokia 3310 battery (Li-Ion). Make sure that the contacts are properly aligned.
Close the cover and screw back three screws gently.
Page 17 of 27
NANO Version 2.12
5
Januar 2015
Configure NANO
Use the NanoConfig program to configure the NANO. A flight declaration can be uploaded or
various parameters can me modified using the program. The NanoConfig program consists of
two major screens. A flight declaration screen and a settings screen.
You may toggle between these two screens by pressing the Declaration or Settings
button in upper left corner of the NanoConfig program.
Press the OK button to confirm changes and exit from the program. Press Cancel to
abandon changes and exit without saving data.
It is important to run the NanoConfig program directly from NANO. Do not copy
the NanoConfig program to another location as settings and declarations will not
be written properly to the NANO.
The version of the program is written in the lower left corner of the NanoConfig window.
When requesting support from LXNAV or reporting a bug, please always include the version
of the program in your email.
All NANO configuration variables are stored in the SYSTEM folder of the NANO in
a file named “system.ini”. It is strongly recommended that you do not modify this
file yourself. If you need more information about the “system.ini” file please
contact us.
5.1 Uploading flight declaration
Flight declarations can be uploaded to the Nano in three different ways; Using the
NanoConfig program, Bluetooth or the serial interface
Declarations are stored in SYSTEM folder in a file called decl. The declaration file is
formatted as a standard IGC header file. It is recommended that you do not try to modify
this file yourself.
5.1.1
Using the Nanoconfig program
Run the NanoConfig program and go to the declaration screen. The declaration screen is
split into two groups. Pilot and glider related information is in the top group and the task
declaration is shown in the bottom group.
Page 18 of 27
NANO Version 2.12
Januar 2015
5.1.1.1 Pilot information
Enter pilot and glider information in the pilot section. In the top right you will find two icons.
The first icon will show a list of stored pilot information and second will add current pilot
information to the list.
5.1.1.2 Task declaration
Before creating a task you have to load the waypoints from which the task will be created.
Press the Load Waypoints button to load waypoints. Waypoints can be loaded from a CUP
formatted file. Once waypoints are loaded you can create a task by typing the names of the
waypoints. Use the icons in the upper left corner of the task declaration group to add or
delete a point or to clear the whole task. Task points can also be deleted by pressing the
DEL key or can be inserted by pressing the INS key.
5.1.2
Using Bluetooth or serial interface
Flight declarations can also be uploaded using the serial interface or Bluetooth (See chapter
0 for Bluetooth pairing). The NANO must be running in normal operating mode.
The protocol used for uploading the declaration is same as used for Colibri, LX20, Posigraph
or any other LX loggers.
When connecting through the serial interface you should use the same baud rate
as is set for NMEA output on the NANO.
When connected through Bluetooth baud rates are not important.
Please refer to the manual for the software used to upload flight declarations. (E.g. Seeyou
Mobile, pocket*Strepla, Winpilot, FlyWithCE)
Page 19 of 27
NANO Version 2.12
Januar 2015
5.2 Changing parameters
Run the NanoConfig program and go to the settings screen. The settings screen is split into
two sections. Settings dedicated to the NANO and settings for NanoConfig.
Parameters for the NANO include recording interval, NMEA output and Bluetooth enable
settings.
In NanoConfig you can change the distance units used in the task declaration and the format
of latitude and longitude.
5.2.1
Flight recording interval
The flight recording interval is set to one second by default. It is recommended that you
keep this setting. Even with the recording interval set to one second, the NANO is capable of
storing approximately 14000hours of flight. Having a recording interval of one second will
allow you to do more accurate post-flight analysis and increases the probability of obtaining
a data point in the observation zone.
If you wish to change these settings, use the up/down arrow or type a new value.
5.2.2
Automatically finish flight
If this option is enabled, flight will be automatically finished and digitally signed once
conditions for finishing flight are met. Nano must fulfil following conditions for 30 second.
GPS status is ok, ground speed is below 4m/s, vertical speed is within 0.2m/s and altitude is
below 3000m.
5.2.3
Start recording on power on
If this option is enabled, recording of new flight will be automatically started when Nano is
powered on. If this option is disabled Nano will start recording when vertical speed is above
1m/s and ground speed is above 8m/s. This option is mostly useful for paragliders.
When this option is enabled, option Automatically finish flight is ignored.
Page 20 of 27
NANO Version 2.12
5.2.4
Januar 2015
Automatically turn off Nano, when flight is finished
This option is very useful for Nano being installed more or less permanently into the glider. If
this option is enabled, Nano will automatically switch off 30 minutes after flight is finished.
5.2.5
Bluetooth
Check the Enable Bluetooth checkbox if you want to turn it on. By default Bluetooth is
disabled.
When Bluetooth is enabled, the NANO will consume more power and the total
endurance of a new and charged battery will reduce to approximately 14hours.
When Bluetooth is enabled, there will be no output on the wired serial interface
and task declarations can only be uploaded via Bluetooth.
5.2.6
NMEA output
Check Enable NMEA output to output NMEA data. The NANO will transmit the following
NMEA sentences GPGGA; GPRMC, LXWP0 every second and LXWP1 once per minute.
NMEA can be output to either the serial interface or Bluetooth but not to both
simultaneously.
Change the NMEA baud rate, if you want to output NMEA at different baud rates.
Page 21 of 27
NANO Version 2.12
Januar 2015
5.3 Nano config for Android devices
NanoConfig can be downloaded from LXNAV web site or Google Play Market. Nano config is
configuration tool for NANO. The user can easily modify flight recorder parameters, edit pilot
and glider information, edit the declaration, and transfer flights from the NANO to the smart
phone.
Nano config consists of four tabs: Main, Logbook, Pilot, Task and Settings.
NanoConfig will work only with NANO version 2.03 or higher
5.3.1
Connecting and pairing NANO
When we run NanoConfig on smart phone, the program will first ask you to turn on
Bluetooth, if it’s not turned on yet.
Over the menu button is access to the scan function, which will scan for BlueTooth devices.
If the NANO is turned on and BlueTooth functionality in the NANO is enabled, it will appear
on scanned list. Choose nano. The first time it will be necessary to pair the NANO and Smart
Phone. More about pairing is written in Ch.4.9.
5.3.2
Main page
On the main tab is information about the Nano and its GPS status.
5.3.3
Downloading flights
The first time you access this tab, NanoConfig will automatically start reading flights from the
connected NANO. Downloading always goes from the most recent to the oldest flight. If you
Page 22 of 27
NANO Version 2.12
Januar 2015
have a lot of flights in the NANO’s memory, the transfer of the logbook can be interrupted
with BACK button.
After the downloading of logbook data is finished, a short press on the desired flight will
start the download process. If the flight size is big, the download may take more than
minute. Flights are downloaded into NanoConfig folder. With a long press on the flight the
downloaded flight can be shared with other applications installed on your smart phone
(Gmail, SeeYou (not available), OLC (not available) , Google Docs, Facebook).
5.3.4
Editing pilot info
The Pilot tab can be used to edit information about the glider and crew.
5.3.5
Editing task for declaration
Editing the task is very simple. First is necessary to choose a waypoint file in the CUP
(SeeYou) format. To select the CUP file, use the MENU button. Press the Add waypoint
button to add the waypoint to the last position. A long press on the waypoint will give us an
option to insert a waypoint. On the right side of waypoint name is the trash box. Press the
trash box to delete the waypoint from the list. After a task has been entered, it can be
transferred to NANO by pressing the write button.
Page 23 of 27
NANO Version 2.12
5.3.6
Januar 2015
Configuring nano
In this tab the recording interval, automatic power off, and NMEA settings can be
configured.
Page 24 of 27
NANO Version 2.12
6
Januar 2015
Troubleshooting
Q: My computer does not recognize the NANO as a USB mass storage device?
A: Make sure that that NANO is turned off before connecting to computer.
Q: My flight has no security.
A: Switch off the NANO for five minutes and turn it on for normal operation. If the flight is
still not secure contact us.
Q: When I power on see all green LEDs blinking and the red LED is illuminated.
A: This means that your flight recorder has lost security. Contact us for further details.
Q: When I power on I see one green LED and the red LED is illuminated.
A: There is a problem with the SD card. We recommend that you eject SD card and format
it.
Q: Is the internal LiIon battery for the NANO end-user replaceable or would I need to send
the unit back to LXNAV or a dealer to have the battery replaced?
A: User can replace Li-Ion Battery. See chapter 4.11
Q: I can't read nano on my notebook.
A: Change power management scheme on your notebook, or connect notebook to power
supply.
Q: When I connect NANO to my notebook, message "USB device connected" would appear,
disappear, appear, etc. from the laptop screen.
A: Change power management scheme on your notebook, or connect notebook to power
supply.
Q: Can I open files from NANO on Apple computer?
A: Yes.
Q: I run Ubuntu on my laptop so cannot run NanoConfig.exe.
A: NanoConfig is Windows application, that runs only on windows operating system.
Q: Can I declare task with OUDIE?
A: Yes, declaration can be done via serial cable or over BlueTooth. Please read step by step
instructions
http://www.lxnav.com/downloads/manuals/FAQ_Upload_declaration_from_OUDIE%20to%2
0NANO.pdf
Q: My NANO will not turn off or function. It is displaying from left to right: no light, green
light, green light, no light, red light. How can I fix this?
A: That combination of LED's appears only in case of SD card error. That happens only if
SD card is not inserted properly in socket. It's hard to eject SD card. Now you must remove
SD card and insert it back, then everything will be ok. To turn off NANO from described
position the only way is to use the reset button with a paperclip or similar device.
Q: When I run nanoConfig, I'm getting errors.
A: Probably Microsoft Net Framework is not installed.
Page 25 of 27
NANO Version 2.12
Januar 2015
Q: I have previously used the NANO on several flight and it worked beautifully and gave
some good detail of the flights I made. It seems to have developed a problem where it no
longer obtains GPS data. When I turned it on, the following lights were left illuminated on
the NANO: 2nd Light from the left (GPS), 3rd Light from the left (Flight Recorder), 5th Light
(Red) indicating a problem. None of the lights are flashing - they are fixed solid. I am now
unable to turn the unit off also.
A: SD card is not inserted properly. Use paperclip to reset NANO.
Q: When I press the rocker button for a few seconds to power up the unit, sometimes it
does not do anything.
A: You must push harder to turn on NANO. The button is intentionally made like this in
order to prevent accidental power ups.
Q: I did not figure out how to start recording by moving the rocker button, it shows battery
charge and goes back to displaying the power+GPS leds. Am I doing something wrong ?
A: Recording can be started only if you moving faster than 40km/h, or vario is present.
Rocker button function is only to check battery or event(short press) or long press for
switching off.
Page 26 of 27
NANO Version 2.12
7
Januar 2015
Revision History
September 2010
April 2011
September 2011
December 2011
May 2012
January 2015
Initial release of owner manual
Updated manual
Detailed LED description (Ch 3.4)
Updated FAQ
Updated NanoConfig and changes for version 2.0
Charging nano battery (Ch 4.6)
NanoConfig for Android (Ch.5.3)
Storing NANO (Ch.4.10)
Table of of available cables for NanoPower port
Corrections
Page 27 of 27