1
Digital Cards Trigger Dialogue
Hardware Setup Dialogues
Digital Cards Trigger Dialogue
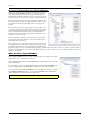
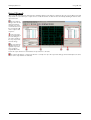
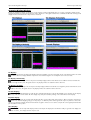
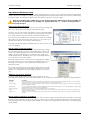
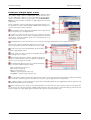
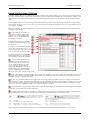
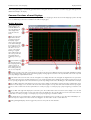
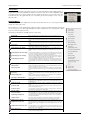
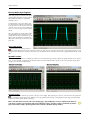
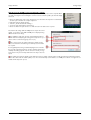
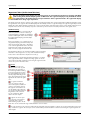
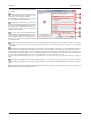
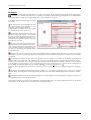
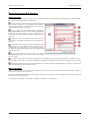
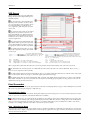
The trigger dialogue allows to set up all trigger modes of the hardware. The powerful dialogues can set simple trigger like single external
source or even multiple trigger conjunction of several channels located on multiple cards. The digital trigger setup shows the complete current
setup in table form and summary form and allows to manipulate the trigger settings of every available source directly inside the dialogue
window.
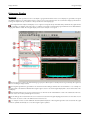
The setup dialogue stays on screen and changes will immediately take effect. The dialogue can either be docked to other setup dialogues,
can be placed somewhere on the screen (or even on a second screen) when using the freely floating version of it or can be hidden using one
of the „Toggle“ commands.
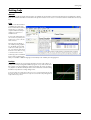
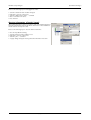
Please see the chapter „Arranging Setup Windows“ to see how the setup window can be placed at different locations and how the show
and toggle commands work.
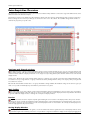
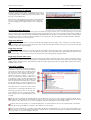
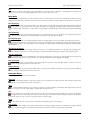
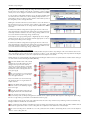
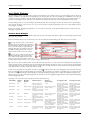
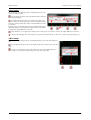
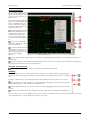
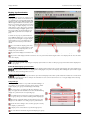
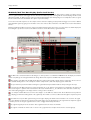
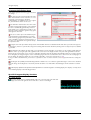
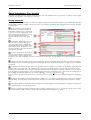
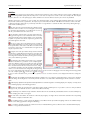
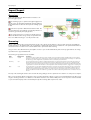
The general trigger mode allows to
switch between software trigger, single
hardware source or the versatile multiple
hardware sources with AND/OR mask
based trigger conjunction.
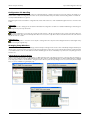
If selecting software trigger the card will
immediately start acquisition after pressing
the start button.
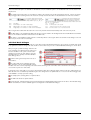
The single source is intended for all applications where a single trigger source is sufficient. Selecting single source makes setup
easier as some setup elements are hidden.
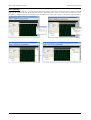
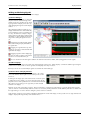
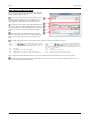
The multiple hardware sources AND/OR
masked trigger allows to set up any trigger
conjunction that is supported by hardware.
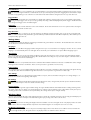
If selecting multiple hardware sources
AND/OR mask trigger mode under (1)
both check boxes are accessible. Inhere
one can enable/disable the two trigger
source conjunctions globally without
changing the detailed source setup. This is
suitable if setting up a complicated trigger
conjunction and having the need to disable this for a short time without losing the setup.
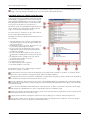
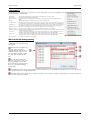
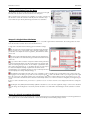
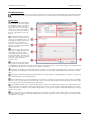
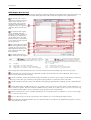
The tabs of the table show the different trigger source groups. In our example we have external trigger sources available as well as channel trigger sources. Clicking on the appropriate page tab will bring the matching list to the front for setup. The setup inside the list itself is
saved and won’t get lost if changing the pages.
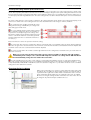
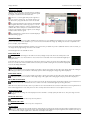
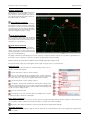
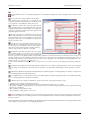
The „Auto Trig“ checkbox enables the auto trigger mode. In auto trigger mode the hardware will wait for a trigger event for the time
defined below the checkbox. After the time has elapsed the card will automatically generate a software trigger event and will issue one acquisition. After this software trigger the card will be re-armed (if running in loop mode) and will again wait the time defined until a trigger
event occurs. The time is programmed in milli seconds in the field below the check box.
The Delay field defines a trigger delay in either samples or time value depending on the setting of (6). The detected trigger will be delayed
by that value until forwarded to the acquisition firmware.
The Samples/Time button allows to switch between samples entry and time entry for pulse width and delay entries in the trigger table.
When switching between the modes the currently selected value will be recalculated and shown in the new unit then.
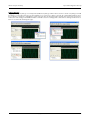
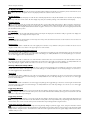
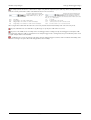
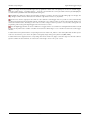
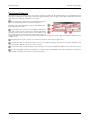
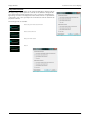
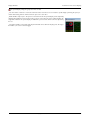
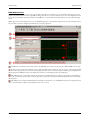
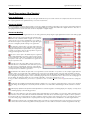
If selected to samples input the field will
accept pure samples values or entries with a
samples modifier input of „k“, „M“, „G“:
192 S
16 kS
4 MS
2 GS
192 Samples
16 kilo Samples = 16 x 1024 = 16384 Samples
4 Mega Samples = 4 x 1024 kS = 4 x 1024 x 1024 Samples
2 Giga Samples = 2 x 1024 MS = 2 x 1024 x 1024 x 1024 Samples
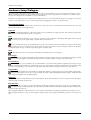
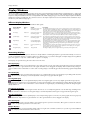
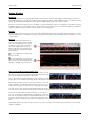
If selected to time input the field will accept
pure time values which are recalculated to
samples value automatically using the currently selected sampling rate. Time values are entered as seconds or fractions of. The modifiers „m“, „u“, „n“ are accepted.
10 s
10 seconds
20 ms
20 milli seconds = 0.020 seconds
30 us
30 micro seconds = 0.03 ms = 0.000030 seconds
500 ns
500 nano seconds = 0.5 us = 0.0000005 seconds
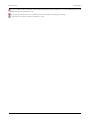
When using another modifier than allowed for the current entry mode the field will automatically switch to the other entry mode.
54
SBench 6 Software Manual