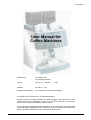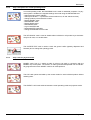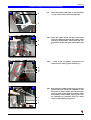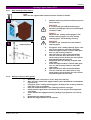
1
M.Schaerer Ltd. Gewerbestrasse 15 3302 Moosseedorf Switzerland Phone: Fax: E-Mail: Internet: +41 31 858 51 11 +41 31 858 51 40 [email protected] www.schaerer.com User manual BASO 2 - 02 Order number: 020'201 Introduction User Manual for Coffee Machines Published by: M. Schaerer AG CH-3302 Moosseedorf Version: Version 07 / October Software: NT 2000 V 1.05 Designed and edited by: M. Schaerer AG, CH-3302 Moosseedorf 2001 © Copyright by M. Schaerer AG, CH-3302 Moosseedorf All rights reserved, including translation into other languages. This manual may not be copied, photocopied or distributed, in whole or in part, by any means, nor transmitted electronically, without the publisher’s written consent. All the information, technical data and illustrations in this instruction manual are based on the latest data available at the time of going to press. M. Schaerer AG reserves the right to undertake modifications at any time without further notice. BASO-2 - 02.00 - V07 Page 0-1 Introduction Page 0-2 BASO-2 - 02.00 - V07 Introduction 0. SAFETY INSTRUCTIONS AND WARNINGS Read the information in the user manual carefully before using the machine for the first time. It contains important information on safety, use and service of the machine. 0.1. Safety This chapter contains important safety information and liability provisions on how to avoid damaging the machine, outlined in this instruction manual. You will also find instructions for conventional use. This chapter warns you about possible dangers by conventional use of the machine. The information on how to recognize danger enables a safe and correct operation. It is absolutely crucial to read and understand this chapter before using the machine. 0.2. For your safety Please keep this operating manual in the vicinity of the machine. The machine will be handed over by the authorized after sales service organization. Please familiarize yourself with the operating manual before you use the machine for the first time. It is crucial that you read the safety notes. Especially important points are marked with a symbol. Dangers by maloperation or misuse, • • • BASO-2 - 02.00 - V07 for the operators body and life and for third persons and animals that are in the vicinity of the machine. for the machine and other valuables belonging to the operator and third persons. that the machine will not run smoothly. Page 0-3 Introduction 0.2.1. Safety symbols used in these instructions The following symbols occur in conjunction with all important notes on safety in these operating instructions. Follow the instructions to the letter and proceed with particular care in such cases. • Identification of notes on safety: Danger! This note indicates a risk of severe and/or fatal injury if specific procedural rules are violated. Please take all necessary safety precautions if you see this symbol in the operating instructions. Danger! Danger of electric shock! Attention! This note warns you of damage to property as well as of financial and statutory penalties (e.g. loss of rights to claim under guarantee, liability suits, etc.). Environmental protection! Check the equipment you are using is environmentally friendly. Comply with the disposal regulations of the country you are in and take advantage of the local opportunities provided for correct waste disposal. Bear in mind that environmental protection is to everyone’s benefit. Note: This provides important notes and information. Page 0-4 BASO-2 - 02.00 - V07 Introduction 0.3. Liability Claims under guarantee and liability claims in the event of injury to people and damage to property cannot be entertained if they are due to one or more of the following causes: – – – – – – – Unconventional use of the machine Improper assembling, start-up, operation and service of the machine Operating the machine with defect safety devices or when safety devices are not in place or functioning properly Failure to comply with the information in the operating manual regarding storage, assembly, start-up, use and service of the machine Inadequate monitoring of worn parts Incorrectly undertaken repairs Catastrophic damage due to the influence of foreign bodies, acci- dents, vandalism and force majeure Attention! The machine must be serviced by an after sales service organization authorized by the manufacturer. The service interval is every 12 months or after 45,000 servings of coffee. The manufacturer accepts claims on the guarantee and/or any liability only and exclusively providing the specified service intervals have been observed. The guarantee only applies if any spare parts used have been ordered from the manufacturer or from a supplier authorized by the manufacturer. Safety-relevant parts, such as safety valves, boiler, etc., must be replaced and are not allowed to be repaired. For safety reasons the safety valve must be replaced every 12 months. The steam generator and instant heater must be replaced every 36 months for safety reasons. BASO-2 - 02.00 - V07 Page 0-5 Introduction 0.4. Accident prevention regulations 0.4.1. General Note: This chapter describes the safety instructions and accident prevention regulations, which you must adhere to for your own safety and the safety of others. Before each start-up of the machine: - - 0.4.2. Check its operational safety! Carefully perform the checks as described in the individual chapters. Abide by the instructions, the safety and accident prevention regulations in this user manual as well as your local legal technical safety and hygiene regulations. Immediately rectify any malfunctions, which impair safety. Unauthorized users Danger! Persons who are unfamiliar with the operating manual, children as well as persons under the influence of drugs or medication must not operate the cold milk solution machine unless supervised. In a self-serve establishment, the operator must mark the machines in the beverage and heat retaining plate area in such a way that the customers easily can see it’s a danger zone. 0.4.3. Malfunctions Attention! Be sure that only authorized and trained personnel work on the machine! The provisions of the local employers’ liability insurance association or other responsible supervisory bodies must be adhered to in all cases! If malfunctions occur, they must only ever be rectified by trained and authorized specialists! 0.4.4. Electrical energy Danger! Work on electrical systems is only allowed to be undertaken by an electrician or by trained personnel under the supervision of an electrician and in accordance with the rules governing electrical engineering work. The appropriate EU directives on low voltage and/or the country’s or local safety rules and regulations are in effect. Danger! Never touch live parts! Connect only the machine to AC. The voltage must correspond to the value given on the rating plate of the machine. It is strictly forbidden to insert any object into the machine or to open up the housing! Before servicing, always turn off the main switch to the machine or take the mains plug out of the socket. Otherwise there is a danger of electric shock! Page 0-6 BASO-2 - 02.00 - V07 Introduction 0.4.5. Equipment Attention! If any parts of the unit are leaking or if any cables, hoses, screw connections, flanges, valves, seals, etc. have external signs of damage then this must immediately be reported to the authorized specialist staff and rectified by them! 0.4.6. Environmental protection regulations Environmental protection! When selecting cleaning agents, make sure that they are environmentally safe, bear no health risks, and comply with the local disposal regulations. Use the cleaning agents recommended by the manufacturer. 0.4.7. Designated use The designated use of the coffee machine and the options connected with it are subject only to the contractually agreed mode of use and any existing supplementary agreements, the “general business conditions“ of M. Schaerer AG and this user manual.. Any use other than within the limits specified here shall be regarded as not in accordance with the designated use. The manufacturer shall not be liable for any damage resulting from this. Adherence to the servicing and maintenance intervals stipulated by the manufacturer. BASO-2 - 02.00 - V07 Page 0-7 Introduction 0.4.8. Technical condition The machine must only be operated as designated, if technically safe and if you are fully aware of the safety and danger and follow the appropriate regulations. If any malfunctions are detected, particularly such which could impair safety, they must immediately be rectified by the appropriate personnel. 0.4.9. Cleaning agent When using a cleaning agent, please refer to the notes and specifications on the cleaning container’s label and the specifications and safety data sheet mentioned in chapter 5 “Cleaning” and chapter 9 “Appendix”. 0.5. Safety notes and rating plates Attention! True safety means being familiar with all the notes on safety. This relates to the nature and location of the hazard and in particular to the safety measures taken to counteract it. Always remain on the alert and be aware of the danger(s). The machine is supplied with rating plates. Please keep these in readable condition. Page 0-8 BASO-2 - 02.00 - V07 Introduction CONTENTS Chapter Page ¾ ¾ ¾ ¾ ¾ ¾ ¾ ¾ ¾ Introduction .........................................................................................................................................0-1 Copyright ...............................................................................................................................................0-1 Safety instructions and warnings ..........................................................................................................0-3 Safety ....................................................................................................................................................0-3 For your safety ......................................................................................................................................0-3 Liability ..................................................................................................................................................0-5 Accident prevention regulations ............................................................................................................0-6 Safety notes and rating plates...............................................................................................................0-8 Contents ................................................................................................................................................0-9 1 1.1 1.2 1.3 General .................................................................................................................................................1-1 Welcome ...............................................................................................................................................1-1 Purpose and structure of this instruction manual..................................................................................1-1 Key ........................................................................................................................................................1-1 2 2.1 2.2 2.3 2.4 2.5 2.6 Description...........................................................................................................................................2-1 Coffee machine data .............................................................................................................................2-2 Operating data of the coffee machine...................................................................................................2-5 Equipment and accessories of the coffee machine ..............................................................................2-6 Special settings .....................................................................................................................................2-8 User panel of the coffee machine .........................................................................................................2-9 Chip card functions .............................................................................................................................2-10 3 3.1 3.2 3.3 Installation ...........................................................................................................................................3-1 First-time installation .............................................................................................................................3-1 Location.................................................................................................................................................3-1 Prerequisites for installing the coffee machine .....................................................................................3-1 4 4.1 4.2 4.3 4.4 4.5 4.6 User instructions.................................................................................................................................4-1 Introduction............................................................................................................................................4-3 Operating modes of the coffee machine ...............................................................................................4-4 Messages displayed when coffee machine is ready for operation .......................................................4-4 Routine operating ..................................................................................................................................4-5 Programming using standard chip cards ............................................................................................4-11 Programming using optional chip cards..............................................................................................4-17 5 5.1 5.2 5.3 5.4 5.5 5.6 5.7 5.8 Cleaning ...............................................................................................................................................5-1 Important general notes on cleaning.....................................................................................................5-2 Intermediate rinse .................................................................................................................................5-3 Daily cleaning with refrigerator..............................................................................................................5-5 Weekly cleaning with refrigerator........................................................................................................5-16 Defrosting the refrigerator (option)......................................................................................................5-26 Refrigerator maintenance (option) ......................................................................................................5-26 Cleaning of coffee machine without refrigerator .................................................................................5-27 Cleaning instructions for cappuccinatore CPT (option) ......................................................................5-33 6 6.1 6.2 Problems ..............................................................................................................................................6-1 Problems and error messages..............................................................................................................6-2 Problems without messages (display-messages).................................................................................6-6 BASO-2 - 02.00 - V07 Page 0-9 Introduction Chapter Page 7 7.1 7.2 7.3 7.4 7.5 7.6 7.7 7.8 7.9 7.10 7.11 7.12 7.13 Optional features................................................................................................................................ 7-1 Refrigerator .......................................................................................................................................... 7-2 Payment systems ................................................................................................................................. 7-9 Chip cards ............................................................................................................................................ 7-9 Chip card loader ................................................................................................................................... 7-9 Alarm functions..................................................................................................................................... 7-9 Cappuccinatore CPT .......................................................................................................................... 7-13 Special steam ..................................................................................................................................... 7-15 2nd mill (duo mill)................................................................................................................................. 7-16 Water softener (Filados/Brita) ............................................................................................................ 7-16 Cup sensor ......................................................................................................................................... 7-16 Quick cup warmer .............................................................................................................................. 7-16 Cup warmer ........................................................................................................................................ 7-16 User instructions for special coffee machines (water tank) ............................................................... 7-17 8 8.1 8.1.1 8.2 8.2.1 8.3 8.3.1 8.3.2 8.3.3 8.3.4 8.4 8.4.1 Payment systems ............................................................................................................................... 8-1 Cards compatible with all payment systems ........................................................................................ 8-3 MASTER card ...................................................................................................................................... 8-3 Payment with internal systems............................................................................................................. 8-3 MONEY chip card system .................................................................................................................... 8-3 Payment with self-service systems .................................................................................................... 8-12 Token slot and related systems ......................................................................................................... 8-12 NRIG 13 EMP no-change coin slot and related systems (standard type) ......................................... 8-12 CF350 Totalisator dual-price coin slot................................................................................................ 8-13 CSI (Coffee Standard Interface) external payment – Connection to coffee-bar system.................... 8-13 Payment using Waiter Account .......................................................................................................... 8-15 Waiter Account chip card system....................................................................................................... 8-15 9 Standard Settings............................................................................................................................... 9-1 10 10.1 10.2 10.3 10.4 Appendix ........................................................................................................................................... 10-1 CE Declaration of conformity ............................................................................................................. 10-2 Cleaning agent ................................................................................................................................... 10-3 Rating plates for steam generator and instant heater........................................................................ 10-6 Environmental ISSUES ...................................................................................................................... 10-7 11 Index .................................................................................................................................................. 11-1 Page 0-10 BASO-2 - 02.00 - V07 General 1. General 1.1. Welcome Congratulations on purchasing your coffee machine. This ergonomically and cleverly designed machine has a generously sized workspace. Its modern design and the choice of colors available enable it to blend in with any decor. It combines outstanding quality with revolutionary technology and unparalleled ease-of-use. 1.2. Purpose and structure of this instruction manual This user manual will familiarize you with your machines exceptional features. It contains instructions for correct maintenance, a description of its features and technical information. It is crucial to take note of this information to benefit fully from your coffee machine and to ensure that it functions correctly. Please read through the instruction manual and keep it close to the machine so that you can refer to it if need be (programming, cleaning, troubleshooting, etc.) 1.3. Key Action + This pictogram indicates an “option” that your machine may not have. Optional feature This pictogram indicates an “option” that your machine may not have. Notes This pictogram stands for “information”. The text is designed as an aid to comprehension and complements the function descriptions. Italics PTO Special attention should be paid to texts indicated by a pictogram and written in italics. ª Turn over, more information on this subject on the next page. This sign appears on the bottom right-hand side of pages. Display messages Select product 12:00 15.10.2001 Successive messages, e.g. generated by pressing a button, are shown immediately after or next to the respective instructions. Chip cards The card name (e.g. CHEF, SAVE DATA, etc.) is written in capital letters. You will also find an illustration of the chip cards to the left of the respective texts. The chip card should be correctly inserted into the machine. BASO-2 - 02.01 - V07 Page 1-1 General. Page 1-2 BASO-2 - 02.01 - V07 Description 2. Contents Chap. Text 2. Description 2.1. 2.1.1. 2.1.2. 2.1.3. 2.1.4. Coffee machine data ......................................................................................................................2-2 Overview of the coffee machine.......................................................................................................2-2 Installation chart of the coffee machine ...........................................................................................2-3 Purpose of the coffee machine ........................................................................................................2-4 Serial data of the coffee machine ....................................................................................................2-4 2.2. 2.2.1. 2.2.2. 2.2.3. 2.2.4. Operating data of the coffee machine .........................................................................................2-5 Characteristics of the coffee machine..............................................................................................2-5 Dimensions of the coffee machine...................................................................................................2-5 Power supply....................................................................................................................................2-5 Water connection/outlet ...................................................................................................................2-6 2.3. 2.3.1. 2.3.2. 2.3.3. 2.3.4. Equipment and accessories of the coffee machine ...................................................................2-6 Models of the coffee machine ..........................................................................................................2-6 Standard accessories of the coffee machine (standard delivery package) .....................................2-6 Special accessories of the coffee machine (not in standard delivery package)..............................2-7 Optional features for the coffee machine.........................................................................................2-7 2.4. 2.4.1. 2.4.2. 2.4.3. Special settings..............................................................................................................................2-8 Time settings....................................................................................................................................2-8 Cleaning settings..............................................................................................................................2-8 Miscellaneous ..................................................................................................................................2-8 2.5. User panel of the coffee machine.................................................................................................2-9 2.6. 2.6.1. 2.6.2. 2.6.3. Chip card functions .....................................................................................................................2-10 Standard chip cards .......................................................................................................................2-10 Chip card options for normal operating mode................................................................................2-11 Chip cards for payment mode........................................................................................................2-11 BASO-2 - 02.02 - V07 Page 2-2 Page 2-1 Description 2. DESCRIPTION 2.1. Coffee machine data 2.1.1. Overview of the coffee machine 1 3 4 2 5 17 16 14 15 11 18 13 12 8 6 10 7 9 1. 2. 3. 4. 5. 6. 7. 8. 9. 10. 11. 12. 13. 14. 15. 16. 17. 18. X Page 2-2 Mill 1 coffee bean container (standard coffee mill) Sliding hatch for bean container Opening for decaffeinated coffee powder and cleaning tablets Cup hotplate Surround Drainer Drip tray with/without outlet Height blocking button Drawer for coffee grouts (push outlet up to top) Adjustable coffee outlet Î min. Ø 80 mm, max. × 180 mm (dispenser unit) Steam outlet (only with refrigerator option) Hot water outlet Infusion pressure indicator 2-line illuminated display User panel Chip card slot Service door Refrigerator for milk (optional feature) Right-hand coffee bean container/mill (optional feature) BASO-2 - 02.02 - V07 Description 2.1.2. Installation chart of the coffee machine Drawing number 3.8.5683 E BASO-2 - 02.02 - V07 Page 2-3 Description 2.1.3. Purpose of the coffee machine The coffee machine will supply the following beverages: 2.1.4. - Coffee Ristretto Espresso coffee Decaffeinated coffee Pot of coffee Macchiato Steam for frothing milk Hot water for tea Cappuccino Milk coffee Latté Hot milk Milk foam Serial data of the coffee machine For warranty purposes or in the event of problems, please fill in the data on the machines serial plate in the box provided below. The serial plate is inside the machine above the coffee grouts drawer. Serial plate Pull out coffee grouts drawer (sideways, on inside) Page 2-4 Inst. no Type: Serial number: Nominal pressure: Capacity: Voltage: ................................. ................................. ................................. .................................bar ……………...............Watt .............VAC ............Hz Inst.-Nr. Typ: Serie-Nummer: Nenndruck: Leistung: Spannung: ................................ ................................ ................................ ................................ bar ................................ Watt ............VAC ............. Hz BASO-2 - 02.02 - V07 Description 2.2. Operating data of the coffee machine 2.2.1. Characteristics of the coffee machine The coffee machine is capable of supplying 100-120 cups of coffee or tea per hour. 2.2.2. Dimensions of the coffee machine Width Height Depth Outlet height 420 mm 755 mm 510 mm 80-180 mm Net weight 45 kg (15 SO-2) Subject to modification! 2.2.3. Power supply Model Connected load 1 SO-2 steam 1 SO-2 tea 15 SO-2 6.2 kW / 16 A 6.2 kW / 16 A 9.2 kW / 16 A 400 V AC (3 PNE) 400 V AC (3 PNE) 400 V AC (3 PNE) 50/60 Hz 50/60 Hz 50/60 Hz For special voltages ask the manufacturer or one of your authorized after sales service people. Danger! • An authorized specialist must install or inspect the installation! • The phase must be fuse-protected with 16A. • Never use a machine with a defect mains cable. Let an authorized specialist replace a defect mains cable or plug immediately. • Use only an extension cord when you are sure that it is in perfect condition. The extension cord must have a minimum cross section of 1.5 mm² for each core and a permitted 5 pole plug (PNE) for 16 A. • Mains cable and/or extension cords must be placed so that no one can fall over them. Don’t crush or pull the cords around corners and sharp edges and don’t let them hang exposed in the room. Don’t place the cords on warm surfaces and protect them from oil and harsh cleaning agents. • Never lift or pull the machine by the mains cable. Never pull the plug by the mains cable or extension cord out of the socket. Never touch cord and plug with wet hands. Never insert a wet plug in the socket. Attention! Mains connection according to local regulations. The voltage on the rating plate must correspond to the local mains voltage. BASO-2 - 02.02 - V07 Page 2-5 Description 2.2.4. Water connection/outlet If the coffee machine is to be connected to a newly installed water supply, the pipe and intake hose should be rinsed thoroughly to prevent any dirt particles from entering the machine. The machine must be connected to a safe water supply with supply valve. Connect the pressure hose to the pressure reducer (set to 3 bar) on the tap using the G ½” screw fitting. If the machine is connected to a water outlet, the supplied fixed-temperature outlet hose should be connected to the drainer and siphon. Note: The ideal water hardness is 6-8°dWH (standard German hardness) or 8-12°fWH (standard French hardness). Chlorine content should not exceed 100 mg per liter. The ideal pH value is 7. For all other values, local regulations apply. 2.3. Equipment and accessories of the coffee machine 2.3.1. Models of the coffee machine This coffee machine exists in three models: 1 SO-2 1 SO-2 steam 1 SO-2 tea 15 SO-2 2.3.2. = Coffee = Coffee and steam = Coffee and hot water = Coffee, hot water and steam Standard accessories of the coffee machine (standard delivery package) Article - 1 “CHEF“ chip card - 1 “SAVE DATA Plus"chip card - 1 “SAVE DATA A“ chip card - 1 “SAVE DATA B“ chip card - 1 spoon - 1 pack cleaning tablets - 1 instruction manual - 2 joints - 1 nipple (G1/2“) - 1 brush - 1 reinforced hose - 1 wallet for 2 chip cards - 1 outlet hose without optional refrigerator - 1 outlet hose with optional refrigerator Page 2-6 Ref. no. 063930 063929 from Version 1.05 063933 to Version 1.04 063920 to Version 1.04 067111 065221 064249 068179 067409-A 067766 065278 063353 063345 BASO-2 - 02.02 - V07 Description 2.3.3. Special accessories of the coffee machine (not in standard delivery package) Article Ref. no. - Supplementary chip cards: 2.3.4. “PROGRAM” “KEY BLOCK” “COFFEE TEST” “MANAGER” “LOAD” “MASTER” “WAITER” “COPY WAITER” “PRINT” “MONEY A-J” “Cup” “Credit-Look” 063941 063931 063932 063940 063937 063934 063936 063942 063943 063921-063929 063939 063946 “Clean” (for cleaning card reader) 063945 Optional features for the coffee machine Note: For further details of the optional features described below, refer to chapter 7 (Optional Features) or ask your licensed dealer. BASO-2 - 02.02 - V07 - Refrigerator for keeping milk cool - Waiter Account and MONEY payment systems - Payment systems such as coffee-bar systems (CSI = Coffee Standard Interface), cash payment systems (CCI = Coffee Credit Interface, e.g. coin and token slots) - Chip card loader - Alarm functions - CPT cappuccino unit - Special steam - 2nd mill (DUO mill) - Water softener (Filados / Brita) - Quick cup warmer - Cup warmer - Water tank for trolley version (operates without running water supply) Page 2-7 Description 2.4. Special settings Note: The settings described in this section can only be programmed by the service engineer. 2.4.1. Time settings Service reminder After a certain period or a certain number of beverages, a reminder is displayed that it is time to have the machine serviced. 24-hour display The time can be shown either in 24-hour or 12-hour format. (00:00-24:00 or 00:00am-12:00am / 00:01pm-12:00pm) Timer This enables the coffee machine to be programmed to come on on the days it is used. In this case, it switches itself on automatically. 2.4.2. Cleaning settings Cleaning reminder If the cleaning reminder is activated, drinks will be dispensed for one hour after the message appears. If the coffee machine is not cleaned during this time, the coffee machine blocks. Specify the number of products that may be dispensed and the time. The cleaning reminder is suppressed in case a cleaning takes place less than two hours previously. Obligatory cleaning With this function, up to 50 beverages can be dispensed once the message is displayed. After this, the coffee machine blocks. Manual cleaning This enables the cleaning procedure to be shortened (no need for manual cleaning, except for emptying the grouts drawer. Sample coffee A sample coffee is automatically served and the rinsing program run when the coffee machine is switched on if the coffee machine was cleaned before it was turned off. 24H sample coffee A sample coffee is automatically served immediately after the coffee machine is cleaned. Rinse before switch-off The rinsing program is run before the coffee machine is switched off. 2.4.3. Miscellaneous Product mix Several different products can be pre-selected. Lock/unlock CHEF card The coffee machine can only be switched on and off with the CHEF card. DECAF key manual dosing The DECAF key can be programmed to dispense decaffeinated coffee powder. Automatic piston rinse The piston is rinsed at the end of the specified period. When a product is selected, the “automatic piston rinse” time is reset. Page 2-8 BASO-2 - 02.02 - V07 Description 2.5. User panel of the coffee machine Two-line illuminated LCD display Cleaning and Plus key with LED Shift key with LED Random product selection keys with LED and product symbol Chip card slot recognizes the function of the respective chip cards On/off LED Standby key on / off Minus and STOP key with LED DECAF key with LED BASO-2 - 02.02 - V07 Page 2-9 Description 2.6. Chip card functions Attention! Chip cards should be handled with the same care as bank cards (do not bend, do not use as “door openers”, etc.) This coffee machine features the latest control technology. To facilitate programming, various program groups have been created which can be programmed directly with the aid of the respective chip cards. Using these chip cards protects the program groups from misuse. The service engineer can provide extra protection for the most important chip cards, such as the CHEF, PROGRAM, LOAD and MANAGER cards for example, by programming various security levels. The four available programmable security levels: Security level 0 Customer ref. The control system automatically checks whether the card bears the correct customer reference number. Security level 1 Customer ref. / PIN code Verifies the customer reference and inputs a PIN code before the card is read. Security level 2 Customer ref. / Card ref. Verifies the customer reference number. The *card reference number is also entered in the internal chip card table. This makes it impossible to use any other card, as the system authorizes one card only per program group. Security level 3 Customer ref. / Card ref. / PIN code The highest security level, combining levels 1 and 2. * Every chip card bears a manufacturer-supplied incremental card reference number. If a NEW chip card is inserted into the card reader with security level 1 or 3, any number, including 000, may be entered as the PIN code. This value is then transferred to the card and considered as the current code. 2.6.1. Standard chip cards The CHEF card enables the principal settings or modifications to be undertaken for routine operation: - Reads the daily counter for the total number of coffees and teas and the total per key. - Resets counter - Change quantity of coffee dispensed - Change quantity of coffee ground - Change switch-on and off times - Change time - Change date - Change PIN code (Personal Identification Number) - Lock/unlock function - the service engineer can program the coffee machine so that it can only be switched on and off with the CHEF card. - The CHEF card can be used to eliminate the “service wanted” message (If released by the service technician.) The SAVE DATA card enables the machine settings to be saved or data from the card to be transferred to the machine. The following save cards are needed for the coffee machine: - The “SAVE DATA A“ card saves level 1 data to Version 1.04 - The “SAVE DATA B“ card saves level 2 data to Version 1.04 - The “SAVE DATA Plus" card saves all data (levels 1 + 2) from Version 1.05 Page 2-10 BASO-2 - 02.02 - V07 Description 2.6.2. Chip card options for normal operating mode In normal operating mode, the PROGRAM card is used for statistical purposes. If a payment system is installed, the requisite settings are made using the PROGRAM card: - Switch payment system ON/OFF - Switch price levels 1 + 2 (automatic coffee machines on, off and switchover time) - Change product price and article number - Display MONEY sales - Reset MONEY sales - Display Master sales - Reset Master sales - Log on MASTER card - Delete MASTER card table - Change PROGRAM card PIN code The KEY BLOCK card is used to disable either individual or all product keys simultaneously for all uses, or to enable them. The COFFEE TEST card is used to check the ground coffee (quantity dispensed and fineness) and to change the quantity ground. 2.6.3. Chip cards for payment mode MONEY cards, from A-J, enable a scale of prices to be used in conjunction with the MONEY chip card system. The amount of coffee ground and dispensed can be individually programmed on each MONEY card for all coffee products. The CUP card queries and adds up the counter levels for each individual product without resetting them. The CREDIT LOCK card switches between normal operating mode and payment mode. BASO-2 - 02.02 - V07 Page 2-11 Description Page 2-12 BASO-2 - 02.02 - V07 Installation 3. INSTALLATION 3.1. First-time installation The coffee machine must be installed and initialized by a licensed after sales service agent. Note: Once the coffee machine is installed and after subsequent changes, it is important to save the new data on the SAVE DATA card provided. The SAVE DATA cards should be on hand at all times, including for the service engineer. 3.2. Location Danger! Set up the apparatus on a stable base so no one can tip the machine over or injure themselves on it. Do not place the machine on hot surfaces or near to an oven. Not suitable for outdoor use. Never expose the machine to outside weather, e.g. rain, snow, frost etc. Danger! Do not operate the machine in large catering kitchens without the express written approval of the after sales service authorized by the manufacturer. Attention! The ambient temperature must remain between 10 °C and 40 °C. Protect the machine from frost. If the machine has been exposed to minus temperatures, contact an after sales service organization, authorized by the manufacturer, before using it. 3.3. Prerequisites for installing the coffee machine Note: The power and water supplies must be brought to within one meter of the place where the coffee machine is to be installed. Pay attention to the technical data when installing/connecting up the machine. Install the machine on a smooth, solid base away from heat, damp and steam. Leave a space (above and at the side) for servicing. (Ideally leave about 35 cm free on one side.) Install the machine at least 1 cm away from the wall (for ventilation). (Ideally leave 10 cm.) Local regulations relating to kitchens must be complied with. ª BASO-2 - 02.03 - V07 Page 3-1 Installation Additional hole required for “Container ejection” optional feature Buffet and counter version Refrigerator (optional feature) Page 3-2 BASO-2 - 02.03 - V07 User Instructions 4. Contents Chap. Text 4. User instructions 4.1. Introduction ....................................................................................................................................4-3 4.2. Operating modes of the coffee machine .....................................................................................4-4 4.3. Messages displayed when coffee machine is ready for operation ..........................................4-4 4.4. 4.4.1. 4.4.2. 4.4.2.1. 4.4.3. 4.4.3.1. 4.4.3.2. 4.4.3.3. 4.4.4. 4.4.5. 4.4.6. 4.4.7. 4.4.8. 4.4.9. 4.4.10. 4.4.11. 4.4.11.1. 4.4.11.2. Routine operation ..........................................................................................................................4-5 Making the coffee machine ready for operation...............................................................................4-5 Prepare coffee product ....................................................................................................................4-5 Prepare coffee products using second level....................................................................................4-6 Decaffeinated coffee ........................................................................................................................4-6 Prepare decaffeinated coffee manually ...........................................................................................4-6 Prepare decaffeinated coffee using the coffee mill and DECAF key...............................................4-7 Prepare decaffeinated coffee using the coffee mill without the DECAF key ...................................4-7 Prepare tea ......................................................................................................................................4-7 Heat beverage..................................................................................................................................4-8 Prepare hot milk (only with optional refrigerator) .............................................................................4-8 Prepare milk foam (only with optional refrigerator) ..........................................................................4-9 Prepare Cappuccino Magic, milk coffee, Latté or Macchiato automatically (with optio. refrigera.).4-9 Terminating operation / Switching the coffee machine off.............................................................4-10 Longer idle time:.............................................................................................................................4-10 Disassembly...................................................................................................................................4-11 Disassembly of the coffee machine ...............................................................................................4-11 Disassembly of the refrigerator ......................................................................................................4-11 4.5. 4.5.1. 4.5.1.1. 4.5.1.2. 4.5.1.3. 4.5.1.4. 4.5.1.5. 4.5.1.6. 4.5.1.7. 4.5.1.8. 4.5.1.9. 4.5.1.10. 4.5.1.11. 4.5.2. 4.5.2.1. 4.5.2.2. 4.5.2.3. Programming using standard chip cards..................................................................................4-12 CHEF card .....................................................................................................................................4-12 Menu ..............................................................................................................................................4-12 Read product counter for coffees and teas per key.......................................................................4-12 Reset counter.................................................................................................................................4-13 Change quantity of coffee ground (coffee powder) .......................................................................4-13 Change quantity Î water and/or milk for coffee products ............................................................4-13 Change dosing time Î steam, hot milk and/or milk foam .............................................................4-14 Change on/off time.........................................................................................................................4-14 Change time...................................................................................................................................4-15 Change date...................................................................................................................................4-16 Change PIN code...........................................................................................................................4-16 Service reminder ............................................................................................................................4-16 SAVE DATA card ...........................................................................................................................4-17 Menu ..............................................................................................................................................4-17 Save coffee machine data to card .................................................................................................4-17 Load machine data from card to coffee machine...........................................................................4-18 4.6. 4.6.1. 4.6.1.1. 4.6.1.2. 4.6.1.3. 4.6.1.4. 4.6.1.5. Programming using optional chip cards ...................................................................................4-18 PROGRAM card.............................................................................................................................4-18 Menu ..............................................................................................................................................4-18 Programmable security level..........................................................................................................4-19 Enable/disable payment mode.......................................................................................................4-19 Switch prices ..................................................................................................................................4-19 Change MONEY card price levels 1 + 2 ........................................................................................4-20 BASO-2 - 02.04 - V07 Page 4-3 Page 4-1 User Instructions 4.6.1.6. Change token price with or without MONEY card price levels 1 + 2 ............................................ 4-21 Chap. Text 4.6.1.7. 4.6.1.8. 4.6.1.9. 4.6.1.10. 4.6.1.11. 4.6.1.12. 4.6.1.13. 4.6.1.14. 4.6.2. 4.6.2.1. 4.6.2.2. 4.6.2.3. 4.6.3. 4.6.3.1. 4.6.3.2. Change product price and article number (for external CCI / CSI payment systems).................. 4-22 Display MONEY sales................................................................................................................... 4-22 Reset MONEY sales ..................................................................................................................... 4-23 Display MASTER card .................................................................................................................. 4-23 Reset MASTER card..................................................................................................................... 4-23 Log on MASTER card ................................................................................................................... 4-23 Delete MASTER table ................................................................................................................... 4-24 Change PIN code.......................................................................................................................... 4-24 KEY BLOCK card .......................................................................................................................... 4-25 Menu ............................................................................................................................................. 4-25 Disable keys .................................................................................................................................. 4-25 Enable keys................................................................................................................................... 4-25 COFFEE TEST card ..................................................................................................................... 4-26 Menu ............................................................................................................................................. 4-26 Ground coffee test program .......................................................................................................... 4-26 Page 4-2 Page BASO-2 - 02.04 - V07 User Instructions 4. USER INSTRUCTIONS 4.1. Introduction This chapter describes the basic functions of the coffee machine. Read them attentively to ensure easy and problem-free routine operation. Note: As a prerequisite for a smooth operation of the milk solution machine, it must be installed and programmed by an after sales service organization, authorized by the manufacturer. Danger! The machine must only be operated by qualified personnel! Danger of scalding and burns! • Never work underneath the beverage outlet area while the products are being served. The liquids coming from the machine are hot! To protect yourself from burns, once you have used the outlet buttons, keep your hands and other parts of your body away from the beverage outlet area • Don’t touch any hot surfaces, such as the heat retaining plate. Always use the appropriate handles and buttons (danger of burns)! • When an outlet button has been pressed, the machine will not stop after the cup is removed from the beverage outlet area. The brewing process that has already started (also for selected products) will continue until it’s finished. • The machine does not stop if the coffee pot or cup is removed from the dispensing area after you have pressed a dispense button. While coffee is being made, never put fingers into the brewing unit! Danger! Switch off the coffee machine if you accidentally pour liquid over the cup hotplate (risk of short-circuit)! + Inform the after sales service! Attention! Never put anything other than roast coffee beans into the coffee bean container. Noise emissions! Noise emission levels can be up to 70 dB (A), particular when you are heating up beverages. BASO-2 - 02.04 - V07 Page 4-3 User Instructions 4.2. Operating modes of the coffee machine The coffee machine has three different operating modes: select product 12:00 15.10.2001 If this message is displayed when the coffee machine is ready for operation, it is in normal operating mode, i.e. the corresponding product will be freshly prepared when the key is pressed. credit operation 12:00 15.10.2001 This message is displayed if the coffee machine has an internal or external payment system installed. << Standby >> 12:00 15.10.2001 The coffee machine is switched off but is still connected to the mains supply Note: When it is switched on again, it needs a short time to reach the programmed operating temperature. 4.3. Messages displayed when coffee machine is ready for operation Note: These messages only appear when the coffee machine is idle, i.e. when no beverages are being served. They do not block the dispensing process. ... container full ... heating up Empty the grouts container. Up to five more coffees can be made; after that, the coffee machine blocks. The temperature of the instantaneous water heater has fallen to more than 10°C below the programmed value. Please wait until the machine has warmed up again before ordering the next product. ... clean machine Launch the cleaning program +see chapter 5.3. credit ####.## too little credit Insufficient credit. select product milk empty Page 4-4 The milk container is empty (optional feature). BASO-2 - 02.04 - V07 User Instructions 4.4. 4.4.1. Routine operation Making the coffee machine ready for operation 1. Check the following points before switching on the coffee machine: - That it is connected to the mains power supply - That the water supply is turned on - The coffee bean container is full Danger! DO NOT reach into the mill when refilling the coffee container(s) and DO NOT press any of the product buttons when refilling! - The grouts container is empty - The (unlit) display shows the following message is displayed: <<Standby>> 12:00 15.10.2001 2. Press [ ] key Î All of the buttons light up briefly. The following messages are displayed: selection locked heating up Once the operating temperature has been attained: select product 12:00 15.10.2001 For coffee machines with a fresh water tank, see chapter 5.5. Depending on how the coffee machine is programmed, another message may be displayed when the coffee machine is ready for operation, especially if payment mode is activated. Note: If the cleaning program was run before the coffee machine was switched off, a rinse cycle is automatically run when the coffee machine is re-initialized and, if programmed to do so, a sample coffee is served. (Place a cup under the coffee outlet.) If the lock/unlock function is activated, the CHEF card must be inserted into the card reader in order to switch the coffee machine on and off. 4.4.2. Prepare coffee product If your coffee machine has a payment system installed and enabled, please read the instructions in chapter 6.0. Coffee and hot water are available simultaneously. Pressing the [ ] key deselects the pre-selected product (only if payment is disabled). Holding down the [ ] key for more than two seconds interrupts all of the currently active products (coffee products only during the infusion phase). 1. Place cup under the coffee outlet (the height of the outlet can be adjusted to the cup). Danger! Do not adjust the height of the outlet when the coffee outlet is dispensing (danger of scalding)! 2. Press the desired product key 3. The LED of the selected key lights up red and the following message is displayed: select product choice 1 supply 1 ª BASO-2 - 02.04 - V07 Page 4-5 User Instructions 4. The coffee is freshly prepared and served automatically. Depending on the programming: - The keys can be pre-selected in any order as many times as required. - Other messages may appear (error messages). The [ ] key cancels pre-selected products. Cancellation of pre-selected products is not possible in payment mode. 4.4.2.1. Prepare coffee products using second level If your coffee machine has a second level installed and enabled, the product keys can be used to pre-select two different products. Level 1: Normal use Level 2: See below 1. Place cup under the coffee outlet (the height of the outlet can be adjusted to the cup). Danger! Do not adjust the height of the outlet when the coffee outlet is dispensing (danger of scalding)! 2. Press [ ] = shift key. 3. Press the desired product key. 4. The LED of the selected key lights up red and the following message is displayed: select product choice 1 supply 1 5. The coffee is freshly prepared and served automatically. Depending on the programming: - The keys can be pre-selected in any order as many times as required. - Other messages may appear (error messages). Coffee and hot water are available simultaneously. Pressing the [ ] key deselects the pre-selected product (only if payment is disabled). Holding down the [ ] key for more than two seconds interrupts all of the currently active products (coffee products only during the infusion phase). 4.4.3. Decaffeinated coffee 4.4.3.1. Prepare decaffeinated coffee manually The coffee machine is either programmed to serve decaffeinated coffee ex factory, or this feature may be enabled by the service engineer. Attention! Use ground coffee only. 1. Place cup under the coffee outlet (the height of the outlet can be adjusted to the cup). 2. Press [ ] key. 3. Press the corresponding coffee product key. The following message is displayed: select product coffee powder 4. Place coffee powder in funnel. 5. Press the flashing red [ ] key. 6. The coffee is prepared and served. Page 4-6 BASO-2 - 02.04 - V07 User Instructions 4.4.3.2. Prepare decaffeinated coffee using the coffee mill and DECAF key The coffee machine is either programmed to prepare decaffeinated coffee via a coffee mill ex factory, or this feature may be enabled by the service engineer. 1. Place cup under the coffee outlet (the height of the outlet can be adjusted to the cup) 2. Press [ ] key. 3. Press the corresponding coffee product key. The following message is displayed: select product coffee powder 4. Place powder in funnel. 5. Press [ ] key (LED blinks). Note: Pressing the [ ] key causes the decaffeinated coffee to be taken out of the right-hand or left-hand coffee mill and ground. The same keys are thus used to make both decaffeinated and non-decaffeinated coffee, but two different mills come into play. 4.4.3.3. Prepare decaffeinated coffee using the coffee mill without the DECAF key 1. Place cup under the coffee outlet (the height of the outlet can be adjusted to the cup) 2. Press the corresponding coffee product key. The following message is displayed select product choice 1 supply 1 Note: The caffeine-free bean coffee is automatically drawn in by the programmed coffee grinder and ground. With this program procedure, separate keys must be set for decaffeinated products. 4.4.4. Prepare tea 1. Place tea glass under the hot water outlet. Danger! Do not grip the hot water outlet (danger of scalding)! 2. Press the [ ] key. The following message is displayed: select product 12:00 15.10.2001 3. The hot water is served. If the programmed temperature has not been reached, the following message is displayed: select product heating tea Coffee and tea (as well as steam if fitted) are available simultaneously. Pressing the [ ] key stops the hot water prematurely. Hot water cannot be pre-selected. Once the coffee machine has been switched off, no hot water is available until the system has warmed up. BASO-2 - 02.04 - V07 Page 4-7 User Instructions 4.4.5. Heat beverage Danger! Point the steam pipe towards the drip tray! 1. Briefly press the [ ] key twice in rapid succession to remove condensation from the pipe (only possible in start/stop mode). 2. Immerse the steam pipe into the beverage until it touches the bottom of the recipient. 3. Press the [ ] key again: select product 12:00 15.10.2001 Steam is produced. 4. Heat up contents by raising and lowering the recipient (the deeper the sound, the higher the temperature). The steam is automatically switched off once the preset time runs out. 5. Repeat steps 3 and 4 until the required temperature is attained. 6. Put recipient to one side. Danger! Only use the rubber handle to move the steam pipe. Take care the cleaning cloth does not slip out of your hand. Point the steam pipe towards the drip tray! 7. Clean the steam pipe with a damp cloth. 8. Press the [ ] key twice in rapid succession again (=clean steam pipe). Pressing the [ ] key again prematurely terminates steam output if the coffee machine is in start/stop mode. The steam pipe must be kept immersed while steam is emitted. The beverage may spit when it reaches boiling point. If steam is drawn off in payment mode, pressing the cleaning key immediately after heating will trigger a jet of steam to clean the pipe. Steam cannot be pre-selected. When the coffee machine is switched on, no steam can be drawn off until the system has warmed up 4.4.6. Option of automatic steam cut-out by programmed temperature (automatic steam cut-out). (See chapter 7.7.) Prepare hot milk (only with optional refrigerator) Attention! Do not use unpasteurized milk! Only use pasteurized or UHT milk! Perform a rinsing operation every time you serve milk, unless automatic rinsing has been preprogrammed! Optional feature: 1. Place an empty cup under the outlet. 2. Select milk key. select product 12:00 15.10.2001 3. Product is served. Pressing the key again turns milk off prematurely if the coffee machine is in start/stop mode. Hot milk cannot be pre-selected. ª Page 4-8 BASO-2 - 02.04 - V07 User Instructions Note: The milk in the refrigerator must have a temperature of 3°C-5°C in order for perfect product quality to be guaranteed. Do not refill with milk, which temperature exceeds 6°C! 4.4.7. Prepare milk foam (only with optional refrigerator) Attention! Do not use unpasteurized milk! Only use pasteurized or UHT milk! Perform a rinsing operation every time you serve milk, unless automatic rinsing has been pre-programmed! Optional feature: 1. Place the coffee or other recipient under the outlet. 2. Select milk foam key. select product 12:00 15.10.2001 3. Product is served. Pressing the key again turns milk foam off prematurely if the coffee machine is in start/stop mode. Milk foam cannot be pre-selected. Note: The milk in the refrigerator must have a temperature of 3°C-5°C in order for perfect product quality to be guaranteed. 4.4.8. Prepare Cappuccino Magic, milk coffee, Latté or Macchiato automatically (with optio. refrigera.) Optional feature: If your coffee machine has a payment system installed and enabled, please read the instructions in chapter 6.0. Coffee and hot water are available simultaneously. Pressing the [ ] key deselects the pre-selected product (only if payment is disabled). Holding down the [ ] key for more than two seconds interrupts all of the currently active products (coffee products only during the infusion phase). 1. Place cup under the coffee outlet (the height of the outlet can be adjusted to the cup). 2. Press the desired product key 3. The LED of the selected key lights up red and the following message is displayed: select product choice 1 supply 1 4. The coffee is freshly prepared and served automatically. Depending on the programming: - The keys can be pre-selected in any order as often as wished. - Other messages may appear (error messages). The [ ] key cancels pre-selected products.. Cancellation of pre-selected products is not possible in payment mode. The milk in the refrigerator must have a temperature of 3°C-5°C in order for perfect quality to be guaranteed. BASO-2 - 02.04 - V07 Page 4-9 User Instructions 4.4.9. Terminating operation / Switching the coffee machine off If the coffee machine is not used for longer periods, e.g. nights, it can be switched to stand-by. In this mode the boilers are not kept at temperature and the dispensing of beverages is not possible. But the refrigerator keeps cooling. 1. Do the daily cleaning: + Chapter 5, “Cleaning“ 2. Switch the coffee machine to stand-by by keeping the [ ] key pressed down for about three seconds until the display light goes out. Then release the key Î the display shows: <<Standby>> 12:00 15.10.2001 4.4.10. Longer idle time: If the coffee machine is not used for several weeks or months (e.g. at the end of the season), the coffee machine and probably also the refrigerator should be switched off. Several weeks (e.g. business vacation): 1. Do the weekly cleaning. + Chapter 5, “Cleaning“ If the refrigerator option is installed, defrost the refrigerator. + Chapter 5.5, “Defrosting the Refrigerator“ 2. Close the fresh water supply tap. 3. Pull the mains plug from the socket, respectively cut off the power supply with the master switch. If the refrigerator option is installed turn the thermostat regulator anti-clockwise until the end. To avoid mould growth and unpleasant smells in the refrigerator, empty it completely, clean the interior space and the door insulation and leave the door open a little. If necessary, place something to prevent the door closing. + Chapter 7.1.5.2, “Set temperature at the refrigerator”, page 7-7 The picture shows the refrigerator with door open. Several months (e.g. end of season) 1. Do steps 1 to 3 as described above for “Several weeks.” 2. Remove the coffee beans from the bean container (vacuum cleaner).. 3. On premises where the temperature can drop below zero, the boilers have to be emptied. For this you should call in a service technician authorized by the manufacturer.. ª Page 4-10 BASO-2 - 02.04 - V07 User Instructions Attention! Be sure when operation restarts the first thing is to reopen the fresh water supply, and only then should the power supply be restored. 4.4.11. Disassembly 4.4.11.1. Disassembly of the coffee machine Please contact an after sales service organization, authorized by the manufacturer. 4.4.11.2. Disassembly of the refrigerator Please contact an after sales service organization, authorized by the manufacturer. BASO-2 - 02.04 - V07 Page 4-11 User Instructions 4.5. Programming using standard chip cards The CHEF and SAVE DATA cards are part of the standard delivery package. They provide a simple means of changing settings or retrieving information from the coffee machine. For all the functions described in this chapter, it is assumed that the coffee machine is ready for routine operation in normal operating mode. Keep the chip cards in a safe place where only authorized persons have access to them. When a chip card is in the card reader, no products can be selected. 4.5.1. CHEF card The CHEF card enables the principal settings or modifications to be undertaken for routine operation. 4.5.1.1. Menu - Read daily counter for coffees and teas per key. Reset product counter Read monthly counter Change quantity of product dispensed Change quantity of coffee ground Change on/off timer Change time Change date Change PIN code Delete the “service wanted” message At the end of every menu: Press [ ] or [ ] key to reach the next menu or remove CHEF card Î coffee machine ready in normal operating mode. 4.5.1.2. Read product counter for coffees and teas per key 1. Insert CHEF card into the card reader. 2. Press [ ] or [ ] until the following menu is displayed: total prod. counter K: xxx T: xxx = Displayed value is the total of all coffee and tea products. 3. Individual product totals can be read successively by pressing the respective product keys. total prod. counter quantity ##### 4. Press [ Press [ = Displayed value is the total of the selected product key. ] key to return to message displayed in no. 2. ] or [ ] key to reach next menu, or remove CHEF card Î coffee machine ready in normal operating mode. Page 4-12 BASO-2 - 02.04 - V07 User Instructions 4.5.1.3. Reset counter 1. Insert CHEF card into the card reader. 2. Press [ ] or [ ] until the following menu is displayed: delete counter execute ` Decaf ` 3. Press [ ] key: delete counter delete ? ` Decaf ` 4. Press [ ] key: delete counter .. Done .. total prod. counter K: xxx T: xxx 5. Press [ ] or [ ] key to reach next menu, remove CHEF card Î coffee machine ready in normal operating mode. 4.5.1.4. Change quantity of coffee ground (coffee powder) This function determines the amount of coffee powder that is dispensed for each individual coffee product. 1. Insert CHEF card into the card reader. 2. Press [ ] or [ ] until the following menu is displayed: change grind quantity select product 3. Press the key for the relevant product. change grind quanti. grind quantity +0% 4. Press the [ ] or [ ] to raise or lower the amount of coffee powder dispensed by +/percent. 5. Press [ ] key to confirm the setting or modification. 6. The new setting is now activated. 7. Repeat steps 3 to 6 if the quantity is incorrect or if other product quantities need to be modified. Press the [ ] or [ ] key to reach next menu or remove CHEF card Î coffee machine ready in normal operating mode. 4.5.1.5. Change quantity Î water and/or milk for coffee products This function determines the amount of water and/or milk dispensed for each individual product (all coffee products and milk). 1. Insert CHEF card into the card reader. 2. Press [ ] or [ ] until the following menu is displayed: change fill quantity select product 3. Press the key for the relevant product. change fill quantity water quantity +0% 4. Press the [ 5. Press the [ ] or [ ] to raise or lower the amount of water dispensed by +/- percent. ] key to confirm the setting or modification. ª BASO-2 - 02.04 - V07 Page 4-13 User Instructions 6. The new water setting is now activated. Repeat steps 7 to 8 for products with milk (only with optional refrigerator).For products without milk, go to step 9. change fill quantity milk quantity +0% 7. Press the [ ] or [ ] to raise or lower the amount of milk dispensed by +/- percent. 8. Press [ ] key to confirm the setting or modification. The new setting is now activated. 9. Repeat steps 3 to 6 for water and steps 3 to 9 for milk if the quantity is incorrect or if other product quantities need to be modified. Press [ ] or [ ] key to reach next menu or remove CHEF card Î coffee machine ready in normal operating mode. 4.5.1.6. Change dosing time Î steam, hot milk and/or milk foam This function determines the length of time during which milk and/or milk foam are dispensed for each individual product. Start/stop function is enabled: The dosing time cannot be set. The length of time is determined by a fixed timeout facility and can only be changed by a service engineer. Start/stop function is disabled: Set the dosing time as follows 1. Insert CHEF card into the card reader. 2. Press [ ] or [ ] key until the following menu is displayed: change fill quantity select product 3. Press the key for the relevant product: change fill quantity doser time +0% 4. Press the [ ] or [ ] to raise or lower the length of time/amount dispensed by +/percent. 5. Press [ ] key to confirm the setting or modification. 6. The new dosing time/quantity setting is now activated. 7. Repeat steps 3 to 6 if the dispensing time/quantity is incorrect or if it needs changing for other products as well. Press [ ] or [ ] key to reach next menu or remove CHEF card Î coffee machine ready in normal operating mode. 4.5.1.7. Change on/off time The appliance can be programmed to switch itself on and off automatically, e.g. to save electricity. (This feature must be enabled by the service engineer if it is not available). 1. Insert CHEF card into the card reader. 2. Press [ ] or [ ] key until the following menu is displayed: on / off time execute `Decaf ` 3. Press [ ] key. switch on 00:00 ª Page 4-14 BASO-2 - 02.04 - V07 User Instructions 4. Set the hour at which the coffee machine is to come on using the [ ] or [ ] keys. switch on 23:00 5. Press [ ] key. 6. Set the minutes at which the coffee machine is to come on using the [ ] or [ ] keys. switch on 23:30 7. Press [ ] key. switch on switch off 8. 23:30 00:00 Set the hour at which the coffee machine is to turn off using the [ switch on switch off ] or [ 23:30 06:00 9. Press [ ] key. 10. Set the minutes at which the coffee machine is to turn off using the [ switch on switch off ] keys. ] or [ ] keys. 23:30 06:15 11. Press [ ] key. 12. Press [ ] or [ ] key to reach next menu, remove CHEF card Î coffee machine ready in normal operating mode. If the coffee machine switches itself off automatically, it can be switched on again at any time by pressing the [ ] key. In this event, the automatic on/off facility is interrupted for the duration of the cycle. (During the minute at which the coffee machine is programmed to switch itself off, it cannot be switched on. Wait until the next minute). The service engineer can activate separate automatic on/off times for each workday. For example, the coffee machine can be switched on automatically from Mondays to Fridays, remains off during the weekend but can be switched on again manually at any time. If all on/off values are set to zero, the timer is deactivated. 4.5.1.8. Change time 1. Insert CHEF card into the card reader. 2. Press [ ] or [ ] key until the following menu is displayed: change time execute ` Decaf ` 3. Press [ ] key. change time 12:00:00 4. 5. 6. 7. BASO-2 - 02.04 - V07 Set the hour using the [ ] or [ ] key. Confirm by pressing the [ ] key. Repeat steps 4 and 5 to set the minutes and seconds. Press [ ] or [ ] key to reach next menu, remove CHEF card Î coffee machine ready in normal operating mode. Page 4-15 User Instructions 4.5.1.9. Change date 1. Insert CHEF card into the card reader. 2. Press [ ] or [ ] key until the following menu is displayed: change date execute ` Decaf ` 3. Press [ ] key. change date 15.10.2001 4. 5. 6. 7. 4.5.1.10. Set the date using the [ ] or [ ] key. Confirm by pressing the [ ] key. Repeat steps 4 and 5 to set the month and the year. Press [ ] or [ ] key to reach next menu, remove CHEF card Î coffee machine ready in normal operating mode. Change PIN code 1. Insert CHEF card into the card reader. 2. Press [ ] or [ ] key until the following menu is displayed: change PIN-code execute `Decaf ` 3. Press key. PIN-Code 0000 `+/- ` ` Decaf `Æ 4. 5. 6. 7. Set the first digit of the new PIN code using the [ ] and [ ] keys. Confirm by pressing the [ ] key. Repeat steps 4 and 5 for each successive digit until the full PIN code is entered. Press [ ] or [ ] key to reach next menu, remove CHEF card Î coffee machine ready in normal operating mode. Pressing the [ ] key accepts existing settings. The PIN code is only activated if so programmed. The current PIN code is not displayed. 4.5.1.11. Service reminder The following optional message is only displayed if programmed: select product service wanted If this message was enabled by the installer for the CHEF card, it can be suppressed. 1. Insert CHEF card into the card reader. 2. Press [ ] or [ ] key until the following selection is displayed: service wanted service counter 45011 (Number is only an example) ª Page 4-16 BASO-2 - 02.04 - V07 User Instructions 3. Press [ ] key. service wanted delete? ‘Decaf’ 4. Press [ ] key. (The message is suppressed). If the “service wanted” reminder is programmed but cannot be suppressed using the CHEF card, the total number of coffees served and the total of all products may be queried from step 3 by holding the Decaf key pressed down. The service reminder message will continue to be displayed. 4.5.2. SAVE DATA card The SAVE DATA card is a backup card to which all the coffee machine data can be saved. Whenever settings are changed by the service engineer, the coffee machine requests the programmer to save the new settings on the SAVE DATA card. The SAVE DATA cards should be stored in a safe place where they can be found easily. Only replace SAVE DATA cards after prior agreement with the licensed after sales service. SAVE DATA A = Level A SAVE DATA B = Level B SAVE DATA Plus = All 4.5.2.1. to Version 1.04 to Version 1.04 from Version 1.05 Menu - Machine Î card Card Î machine At the end of every menu: Remove SAVE DATA card Î coffee machine ready in normal operating mode. 4.5.2.2. Save coffee machine data to card 1. Insert SAVE DATA card into the card reader. 2. Press [ ] or [ ] until the following menu is displayed: SAVE DATA machine Æ card 3. Press [ ] key to save the data from the coffee machine to the card: .. Save .. 4. A signal indicates that the data have been saved. The coffee machine returns to normal operating mode. select product 12:00 15.10.2001 5. Remove SAVE DATA card from the card reader. BASO-2 - 02.04 - V07 Page 4-17 User Instructions 4.5.2.3. Load machine data from card to coffee machine 1. Insert SAVE DATA card into the card reader. 2. Press [ ] or [ ] until the following menu is displayed: SAVE DATA card Æ machine 3. Press [ ] key to save the data from the card to the coffee machine: .. Load .. 4. A signal indicates that the data have been transferred. The date of the previous backup is displayed: 12:00 last backup 15.10.2001 5. Remove SAVE DATA card from the card reader: select product 12:00 15.10.2001 The coffee machine returns to normal operating mode. 4.6. Programming using optional chip cards The chip cards described in this chapter are available as optional features and are not included in the standard delivery package. You will find a list and a brief description of the available chip cards in chapter 2.6.2. Note: For all the functions described in this list, it is assumed that the coffee machine is ready for routine operation in normal operating mode. When a chip card is in the card reader, no products can be selected. 4.6.1. PROGRAM card In normal operating mode, the PROGRAM card is used for statistical purposes. If a payment system is installed, the requisite settings for payment mode are made using this card. 4.6.1.1. Menu - Enable/disable payment mode Switch prices MONEY card price levels 1+2 Change token price with or without MONEY cards price levels 1+2. Change product prices and article numbers (Only for external payment mode) Display MONEY sales Reset MONEY sales Display MASTER sales Reset MASTER sales Log on MASTER card Delete MASTER card table Enable/disable timer Change PIN code ª Page 4-18 BASO-2 - 02.04 - V07 User Instructions At the end of every menu: Remove PROGRAM card Î coffee machine ready in normal operating mode. Press [ ] or [ ] key to reach the next menu. 4.6.1.2. Programmable security level If the service engineer has programmed security levels 1 or 3 for the PROGRAM card, the PIN code must be entered each time the coffee machine is used. 1. Insert PROGRAM card into the card reader: PIN-Code 0000 ` +/- ` ` Decaf Æ` 2. 3. 4. 5. Set the first digit of the PIN code using the [ ] and [ ] keys. Confirm by pressing the [ ] key. Repeat steps 4 and 5 for each successive digit until the full PIN code is entered. Press [ ] or [ ] key to reach next menu, remove PROGRAM card Î coffee machine ready in normal operating mode. Pressing the [ ] key accepts existing settings. The PIN code is only activated if so programmed. The current PIN code is not displayed. 4.6.1.3. Enable/disable payment mode The licensed after sales service agent uses this function to enable or disable the programmed payment mode. It applies only to coffee machines connected to a payment system. 1. 2. Insert PROGRAM card into the card reader: Press [ ] or [ ] until the following menu is displayed: accounting mode ........ 3. 4. 4.6.1.4. Toggle enable and disable by pressing the [ ] key. Press the [ ] or [ ] key to reach next menu, remove PROGRAM card Î coffee machine ready in normal operating mode. Switch prices If all values are set to zero, the switch price function is automatically disabled and price level 1 activated. 1. Insert PROGRAM card into the card reader. 2. Press [ ] or [ ] until the following menu is displayed change price level execute ` Decaf ` 3. Press [ ] key. price – 1 00:00 4. Enter the number before the decimal point by pressing the [ 0-99). ] and [ ] keys (price 1 ª BASO-2 - 02.04 - V07 Page 4-19 User Instructions 5. Confirm by pressing the [ ] key. price – 1 xx:00 6. Enter the numbers after the decimal point by pressing the [ 0-99). 7. Confirm by pressing the [ ] key. ] and [ ] keys (price 1 price – 1 xx:xx price – 2 00:00 8. Enter the numbers before the decimal point by pressing the [ 2 0-99). 9. Confirm by pressing the [ ] key. ] and [ ] keys (Price price – 1 xx:xx price – 2 xx:00 10. Enter the numbers after the decimal point by pressing the [ ] and [ ] keys (Price 2 0-99). 11. Confirm by pressing [ ] key. 12. Press [ ] or [ ] to reach next menu item, remove PROGRAM card. insert card SAVE DATA / Key.. 13. If changed data are to be saved to the DATA SAVE card, insert the DATA SAVE card. ... Save … 14. Wait for the signal. credit operation 12:00 15.10.2001 15. If changed data are not to be saved to the DATA SAVE card, press [ 4.6.1.5. ] key. Change MONEY card price levels 1 + 2 1. Insert PROGRAM card into the card reader: 2. Press [ ] or [ ] until the following menu is displayed: change price select product 3. Press required product key. price level product price -1 0:00 4. Enter the first product price by pressing keys [ ] key. 5. Confirm by pressing the [ price level product price 6. 7. 8. 9. ] and [ ] (0-99.99). -2 0:00 Enter the second product price by pressing keys [ ] and [ ] (0-99.99). Confirm by pressing the [ ] key. Repeat steps 3 and 7 for each successive product price change. Press [ ] or [ ] to reach next menu, remove PROGRAM card Î insert card SAVE DATA / Key.. ª Page 4-20 BASO-2 - 02.04 - V07 User Instructions 10. If the changed data are to be saved on the DATA SAVE card, insert this card. ... Save … 11. Wait for the acoustic signal. credit operation 12:00 15.10.2001 12. If changed data are not to be saved to the DATA SAVE card, press [ 4.6.1.6. ] key Change token price with or without MONEY card price levels 1 + 2 1. Insert PROGRAM card into the card reader: 2. Press [ ] or [ ] until the following menu is displayed: change price select product 3. Press required product key. price level 1 Price ##.## 4. Enter the first product price by pressing keys [ ] and [ Enter 0.00 if MONEY card mode is not enabled. 5. Confirm by pressing the [ ] key. ] (0-99.99). price level 2 Price ##.## 6. Enter the second product price by pressing keys [ Enter 0.00 if MONEY card feature is not enabled. 7. Confirm by pressing the [ ] key. ] and [ ] (0-99.99). token tester number token # 8. 9. 10. 11. Enter the number of tokens that corresponds to the product price. Confirm by pressing the [ ] key. Repeat steps 3 and 9 for each successive product price change. Press [ ] or [ ] to reach next menu item, Remove PROGRAM card Î insert card SAVE DATA / Key.. 12. If the changed data are to be saved on the DATA SAVE card, insert this card. ... Save … 13. Wait for the acoustic signal. credit operation 12:00 15.10.2001 14. If the changed data are NOT to be saved on the DATA SAVE card, press the [ ] key. BASO-2 - 02.04 - V07 Page 4-21 User Instructions 4.6.1.7. Change product price and article number (for external CCI / CSI payment systems) 1. Insert PROGRAM card into the card reader: 2. Press [ ] or [ ] until the following menu is displayed: change price select product 3. Press required product key. price level 1 Price ##.## 4. Enter the first product price by pressing keys [ pressing the [ ] key. ] and [ ] (0-99.99). Confirm by ] and [ ] (0-99.99). price level 2 Price ##.## 5. Enter the second product price by pressing keys [ ] key. 6. Confirm by pressing the [ single product article no. 0 7. Enter the product article number by pressing keys [ 8. Confirm by pressing the [ ] key. ] and [ ] (0-99). double product article no. 0 9. Enter the product article number by pressing keys [ ] and [ ] (0-99). 10. Confirm by pressing the [ ] key. 11. Repeat steps 3 and 10 for each successive product price and/or article number change. 12. Press [ ] or [ ] to reach next menu item, remove PROGRAM card Î insert card SAVE DATA / Key.. 13. If the changed data are to be saved on the DATA SAVE card, insert this card. ... Save … 14. Wait for the acoustic signal. credit operation 12:00 15.10.2001 15. If the changed data are NOT to be saved on the DATA SAVE card, press the [ key. 4.6.1.8. ] Display MONEY sales 1. Insert PROGRAM card into the card reader: 2. Press [ ] or [ ] until the following menu is displayed: sale amount MONEY amount 0.00 3. Press [ ] or [ ] to reach next menu, remove PROGRAM card Î coffee machine is ready in normal operating mode. Page 4-22 BASO-2 - 02.04 - V07 User Instructions 4.6.1.9. Reset MONEY sales 1. Insert PROGRAM card into the card reader: 2. Press [ ] or [ ] until the following menu is displayed: sale amount MONEY amount 0.00 3. Press [ ] key. sale amount MONEY delete ? ` Decaf ` 4. Press [ ] key. ... Done … 5. Press [ ] or [ ] to reach next menu, remove PROGRAM card Î coffee machine is ready in normal operating mode. 4.6.1.10. Display MASTER card 1. Insert PROGRAM card into the card reader: 2. Press [ ] or [ ] until the following menu is displayed: sale amount MASTER amount 0.00 3. Press [ ] or [ ] to reach next menu, remove PROGRAM card Î coffee machine is ready in normal operating mode. 4.6.1.11. Reset MASTER card 1. Insert PROGRAM card into the card reader: 2. Press [ ] or [ ] until the following menu is displayed: sale amount MASTER amount 0.00 3. Press [ ] key. sale amount MASTER delete ? ` Decaf ` 4. Press [ ] key. ... Done … 5. Press [ ] or [ ] key to reach next menu, remove PROGRAM card Î coffee machine is ready in normal operating mode. 4.6.1.12. Log on MASTER card 1. Insert PROGRAM card into the card reader: 2. Press [ ] or [ ] until the following menu is displayed: log on MASTER execute ` Decaf ` ª BASO-2 - 02.04 - V07 Page 4-23 User Instructions 3. Press [ ] key. remove card 4. Remove PROGRAM card: insert card MASTER/PROGRAM 5. Insert MASTER card. card logged on remove card 6. Remove MASTER card. insert card MASTER/PROGRAM If other MASTER cards are to be logged on, repeat steps 5 and 6 several times. 7. Press [ ] or [ ] to reach next menu, remove PROGRAM card Î coffee machine is ready in normal operating mode. Up to 20 cards can be programmed. 4.6.1.13. Delete MASTER table 1. Insert PROGRAM card into the card reader. 2. Press [ ] or [ ] until the following menu is displayed: delete MASTER execute ` Decaf ` 3. Press [ ] key. delete MASTER delete ? ` Decaf ` 4. Press [ ] key. delete MASTER .. Done .. If you do not wish to delete the table, Press [ ] or [ ] to reach next menu, remove PROGRAM card Î coffee machine is ready in normal operating mode. 4.6.1.14. Change PIN code 1. Insert PROGRAM card into the card reader: 2. Press [ ] or [ ] until the following menu is displayed: change PIN-code execute ` Decaf ` 3. Press [ ] key. change PIN-code execute ` Decaf ` ª Page 4-24 BASO-2 - 02.04 - V07 User Instructions 4. Press [ ] key. PIN-Code 0000 ` +/- ` ` Decaf ` 4.6.2. 5. 6. 7. 8. Set the first digit of the new PIN code using keys [ ] and [ ] Confirm by pressing the [ ] key. Repeat steps 5 and 6 for each successive digit until the full PIN code is entered. Press [ ] or [ ] to reach next menu, remove PROGRAM card Î coffee machine ready in normal operating mode.. Pressing the [ ] key accepts existing settings. The PIN code is only activated if so programmed. The current PIN code is not displayed. In the event of an incorrect entry, repeat steps 3 to 7. KEY BLOCK card The KEY BLOCK card enables you to enable and disable product keys. 4.6.2.1. Menu - 4.6.2.2. Disable Enable Disable keys 1. Insert KEY BLOCK card into the card reader. 2. All of the enabled product keys light up red: lock buttons select product 3. Press the product key you wish to disable. The light in the relevant key goes out. 4. Remove KEY BLOCK card. The product key is now disabled. Disable all product keys Î Press [ ] key (display LED lights up). Several keys can be disabled simultaneously. Non-programmed product keys do not light up when the KEY BLOCK card is inserted and cannot be disabled/enabled. 4.6.2.3. Enable keys 1. Insert KEY BLOCK card into the card reader. 2. All of the product keys which do not light up red are disabled: lock buttons select product ª BASO-2 - 02.04 - V07 Page 4-25 User Instructions 3. Press the product key you wish to enable. The key lights up red. 4. Remove the KEY BLOCK card. If all the product keys had previously been disabled using the [ ] key, this action can be cancelled: Î Press [ ] key: the disabled product keys are enabled again. Several keys can be enabled simultaneously. Non-programmed product keys do not light up when the KEY BLOCK card is inserted and cannot be disabled/enabled. 4.6.3. COFFEE TEST card The COFFEE TEST card enables you to test the amount of coffee ground and the grinding time per coffee product. This function offered by the COFFEE TEST card will also be appreciated by the coffee supplier when adapting a new blend to the coffee machine. 4.6.3.1. Menu Coffee test. At the end of every menu: Remove COFFEE TEST card Î coffee machine is ready in normal operating mode. 4.6.3.2. Ground coffee test program 1. Insert COFFEE TEST card into the card reader: CHEF grinder test remove container 2. Remove grouts container Î Coffee machine enters infusion phase: grinder test select product 3. Place flat container in the container shaft underneath the coffee machine. 4. Press the key of the coffee product to be tested Î the ground coffee falls into the container. grinder test grind quantity + 0 % 5. Check the amount of ground coffee. Raise the % amount by pressing [ ]. Lower the % amount by pressing [ ]. The new setting is automatically considered as 100% once the procedure is terminated. 6. Confirm by pressing the [ ] key. grinder test select product Repeat steps 3 to 6 to test other products. 7. Put grouts container back. 8. Remove COFFEE TEST card Î coffee machine returns to normal operating mode: select product 12:00 15.10.2001 Page 4-26 BASO-2 - 02.04 - V07 Cleaning 5. Contents Chapter Text 5 CLEANING.......................................................................................... 5-2 5.1 Important general notes on cleaning..............................................................................................5-2 5.2 5.2.1 5.2.2 5.2.3 Rinsing in between:..........................................................................................................................5-3 Rinsing the coffee pipes .....................................................................................................................5-3 Rinsing the milk pipes (fridge option) .................................................................................................5-3 Steam cleaning the milk pipes (fridge option).....................................................................................5-4 5.3 5.3.1 5.3.2 Daily cleaning coffee machine with fridge .....................................................................................5-5 Inside Cleaning ...................................................................................................................................5-5 Outside cleaning ...............................................................................................................................5-15 5.4 5.4.1 5.4.2 5.4.3 Weekly cleaning coffee machine with fridge ...............................................................................5-16 Dismantling and cleaning the milk pipe system................................................................................5-16 Reassembling / Major cleaning ........................................................................................................5-20 Table for reassembling the milk pipe system ...................................................................................5-26 5.5 Defrosting the fridge ......................................................................................................................5-27 5.6 Fridge maintenance........................................................................................................................5-27 5.7 5.7.1 5.7.2 Cleaning coffee machine (without fridge) ....................................................................................5-28 Inside Cleaning .................................................................................................................................5-28 Outside cleaning ...............................................................................................................................5-33 5.8 5.8.1 5.8.2 Cleaning instructions for cappuccinatore CPT (option).............................................................5-34 Daily cleaning of CPT (option)..........................................................................................................5-35 Weekly cleaning of CPT (option) ......................................................................................................5-35 BASO-2 - 01.05 - V07 Page Page 5-1 Cleaning 5 CLEANING 5.1 Important general notes on cleaning Danger of burns! Never reach inside the machine during the automatic cleaning and do not work underneath the beverage outlet. Watch for sharp edges when you clean. Danger! Never clean the machine with a hose, a high pressure cleaner or steam cleaner. Never immerse the machine in water! Attention! Please follow the generally valid hygiene HACCP regulations! • Always wash and disinfect your hands carefully before you clean the machine! • Never refill milk. • Always remove leftovers from the milk container. • Always clean the milk container thoroughly before filling it with fresh milk. • Only use milk that is no warmer than 3°C - 5°C. • Clean the milk container every day. • Replace the milk in the milk container with fresh milk once a day. • Don’t use raw milk. Use only pasteurized or ultrahigh temperature treated (UHT) milk. • Empty the milk container if the machine will not be used for more than 24 hours. Fill the milk container with fresh milk only just before use. • Fill the milk container with fresh milk only. • Make sure that the fridge door is closed during cleaning! • Never use the milk container for cleaning and the cleaning container for milk! • Use only clean, cold water for automatic self-cleaning and follow the measuring instructions for the cleaning agent as well as the cleaning safety regulations on the detergent package! • Never use abrasives, scrubbers or cleaning tools made of metal! • Use only cleaning agents that have been recommended by the manufacturer. • Read the information on cleaning agents in Chapter 10.2 “Appendix” and/or the enclosed safety data sheets carefully. • Ask the manufacturer or an after sales service organization, authorized by the manufacturer, for advice on the cleaning tools you should use. Note: • • Please note that some of the parts may differ from the ones in the pictures. All the machine’s product outlets will be blocked during the cleaning cycle. ª Page 5-2 BASO-2 - 01.05 - V07 Cleaning • • • • • The machine cleaning program consists of an automatic self-cleaning cycle and a manual cycle. Together they form an operation cycle. In order that all dispensed beverages obtain the best possible quality, it is absolutely necessary to clean the machine and the existing options thoroughly on a daily and weekly basis. You can use a commercial dish detergent and cold, clean water to clean the milk container during the rinsing cycle. Measure the milk temperature every day with a clean thermometer (maximum 5 ° C) and make a note of the range in a chart. If the milk’s temperature is too high: Check that the fridge door is tightly closed. Check the temperature control setting. Chapter 7.1.5.2 “Regulating the fridge’s temperature“, page 7-7. Check the machine’s power supply (mains plug, fuse). 5.2 Rinsing in between: 5.2.1 Rinsing the coffee pipes In between rinsing is available in normal and payment mode. You can rinse in between as required. Hold the [ / ] button down for 5 seconds (cleaning button). Display message: Cleaning Container entfernen Press briefly on the [ / ] button (approx. 1 cup of water). Rinsing Selection locked 12:00 Rinsing 15.10.2001 The machine is now ready for use. Note: A service technician can program an automatic rinsing cycle so that the automatic rinsing is triggered at regular intervals (0-300 min) without the products being dispersed. You will hear six short continuous beeps, just before the automatic rinsing is activated, to alert you that the automatic rinsing is in use. 5.2.2 Rinsing the milk pipes (fridge option) Attention! It is absolutely necessary to rinse the milk pipes each time a milk product has been used to provide and maintain a bacteria-free and healthy environment. Note: There are two variants available that can be adjusted by an after sales service organization, authorized by the manufacturer. ª BASO-2 - 01.05 - V07 Page 5-3 Cleaning Danger of burns! Do not reach underneath the beverage outlet during the automatic rinsing! 1. The milk pipes are rinsed automatically: Rinsing is registered after each milk product serving and is automatically activated after all pre-selected products have been served. A time delay (standard time 30 seconds) is programmed between the last product serving and the automatic rinsing. If a new product is chosen in this time period, the product will be served immediately, and the time delay reset at zero. When the rinsing is activated, the product choice will be blocked for 12 seconds (standard time). The [ / ] button (= cleaning button) is blinking Display message: Rinsing Selection locked 2. The milk pipes are rinsed manually: Rinsing is registered after each milk product serving. Display message: select product Please rinse cappuc. This message will be displayed until the rinsing has started. It is still possible to serve products. [ / ] Press the [ ] button to start the rinsing. When the rinsing is activated, the product choice will be blocked for 12 seconds (standard time). Display message: Rinsing Selection locked 5.2.3 Steam cleaning the milk pipes (fridge option) Danger of burns! Do not reach underneath the beverage outlet during the steam cleaning process! Steam cleaning is a quick milk pipe cleaning. If the rinsing (Chapter 5.2.2 "Rinsing the milk pipes”, page 5-3) did not activate, then there is still milk left in the pipes that could impair the quality of the next product. Steam cleaning will prevent this from happening, because two short bursts of steam are released five seconds after the milk product is served. This guarantees that each product is served with the right color and taste. Note: You can ask an after sales service organization, authorized by the manufacturer, to have the steam cleaning activated or deactivated after products have been served. However, the steam cleaning cannot be deactivated during cleaning and rinsing. Page 5-4 BASO-2 - 01.05 - V07 Cleaning 5.3 Daily cleaning coffee machine with fridge 5.3.1 Inside Cleaning 1 1. Wash your hands carefully. Protect open wounds. You may use protective gloves. 2 2. Open the coffee machine’s service door (panel) while pulling the left side forwards and swinging it completely open. Display message: Selection locked door open 3 3.1 3.2 a b 3.3 Swing the outlet cover (a) upwards. Take the outlet insert (b) out by pulling downwards. Clean the outlet insert (b) with a soft brush. Then rinse with plenty of clean, lukewarm water. ª BASO-2 - 01.05 - V07 Page 5-5 Cleaning Daily cleaning coffee machine with fridge 4 4. Pull the foamer head (a) out. 5. Remove the tube adapter (a) from the foamer head’s middle part. 6.1 Remove the expander (a) from the T-piece (b). 7.1 Remove the expander cover (a) and the baffle (b) from the expander (c). Remove the milk residues under running warm water with a soft brush. Check if the washers (d) are intact. a 5 a b 6 a b 7 1. a 7.2 7.3 Order number packing rings (set): d: 065'232 c b d ª Page 5-6 BASO-2 - 01.05 - V07 Cleaning Daily cleaning coffee machine with fridg 7 .4 7.4 7.5 b 7.6 Place the baffle (b) on the expander (c). Seal off the smaller opening on the expander (c) with your thumb. Fill the expander with water. c 7 .7 7.7 a 7.7 b 7.8 Place the expander cover (a) on the expander (c). Now press on the cover (a) with your finger: A fine water jet will escape from the baffle’s hole. If this does not happen, clean the hole with a fine solid object and repeat from step 7.4 to 7.7. c 8 a 1 8.1 8.2 2 8.3 8.4 8.5 b 3 c Dismantle the foamer head as shown in the picture. Clean the foamer head parts with a soft brush under running water. Check whether the packing rings (a and b) are still intact. Reassemble the foamer head. Make sure you know where the outlet openings are located on the foamer head’s lower part! Order number packing rings: a: 063'499 b: 063'496 1 2 3 a b c Foamer head cover Foamer head’s middle part Foamer head’s lower part Packing rings for foamer head’s cover Packing rings for foamer head’s lower part Outlet openings ª BASO-2 - 01.05 - V07 Page 5-7 Cleaning Daily cleaning coffee machine with fridge a (blue) b (white) 9 Attention! Make sure that the tubes (a and b) and the tube adapter’s plug-ins are connected according to color as shown in the picture. c white 9. Put the tube adapter (c) back into the foamer head (d). 10. Push the foamer head back on the two plugins (a), until it reaches the stop plate (b). d black 10 b a 11 a 11.1 Connect the expander (b) and the baffle (a) with the T-piece (c). 11.2 Place the T-piece in the retainer (d). b c d 12 .1 a b 12.1 Place the coffee outlet cup (b) in the outlet cover (a). With one hand fix the coffee outlet cup (b) to this position. Then move the coffee outlet cup (b) with your other hand until it … ª Page 5-8 BASO-2 - 01.05 - V07 Cleaning Daily cleaning coffee machine with fridg 12 .2 12.2 ... rests at the slit guides (d) between the outlet cover’s (a 12.1) guide surfaces (c). c d 12 .3 e 12.3 Now push the coffee outlet cup (g) into the guides with your thumb (as outlined in step 12.2) until it stops. Before you lift the outlet cover (f) down to the working position, make sure that the coffee outlet cup’s (g) two outlet openings (e) protrude from the outlet cover in two equally long pieces. f g 12 .4 12.4 Correct Both outlet openings (a) are directed strait down and are equally long. Note: Only when the coffee outlet cup is inserted correctly coffee products can be served properly. correct a 12 .5 12.5 Wrong Both outlet openings (b) are slightly sloping to the right or the left. The outlet openings are not of the same length. wrong b ª BASO-2 - 01.05 - V07 Page 5-9 Cleaning Daily cleaning coffee machine with fridge 13 13. Close the coffee machine’s service door (panel). Make sure that the service door is tightly closed. Display message: Select product 12:00 15.10.2001 14 14.1 Open the door to the fridge. 14.2 Remove the milk container from the fridge. 14.3 Clean the milk container with a dish detergent. Then rinse the milk container with plenty of cold, running water and let dry. Attention! Never use abrasives, cleaning agents, chemicals, soap, scrubbers or cleaning tools made of metal! 15 15.1 Read the following instructions before you continue cleaning. Danger of corrosion! It is crucial that you read the measuring instructions and danger notices on the detergent container’s label. Read chapter 10.2.1 “Cleaning agents”, page 10-3. Never mix the “weakly cleaning agent” with the “daily cleaning agent”. Only use “daily cleaning agent” for the daily cleaning. Attention! Put water in the cleaning container first and then the cleaning agent. 15.2 Fill the brown cleaning container with 4 liters of clean, cold water. 15.3 Put the “daily cleaning agent“ carefully in the cleaning container. ª Page 5-10 BASO-2 - 01.05 - V07 Cleaning Daily cleaning coffee machine with fridg 16 17 16. Place the brown milk container in the fridge and close the door. 17. Press the stop button (1) and push the outlet (2) upwards into the highest position. 18. Press the [ / ] cleaning button down for approx. six seconds. 2 1 18 Display message: Cleaning remove container 19 19. Pull the grouts container out within 6 seconds. Otherwise the machine goes back to its normal stand-by mode. The LED on the [ Display message: / ] button blinks. clean: re-insert cleaning container ª BASO-2 - 01.05 - V07 Page 5-11 Cleaning Daily cleaning coffee machine with fridge 20 Danger of injury! With the next step the brewing unit is moved into the suitable cleaning position. For safety reasons always use both hands to press the buttons [ / ] and [ / ] and do not place your hands in the machine! Make sure that no one is in the danger zone and be the only one to press the buttons [ / ] and [ / ]! 21 22 20. Press the two buttons [ / ] and [ / ] on the panel simultaneously with both hands. 21. Clean the brewing unit and its surrounding space with a brush. 22.1 Clean the coffee grouts container with a dish detergent and then dry the surfaces with a clean, dry paper cloth. 22.2 Re-insert the grouts container. The LED on the [ Display message: / ] button blinks. Cleaning insert tablet 23 23. Drop a cleaning tablet, that has been recommended by the manufacturer or an after sales service organization, authorized by the manufacturer, in the filler funnel. Attention! It is crucial that you read the measuring instructions and danger notices on the detergent container’s label. Read chapter 10.2.3 “Cleaning agents for the coffee machine”, page 10-5. ª Page 5-12 BASO-2 - 01.05 - V07 Cleaning Daily cleaning coffee machine with fridg 24 .1 Danger of burns! In the next step the machine will automatically start the self-cleaning cycle. Never reach underneath the beverage outlet! The cleaning cycle starts immediately after the button is pressed. 24.1 The LED on the [ / ] button blinks. Display message: Cleaning cleaning agent 24.2 Press the [ / ] cleaning button. Display message: Cleaning Selection locked 24 .2 Danger of burns! Never reach underneath the beverage outlet during the self-cleaning cycle! Don’t work in the beverage outlet area! The self-cleaning cycle lasts approx. 6 minutes. The following display message shows when the self cleaning cycle has finished: Cleaning Please rinse cappuc. 25 25.1 Remove the cleaning container from the fridge. Empty it and rinse it with clean, cold running water. 25.2 Place the empty cleaning container in the fridge. Attention! It’s very important that you empty the cleaning container; otherwise it will overflow and cause material damage. ª BASO-2 - 01.05 - V07 Page 5-13 Cleaning Daily cleaning coffee machine with fridge 26 Danger of burns! In the next step the machine will automatically start the self-cleaning cycle. Keep away from the beverage outlet! The cleaning cycle starts immediately after the button is pressed. 26. Press the [ / ] cleaning button. The rinsing cycle lasts approx. 4 minutes. Note: When you press the [ / ] button briefly, you will activate the coffee machines automatic switch-off, which will stop the coffee machine after the self-cleaning cycle has finished. The LED on the [ / ] button turns red. When you press the [ / ] button once more, the automatic switch-off will again be deactivated. The following display message shows when the rinsing cycle is finished: Select product 12:00 15.10.2001 27 27.1 Remove the cleaning container from the fridge. Empty it and rinse it with clean, cold running water. 27.2 Clean the tubes with a clean paper cloth. Attention! Clean the fridge’s inside and service room with a clean paper cloth, clean, lukewarm water and a dish detergent. Clean the milk container with a dish detergent every day. Rinse the milk container thoroughly with running water and let it dry! Fill the milk container with fresh milk only just before use. ª Page 5-14 BASO-2 - 01.05 - V07 Cleaning Daily cleaning coffee machine with fridg 5.3.2 Outside cleaning 28 28. Display message! Don’t clean the outside until the rinse cycle has finished. Attention! Never clean the outside during the cleaning or rinsing cycle! Select product 12:00 15.10.2001 Attention! Never use scrubbers, abrasives, chemicals and cleaning tools made of metal! 29 29.1 Lift the drip grid out of the drip tray. 29.2 Clean the drip grid with a dish detergent and a soft brush. Then rinse the drip grid with clean water. 29.3 Clean the exterior surfaces and the drip tray with a dish detergent. 30 30.1 Rinse the drip tray of machines with water discharge or wastewater tank with plenty of warm water. 30.2 Wipe the cleaned surfaces with a clean, moist paper cloth. 30.3 Then dry the surfaces with a clean, dry paper cloth. 30.4 Put the drip grid back in the drip tray. 31 31. Finally dry all exterior surfaces with a clean, dry paper cloth. Note: For cleaning and fridge maintenance please see: Chapter 5.6 Fridge maintenance, page 5-27 BASO-2 - 01.05 - V07 Page 5-15 Cleaning WeeklWeekly cleaning coffee machine with fridgey cleaning coffee machine with fridg 5.4 Weekly cleaning coffee machine with fridge 5.4.1 Dismantling and cleaning the milk pipe system 1 1. Wash your hands carefully. Protect open wounds. You may use protective gloves. 2 2.1 2.2 Open the door to the fridge. Remove the milk container from the fridge. 3 3.1 Open the service door to the fridge. Display message: Selection locked door open 3.2 3.3 Push the tube holder out of the guide. Rinse the tube holder with clean running water. ª Page 5-16 BASO-2 - 01.05 - V07 Cleaning Weekly cleaning coffee machine with fridge 4 5 4.1 Clean the recess of the tube holder thoroughly with a clean paper cloth. 5.1 Remove the tubes from the air valve’s (b) nipples (a). Press the ejector (c) downwards and pull the air valve (b) out of the holder horizontally. 5.2 a b 5.2 6 c 6. Open the coffee machine’s service door (panel) while pulling the left side forwards and swinging it completely open. Display message: Selection locked door open 7 7.1 7.2 Pull the tubes that lead to the fridge out of the machine. Close the door to the fridge. ª BASO-2 - 01.05 - V07 Page 5-17 Cleaning Weekly cleaning coffee machine with fridge 8 8.1 8.2 a 8.3 b 9 Swing the outlet cover (a) upwards. Take the outlet insert (b) out by pulling downwards. Clean the outlet insert (b) with a soft brush. Then rinse it with plenty of clean, lukewarm water. 9. Pull the foamer head (a) out. 10. Remove the tube insert (a) from the foamer head’s middle part (b). a 10 a b 11 11.1 Remove the expander (a) from the T-piece (b). a b ª Page 5-18 BASO-2 - 01.05 - V07 Cleaning Weekly cleaning coffee machine with fridge 12 12.1 Lift the T-piece (a) upwards out of the holder. a b 13 1 a 2 3 b 13.1 Dismantle the foamer head as shown in the picture. 13.2 Clean the foamer head parts with a soft brush under running water. 13.3 Check whether the packing rings (a and b) are still intact. Order number packing rings: a: 063'499 b: 063'496 c 1 2 3 a b c 14 Foamer head cover Foamer head’s middle part Foamer head’s lower part Packing rings for foamer head’s cover Packing rings for foamer head’s lower part Outlet openings 1. a c b 14.1 Remove the expander cover (a) and the baffle (b) from the expander (c). 14.2 Remove the milk residues under running warm water with a soft brush. 14.3 Check if the packing rings (d) are intact. Order number packing rings (set): d: 065232 d ª BASO-2 - 01.05 - V07 Page 5-19 Cleaning Weekly cleaning coffee machine with fridge 15 15. Read the following instructions before you continue cleaning. Attention! It is crucial that you read the measuring instructions and danger notices on the detergent container’s label. Read chapter 10.2.2 “Cleaning agents”, page 10-4. Danger! Never mix the “weakly cleaning agent” with the “daily cleaning agent”. Use only “weekly cleaning agent” for the weekly cleaning. Attention! Fill water in the container first, then add the cleaning agent. 16 16.1 Put the “weekly cleaning agent “ carefully in the container filled with cold water. 16.2 Place the dismantled parts in the container for at least 10 minutes. 16.3 Then clean the parts thoroughly with a soft brush. 16.4 Then rinse all parts thoroughly with clean, warm running water. 16.5 Reassemble the foamer head. 16.6 Make sure you know where the outlet openings are located on the foamer head’s lower part! 5.4.2 Reassembling / Major cleaning 17 .1 b 17.1 Place the baffle (b) on the expander (c). 17.2 Seal off the smaller opening on the expander (c) with your thumb. 17.3 Fill the expander with water. c ª Page 5-20 BASO-2 - 01.05 - V07 Cleaning Weekly cleaning coffee machine with fridge 17 .4 a b 17.4 Place the expander cover (a) on the expander (c). 17.5 Now press on the cover (a) with your finger: A fine water jet will escape from the baffle’s hole. 17.6 If this does not happen, clean the hole with a fine solid object and repeat from step 17.3 to 17.5. c 18 .1 a b (weiss) c 18 .4 a a b c 18.1 Start mounting the air valve with the white tube (b). 18.2 Lead the tube behind the ejector (b) and through the rear hole of the tube guide (c). 18.3 Lead the blue tube through the tube guide's (c) front hole. 18.4 Press the ejector (d) downwards and push the air valve (b) without pressure onto the two tube ends. 18.5 Press the upper lever (a) to the right and push the air valve (b) back until the ejector (d) engages. d 19 a 19.1 Pull the tubes (b) slightly downwards and push the tube holder (a) in the guide on the fridge completely back. 19.2 Close the service door to the fridge. b Display message: Select product 12:00 15.10.2001 ª BASO-2 - 01.05 - V07 Page 5-21 Cleaning Weekly cleaning coffee machine with fridge 20 20.1 Connect the short white tube (a) with the tube nipple to the milk baffle (b) of the Tpiece (c) (connection to the fridge). 20.2 Connect the long white tube (d) with the tube adapter to the tube nipple of the Tpiece (c) (connection to the coffee machine). Coffee machine Fridge Milk a b c d 21 a b e 21.1 Place the blue tube (f) in the retainer (d). 21.2 Place the white tube (e) with the T-piece (c) in the retainer (d). 21.3 Pull the tubes with the tube adapter to the foamer head in the coffee machine. 21.4 Connect the expander (a) and the baffle (b) with the T-piece (c). c f d 22 a 22.1 Connect the white tube (a) to the rear nipple of the foamer head (c). 22.2 Connect the white tube (a) to the rear nipple of the foamer head (c). b c a (blue) b (white) 23 Attention! Make sure that the tubes (a and b) and the tube adapter are connected according to color as shown in the picture. c weiss 23. Put the tube adapter (c) back into the foamer head (d). d schwarz ª Page 5-22 BASO-2 - 01.05 - V07 Cleaning Weekly cleaning coffee machine with fridge 24 b 24. Push the foamer head back on the two plugins (a), until it reaches the stop plate (b). a 25 .1 a b 25 .2 25.1 Place the coffee outlet cup (b) in the outlet cover (a). With one hand fix the coffee outlet cup (b) to this position. Then move the coffee outlet cup (b) with your other hand until it … 25.2 ... rests at the slit guides (d) between the outlet cover’s (a 25.1) guide surfaces (c). c c d d 25 .3 e 25.3 Now push the coffee outlet cup (g) into the guides with your thumb (as outlined in step 25.2) until it stops. Before you lift the outlet cover (f) down to the working position, make sure that the coffee outlet cup’s (g) two outlet openings (e) protrude from the outlet cover in two equally long pieces. f g ª BASO-2 - 01.05 - V07 Page 5-23 Cleaning Weekly cleaning coffee machine with fridge 25 .4 25.4 Correct Both outlet openings (a) are directed strait down and are equally long. Note: Only when the coffee outlet cup is inserted correctly coffee products can be served properly. correct a 25 .5 25.5 Wrong Both outlet openings (b) are slightly sloping to the right or the left. The outlet openings are not of the same length. wrong b 26 26. Close the coffee machine’s service door (panel). Make sure that the service door is tightly closed. Display message: Select product 12:00 15.10.2001 27 27. Read the following instructions before you continue cleaning. Attention! It is crucial that you read the measuring instructions and danger notices on the detergent container’s label. Read chapter 10.2.2 “Cleaning agents”, page 10-4. Danger! Never mix the “weakly cleaning agent” with the “daily cleaning agent”. Use only “weekly cleaning agent” for the weekly cleaning. ª Page 5-24 BASO-2 - 01.05 - V07 Cleaning Weekly cleaning coffee machine with fridge 28 28. Place the brown milk container in the fridge and close the door. 29 29. Check the fitting of the tube system as shown in picture A, page 5-26. 30 30. Carry out step 17 to 31 of the “daily cleaning.” ª BASO-2 - 01.05 - V07 Page 5-25 Cleaning Weekly cleaning coffee machine with fridge 5.4.3 Table for reassembling the milk pipe system A 1 2 b 5 3 c a 6 front 4 7 rear c d e 7 6 8 B Legend picture A 1. Air valve 2. Baffle 3. Expander 4. T-piece 5. Coffee outlet cup 6. Tube blue 7. Tube white 8. Foamer head z z z z a) Tube connection from air valve to foamer head b) Tube connection from air valve to T-piece c) Tube connection from T- piece to foamer head d), e) Tube connection from air valve to fridge Coffee machine Fridge Milk Legend picture B Assembly plan “T-piece with expander and baffle“ ª Page 5-26 BASO-2 - 01.05 - V07 Cleaning 5.5 Defrosting the fridge Note: The fridge has to be defrosted when the layer of ice is more than 3 mm thick. This is an important prerequisite, if the machine is to operate smoothly. To defrost completely, turn the thermostat control anti-clockwise until it stops. The fridge is now turned off. Attention! Never remove the ice with pointed and sharp objects or with objects made of metal! It can damage the cooling plates! After defrosting the fridge, put it back in operation by setting the thermostat at the right temperature (3-5 °C). + Chapter 7.1.5.2 “Regulating the fridge’s temperature“, page 7-7. 5.6 Fridge maintenance Electric shock! If the fridge’s power supply is not connected to the coffee machine, pull the mains plug out of the socket! There is danger of injury from electric shock! Outside cleaning: Clean the fridge outside with a dish detergent. Wipe the cleaned surfaces with a moist, clean cloth without detergent. Then dry the surfaces with a clean, dry cloth. Do not use abrasives. Inside cleaning: Remove the milk container from the fridge and clean it. Clean the fridge with soda or vinegar in lukewarm water. Wipe the cleaned surfaces with a moist, clean cloth without detergent. Then dry the surfaces with a clean, dry cloth. Never use abrasives, cleaning agents or soap. General: To avoid a build-up of mould and unpleasant odors when the fridge is idle for an extended period of time please prepare as follows: Empty the fridge completely, clean the inside and the sealing on the door and leave the door slightly open. Chapter 4.4.9, “Termination operation”, page 4-10 Picture. C The picture shows the fridge with the door open. Note: Please note that the fridge should be turned on at least one hour before use, so that the cooling level (3 - 5 °C) is ready for operation. BASO-2 - 01.05 - V07 Page 5-27 Cleaning 5.7 Cleaning coffee machine (without fridge) 5.7.1 Inside Cleaning 1 1. Wash your hands carefully. Protect open wounds. You may use protective gloves. 2 2. Open the coffee machine’s service door (panel) while pulling the left side forwards and swinging it completely open. Display message: Selection locked door open 3 3.1 3.2 a b 3.3 Swing the outlet cover (a) upwards. Take the outlet insert (b) out by pulling downwards. Clean the outlet insert (b) with a soft brush. Then rinse with plenty of clean, lukewarm water. ª Page 5-28 BAKML SM-2 - 01.05 - V07 Cleaning Cleaning coffee machine (without fridge) 4 .1 4.1 Place the coffee outlet cup (b) in the outlet cover (a). With one hand fix the coffee outlet cup (b) to this position. Then move the coffee outlet cup (b) with your other hand until it … 4.2 ... rests at the slit guides (d) between the outlet cover’s (a 12.1) guide surfaces (c). 4.3 Now push the coffee outlet cup (g) into the guides with your thumb (as outlined in step 12.2) until it stops. Before you lift the outlet cover (f) down to the working position, make sure that the coffee outlet cup’s (g) two outlet openings (e) protrude from the outlet cover in two equally long pieces. 4.4 Correct a b 4 .2 c d 4 .3 e f g 4 .4 Both outlet openings (a) are directed strait down and are equally long. Note: Only when the coffee outlet cup is inserted correctly coffee products can be served properly. correct a ª BASO-2 - 01.05 - V07 Page 5-29 Cleaning Cleaning coffee machine (without fridge) 4 .5 4.5 Wrong Both outlet openings (b) are slightly sloping to the right or the left. The outlet openings are not of the same length. wrong b 5 5. Close the coffee machine’s service door (panel). Make sure that the service door is tightly closed. Display message: Select product 12:00 15.10.2001 6 6. Press the stop button (1) and push the outlet (2) upwards into the highest position. 7. Press the [ / ] cleaning button down for approx. six seconds. 2 1 7 Display message: Cleaning remove container ª Page 5-30 BASO-2 - 01.05 - V07 Cleaning Cleaning coffee machine (without fridge) 8 8. Pull the grouts container out within 6 seconds. Otherwise the machine goes back to its normal stand-by mode. The LED on the [ Display message: / ] button blinks. Cleaning cleaning container Danger of injury! 9 10 11 With the next step the brewing unit is moved into the appropriate cleaning position. For safety reasons always use both hands to press the buttons [ / ] and [ / ] and do not reach into the machine! Make sure that no one is in the danger zone and be the only one to press the [ / ] and [ / ] buttons! 9. Press the two buttons [ / ] and [ / ] on the panel simultaneously with both hands. 10. Clean the brewing unit and its surrounding space with a brush. 11.1 Clean the coffee grouts container with a dish detergent and then dry the surfaces with a clean, dry paper cloth. 11.2 Re-insert the grouts container. The LED on the [ Display message: / ] button blinks. Cleaning insert tablet ª BASO-2 - 01.05 - V07 Page 5-31 Cleaning Cleaning coffee machine (without fridge) 12 12. Drop a cleaning tablet, that has been recommended by the manufacturer or an after sales service organization, authorized by the manufacturer, in the filler funnel. Attention! It is crucial that you read the measuring instructions and danger notices on the detergent container’s label. Read chapter 10.2.3 “Cleaning agents for the coffee machine”, page 10-5. 13 .1 Danger of burns! In the next step the machine will automatically start the self-cleaning cycle. Keep away from the beverage outlet! The cleaning cycle starts immediately after the button is pressed. 13.1 The LED on the [ / ] button blinks. Display message: Cleaning cleaning agent 13.2 Press the [ / ] cleaning button. Display message: Cleaning Selection locked 13 .2 Danger of burns! Never reach underneath the beverage outlet during the self-cleaning cycle! Don’t work in the beverage outlet area! The self-cleaning cycle lasts approx. 6 minutes. The following display message shows when the self cleaning cycle has finished: Cleaning Please rinse cappuc. ª Page 5-32 BASO-2 - 01.05 - V07 Cleaning Cleaning coffee machine (without fridge) 5.7.2 Outside cleaning 14 14. Display message! Do not clean the outside until the rinsing cycle has finished. Attention! Never clean the outside during the cleaning or rinsing cycle! Select product 12:00 15.10.2001 Attention! Never use scrubbers, abrasives, chemicals and cleaning tools made of metal! 15 16 17 15.1 Lift the drip grid out of the drip tray. 15.2 Clean the drip grid with a dish detergent and a soft brush. Then rinse the drip grid with clean water. 15.3 Clean the exterior surfaces and the drip tray with a dish detergent. 16.1 Rinse the drip tray of machines with water discharge or wastewater tank with plenty of warm water. 16.2 Wipe the cleaned surfaces with a clean, moist paper cloth. 16.3 Then dry the surfaces with a clean, dry paper cloth. 16.4 Put the drip grid back in the drip tray. 17. Finally dry all exterior surfaces with a clean, dry paper cloth. Note: For cleaning and fridge maintenance please see: + Chapter 5.6 Fridge maintenance, page 5-27 BASO-2 - 01.05 - V07 Page 5-33 Cleaning 5.8 Cleaning instructions for cappuccinatore CPT (option) Danger of burns! Never reach inside the machine during the automatic cleaning and do not work underneath the beverage output. Watch for sharp edges when you clean. Attention! If cleaning is not done on a regular basis, there is no guarantee that the machine will be operating at full capacity. Description Components 1. O-ring sealings (063111) 2. Regulating screw 3. Suction tube 4. Cappuccinatore components 5. Steam nozzle (CPT connection) 6. O-ring (063112) ª Page 5-34 BASO-2 - 01.05 - V07 Cleaning Cleaning Cappuccinatore CPT 5.8.1 Daily cleaning of CPT (option) Note: After use, the cappuccinatore device must be cleaned as follows: 1 1. Read the following instructions before you continue cleaning. Attention! It is crucial that you read the measuring instructions and danger notices on the detergent container’s label. Danger! Never mix the “weakly cleaning agent” with another cleaning agent. Use only “weekly cleaning agent” for the weekly cleaning. Attention! 2 Fill water in the container first, then add the cleaning agent. Cappuccinatore 2. 3. 4. 5. 6. 7. 8. 9. 5.8.2 Fill approx. 20 ml “weekly cleaning agent“ carefully in the container, filled with cold water. Place the cappuccinatore’s suction tube (position 3) in the cleaning container. Open the valve via the CPT product button. You can close the valve when there is only steam coming out of the CPT (the valve closes automatically after 60 seconds). Empty and rinse the cleaning container with clean water. Place the cappuccinatore’s suction tube (position 3) in the cleaning container, filled with clean water. Open the valve via the CPT product button. You can close the valve when there is only steam coming out of the CPT (the valve closes automatically after 60 seconds). Weekly cleaning of CPT (option) 1. 2. 3. 4. 5. 6. 7. 8. BASO-2 - 01.05 - V07 Before you start, read point 1. of the “daily CPT cleaning” After you have cleaned the cappuccinatore, pull it downwards and dismantle it (position 4). Fill approx. 20 ml “weekly cleaning agent“ carefully in the cleaning container, filled with 1 liter of cold water. Place the dismantled parts in the cleaning container overnight. Finally clean the parts with a soft brush and rinse all parts thoroughly with clean water. Check whether the capppuccinatore’s packing rings (position 1) are still intact. Reassemble the cappuccinatore. Mount the cappuccinatore to the machine. Page 5-35 Cleaning Page 5-36 BASO-2 - 01.05 - V07 Problems and Error Messages 6. Contents Chap. Text 6. Problems 6.1. 6.1.1. 6.1.2. 6.1.3. 6.1.4. 6.1.5. 6.1.6. Problems and error messages .....................................................................................................6-2 Coffee machine is blocked, no products can be served ..................................................................6-2 Coffee products cannot be served ...................................................................................................6-3 No steam products are served .........................................................................................................6-4 No tea products can be served ........................................................................................................6-4 Products can still be served .............................................................................................................6-5 Chip card error messages................................................................................................................6-6 6.2. 6.2.1. Problems without messages (display-messages)......................................................................6-6 Cup sensor.......................................................................................................................................6-6 BASO-2 - 02.06 - V07 Page 6-2 Page 6-1 Problems and Error Messages 6. PROBLEMS 6.1. Problems and error messages 6.1.1. Coffee machine is blocked, no products can be served Danger! Inform the authorized after sales service immediately if you cannot rectify a fault message! Never open up the machine! Note: Your machine cannot dispense products if the following messages appear on its display. selection locked heating up When the coffee machine is switched on, no products can be served until the system warms up (approx. 5 min.). selection locked cup missing No products can be served because the cup sensor has failed to detect a cup. Place a cup under the outlet. See also section 6.2.1 selection locked container n. i. place Insert the grouts container. If the message is still displayed, the switch is defective: + <<button?>> selection locked Contact After Sales Service! The product key is stuck or dirty. This problem can be solved by cleaning or pressing the key several times. If not: + Contact After Sales Service! selection locked clean machine All product selection is blocked. Execute the cleaning program as described in chapter 5.3. selection locked watertank empty Fill up the fresh water tank with drinking water and press the [ plies to coffee machines without a fixed water supply). selection locked waste watertank full selection locked 12:00 15.10.2001 selection locked heating timeout selection locked comms. interrupted Empty the wastewater tank and press the [ chines without a wastewater outlet). ] key (only ap- ] key (only applies to coffee ma- All products have been blocked using the KEY BLOCK card. Grouts container is missing or is not pushed in far enough. ÎHeater problem. + Contact After Sales Service! Communication with an external device has been interrupted. Check that the external devices are properly connected to the mains and to the coffee machine. If so, and the message still appears: + Contact After Sales Service! ª Page 6-2 BASO-2 - 02.06 - V07 Problems and Error Messages selection locked ** LAN-Timeout ** Communication with an external device has been interrupted. Check that the external devices are properly connected to the mains and to the coffee machine. If so, and the message still appears: + selection locked error account system Communication with an external device has been interrupted. Check that the external devices are properly connected to the mains and to the coffee machine. If so, and the message still appears: + selection locked door open selection locked milk door open selection locked outlet missing battery flat motor current Contact After Sales Service! The service door (panel) is not shut properly. Check it and if necessary, shut it. + Contact After Sales Service! Product selection remains blocked until the milk panel is properly closed. + Contact After Sales Service! Outlet is incorrectly placed (or is missing). If this message is still displayed after verification: + Contact After Sales Service! The internal control unit battery needs replacing. + ** EEPROM error! Contact After Sales Service! Contact After Sales Service! Serial EEPROM is defective. + Contact After Sales Service! Switch off coffee machine, wait for 10-30 seconds and then switch back on. If the problem persists, switch off the coffee machine. + Contact After Sales Service! Switch off the coffee machine. motor driver error 6.1.2. + Contact After Sales Service! Coffee products cannot be served When the following messages are displayed on the lower display line, no tea or coffee products can be served. selection locked clean machine select product grinder right empty No products at all can be selected when this message is displayed. Execute the cleaning program as described in chapter 5.3. The right-hand coffee mill is out of coffee beans. Fill the bean container. select product grinder left empty The left-hand coffee mill is out of coffee beans. Fill the bean container. selection locked empty container! Empty grouts container and put it back in place. select product grinder left blocked select product grinder right block. Press [ ] key. If the problem persists, open the bean container hatch and remove the bean container. Remove the remaining coffee beans (e.g. using a vacuum cleaner) and make sure that nothing (e.g. a piece of gravel) is stuck in the mill. If not and the problem persists: + Contact After Sales Service! ª BASO-2 - 02.06 - V07 Page 6-3 Problems and Error Messages The temperature sensor in the instantaneous coffee heater is defective. temp. sensor coffee heating up coffee + Wait for approx. 5 minutes (too much coffee water may have been served). If the message does not disappear: + rinsing selection locked Contact After Sales Service! Contact After Sales Service! The coffee machine is being automatically rinsed. If it is programmed to do so: Î no error. The hoist motor is defective. piston motor timeout 6.1.3. + Contact After Sales Service! No steam products are served When the following messages are displayed on the lower display line, no steam products can be served. selection locked clean machine temp. sensor steam level probe steam No products at all can be selected when this message is displayed. Execute the cleaning program as described in chapter 5.3. The temperature sensor in the steam generator is defective Î Steam emission is blocked: + Contact After Sales Service! The level sensor in the steam generator is defective Î steam emission is blocked. For the first 2 minutes after the display lights up, or when the coffee machine has been switched off, no tea or coffee can be served either. Make sure that the water tap is turned on. If the problem persists: switch the machine off, wait for 10-30 seconds and switch it on again. If the problem persists: Timeout heat. steam 6.1.4. Contact After Sales Service! If the system does not reach the programmed temperature after 8 minutes, the following message is displayed: “Timeout heat. steam” + heating steam ) Contact After Sales Service! Wait for approx. 5 minutes (too much steam may have been drawn off). If the message does not disappear, the message “heating steam” is displayed. + Contact After Sales Service! No tea products can be served selection locked clean machine No products at all can be selected when this message is displayed. Execute the cleaning program as described in chapter 5.3. timeout heat. tea If the system does not reach the programmed temperature after 8 minutes, the following message is displayed: “Timeout heat.tea” + Contact After Sales Service! The temperature sensor in the instantaneous water heater is defective: temp. sensor tea heating tea Î No hot water can be served for tea: Contact After Sales Service! Wait for approx. 2 minutes (too much hot water may have been drawn off). If the message does not disappear, the message “heating steam” appears: + Page 6-4 + Contact After Sales Service! BASO-2 - 02.06 - V07 Problems and Error Messages 6.1.5. Products can still be served The following error messages do not cause the coffee machine to block. However, the problems should be eliminated as quickly as possible. selection locked container full ! select product clean machine Empty grouts container and put it back. Five further coffee products can be served after this message is displayed, after which the coffee machine blocks Î Empty grouts container. Clean the coffee machine. Products can still be served. If the coffee machine is so programmed, up to 50 coffees can be served, or coffees can be served for up to one hour, after which the coffee machine blocks and must be cleaned (obligatory cleaning). select product button locked Product key is disabled. (KEY BLOCK or key not programmed) credit operation button locked select product temp. sensor outside Product key is disabled Optional automatic steam cut-off is enabled, but steam can be drawn off after timeout. + select product flowmeter defect The coffee water flow meter is defective. Water dosing is time-controlled and products can still be served (this message can only be deleted by the service engineer). + system-data error! select product milk empty Contact After Sales Service! An error has occurred in the product key programming or the general system data. If a product key also lights up, it may be unusable. Press the [ ] key to proceed: + select product replace water filter Contact After Sales Service! Contact After Sales Service! The installed water filter needs cleaning, filling or replacing. + Contact After Sales Service! This message is displayed if the optional milk sensor is mounted and enabled. Products can be served if enabled. Products cannot be served if disabled. See also chapters 6.2 (Problems without messages) and 7.5.1 (Optional features – alarm functions). select product service wanted Reminder that service by a licensed after sales agent is required. Products can still be served. Nevertheless, your after sales service should be informed rapidly. This message can be suppressed using the CHEF card, see section 4.5.1.11. select product please rinse cappuc. BASO-2 - 02.06 - V07 After a cappuccino is served, the coffee machine requests manual rinsing of the cappuccino unit if programmed to do so. Page 6-5 Problems and Error Messages 6.1.6. Chip card error messages The following messages indicate handling errors relating to the chip cards. * read error remove card * wrong card remove card The card in the card reader is incorrectly inserted (note direction of arrow) or defective. The coffee machine is requesting another card type. A MONEY card has been inserted for the first time or credit is zero. The MONEY card has not been logged on. Î Load credit onto the MONEY card using the LOAD card and/or log it on. No payment system is installed. * mistake remove card An error occurred during data transfer to the Î SAVE card. The card was withdrawn from the card reader too early. Data transfer was incomplete or data are corrupted Î save data again. product - * 5 Error! Press any key... An error occurred during data transfer from the SAVE card Î coffee machine. The card was withdrawn from the card reader too early. Data transfer was incomplete or data are corrupted Î Press [ ] key, wait for five seconds, then save data again * data error remove card The data structure on the card has been damaged because the card was withdrawn from the card reader during data transfer, or the card is new and needs logging on, enabling or loading. *wrong PIN-code remove card no accounting 6.2. The wrong PIN code (Personal Identification Number) was entered. Repeat procedure. No payment system is installed. Problems without messages (display-messages) Note: The following problems may occur without causing the coffee machine to display an error message. 6.2.1. Cup sensor If a product is served even though no cup is under the outlet, wipe the lens of the cup sensor with a soft damp cloth. If the problem persists: + Contact After Sales Service! If products cannot be served although a cup has been placed under the outlet, first clean the lens as described above. If the problem persists: + Page 6-6 Contact After Sales Service! BASO-2 - 02.06 - V07 Optional Features 7. Contents Chap. Text 7. Optional features 7.1 7.1.1 7.1.1.1 7.1.1.2 7.1.1.3 7.1.1.4 7.1.2 7.1.2.1 7.1.2.2 7.1.2.3 7.1.2.4 7.1.3 7.1.3.1 7.1.3.2 7.1.3.3 7.1.4 7.1.5 7.1.5.1 7.1.5.2 7.1.5.3 7.1.5.4 7.1.5.5 7.1.5.6 Refrigerator ...............................................................................................................................7-2 Description ..................................................................................................................................7-2 Refrigerator overview..................................................................................................................7-2 Refrigerator installation chart......................................................................................................7-2 Purpose.......................................................................................................................................7-2 Refrigerator serial data ...............................................................................................................7-3 Product data................................................................................................................................7-3 Characteristics ............................................................................................................................7-3 Dimensions .................................................................................................................................7-3 Power supply of the refrigerator..................................................................................................7-4 Standard refrigerator accessories...............................................................................................7-4 Problems and troubleshooting ....................................................................................................7-5 The refrigerator does not work....................................................................................................7-5 The refrigerator functions noisily.................................................................................................7-5 Refrigerator is not cold enough...................................................................................................7-5 Refrigerator parts ........................................................................................................................7-6 Installing the refrigerator .............................................................................................................7-7 First-time installation ...................................................................................................................7-7 Set temperature ..........................................................................................................................7-7 Milk container level/Milk empty (optional feature).......................................................................7-8 Recalibrate milk level sensor ......................................................................................................7-8 Cup sensor (optional extra) ........................................................................................................7-9 Milk temperature monitor (optional extra) ...................................................................................7-9 7.2 Payment systems......................................................................................................................7-9 7.3 Chip cards..................................................................................................................................7-9 7.4 Chip card loader........................................................................................................................7-9 7.5 7.5.1 7.5.2 7.5.3 Alarm functions.......................................................................................................................7-10 Alarm group 1 (Info) ..................................................................................................................7-10 Alarm group 2 (Errors) ..............................................................................................................7-10 Disable driver ............................................................................................................................7-12 7.6 7.6.1 7.6.2 CPT cappuccino unit ..............................................................................................................7-13 How to make cappuccino using the CPT cappuccino unit .......................................................7-13 How to prepare Cappuccino Magic and hot milk manually using a CPT (optional extra) ........7-14 7.7 7.7.1 Special steam ..........................................................................................................................7-15 Special steam with automatic steam cut-off .............................................................................7-15 7.8 2nd mill (duo mill).....................................................................................................................7-16 7.9 Water softener (Filados/Brita) ...............................................................................................7-16 7.10 Cup sensor ..............................................................................................................................7-16 7.11 Quick cup warmer...................................................................................................................7-16 7.12 Cup warmer .............................................................................................................................7-16 7.13 7.13.1 7.13.2 7.13.3 User instructions for special machines (water tank) ..........................................................7-17 Refill fresh water tank ...............................................................................................................7-17 Empty wastewater tank.............................................................................................................7-17 User instructions for machines with fresh and wastewater tanks (trolley-mounted) ................7-17 BASO-2 - 02.07 - V07 Page 7-2 Page 7-1 Optional Features 7. OPTIONAL FEATURES Attention! Follow the safety instructions given in these operating instructions when using all optional components! 7.1 Refrigerator 7.1.1 Description 7.1.1.1 Refrigerator overview 4 1. Refrigerator door 2. Milk container 3. Hoses for milk and milk foam 3 4. Refrigerator service door 2 1 7.1.1.2 Refrigerator installation chart See chapter 2.1.2. 7.1.1.3 Purpose When the refrigerator is connected to a coffee machine you can additionally prepare the following drinks: - Page 7-2 Cappuccino Milk coffee Macchiato Latté Hot milk Milk foam BASO-2 - 02.07 - V07 Optional Features 7.1.1.4 Refrigerator serial data For warranty purposes, and in case of failure, please transfer the refrigerator’s rating plate to the following area! Serial plate Pull out milk container (sideways on inside) 7.1.2 Product data 7.1.2.1 Characteristics Inst. no Type: Serial number: Nominal pressure: Capacity: Voltage: .............VAC ................................. ................................. ................................. ................................. bar ................................. Watt ................................. Hz Inst.-Nr. Typ: Serie-Nummer: Nenndruck: Leistung: Spannung: ................................. ................................. ................................. ................................. bar ................................. Watt ................................. VAC Hz The milk container has a maximum volume capacity of 4 liters. 7.1.2.2 Dimensions Breadth Height Depth Door clearance 260 330 360 260 mm mm mm mm Net weight 26.0 kg Subject to alteration! BASO-2 - 02.07 - V07 Page 7-3 Optional Features 7.1.2.3 Power supply of the refrigerator Model Connected load VITRIFRIGO 70 W / 0.49 A 220/240 V AC (PNE) 50/60 Hz For special voltages, contact the manufacturer or the licensed after sales service agent. This appliance complies with EC standard 89/336 in relation to radio interference (EMC). 7.1.2.4 Standard refrigerator accessories Item Ref. no. - 1 milk container - 1 cleaning container - 1 “clean-up” measuring beaker - 1 set of O-ring joints for the foam head - 2.5 m Teflon hose - 1 outlet hose - 1 Ø 20 mm, clamp for the outlet hose - 1 1.2-mm facing piece 063243 063243 061020 050415 061445 063345 063119 063446 - Cleaning agent: Ask at your point of sale, authorized by the manufacturer. Page 7-4 BASO-2 - 02.07 - V07 Optional Features 7.1.3 Problems and troubleshooting 7.1.3.1 The refrigerator does not work Attention! Have the link between refrigerator and coffee machine checked only by a service technician! Check whether - The temperature is set to zero; + Capture 7.1.5.2 Set temperature, page. The power supply has been cut off; The safety switch (FI) in the electrical system is off; If the refrigerator is not connected to the power supply via the coffee machine, check whether: - The mains plug is damaged or not plugged in properly. Danger! Do not repair the mains plug! Inform a service technician or electrician immediately! 7.1.3.2 The refrigerator functions noisily Check whether the refrigerator in particular the chiller is standing flatly; the refrigerator is in contact with the surrounding furniture and transfers the vibrations; Attention! Never open the device! Have only a service technician check the cooling pipes at the back of the device for flushness and vibrations; 7.1.3.3 Refrigerator is not cold enough Check whether - + The door is properly shut; the door seal is intact. the inside of the refrigerator is coated with ice. The layer of ice must not be more than 3 mm thick. The refrigerator is near a source of heat; The refrigerator or separate refrigerating unit are sufficiently ventilated; The evaporator is iced up. Contact your after sales service Attention! Check for dust contamination on condensers or rotating fans (in models with forced cooling). Only have this check performed by a service engineer! BASO-2 - 02.07 - V07 Page 7-5 Optional Features 7.1.4 Refrigerator parts Ventilator valve Thermostat Air supply system 1. Ventilator valve 2. Milk foam hose (white) 3. Milk hose (blue) 4. Hoses in milk container 5. Automatic rinse pipes Minus – Turn in an anti-clockwise direction (-) to raise the temperature. To turn the refrigerator off, turn the thermostat as far as it will go. Assembling information for the expander 2 Plus + Turn in a clockwise direction to lower the temperature. ( See section 7.1.5.2) 3 1 Minus 1 5 4 Plus 2 3 Legend 1. Air baffle 2. Milk baffle 3. T block Assemble the expander so the milk baffle is on the left side. Note: The mounting instruction sticker must be kept clean. If it is very dirty or no longer legible, a new one must be requested from the manufacturer and the old one replaced. Page 7-6 BASO-2 - 02.07 - V07 Optional Features 7.1.5 Installing the refrigerator 7.1.5.1 First-time installation Note: The refrigerator must be installed and initialized by a licensed after sales service agent See also chapter 3. 7.1.5.2 Set temperature You can regulate the refrigerator's temperature with the built-in temperature control. You will find the temperature control when you lift the refrigerator’s panel. Please see the pictures on the previous page. 1. Rotary knob on the temperature control To move the rotary knob on the temperature control lift the panel until it stops. 2.1 Warmer temperature: Turn the rotary knob anti-clockwise. 2.2 Colder temperature: Turn the rotary knob clockwise. Normal position 2.3 Placing the temperature control in the normal position: Turn the rotary knob anti-clockwise until it stops and then clockwise until it reaches the scale mark “A”. Picture of temperature control Attention! The refrigerator’s normal temperature setting depends on the ambient temperature and will have to be adjusted either up or down. 2.4 Temperature “OFF” Turn the rotary knob on the temperature control anti-clockwise until it stops 3. Lower the panel. Note: • The refrigerator should be turned on at least one hour before use, so that the cooling circuit (3 -5 °C) is ready for operation. • Never put warm milk in the refrigerator, as it would take too long to reach the 3 - 5 ° C temperature. • Never put warm milk in the refrigerator. Coated with ice due to condensed water! (Regular defrosting necessary.) BASO-2 - 02.07 - V07 Page 7-7 Optional Features 7.1.5.3 Milk container level/Milk empty (optional feature) Option: At given time intervals, a built-in ultrasonic temperature sensor in the refrigerator will measure the milk level (the milk’s surface) in the milk container. If the milk level drops to a programmable “alarm level” the following message will be displayed on the coffee machine: select product milk empty • Beverage outlets with milk are blocked. It is released only after milk is filled in. It is still possible to serve beverages with milk. Since the remaining milk in the milk container can be used up completely without further warning, it is advisable to set the alarm level so that there is always enough time to fill up with milk. • Attention: • • Never top up with milk. Always remove milk residues. Always thoroughly clean the milk container before filling it with fresh milk. Fill up with fresh milk only before resumption of operation. Only fill in milk that does not exceed 3°C - 5°C. Use only milk that has been pasteurized or heated with a UHT process (do not use raw milk). • • • Note: The milk container’s maximum capacity is 4 liters. The milk level can be custom-programmed by an after sales service organization, authorized by the manufacturer. When the milk container is full and back in the refrigerator the coffee machine’s display shows the following: select product 12:00 01.08.2001 All products are available again. 7.1.5.4 Recalibrate milk level sensor Note: Possible only up to Software 1.04!!! From 1.05 only by service technician. The milk level setting (calibration) can be accidentally changed if the wrong keys are pressed while the cleaning program is running. The following section tells you how to reset the sensor to the correct minimum level. select product 12:00 15.10.2001 Hold down [ ] key for approx. 5 seconds. The following message is displayed: milk level XXX calibrate ? ‘Decaf’ Fill container to the required minimum level (milk or water). The ex-factory setting is 1 liter. The sensor is calibrated to the minimum level in the milk container. When this minimum is attained, the following message is displayed: select product milk empty milk level XXX calibrate Decaf? Page 7-8 BASO-2 - 02.07 - V07 Optional Features Press the [ ] key to save the calibrated value. The following message is displayed: …Save… select product milk empty The milk container can now be filled. Once the filled milk container has been replaced in the refrigerator, the following message is displayed: select product 12:00 15.10.2001 All products are now available again. 7.1.5.5 Cup sensor (optional extra) Option: 7.1.5.6 Description section 7.10 (Cup sensor). Milk temperature monitor (optional extra) Option: The temperature sensor of the automatic steam cut-off facility continuously checks the temperature of the milk as it is heated. See also section 7.7 (Special Steam). 7.2 Payment systems Option: Your coffee machine can be connected e.g. to your cash register by means of a payment system, for example. This facilitates daily, weekly and monthly accounting. See also chapter 8 (Payment Systems). For further information, contact your licensed dealer. 7.3 Chip cards Option: A series of chip cards allows you to simplify processes, assign products to keys and program a variety other useful functions. See also chapter 2.6 (Chip card functions). For further information, contact your licensed dealer. 7.4 Chip card loader Option: Additional load device for MONEY chip cards (load credit; device for loading credit onto MONEY card) The cards can also be loaded on the coffee machine as described in chapter 8.2 (MONEY chip card system) (standard). For further information, contact your licensed dealer. BASO-2 - 02.07 - V07 Page 7-9 Optional Features 7.5 Alarm functions The purpose of the alarm functions is to attract your attention. If an optional acoustic and/or visual alarm is installed and one of the following information texts or error messages is activated, a corresponding warning signal is emitted in addition to the message on the display. Most of the alarm functions are accompanied by the blocking of the coin or token slot if this optional feature is installed. 7.5.1 Alarm group 1 (Info) The alarm levels must be programmed by a service engineer and enabled. If one of these information texts or error messages is activated with the alarm function enabled, they trigger the optionally installed alarm system. Coffee grouts container is full. + container full See also chapter 6.1.5. Coffee grouts container is full. (Coffee machine blocked.) + empty container! See also chapter 6.1.2. Cleaning reminder. clean machine + See also chapter 6.1.2. The left-hand coffee mill is empty and needs refilling. grinder left empty + See also chapter 6.1.2. The right-hand coffee mill is empty and needs refilling. grinder right empty + See also chapter 6.1.2. The milk container is empty and needs refilling. milk empty service wanted + Servicing by a licensed after sales service agent is required. Annual capacity has been attained. + 7.5.2 See also chapter 6.1.5. See also chapter 6.1.5. Alarm group 2 (Errors) The alarm levels must be programmed by a service engineer and enabled. If one of these information texts or error messages is activated with the alarm function enabled, they trigger the optionally installed alarm system. These problems can be eliminated by authorized persons only. water filter Given the number of hectoliters, which have passed through the filter, it is likely that the filter needs replacing or cleaning + See also chapter 6.1.5. ª Page 7-10 BASO-2 - 02.07 - V07 Optional Features The battery needs changing. battery flat + See also chapter 6.1.1. Serial EEPROM is defective. **EEPROM error! + See also chapter 6.1.1. The flow meter is defective. flowmeter defect + See also chapter 6.1.5. The coffee water temperature sensor is defective. temp. sensor coffee + See also chapter 6.1.2. The tea water temperature sensor is defective. temp. sensor tea + See also chapter 6.1.4. Tea water temperature not attained. No tea can be served. Timeout heat. tea + See also chapter 6.1.4. The steam temperature sensor is defective. temp. sensor steam + See also chapter 6.1.3. Steam temperature not attained. No steam can be drawn off. Timeout heat. steam + See also chapter 6.1.3. Level sensor defective. level probe steam + See also chapter 6.1.3. External temperature sensor defective. temp. sensor outside + See also chapter 6.1.5. Motor defective. motor current + See also chapter 6.1.1. Hoist motor control unit defective. piston motor timeout + See also chapter 6.1.2. Left-hand mill is blocked or defective grinder left blocked + See also chapter 6.1.2. Right-hand mill is blocked or defective. grinder right blocked + See also chapter 6.1.2. Communication with an external payment system is interrupted. error account system BASO-2 - 02.07 - V07 + See also chapter 6.1.1. ª Page 7-11 Optional Features Communication with an external payment system is interrupted. comms. interrupted + See also chapter 6.1.1. Communication with an external payment system is interrupted. + EE LAN-Timeout 7.5.3 See also chapter 6.1.1. Disable driver The same driver level causes the machine to block. The driver is disabled because for some reason, the machine is no longer functioning correctly. These functions are programmed as standard and cannot be changed. The “Alarm functions” optional feature cannot be installed for these error messages (no signal is emitted by the optionally installed alarm system). selection locked outlet missing selection locked container n.i. place selection locked motor driver error selection locked milk door open selection locked door open selection locked heating timeout Page 7-12 The outlet is missing or has not been detected. + See also chapter 6.1.1. The coffee grouts container is missing or has not been detected. + See also chapter 6.1.1. Switch off coffee machine. + See also chapter 6.1.1. The milk service door is open or the sensor is defective. + See also chapter 6.1.1. The panel appears to be open. + See also chapter 6.1.1. The tea boiler heating system is defective. + See also chapter 6.1.1. BASO-2 - 02.07 - V07 Optional Features 7.6 CPT cappuccino unit Option: The following products can be prepared using the CPT: Cappuccino, manual preparation Hot milk, manual preparation For further information, contact your licensed dealer. Danger! Once you have pressed the dispense buttons, keep your hands and other parts of your body away from the beverage dispensing area in order to protect yourself against scalding! 7.6.1 How to make cappuccino using the CPT cappuccino unit Description Parts 1. 2. 3. 4. 5. O-ring joints (063111) Regulator screw Suction hose Individual CPT units Steam nozzle (CPT connector) 6. O-ring joint (063112) Immerse suction hose (3) in the milk container. Screw the temperature regulator (2) in as far as it will go and then give a single turn in the unscrew direction. Open the valve above the key. If the cappuccino is too hot, turn the regulator screw slightly anticlockwise. When a sufficient quantity of cappuccino has been served, close the valve by pressing the key. Note: There must be at least 40 cm clearance between the milk pack and the CPT. Previously heated milk or milk that has passed the “best before” date will not foam. BASO-2 - 02.07 - V07 Page 7-13 Optional Features 7.6.2 How to prepare Cappuccino Magic and hot milk manually using a CPT (optional extra) Danger! Never point the steam jet towards parts of your body! Option: 1. Press the [ ] key twice in rapid succession to remove any condensation from the pipe (only possible in start/stop mode). 2. Immerse the suction hose in the milk container. 3. Put a cup under the Cappuccino Magic outlet. 4. Press the [ ] key again: select product 12.00 15.10.2001 The milk is served. Pressing the [ ] key again prematurely terminates milk output (only in start/stop mode). The nature of the milk foam can be regulated using the air intake screw (unscrewing it causes a greater quantity of firmer milk foam to be served, screwing it in a smaller quantity of less firm milk foam). There must be at least 40 cm clearance between the milk container and the cup. The milk must be at room temperature. Previously heated milk or milk that has passed the “best before” date will not foam. It makes no difference whether the coffee or milk foam is served first. The only difference will be in the color of the foam. If a Cappuccino Magic is paid for by card, pressing the cleaning key immediately after serving triggers a jet of steam to clean the outlet. Cappuccino Magic can be programmed so that coffee and milk can be served simultaneously. Page 7-14 BASO-2 - 02.07 - V07 Optional Features 7.7 Special steam 7.7.1 Special steam with automatic steam cut-off Danger! Never point the steam jet towards parts of your body! Option: This special steam outlet measures the temperature of the product to be heated. The steam output automatically cuts off when the fixed temperature setting programmed by the service engineer is reached. A timer operates in parallel to the temperature measurement. Repeat the procedure if the required temperature is not attained under exceptional circumstances and the steam outlet cuts off nevertheless. Two variants of this design are available. 1st variant: Press the [ ] key briefly to heat up a full cup. Press the [ ] key and hold it for about 2 seconds to heat up a full pot. (The steam output can be cancelled prematurely by pressing the steam button again.) 2nd variant: Automatically controlled steam output. Pressing the [ ] key briefly causes steam to be output. The steam output is automatically increased to full capacity after 3 seconds. This variant is only suitable for larger containers such as coffee pots with a capacity of min. 500 ml. Pressing the steam key again cancels the steam output prematurely (providing start/stop mode is enabled). Preparing a beverage: 1. Immerse the steam pipe into the beverage to be heated until it reaches the bottom of the container. ] key as described above: 2. Press the [ select product 12:00 15.10.2001 3. The steam output is switched off automatically when the pre-programmed temperature is reached or by pressing the steam key again. (The deeper the note, the higher the temperature.) 4. Place the container to the side. 5. Clean the steam pipe with a damp cloth. Pressing the [ ] key again cancels the steam output prematurely, providing start/stop mode is enabled. The steam pipe must remain immersed for as long as steam is being output. The beverage may start to bubble when the boiling point is reached. Steam cannot be pre-selected. Steam output is prevented during the coffee machine’s heating up phase after the system has been switched on. BASO-2 - 02.07 - V07 Page 7-15 Optional Features 7.8 2nd mill (duo mill) Option: Installing a second coffee mill enables normal and decaffeinated coffee to be freshly ground. Can be retrofitted. For further information, contact your licensed dealer. 7.9 Water softener (Filados/Brita) Option: Using a water softener improves the quality of the water or softens it to the hardness recommended for the coffee machine. See also chapter 2.2.4 (Water connection/outlet). For further information, contact your licensed dealer. 7.10 Cup sensor Option: 7.11 The cup sensor recognizes the cup under the beverage outlet of the machine and releases the product dispensing. Without a cup in place product dispensing is blocked. The automatic rinsing process will also be blocked, after the milk is served, until the cup is removed from the beverage outlet. Quick cup warmer Option: The cup is (manually) pre-warmed before the product is served. For further information, contact your licensed dealer. 7.12 Cup warmer Optional feature: The cup warmer consists of an additional unit (enables large numbers of cups to be pre-warmed). For further information, contact your licensed dealer. Page 7-16 BASO-2 - 02.07 - V07 Optional Features 7.13 User instructions for special machines (water tank) The following information only applies to machines with fresh and wastewater tanks. 7.13.1 Refill fresh water tank When the level in fresh water tank is too low, the [ is displayed: ] key flashes. The following message selection locked watertank empty 1. 2. 3. 4. Take out the fresh water tank. Fill up with fresh water. Put the water tank back in place. Quit by pressing the flashing red [ ] key. To prevent the water pump from functioning without water, no products can be served if the water level is too low. The current product is served. Always check the water level before running the cleaning program. 7.13.2 Empty wastewater tank When the wastewater tank is full, the [ played: ] key flashes. The following message is dis- selection locked waste watertank full 1. 2. 3. 4. Remove the wastewater tank. Empty and, if necessary, rinse. Put the wastewater tank back in place. Quit by pressing the flashing red [ ] key. To prevent the wastewater tank from overflowing, no products can be served. If the message is displayed while a product is being served, service continues. Always empty the wastewater tank before running the cleaning program. 7.13.3 User instructions for machines with fresh and wastewater tanks (trolley-mounted) Capacities are as follows: Fresh water tank: 16 liters. Wastewater tank: 11 liters The fresh water tank must be filled daily with fresh, clean drinking water. If the machine is out of use for lengthy periods, both tanks must be emptied and cleaned. Always keep the inside of the trolley dry. Only place the tanks in the space provided (level monitoring). The trolley must be pulled, not pushed, during transport (safety measure). The trolley is not intended for transportation of merchandise. The manufacturer accepts no liability for damage caused by misuse of the trolley or failure to respect the user instructions. BASO-2 - 02.07 - V07 Page 7-17 Optional Features Page 7-18 BASO-2 - 02.07 - V07 Payment Systems 8. Contents Optional features: This chapter addresses users who have a payment system installed on their coffee machine. Available payment systems The coffee machine can be used with or without payment. Various systems and possibilities exist for payment mode. Chap. Text 8. Payment systems 8.1. 8.1.1. 8.1.1.1. Cards compatible with all payment systems .........................................................................8-3 MASTER card ............................................................................................................................8-3 How to obtain beverages using the MASTER card ....................................................................8-3 8.2. 8.2.1. 8.2.1.1. 8.2.1.1.1. 8.2.1.1.2. 8.2.1.1.3. 8.2.1.2. 8.2.1.2.1. 8.2.1.2.2. 8.2.1.2.3. 8.2.1.2.4. 8.2.1.2.5. 8.2.1.2.6. 8.2.1.2.7. 8.2.1.2.8. 8.2.1.2.9. 8.2.1.2.10. 8.2.1.3. 8.2.1.3.1. Payment with internal systems ...............................................................................................8-3 MONEY chip card system ........................................................................................................8-3 MONEY card ...............................................................................................................................8-4 How to obtain beverages using the MONEY card ......................................................................8-4 Program the amount of water/coffee powder dispensed for individual coffee products.............8-5 Reset amounts of water/coffee powder for individual coffee products .......................................8-5 LOAD card ..................................................................................................................................8-6 Menu ...........................................................................................................................................8-6 Programmable security levels.....................................................................................................8-6 Load credit onto MONEY card....................................................................................................8-6 Delete credit from MONEY card .................................................................................................8-7 Display total amount of credit loaded and reset (MONEY card).................................................8-8 Chip card info..............................................................................................................................8-8 Enable MONEY card...................................................................................................................8-9 Disable MONEY card..................................................................................................................8-9 MONEY card history .................................................................................................................8-10 Change PIN code......................................................................................................................8-10 PROGRAM card .......................................................................................................................8-11 Menu .........................................................................................................................................8-11 8.3. 8.3.1. 8.3.1.1. 8.3.2. 8.3.2.1. 8.3.3. 8.3.4. 8.3.4.1. Payment with self-service systems ......................................................................................8-12 Token slot and related systems ............................................................................................8-12 Prepare beverages ...................................................................................................................8-12 NRIG 13 EMP no-change coin slot and related systems (standard type) .........................8-12 Prepare beverages ...................................................................................................................8-13 CF350 Totalisator dual-price coin slot..................................................................................8-13 CSI (Coffee Standard Interface) external payment – Connection to coffee-bar system .8-13 Prepare beverages ...................................................................................................................8-14 8.4. 8.4.1. 8.4.1.1. 8.4.1.1.1. 8.4.1.2. 8.4.1.2.1. 8.4.1.2.2. 8.4.1.2.3. 8.4.1.2.3.1. 8.4.1.2.3.2. Payment using Waiter Account .............................................................................................8-15 Waiter Account chip card system .........................................................................................8-15 WAITER card ............................................................................................................................8-15 Preparing beverages with the WAITER card............................................................................8-15 MANAGER card........................................................................................................................8-16 Menu .........................................................................................................................................8-16 Programmable security levels...................................................................................................8-16 Waiter payment.........................................................................................................................8-16 WAITER card sales...................................................................................................................8-16 Reset WAITER card..................................................................................................................8-17 BASO-2 - 02.08 - V07 Page 8-3 Page 8-1 Payment Systems Chap. Text 8.4.1.2.4. 8.4.1.2.5. 8.4.1.2.6. 8.4.1.2.7. 8.4.1.2.8. 8.4.1.3. 8.4.1.3.1. 8.4.1.3.2. 8.4.1.3.3. 8.4.1.4. 8.4.1.4.1. Log on waiter............................................................................................................................ 8-17 Log off waiter............................................................................................................................ 8-18 Display waiter numbers............................................................................................................ 8-19 Data backup ............................................................................................................................. 8-19 Change PIN code..................................................................................................................... 8-19 COPY WAITER card ................................................................................................................ 8-20 Menu ........................................................................................................................................ 8-20 Copy waiter table “Card Æ Coffee machine” ........................................................................... 8-20 Copy waiter table “Coffee machine Æ Card” ........................................................................... 8-20 PROGRAM card....................................................................................................................... 8-21 Menu ........................................................................................................................................ 8-21 Page 8-2 Page BASO-2 - 02.08 - V07 Payment Systems 8. Payment systems 8.1. Cards compatible with all payment systems 8.1.1. MASTER card The MASTER card is a chip payment card that is compatible with all payment systems, both external and internal. It entitles the bearer to obtain beverages from the machine free of charge, without these being booked to the payment system. Beverages obtained using the MASTER card are simply added to the total on the machine and daily counters. The MASTER chip card must be enabled by the service engineer or by means of the PROGRAM card (optional feature) on the machine (see chapter 4.6.1.12). If the MASTER card is to be valid for several machines, it must be enabled separately on each machine (security measure). 8.1.1.1. The MASTER card is an optional feature and is not included in the standard delivery package. How to obtain beverages using the MASTER card To obtain a beverage free of charge, insert the MASTER card in the card reader. Press the desired product key and remove the card from the card reader. 1. Insert MASTER card in the card reader: 12:00 free product 15.10.2001 2. Press product key: The selected product is served. 3. Remove MASTER card. 8.2. Payment with internal systems 8.2.1. MONEY chip card system Requisite chip cards - MONEY MONEY MONEY MONEY MONEY MONEY MONEY MONEY MONEY MONEY LOAD PROGRAM MASTER A B C D E F G H I J - card(s) card(s) card(s) card(s) card(s) card(s) card(s) card(s) card(s) card(s) card (see chapter 8.2.2) card (see chapter 8.2.3) card (see chapter 8.1) For all the functions described in this chapter, it is assumed that the coffee machine is ready for routine operation in payment mode. BASO-2 - 02.08 - V07 Page 8-3 Payment Systems 8.2.1.1. MONEY card The MONEY card is a credit card, which is inserted into the card reader to obtain a beverage. Payment is debited from the card and the remaining credit displayed. The various MONEY cards (MONEY A-J) have different price levels (0%-255% of the programmed product price). These price levels can be programmed individually, as required, by the service engineer. A single MONEY card may be enabled for several coffee machines on condition that the machines have the same ID number (set by the service engineer). 8.2.1.1.1. How to obtain beverages using the MONEY card Coffee products credit operation 12:00 15.10.2001 1. Insert MONEY card into the card reader. credit xx.xx select product 2. Press product key. credit xx.xx choice x supply x 3. The beverage is served 4. Order further beverages or remove the MONEY card from the card reader. Tea/steam credit operation 12:00 15.10.2001 1. Insert MONEY card into the card reader. credit xx.xx select product 2. Press tea or steam key. credit 12:00 3. Page 8-4 xx.xx 15.10.2001 The beverage is served. Pressing the same key again prematurely ends water or steam output. Several water and steam products cannot be obtained in succession. When the product key is pressed, payment is debited from the MONEY card and the remaining credit displayed. Several coffee products can be obtained in succession. Pre-selection using several MONEY cards is not possible. please wait All of the beverages ordered with the first MONEY card are remove card served before products can be ordered using the next MONEY card. If the MONEY card remains in the card reader for more than 5 seconds (can be set by the service engineer to any value from 0-99), a signal sounds to remind the user that the card is still in the card reader (signal can be deactivated by the service engineer). This message appears if the price of the product exceeds credit xx.xx the amount of credit left on the MONEY card. too little credit BASO-2 - 02.08 - V07 Payment Systems 8.2.1.1.2. Program the amount of water/coffee powder dispensed for individual coffee products credit operation 12:00 15.10.2001 1. Insert MONEY card into the card reader: credit xx.xx select product 2. Hold [ ] key down for approximately 4 seconds. select product store ? ` Decaf ` 3. Select the required product key. water quantity + 0% change `-/+` ` Decaf ` --> 4. Change the amount of water using the [ ] and [ ] keys (max. 30% more or less). 5. Press [ ] key to confirm the new amount of water. grind quantity + 0% change `-/+` ` Decaf ` - 6. Change the amount of coffee powder using the [ ] and [ ] keys (max. 20% more or less) 7. Press [ ] key to confirm the new amount of coffee powder. select product store ? ` Decaf ` 8. Repeat steps 3 to 7 for each successive product. 9. Press [ ] key to save the changed data to the card. ... Busy ... credit xx.xx select product Signal sounds after set time interval. 10. Remove MONEY card from the card reader. 11. Products are now served with the newly programmed amounts of water and coffee. If the MONEY card is removed before the data are saved (9) a brief signal sounds. The values have not been saved to the card. 8.2.1.1.3. Reset amounts of water/coffee powder for individual coffee products credit operation 1. Insert MONEY card into the card reader: credit xx.xx select product 2. Hold [ ] key down for approximately 4 seconds until a signal sounds. The following message is displayed: individual measuring delete ? ` Decaf ` « 3. Press [ ] key. Signal sounds after set time interval. 4. Remove MONEY card from the card reader. credit xx.xx select product When values are reset, the manufacturer defaults are written to the card. BASO-2 - 02.08 - V07 Page 8-5 Payment Systems 8.2.1.2. LOAD card The LOAD card is used to load or delete credit onto/from MONEY cards. If you have no LOAD card, MONEY cards can be reloaded by your licensed after sales service. The LOAD card is an optional feature and is not included in the standard delivery package. 8.2.1.2.1. Menu - Load credit onto MONEY cards Delete credit to MONEY cards Display total credit loaded on MONEY cards Info MONEY cards Enable MONEY cards Disable MONEY cards MONEY cards history Change PIN code At the end of every menu: Press [ ] or [ ] key to reach the next menu, remove LOAD card Î coffee machine ready in payment mode. 8.2.1.2.2. Programmable security levels If the service engineer has programmed security levels 1 or 3 for the LOAD card, the PIN code must be entered each time the card is used. 1. Insert LOAD card into the card reader: PIN-Code 0000 ` +/- ` ` Decaf Æ` 2. 3. 4. 5. Set the first digit of the PIN code using the [ ] and [ ] keys. Confirm with the [ ] key. Repeat steps 2 and 3 until the complete PIN code has been entered. Press [ ] or [ ] key to reach the next menu, remove LOAD card Î coffee machine ready in payment mode. Pressing the [ ] key accepts existing values The PIN code is only activated if so programmed. The current PIN code is not displayed. 8.2.1.2.3. Load credit onto MONEY card 1. Insert LOAD card into the card reader. 2. Press [ ] or [ ] key until the following menu is displayed: load MONEY-card execute ‘ Decaf ’ 3. Press [ ] key. remove card ª Page 8-6 BASO-2 - 02.08 - V07 Payment Systems 4. Remove LOAD card. insert card MONEY / LOAD -Æ 5. Insert MONEY card into the card reader. amount entry xx.xx x.xx Amount = Credit balance Enter = Credit to be loaded 6. Using the [ ] and [ ], enter the amount of credit to be loaded. Pressing the [ ] or [ ] key adds or subtracts credit by the factor programmed by the service engineer. 7. Press [ ] key. amount xx.xx ... Save ... remove card 8. Remove MONEY card insert card MONEY / LOAD -Æ 9. Load another MONEY card Î Repeat steps 5-8. Back to menuÎ Insert LOAD card into the card reader. load MONEY-card execute ‘ Decaf ’ 10. Press [ ] or [ ] key to reach the next menu, remove LOAD card Î coffee machine ready in payment mode. 8.2.1.2.4. Delete credit from MONEY card 1. Insert LOAD card into the card reader. 2. Press [ ] or [ ] key until the following menu is displayed: delete MONEY-card execute ‘ Decaf ’ 3. Press [ ] key. remove card 4. Remove LOAD card: delete MONEY-card execute ‘ Decaf ’ 5. Insert MONEY card into the card reader: MONEY card delete ? ` Decaf ` 6. Press [ ] key. MONEY-card ... Busy ... remove card 7. Remove MONEY card. insert card MONEY / LOAD -Æ ª BASO-2 - 02.08 - V07 Page 8-7 Payment Systems 8. Delete another MONEY card Î Repeat steps 5-7. Back to menuÎ Insert LOAD card into the card reader. delete MONEY-card execute ‘ Decaf ’ 9. Press [ ] or [ ] key to reach the next menu, remove LOAD card Î coffee machine ready in payment mode. 8.2.1.2.5. Display total amount of credit loaded and reset (MONEY card) 1. Insert LOAD card into the card reader. 2. Press [ ] or [ ] key until the following menu is displayed: =Total amount of credit loaded on all MONEY cards since load MONEY-card the last reset. sales 0.00 3. Press [ ] key. load MONEY-card delete ? `Decaf ` 4. Press [ ] key. loead MONEY-card ... Done ... loead MONEY-card sales 0.00 5. Press [ ] or [ ] key to reach the next menu, remove LOAD card Î coffee machine ready in payment mode. 8.2.1.2.6. Chip card info It is possible to query card numbers (incremental and assigned by the manufacturer). E.g. if a MONEY card is found, the card number enables the bearer to be identified, on condition that the cards are registered when allocated. 1. Insert LOAD card into the card reader. 2. Press [ ] or [ ] key until the following menu is displayed: info MONEY-card display ` Decaf ` 3. Press [ ] key. remove card 4. Remove LOAD card. insert card MONEY / LOAD Æ 5. Insert MONEY card into the card reader. MONEY-A Card-Nr. YY xxxx MONEY-A YY Card no. = Price group = Transaction counter (no. of products served) = Card no. 6. Remove MONEY card. insert card MONEY / LOAD -Æ 7. Load another MONEY card Î Insert next MONEY card. Back to menuÎ Insert LOAD card into the card reader. 8. Press [ ] or [ ] key to reach the next menu, remove LOAD card Î coffee machine ready in payment mode. Page 8-8 BASO-2 - 02.08 - V07 Payment Systems 8.2.1.2.7. Enable MONEY card 1. Insert LOAD card into the card reader. 2. Press [ ] or [ ] key until the following menu is displayed: release MONEY-card execute ` Decaf ` 3. Press [ ] key. remove card 4. Remove LOAD card: insert card MONEY / LOAD Æ 5. Insert MONEY card into the card reader: MONEY card released remove card 6. Remove MONEY card. insert card MONEY / LOAD Æ 7. Enable another MONEY card Î Insert the next MONEY card. Back to menuÎ Insert LOAD card into the card reader. 8. Press [ ] or [ ] key to reach the next menu, remove LOAD card Î coffee machine ready in payment mode. 8.2.1.2.8. Disable MONEY card 1. Insert LOAD card into the card reader. 2. Press [ ] or [ ] key until the following menu is displayed: lock MONEY-card execute ` Decaf ` 3. Press [ ] key. remove card 4. Remove LOAD card: insert card MONEY / LOAD Æ 5. Insert MONEY card into the card reader. MONEY card locked remove card 6. Remove MONEY card. insert card MONEY / LOAD --> 7. Disable another MONEY card Î Insert next MONEY card. Back to menuÎ Insert LOAD card into the card reader. 8. Press [ ] or [ ] key to reach the next menu, remove LOAD card Î coffee machine ready in payment mode. BASO-2 - 02.08 - V07 Page 8-9 Payment Systems 8.2.1.2.9. MONEY card history 1. 2. Insert LOAD card into the card reader. Press [ ] or [ ] key until the following menu is displayed: MONEY history display ` Decaf ` 3. Press [ Nr. xx 12:00 ] key. xxxxx 15.10.2001 The card and registration numbers and the time and date the card was last written to are displayed. 4. Pressing [ ] or [ ] browses the entries on the MONEY cards (1–20). 5. Remove LOAD card Î coffee machine is ready in payment mode. It is possible to query card numbers (incremental and assigned by the manufacturer). E.g. if a MONEY card is found, the card number enables the bearer to be identified, on condition that the cards are registered when allocated. 8.2.1.2.10. Change PIN code 1. Insert LOAD card into the card reader. 2. Press [ ] or [ ] key until the following menu is displayed: change PIN-code execute ` Decaf ` 3. Press [ ] key. PIN-Code 0000 `+/- ` ` Decaf `Æ 4. 5. 6. 7. Set the first digit of the PIN code using the [ ] and [ ] keys. Confirm with the [ ] key. Repeat steps 4 and 5 until the complete PIN code has been entered. Press [ ] or [ ] key to reach the next menu, remove LOAD card Î coffee machine ready in payment mode. Pressing the [ ] key accepts existing values. The PIN code is only activated if so programmed. The current PIN code is not displayed. Page 8-10 BASO-2 - 02.08 - V07 Payment Systems 8.2.1.3. PROGRAM card In payment mode using MONEY cards, the PROGRAM card is used for statistical purposes and for setting user-relevant data. The PROGRAM card is an optional feature and is not included in the standard delivery package. 8.2.1.3.1. Menu - Enable/disable payment mode Switch prices MONEY card price levels 1+2 Change token price with or without MONEY cards price levels 1+2. Change product prices and article numbers (Only for external payment mode) Display MONEY sales Reset MONEY sales Display MASTER sales Reset MASTER sales Log on MASTER card Delete MASTER card table Enable/disable timer Change PIN code At the end of every menu: Remove PROGRAM card Î coffee machine ready in payment mode. Press [ ] or [ ] key to reach the next menu. You will find a detailed description of how to use and program the coffee machine using the PROGRAM chip card in chapter 4.6.1. BASO-2 - 02.08 - V07 Page 8-11 Payment Systems 8.3. Payment with self-service systems 8.3.1. Token slot and related systems Chip cards required - None - MASTER card (see chapter 8.1). For all the functions described in this chapter, it is assumed that the machine is ready for routine operation in payment mode. The coffee machine will accept tokens at the same time as MONEY cards if programmed to do so by the service engineer. 8.3.1.1. Prepare beverages 1. If the machine is ready in payment mode, the following message is displayed: credit operation 12:00 15.10.2001 2. Insert token into the token slot. token credit 1 select product 3. Press product key. Product is served. Several tokens may be inserted. When a product is selected, the number of tokens set by the service engineer for the selected key is debited from the displayed credit. It may be necessary to insert several tokens (max. 5) in order to obtain a beverage. For the token slot to be able to accept tokens the machine must be switched on and payment mode enabled with the PROGRAM card (see chapter 4.6.1.3). If too many tokens are inserted, they remain as credit but cannot be reclaimed. No coins/tokens are returned. Attention: Credit is lost when the machine is switched off. 8.3.2. NRIG 13 EMP no-change coin slot and related systems (standard type) Chip cards required - None - MASTER card (see chapter 8.1) - PROGRAM card to change prices, enable, disable and for payment mode. For all the functions described in this chapter, it is assumed that the coffee machine is ready for routine operation in payment mode. If the coin slot is programmed for tokens, it can be fed both coins and tokens. Each product has a coin price and a token price. The slot can also be used solely for tokens if disabled for coins. Page 8-12 BASO-2 - 02.08 - V07 Payment Systems 8.3.2.1. Prepare beverages 1. When the coffee machine is ready, the following message is displayed: insert money 12:00 15.10.2001 2. Insert the required amount into the coin slot. Warning: Only use the coins intended for the coin slot. When a token is inserted: When coins are inserted: price level -1 select product credit 1,50 select product 3. Press product key. The product is served. This message is displayed if not enough money has been inserted: insert money price 1,50 1 token For multiple-price coin slot systems, contact the licensed after sales service. For the coin slot to be able to accept coins the machine must be switched on and payment mode enabled using the PROGRAM card. (See also chapter 4.6.1.3.) If too much money is inserted, it remains as credit but cannot be reclaimed. No coins are returned. WARNING: Credit is lost when the machine is switched off. 8.3.3. CF350 Totalisator dual-price coin slot The coin slots are programmed by the service engineer or ex-factory for two price levels. Insert the coins or tokens. If the first price level is attained, the corresponding product can be obtained. If a second price-level product is ordered, the following message is displayed: “enough credit” If the second price level is attained, all products can be obtained. When a product is served, excess cash or tokens are deleted. No coins/tokens are returned. 8.3.4. CSI (Coffee Standard Interface) external payment – Connection to coffee-bar system Chip cards required - None - MASTER card (see chapter 8.1). The coffee machine is connected to an external payment system and indirectly linked to the cash register via a coffee-bar system. The waiter is identified by the external system. When the waiter ID is authenticated, an enable signal is sent from the payment system to the machine. When the product is served, the article reference and the number of products are transmitted to the cash register and booked to the respective waiter. For all the functions described in this chapter, it is assumed that the machine is ready for routine operation in payment mode. BASO-2 - 02.08 - V07 Page 8-13 Payment Systems 8.3.4.1. Prepare beverages 1. When the coffee machine is ready, the following message is displayed: waiter release 12:00 15.10.2001 2. Plug waiter jack into coffee-bar system. select product 12:00 15.10.2001 3. Press product key. Product is served. To ensure that payment mode functions correctly, the machine must be switched on and payment mode enabled using the PROGRAM card (see chapter 4.6.1.3). Page 8-14 BASO-2 - 02.08 - V07 Payment Systems 8.4. Payment using Waiter Account 8.4.1. Waiter Account chip card system For all the functions described in this chapter, it is assumed that the coffee machine is ready for routine operation in payment mode. Chip cards required: 8.4.1.1. - WAITER card(s) - MANAGER card - PROGRAM card - COPY WAITER card - MASTER card (see chapter 8.1) WAITER card In order to obtain a beverage, the WAITER chip card must be inserted into the card reader. Each waiter has his own personal card which has been enabled using the coffee machine’s PROGRAM card and given an ID number. Beverages served are totaled on the WAITER chip card. Up to 128 WAITER chip cards can be enabled for the machine. 8.4.1.1.1. Preparing beverages with the WAITER card waiter release 12:00 15.10.2001 1. Insert the WAITER card into the card reader: waiter 1 sales 0.000 2. Press product key: waiter 1 choice 1 supply 1 3. The beverage is served: waiter 1 sales 3.000 4. Order further products or remove the WAITER card from the card reader. When the product key is pressed, the product price is added to the total sales on the WAITER card and displayed if programmed to do so. ATTENTION: If the WAITER card is removed from the card reader too early (up to 1 second after the product has been served) the following message is displayed: waiter release *write error BASO-2 - 02.08 - V07 The product will not be served but the price will be debited. Page 8-15 Payment Systems 8.4.1.2. MANAGER card The MANAGER-chip card is used to program data relevant to routine Waiter Account payment mode. • The MANAGER card is an optional feature and is not included in the standard delivery package - Waiter payment Data backup Display waiter Log on waiter Log off waiter Change PIN code 8.4.1.2.1. Menu At the end of every menu: Remove MANAGER card Î Coffee machine ready in payment mode. Press [ ] key to reach the next menu. 8.4.1.2.2. Programmable security levels If the service engineer has programmed security levels 1 or 3 for the MANAGER card, the PIN code must be entered each time the card is used waiter release 12:00 15.10.2001 1. Insert MANAGER card into the card reader: PIN-Code xxxx 2. Enter the PIN code using the [ [ ] key. ] and [ ] keys. Confirm individual digits with the 8.4.1.2.3. Waiter payment 8.4.1.2.3.1. WAITER card sales This function enables you to query waiter sales. The logged on WAITER cards are required in order to do so. 1. Insert the MANAGER card into the card reader. 2. Press [ ] or [ ] until the following menu is displayed: waiter accounting execute ‘ Decaf ’ 3. Press [ ] key: remove card 4. Remove MANAGER card: insert card KELLNER/MANAGER-> 5. Insert the WAITER card whose sales you wish to display or reset: Î Waiter number waiter 1 Î and total sales are displayed. sales 0.000 Remove the WAITER card from the card reader. Insert another WAITER card or the MANAGER card Î Coffee machine ready in payment mode. Page 8-16 BASO-2 - 02.08 - V07 Payment Systems 8.4.1.2.3.2. Reset WAITER card This function enables you to reset waiter sales. The logged on WAITER cards are required in order to do so. 1. Insert MANAGER card in to the card reader. 2. Press [ ] or [ ] until the following menu is displayed: waiter accounting execute ‘ Decaf ’ 3. Press [ ] key: remove card 4. Remove MANAGER card: insert card WAITER/MANAGER--> 5. Insert the WAITER card whose sales you wish to display or reset: Î Waiter number waiter 1 Î and total sales are displayed. sales 22.222 6. Press [ ] key: WAITER card delete ? ‘ Decaf ’ 7. Press [ ] key: waiter 1 sales 0.000 Remove the WAITER card from the card reader. Insert another WAITER card or the MANAGER card Î Coffee machine ready in payment mode. 8.4.1.2.4. Log on waiter This function enables you to log on a waiter. The logged on WAITER cards are required in order to do so. 1. Insert MANAGER card into the card reader. 2. Press [ ] or [ ] until the following menu is displayed: log on waiter execute ‘ Decaf ’ 3. Press [ ] key: remove card 4. Remove MANAGER card: insert card WAITER/MANAGER --> 5. Insert WAITER card: waiter xx 6. Enter a WAITER number. (0-999) waiter 1 ª BASO-2 - 02.08 - V07 Page 8-17 Payment Systems If 0 is entered, the following message is displayed: waiter 0 no. invalid If a number is entered which already exists, the following message is displayed: waiter 1 no. exists In both cases, remove the WAITER card, re-insert it and enter a new number 7. Press [ ] key. ... Busy ... remove card 8. Remove WAITER card: insert card WAITER/MAN 9. To log on further WAITER cards, insert the next WAITER card and repeat steps 4 and 5. Remove MANAGER card Î Coffee machine ready in payment mode. If several machines are in use, the card is now enabled for all of them. However, in order to be able to obtain products, the WAITER card must also be logged onto the other machines as well. 8.4.1.2.5. Log off waiter This function enables you to log off a waiter. The logged on WAITER cards are not required in order to do so. 1. Insert MANAGER card into the card reader. 2. Press [ ] or [ ] until the following menu is displayed: log off waiter execute ‘ Decaf ’ 3. Press [ ] key: waiter 0 4. Press [ ] or [ ] key until the desired WAITER number is displayed. waiter 1 5. Press [ ] key: waiter 1 card logged off waiter 0 If a WAITER number is entered which does not figure in the waiter table, the following message is displayed: waiter 2 does not exist waiter 0 6. Repeat steps 4 and 5 to log off further WAITER cards. Remove MANAGER card Î Coffee machine ready in payment mode. Page 8-18 BASO-2 - 02.08 - V07 Payment Systems 8.4.1.2.6. Display waiter numbers This function enables you to disable waiter sales. The logged-on WAITER cards are not required in order to do so. 1. Insert MANAGER card into the card reader. 2. Press [ ] or [ ] until the following menu is displayed: 3. Press [ ] key: waiter 1 All of the waiter numbers in the waiter table are briefly displayed in order. waiter 2 waiter 3 ... and so on. 8.4.1.2.7. Data backup If a WAITER card is lost or is defective, this function enables you to query the total sales of the 32 most recently used WAITER cards. 1. Insert MANAGER card into the card reader. 2. Press [ ] or [ ] until the following menu is displayed: save data display ‘ Decaf ’ 3. Press [ ] key: waiter 3 sales 22.222 4. Pressing the [ ] key enables you to query the total sales in order starting with the highest waiter number save data sales 0.000 8.4.1.2.8. Change PIN code CHEF 1. Insert MANAGER card into the card reader. 2. Press [ ] or [ ] until the following menu is displayed: change PIN-code execute ‘ Decaf ’ 3. Press [ ] key: PIN-Code 0000 ‘ -/+ ‘ ‘ Decaf ‘ --> 4. Set the first digit using the [ ] and [ ] keys. 5. Confirm with the [ ] key. 6. Repeat steps 4 and 5 until the complete PIN code has been entered. When the final digit is confirmed, the new PIN code is briefly confirmed. PIN-Code 0000 ... Down ... Pressing the [ ] key accepts existing values. The PIN code is only activated if so programmed. The current PIN code is not displayed. BASO-2 - 02.08 - V07 Page 8-19 Payment Systems 8.4.1.3. COPY WAITER card The COPY WAITER chip card enables you to transfer the table of logged-on WAITER cards to another machine. The COPY WAITER card is an optional feature and is not included in the standard delivery package. 8.4.1.3.1. Menu - Card Î Coffee machine - Coffee machine Î Card 8.4.1.3.2. Copy waiter table “Card Æ Coffee machine” 1. Insert COPY WAITER card into the card reader: CHEF copy WAITER card --> machine 2. Press [ ] key: ... Load ... 12:00 last backup 15.10.2001 The waiter table is copied to the machine. The date of the last waiter table backup to the card is displayed. 3. Remove COPY WAITER card. Never remove the COPY WAITER card from the card reader during data transfer! 8.4.1.3.3. Copy waiter table “Coffee machine Æ Card” 1. Insert COPY WAITER card into the card reader: CHEF copy WAITER card -> machine 2. Press [ ] key until the following menu is displayed: copy WAITER machine --> card 3. Press [ ] key: ... Save ... The waiter table is copied to the chip card. waiter release 12:00 15.10.2001 4. Remove COPY WAITER card. Never remove the COPY WAITER card from the card reader during data transfer! Page 8-20 BASO-2 - 02.08 - V07 Payment Systems 8.4.1.4. PROGRAM card In Waiter Account payment mode, the PROGRAM card is used for statistical purposes and for setting user-relevant data. The PROGRAM card is an optional feature and is not included in the standard delivery package. (For description, see chapter 4.6.1/article ref. nos. in chapter 2.3.3) 8.4.1.4.1. Menu - Enable/disable payment mode Switch prices MONEY card price levels 1+2 Change token price with or without MONEY cards price levels 1+2. Change product prices and article numbers (Only for external payment mode) Display MONEY sales Reset MONEY sales Display MASTER sales Reset MASTER sales Log on MASTER card Delete MASTER card table Enable/disable timer Change PIN code You will find a detailed description of how to use and program the machine using the PROGRAM-chip card in chapter 4.6.1. BASO-2 - 02.08 - V07 Page 8-21 Payment Systems Page 8-22 BASO-2 - 02.08 - V07 Standard Settings 9. Contents Chap. Text 9.1. Standard Settings (Software NT 2000 V 1.05) ...........................................................................9-2 BASO-2 - 02.09 - V07 Page Page 9-1 Standard settings 9.1. Standard Settings (Software NT 2000 V 1.05) Hoists per cup Product pre-selection Dual product Coffee mill – Choice (left or right) Grinding time Dual product Extra amount ground Initial pressure Outlet switching Prelim. infusion (no. of impulses) Infusion Delay (sec.) Extra water 0 = disabled (sec.) Secondary pressure Secondary pressure (sec.) Proportion of milk Amount of milk (0-30 sec.) Dispense variants: Milk before coffee Milk with coffee Milk after coffee Delay Product amount (impulses) Open infusion chamber Opening time (ms) Counted products 1 1 enabled / disabled enabled / disabled Links 450 45 % 160 enabled / disabled 5 0.0 00 60 0.0 150 2.0 - - - - Espresso 1 1 enabled / disabled enabled / disabled Links 450 45 % 160 enabled / disabled 0 - 00 80 0.0 150 2.0 - - - - Coffee 1 1 enabled / disabled enabled / disabled Links 450 45 % 160 enabled / disabled 0 - 00 140 0.0 150 2.0 - - - - 2 Ristrettos 2 1 enabled / disabled enabled / disabled Links 600 45 % 160 enabled / disabled 5 - 00 150 0.0 150 2.0 - - - - 2 espressos 2 1 enabled / disabled enabled / disabled Links 600 45 % 160 enabled / disabled 0 - 00 150 3.0 150 2.0 - - - - 2 coffees 1 2 enabled / disabled enabled / disabled Links 450 45 % 160 enabled / disabled 0 - 10 280 6.0 150 2.0 - - - - Macchiato 1 1 enabled / disabled enabled / disabled Links 450 45 % 160 enabled / disabled 0 - 00 60 0.0 150 2.0 50 % 10.0 Cappuccino 1 1 enabled / disabled enabled / disabled Links 450 45 % 160 enabled / disabled 0 - 00 60 0.0 150 2.0 0% 10.0 Milk coffee 1 1 enabled / disabled enabled / disabled Links 450 45 % 160 enabled / disabled 0 - 00 60 0.0 150 2.0 100 % 10.0 Latté 1 1 enabled / disabled enabled / disabled Links 450 45 % 160 enabled / disabled 0 - 00 60 0.0 150 2.0 50 % 10.0 Coffee pot 1 1 enabled / disabled enabled / disabled Links 450 - 160 enabled / disabled 0 - 00 200 0.0 150 2.0 - - - - By-pass coffee for spirits 1 1 enabled / disabled - Links 200 - 160 enabled / disabled 0 - 00 140 150 2.0 - - - - Product program Ristretto Products Milk bef. Milk with Milk aft. Milk bef. Milk with Milk aft. Milk bef. Milk with Milk aft. Milk bef. Milk with Milk aft. enabled / disabled enabled / disabled enabled / disabled enabled / disabled 60 % * *NB Extra water is served after the coffee and not with the coffee BASO-2 - 02.09 - V07 Page 9-2 Standard settings Standard Settings (Software NT 2000 V 1.05) Milk Start / Stop enabled / disabled Milk timeout 0-150 sec Standard 10.0 sec Milk 0-99.0 sec Standard 10.0 sec - Milk foam Start / Stop enabled / disabled Milk foam timeout 0-150 sec Standard 10.0 sec Milk foam 0-99.0 sec Standard 10.0 sec - Tea Start / Stop enabled / disabled Tea timeout after 0-150 sec Standard 10.0 sec Tea dosing time 0-99.0 sec Standard 10.0 sec - Steam Start / Stop enabled / disabled Steam timeout after 0-150 sec Standard 10.0 sec Steam dosing time 0-99.0 sec Standard 10.0 sec - Special steam Start / Stop enabled / disabled Special steam timeout after 0-150 sec Standard 90.0 sec Automatic steam level enabled / disabled Milk temperature 0°C - 90°C Standard 70°C Output pulse 500ms - - - Temperature Infusion water = 86°C Temperature Steam = 120°C / with KML = 130°C Infusion water Excess temperature-1 = 16°C Infusion water Excess temperature -2 = 7°C Temperature Hot water = 95°C Grouts container capacity = 45 prods. Mill empty message = 50 Cleaning reminder = 450 - - - Chocolate Gen. parameters Gen. parameters Gen. parameters BASO-2 - 02.09 - V07 Temp. of milk in refrigerator = 3°C-5°C Page 9-3 Standard settings BASO-2 - 02.09 - V07 Page 9-4 Appendix 10. Chap. Contents Text Page 10 appendix........................................................................................... 10-2 10.1 10.1.1 10.1.2 CE Declaration of conformity ........................................................................................................10-2 Cleaning agents “Weekly cleaning agents” ......................................................................................10-4 Cleaning tablet for the coffee machine.............................................................................................10-5 10.2 10.2.1 10.2.1.1 10.2.1.2 10.2.1.3 Performance plate of the steam generator and the instant heater ...........................................10-6 Coffee machine.................................................................................................................................10-6 Steam generator (Type - DA 61156) ................................................................................................10-6 Instant heater (Type - HW Tea 61164).............................................................................................10-6 Instant heater (Type - HW Brewing 65111)......................................................................................10-6 10.3 Environmental aspects ..................................................................................................................10-7 BASO-2 - 02.10 - V07 Page 10-1 Appendix 10 APPENDIX 10.1 CE Declaration of conformity These products meet the demands of the EU guidelines. 73/23/EEC Electrical Equipment for Use within Stipulated Voltage Limits. 89/336/EEC Electromagnetic Compatibility. The declaration of conformity can be obtained from the following addresses: M. Schaerer AG Gewerbestrasse 15 CH - 3302 Moosseedorf / Switzerland Phone: ++41 031 85 85 111 FAX: ++41 031 85 85 140 E-Mail: [email protected] Internet: http://www.schaerer.com Page 10-2 BASO-2 - 02.10 - V07 Appendix 10.2 Cleaning agents 10.2.1 Cleaning agent “Daily cleaning agent” Attention! Before you use the cleaning agent read the label attached to the cleaning agent container and the "HEALTH & SAFETY DATA SHEET." Should you not be in possession of the safety sheet, please order it from the distributing firm. Purpose: Daily cleaning of the milk pipe system. Form / smell: See "HEALTH & SAFETY DATA SHEET." Use: • • • • • • Emergency information: Keep away from children and unauthorized persons. Do not swallow. Never mix the “daily cleaning agent” with the “weekly cleaning agent” or acids! When diluting with water carefully admix first the water (not hotter than 20° C) then the “daily cleaning agent.” Use the enclosed cleaning container for the cleaning.. While working with cleaning agents ensure good ventilation. Ask the distributing company or a customer service authorized by the distributor for the telephone number of the emergency information center (toxicological information center) in your country. If your country has no such or similar institution, call the following number in Switzerland for information in emergencies ++41 01 251 51 51 (Toxicological Information Center) FIRST AID: SEE "HEALTH & SAFETY DATA SHEET." Note: Important for the doctor: If possible show the doctor the cleaning agent label or the "HEALTH & SAFETY DATA SHEET." Storage of the “daily cleaning agent:” • Keep out of the reach of children and unauthorized persons • Protect from heat. • Protect from light. • Do not mix cleaning agents. • Store only in original container/packaging. • Do not store together with food, beverages or other items of human consumption. • Obey regulations for storage of cleaning agents. BASO-2 - 02.10 - V07 Page 10-3 Appendix 10.1.1 Cleaning agents “Weekly cleaning agents” Attention Before you use the cleaning agent read the label attached to the cleaning agent container and the "HEALTH & SAFETY DATA SHEET.” Should you not be in possession of this safety sheet, please order it from the distributing firm. Purpose: For the weekly cleaning of the milk pipe system. Form / smell: See "HEALTH & SAFETY DATA SHEET." Use: • • • • • • Emergency information: Keep cleaning agent away from children and unauthorized persons. Do not swallow! Never mix the “weekly cleaning agent” with the “daily cleaning agent” or acids! When diluting with water carefully admix first the water (not hotter than 20° C) then the “weekly cleaning agent.” Use the enclosed container for the cleaning.. While working with the cleaning agents ensure good ventilation. Ask the distributing company or a customer service authorized by the distributor for the telephone number of the emergency information center (toxicological information center) in your country. If your country has no such or similar institution, call the following number in Switzerland for information in emergencies: ++41 01 251 51 51 (Toxicological Information Center) First aid: See "HEALTH & SAFETY DATA SHEET." Note: Important for the doctor: If possible show the doctor the cleaning agent label or the "HEALTH & SAFETY DATA SHEET." Storage of the “weekly cleaning agent”: • Keep out of the reach of children and unauthorized persons. • Protect from heat. • Protect from light. • Do not mix cleaning agents • Store only in original container/packaging. • Do not store together with food, beverages and other items of human consumption. • Obey regulations for storage of cleaning agents. ª Page 10-4 BASO-2 - 02.10 - V07 Appendix 10.1.2 Cleaning tablet for the coffee machine Attention! Before you use the cleaning agent read the label attached to the cleaning agent container and the “HEALTH AND SAFETY DATA SHEET.” Should you not be in possession of this safety sheet, please order it from the distributing firm. Purpose: For the daily cleaning of the coffee system of the coffee machine. Form / smell: See “HEALTH AND SAFETY DATA SHEET.” Use: • • • • • Emergency information: Keep the cleaning tablet away from children and unauthorized persons. Do not swallow! Do not eat or drink while using the cleaning tablet. Wash hands and face immediately before breaks and after using the cleaning tablet. Never mix the cleaning tablet with liquid or pulverized cleaning agents or with acids. Ask the distributing company or a customer service authorized by the distributor for the telephone number of the emergency information center (toxicological information center) in your country. If your country has no such or similar institution, call the following number in Switzerland for information in emergencies: ++41 01 251 51 51 (Toxicological Information Center) First aid: See "HEALTH & SAFETY DATA SHEET." Note: Important for the doctor: If possible show the doctor the cleaning agent label or the "HEALTH & SAFETY DATA SHEET." Storage of the cleaning tablet: • Keep out of the reach of children and unauthorized persons. • Protect from heat. • Protect from light. • Protect from moisture • Do not mix cleaning agents. • Store only in original container/packaging. • Do not store together with food, beverages and other items of human consumption • Obey regulations for storage of cleaning agents. BASO-2 - 02.10 - V07 Page 10-5 Appendix 10.2 Performance plate of the steam generator and the instant heater 10.2.1 Coffee machine Key 10.3.1.1. 10.3.1.2. 10.3.1.3. Type Excess operating pressure Maximum excess op. pressure Test excess pressure Maximum op. temperature Minimum op. temperature Operating temperature Water capacity Year of construction Manufacture number DA 2.5 bar 12 bar 18 bar 192°C 10°C 140°C 0.8 l 20.. DA..... HW 4.0 bar 12 bar 18 bar 192°C 10°C 152°C 0.8 l 20.. HW..... HW 2.5 bar 12 bar 18 bar 192°C 10°C 95°C 0.8 l 20... HW..... pmax Tmax Tmin Vol. 10.2.1.1 Steam generator (Type - DA 61156) M. Schaerer AG, CH-3302 Moosseedorf Typ pmax U f : : : : SE 12 bar 230 VAC 50/60 Hz F-Nr. : DA....... Constr. year: 20.. Tmax : 192ºC Vol. : 0.8 l Tmin : 10ºC P : 3000 W Exec. and. control n. SVTI und TÜV Regulations M. Schaerer AG, CH-3302 Moosseedorf Typ pmax U f : : : : SE 12 bar 230 VAC 50/60 Hz F-Nr. : DA....... Baujahr : 20.. Tmax : 192ºC Vol. : 0.8 l Tmin : 10ºC P : 3000 W Ausfng. u. Prüfung n. SVTI und TÜV Vorschriften 10.2.1.2 Instant heater (Type - HW Tea 61164) M. Schaerer AG, CH-3302 Moosseedorf Typ pmax U f : : : : SE 12 bar 230 VAC 50/60 Hz F-Nr. : HW....... Constr. year : 20.. Tmax : 192ºC Vol. : 0.8 l Tmin : 10ºC P : 2x3000 W Exec. and. control n. SVTI und TÜV Regulations M. Schaerer AG, CH-3302 Moosseedorf Typ pmax U f : : : : SE 12 bar 230 VAC 50/60 Hz F-Nr. : HW....... Baujahr : 20.. Tmax : 192ºC Vol. : 0.8 l Tmin : 10ºC P : 2x3000 W Ausfng. u. Prüfung n. SVTI und TÜV Vorschriften 10.2.1.3 Instant heater (Type - HW Brewing 65111) M. Schaerer AG, CH-3302 Moosseedorf Typ pmax U f : : : : SE 12 bar 230 VAC 50/60 Hz F-Nr. : HW....... Constr. year: 20.. Tmax : 192ºC Vol. : 0.8 l Tmin : 10ºC P : 3000 W Exec. and. control n. SVTI und TÜV Regulations M. Schaerer AG, CH-3302 Moosseedorf Typ pmax U f Page 10-6 : : : : SE 12 bar 230 VAC 50/60 Hz F-Nr. : HW....... Baujahr : 20.. Tmax : 192ºC Vol. : 0.8 l Tmin : 10ºC P : 3000 W Ausfng. u. Prüfung n. SVTI und TÜV Vorschriften BASO-2 - 02.10 - V07 Appendix 10.3 Environmental aspects Packaging The machines are shipped in reusable cartons and palettes. Spare parts Parts exchanged during a service are reconditioned as far as possible and used again. Coffee grouts The grouts in the grouts container can put in the garden or added to the compost. Cleaning agent Environmental protection! If no re-use is possible, cleaning agents and their packaging must be disposed of in line with local laws and regulations in accordance with the “HEALTH AND SAFETY DATA SHEET.” Energy consumption The energy consumption corresponds to the technical state of the art at the time the machine was developed. Disposal: Environmental protection! The machines must be disposed off correctly and in line with local laws and regulations. BASO-2 - 02.10 - V07 Page 10-7 Appendix Page 10-8 BASO-2 - 02.10 - V07 Index 11. Index ACDEFGHI KLMNOPQRSTUW Text Kapitel A Index Accident prevention regulations ........................................................................................ Alarm functions.................................................................................................................. Alarm group 1 (Info)........................................................................................................... Alarm group 2 (Errors)....................................................................................................... Appendix............................................................................................................................ C 0.4. ............... 0 -7 7.5 ................ 7 -10 7.5.1 ............. 7 -10 7.5.2 ............. 7 -10 10 ................. 10 -2 Index Cards compatible with all payment systems ..................................................................... CE Declaration of conformity............................................................................................. CF350 Totalisator dual-price coin slot............................................................................... Change date ...................................................................................................................... Change dosing time è steam, hot milk and/or milk foam .................................................. Change MONEY card price levels 1 + 2 ........................................................................... Change on/off time ............................................................................................................ Change PIN code .............................................................................................................. Change PIN code .............................................................................................................. Change PIN code .............................................................................................................. Change PIN code .............................................................................................................. Change product price and article number (for external CCI / CSI payment systems) ...... Change quantity è water and/or milk for coffee products.................................................. Change quantity of coffee ground (coffee powder) ........................................................... Change time ...................................................................................................................... Change token price with or without MONEY card price levels 1 + 2................................. Characteristics................................................................................................................... Characteristics of the coffee machine ............................................................................... CHEF card......................................................................................................................... Chip card error messages ................................................................................................. Chip card functions............................................................................................................ Chip card info .................................................................................................................... Chip card loader ................................................................................................................ Chip card options for normal operating mode ................................................................... Chip cards ......................................................................................................................... Chip cards for payment mode ........................................................................................... Cleaning agent .................................................................................................................. Cleaning agents “Weekly cleaning agents”....................................................................... Cleaning coffee machine (without fridge) .......................................................................... Cleaning instructions for cappuccinatore CPT (option)..................................................... Cleaning settings ............................................................................................................... Cleaning tablet for the coffee machine.............................................................................. Clening .............................................................................................................................. Coffee machine ................................................................................................................. Coffee machine data ......................................................................................................... BASO-2 - 02.11 - V07 Seite 8.1. ............... 10.1 .............. 8.3.3. ............ 4.5.1.9. ......... 4.5.1.6. ......... 4.6.1.5. ......... 4.5.1.7. ......... 4.5.1.10. ....... 4.6.1.14. ....... 8.2.1.2.10. .... 8.4.1.2.8. ...... 4.6.1.7. ......... 4.5.1.5. ......... 4.5.1.4. ......... 4.5.1.8. ......... 4.6.1.6. ......... 7.1.2.1 .......... 2.2.1. ............ 4.5.1. ............ 6.1.6. ............ 2.6. ............... 8.2.1.2.6. ...... 7.4 ................ 2.6.2. ............ 7.3 ................ 2.6.3. ............ 0.4.9. ............ 10.1.1 ........... 5.7 ................ 5.8 ................ 2.4.2. ............ 10.1.2 ........... 5 ................... 10.2.1 ........... 2.1. ............... 8 -3 10 -2 8 -13 4 -16 4 -14 4 -20 4 -14 4 -16 4 -24 8 -10 8 -19 4 -22 4 -13 4 -13 4 -15 4 -21 7 -3 2 -5 4 -12 6 -6 2 -10 8 -8 7 -9 2 -11 7 -9 2 -11 0 -9 10 -4 5 -28 5 -34 2 -8 10 -5 5 -2 10 -6 2 -2 Page 11-1 Index Text Kapitel Coffee machine is blocked, no products can be served.................................................... Coffee products cannot be served .................................................................................... COFFEE TEST card.......................................................................................................... COPY WAITER card ......................................................................................................... Copy waiter table “Card à Coffee machine” ...................................................................... Copy waiter table “Coffee machine à Card” ...................................................................... CPT cappuccino unit ......................................................................................................... CSI (Coffee Standard Interface) external payment – Connection to coffee-bar system ... Cup sensor ........................................................................................................................ Cup sensor ........................................................................................................................ Cup sensor (optional extra) ............................................................................................... Cup warmer ....................................................................................................................... 6.1.1.............. 6.1.2.............. 4.6.3.............. 8.4.1.3........... 8.4.1.3.2........ 8.4.1.3.3........ 7.6................. 8.3.4.............. 6.2.1.............. 7.10............... 7.1.5.5........... 7.12............... 6 -2 6 -3 4 26 8 -20 8 -20 8 -20 7 -13 8 -13 6 -6 7 -16 7 -9 7 -16 5.3................. 5.8.1.............. 8.4.1.2.7........ 4.4.3.............. 5.5................. 8.2.1.2.4........ 4.6.1.13......... 2.................... 7.1.1.............. 0.4.7.............. 7.1.2.2........... 2.2.2.............. 7.5.3.............. 4.6.2.2........... 8.2.1.2.8........ 4.4.11............ 4.4.11.1......... 4.4.11.2......... 5.4.1.............. 4.6.1.10......... 4.6.1.8........... 8.2.1.2.5........ 8.4.1.2.6........ 5 -5 5 -35 8 -19 4 -6 5 -27 8 -7 4 -24 2 -2 7 -2 0 -8 7 -3 2 -5 7 -12 4 -25 8 -9 4 -11 4 -11 4 -11 5 -16 4 -23 4 -22 8 -8 8 -19 D Index Daily cleaning coffee machine with fridge ......................................................................... Daily cleaning of CPT (option)........................................................................................... Data backup....................................................................................................................... Decaffeinated coffee.......................................................................................................... Defrosting the fridge .......................................................................................................... Delete credit from MONEY card ........................................................................................ Delete MASTER table ....................................................................................................... Description......................................................................................................................... Description......................................................................................................................... Designated use.................................................................................................................. Dimensions ........................................................................................................................ Dimensions of the coffee machine .................................................................................... Disable driver..................................................................................................................... Disable keys ...................................................................................................................... Disable MONEY card ........................................................................................................ Disassembly ...................................................................................................................... Disassembly of the coffee machine................................................................................... Disassembly of the refrigerator.......................................................................................... Dismantling and cleaning the milk pipe system................................................................. Display MASTER card....................................................................................................... Display MONEY sales ....................................................................................................... Display total amount of credit loaded and reset (MONEY card) ....................................... Display waiter numbers ..................................................................................................... E Index Electrical energy ................................................................................................................ Empty wastewater tank ..................................................................................................... Enable keys ....................................................................................................................... Enable MONEY card ......................................................................................................... Enable/disable payment mode .......................................................................................... Environmental aspects ...................................................................................................... Environmental protection regulations ................................................................................ Equipment.......................................................................................................................... Equipment and accessories of the coffee machine........................................................... Page 11-2 Seite 0.4.4.............. 0 -7 7.13.2............ 7 -17 4.6.2.3........... 4 -25 8.2.1.2.7........ 8 -9 4.6.1.3........... 4 -19 10.3............... 10 0-7 0.4.6.............. 0 -8 0.4.5.............. 0 -8 2.3................. 2 -6 BASO-2 - 02.11 - V07 Index Text Kapitel F Seite Index First-time installation.......................................................................................................... First-time installation.......................................................................................................... For your safety................................................................................................................... Fridge maintenance........................................................................................................... 3.1. ............... 7.1.5.1 .......... 0.2. ............... 5.6 ................ 3 -1 77 0 -4 5 -27 General.............................................................................................................................. 0.4.1. ............ Ground coffee test program .............................................................................................. 4.6.3.2. ......... 0 -7 4 -26 G H Index Index Heat beverage ................................................................................................................... How to make cappuccino using the CPT cappuccino unit ................................................ How to obtain beverages using the MASTER card........................................................... How to obtain beverages using the MONEY card............................................................. How to prepare Cappuccino Magic and hot milk manually using a CPT (optional extra) . I 5.1 ................ 5 -2 5.3.1 ............. 5 -5 5.7.1 ............. 5 -28 2.1.2. ............ 2 -3 7.1.5 ............. 7 -7 10.2.1.3 ........ 10 -6 10.2.1.2 ........ 10 -6 4.1. ............... 4 -3 Index Key..................................................................................................................................... 1.3. ............... KEY BLOCK card .............................................................................................................. 4.6.2. ............ L 1 -1 4 -25 Index Liability............................................................................................................................... LOAD card......................................................................................................................... Load credit onto MONEY card .......................................................................................... Load machine data from card to coffee machine .............................................................. Location ............................................................................................................................. Log off waiter ..................................................................................................................... Log on MASTER card........................................................................................................ Log on waiter ..................................................................................................................... Longer idle time: ................................................................................................................ BASO-2 - 02.11 - V07 4 -8 7 -13 8 -3 8 -4 7 -14 Index Important general notes on cleaning ................................................................................. Inside Cleaning.................................................................................................................. Inside Cleaning.................................................................................................................. Installation chart of the coffee machine............................................................................. Installing the refrigerator.................................................................................................... Instant heater (Type - HW Brewing 65111)....................................................................... Instant heater (Type - HW Tea 61164).............................................................................. Introduction........................................................................................................................ K 4.4.5. ............ 7.6.1 ............. 8.1.1.1. ......... 8.2.1.1.1. ...... 7.6.2 ............. 0.3. ............... 8.2.1.2. ......... 8.2.1.2.3. ...... 4.5.2.3. ......... 3.2. ............... 8.4.1.2.5. ...... 4.6.1.12. ....... 8.4.1.2.4. ...... 4.4.10. .......... 0 -6 8 -6 8 -6 4 -18 31 8 18 4 -23 8 -17 4 -10 Page 11-3 Index Text Kapitel M Seite Index Making the coffee machine ready for operation ................................................................ Malfunctions....................................................................................................................... MANAGER card................................................................................................................. MASTER card.................................................................................................................... Menu.................................................................................................................................. Menu.................................................................................................................................. Menu.................................................................................................................................. Menu.................................................................................................................................. Menu.................................................................................................................................. Menu.................................................................................................................................. Menu.................................................................................................................................. Menu.................................................................................................................................. Menu.................................................................................................................................. Menu.................................................................................................................................. Messages displayed when coffee machine is ready for operation.................................... Milk container level/Milk empty (optional feature) ............................................................. Milk temperature monitor (optional extra).......................................................................... Miscellaneous .................................................................................................................... Models of the coffee machine............................................................................................ MONEY card...................................................................................................................... MONEY card history.......................................................................................................... MONEY chip card system ................................................................................................. 4.4.1.............. 0.4.3.............. 8.4.1.2........... 8.1.1.............. 4.5.1.1........... 4.5.2.1........... 4.6.1.1........... 4.6.2.1........... 4.6.3.1........... 8.2.1.2.1........ 8.2.1.3.1........ 8.4.1.2.1........ 8.4.1.3.1........ 8.4.1.4.1........ 4.3................. 7.1.5.3........... 7.1.5.6........... 2.4.3.............. 2.3.1.............. 8.2.1.1........... 8.2.1.2.9........ 8.2.1.............. 4 -5 0 -7 8 -16 8 -3 4 -12 4 -17 4 -18 4 -25 4 -26 8 -6 8 -11 8 -16 8 -20 8 -21 4 -4 7 -8 7 -9 2 -8 2 -6 8 -4 8 -10 8 -3 No steam products are served .......................................................................................... 6.1.3.............. No tea products can be served.......................................................................................... 6.1.4.............. NRIG 13 EMP no-change coin slot and related systems (standard type)......................... 8.3.2.............. 6 -4 6 -4 8 -12 N O Index Index Operating data of the coffee machine ............................................................................... Operating modes of the coffee machine ........................................................................... Optional features ............................................................................................................... Optional features for the coffee machine .......................................................................... Outside cleaning ................................................................................................................ Outside cleaning ................................................................................................................ Overview of the coffee machine ........................................................................................ P 2 -5 4 -4 7 -2 2 -7 5 -15 5 -33 2 -2 Index Payment systems .............................................................................................................. Payment systems .............................................................................................................. Payment using Waiter Account ......................................................................................... Payment with internal systems .......................................................................................... Payment with self-service systems.................................................................................... Performance plate of the steam generator and the instant heater.................................... Power supply ..................................................................................................................... Power supply of the refrigerator ........................................................................................ Page 11-4 2.2................. 4.2................. 7.................... 2.3.4.............. 5.3.2.............. 5.7.2.............. 2.1.1.............. 7.2................. 7 -9 8.................... 8 -3 8.4................. 8 -15 8.2................. 8 -3 8.3................. 8 -12 10.2............... 10 -6 2.2.3.............. 2 -5 7.1.2.3........... 7 -4 BASO-2 - 02.11 - V07 Index Text Kapitel Prepare beverages ............................................................................................................ Prepare beverages ............................................................................................................ Prepare beverages ............................................................................................................ Prepare Cappuccino Magic, milk coffee, Latté or Macchiato automatically (with optio. refrigera.) ........................................................................................................................... Prepare coffee product...................................................................................................... Prepare coffee products using second level ..................................................................... Prepare decaffeinated coffee manually............................................................................. Prepare decaffeinated coffee using the coffee mill and DECAF key ................................ Prepare decaffeinated coffee using the coffee mill without the DECAF key..................... Prepare hot milk (only with optional refrigerator) .............................................................. Prepare milk foam (only with optional refrigerator) ........................................................... Prepare tea........................................................................................................................ Preparing beverages with the WAITER card .................................................................... Prerequisites for installing the coffee machine.................................................................. Problems ........................................................................................................................... Problems and error messages .......................................................................................... Problems and troubleshooting........................................................................................... Problems without messages (display-messages) ............................................................. Product data ...................................................................................................................... Products can still be served .............................................................................................. PROGRAM card ................................................................................................................ PROGRAM card ................................................................................................................ PROGRAM card ................................................................................................................ Program the amount of water/coffee powder dispensed for individual coffee products ... Programmable security level ............................................................................................. Programmable security levels ........................................................................................... Programmable security levels ........................................................................................... Programming using optional chip cards ............................................................................ Programming using standard chip cards........................................................................... Purpose ............................................................................................................................. Purpose and structure of this instruction manual .............................................................. Purpose of the coffee machine.......................................................................................... 8.3.1.1. ......... 8.3.2.1. ......... 8.3.4.1. ......... 4.4.8. ............ 8 -12 8 -13 8 -14 4 -9 4.4.2. ............ 4.4.2.1. ......... 4.4.3.1. ......... 4.4.3.2. ......... 4.4.3.3. ......... 4.4.6. ............ 4.4.7. ............ 4.4.4. ............ 8.4.1.1.1. ...... 3.3. ............... 6. .................. 6.1. ............... 7.1.3 ............. 6.2. ............... 7.1.2 ............. 6.1.5. ............ 4.6.1. ............ 8.2.1.3. ......... 8.4.1.4. ......... 8.2.1.1.2. ...... 4.6.1.2. ......... 8.2.1.2.2. ...... 8.4.1.2.2. ...... 4.6. ............... 4.5. ............... 7.1.1.3 .......... 1.2. ............... 2.1.3. ............ 4 -5 4 -6 4 -6 4 -7 4 -7 4 -8 4 -9 4 -7 8 -15 3 -1 6 -2 6 -2 7 -5 6 -6 7 -3 6 -5 4 -18 8 -11 8 -21 8 -5 4 -19 8 -6 8 -16 4 -18 4 -12 7 -2 1 -1 2 -4 Quick cup warmer.............................................................................................................. 7.11 .............. 7 -16 Q R Index Index Read product counter for coffees and teas per key .......................................................... Reassembling / Major cleaning ......................................................................................... Recalibrate milk level sensor............................................................................................. Refill fresh water tank ........................................................................................................ Refrigerator........................................................................................................................ Refrigerator installation chart ............................................................................................ Refrigerator is not cold enough ......................................................................................... Refrigerator overview ........................................................................................................ Refrigerator parts............................................................................................................... Refrigerator serial data...................................................................................................... Reset amounts of water/coffee powder for individual coffee products.............................. Reset counter .................................................................................................................... Reset MASTER card ......................................................................................................... Reset MONEY sales.......................................................................................................... Reset WAITER card .......................................................................................................... BASO-2 - 02.11 - V07 Seite 4.5.1.2. ......... 5.4.2 ............. 7.1.5.4 .......... 7.13.1 ........... 7.1 ................ 7.1.1.2 .......... 7.1.3.3 .......... 7.1.1.1 .......... 7.1.4 ............. 7.1.1.4 .......... 8.2.1.1.3. ...... 4.5.1.3. ......... 4.6.1.11. ....... 4.6.1.9. ......... 8.4.1.2.3.2. ... 4 -12 5 -20 7 -8 7 -17 7 -2 7 -2 7 -5 7 -2 7 -6 7 -3 8 -5 4 -13 4 -23 4 -23 8 -17 Page 11-5 Index Text Kapitel Rinsing in between: ........................................................................................................... Rinsing the coffee pipes .................................................................................................... Rinsing the milk pipes (fridge option) ................................................................................ Routine operation .............................................................................................................. 5.2................. 5.2.1.............. 5.2.2.............. 4.4................. S 7 -16 5 -26 0 -9 4 -10 7 -5 7 -5 2 -8 8 -12 0.4.2.............. 4.................... 7.13.3............ 7.13............... 2.5................. 0 -7 4 -3 7 -17 7 -17 2 -9 8.4.1.............. 8.4.1.1........... 8.4.1.2.3.1. ... 8.4.1.2.3........ 8 -15 8 -15 8 -16 8 -16 Index Waiter Account chip card system ...................................................................................... WAITER card..................................................................................................................... WAITER card sales ........................................................................................................... Waiter payment.................................................................................................................. Page 11-6 7.8................. 5.4.3.............. 0.4.8.............. 4.4.9.............. 7.1.3.1........... 7.1.3.2........... 2.4.1.............. 8.3.1.............. Index Unauthorized users ........................................................................................................... User instructions ................................................................................................................ User instructions for machines with fresh and wastewater tanks (trolley-mounted) ......... User instructions for special machines (water tank).......................................................... User panel of the coffee machine...................................................................................... W 0.1................. 0 -4 0.5................. 0 -9 0.2.1.............. 0 -5 4.5.2.2........... 4 -17 4.5.2.............. 4 -17 2.1.4.............. 2 -4 4.5.1.11......... 4 -16 7.1.5.2........... 7 -7 2.3.3.............. 2 -7 2.4................. 2 -8 7.7................. 7 -15 7.7.1.............. 7 -15 2.3.2.............. 2 -6 2.6.1.............. 2 -10 7.1.2.4........... 7 -4 9.1................. 9 -2 5.2.3.............. 5 -4 10.2.1.1......... 10 -6 4.6.1.4........... 4 -19 Index 2nd mill (duo mill)............................................................................................................... Table for reassembling the milk pipe system .................................................................... Technical condition............................................................................................................ Terminating operation / Switching the coffee machine off ................................................ The refrigerator does not work .......................................................................................... The refrigerator functions noisily ....................................................................................... Time settings ..................................................................................................................... Token slot and related systems......................................................................................... U 5 -3 5 -3 5 -3 4 -5 Index Safety................................................................................................................................. Safety notes and rating plates ........................................................................................... Safety symbols used in these instructions ........................................................................ Save coffee machine data to card ..................................................................................... SAVE DATA card .............................................................................................................. Serial data of the coffee machine ...................................................................................... Service reminder ............................................................................................................... Set temperature ................................................................................................................. Special accessories of the coffee machine (not in standard delivery package)................ Special settings.................................................................................................................. Special steam .................................................................................................................... Special steam with automatic steam cut-off ...................................................................... Standard accessories of the coffee machine (standard delivery package)....................... Standard chip cards........................................................................................................... Standard refrigerator accessories ..................................................................................... Standard Settings (Software NT 2000 V 1.05) ................................................................ Steam cleaning the milk pipes (fridge option) ................................................................... Steam generator (Type - DA 61156) ................................................................................. Switch prices...................................................................................................................... T Seite BASO-2 - 02.11 - V07 Index Text Kapitel Water connection/outlet..................................................................................................... Water softener (Filados/Brita) ........................................................................................... Weekly cleaning coffee machine with fridge ..................................................................... Weekly cleaning of CPT (option)....................................................................................... Welcome............................................................................................................................ 2.2.4. ............ 7.9 ................ 5.4 ................ 5.8.2 ............. 1.1. ............... BASO-2 - 02.11 - V07 Seite 2 -6 7 -16 5 -16 5 -35 1 -1 Page 11-7 Index Page 11-8 BASO-2 - 02.11 - V07