1
Section 3: Operation
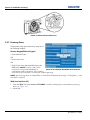
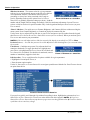
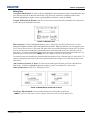
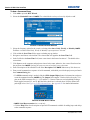
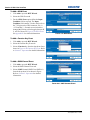
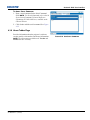
ADVANCED EDGE BLENDING - SUBMENU
Use Edge Blending controls to set the precise width, shape and midpoint you need to blend overlapping edges
together smoothly.
• Blend Width determines how much area is used for blending along an overlapping edge. Slide bar values
represent the number of eight-pixel steps used for the blend. For example, a setting of “eight” creates a
blended edge 24 pixels wide.
• A setting of “0” signifies no blending. For best results in most applications, use a blend width of 16-48
steps (128-384 pixels). NOTE: Ranges: 0-80 horizontal, 0-60 vertical.
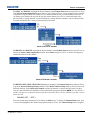
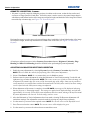
• Blend Shape determines the rate of roll-off across the blend width, i.e. how quickly the white levels across
the blend change from light and dark. Increasing the Blend Shape setting accelerates the rate of change at
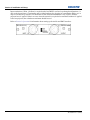
both extremes so that less of the region appears mid-grey (see Figure 3.20). Decreasing the Blend Shape
setting slows the rate of change so that more of the region appears mid-grey. For most applications, this
subtle control is best left close to 50.
• Blend Midpoint determines the white level at the blend midpoint (the point equidistant between the
beginning and end of the blend). Increasing the Blend Midpoint setting creates a blend that appears brighter
than the rest of the image. Decreasing the Blend Midpoint setting creates a blend that is darker than the rest
of the image. A setting of 50 means the midpoint is approximately 50% black—for best results in most
applications, keep fairly close to this default.
• Show Blending Overlap turns your defined blend width area to solid grey so that, if needed, simply
overlapping the grey bars can seamlessly align two adjacent images. Toggle the Show Blending Overlap off
to reactivate the blend effect. NOTE: Blending Overlap appears as Reserved when Christie TWIST is
installed.
Other Functions
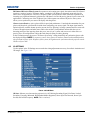
For convenience, the Edge Blending submenu also includes related options for enabling a specific color and/
or test pattern, or for working with colors or the lamp. Such functions duplicate those provided elsewhere in
the menu system.
Edge Blending Procedure
NOTES: 1) Before attempting to work with edge blending software functions, align the projectors/images by
correctly overlapping the displays from your intended external source. 2) Match colors and the brightness
uniformity.
IMPORTANT! For a shared edge, all blend procedures and settings should be identical on both projectors.
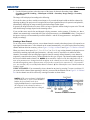
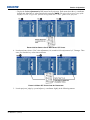
1. Start with two projectors. Display full white field test pattern from both.
2. In the Edge Blending submenu, enable Edge Blending by entering a checkmark in the top check box.
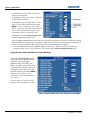
3. SET STARTING POINTS FOR ADJUSTMENT
a. Set all blend widths to 0.
b. Go to More and set everything in the Edge Blending menu to 50.
4. SET BLEND WIDTH On one projector, increase the Blend Width for an overlapping edge (for example, if
the projector’s image is on left, its right edge overlaps the adjacent image—adjust Right Blend Width).
Use the same setting on the second projector for this shared edge.
Mirage M Series User Manual
020-100575-02 Rev. 1 (11-2010)
3-43