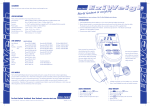
Download the EziWeigh 2 User Manual
Transcript
GB
English
p1
F
FRENCH
p5
D
GERMAN
p9
S
SPANISH
p13
P
PORTUGUESE
p17
EziWeigh User manual
important: Follow the instructions below before using EziWeigh.
WARNING:
Start Up
Do NOT change any
other settings within
these menus. Changing
other settings may
cause your EziWeigh
indicator to malfunction.
Instructions for setting user language on EziWeigh 1 and 2 indicators: (See diagram below for position of hidden keys)
1. Connect the indicator to a power supply.
2. Press
to turn on the indicator.
3. When the display window shows
, press
and
together.
4. Press
repeatedly to scroll through the menu until you reach
5. Press
repeatedly to scroll through the menu to find your language:
↪
English
6. Press
→
French
to save.
→
Spanish
→
.
German
→
Portuguese
↩
Instructions for setting weighing units on EziWeigh 1 and 2 indicators:
1. Press
to turn on the indicator.
2. When the display window shows
The word
, press
and
together.
should display on the screen.
3. Press
to change between
4. Press
to save.
(pounds) and
(kilograms).
Installation
1.
2.
3.
4.
Install load bars under the platform on a firm,
level surface (see Load Bar User Manual).
Mount indicator bracket in a convenient
place where animals cannot knock the
indicator off or chew the cables. The
bracket mounts onto flat surfaces (timber
rails, concrete) or pipe-work with the
supplied U-bolt.
Connect load bar cables to the indicator.
Connect dust caps as shown. The indicator
automatically calibrates to Tru-Test load bars.
Connect power cable (if needed).
Load cell
connectors
Power connector for connecting
12 V vehicle battery (red clip to
positive terminal) or Tru-Test power
adaptor. To connect power adaptor,
pull battery clips off indicator lead
and plug lead into power adaptor
lead (red to red). The power cable
is permanently connected to nonbattery indicators.
Dust caps screw together to keep out dirt and moisture when cables are connected
to indicator. Screw back on indicator/cables when cables removed.
www.tru-test.com
WORLD LEADERS IN WEIGHING
p
Stable light
FUNCTIONS
shows weight is stable.
Turns indicator off.
Shows displayed weight
has been locked using
key.
Locks weight until
next animal is
weighed, or
is pressed.
HOLD annunciator is
on when weight is
locked.
Turns indicator on.
Returns indicator to live weight
display. Press to re-weigh if animal
is not fully on the platform when
stable light shows.
Press to manually
zero the scale.
Sets automatic zeroing on/off.
The indicator will zero on power
up or when there is no load on the
platform. This zeroes the platform
to compensate for any build up
of dirt (up to 3 kg/6 lb) during
weighing. In some situations this
feature should be turned off.
Two common examples are:
1. To avoid accidental zeroing of
the user’s hand pressure on the
entry gate.
2. To avoid zeroing a bale left in
a wool press when the indicator
is turned off and then on again
later.
Sets fine weighing on/off.
Not available for some load cells.
Install on a horizontal or vertical pipe as shown, or attach to the wall using screws supplied.
Bracket
Pipe (maximum 55 mm diameter).
p
BRACKET
INSTALLATION
BASIC
WEIGHING
HOLD WEIGHT
1.
Press
2.
Move animal onto platform.
3.
Wait for stable light
4.
Release animal and repeat from step 2.
1.
Press
2.
Move animal onto platform.
3.
Wait for stable light
4.
Press
5.
Release animal.
6.
Note down animal weight.
DISPLAY
MESSAGES
and wait for
.
and wait for
display.
.
to lock display until next animal.
OPERATING
NOTES
display.
Load cell type not recognised. Contact TRU-TEST.
Recharge battery. About 10 minutes till flat.
Battery is charging. Indicator can be used normally.
Charge level. Battery is low.
Charge level. Battery is fully charged. It is safe to leave on charge.
Scale needs service. Note the error number and contact TRU-TEST.
External power supply too high. Check power supply.
External power supply too low. Voltage too low to charge.
Function is off.
Function is on.
Overload. Weight on scale is greater than capacity. If fine mode is on, clear stats
and turn fine mode off.
Under load. Negative load or faulty load cell/wiring.
Indicator is zeroing.
During weighing, check that animals are fully on the platform.
Ensure that the underside of the platform or crate is kept clear of dirt and stones.
Do not leave the indicator or load bars in water. Store the indicator in a cool dry place.
The indicator automatically turns off after 15 minutes of no activity, to limit discharge of the
internal battery.
p
The internal battery charger operates from either the recommended Tru-Test power adaptor or a 12 volt
vehicle battery. Damage to the indicator caused by other charging supplies, including automotive
battery chargers, is not covered by the warranty.
The indicator displays
about 10 minutes before flat, if the battery was fully charged within
the last 2 weeks. Charge the indicator for 12 hours before using it for the first time.
To
•
•
•
INTERNAL
BATTERY
OPTION
maximise battery life, observe the following simple guidelines:
Preferably recharge the battery overnight.
Never charge the indicator in direct sunlight.
Store the indicator in a cool dry place.
The internal battery charger ensures maximum life of the battery, while giving the fastest charging
rate possible. The battery is protected from overcharging. Charging a flat battery takes 6 hours at
temperatures of 10 to 35 ºC (50 to 95 ºF).
You can safely leave the indicator on charge all the time. The scale can be used while charging. You do
not need to charge before storage.
Charging at low or high temperatures could extend the charging time to 12 hours. At extreme
temperatures the indicator will not charge.
Fully charge the indicator after storage.
Cleaning:
Clean only with warm water and soap, other cleaners may damage the case.
Note: product specifications may change without prior notice.
Total Capacity
2000 or 3000 kg (4400 or 6600 lb) depending on load bars used.
Resolution
Set to 0.5 kg (fine mode 0.1 kg) or 1 lb (fine mode 0.2 lb).
Accuracy
±1 % or 2 resolutions (whichever is greater) with Tru-Test load bars
connected.
Power supply
12 V DC (power adaptor or vehicle battery).
Operating temperature
-10 to +40 ºC (+14 to +104 ºF).
Storage temperature
-20 to +35 ºC (-4 to +95 ºF).
Internal battery run time
8 hours with 2 load bars connected.
Environmental
IP67 (immersion in 1 m of water).
Service Information:
For repair or service information, contact the supplier of your EziWeigh or visit our website at
www.tru-test.com.
For online registration of warranties go to www.tru-test.com.
FCC Notice
This Tru-Test model EziWeigh has been tested and found to comply with the limits for a Class A digital device, pursuant to Part 15 of the FCC rules. These
limits are designed to provide reasonable protection against harmful interference when the equipment is used in a commercial environment. This equipment
generates, uses and can radiate radio frequency energy and, if not installed and used in accordance with the instructions, may cause harmful interference to
radio communications. Operation of this equipment in a residential area is likely to cause harmful interference, in which case users will be required to correct
the interference at their own expense.
p
Tru-Test Limited, New Zealand www.tru-test.com An ISO 9001 Quality Registered Company
SPECIFICATIONS


