1
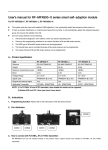
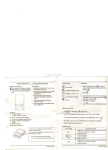
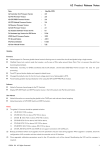
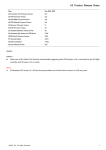
《 HK-X600-X SERIES INTELLECTIVE SELF ADAPTING MODULE MANUAL》 This manual is for the user of HK-X600-F,HK-X600-J,HK-X600-H. This system applied an intellective self adapting jump frequency algorithm, which can scan automatically and select the best frequency for working. If it is interfered periodically or the signal channel is blocked beyond the setting time while working, it can automatically review and jump the frequency group to keep a stable working state. The difference between our product and some similar products of different brands on market is as below: 1, The binding switch was anti-collision designed to avoid operation error. 2, There are five programmable switches that can set various functions on OS and OSX series receivers. 3, ESC types to OS and OSX series receiver can be programmed; 4, The control channel of the integrated linear servo on OS and OSX receiver can be programmed; 5 The output channel on OS and OSX series receiver can be programmed; Product catalog: TYPE SIZE(mm) WEIGHT Maximum transmit power Frequency Voltage Input signal type Support outside signal Applicable transmitter HK-X600-F 58.15x37.26x22.05 42.5g 18DBm HK-X600-J 64.46x51.80x23.27 49.3g 18DBm HK-X600-H 58.15x37.26x22.05 42.5g 18DBm 2.4G 5.0~12.0V PPM(50mv 或 2~5V) 2.4G 5.0~12.0V PPM(50mv 或 2~5V) 2.4G 5.0~12.0V PPM(50mv 或 2~5V) yes yes yes FUTABA , SPEKTRU M JR,SPEKTRUM HITEC,SPEKTRUM ATTN : 1 ) Transmitters such as FUTABA , JR and HITEC, it can support all those transmitters that can install a module; 2)The transmitters we tested are SPEKTRUM DX6i and DX7,we didn’t do any test on other transmitters. INSTRUCTION FOR USE 1、Programming functions: Please check the user manual for OS and OSX series receiver. 2、 Port distribution: 3、How to connect Futaba, JR and HITECH transmitters: HK-X600-F/J/H module can be mounted on the place where the original FUTABA, JR and HITECH module is located. USAGE DETAILS: 1) Turn on the power of the transmitter, set to PPM mode and then turn off the power; 2) Removed the original module and mount HK-X600-F / J / H module , install the antenna and tight it; 3) Set HK-X600-F/J/H 上 SW5 to OFF, and turn on the power of the transmitter, you can see the LED light blinks, it indicates that HK-X600-F /J/H has already checked the PPM signal from transmitter. 4、 HOW TO CONNECT A SPEKTRUM TRANSMITTER: HK-X600-F / J / H module connects SPEKTRUM transmitter through connecting SPM9545 on SPEKTRUM. Usage details: 1) Select a SPM9545 that already be bound with SPEKTRUM transmitter; 2) Connect SPM9545 to the port of CON3 on HK-X600-F / J / H according to figure 1, fix SPM9545 according to figure 2, Turn the SW5 on HK-X600-F /J/H to ON; 3) Turn on the power of SPEKTRUM first, and then connect the power to the port of CON1 on HK-X600-F/J/H; 4) If red LED light on HK-X600-F / J / H blinks, it indicates the connection between HK-X600-F/J/H and SPEKTRUM is succeed. Figure 1: Figure 2: 5、 Power ON and Power OFF order: Power ON : Under the use of FUTABA , JR and HITEC transmitter : Transmitter Receiver; Under the use of SPEKTRUM transmitter:Transmitter module receiver; Power OFF : Under the use of FUTABA, JR and HITEC transmitter : Receiver transmitter; Under the use of SPEKTRUM transmitter:receiver module transmitter; 6、binding operation: HK-X600-F/J/H can either bind one receiver or several receivers at one time. When HK-X600-F / J / H module connects with FUTABA 、 JR or HITEC transmitter, SW1~SW5 is set to OFF after binding ,The green LED light is out as soon as the power is on. When HK-X600-F/J/H is connected with SPEKTRUM transmitter,SW1~SW4 is set to OFF, SW5 is set to ON,LED light is on as soon as it is powered. 1) Connect power with the receiver, it enters binding mode after about 5 seconds ( LED light on receiver blinks from slow to fast); 2) Turn on the power on the transmitter, press the binding switch on module ( please set the program switch if it is necessary ),release the binding switch when the green LED light blinks from dark to bright and then from bright to dark, it indicates that the model enters binding mode, the red LED light on module blinks quickly at the moment; 3) After about 3 seconds, the LED light on receiver blinks slowing from jump blinks, and then becomes constant on without blink. 4) The binding operation is successful if the transmitter can control the receiver. ATTN:Binding operation is a must for the first time use. Warning: * Prohibit Binding operation when operating the model; * Prohibit using these products in the high temperature and high humidity environment; * Please notice the place of anode and cathode when pit in the batteries; * Non-normal use damage is not responsible for warranty.