1
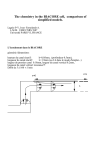
ddddddddddddddddddddddddddd dfg dfg dfg dfg dfg dfg dfg dfg dfgd fgd fg dfgd fgd fgdf gdfg dgf dgf dgfd gf dgf dgf dgf d gfd ™ gfd gfd gf dgf Angle, Slope,dgLevel Indicator Model df 2000 series gd fg dgf dgf ASLI User’s Manual d gfd gf July 08, 2014 copyright 2014 Horus Vision, LLC. All rights reserved, dgf Patent Pending. The ASL unit is a non-restricted ‘COTS” item! Written consent of Horus Vision LLC is required to copy or use any of the material in this manual dgf 1 CONTENTS Introduction .................................................................................................................................................... 3 Foreword ....................................................................................................................................................... 4 What is the ASLI ............................................................................................................................................ 5 Why You Need the ASLI................................................................................................................................ 6 Specifications................................................................................................................................................. 7 The ASLI is Self Adjusting ............................................................................................................................. 8 Versatile Mounting Options ........................................................................................................................... 9 A Concise Discussion on the Effects of Shooting Up Hill or Down Hill ....................................................... 10 Anatomy of Horizontal, Uphill and Down Hill Shooting ............................................................................... 11 Calculating the Corrected Range ................................................................................................................ 16 Using the ASLI to Accurately Calculate Range ........................................................................................... 19 Bubble Level ................................................................................................................................................ 20 Cant ............................................................................................................................................................ 21 How to Use the Cant Indicator (level bubble) .............................................................................................. 22 Using the ASLI for Rifle Fired Grenades ..................................................................................................... 23 How to Properly Mount the ASLI to the Weapon ........................................................................................ 24 Properly Mounting the ASLI Unit ................................................................................................................ 25 Care of the ASLI Unit ................................................................................................................................... 28 Repair & Maintenance ................................................................................................................................. 28 Related Horus Vision® Products ................................................................................................................. 28 Word of Caution Regarding the “Level” of Your Shooting System .............................................................. 29 Appendix ...................................................................................................................................................... 30 Warranty ...................................................................................................................................................... 31 Legal Notice ................................................................................................................................................. 32 Contact ........................................................................................................................................................ 33 2 INTRODUCTION ABOUT HORUS VISION Horus Vision’s cutting-edge technology improves shooting accuracy at extended ranges and increases the likelihood of a first-round hit. Our patented reticles reduce the need for manual scope manipulation and mental calculation. Horus Vision’s simplified shooting system improves accuracy at any distance and can make anyone an expert marksman. Horus Vision’s ATrag™ ballistics software algorithms were developed and refined by the former chief of ARDEC's small-arms division, William C. Davis. Horus Vision was founded in 2000 and is headquartered in San Bruno, California. SAFETY WARNING Always use great care with all firearms. A mistake in judgment or lapse of attention can result in serious injury or death. The information in this manual, while believed to be accurate at the date of publication, is not warranted or represented to be accurate, correct, or useful for any particular purpose. Use the information in this manual with caution and common sense, and verify it with respect to your own firearms before use. The author and publishing company accept no responsibility for errors in the information presented herein, or for accidents, injuries, damage or any other problems which might arise as a result of your use of the information contained in this book, and expressly disclaim all liability for injuries, death and damages, whether direct, incidental, consequential, punitive or otherwise. 3 FORWARD The “Angle Slope Level Indicator” (ASLI) was developed out of sheer necessity to compliment our “System 5™” family of long-range shooting products. No accurate, self-adjusting Angle of Fire indicator existed on the market that could be used with the Horus Vision Systems. We therefore designed our own. It includes a “bubble level” Cant indicator that works with our overall ergonomic design. The ASLI is engineered, constructed and patented by Horus Vision LLC. The ASLI is a precision unit that does not require batteries. We deliberately avoided any and all types of illumination. Numerous devices exist to locate illumination. Even the smallest illumination can be detected with terminal consequences for the military rifleman. One must remember that laser rangefinders, illuminated reticles in optical devices, ‘splash’ from night vision devices, illuminated dials on wrist watches, etc., all have an optical signature! The rifleman must face the reality that the earth’s topography is not completely flat. With Horus Vision’s technology, riflemen now accurately engage targets past 2,000 meters. As range increases, accurate Angle of Fire calculation and proper adjustments for Cant elimination determine the shot’s success or failure. Many authors of operational manuals and books on police and military sniping totally avoid the subject of uphill and downhill target engagement, as well as Cant. Since this is a subject that is rarely dealt with, this manual explains these principals in great detail. Some sections appear to be repetitive but this is to ensure a thorough understanding of the subject. The ASLI precisely measures the Angle of Fire in uphill and downhill shooting. It gives you the information you need to accurately calculate holdover for gravitational bullet drop, assuring a first round hit. Without this measurement, the rifleman cannot correctly calculate gravitational adjustment. And at ranges greater than 400 yards, that means missed shots! Simply put, if you don’t calculate and compensate, you miss. The ASLI also helps eliminate Cant errors. It indicates whether your rifle is positioned perpendicular to the earth. At ranges past 400 yards, the slightest tilt leads to left/right bullet drift and missed shots! The ASLI is an essential tool for the professional rifleman. 4 WHAT IS THE ASLI (ANGLE, SLOPE, LEVEL INDICATOR)? The ASLI is two instruments in one. It is a precision bubble level for eliminating Cant. And it is a precision angle indicator for accurately engaging uphill and downhill targets. This small precision instrument is specifically designed and engineered to be attached to a scope or scope base. 5 WHY YOU NEED THE ASLI For accurate uphill and downhill shooting, you must know your rifle barrel’s precise Angle of Fire. Without this crucial information, you can’t calculate correct compensation for gravitational bullet drop. If you don’t calculate and compensate, you’ll simply miss your shot. The ASLI gives the exact information you need for first-round hits. Its angle indicator quickly and easily shows your precise Angle of Fire. You can then properly calculate correct adjustment for the affects of natural gravity on the shot. Additionally, the ASLI’s bubble level helps you avoid misses caused by Cant. It is a simple low-tech device allowing you to keep your rifle perpendicular to the earth. And at extended ranges, even the slightest errors in Cant mean missed shots. With the ASLI, you’ll make precision first-round hits at any distance. 6 SPECIFICATIONS Height: 1.8 inch (4.6 cm) Width: 1.5 inch (3.8 cm) Depth: 0.8 inch (2.1 cm) Weight: 1.5 oz (42.5 gr), 2.0 oz with cover Housing: Backside: hardened Ballistic Polymer. Clear Cover: high-impact poly carbonate, frosted for reduced glare in bright conditions Angle Indicator Wheel: Precision machined aluminum to a tolerance of +/- .004” All markings of calibration are 360 degrees laser engraved Calibration Markings: o Designed to be read and used from any of the 4 mounting positions o To facilitate different shooters and methods that they employ to calculate hold, the ASLI incorporates 2 scales of measuring angles: Outer Ring: Calibrated in Cosign Inner Ring: Calibrated in Degrees The Indicator Wheel is self adjusting to 0 degrees. Additional Information: Rare Earth Magnets damp Indicator Wheel isolation. Leveling Bubble is a precision bubble level enclosed in a precisely machined portion of the clear hi-impact Polycarbonate cover. All secondary (2nd) parts are precision machined to insure proper fit and functionality. The ASLI is Dry Nitrogen Purged and hermetically sealed. The ASLI is dust proof The ASLI is water proof to 20 meters in depth The ASLI is shock proof The ASLI unit has no batteries and no illumination signature. The ASLI unit comes equipped with a rubber cover to protect it in the field when not in use. Note: The ASLI is a ruggedized unit specifically designed to be used with heavy recoiling rifles under adverse conditions. The ASLI is not designed to withstand deliberate abuse or severe mishandling. 7 THE ASLI IS SELF ADJUSTING The ASLI is a self adjusting unit. When correctly mounted, it automatically adjusts to ‘zero.’ There are no internal or external adjustment screws. For proper mounting instructions, see section “Properly Mounting the ASLI unit.” 8 VERSATILE MOUNTING OPTIONS The Horus Vision ASLI unit is the most versatile instrument of its type on the market today. It can be mounted in four configurations: Right-handed shooter, bubble level up Mounted on left side of the optic for right-handed shooters, with bubble level on the top Left-handed shooter, bubble level up Mounted on right side of the optic for left-handed shooters, with bubble level on the top Left-handed shooter, bubble level down Mounted on right side of the optic for left-handed shooters, with bubble level on the bottom Right-handed shooter, bubble level down Mounted on left side of the optic for right-handed shooters, with bubble level on the bottom 9 A CONCISE DISCUSSION OF THE EFFECTS OF SHOOTING UPHILL OR DOWNHILL By Bill Davis The vertical drop of a bullet below its line of departure is practically the same whether the target is uphill, downhill or at the same level as the rifle. That does not imply, however, that the sight adjustment or the allowance in aiming required to hit a target at any range is unaffected by the slope of the rifle-target line. The reason for this apparent contradiction is that the effects of an aiming allowance or elevation adjustment of the sight are in a plane perpendicular to the line of sight, which, in the case of up hill or downhill firing, is not the same as the vertical plane in which the bullet drop is measured. The reason we must take account of the slope of the rifle-target line is illustrated in the following examples: 1. Suppose we are firing a .30 caliber 180 grain bullet having a ballistic coefficient or C1=.450 and a muzzle velocity of 2600 fps, under standard sea level atmospheric conditions, and that we have sighted in the rifle at 200 yards. Suppose further that we wish to shoot at a bull’s eye on a tall vertical target 700 yards away on the same level as the rifle. We can calculate that, if we were to fire with the sight adjusted for the sight in range of 200 yards, the bullet would strike about 147 inches low on the vertical target. Therefore, to hit the bull’s eye we must either (1) aim 147 inches high or (2) make an elevation adjustment of about 21 MOA (147/7) on the sight. 2. Now suppose that all the conditions are the same as those described above except that the tall vertical target is on higher ground at an uphill angle of 30 degrees. Since the vertical drop of the bullet is the same as before, the bullet would strike the vertical target at a point 147 inches below the bull’s eye if we fired with the sight adjusted for the sight in range. However, as we look upward at a 30 degree angle toward the target, the vertical line between the bullet hole and the center of the bull’s eye would to be less than 147 inches long because of the angle from which we are viewing it. We can calculate by trigonometry that a vertical line 147 inches long would appear to be only about 127 inches (147 x cosine 30 degrees) when viewed from a location 30 degrees below. Therefore, we could hit the bull’s eye by (1) aiming 127 inches high or (2) by making an elevation adjustment of about 18 MOA (127/7) on our sight. By reasoning similarly, we can see that a 147 inch vertical line would appear to be about 127 inches long when viewed from 30 degrees above the target as well as from 30 degrees below and therefore the same allowance in elevation must be made in either case. 10 ANATOMY OF HORIZONTAL, UPHILL, AND DOWNHILL SHOOTING Notes: Uphill shooting can also be called high angle fire from 0 to plus (+) 90 degrees. Downhill shooting can also be called low angle fire from 0 to minus (-) 90 degrees. Horizontal is level shooting, neither up nor down. HORIZONTAL SHOOTING Horizontal shooting occurs when the rifle barrel and target are the same height off the ground. The rifle barrel and target are in the same horizontal plain. 1. The angle of fire in horizontal shooting is ‘0’ degrees. 2. The horizontal distance to the target and the ‘true measured range to the target’ are exactly the same. The bullet or projectile is under the influence of gravity for this distance. There is no effect from Angle of Fire. For Horizontal Shooting… no correction or hold over adjustment is necessary! 11 UPHILL SHOOTING Uphill shooting occurs when the rifle barrel is pointed toward a target that is higher off of the ground than the barrel. Examples include shooting from a valley floor up to a high ledge, or shooting from street level to a target on a tall building. Basic Diagram of Up Hill Shooting 1. The Horizontal Distance from the Rifle to the Target is always shorter than the True Measured Range to the Target. Here’s a simple formula for finding the Horizontal Distance to Target: (True Measured Range to Target) x (Cosine from ASLI) = Horizontal Distance to Target The following example shows how this simple formula works. (600 yards) x (.87 cosine) = 522 yards Thus, we know the Horizontal Distance to Target is 522 yards. 12 Knowing the horizontal distance to the target allows the rifleman to qualitatively factor gravity for uphill shooting. The rifleman can then calculate accurate holdover for gravitational bullet drop, assuring a first round hit! 2. The Angle of Fire can be measured by the ASLI unit. The measurement calibration value is either in degrees or cosine value. 3. The True Measured Range from the Rifle to the Target is determined by using a laser rangefinder, the reticle in the rifle scope, or an optical range finder. Accurate measurement of the distance is very important because it allows the calculation of an accurate horizontal distance. Also the true measured range allows the calculation of the correct windage adjustment! 4. For Uphill shooting, the rifleman needs to know the following: a) If the Angle of Fire is 15 degrees or less with targets out to 500 yards/meters, the adjustment is so small that a calculated firing solution for uphill fire is not necessary. b) If the Angle of Fire is greater than 15 degrees and you do not calculate the corrected firing solution, the bullet will strike high. c) As the Angle of Fire increases or the range to the target increases, or both, a corrected firing solution is required using the ASLI. Not correcting for both the angel and/or distance will result in a complete miss! 13 DOWNHILL SHOOTING Downhill shooting occurs when the rifle barrel is pointed toward a target that is lower than the rifle. Examples include shooting from a mountain top down into a valley, shooting from the top of a building to a target at street level, or shooting from a helicopter. Basic Diagram of Down Hill Shooting 1. The Angle of Fire can be measured by the ASLI unit. The measurement calibration value is either in degrees or cosine value. 2. The True Measured Range From The Rifle To the Target is determined by using a laser rangefinder, the riflescope’s reticle, or an optical range finder. Accurate measurement of the distance is very important because it allows you to calculate an accurate horizontal distance. Also, the True Measured Range allows you to calculate the correct windage adjustment. 3. The Horizontal Distance from the Rifle to the Target is always shorter than the True Measured Range to the Target. Here’s a simple formula for finding the horizontal distance to the target: (True Measured Range to Target) x (Cosine from ASLI) = Horizontal Distance to Target 14 4. The following example shows how this simple formula works. Thus, we know the Horizontal Distance to Target is 522 yards. Knowing the Horizontal Distance to Target allows the rifleman to quantitatively factor the influence of gravity on the bullet’s flight for downhill shooting. 5. For downhill shooting, the rifleman needs to know the following: a) If the Angle of Fire is 15 degrees or less with targets out to 500 yards/meters, the adjustment is so small that a calculated firing solution for uphill/high Angle fire is not necessary. b) If the Angle of Fire is greater than 15 Degrees and you do not calculate the corrected firing solution, the bullet will strike high. c) As the Angle of Fire increases or the range to the target increases, or both, a corrected firing solution is required using the ASLI. Not correcting for both the angel and/or distance will result in a complete miss! Hence a lost opportunity! 15 CALCULATING THE CORRECTED RANGE HOW TO FIND THE ANGLE OF FIRE From the firing position, look through the rifle scope at the target. With the opposite eye (or even the same eye), look at the red line on the ASLI. Note the numerical angle or cosine value directly behind the red line. Cosine values are shown on the outer scale (the row of numbers closer to the dovetail) as decimal numbers, like “.80”. Degrees are shown on the inner scale (the row of numbers farther away from dovetail) as whole numbers, like “40”. There are two different methods for calculating the corrected range necessary to compute a holdover value: the Manual Calculation Method using the cosine value, and the Digital Aiming Program Method. 1. “Manual” Calculation Method using the cosine value The following information is necessary for both uphill and downhill shots: 1. True Measured Range to Target. This distance is measured by a laser rangefinder, optical range finder, or mil dot reticle in a riflescope. From the shooting position observe the target and measure the distance. 2. Angle of Fire. This is obtained from the ASLI. While looking through the rifle scope, place the target on the central cross hairs and note the ASLI cosine value. Be sure to use the decimal number on the ASLI’s outer scale. To calculate the corrected range, use the following formula: TMR (True Measured Range to Target) x ASLI Cosine = Range (adjusted for angle of fire) Consider the following example: 600 yards x .87 (Cosine value of a Slope Angel of 30 degrees) = 522 yards In the above example you would use your “come ups” or “hold” for a 522 yard target when shooting at a target that is 30 degrees above or below you with a True Measured range of 600 yards. Once you have computed the Horizontal Distance to the Target, (522 yards in this example) you can apply any method of manually computing the correct holdover. Note that all corrections for windage must use the True Measured Range to Target (600 yards in this example). 16 Windage / Bullet Drop Compensation 2. Digital Aiming Program Method using a PDA computer: Using a PDA (Handheld Computer) with Horus Vision ATRAG™ Software is the most accurate method available. Regardless of whether the target is positioned uphill or downhill, the following information is necessary: 1. True Measured range to the target: the value measured by a laser rangefinder, optical range finder such as one found in the Horus Vision Reticles, mil dot, etc. 2. Angle of Fire (obtained from the ASLI reading noted above) The ASLI ™ indicator wheel indicates the shot’s Angle of Fire. Once this angle is entered into a digital aiming program, the necessary adjustment is instantly calculated for accurate hold, compensating for Angle of Fire. For example, Horus Vision’s ATRAG software provides a “Target” screen. The “IA”( “Inclination Angle”) line provides an input field for entering the angle indicated on your ASLI wheel. When this number is entered, along with ballistic and environmental data (temperature, wind, etc.), the system automatically computes the corrected hold in mil radians, clicks or MOA. THIS IS THE MOST ACCURATE METHOD WITH FEW, IF ANY, MISSED SHOTS! 17 Example: You are positioned on a high ridge on a mountain pass with your 300 win mag rifle. You have spotted a target on a trail below your position. Your laser range finder indicates a True Measured Range or target of 1000 yards. The ASLI on your rifle scope shows an angle of 30 degrees. You now enter the True Measured Range to Target (1000 yards) and the ASLI reading (30 degrees) into your Horus Vision ATRAG PDA aiming software. It instantly computes a precise firing solution. Shooting 300 win MAG from high mountain ridge Corresponding ATrag screens for 300 win MAG Uncorrected Range The shooter failed to factor in Angle of Fire. Corrected Range The shooter successfully factored in Angle of Fire. 18 USING THE ASLI TO ACCURATELY CALIBRATE RANGE Many riflemen passively range uphill and downhill targets using the calibrated reticle in their rifle scopes. The ASLI is an essential tool when using the known height of a target to calculate range. If the rifleman fails to factor in the angle of observation, the calculated range will be incorrect. The following example using Horus Vision’s ATRAG Software illustrates how range can change. A rifleman on a high ledge spots a target in a deep valley below him. Next to the target, the rifleman notes an object in a vertical position. From experience, he knows it is 36” in length. He mils the target, noting that it subtends (covers) exactly 1 mil on his vertical crosshair. Next he places the 36” object on his main crosshairs; noting a reading of 30 degrees on his ASLI. 1. Computer method Uncorrected Range The shooter failed to factor in Angle of Fire. Corrected Range The shooter successfully factored in Angle of Fire. 2. Manual method (Example calculated in yards) Note (very important): Only apply the above method for objects in vertical position. If the object you’re ranging is in a horizontal position, do not factor in the angle measurement from the ASLI unit. 19 BUBBLE LEVEL The Bubble Level embedded in the ASLI unit is a precision device the rifleman can use to keep his rifle level and perpendicular to the earth. When the ASLI unit is properly mounted and adjusted, the bubble level reflects the rifle’s true perpendicular position in relation to the earth. If the rifleman makes reasonable effort to keep the rifle in a vertical position, shooting out to 400 yards/meters will present no significant Cant problems. However, beyond 400 yards/meters, Cant becomes progressively worse and dramatically increases the probability of missed shots. Beyond 400 yards/meters, you must use the ASLI’s™ bubble level. Not level… Cant! Level 20 Not level… Cant! CANT The word “cant” describes bullet drift resulting from not holding the rifle perpendicular to the earth. To shoot accurately at extended range, the rifle must be in a level perpendicular position. Failure to maintain a level position will cause the shot to vary to the left or right of the target, resulting in missed shots. The greater the Cant, the greater the probability of a missed shot. This is especially true as range increases. The following diagram illustrates the effects of Cant. In this example, the rifle was not held exactly perpendicular and was tilted slightly to the left. You can visually see a horizontal displacement to the left and a vertical displacement downward. Horus Series II “CATS™” targets show the maximal lateral displacement based on the elevation selection you are shooting. The lateral distance shown on the target gives you feedback information needed to correct Cant. By correcting Cant, you eliminate lateral movement displacement and slight vertical displacement. 21 HOW TO USE THE CANT INDICATOR (LEVEL BUBBLE) For the right handed shooter, while looking through the scope with the right eye, open the left eye to note the position of the bubble level on the ASLI unit. Adjust the level of the rifle accordingly until the bubble is centered. For the left handed shooter, while looking through the scope with the left eye, open the right eye to note the position of the bubble level on the ASLI unit. Adjust the level of the rifle accordingly until the bubble is centered. Right handed Cant usage Left handed Cant useage 22 USING ASLI FOR RIFLE FIRED GRENADES When firing a rifle grenade, the rifleman must know the range to the target. Using a range table based on the Angle of fire verses the range, he selects the correct angle that will give the range desired. With both eyes open, he views the target through the rifle scope while keeping the main cross hairs on the target. With the other eye, he views the ASLI to ensure the rifle is being held at the correct angle and that the bubble on the ASLI is centered. He is now ready to fire. Most range tables for the rifle fired grenade are generated by the “field method” - try and record! Simply, a grenade is fired at various angles and the impact range is recorded thereby creating a firing table. 23 HOW TO PROPERLY MOUNT THE ASLI TO THE WEAPON The ASLI unit is shipped with the 34mm ring and 30mm adapter inserts attached to the unit. Follow these steps to mount the ASLI to your scope tube: 1) Using the hex key that shipped with your unit, remove the screws holding the ring together 2) If your scope tube requires a 34mm ring, remove the 30mm inserts. 3) The ring should then be mounted directly to the scope body, either on the right or left side, forward or aft of the adjusting turrets. It is recommended that the ASLI unit be mounted to the front of the turrets, if possible, as this position gives the clearest unobstructed view of the ASLI. 24 PROPERLY MOUNTING THE ASLI UNIT Even though the ASLI is a self adjusting unit, the rifleman still has the final responsibility to correctly mount the unit to his weapon. There are a number of methods. These include: The Eye Ball Method The Level Method Use of after market scope mounting devices Use of Horus Vision’s CATS system No matter which method is used the following mounting techniques should be employed: First ...MAKE ABSOLUTELY CERTAIN THAT THE WEAPON IS EMPTY. If it is a ‘bolt’ gun, remove the bolt. When mounting the ASLI unit to your rifle, care should be taken to ensure that both the optic and the scope mount are mounted correctly on the rifle before mounting the ASLI unit to either of these items. Additionally, the decision regarding the location of the ASLI unit should be made taking into consideration both the protrusions on the scope or rifle plus the eye relief of the individual rifleman. Mount the unit far enough away from the rifleman’s eye to ensure that the ASLI indicator wheel is in full focus. The following technique should be used: Ensure that the rifle is completely level prior to mounting the ASLI unit. Place the rife in a steady rest and place a spirit level on the flat service of the scope mount, making sure the ‘bubble’ is level. Then attach the ASLI unit to either the scope tube or the scope mount, and center the bubble on the bubble level of the ASLI unit to conform to the spirit level noted above. Then tighten the ring or mount on the ASLI unit, making sure the respective ‘bubbles’ have the same reading when the ASLI is firmly mounted. Next, turn the spirit level used above so as to measure the level of the scope base. Adjust the rifle in the rest until the bubble is centered. Check the ASLI gauge…it should be on ‘Zero’. If you are using either a sloped scope base or slopped rings, the ASLI unit should have a reading equal to the slope of your base or rings. You should make a note of this number as the ASLI unit will read a slight angle when the rifle is in fact in a completely level position. This small deviation should not be a material factor but you should be aware of it in the event that you are continually off at long distances. 25 THE ‘EYE BALL’ METHOD Simply stated, the eyeball method requires setting up the rifle system on a rest, leveling it based on how well it looks to the eye, and then mounting the ASLI unit so that the level bubble is centered. This method is OK for shorter range shooting. It is OK for long distance shooting ONLY IF it is further adjusted by using the Horus Vision CATS system (see CATs manual on Horus Vision website, www.HorusVision.com). THE LEVEL METHOD The level method utilizes external levels to check all of the components of the shooting system. This method entails the following: First, set the rifle Stock up in a rest and check to make sure it is level with a bubble level device. Second, mount the barreled action into the stock and check the action with a bubble level device to ensure that it is also level with the stock. Third, mount the scope base to the receiver and ensure that it is level with a bubble level device. Forth, verify that the centerline of the stock, receiver, scope mount and barrel are the same. Fifth, mount the scope rings to the scope base and check the level of the rings as well as the centerline. Sixth, mount the scope in the rings using a bubble level device to ensure the scope is level. Scope rings should also be ‘lapped’ to ensure that they are in line and do not bind the scope in any way. Finally, while the shooting system is still in the mount and all elements have been verified as noted above, mount the ASLI unit to the scope tube body or the scope mount using the ASLI’s bubble level to ensure the ASLI is level. External level method 26 AFTER MARKET MOUNTING DEVICES After-market mounting devices are acceptable for mounting the scope to the shooting system. However, unless all of the elements of this system are checked as noted above in the Level Method, the entire system’s level and bore line will be suspect and should be proven using the Horus Vision CATS system noted below. After market mounting device 27 CARE OF ASLI UNIT The Horus Vision ASLI Unit is a sealed nitrogen filled unit which is magnetically dampened to prevent wheel oscillation. It is not engineered to be disassembled in the field. Cover: Each ASLI unit comes with a rugged rubberized cover attached with a lanyard to the unit. When not is use, the ASLI unit should have this cover firmly in place to protect it from inadvertent damage. Solvents and Cleaners: The ASLI unit’s housing is impact resistant. It’s strong clear acrylic is resistant to abrasions. It is also resistant to solvents and cleaners. Therefore there are no concerns when cleaning the weapon. The surface should be cleaned with a damp soft cloth when dirty. Shock Resistant: The ASLI unit is tested to withstand the shock of impacts caused by dropping the weapon. However, if that occurs, the unit should be checked to ensure that the resulting impact did not shift the mounting device. Housing: While it is not advisable to stand on the ASLI unit, the unit housing is strong enough to withstand the pressure in excess of 200 pounds. When the housing needs to be cleaned, use a damp soft towel. REPAIR AND MAINTENANCE The ASLI is a hermetically sealed unit which cannot be “field” repaired. Any equipment failure should be returned to Horus Vision LLC using a “Return” form. A replacement unit will be forwarded within 10 business days of receipt. RELATED HORUS VISION PRODUCTS The professional rifleman requires precision tools in order to hit the target at extended ranges. The ASLI is just one part of the Horus Vision Shooting System. To complement the ASLI, we recommend the following Horus Vision System components: ATRAG, Ballistic Aiming Software for Hand Held PDA, Palm and Windows operating systems CATS Combination Accuracy Targeting System Horus Vision Patented Reticles available in the following scopes: Schmidt & Bender, Zeiss, Leupold, US Optic, and Horus Vision. 28 WORD OF CAUTION REGARDING THE “LEVEL” OF YOUR SHOOTING SYSTEM A word of caution is needed, due to the very nature of the elements comprising your shooting system. These elements are: The stock The action The barrel The scope mount The scope mounting rings The scope/reticle/windage and elevation adjustments Each is an independent component which, to perform correctly, must be in a level condition and lined up concentrically, i.e. the line of the bore must be in line with the line of the receiver which must be in line with the scope mount which in turn must be in line with the scope, etc. If any of these components are not aligned and accordingly adjusted before usage (for example, the scope’s windage adjustment), your system will not allow for accurate shots at extended distances. Worst of all, the rifleman will not know how or why this is the case. There is only one system that absolutely and positively enables the rifleman to both prove the shooting system and make the necessary adjustments to eliminate any discrepancies. That system is the Horus Vision CATS target system. If you intend to engage targets at ranges in excess of 1000 yards, you must use a Horus CATS Series II Target (see CATS manual on Horus Vision website, www.HorusVision.com). 29 APPENDIX This chart shows the mathematical relationship between Cosine and Degrees: 30 WARRANTY The ASLI is a hermetically sealed unit designed to be maintenance free. Should it fail for any reason, no attempt to repair it in the field should be made. The unit carries the following guarantee: 1) 30 day money back guarantee if product is returned un-used. 2) Full Replacement within 10 business days from arrival in our offices in San Bruno CA., if product fails within 2 years from the date of purchase as a result of manufacturing or material defect, normal wear and tear accepted. 31 LEGAL NOTICE HORUS VISION® and the EYE OF THE FALCON logo are registered trademarks of Horus Vision, LLC and may not be used in any manner without express permission from Horus Vision, LLC. SECOND SHOT, TACTICAL SOLUTIONS and TARGETING SOLUTIONS are trademarks of Horus Vision, LLC and may not be used in any manner without express permission from Horus Vision, LLC. Horus Vision software products and written and visual materials are protected by U.S. and international copyright protection and may not be used in any manner without express permission from Horus Vision, LLC. A wide variety of scopes, reticles, software, computer systems, and other products associated with shooting and ballistics (“Horus Vision systems”) are exclusively owned by Horus Vision, LLC and are protected by issued patents in the United States, including U.S. Pat. Nos. 5,920,995, 6,032,374, 6,453,595, 6,516,699 and 6,681,512, issued foreign counterparts, as well as numerous additional pending patent applications in the United States and foreign jurisdictions, including, but not limited to Europe, Japan, Israel, Canada and Australia. Manufacture, sale, importation or use of the Horus Vision systems requires a license from Horus Vision, LLC. For more specific information on obtaining a license, please contact Horus Vision, LLC. Nothing contained herein should be construed as granting, by implication, estoppels or otherwise, any license or right to use any Horus Vision, LLC intellectual property. © 2013 Horus Vision, LLC. All rights reserved. 32 CONTACT Horus Vision, LLC 598 San Mateo Avenue San Bruno, CA 94066 Phone: 650-588-8862 Fax: 650-588-6264 E-mail: [email protected] Website: www.horusvision.com 33