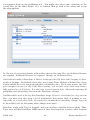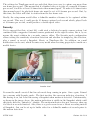
1
ATPM
14.01 / January 2008
Volume 14, Number 01
About This Particular Macintosh: About the personal computing experience.™
ATPM 14.01
1
Cover
Cover Art
Copyright © 2008 Mirko von Berner. We need new cover art each month. Write to us!
The ATPM Staff
Publisher/Editor
Managing Editor
Reviews Editor
Web Editor
Copy Editors
Webmaster
Beta Testers
Contributing Editors
Michael Tsai
Christopher Turner
Paul Fatula
Lee Bennett
Chris Lawson
Linus Ly
Ellyn Ritterskamp
Brooke Smith
Vacant
Michael Tsai
The Staff
Eric Blair
Mike Chamberlain
Chris Dudar
Ed Eubanks, Jr.
Matthew Glidden
Ted Goranson
Andrew Kator
Robert Paul Leitao
Wes Meltzer
Sylvester Roque
Charles Ross
Mark Tennent
David B. Thompson
Evan Trent
Vacant
Artwork & Design
Layout and Design
Web Design
Cartoonist
Blue Apple Icons
Other Art
ATPM 14.01
Michael Tsai
Simon Griffee
Matt Johnson
Mark Robinson
RD Novo
2
Cover
Graphics Director
Vacant
Emeritus
RD Novo, Robert Madill, Belinda Wagner, Jamal Ghandour, Edward Goss, Tom Iovino,
Daniel Chvatik, Grant Osborne, Gregory Tetrault, Raena Armitage, Johann Campbell,
David Ozab.
Contributors
Lee Bennett, Mike Chamberlain, Jennifer Curry, Ed Eubanks, Jr., Matt Johnson, Chris
Lawson, Robert Paul Leitao, Linus Ly, Tricia Roach, Mark Stoneman, Mark Tennent,
Macintosh users like you.
Subscriptions
Sign up for free subscriptions using the Web form.
Where to Find ATPM
Online and downloadable issues are available at the atpm Web Site. atpm is a product of
atpm, Inc. © 1995-2008. All Rights Reserved. ISSN: 1093-2909.
Production Tools
Apache, AppleScript, BBEdit, Cocoa, Docutils, DropDMG, FileMaker Pro, GraphicConverter, LATEX, Mesh, make, Mailman, Mojo Mail, MySQL, Perl, PyObjC, Python,
rsync, Snapz Pro X, ssh, Subversion.
Reprints
Articles, original art, and desktop pictures may not be reproduced without the express
permission of the author or artist, unless otherwise noted. You may, however, print or
distribute copies of this issue of atpm as a whole, provided that it is not modified in any
way. Authors may be contacted through atpm’s editorial staff, or at their e-mail addresses,
when provided.
Legal Stuff
About This Particular Macintosh may be uploaded to any online area or included on a
CD-ROM compilation, so long as the file remains intact and unaltered, but all other rights
are reserved. All information contained in this issue is correct to the best of our knowledge.
The opinions expressed in atpm are not necessarily those of the entire atpm staff. Product
and company names and logos may be registered trademarks of their respective companies.
Thank you for reading this far, and we hope that the rest of the magazine is more interesting
than this.
•••
ATPM 14.01
3
Cover
Thanks for reading atpm.
ATPM 14.01
4
Cover
Sponsors
About This Particular Macintosh has been free since 1995, and we intend to keep it that
way. Our editors and staff are volunteers with real jobs who believe in the Macintosh way
of computing. We don’t make a profit, nor do we plan to. Our aim is to produce a fiercely
independent magazine, with multiple formats designed for easy reading rather than showing
ads. The views expressed in these pages have always been our own, and to help prove it we
do not accept direct sponsorships or advertising. We do, however, need to pay for our Web
site and other expenses, so we rely on minimal advertising, sold indirectly via Google and
Yahoo, as well as the support of atpm readers who shop using our links.
ATPM 14.01
5
Sponsors
Welcome
by Robert Paul Leitao, [email protected]
Welcome to the January issue of About This Particular Macintosh! It’s a new year and a
leap year too! Before we leap to a bit of news in review, we’d like to extend our wish for
prosperity and peace to each of you, our readers. The holiday season has come to an end,
but a new round of excitement begins as Mac enthusiasts around the world prepare for this
month’s annual expo.
This issue marks the beginning of our 14th calendar year of publication. Many things have
changed in all that time but one thing remains the same: the editors of atpm are dedicated
to bringing you the best news and reviews in our unique and easy-to-read monthly format.
We chronicle the “personal computing experience” one issue at a time.
Bye Bye Blockbuster?
At press time, reports of Apple’s imminent entry into the movie rental business via iTunes
are all over the Web, filling pages galore with prognostications of the subsequent demise of
Blockbuster and Netflix. Will the popularity of iTunes extend Apple’s digital distribution
dominance in music to the towers of tinsel town?
Media stories indicate Fox and Disney have signed on for movie rentals through iTunes, but
the lack of selection of movies for sale through iTunes, due to industry resistance to partner
with Apple, has so far hampered Apple’s commercial movie distribution efforts.
Hello Expo
Each year at this time, anticipation of announcements during the keynote address at the
annual Macworld Conference and Expo brings out the silly in many a Mac user. Expectations flow from the bizarre to the banal as the tickets for a seat in the auditorium for the
Steve Jobs presentation become among the hottest items to have in Silicon Valley and San
Francisco. While the story of Apple entering the movie rental business may have leaked
before the big show, there’s plenty of talk of other major announcements. The conference
opens its doors on January 14th with the expo’s keynote address scheduled for the following
morning.
Apple TV 2.0
If the first edition of the Apple TV didn’t get you running out to an Apple retail store to
make the purchase, there’s talk an anticipated update will at least get you walking fast to
a Mac sales Mecca. Combined with a movie rental service, the Apple TV may finally find
its niche.
AAPL 200
The week between Christmas and New Year’s Day treated Apple’s shareholders to a special
holiday gift. Apple’s share price rose above $200 per share in intra-day activity. AAPL
ATPM 14.01
6
Welcome
closed 2007 at $198.08 per share. December’s placid share price rise was a pleasant departure
from the previous month’s ride and provided comfortable holiday travel for weary AAPL
traders.
Rumors 101
It’s the nature of rumors that they become more weird the more frequently they are told.
As Santa leaves the scene, winter elves busy themselves with Apple expo rumors. Many
of these rumors sound like they dropped off the mythical sleigh on its return to the North
Pole. We don’t wish to give rumors credence in our esteemed publication, but they are fun
to follow. Watch for the rumors to heat up over the next couple of weeks. It creates its
own form of global warming. By the expo keynote, even the elves at the North Pole might
find it a bit balmy outside
Pre-Paid iPhone Pizza
Can you imagine driving around town looking for dinner and finding the location and menu
of a local pizza parlor on your iPhone? Press a button and the pizza with anchovies and
olives is pre-paid and ready for pick-up when you arrive. It’s the sort of imaginings traveling
the Apple Web following the publication of a new Apple patent application. Just reading
this might make some people hungry already. It’s another way the iPhone and other Apple
products may continue to change the world, one pizza pie at a time, while keeping the
company rolling in dough.
Innovation Keeps Its Own Time
2007 may be known as the Year of the iPhone, but creativity and ingenuity keeps to its own
time. There’s no calendar for inspiration and new ideas but only a calendar for delivery of
new products and services that encase or exploit them. January may be the month of new
Apple product announcements, but each day, no matter the month, new and innovative
ideas for enhancing the personal computing experience come to mind and eventually find
themselves in products that come to market. atpm chronicles how we use technology to
better our lives and the world around us. Each issue of atpm is one more episode in our
chronicle of the personal computing experience.
Our January issue includes:
Mac About Town: How Did I End Up Here?
Mike Chamberlain explains why he decided to buy a Treo instead of an iPhone.
MacMuser: Sum Thing Dickered This Way Bombs
A short tale about FileMaker.
MacMuser: Where Next For iPods?
Mark Tennent muses about the future of iPods.
ATPM 14.01
7
Welcome
Segments: Grandma’s Life as a Video Star
What do you get when you mix one loving grandma, one video camera, great children’s
literature, and a Mac? I call them the “Grandma Videos,” and they’re almost as much fun
to make as grandma’s cookies.
Desktop Pictures: Cuba Buildings and Cityscapes
Reader Jennifer Curry offers this month’s desktop pictures from a 2006 trip to Cuba.
Cartoon: Cortland
Angie flashes back to 1984 as she and Cortland face off against Lisa in the Mudrix for a
final showdown.
Review: Baseline 1.0.1
Where has all your space disk space gone? Use Baseline to get the answer and take the
appropriate actions.
Review: BusySync 1.07
BusySync answers the longstanding lack of two-way calendar sharing in iCal.
Review: Fin Laptop Handle/Stand
A rugged metal stand/handle for recent Apple laptops that does a fine job of cooling down
your ’Book.
Review: Iris 1.0.4
Almost like six applications in one, Iris brings features such as TimeLapse and Security
Camera recordings to an iSight.
Review: Mellel 2.2.7.1
In spite of several shortcomings, Mellel excels in the control of text appearance, multi-lingual
capabilities, and setting up footnotes.
ATPM 14.01
8
Welcome
E-Mail
iPhone Case Roundup
Great review! I’m writing this comment in a car on the motorway in sunny England on my
new iPhone! Will definitely be buying a case tomorrow.
—Henry Carless
Would You Like a Cup of Coffee With That?
Nice coverage of topics. On the Kindle, I think a lot of reviewers are missing the point. It’s
so easy to look at features and missing features and industrial design and forget that it’s
just a device to display text.
I got the opportunity to use a friend’s Kindle for an afternoon. After about a half an hour
it just disappears. I got involved in a reading The Omnivore’s Dilemma, which my wife
owns in hard cover, and totally forgot that I was reading from a gadget. That’s the real
bottom line.
I picked up reading where I had left off in the regular book, read for a couple of hours, and
went back to the printed book the next day at home. No sense of loss or difficulty. It’s
easier to read than many paperbacks.
The screen is crisp, the text very readable, and font resizing allowed me to read the Kindle
comfortably on my exercise bike. The book holder places the book about two and a half
feet from my eyes, an awkward distance for middle-aged eyes with reading glasses. The
one-touch page “turn” works beautifully in that situation. No lifting the book out of the
holder, flipping pages, then returning it.
Don’t worry about contrast. It’s fine. Don’t worry about boring design. The thing works.
When the price drops to about half and the number of books increases, I’ll get one.
This is the future.
—Michael
•••
I do not understand the desire to have e-books resemble paperbacks, right down to a
foldable, split-page format. I must be unusual, because I read only one page at a time.
I dislike holding a book open. I would be quite happy with a single page view e-book that
had crisp text at a choice of font sizes. It also would have to complete page changes in less
than one second and support encoded e-book formats as well as PDF, HTML, text, RTF,
etc. No e-books meet these criteria, so I stick with paper.
ATPM 14.01
9
E-Mail
—Gregory Tetrault
A Tutorial on Resolution
After you have changed the resolution to 300dpi by unchecking Resample Image, if you
later check Resample Image to resize the pixel dimensions, this doesn’t interfere with the
300dpi resolution, does it? I want to print a card with a photo on it, but I’m worried that
when I shrink the 300dpi photo to fit the card, it will affect the resolution quality.
—Annabel Way
The resolution will always be somehow affected if the Resample Image checkbox is on.
Here’s an example workflow that I use which may be of help to you:
First of all, I always keep my original, unedited images. Most of the time, that means
it’s the 72ppi JPEG file directly from a digital camera. If you keep a separate copy of
this original file, then you always have it to fall back on, even if that means you lost any
work/editing on a photo.
Then, working on a copy, and with the Resample box turned off, I change the image
to 300ppi in preparation for any print work that I’m doing. If I imported the same photo
into my InDesign project at 72ppi, it would be enormous because InDesign would dutifully
represent 72 pixels within one inch of the InDesign page. If you change it to 300ppi,
however, InDesign will represent the image smaller, with 300 pixels in a linear inch.
Note that regardless whether it’s being shown huge at 72ppi, or smaller size at 300ppi,
since the Resample option was off, the image has not changed in quality. It would still be
the same number of pixels in height and width. You’re only defining how many of those
pixels are squeezed into one inch.
After I’ve done all my editing, I make a another copy of the image so that I still
have the full-size version that has been adjusted, and on the copy, I will scale it down in
Photoshop so it matches the size I used in InDesign. For this, I turn the Resample option
back on. When I do so, I change the height/width values to the amount I need, but the
300ppi stays the same because the Resample box is on. This step will definitely change
the resolution. It is always my last step, and it is always done on a separate copy.
P.S. The reason I scale my final images to 100% in Photoshop is because page layout
programs like InDesign already have enough to worry about in terms of processing at the
time a page is sent to an imagesetter to be made into press film. The output is much
faster if InDesign isn’t having to scale the size of all the photos on the fly at the time you
output the job. Sure, I work with the full resolution versions during production so I can
change the size back and forth while working. I don’t scale them in Photoshop until the
final layout is approved.
—Lee Bennett
What Leopard Means For GTD
While the new features of Mail would be great if they worked consistently and reliably,
they don’t. Use on more than one computer with IMAP leads to duplications and data
loss. Furthermore, the new features don’t even integrate well with the iPhone, let alone
non-Apple platforms. I was disappointed.
ATPM 14.01
10
E-Mail
—Michael Ogilvie
•••
Much as I appreciate the changes that have come to Mail and iCal for all my getting things
done mentality, I have to say that the bug-ridden mess that is Notes and To Do links is
really so annoying that I had to stop using it. Examples:
1. When I put To Dos in Notes, they would sometimes get corrupted such that
they weren’t listed as To Dos anymore.
2. When I filed Notes, the original sometimes wouldn’t get moved, and I’d have
two copies. Due to synching issues, one would get corrupted as listed in #1.
Ah, but if you deleted one, they would both disappear! What the hell? I had to
go into the Finder and find the multiple copies of the mails (yeah, Quick Look
for this), then delete them, and then rebuild the offending mailboxes.
3. Oh, right, once you’ve done that, all To Dos that were linked into iCal are
missing. They got deleted, after all. Argh!
In sum, it’s a totally non-trustworthy system, and I spent more time fighting it than using
it. The promised “system-wide” To Do access didn’t materialize for the Finder, so there’s
no easy way to attach a Finder file or folder to a To Do, either.
I went back to iGTD, which had its own problems. It doesn’t synch with iCal, but I’ve
given up on that travesty. Corruption is sure to ensue. Not trustworthy, and I can’t afford
“not trustworthy.” I just don’t use iCal. With the new iGTD, I am one keystroke away
from dumping any Finder file or folder, as well as any Mail, into the iGTD database and
processing things from there. It works.
I do miss Hallon. It was a fabulous and quirky program that allowed for all sorts of filtering
and such, but it was never a real program. If it gets fixed, it does better at collecting
information from around your machine and filing and filtering it, but the quirks eventually
made it too difficulty to use. I keep going back, though. . .
—Michael Wittmann
•••
TaskPaper has been the pleasant surprise in the interval between publications of this column. For those not in the know, it is Jesse Grosjean’s (of Mori and WriteRoom fame)
latest work. TaskPaper is a lot like what the name sounds like. It brings the simplicity
and ease of paper-based lists to the computer, using a text file–based format that is easy
ATPM 14.01
11
E-Mail
to parse for external scripting. Out of all the applications and Web apps I’ve used, it is
by far the easiest to brainstorm in. Unfortunately, I also find it a bit difficult to get data
out of it once it is in—-once the list gets big. I have many hundreds of tasks, and many
of those are time sensitive. Currently TaskPaper doesn’t have much in the way of due
date management—-critical for what I need. But it’s not shabby. There are some good
features for focussing on projects and contexts, so while it didn’t quite work out for me in
an industrial setting, I’m sure many will love it.
So I have a license for it, and will definitely keep watching its development, but for now I
continue to use OmniFocus (which I also have a license for). OmniFocus has matured quite
a bit as well, and its powerful Perspectives feature is unique as far as I know, to the GTD
application market.
I have to agree with Mr. Wittmann regarding the disappointment in Leopard. The prerelease hype made it look like using the OS itself as a GTD platform would at last be
feasible, but sadly this has not turned out to be the case. I never did much like Mail. It felt
like an unstable client in the past, and it feels even more unstable now, even if you don’t
use the buggy notes and To Do features.
—Amber Vaesca
We’d love to hear your thoughts about our publication. We always welcome your comments, criticisms,
suggestions, and praise. Or, if you have an opinion or announcement about the Macintosh platform
in general, that’s OK too. Send your e-mail to [email protected]. All mail becomes the property of
atpm and may be edited for publication.
ATPM 14.01
12
E-Mail
Mac About Town
by Mike Chamberlain, [email protected]
How Did I End Up Here?
Well, that’s embarrassing! My #1 gadget hope for 2007 is a matter of record. It was a
“MacPhone.” A couple of weeks after my January column appeared, Uncle Steve came
through for the faithful (albeit with a delayed shipping date) and we were all agog at the
iPhone. I dutifully entered my e-mail address on both Apple’s and AT&T’s Web sites and
for the next five months soaked up the news and speculation about the machine of my
dreams. June found me in a new location thanks to a job change. Everything is up to date
in Kansas City, as the song goes. It’s fully covered by AT&T’s 3G network, and we even
have an Apple store! I knew that my new iPhone was only a matter of time.
So, here I am at the end of the year with my new phone in hand, happy that I have finally
pushed my way through all the decision gates and comparisons and false starts. The only
surprise to me, and the source of some personal embarrassment I must admit, is that my
new phone is a Treo 775p.
Now before you report me to Scott Bourne as a “hater,” let me say that I am still hopeful
that one day Apple will produce the phone that I’m looking for—it just hasn’t done it
yet. Who knows, perhaps Steve will have a new form factor at this year’s Macworld Expo.
Nonetheless, there are some concrete reasons that I am using a Palm-based Treo and not
an iPhone:
1. A ton of software: The Palm OS may be getting long in the tooth, but the
truth is that it is very stable and has built up an impressive library of software
of both productive and entertaining varieties. Moving to the Treo allowed me
to bring all my Palm applications with me to add to Treo functionality. Unlike the iPhone, there are no barriers to further software development. Some
of the best productivity applications, for instance, overlay the Palm’s core application’s data to bring additional flexibility. It doesn’t seem to have posed
any particular danger to the phone’s functioning. Apple has other considerations, of course. The iPhone truly is a mobile computer and thus, one would
assume, more susceptible to malware. Perhaps Apple needs to be cautious, but
the caution has come at a price.
2. Enterprise support: Leo LaPorte, for one, has argued from the beginning that
the iPhone is more of a video iPod that makes phone calls than a phone that
shows video. I think he’s right. The evidence for the argument can be found
in the enterprise functionality (non-functionality would be more accurate) of
the iPhone’s basic software. We get Cover Flow for browsing our music, for
ATPM 14.01
13
Mac About Town: How Did I End Up Here?
instance, but no way to manage and manipulate tasks or to extend the limited
options available within iCal. I’d be happy to have the iPhone on my vacation,
but day-to-day in the office, the Treo has everything I need and then some.
3. Toughness: I’m hard on my phones—and my PDAs for that matter. I can’t
count the times that I have had my phone hit the floor and watched the battery
and cover come off, or dropped my PDA and had the SD card and stylus pop
out. I’ve never held the iPhone without a vision of what dropping it would look
like. They aren’t pretty images. My Treo, on the other hand, seems to be a
pretty stout piece of gear sporting an attractive non-slip case that fits snuggly
in my paw.
4. AT&T: Speed, cost, service. ’Nuf said. I’m sticking with Sprint.
5. Undefinables: Lastly, there was the issue of the bricking. I’m not a person who
would tamper with the software of my iPhone, so I wasn’t personally threatened
by the bricking of unlocked phones. I don’t even believe that they did it maliciously. That doesn’t prevent me, however, from being troubled by the thought
that Apple has been tainted by its association with the cell phone industry and
has acted more in keeping with that industry’s standards of behavior than with
their own corporate identity—at least what I have thought Apple’s identity to
be.
I’m content that I finally have a phone that really meets my personal and business needs.
I’m just surprised that it isn’t an Apple. I continue to dream of the day when I can bring
my newly-purchased, fully-functional, modifiable, open Apple phone to whatever carrier I
choose and have it my way .
In the meantime, however, I’ll be waiting for the call from Steve on my Treo.
Happy New Year, everyone.
Copyright © 2008 Mike Chamberlain, [email protected].
ATPM 14.01
14
Mac About Town: How Did I End Up Here?
MacMuser
by Mark Tennent, [email protected]
Where Next For iPods?
Can iPods Get Any Smaller?
If you’ve ever driven a Honda V-TEC engine you’ll know what I mean. The engine loves to
rev, as Vicki Butler-Henderson’s squeals testify. At about 5000 revs, the camshaft switches,
the engine growls, and the seat kicks you in the back. That annoying white van glued to
your rear bumper becomes a rapidly shrinking dot in the rear-view mirror.
It was with some trepidation that I switched to an oil burner recently—the sort Garrison
Keiller sings about, with all the fluffy bunny rabbits in the advert. At least the engine was
designed and built by Ikuo Kajitani and Kenichi Hagahiro, the same blokes who created
the V-TEC and Honda racing engines. Instead of a clever camshaft their diesel has a low
compression ratio with a turbocharger that redlines at a more relaxed 5500rpm.
The engine is larger than any I’ve had before, in a car much smaller than I normally drive.
The funny thing is I find it harder to reverse. I can drive a Toyota pickup backwards
through the gateway, round the flowerbeds, pass a couple of cars, to park an inch from
the fence. I’ve done three-point turns in double-decker buses and reversed trailers round
corners, but back a little hatchback up the drive and I make a right hash of it. It seems for
me the smaller cars get, the harder they are to use.
Just the Reverse
This is almost the opposite of iPods. They started out as heavy lumps of stainless steel
with large hard disk storage space and a small screen. In five years they have evolved to
be 50 times smaller with a fifth of the memory. I’ve bought three iPods yet own only an
original first generation. My MP3 player of choice is a Dixon’s-own Matsui running for
weeks from an AAA battery. It has all the iPod facilities, plus recording and costs about a
tenner. Who would mug me for that?
Our latest iPod, purchased for my partner, is the Nano. If you’ve never played with one,
they are pure science fiction. Slim slivers of plastic, much smaller than a credit card, and
a screen large enough to watch films. Its 4 GB of memory is ample for modern compressed
recordings. Just what can Apple do with iPods now that they have shrunk the players so
small? Each generation makes the previous look like house bricks by comparison.
The Way Ahead?
Heston Blumenthal OBE, purveyor of scrambled egg and bacon ice cream and snail porridge,
in his €150 tasting menu, also offers “Sound of the Sea.” This features (not much) seafood,
ATPM 14.01
15
MacMuser: Where Next For iPods?
foam and edible sand, served accompanied by an iPod playing sea noises. Personally I
prefer to open a window when I get fish and chips, or better still, walk along the beach
feeding chips to greedy herring gulls. But then, the English Channel is within 50 yards
of our office, something we might regret when melting icebergs bring it closer still. But is
Heston showing the way ahead?
If iPods get any smaller they will be too difficult to operate and with a screen not worth
watching. It is doubtful there will be a dramatic lowering in price, something Apple has no
history of. MP3 players are on the market already, priced at a couple of quid retail. Singleuse functions such as Heston’s might have a part to play if they get cheaper still, especially
if they can play videos. Estate agents and car sales could send their stock complete with
virtual tours to prospective buyers. Ikea’s instruction sheets could become digital.
Wireless connectivity would mean we could dump earphone cables. Every iPod user has
suffered neck spasms as their iPod drops from their pocket while still attached to their ears.
I am reliably informed the Nano’s earphone tug is almost negligible compared with an iPod
mini’s. Digital TV and radio reception would be good but are unlikely while there are too
many competing standards around the world.
Perhaps the solution will be add-on dongles. Buy a basic iPod then plug in the extras you
want, such as roll-up widescreen, Bluetooth, or whatever.
Copyright © 2008 Mark Tennent, [email protected].
ATPM 14.01
16
MacMuser: Where Next For iPods?
MacMuser
by Mark Tennent, [email protected]
Sum Thing Dickered This Way Bombs
It’s funny how you can make a tiny change which on the surface seems innocent but underneath reaps enormous consequences.
Take, for example, our accounts database. It was created back in 1991 when the accounts
were first computerized. FileMaker Pro 1 was the chosen software, largely because we
had a copy and it came with a set of templates for an American-based business. In those
days FileMaker was only a flat-file database but it had look-up facilities in a one-direction,
relational sort of way. It is a big tribute to FileMaker’s creators that we were able to
recreate a whole accounting package, working only from the online help files, but this is the
nature of Apple’s software which “just works.”
A Little History
FileMaker’s first incarnation was in the early 1980 as a DOS program called Nutshell. When
the Mac appeared in 1984, Nutshell was adapted for graphical interfaces, and as a result
became far easier to use and was renamed FileMaker. At one point it nearly became a
Microsoft program when they bought up FileMaker’s distributors, Nashoba. FileMaker
was not part of the package and actually outsold Microsoft’s own database, imaginatively
called Microsoft File, in its pre-nascent Microsoft Office suite. Shortly after, Apple bought
FileMaker, renumbered it, and published it under their Claris label.
Over the years FileMaker has become one of the easiest relational databases to use, gaining
features and rewrites, crossed platforms, and always had the ability to make changes on the
fly. Which is exactly what I had done. A recent switch of car meant I was entering diesel
costs into a field called “Petrol.” Being a neat and tidy person (ha!) I changed the name to
“Diesel,” entered the last three months worth of receipts, and tried to do my VAT return.
Bigger Than Felix Dennis’s Tax Bill
Apparently I owe HM Customs and Excise eight million quid. I would happily pay this
were it true, thinking what our turnover would have to be to accumulate a tax bill larger
than Felix Dennis’s. Since I have no recollection of such wealth passing through our meagre
accounts, something had gone horribly wrong. A moment’s delving into FileMaker showed
the error. The “Petrol” field set up 15 years ago, was referenced in many calculations which,
because of our lack of advanced maths, were done with simple additions, subtractions, and
so on. Changing the field to “Diesel” had confused the rest of the database. A quick retyping
of its name saw eight million become eight hundred. Which is just as unachievable, but at
least we don’t have to skip the country.
ATPM 14.01
17
MacMuser: Sum Thing Dickered This Way Bombs
Copyright © 2008 Mark Tennent, [email protected].
ATPM 14.01
18
MacMuser: Sum Thing Dickered This Way Bombs
Segments: Slices from the Macintosh Life
by Tricia Roach
Grandma’s Life as a Video Star
What do you get when you mix one loving grandma, one video camera, great children’s
literature, and a Mac? I call them the “Grandma Videos,” and they’re almost as much fun
to make as grandma’s cookies.
I live in a land far, far away. . .well, that’s how my two young granddaughters describe it
anyway. They live in Massachusetts; I live in Arizona. I earn a bunch of frequent flyer miles
going to see them three or four times a year, but that just isn’t enough. As a Mac user,
I’ve found lots of fun ways to stay close to them, even from 2,000 miles away.
I’m a teacher—reading books to kids is a natural. Reading to my granddaughters is a
top priority. So, I created what my girls have come to call the Grandma Videos using my
favorite Mac tool—the iLife suite. I read books to them via DVD.
I choose a book to match their ages (2 and 4) and attention span. Dr. Seuss’
The Cat in the Hat was my first. I scan each page into my computer with my Epson Perfection 2
then edit with iPhoto as needed. I store this set of photos in its own album for easy accessibility from within iMovie.
I currently have no formal lights to use when filming myself, so I must plan around when
the natural sunlight is coming through my window. It’s not ideal, and I have been shopping
around for a light kit to buy. iMovie has no way to adjust for lighting issues.
ATPM 14.01
19
Segments: Grandma’s Life as a Video Star
I set up my Canon Optura Xi video camera on a tabletop tripod and aim it at my rocking
chair. After a few adjustments to frame myself just right in the camera lens, I grab my
props—the book to be read, my video camera remote, and of course my Dr. Seuss hat—to
start reading and filming. I try hard to enunciate and speak slowly enough to be understood,
pausing between pages to provide enough footage to play with inside iMovie.
Next, I import the footage into iMovie HD. It is usually a single clip, but as I work with
it, I split it every place I finish reading a page, to insert the photo of the page itself from
the book. The effect is the same as if I were showing my granddaughters each page I’m
reading. After all this splitting and inserting, I adjust the Ken Burns effect for each photo,
to highlight the relevant text or image on the page.
When you import photos from iPhoto into iMovie, be sure to keep the Ken Burns effect
turned on. Otherwise, they don’t render as part of the video. The consequence of forgetting
to keep Ken Burns turned on is that when played on TV, the photos appear very badly—
unclear and fuzzy. I also increase the length of time for each photo to appear on screen, to
allow for transitions, which are added next.
I create a title slide for the beginning and a credits slide for the end of the video. Then, I
search my iTunes library for music to place in the background as I’m reading. I only use
instrumental music, and adjust its volume so it doesn’t upstage my reading. iMovie HD
allows me to split and add audio at just the right moments, so the music style matches the
content of the book. I add a list of music titles and artist names to the credits slide at the
end of the movie.
Once I’m done adding music, I play the entire movie through, fixing or adjusting as I go.
At this point, I save the video as full quality DV. I repeat the entire process with a second
story, so that I can have two videos to burn to DVD.
I choose an iDVD theme (using 4:3 aspect ratio, since this is what my granddaughters’ TV
is at home) and bring photos from the two stories into the various drop zones. I don’t add
much else to the iDVD workspace except for another song from iTunes. Drag in each video,
adjust titles as desired, and make sure I’ve paid attention to the TV-safe zone. That’s it. I
always choose to Save as Disc Image, then burn my DVD using Apple’s Disk Utility. I can
fit two full-quality DV videos on one DVD. I burn at a slow speed and head off to finish
my other housekeeping chores.
After testing the DVD on my own TV, I borrow the LightScribe DVD burner from the office
where I work and create a DVD cover, using images from my video, which is laser-burned
onto the DVD. No more Sharpies for me! It takes about twenty minutes for the burn.
I pack up the DVD to mail out to Massachusetts. I send a copy of each book, so that my
girls can follow along as I’m reading on the TV screen. As they get older, I will choose more
involved books, and will probably have to adjust my process, but for now, the Grandma
Videos are a hit!
ATPM 14.01
20
Segments: Grandma’s Life as a Video Star
Copyright © 2008 Tricia Roach. The Segments section is open to anyone. If you have something
interesting to say about life with your Mac, write us.
ATPM 14.01
21
Segments: Grandma’s Life as a Video Star
Cuba Buildings and Cityscapes
by Jennifer Curry
We need new desktop pictures each month. Write to us!
This Month’s Desktop Pictures
This month’s pictures were taken by atpm reader Jennifer Curry during her 2006 trip to
Cuba.
View Pictures
Previous Months’ Desktop Pictures
Pictures from previous months are listed in the desktop pictures archives.
Downloading All the Pictures at Once
Some browsers can download an entire set of desktop pictures at once.
iCab Use the Download command to download “Get all files in same path.”
OmniWeb Choose “Save Linked . Images. . .” from the File menu.
Safari Use this Automator workflow.
Contributing Your Own Desktop Pictures
If you have a picture, whether a small series or just one fabulous or funny shot, feel free to
send it to [email protected] and we’ll consider publishing it in next month’s issue. Have a
regular print but no scanner? Don’t worry. E-mail us, and we tell you where to send it so
we can scan it for you. Note that we cannot return the original print, so send us a copy.
Placing Desktop Pictures
Mac OS X 10.3.x through 10.5.x
Choose “System Preferences. . .” from the Apple menu, click the “Desktop & Screen Saver”
button, then choose the Desktop tab. In the left-side menu, select the desktop pictures
folder you want to use.
ATPM 14.01
22
Desktop Pictures: Cuba Buildings and Cityscapes
You can also use the pictures with Mac OS X’s built-in screen saver. Select the Screen
Saver tab which is also in the “Desktop & Screen Saver” System Preferences pane. If you
put the atpm pictures in your Pictures folder, click on the Pictures Folder in the list of
screen savers. Otherwise, click Choose Folder to tell the screen saver which pictures to use.
Mac OS X 10.1.x and 10.2.x
Choose “System Preferences. . .” from the Apple menu and click the Desktop button. With
the pop-up menu, select the desktop pictures folder you want to use.
You can also use the pictures with Mac OS X’s built-in screen saver. Choose “System
Preferences. . .” from the Apple menu. Click the Screen Saver (10.1.x) or Screen Effects
(10.2.x) button. Then click on Custom Slide Show in the list of screen savers. If you put
the atpm pictures in your Pictures folder, you’re all set. Otherwise, click Configure to tell
the screen saver which pictures to use.
Mac OS X 10.0.x
Switch to the Finder. Choose “Preferences. . .” from the “Finder” menu. Click on the
“Select Picture. . .” button on the right. In the Open Panel, select the desktop picture you
want to use. The panel defaults to your ~/Library/Desktop Pictures folder. Close the
“Finder Preferences” window when you are done.
ATPM 14.01
23
Desktop Pictures: Cuba Buildings and Cityscapes
Cortland
by Matt Johnson, [email protected]
ATPM 14.01
24
Cartoon: Cortland
ATPM 14.01
25
Cartoon: Cortland
ATPM 14.01
26
Cartoon: Cortland
ATPM 14.01
27
Cartoon: Cortland
ATPM 14.01
28
Cartoon: Cortland
ATPM 14.01
29
Cartoon: Cortland
ATPM 14.01
30
Cartoon: Cortland
ATPM 14.01
31
Cartoon: Cortland
ATPM 14.01
32
Cartoon: Cortland
ATPM 14.01
33
Cartoon: Cortland
ATPM 14.01
34
Cartoon: Cortland
ATPM 14.01
35
Cartoon: Cortland
Copyright © 2008 Matt Johnson, [email protected].
ATPM 14.01
36
Cartoon: Cortland
Software Review
by Linus Ly, [email protected]
Baseline 1.0.1
Developer: MildMannered Industries
Price: $20 (unlimited number of personal computers; one business computer)
Requirements: Mac OS X 10.4. Universal.
Trial: Fully-featured (14 days). After the trial period, Baseline no longer shows
comparison against saved baselines, but all other functionality is still usable.
I recently tried to bring 40 minutes of video footage from my old tape-based camcorder into
my laptop computer via iMovie. I quickly learned that the few gigabytes I had remaining
on the PowerBook were far from enough to hold the iMovie project. I deleted songs and
podcasts I no longer needed, threw out demos that expired, got rid of old applications, and
so on, but it still wasn’t enough. In desperation, I turned on the Finder’s Calculate All
Sizes option to see the folder sizes, but as I was afraid to find out, it was just plain too
slow. I needed a quick way to find out the folder sizes, and Baseline from MildMannered
Industries could have helped.
Start With a Baseline
Baseline’s catchphrase is “Where has all your disk space gone?” and it is true that with
Baseline at work for you the question can be answered. You begin by scanning your hard
drive and saving the result as a baseline. Naturally, you can see only the folders thats your
account has access to. You now know, for this instant in time, how many bytes each folder
on your hard drive takes up. Next time you need to know what has changed with your hard
drive space, scan again and you will know where the changes are. Click on Changes Only
and you would see just the changes. You can save as many baselines as you wish.
ATPM 14.01
37
Review: Baseline 1.0.1
The Baseline interface showing only folders that have changed in size compared to the baseline, sorted by the
size of the change.
The first scan took very little time to complete, but subsequent scans required more time.
For my 80 GB hard drive with 10 GB of free space, each rescan took about 10 minutes
to complete. However, once it is done, the sizes for the folders and the subfolders are
shown instantly as they are opened. Granted, the numbers are not up-to-date, but it
is a fair tradeoff. With Calculate All Sizes selected, the Finder can report on all folder
sizes as folders and windows are opened, but the delay is noticeable when large folders are
encountered. I much prefer Baseline’s approach of taking a one-time snapshot, even if it
takes a little more time for the one scan. Just let the scanning take its course, then fly
through the folders later on and take actions as needed.
Take Actions
Knowing the culprits that eat up all your precious space, it is time to take action. The first
straightforward action to take is to empty out the Trash. The Known Issues list accessible
within the application does point out that the Trash only reflects what is in the baseline,
i.e. the Trash is not updated live. Other options for reclaiming your hard drive space are
Delete, Compress, and Archive. Delete works on either files or folders, but Compress works
on files only, and similarly Archive only works with folders. Still, with either compress or
ATPM 14.01
38
Review: Baseline 1.0.1
archive, the result is the same. A copy of the original file or folder is stored in compressed
format while the original itself is removed from the hard drive.
Some Complaints
A little annoyance with the cleanup actions is that there is no way to turn off confirmation.
For every item to be deleted, compressed, or archived, you are presented with a confirmation
window. I tried holding down the Option key, but the confirmation window still showed
up. Strangely, if you open the Manage Baselines window and unwittingly click the button
with a minus sign in it, which has no bubble help, the selected baseline will be deleted, no
questions asked!
Another, bigger, annoyance is that there is no way to select multiple files or folders. In
some ways, the Baseline window can be thought of as just another Finder window. Files
are listed and launched directly from within Baseline. When it comes to file selection, the
similarity ends. You simply do not have the option of carrying out an action on more than
one file at a time.
I exchanged e-mail with MildMannered Industries and was told that the next release will
have the option to take action without seeing the confirmation window by first holding a
modifier key. I was also informed that the idea of multiple selection will be considered for
a future release.
Wish List
There are other programs that perform similar functions to Baseline, such as WhatSize,
Disk Inventory X, and Omni Disk Sweeper, However, Baseline’s comparison feature makes
it a more attractive contender in the genre. To keep the lead, I think future versions
of Baseline should include scheduled scanning. While my lone laptop’s hard drive takes
relatively little time to scan, in a business there may be a network of resources to be
scanned periodically. Even with today’s multi-terabyte hard drives, network users still
manage to fill them up, at least where I work. A network administrator using Baseline with
the scheduled scanning feature could then regularly check his network’s health. Perhaps
he could even archive files in a certain folder or those matching certain name patterns, on
schedule. I imagine something involving AppleScript or Automator could be included in
the package.
Summary
Baseline is a simple answer to the common question, “What takes up all my hard drive
space?” Allocate some time for Baseline to scan your hard drive, then at a glance you can
see where the problem lies. Right within Baseline, you can take actions to reclaim any
wasted space, through deletion or compression. Unfortunately, you’ll have to confirm every
action, and actions can only be applied to one file or folder at a time.
Copyright © 2008 Linus Ly, [email protected]. Reviewing in atpm is open to anyone. If you’re interested,
write to us at [email protected].
ATPM 14.01
39
Review: Baseline 1.0.1
ATPM 14.01
40
Review: Baseline 1.0.1
Software Review
by Ed Eubanks, Jr.
BusySync 1.07
Developer: BusyMac
Price: $20 (volume discounts available)
Requirements: Mac OS X 10.4. Universal.
Trial: Fully-featured (30 days)
One of the prevailing complaints about iCal, prior to the release of Leopard, was the lack of read-write ability with subscribed calendars. While it was (and is)
wonderful to publish calendars unidirectionally, and to subscribe to other calendars in a
similar way, there are certain contexts where more is needed—or at least preferred. Full
two-way calendar sharing is a powerful tool for managing time.
Thus, when exactly that was announced for Mac OS X 10.5 Leopard, a collective sigh
of relief might describe the response of that circle who had anticipated this feature. As
time went on (and the release of Leopard came), however, even this was revealed to be a
somewhat less-than-ideal solution: you need a CalDAV-compatible server, for starters, and
those are hard to find. Many hosts support WebDAV, but few offer CalDAV; even Apple’s
own .Mac does not (yet) offer full CalDAV-style calendar sharing. And setting up a CalDAV
server of your own (through a local network, say, or a Web-server enabled computer) is too
much for the average user—it can be done (I’m told) but may not be for the faint of heart.
That’s why BusyMac’s BusySync software is such a welcome addition to the shareware/small commercial developer offerings. In a nutshell, BusySync enables any Mac to
grant read-only or full read-write privileges to any other user or another Mac, either with
or without password protection.
This is all I need. I want to share my calendars with my wife, as well as have them synced
on both Macs that I use. Down the line, I also want to be able to incorporate full calendarsharing if I should hire an administrative assistant to, among other things, help me manage
my schedule. BusySync doesn’t offer a perfect implementation, but it does a good job.
Setting Up
Downloading the application from BusyMac’s Web site gets you a zipped folder, containing
the usual EULA and Read Me file, a webloc file for the user manual, and the BusySync application (which is actually a preferences pane, not a stand-alone application). Installation
of preferences pane is straightforward: double-click it, and it is installed in your Library
folder (either your user’s Library, if you selected “Install for this user only,” or in the main
Library folder if you chose “Install for all users”). Some users may not know that, however,
ATPM 14.01
41
Review: BusySync 1.07
and right up front I was a little disappointed that BusyMac had not bothered to create
a more robust installation method—either a full-fledged installer, or at least a disk image
that offered some sort of guidance.
Once it is installed, it loads in the System Preferences, you confirm that you are using a trial
version, etc. Preference panes are, by nature, fairly straightforward items, and BusySync
is no different: five tabs across the top allow you to select the different options for syncing
and sharing. Here again, however, I could see how someone who is less technically-minded
may hit an obstacle of confusion; what now?
Sharing Made (Relatively) Easy
What now, is that you choose Publish, select which calendars you want to share, and at
what levels—specifically, do you want anyone to be able to read them, or only those who
have password permission? Do you want to allow any network user to write to them, or
only those you have supplied a password to? Once that is done, you’re done on that Mac
(for now).
Now you can set up the sharing on the computers or users that will read or read/write on
those calendars you just published. Install BusySync for that user or computer, then use
the Subscribe tab to enable the other end of sharing. You’ll need to enter passwords where
ATPM 14.01
42
Review: BusySync 1.07
you required them on the publishing side. You might also select some calendars on the
second Mac (or the third, fourth, etc.) to Publish, then go back to the others and set up
the subscriptions.
By the way, if you’re just sharing with another user on the same Mac, no additional licenses
are required. Additional licenses are required, though, for additional Macs.
One hidden benefit of BusySync is that it backs up your iCal data daily, keeping 10 days’
worth of backups. Particularly those who aren’t using Time Machine will find this a huge
feature should they ever run afoul with their calendaring data. If, for some reason, the data
gets corrupted on any (or all) of the Macs syncing, you are just a few clicks away from a
fully restored set of iCal data. It is also easy to reset syncing data, effectively removing all
publishing and subscribing data from the BusySync settings.
Another subtle asset is the log that BusySync keeps. If you’ve ever looked at a log on your
Mac, you know that they keep a lot of information that means little or nothing to you,
especially on a day-to-day basis. If you need to troubleshoot something, though, logs can
be incredible tools for discerning where things went amiss.
BusySync works with Tiger or Leopard, and you can share calendars between them. Thus,
Tiger users will find BusySync fulfills most of their long hoped-for features, while Leopard
ATPM 14.01
43
Review: BusySync 1.07
users who don’t have CalDAV access will find BusySync a useful alternative. I’ll note here,
though, that BusySync is not a direct CalDAV replacement. Positively, this means that
BusySync and CalDAV can be used at the same time—but on the downside, those looking
to put iCal’s new features for group calendaring to use will not be able to do so.
BusySync also has some advanced settings for security: specifically, port-mapping and SSL
encryption. You can set these up under the “Advanced” button on the Publish tab. You
may want to do this to keep your firewall tighter, or to make sure that the data traveling
through your network is encrypted. Be aware, however, that SSL encryption is available
only to Leopard users.
Things I’d Like to See
It’s hard to find many complaints about BusySync; it generally does what it is supposed
to do, and without much fanfare or difficulty. Like many Mac programs, it increases your
efficiency while staying out of your way.
That said, there’s a couple of things I would like to see. For starters, BusyMac could
make calendar sharing even easier by creating some basic guidance for installation and
set-up: an installer, perhaps, and a pop-up screen that immediately opens the first time
BusySync is launched. This is a subtle step, but I think an important one given the
perceived intimidation factor of setting up something like calendar sharing.
BusyMac should also include two installations with the basic license. Sure, no additional
license is required to share calendars on one Mac—but my suspicion is that most contexts
where this sort of calendar sharing is desired and useful involves two or more Macs. I’d
rather see the price go up to $25 for a two-Mac license.
I’d also like to see BusySync work through Back to My Mac. In fact, they could tout this
as the missing feature from .Mac that makes calendar sharing more complete. Leopard’s
Back to My Mac opens up a host of possibilities, and it will be fun to see how developers
think of creative ways to maximize those possibilities; I’d like BusyMac to focus on this.
Finally, it would be great to see future versions open up the group calendaring features in
iCal that Leopard brought. I don’t even know if that is possible, but it would be cool to see
them try. Apple boasted great things about the updates to iCal—and, to be sure, they are
neat tools—but the requirement of CalDAV, combined with the relative paucity of CalDAV
servers, means that these tools aren’t yet available to the masses. BusyMac could capitalize
on this by democratizing CalDAV on a local network level.
BusySync is a good addition to my Macs, and it would be good in any household or office
where straightforward calendar sharing is helpful.
Copyright © 2008 Ed Eubanks, Jr. Reviewing in atpm is open to anyone. If you’re interested, write
to us at [email protected].
ATPM 14.01
44
Review: BusySync 1.07
ATPM 14.01
45
Review: BusySync 1.07
Accessory Review
by Chris Lawson
Fin Laptop Handle/Stand
Developer: Fins-Up
Price: $30
Requirements: Aluminum PowerBook G4, MacBook, or MacBook Pro.
Trial: None
Pop quiz: What’s the easiest way to keep a laptop cool? If your answer
involved preserving or increasing airflow around the laptop, you get a gold star.
Apple’s laptops are real portable powerhouses, but along with that increased computing
power comes a great deal of heat. Using metal cases and advising consumers to ensure
the laptop is used on a hard surface help dissipate that heat, to be certain, but I’ve always
thought those little rubber feet weren’t doing much for airflow under the laptop when they’re
raising it off of the desk only one-sixteenth of an inch.
Fins-Up has a solution. Take one billet of aluminum, machined in the shape of a handle
and finished to match Apple’s aluminum, white, or black laptops, and four extra-long
screws, and you have the Fin, a laptop stand-cum-handle that makes it easier to carry your
PowerBook around while providing better cooling when you’re using the ’Book.
The Fin installed on the bottom of the laptop.
This isn’t the first time we’ve seen a handle or handle/stand combination for a laptop.
Apple built a handle, though not a stand, into the original iBook. QuickerTek developed
ATPM 14.01
46
Review: Fin Laptop Handle/Stand
a similar product way back when the TiBooks were new, and Case-Mate has since taken
over the QuickerTek product, now called Handle-It. The Fin is much cheaper than the
Handle-It and much more rugged than its spiritual predecessors.
Installation is pretty simple, but you need the right tools. Fins-Up thoughtfully includes two
small screwdrivers—a #00 Phillips (for PowerBook G4s) and a #0 Phillips (for MacBooks
and MacBook Pros) in the packaging, along with an instruction sheet that clearly explains
the process.
The Fin from the back, as installed.
The included screwdrivers may slip—mine did—when breaking the factory screws free of
the thread-locking compound used on them, so if you have a good #00 or #0 Phillips
screwdriver, you might want to use it instead. If you don’t have one, you can buy a set
of precision screwdrivers for a few dollars at most hardware stores. Or borrow one from a
tool-loving friend. Kudos to Fins-Up, though, for including the screwdrivers it did, which
are certainly better than nothing.
Once installed, there’s really nothing else to do but enjoy your cooler-running laptop. How
much cooler? Time constraints prevented a full-blown scientific test or comparisons to other
stands, but using the built-in temperature sensor in my PowerBook G4 (1.5 GHz, combo
drive, 2 GB RAM), the Fin lowered temperatures about 15◦ C, depending on the surface.
It also kept the fan from running as much when using the PowerBook on surfaces besides
wood and glass.
ATPM 14.01
47
Review: Fin Laptop Handle/Stand
The Fin installed, elevating the laptop off the table.
To be sure, the increased airflow provided by elevating the back of the laptop helps greatly
in cooling it better. The Fin, however, is unlike most stands in that it is made of a solid
chunk of metal and attached securely to the laptop. This allows the Fin to act as a fairly
large heatsink and provides even more surface area through which heat can be exchanged
to the ambient air.
ATPM 14.01
48
Review: Fin Laptop Handle/Stand
The handle function of the Fin in use.
Of course, the Fin works as a handle for carrying your ’Book around, too. Most people,
myself included, don’t carry bare laptops around very much anymore since there’s just too
much risk. For the few times you need to do that, it sure feels better to have a secure
handhold (like what the Fin provides) than to try to grip the slick skin of the laptop itself.
ATPM 14.01
49
Review: Fin Laptop Handle/Stand
But, you might ask, is there anything I might not like about the Fin? Sadly, very few
products that pass through the hands of reviewers here are perfect, and the Fin is no
exception. A PowerBook with a Fin installed is not as comfortable for use on the lap, since
the Fin digs into your thighs. The Fin gets quite warm—remember the heatsink effect just
discussed—though not uncomfortably so for me. Perhaps most importantly, the Fin adds
weight and significant size to a laptop. The weight (just a few ounces) isn’t too much of an
issue, but if you use a form-fitting case or sleeve, you may find your laptop doesn’t fit as
well (or at all) with the Fin installed.
For me, the best aspect of the Fin is that it behaves exactly like a factory extension of my
PowerBook. I don’t have to carry an extra piece with me when I travel, which is pretty
much all the time. I don’t have to remember to set it up after removing the PowerBook from
its case (a MaxUpgrades MaxSleeve which, though fairly form-fitting, is also just stretchy
enough to fit with the Fin installed). And it allows me to use the PowerBook in the open
sleeve without worrying about heat buildup. Perhaps the most telling thing about the Fin is
that my Podium CoolPad, formerly my go-to stand for travel, has gone completely unused
since the Fin arrived.
Thirty bucks is cheap insurance against heat-related problems down the road, especially
since the stand doubles as a handle. The Fin’s convenience factor, as long as it won’t force
you to buy a new laptop bag, is extremely high. Fins-Up gets two human thumbs up from
me for this laptop stand.
Copyright © 2008 Chris Lawson. Reviewing in atpm is open to anyone. If you’re interested, write to
us at [email protected].
ATPM 14.01
50
Review: Fin Laptop Handle/Stand
Software Review
by Lee Bennett, [email protected]
Iris 1.0.4
Developer: MildMannered Industries
Price: $30
Requirements: Mac OS X 10.4. Mac with PowerPC G4, iSight camera (many
other USB and FireWire cameras also work). Universal.
Recommended: Quartz Extreme–capable video card.
Trial: Feature-limited (motion detection limited to 10 minutes).
Anyone who enjoys finding new things to do with an iSight camera is sure to find MildMannered Industries’ Iris to be a welcome addition to any collection of applications. The
number of people who like playing with an iSight camera is almost certainly growing since
every Macintosh laptop now has one built-in, and there are plenty rumored guesses that the
next round of updates to Apple’s Cinema Displays will likely gain built-in iSight cameras.
Were it not for a few small features that are part of Apple’s Photo Booth application, Iris
could very nearly be a replacement for Photo Booth. There are only two Photo Booth
features I found noticeably missing from Iris: the white-screen flash, which provides a bit
of extra light when taking still photos; and the background replacement capability. A
workaround for the screen flash is simply to open a blank white window (such as a text
editor or Web browser) and then to maximize it so it fills the screen. As for Photo Booth’s
background replacement feature, I’ve never had much use for it because I’m seldom in front
of a background that fosters acceptable results. As such, I may never have use for Photo
Booth again.
But enough comparison against Photo Booth. Looking at Iris’ core functions, one can start
thinking of it as six different applications instead of just one. Each of these modes is easily
accessed by a menu that appears when the mouse pointer hovers the image.
ATPM 14.01
51
Review: Iris 1.0.4
Ignore the man behind the curtain! Look, instead, at the easy-to-understand icon menu that appears when the
mouse hovers over the camera preview screen.
Snapshot
The first mode, Snapshot, is the part of Iris that functions much the same as Photo Booth.
It’s a quick means to snap a picture of what an iSight sees. I would have said it’s a nofrills means, but there actually is one “frill.” Iris includes a filter gallery to apply effects
to Snapshots, and there are considerably more filters available than Photo Booth offers.
Not counting Photo Booth’s background replacements, Iris has 10 more filters than Photo
Booth.
ATPM 14.01
52
Review: Iris 1.0.4
Previews of the first eight filter selections.
This filter gallery is the only part of Snapshot mode that could use a little improvement. For
one, it isn’t immediately apparent that a filter is activated by double-clicking it, especially
considering I was used to the single-click activation in Photo Booth. Maybe I simply needed
to do a better job of reading the manual!
The one other problem I encountered is that navigation through the filter previews can
be difficult because Iris became very sluggish while the preview mode was active. Since
I’m using a less-than-one-year-old MacBook Pro, and since I perceive no sluggish behavior
in Photo Booth, I can only conclude that Iris’ code for displaying the previews could be
streamlined.
ATPM 14.01
53
Review: Iris 1.0.4
As long as I can remember the appearance of an effect just by reading its name instead of seeing previews, I
can avoid the sluggishness I observed while choosing filters by instead selecting the desired filter from the menu
in the lower left corner of the preview window.
ATPM 14.01
54
Review: Iris 1.0.4
Movie
Like Snapshot mode, Movie mode is similarly light on frills. Probably the best aspect is that
it can record directly to any format already supported via QuickTime on a given computer.
Once again, I found two small areas in which this mode could improve. First, it would be
nice to be able to choose other movie sizes than just 640×480 or 320×240. Second, there
should be a means to select a different audio source without having to jump over to the
Sound preference pane—or at least a button to quickly access the Sound preference pane.
TimeLapse
The next three modes are likely to be the reason anyone would want to use Iris instead of
Photo Booth. TimeLapse mode, like Movie mode, records movies in any format supported
by QuickTime on a given machine. Also like Movie mode, sizes of 640×480 or 320×240
are offered. But rather than recording a standard video, there are options to set up Iris to
capture one frame every x-number of seconds over any duration specified. There is also a
setting to specify the frames per second rate of the final video.
Capturing one frame every second for five minutes results in a 10-second video when played at 30 frames per
second. (The video sample is 320×240, H.264 codec, and 670 kilobytes in size.)
ATPM 14.01
55
Review: Iris 1.0.4
The settings for TimeLapse mode are such that there is no way to capture any more than
one frame per second. This means that if a finished video is to play at a smooth 30 frames
per second, it will be at least 30 times faster than normal speed. To make it 10 times faster
than normal speed, its playback frame rate must be set at 10 frames per second. But, by
this time, the video will start to stutter from the low frame rate.
Ideally, the setup menu would allow a definable number of frames to be captured within
one second. This way, I could specify 15 frames captured each second which, played back
at 30 frames per second, would produce a double-speed video.
Security
Not to suggest that Iris, at just $30, could rival a dedicated security camera system, but
combined with a supported external camera positioned in the right location, Iris is, by no
means, the worst solution for a security camera, either. The Security mode configuration
allows setting the sensitivity of motion detection and whether to simply log the detection,
play a sound, or record a Snapshot, Movie, or TimeLapse file. In addition, an e-mail
notification can be sent, which becomes very useful when receiving pager-style e-mails on a
mobile device.
Intruder alert!
It seems the small caveats I find in each mode keep coming in pairs. Once again, I found
two concerns with Security mode. The first involves the on-screen indicator of motion. I
like having it on, but I also like saving a Snapshot when motion is detected. Unfortunately,
as shown in the image above, the motion indication is visible in the Snapshot which could
effectively hide the “intruder’s” identity. The motion indicator does not, however, show up
if a Movie is recorded instead. Also, there is a good reason to use a Movie recording instead
of Snapshot—Iris can be set up to buffer video for a definable number of seconds prior to
the motion detection.
ATPM 14.01
56
Review: Iris 1.0.4
The second issue with Security mode is with the Snapshot or Movie thumbnail in the log.
Full-size versions from those thumbnails are accessible, but it’s difficult to return to the log
screen. The only ways I found to do so were to either click the Mark button, which records
a timestamp marker within the log, or to exit then return to Security mode.
WebCam
WebCam mode is the reason Iris got my attention in the first place. This mode is exactly
what its name suggests—taking video from a camera and publishing it as a Web page via
an old-school Meta Refresh method, as a Java Applet, or as a Server Push which is the best
method if the Web browser being used supports it (and Safari does support it).
Like Movie and TimeLapse mode, there are two sizes from which to choose. There is a
setting for the desired frame rate, whether or not to advertise the WebCam via Apple’s
Bonjour, and whether to require a password to connect. If the WebCam needs to be
accessible from outside a local network (LAN), the matching port number must be opened
on a router and directed to the computer’s IP address that is running Iris.
Gallery
The Gallery mode might seem like more of a tool to be used with the other five modes than
a mode all to itself, but the easy access to various means of export has let me think of it as
a useful tool in its own right.
Iris’ Gallery mode.
ATPM 14.01
57
Review: Iris 1.0.4
From here, Snapshots can be exported as one of five different file formats, though there is
still the 640×480 or 320×240 size limit. There’s also Flickr integration, allowing Snapshots
to be published directly to a Flickr stream.
Movies (including TimeLapse recordings) can be converted to the same variety of codecs
found in the Movie mode settings. There are also presets for quickly exporting videos to
formats suitable for an iPod, iPhone, and Apple TV.
Surprise Feature
While giving Iris a run-through, I remembered I still have my old external iSight, and I
found myself wondering whether Iris could handle both at the same time. I was quite
pleased to find that it does.
Looking at preview images for both iSight cameras really shows off the differences of the imaging sensor used
in the old iSight versus the new built-in iSights.
Even more surprising to me was that WebCam mode can broadcast both cameras simultaneously. Unique port numbers were automatically assigned to each and I could connect to
both with separate Web browser windows.
Wish For a Seventh Mode
I mentioned earlier that the WebCam mode was the original reason I gave Iris a try. This
was because I was looking for a replacement for another application which I found to be
buggy and that has shown no signs of being fixed by the developer.
However, while the WebCam mode in Iris is very nifty, it wasn’t exactly what I had in
mind. WebCam mode is akin to Movie mode, whereby it attempts to provide, as much as
possible, a real-time view through the camera via the Web.
What I would love to see as an additional mode is a SnapShot-style WebCam where still
images are snapped at a defined interval and automatically saved into a specified folder
ATPM 14.01
58
Review: Iris 1.0.4
and/or uploaded to a Web server (via FTP/SFTP, a shared folder, .Mac, etc.). I’d also like
to see Iris manage a Web page to display the most current SnapShot as well as provide an
archive for prior images.
For those, like me, who are interested in programming their own Web interface, Iris would
manage the filenames of the saved SnapShots such that the current one always had a
common filename, and the previous current image would get renamed with a timestamp.
The Verdict
Keep in mind that Iris is still a 1.0.x product. I’ve read other opinions that claim Iris does
not provide an adequate amount of control. But, with the exception of the limited choices
of image size, I felt Iris provided all the control most anyone would need, and I found access
to configuration and setup was very intuitive. In fact, except for when I was activating
the second iSight, I really didn’t even need to use Iris’s menu bar items. Essentially every
control is accessible via the mouse-hover menu or by the window menu in the lower left
corner. Even the IP and port number Web address needed to view the WebCam output
are provided in the bottom portion of the preview window, and simply clicking it opens the
URL in a Web browser.
Iris is already a great version 1.0 product and is sure to become a solid tool by the time
the next significant update is released.
Copyright © 2008 Lee Bennett, [email protected]. Reviewing in atpm is open to anyone. If you’re
interested, write to us at [email protected].
ATPM 14.01
59
Review: Iris 1.0.4
Software Review
by Mark Stoneman, [email protected]
Mellel 2.2.7.1
Developer: RedleX
Price: $49 (download); $64 (boxed); $35 (academic); $19 (upgrade price after two
years).
Requirements: Mac OS X 10.3. Universal.
Trial: Feature-limited (prints watermark across each page, also when saving to
PDF; after 30 days cannot copy or export content from saved Mellel documents).
I discovered Mellel some four years ago during a period of frustration. Microsoft Word
had all the features I needed for my history dissertation, and then some, but it crashed
at inopportune moments, and my files sometimes became corrupt. There was the new,
slick-looking Nisus Writer Express, but it did not offer footnotes yet. The only way to do
footnotes outside of Word seemed to be with two Carbon applications brought over from
Apple’s OS 9 days, AppleWorks and Mariner Write. Neither offered substantial control over
the look and feel of footnotes, and the styles I customized in the more promising Mariner
Write did not always stick, either. I could have turned to OpenOffice.org or AbiWord, but
I did not want to work in X11.
Mellel came along at an opportune moment. A word processor that understood academic
writing, Mellel offered multiple streams of footnotes, sections and chapters, and close, reliable control over styles. It was also fast and stable, and it fit a graduate student’s budget.
The Mac word processing market has come a long way since then, especially with the release of Nisus Writer Pro, but Mellel continues to occupy an important place among word
processors for the Mac.
User Interface
The first thing one notices about Mellel is its user interface, which is unusual enough to
ensure that many people will decide right away whether or not they like it. With its
toolbar visible, Mellel’s non-standard metal interface and styling makes it look like the
old-fashioned metal typewriter in its icon. The look has a certain charm, although it will
displease the user who is intent on customizing the toolbar, because that is impossible. I
had this problem when I first began using Mellel, but the application has grown on me over
the years. Besides, as with most applications, I hide everything I can, in order to make
more workspace on my tiny 1200 iBook.
ATPM 14.01
60
Review: Mellel 2.2.7.1
Mellel’s Main Window
Most of the toolbar features are also available via a group of palettes whose number, order,
and visibility can be individually controlled. The only one I have not found in the palettes
or menu bar is the pop-up menu for choosing at what size to view the text. Since that
is the only feature I must have from the toolbar, I have sometimes wished it were on the
bottom of the Mellel window next to another important pop-up menu, Show, which offers
individual viewing preferences for non-printing characters. This menu is also where the
options to show and hide the toolbar and ruler are. As much as I enjoy the extra control
these interface elements offer, though, Mellel also needs to have keyboard equivalents for
those of us who like to keep our fingers on the keyboard.
ATPM 14.01
61
Review: Mellel 2.2.7.1
Mellel’s Palettes With the Marker Palette Open
If you dislike Mellel’s metal interface, you can choose an Aqua alternative in the preferences,
though this one too is non-standard.
Mellel also offers three ways to view your text: Mellel View, Compact View, and Fullscreen.
The Mellel View displays the entire page as it will look when you print it, and it shows a
gap between each page. The Compact View only displays a thick black line between each
page, but it too shows the contents of headers and footers. The comfortable Fullscreen
option acts like the Compact View, but without the distractions of a menu bar or anything
else on your computer’s screen.
ATPM 14.01
62
Review: Mellel 2.2.7.1
Editing
Mellel is a comfortable editing environment, but I tend only to write in it when I have a
definite idea of what I am writing about. Most of the time I draft several pages in BBEdit
or WriteRoom first, and then I move the text into Mellel.
I began this procedure when I noticed that Mellel did not let me undo an edit past my
last save. That was a huge problem, but Mellel’s excellent layout features made me willing
to put up with it. At the same time I realized that writing fresh text in a document that
grew to over 300 pages was intimidating. I also recognized that my concentration increased
and I wrote better when I did not have any style features available. (I thank the makers of
Ulysses for that lesson.) So Mellel was not there for me to write every word in. It was the
place where I organized, styled, and began editing my various chunks of text.
Nonetheless, Mellel has now reached a point where I think I can expect it to offer undos
past the last save. Its fullscreen environment, its markers (highlighters), and its powerful
find and replace features for both content and style all suggest that its developers would
like it to be a viable environment for composition, not just formatting and organization.
Finally, there is one consideration of special interest to users addicted to gaining access
to Apple’s Dictionary via Command-Control-D. Mellel uses its own text engine, so this
standard OS-provided function does not work in this particular application. To compensate
for this incompatibility, Mellel has a Dictionary command in its contextual menu.
Styling
Mellel’s strength lies in the unparalleled control it offers over the appearance of text. While
one can sit down at Mellel and start typing without any prior knowledge of the program,
its value emerges when one takes the time to set up the various styles one plans to use.
Panels for this purpose are available through the Paragraph and Character menus. Users
who have a variety of customized styles can organize them by context via the Style Sets
menu.
People working in other languages will also appreciate Mellel’s multi-lingual and right-to-left
text capabilities.
There is one potential problem with Mellel’s rich style features, though. A friend of mine
quit using the application because she could not find a preference to turn off hyphenation.
I too had to look, and, as is often the case, I found myself opening the Mellel Guide, which
is available via the Help menu. (There are also Mellel files for Apple’s Help application,
but these are less extensive and they take longer to search.) Sure enough, Mellel lets one
turn hyphenation on and off, but it does so in the paragraph style panels. If you never use
hyphenation, turn it off in one paragraph style and then base all the other styles off of that
one.
This example is symptomatic of the high degree of control over appearance that Mellel
offers the user. It also underlines Mellel’s frequent departure from the typical expectations
of experienced word processor users. That is often a good thing, but Mellel could also
ATPM 14.01
63
Review: Mellel 2.2.7.1
offer global options for users who have simpler needs. For example, I almost never use
hyphenation, so I would rather turn it off in all cases via a main preference and only turn
it on for special paragraph styles.
Footnotes and Endnotes
Footnotes are where Mellel really shines. Besides styling the format of the characters and
paragraphs, one can choose how footnotes are indicated, whether with a number or letter or
special character. One can determine how that character will look both in the footnote and
in the text. Best of all, it is possible to run multiple streams of footnotes simultaneously.
Why multiple streams? I use my main stream of footnotes for my citations, but sometimes
I need to translate or define a term, and I do not want that note to get lost in the citations.
Instead of using a regular footnote with a number, I set up a stream for notes marked with
an asterisk or other non-alphanumeric character. That way the reader can know what kind
of footnote is available. I use such notes sparingly, of course, but I am glad to have the
option, because it is often impossible to get around using the occasional foreign word in my
field.
A more recent positive development is that the Note Streams panel now also allows one to
set a limit on how much space footnotes can fill on a page.
Where are all these features? I had to look them up in the manual, but afterwards it seemed
obvious. They are accessible via the Insert menu. Choose the Note submenu, which will
list the note streams already defined as well as a menu item to edit note attributes.
Mellel’s Footnote Stream Panel
ATPM 14.01
64
Review: Mellel 2.2.7.1
And what about endnotes? They are not designed as a separate feature in Mellel. Instead
one simply defines a note stream and tells this stream that notes are to appear at the end
of the document. Unfortunately, I do not see a way to make endnotes appear at the end of
each section. That does not bother me, but it might be a problem for some users.
Organization
From the Insert Menu there is also an Auto-Title submenu available, albeit with no keyboard
commands. This feature is also available via a Mellel palette. I did not buy Mellel with
organization in mind, but the auto-numbered titles at various heading levels provide my
documents with a structure that Mellel can understand. This becomes useful when one
opens the Outline feature, which is available through the View menu as well as the toolbar.
The outline appears in the main window to the left of one’s text, thus providing a handy
overview of a long document as well as links to navigate through it. The outline has one
more trick up its sleeve too. The user can rearrange a document’s headings—and hence its
content—via drag and drop.
Compatibility With Other Applications
Mellel began by using a file format that only it could read, but now it saves files in a
package in XML. Still, Mellel creates styled documents whose structure only other Mellel
users can see, at least until developers decide it is worth building Mellel support into their
applications. Since that day might be a long way off, and since writers often have to
interact with people on other word processors and platforms, Mellel includes import and
export options for Word format, RTF, plain text, and OPML.
Importing directly from Word format is not a good idea if the document has footnotes.
Footnote references disappear from the text, and the notes themselves appear in an unnumbered list at the end of the document. To get around this problem, save your Word
document to RTF first, and then import this file into—or open it with—Mellel. Footnotes
are preserved. Exporting directly into Word or RTF keeps footnotes intact. A plain text
export works, too. Mellel marks footnote placeholders in the text with numbers surrounded
by asterisks, and it places the numbered footnotes at the end of the text document.
One important deficit here is the import and export of outlines. An export of my dissertation
makes accurately styled text and footnotes available both to Word and Nisus Writer Pro,
but the outline does not carry over. Also, when I export the dissertation via OPML, only
my chapter and section headings are exported, nothing else. OPML imports, on the other
hand, work nicely, as long as only one column is involved.
Balance Sheet
I continue to stick with Mellel for academic writing because of its styling and footnote
capabilities, which Nisus Writer Express has yet to match. I also like its speed and stability.
A document of more than 300 pages opens almost instantly on my G4 iBook, and I can
navigate around it with nary a hiccup. Finally, an important benefit for academic writers
ATPM 14.01
65
Review: Mellel 2.2.7.1
is Mellel’s integration with Bookends, an excellent bibliography and citation application,
and now Mellel also offers integration with Bookends’ rival, Sente.
Mellel, however, also has a few significant drawbacks. The biggest for me are its lack of
an undo feature past the last save, its inability to count characters inside its citations, and
the absence of any support for AppleScript. Fortunately, Mellel’s developers are accessible.
They answer their e-mail and have an active and helpful user forum. These facts give me
reason to believe Mellel will continue to improve.
Copyright © 2008 Mark Stoneman, [email protected]. Reviewing in atpm is open to anyone.
If you’re interested, write to us at [email protected].
ATPM 14.01
66
Review: Mellel 2.2.7.1
FAQ: Frequently Asked Questions
What Is ATPM?
About This Particular Macintosh (atpm) is, among other things, a monthly Internet magazine or “e-zine.” atpm was created to celebrate the personal computing experience. For
us this means the most personal of all personal computers—the Apple Macintosh. About
This Particular Macintosh is intended to be about your Macintosh, our Macintoshes, and
the creative, personal ideas and experiences of everyone who uses a Mac. We hope that we
will continue to be faithful to our mission.
Are You Looking for New Staff Members?
atpm is looking to add more regular reviewers to our staff. Though all positions with About
This Particular Macintosh are volunteer, reviewing is a great way to share your product
knowledge and experience with fellow members of the Macintosh community. If you’re
interested, contact atpm’s Reviews Editor, Paul Fatula.
How Can I Subscribe to ATPM?
Visit the subscriptions page.
Which Format Is Best for Me?
• The Online Webzine edition is for people who want to view atpm in their Web
browser, while connected to the Internet. It provides sharp text, lots of navigation
options, and live links to atpm back issues and other Web pages.
• The Offline Webzine is an HTML version of atpm that is formatted for viewing
offline and made available in a Mac OS X disk image. The graphics, content, and
navigation elements are the same as with the Online Webzine, but you can view it
without being connected to the Internet. It requires a Web browser.
• The Print PDF edition is saved in Adobe PDF format. It has a two-column layout
with smaller text and higher-resolution graphics that are optimized for printing. It
may be viewed online in a browser, or downloaded and viewed in Apple’s Preview or
Adobe Reader on Macintosh or Windows. PDFs may be magnified to any size and
searched with ease.
• The Screen PDF edition is also saved in Adobe PDF format. It’s a one-column
layout with larger text that’s optimized for reading on-screen.
How Can I Submit Cover Art?
We enjoy the opportunity to display new, original cover art every month. We’re also very
proud of the people who have come forward to offer us cover art for each issue. If you’re a
ATPM 14.01
67
FAQ
Macintosh artist and interested in preparing a cover for atpm, please e-mail us. The way
the process works is pretty simple. As soon as we have a topic or theme for the upcoming
issue we let you know about it. Then, it’s up to you. We do not pay for cover art but
we are an international publication with a broad readership and we give appropriate credit
alongside your work. There’s space for an e-mail address and a Web page URL, too. Write
to [email protected] for more information.
How Can I Send a Letter to the Editor?
Got a comment about an article that you read in atpm? Is there something you’d like
us to write about in a future issue? We’d love to hear from you. Send your e-mail to
[email protected]. We often publish the e-mail that comes our way.
How Can I Contribute to ATPM?
There are several sections of atpm to which readers frequently contribute:
Segments: Slices from the Macintosh Life
This is one of our most successful spaces and one of our favorite places. We think of
it as kind of the atpm “guest room.” This is where we will publish that sentimental
Macintosh story that you promised yourself you would one day write. It’s that special place
in atpm that’s specifically designated for your stories. We’d really like to hear from you.
Several Segments contributors have gone on to become atpm columnists. Send your stuff
to [email protected].
Hardware and Software Reviews
atpm publishes hardware and software reviews. However, we do things in a rather unique
way. Techno-jargon can be useful to engineers but is not always a help to most Mac users.
We like reviews that inform our readers about how a particular piece of hardware or software
will help their Macintosh lives. We want them to know what works, how it may help them
in their work, and how strongly we recommend it. Please contact our reviews editor, before
you begin writing, if you have a piece of hardware or software that you’d like to review.
Which Products Have You Reviewed?
Check our reviews index for the complete list.
What is Your Rating Scale?
atpm uses the following ratings (in order from best to worst): Excellent, Very Nice, Good,
Okay, Rotten. Products rated Good or better are ones that we recommend. Okay products
get the job done. We recommend avoiding Rotten products.
Will You Review My Product?
If you or your company has a product that you’d like to see reviewed, send a copy
our way. We’re always looking for interesting pieces of software to try out. Contact [email protected] for shipping information. You can send press releases to
[email protected].
ATPM 14.01
68
FAQ
Where Can I Find Back Issues of ATPM?
Back issues of atpm, dating since April 1995, are available in DOCMaker stand-alone
format and as PDF. In addition, all issues since atpm 2.05 (May 1996) are available in
HTML format.
What If My Question Isn’t Answered Above?
We hope by now that you’ve found what you’re looking for (We can’t imagine there’s
something else about atpm that you’d like to know.). But just in case you’ve read this
far (We appreciate your tenacity.) and still haven’t found that little piece of information
about atpm that you came here to find, please feel free to e-mail us at (You guessed it.)
[email protected].
ATPM 14.01
69
FAQ