1
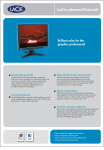
How To Use This Manual
LaCie photon20visionII
User’s Manual
How To Use This Manual
In the toolbar:
Previous Page / Next Page
Go to Previous View / Go to Next View
Go to Contents Page / Go to Precautions Page
On the page:
Click on the text within the Contents page to jump to information on that topic.
Click on any red text to automatically jump to more information about that topic.
Printing:
While optimized for onscreen viewing, the pages of this manual are formatted for printing on 8 1/2” x 11” and A4 sized
paper, giving you the option to print the entire manual or just a specific page or section.
To Exit:
From the Menu bar at the top of your screen, select: File > Quit.
Icons Used In This Manual
Italicized paragraphs feature an icon describing the type of information being given.
Important Info: This
Tech Note: This
Caution! This
icon refers to an important step that must be followed.
icon refers to tips to help maximize performance.
icon indicates a potential hazard, and gives tips on how to avoid them.
Downloaded from ManualMonitor.com Manuals
LaCie photon20visionII
User’s Manual
Foreword
Precautions
1. Introduction
2. Getting to Know Your LaCie photon20visionII Monitor
2.1 Package Contents
2.2 Views of the Monitor
3. Setting Up Your LaCie photon20visionII Monitor
3.1 Connecting Your Monitor
3.2 Location Considerations
3.3 Ergonomic Considerations
3.4 Positioning Your Display
3.4.1 Height Range
3.4.2 Tilt Range
3.4.3 Landscape and Portrait
3.5 Using the USB Ports
3.6 Installing the LaCie Blue Hood
3.7 Cleaning Your Monitor
4. How to Use Your LaCie photon20visionII Monitor
4.1 Control Panel
4.2 On Screen Display (OSD) Control Adjustments
4.3 Recommended Resolution
5. Specifications
5.1 Preset Modes (Resolution)
5.2 Signal Connector Pin Assignments
5.2.1 DVI-I Connector
5.2.2 15-Pin D-SUB Connector
5.3 VESA Mounting and Security Slot
6. Troubleshooting
7. Contacting Customer Service
8. Warranty
9. Appendix 1 –TCO’ 95
10. Appendix 2 – TCO’ 99
Glossary
Downloaded from ManualMonitor.com Manuals
Table of Contents
page 2
3
5
6
7
7
8
11
11
14
14
15
15
16
16
17
18
19
20
20
23
27
28
29
30
30
30
31
32
35
37
38
41
43
LaCie photon20visionII
User’s Manual
Foreword
page 3
Copyrights
Copyright © 2004 LaCie. All rights reserved. No part of this publication may be reproduced, stored in a retrieval system, or
transmitted in any form or by any means, electronic, mechanical, photocopying, recording or otherwise, without the prior
written consent of LaCie.
Trademarks
Apple, Mac and Macintosh are registered trademarks of Apple Computer, Inc. Microsoft, Windows 98, Windows 98 SE,
Windows 2000, Windows Millennium Edition and Windows XP are registered trademarks of Microsoft Corporation.
ENERGY STAR is a U.S. registered mark. Other trademarks mentioned in this manual are the property of their respective
owners.
Changes
The material in this document is for information only and subject to change without notice. While reasonable efforts have
been made in the preparation of this document to assure its accuracy, LaCie assumes no liability resulting from errors or
omissions in this document, or from the use of the information contained herein. LaCie reserves the right to make changes or
revisions in the product design or the product manual without reservation and without obligation to notify any person of such
revisions and changes.
FCC Compliance Statement
LaCie photon20visionII
This equipment has been tested and found to comply within the limits of a Class B
digital device pursuant to Part 15 of the FCC Rules. These limits are designed to
Tested To Comply
provide reasonable protection against harmful interference in a residential
With FCC standards
installation.
This equipment generates, uses, and can radiate radio frequency energy and if not
FOR HOME OR OFFICE USE
installed and used in accordance with the instructions, may cause harmful
interference to radio communications. However, there is no guarantee that interference will not occur in a particular
installation.
If this equipment does cause harmful interference to radio or television reception (which can be determined by turning the
equipment on and off), the user is encouraged to try to correct the interference by using one or more of the following
measures:
• Reorient or relocate the receiving antenna.
• Increase the separation between the equipment and the receiver.
• Connect the equipment into an outlet on a circuit different from that to which the receißver is connected.
• Consult the dealer or an experienced radio/TV technician for help.
Downloaded from ManualMonitor.com Manuals
LaCie photon20visionII
User’s Manual
Foreword
page 4
Caution! Changes or modifications not expressly approved by the party responsible for compliance could void the
user's (or your) authority to operate the equipment. Only peripherals (digital input/output devices, terminals,
printers, etc.) certified to comply with the Class B limits may be attached to this monitor. Operation with noncertified peripherals is likely to result in interference to radio and TV reception. Only shielded signal cables may be
used with this System.
NOTICE
- The regulations are applied only to the products with the ID LABEL indicating specific requirements.
Canadian DOC Notice
This Class B digital apparatus meets all requirements of the Canadian Interference-Causing Equipment Regulations.
Cet appareil numerique de la classe B respecte toutes les exigences du Reglement sur le materiel brouilleur du Canada.
NOTICE
- The regulations are applied only to the products with the ID LABEL indicating specific requirements.
CE Conformity Notice (for Europe)
Products with the “CE” Marking comply with the EMC Directive(89/336/EEC) and LOW VOLTAGE Directive
(73/23/EEC) issued by the Commission of the European Community.
Compiance with these directives implies conformity to the following European Norms:
• EN 55022 ; Radio Frequency Interference
• EN 50082-1:1992 ; Electromagnetic Immunity
• EN 60555-2 ; Power Line Harmonics
• EN 60555-3 ; Voltage Fluctuations
• EN 60950 ; Product Safety
NOTICE
- The regulations are applied only to the products with the ID LABEL indicating specific requirements.
Low Radiation Compliance (MPR II)
This monitor meets one of the strictest guidelines available today for low radiation emissions, offering the user extra shielding
and an antistatic screen coating. These guidelines, set forth by a government agency in Sweden, limit the amount of emission
allowed in the Extremely Low Frequency (ELF) and Very Low Frequency (VLF) electromagnetic range.
Downloaded from ManualMonitor.com Manuals
LaCie photon20visionII
User’s Manual
Precautions
page 5
General Use Precautions
Only qualified persons are authorized to carry out maintenance on this device.
• Read this User's Guide carefully, and follow the correct procedure when setting up the monitor.
• Do not attempt to disassemble or modify your monitor. Never insert any metallic object into the circuitry to avoid any risk of
electrical shock, fire, short-circuiting or dangerous emissions. Your monitor contains no user-serviceable parts. If it appears to
be malfunctioning, have it inspected by a qualified LaCie Technical Support representative.
• Never expose your monitor to rain, or use it near water, or in damp or wet conditions. Never place objects containing
liquids on the monitor, as they may spill onto its circuitry. Doing so increases the risk of electrical shock, short-circuiting, fire or
personal injury.
• Make sure that the computer and the monitor are electrically grounded. If the devices are not grounded, there is an
increased risk of electrical shock.
• Do not expose the monitor to temperatures outside the range of 5° C to 45° C (41° F to 104° F). Doing so may damage the
monitor or disfigure its casing. Avoid placing your monitor near a source of heat or exposing it to sunlight (even through a
window). Inversely, placing your monitor in an environment that is too cold or humid may damage the unit.
Downloaded from ManualMonitor.com Manuals
1. Introduction
LaCie photon20visionII
User’s Manual
page 6
1. Introduction
Congratulations on the purchase of your new LaCie
photon20visionII monitor. This professional quality monitor
was designed to provide you with a high-resolution monitor
that will give you years of reliable, trouble-free operation.
LaCie photon20visionII monitors feature:
• Wide viewing angle technology
• Perfect fit for any size workarea
• On-screen controls for quick adjustment
Ideally suited for creative professionals using advanced
applications like computer-aided graphics, imaging and
desktop publishing, LaCie photonvision monitors deliver
precise, crisp colors for outstanding results. Featuring
state-of-the-art color accuracy and impressive resolutions,
these monitors incorporate a brilliant active matrix TFT
display to give you the sharpest details and exact
viewing control.
LIGHT VIEW
AUTO
SOURCE
MENU
SELECT
These cross-platform monitors are compatible with VGA, DVI and ADC connectors, and feature a USB hub so you can easily
and conveniently connect peripheral devices through the monitor.
Also available from LaCie is an ergonomic desk clamp that helps to save desktop real-estate and allows the monitor to be
positioned in a nearly limitless number of viewing positions and angles.
This manual will help you to:
• Install your new device properly
• Get your monitor up and running
• Quickly learn how to operate it
Downloaded from ManualMonitor.com Manuals
2. Your LaCie photon20visionII Monitor
LaCie photon20visionII
User’s Manual
page 7
2. Your LaCie photon20visionII Monitor
2.1 Package Contents
Your LaCie photon20vision
monitor is shipped with the
following:
LaCie photon20visionII monitor
and desktop foot
LIGHT VIEW
AUTO
SOURCE
MENU
SELECT
Power cord
VGA to VGA cable
DVI to DVI cable
ADC to DVI cable
USB cable
LaCie Blue Hood
Pivot Pro CD-ROM for
Windows 98SE, Me, 2000 and XP
LaCie photonvision
v.1.x
• LaCie manual
• LaCie color profile
photon20visionII
©C
op y
righ
t 20
Downloaded from ManualMonitor.com Manuals
Included on this CD:
MyDVD, Roxio Easy CD Creator,
Direct CD, InterVideo,
USB 2.0 Driver,
72
DVD-RAM Driver
71
70
30 3
0 31
04, La
C ie Ltd. A ll r igh ts r eser ved.
LaCie Color Utilities CD-ROM
2. Your LaCie photon20visionII Monitor
LaCie photon20visionII
User’s Manual
page 8
2.2 Views of The Monitor
Front view –
LIGHT VIEW
LIGHT VIEW
AUTO
SOURCE
MENU
AUTO
SOURCE
MENU
SELECT
SELECT
Control Panel –
Use the Control Panel to access the On Screen Display (OSD) controls. For more information, see section 4. How to Use Your
LaCie photon20visionII Monitor.
Downloaded from ManualMonitor.com Manuals
LaCie photon20visionII
User’s Manual
2. Your LaCie photon20visionII Monitor
page 9
Side view –
Vacation Switch –
Turn on the Vacation Switch after connecting the power supply. For more information, see section 3.1 Connecting Your
Monitor.
Downloaded from ManualMonitor.com Manuals
2. Your LaCie photon20visionII Monitor
LaCie photon20visionII
User’s Manual
page 10
Rear view –
2
D
3
1
1
Security Slot – Use this slot to
connect security cables, such as
the LaCie Security Lock. For more
information about this function, see
section 5.3 VESA Mounting and
Security Slot.
Power Supply Connector – Use
this to connect the Power Supply
cable from the monitor to a power
outlet. For more information, see
section 3.1 Connecting Your Monitor.
2
Signal Cable Connectors – Use
these ports to connect either the
DVI or VGA signal cables. For more
information on these connections, see
sections 3.1 Connecting Your Monitor
and 5.2 Signal Connector Pin
Assignments.
3
4
4
PUSH
USB Ports – Use these ports to connect USB peripherals. For more information about this function, see section
3.5 Using the USB Ports.
Downloaded from ManualMonitor.com Manuals
LaCie photon20visionII
User’s Manual
3. Setting Up Your LaCie photon20visionII Monitor
page 11
3. Setting Up Your LaCie photon20visionII Monitor
3.1 Connecting Your Monitor
1) Turn off the power to your computer.
2) If you do not already have a graphics card installed, you will need to have one installed prior to installation. Please refer to
your graphics card installation manual for more information.
3) Place the monitor in a convenient, well-ventilated location near your computer (for more information about where to place
your monitor, see 3.2 Location Considerations).
4) On the back of the stand, press the PUSH button and pull the stand cover down to separate it from the stand.
PUSH
Downloaded from ManualMonitor.com Manuals
PUSH
LaCie photon20visionII
User’s Manual
3. Setting Up Your LaCie photon20visionII Monitor
page 12
5) Connect the signal cable to the back of the monitor.
Once the signal cable is attached, tighten the
thumbscrews to secure the connection.
6) Attach the female end of the supplied power cable
into the AC power connector on the back of the
monitor, and the male end into a properly-grounded,
three-prong AC outlet.
PUSH
7) After connecting the power supply and signal
cables, re-attach the stand cover by placing the slots
on the bottom back into the holes on the stand. Once
securely connected, you should hear a “click” sound
when it latches.
PUSH
Downloaded from ManualMonitor.com Manuals
3. Setting Up Your LaCie photon20visionII Monitor
LaCie photon20visionII
User’s Manual
page 13
8) Connect the signal cable to the monitor connection on the back of your computer and tighten the screws to secure the
connection.
Computer models vary. Please consult your computer’s User’s Manual for the exact location of your monitor connection.
Important Info: Mac Users:
your Mac.
Some Macs may require the use of the ADC to DVI adapter to connect the monitor to
9) Power on your computer and then the monitor.
Important Info:
Make sure that the vacation switch, located on the right side of the monitor, is turned on.
Downloaded from ManualMonitor.com Manuals
LaCie photon20visionII
User’s Manual
3. Setting Up Your LaCie photon20visionII Monitor
page 14
3.2 Location Considerations
Important Info:
Correct placement and adjustment of the monitor can reduce eye, shoulder and neck fatigue.
When setting up your monitor, keep the following in mind:
• For optimal viewing, avoid placing the monitor against a bright background or where sunlight or other light sources may
reflect on the display area of the monitor; place your monitor no closer than 12 inches and no further away than 28 inches
from your eyes. The optimal distance is 24 inches.
• Position the monitor at a 90° angle to windows and other light sources to minimize glare and reflections. Adjust the monitor
tilt so that ceiling lights do not reflect on your screen.
• Rest your eyes periodically by focusing on an object at least 20 feet away, and blink often.
• Adjust the monitor height so that the top of the screen is at or slightly below eye level. Your eyes should look slightly
downward when viewing the middle of the screen.
• Place the monitor away from strong magnetic or electromagnetic fields, such as high-capacity transformers, electric motors,
large-current power lines and steel pillars. Magnetism can cause distortion in the picture and/or color purity.
• Avoid covering the slots or openings of the monitor. Allow adequate ventilation around the monitor so the heat from the
monitor can properly dissipate. Avoid putting the monitor into any enclosure that does not have adequate ventilation.
• Avoid exposing the monitor to rain, excessive moisture or dust, because this can cause a fire or shock hazard.
• Avoid placing the monitor, or any other heavy object, on the power cord. Damage to the power cord can cause a fire or
electrical shock.
• Handle the monitor with extreme care when transporting.
3.3 Ergonomic Considerations
To realize the maximum ergonomic benefits, we recommend the following:
• Adjust the brightness until the background raster disappears
• Do not position the Contrast control to its maximum setting
• Use the preset Size and Position controls with standard signals
• Use the preset Color Setting and Sides Left/Right controls
• Use non-interlaced signals with a vertical refresh rate between 75-160Hz
• Do not use primary color blue on a dark background, as it is difficult to see and may produce eye fatigue due to
insufficient contrast
Downloaded from ManualMonitor.com Manuals
LaCie photon20visionII
User’s Manual
3. Setting Up Your LaCie photon20visionII Monitor
page 15
3.4 Positioning Your Display
Adjust the position of the panel for maximum comfort.
3.4.1 Height Range
Before adjusting your monitor’s height, follow these steps:
1) Before pushing the lock, push the monitor down. Now push the lock to the left.
PUSH
2) Hold the base of the monitor, and with your other hand gently pull the monitor up to adjust
the height. Push the lock back to the right once you have adjusted the monitor to its
appropriate height.
PUSH
Downloaded from ManualMonitor.com Manuals
Height Range: Maximum height = 3.15 in (80.0 mm)
80.0mm
3. Setting Up Your LaCie photon20visionII Monitor
LaCie photon20visionII
User’s Manual
page 16
3.4.2 Tilt Range
Tilt Range = -5° to 30°
5˚
0˚
30˚
3.4.3 Landscape And Portrait
You can rotate the panel 90°, clockwise. For more detailed information on this feature, please refer to the Pivot Pro Software
CD-ROM, included with your monitor.
Important Info: The rotational capabilities offered by Pivot Pro are supported under Windows 98SE, Me, 2000
and XP. At the time of publication (April, 2004), Mac OS X does not support the rotational capabilities offered by
Pivot Pro.
Downloaded from ManualMonitor.com Manuals
3. Setting Up Your LaCie photon20visionII Monitor
LaCie photon20visionII
User’s Manual
page 17
3.5 Using the USB Ports
The Universal Serial Bus (USB) ports allow you to connect different desktop peripherals to your computer. By using the USB
ports on your LaCie photon20visionII monitor, you can connect your mouse, keyboard or other USB compliant devices to your
monitor, instead of connecting them to your computer or a hub. The LaCie photon20visionII has an integrated, self-powered
USB hub that allows you to connect up to two other USB devices.
USB Connection
1) Connect one end of a USB
cable to the upstream port of
your display, and the other
end of the USB cable to a
compliant port on your
computer or USB hub.
2) Connect USB compliant
peripheral devices to your
monitor using the monitor’s
downstream ports.
PUSH
Upstream port, To computer
Important Info:
Downstream port, To devices
• To activate the USB hub of your LaCie photon20vision, the display must be connected to a USB compliant
computer or hub with a USB cable.
• When connecting the USB cable, ensure that the cable end matches the port that you are attaching it to.
• Even if the display is in power save mode, USB compliant devices will still function when they are connected to
the display.
Downloaded from ManualMonitor.com Manuals
LaCie photon20visionII
User’s Manual
3. Setting Up Your LaCie photon20visionII Monitor
page 18
3.6 Installing the LaCie Blue Hood
The LaCie color enhancing hood guarantees the most accurate and consistent colors on the monitor by reducing the
interference of surrounding light, and by reducing light reflection and shadows.
Installation
Before you install the hood, first decide which position, portrait or landscape, that you are going to use the monitor in.
Landscape
1) Place the landscape top panel onto the back of the monitor, and
insert the three tabs of the top into the three holes on the back of the
monitor.
2) Slide the side panels, with the soft velvet side of the tabs facing the
monitor, into the grooves on the top panel.
Important Info: The
rotational capabilities offered by Pivot Pro are supported under Windows 98SE, Me, 2000
and XP. At the time of publication (April, 2004), Mac OS X does not support the rotational capabilities offered by
Pivot Pro.
Portrait
Repeat the same installation process for portrait mode as in landscape, except that there are no tabs on the top panel.
Downloaded from ManualMonitor.com Manuals
LaCie photon20visionII
User’s Manual
3. Setting Up Your LaCie photon20visionII Monitor
page 19
3.7 Cleaning Your Monitor
A special coating has been applied to the glass of your monitor to reduce reflection and static electricity on the glass surface.
Due to this delicate coating on the glass surface, use a lint-free, nonabrasive cloth (cotton or equivalent) and a non-alcohol,
neutral, nonabrasive cleaning solution to minimize dust. If the screen requires more than a light cleaning, apply water or a
soft, neutral detergent, diluted with ample water, directly to a soft cloth. Wring out the excess water, then clean the glass
surface.
Caution! Always
unplug the monitor before cleaning.
Caution! The
following agents will cause damage to the monitor when cleaning the glass surface: Benzene,
thinner, acid/alkaline detergent, alcohol detergent, detergent with abrasive powder, detergent with antistatic
agent and detergent for cleaning.
Caution!
circuitry.
Do not spray cleaner directly onto the screen, because it may drip into the monitor and damage the
Downloaded from ManualMonitor.com Manuals
4. How To Use Your LaCie photon20visionII Monitor
LaCie photon20visionII
User’s Manual
page 20
4. How To Use Your LaCie photon20visionII Monitor
4.1 Control Panel
LIGHT VIEW
LIGHT VIEW
AUTO
SOURCE
MENU
5
6
7
2
Downloaded from ManualMonitor.com Manuals
AUTO
SOURCE
MENU
SELECT
SELECT
3
4
1
LaCie photon20visionII
User’s Manual
4. How To Use Your LaCie photon20visionII Monitor
page 21
1 – Power Button / Power (DPMS) Indicator
Use this button to turn the display on or off; this indicator lights up green when the display operates normally. If the display is
in DPM (energy saving) mode, this indicator changes colors to amber.
2 – Menu Button
Use this button to enter or exit the OSD (On Screen Display).
3 – Arrow Buttons / Direct Access Function
Use these buttons to choose or adjust items in the OSD. Brings up the Contrast and Brightness
adjustments.
4 – Select Button
Use this button to enter a selection in the OSD.
5 – Light View
This function optimizes the brightness, contrast or color value to the surrounding conditions and settings, and enables you to
enjoy the most suitable picture by adjusting the surroundings (DAY/NIGHT/USER MODE).
• TEXT: for viewing letters
• MOVIE: for viewing movies
• PHOTO: for viewing pictures or the photographs
• USER MODE: this function memorizes the manual adjustment –
Brightness, Contrast and Color values on the OSD.
6 – AUTO Adjustment Function
When adjusting your display settings, always press the AUTO button
before entering the OSD. This will automatically adjust your display
image to the ideal settings for the current screen resolution size
(display mode). The best display mode is 1600 x 1200 @ 60Hz.
Downloaded from ManualMonitor.com Manuals
LaCie photon20visionII
User’s Manual
4. How To Use Your LaCie photon20visionII Monitor
page 22
7 – SOURCE Selection: SOURCE
SELECT
Use this button to make the DVI digital, DVI analog or D-SUB analog connector active. This feature is used when two
computers are connected to the display. The default setting is D-SUB.
• DVI digital
• DVI analog
• D-SUB analog
Locking/Unlocking Controls: MENU and
This function allows you to secure the current control settings so
that they cannot be inadvertently changed. Press and hold the
MENU button and the
button for 3 seconds – the
“CONTROLS LOCKED” message appears.
You can unlock the OSD controls at any time by pushing the
MENU button and the
button for 3 seconds – the
“CONTROLS UNLOCKED” message appears.
Downloaded from ManualMonitor.com Manuals
4. How To Use Your LaCie photon20visionII Monitor
LaCie photon20visionII
User’s Manual
page 23
4.2 On Screen Display (OSD) Control Adjustments
Screen Adjustment
Making adjustments to the image size, position and operating parameters of the display is quick and easy with the OSD
control system. The following section is an outline of the available adjustments and selections you can make using the OSD.
Important Info: Allow
the display to stabilize for at least 30 minutes before making image adjustments.
To make adjustments in the OSD, follow these steps:
1) Press the MENU button, then the main OSD menu appears.
2) To access a control, use the
3) Use the
or
buttons. When an icon you want becomes highlighted, press the SELECT button.
buttons to adjust the item to the desired level.
4) Accept the changes by pressing the SELECT button.
5) Exit the OSD by pressing the MENU button.
Downloaded from ManualMonitor.com Manuals
4. How To Use Your LaCie photon20visionII Monitor
LaCie photon20visionII
User’s Manual
page 24
OSD Selection and Adjustment
The following table indicates all the OSD control, adjustment and setting menus.
Main Menu
Contrast/Brightness
Color Adjustment
Image Position
Tracking
Setup
OSD Position
Sub Menu
Contrast
Brightness
User (R/G/B)
9300K
6500K
H Position
V Position
Auto
Clock
Phase
Language
Image Size
Transparency
Zoom
Horizontal
Vertical
A
X
X
X
X
X
X
X
X
X
X
X
X
X
X
X
X
D
Reference
Adjust the brightness and contrast of the screen
X
Customize the color of the screen
Adjust the position of the screen
Improve the clarity and stability of the screen
X
X
X
X
X
X
Customize the screen status for the operating environment
Adjust the position of the OSD window on the screen
X = Adjustable; A = Analog Input; D = Digital Input
Contrast/Brightness
Contrast
Adjusts the contrast of the screen.
Brightness
Adjusts the brightness of the screen.
Downloaded from ManualMonitor.com Manuals
LaCie photon20visionII
User’s Manual
4. How To Use Your LaCie photon20visionII Monitor
page 25
Color Adjustment
User (R/G/B)
Set your own color levels
9300K: Select the screen color (slightly bluish/white)
6500K: Select the screen color (slightly reddish/white)
Image Position
Vertical Position
Moves the image up or
down
Horizontal Position
Moves image left or right
Downloaded from ManualMonitor.com Manuals
LaCie photon20visionII
User’s Manual
4. How To Use Your LaCie photon20visionII Monitor
page 26
Tracking
Auto
This function is suitable for analog signal input only. This
button automatically adjusts the screen position, clock and
phase.
Clock
Minimizes any vertical bars or stripes visible on the screen
background. The horizontal screen size also changes.
Phase
Adjusts the focus of the display. This allows you to remove any
horizontal noise, and clears and sharpens the image of
characters. Phase adjustment should be performed after
adjusting the Clock.
Setup
Language
Choose the language in which the control names will be
displayed.
Image Size
This function displays the image in its original size, or
enlarged size, so that it will fit in the full screen of the LCD
panel.
Transparency
Adjusts the transparency of the OSD menu screen.
Zoom
Adjust the horizontal and vertical image size simultaneously. If
you want to move the zooming point, use the H/V Position
function in the sub-menu. If the monitor is turned off while
zooming in and out of the screen, the monitor will return to the
original screen.
Downloaded from ManualMonitor.com Manuals
LaCie photon20visionII
User’s Manual
4. How To Use Your LaCie photon20visionII Monitor
page 27
OSD Position
Horizontal Position
Adjusts the horizontal position of the OSD window on the
screen.
Vertical Position
Adjusts the vertical position of the OSD window on the screen.
4.3 Recommended Resolution
For optimal viewing quality, it is recommended that you set the resolution of your photon20vision monitor to 1600 x 1200.
This allows the image on the screen to be fully displayed, and you will also achieve maximum sharpness.
Downloaded from ManualMonitor.com Manuals
5. Specifications
LaCie photon20visionII
User’s Manual
5. Specifications
Display
Sync Input
Video Input
Resolution
20.1 inches (51.0cm) Flat Panel Active matrix – TFT LCD
Anti-glare coating
20.1 inches viewable
0.255mm pixel pitch
Horizontal Freq.
Analog 28 – 92kHz (automatic)
Digital 30 – 80kHz (automatic)
Vertical Freq.
56 – 85Hz (automatic)
Input Form
Separate TTL, Positive/Negative
Composite TTL, Positive/Negative
SOG (Sync On Green)
Digital
Signal Input
15 pin D-SUB Connector
DVI-I Connector (Digital/Analog)
Input Form
RGB Analog (0.7Vp-p/75ohm), Digital
Max
D-SUB: Analog – VESA 1600x1200 @ 60Hz
DVI:
Analog – VESA 1600x1200 @ 60Hz
Digital – VESA 1600x1200 @ 60Hz
VESA 1280x1024 @ 70Hz
Luminance
Contrast Ratio
Response Time
Plug & Play
Display Color
Signal Cable
Maximum Pixel Clock
Dimensions & Weight
(with tilt/swivel stand)
Tilt/Swivel Range
Power Input
Environmental
Conditions
Power Cord
200 cd/m2 (Typical)
400:1 (Typical)
16ms
DDC 2B
16.7 M Color (True)
15pin-to15pin D-SUB Cable, DVI-D Cable (Detachable)
Analog: 205MHz
Digital: 135MHz
Width:
17.56 in / 44.60cm
Height:
17.54 in / 44.56cm (Min.)
20.69 in / 52.56cm (Max.)
Depth:
9.34 in / 23.73cm
Net:
22.18 lbs / 10.06kg
Tilt range:
-5° – 30°
Swivel range:
90°
Height range:
3.15 in / 80mm
Rotate range:
90° clockwise (landscape > portrait)
AC 100-240V / 60Hz 1.2A
Operating Conditions
Temperature – 10°C to 35°C
Humidity – 10% to 80% non-condensing
Storage Conditions
Temperature – -20°C to 60°C
Humidity – 5% to 95% non-condensing
Wall-outlet type or PC-outlet type
Downloaded from ManualMonitor.com Manuals
page 28
Information in this section is
subject to change without notice.
Important Info:
5. Specifications
LaCie photon20visionII
User’s Manual
page 29
5.1 Preset Modes (Resolution)
1
2
3
4
5
6
7
8
9
10
11
12
13
14
15
16
17
18
Display Modes (Resolution)
640 x 350
640 x 480
640 x 480
640 x 480
720 x 400
800 x 600
800 x 600
800 x 600
832 x 624
1024 x 768
1024 x 768
1024 x 768
1152 x 870
1152 x 900
1280 x 1024
1280 x 1024
1600 x 1024
1600 x 1200
Horizontal Freq. (kHz)
31.47
31.47
37.50
43.27
31.47
37.88
46.88
53.67
49.72
48.36
60.02
68.68
68.68
61.80
63.98
79.98
62.11
75.00
Downloaded from ManualMonitor.com Manuals
Vertical Freq. (Hz)
70
60
75
85
70
60
75
85
75
60
75
85
75
65.96
60.02
75.02
60
60
5. Specifications
LaCie photon20visionII
User’s Manual
page 30
5.2 Signal Connector Pin Assignments
5.2.1 DVI-I Connector
5.2.2 15-pin D-SUB (VGA) Connector
1
8
9
16
17
24
C1
C2
C3
Downloaded from ManualMonitor.com Manuals
10
11
C4
Pin
Signal (DVI-I)
1
T.M.D.S. Data22
T.M.D.S. Data2+
3
T.M.D.S. Data2/4 Shield
4
T.M.D.S. Data45
T.M.D.S. Data4+
6
DDC Clock
7
DDC Data
8
Analog Vertical Sync.
9
T.M.D.S. Data110
T.M.D.S. Data1+
11
T.M.D.S. Data1/3 Shield
12
T.M.D.S. Data313
T.M.D.S. Data3+
14
+5V Power
15
Ground (return for +5V, H. Sync. and V. Sync.)
16
Hot Plug Detect
17
T.M.D.S. Data018
T.M.D.S. Data0+
19
T.M.D.S. Data0/5 Shield
20
T.M.D.S. Data521
T.M.D.S. Data5+
22
T.M.D.S. Clock Shield
23
T.M.D.S. Clock+
24
T.M.D.S. ClockC1
Analog Red
C2
Analog Green
C3
Analog Blue
C4
Analog H. Sync.
C5
Analog Ground
T.M.D.S. (Transition Minimized Differential Signaling)
5
1
6
C5
Pin
1
2
3
4
5
6
7
8
9
10
11
12
13
14
15
15
Signal (15-pin S-SUB)
Red
Green
Blue
Ground
Self-Test
Red Ground
Green Ground
Blue Ground
NC
Ground
Ground
SDA
Hori. Sync
Vert. Sync
SCL
5. Specifications
LaCie photon20visionII
User’s Manual
page 31
5.3 VESA Mounting and Security Slot
The LaCie photon20visionII monitor is compliant with the Video Electronics Standards Association (VESA) Flat Display
Mounting Interface (FDMI) mounting standards, which define a set of corresponding standards that describe interface
mounting pads, wall mount brackets and other mounting apparatus to be provided by mounting equipment manufacturers,
such as the LaCie Desk Clamp.
The LaCie photon20visionII monitor is also comes with a security solution to provide a physical means of securing your
monitor. It is compatible with security locks, such as the LaCie Security Lock.
VESA Mounting Interface
Lock Slot
PUSH
Downloaded from ManualMonitor.com Manuals
6. Troubleshooting
LaCie photon20visionII
User’s Manual
page 32
6. Troubleshooting
In the event that your LaCie photon20visionII Monitor is not working correctly, please refer to the following checklist to find out
where the problem is coming from. If you have gone through all of the points on the checklist and your drive is still not
working correctly, please have a look at the FAQs that are regularly published on our Web site – www.lacie.com. One of
these FAQs may provide an answer to your specific question. You can also visit the drivers pages, where the most recent
software updates will be available.
If you need further assistance, please contact LaCie Technical Support (see chapter 7. Contacting Customer Service for
details).
The Problem
Questions to Ask
Possible Solutions
No Image Appears
Is the display’s power cord
connected?
Check and ensure that the power cord is connected
properly to the power outlet.
Is the power indicator light on?
Press the Power button.
Is the power on and the power
indicator green?
Adjust the brightness and contrast.
Is the power indicator amber?
If the display is in power save mode, try moving
mouse or press any key on the keyboard to bring up
the screen.
Make sure that the power is on.
Check to see that your computer is on.
Is there an “OUT OF RANGE”
message on the screen?
This message appears when the signal from the PC
(video card) is out of horizontal or vertical frequency
range on the display. Check the Specifications section, and then reconfigure your display.
Is there a “CHECK SIGNAL CABLE” This message appears when the signal cable between
message on the screen?
your computer and your monitor is not connected.
Check the signal cable and try again.
Downloaded from ManualMonitor.com Manuals
6. Troubleshooting
LaCie photon20visionII
User’s Manual
page 33
The Problem
Questions to Ask
Possible Solutions
The “CONTROLS LOCKED”
message appears on the
screen.
Does the “CONTROLS LOCKED”
This function allows you to prevent the current control
message appear when you push the settings from inadvertently being changed. To unlock
MENU button?
the OSD controls, push and hold the MENU button
and
button for 3 seconds – the “CONTROLS
UNLOCKED” message will then appear.
The display image is incorrect.
Is the display position incorret?
Press the AUTO button to automatically adjust your
display image to its ideal setting. If you do not get the
results you desire, adjust the image position manually
using the H position and V position icon in the OSD.
Check Control Panel > Display > Settings to see if the
frequency or the resolution was changed. If it was,
readjust the video card to the recommended
resolution.
On the screen’s background, are
Press the AUTO button to automatically adjust your
there vertical bars or stripes visible? display image to its ideal setting. If you do not get the
results you desire, adjust the vertical bars or stripes
manually using the CLOCK icon in the OSD.
Is there horizontal noise appearing
in an image, or are characters not
being clearly portrayed?
Press the AUTO button to automatically adjust your
display image to its ideal setting. If you do not get the
results you desire, manually adjust the horizontal bars
using the PHASE icon in the OSD. Check Control
Panel > Display > Settings and adjust your monitor to
the recommended resolution, and adjust your display
image to the ideal setting. Set the color setting higher
than 24 bits (true color).
Is the screen color mono or
abnormal?
Check to see that the signal cable is properly
connected, and use a screwdriver to fasten the
screws. Make sure that your video card is properly
inserted in its slot. Check Control Panel > Display >
Settings and set the color setting higher than 24 bits
(true color).
Downloaded from ManualMonitor.com Manuals
6. Troubleshooting
LaCie photon20visionII
User’s Manual
page 34
The Problem
Questions to Ask
Possible Solutions
The display image is incorrect.
Is the screen blinking?
Check to see if the screen is set to interlace mode. If it
is, change it to the recommended resolution.
Make sure that the power voltage is high enough. It
has to be higher than AC 100-240V 50/60Hz.
The “IMAGE SIZE” function in
the OSD menu does not work.
Installing the Display Driver.
The USB port is not working
properly.
Check to see if the resolution is set at 1600x1200, or
less than 512x360. The optimal resolution is
1600x1200, and the image is fully displayed on the
monitor and is not converted as a 1:1 image size. If
the resolution is less than 512x360, the image size
will be smaller than the OSD, and it will also not be
converted as a 1:1 image size.
Have you installed the Display
Driver?
Be sure to install the Display Driver that was included
with your monitor.
Does the “Unrecognized monitor,
Plug&Play(VESA DDC) monitor
found” message appear?
Check to ensure that your video card supports Plug &
Play functionality. See your video card’s
documentation for more information.
Is the USB cable connected
properly?
Make sure that both ends of the USB cable are
properly attached.
Does your computer system support Check to see that your system supports the USB
USB functionality?
standard. See your computer system’s user’s manual
for more information.
Downloaded from ManualMonitor.com Manuals
LaCie photon20visionII
User’s Manual
7. Contacting Customer Support
page 35
7. Contacting Customer Support
Before You Contact Technical Support
1) Read the manuals and review the Troubleshooting section.
2) Try to isolate the problem. If possible, make the monitor the only external device on the CPU, and make sure all cables are
correctly and firmly attached.
If you have asked yourself all of the pertinent questions in the troubleshooting checklist, and you still can't get your LaCie
monitor to work properly, contact us via the provided Web link. Before contacting us, make sure that you are in front of your
computer and that you have the following information on hand:
1) Your monitor's serial number
2) Computer brand and model
3) Operating system and version (Mac OS or Windows)
4) Amount of memory installed
5) Names of CD or DVD drives installed on your computer
6) Names of any other devices installed on your computer
Downloaded from ManualMonitor.com Manuals
7. Contacting Customer Support
LaCie photon20visionII
User’s Manual
page 36
LaCie Technical Support
LaCie Australia
Contact Us At:
http://www.lacie.com/au/contact/
LaCie Belgium
Contact Us At:
http://www.lacie.com/be/contact/
LaCie Canada
Contact Us At:
http://www.lacie.com/caen/contact/ (English)
LaCie Denmark
Contact Us At:
http://www.lacie.com/dk/contact/
LaCie Finland
Contact Us At:
http://www.lacie.com/fi/contact
LaCie France
Contact Us At:
http://www.lacie.com/fr/contact/
LaCie Germany
Contact Us At:
http://www.lacie.com/de/contact/
LaCie Italy
Contact Us At:
http://www.lacie.com/it/contact/
LaCie Japan
Contact Us At:
http://www.lacie.co.jp
LaCie Netherlands
Contact Us At:
http://www.lacie.com/nl/contact/
LaCie Norway
Contact Us At:
http://www.lacie.com/no/contact/
LaCie Spain
Contact Us At:
http://www.lacie.com/es/support/request
LaCie Sweden
Contact Us At:
http://www.lacie.com/se/contact/
LaCie Switzerland
Contact Us At:
http://www.lacie.com/chfr/contact
LaCie United Kingdom & Ireland
Contact Us At:
http://www.lacie.com/uk/support/request
LaCie USA
Contact Us At:
http://www.lacie.com/contact/
LaCie Grand Export
Contact Us At:
http://www.lacie.com/intl/contact/
Downloaded from ManualMonitor.com Manuals
LaCie photon20visionII
User’s Manual
8. Warranty
page 37
8. Warranty
LaCie warrants your monitor against any defect in material and workmanship, under normal use, for the period designated
on your warranty certificate. In the event this product is found to be defective within the warranty period, LaCie will, at its
option, repair or replace the defective monitor.
This warranty is void if:
• The monitor was operated/stored in abnormal use or maintenance conditions;
• The monitor is repaired, modified or altered, unless such repair, modification or alteration is expressly authorized in writing
by LaCie;
• The monitor was subjected to abuse, neglect, lightning strike, electrical fault, improper packaging or accident;
• The monitor was installed improperly;
• The serial number of the monitor is defaced or missing;
• The tamper seal on the monitor casing is broken.
LaCie will not, under any circumstances, be liable for direct, special or consequential damages such as, but not limited to,
damage or loss of property or equipment, loss of profits or revenues, cost of replacement goods, or expense or inconvenience
caused by service interruptions.
Under no circumstances will any person be entitled to any sum greater than the purchase price paid for the drive.
To obtain warranty service, call your LaCie Reseller or LaCie Technical Support. You maybe asked to furnish proof of purchase
to confirm that the drive is still under warranty.
All monitors returned to LaCie must be securely packaged in their original box and shipped with postage prepaid.
Register online for free technical support:www.lacie.com/register.htm
Downloaded from ManualMonitor.com Manuals
LaCie photon20visionII
User’s Manual
9. Appendix 1 – TCO’ 95
page 38
9. Appendix 1 – TCO’ 95
Congratulations!
You have just purchased a TCO’95 approved and labeled product! Your choice has
provided you with a product developed for professional use. Your purchase has
also contributed to reducing the burden on the environment and to the further
development of environmentally-adapted electronic products.
Why do we have environmentally labeled computers?
In many countries, environmental labeling has become an established method for
encouraging the adaptation of goods and services to the environment. The main
problem as far as computers and other electronic equipment are concerned is that
environmentally harmful substances are used both in the products and during their manufacture.
Since it has not been possible so far for the majority of electronic equipment to be recycled in a satisfactory way, most of
these potentially damaging substances sooner or later enter nature.
There are also other characteristics of a computer, such as energy consumption levels, that are important from both the
working and natural environment viewpoints. Since all types of conventional electricity generation have a negative effect on
the environment (acidic- and climatic-influencing emissions, radioactive waste, etc.), it is vital to conserve energy. Electronic
equipment in offices consumes as enormous amount of energy, since it is often routinely left running continuously.
What does the environmental labeling involve?
This product meets the requirements for the TCO’95 scheme, which provides for international environmental labeling of
personal computers. The labeling scheme was developed as a joint effort by the TCO (The Swedish Confederation of
Professional Employees), Naturckyddsforeningen (The Swedish Society for Nature Conservation), and NUTEK (The National
Board for Industrial and Technical Development in Sweden), and SEMKO AB (an international certification agency). The
requirements cover a wide range of issues: environment, ergonomics, usability, emission of electrical and magnetic fields,
energy consumption and electrical and fire safety.
The environmental demands concern, among other things, restriction on the presence and use of heavy metals, brominated
and chlorinated flame retardants, CFCs (freons), and chlorinated solvents. The product must be prepared for recycling, and
the manufacturer is obliged to have an environmental plan, which must be adhered to in each country where the company
implements its operational policy.
The energy requirements include a demand that the computer and/or display, after a certain period of inactivity, shall reduce
Downloaded from ManualMonitor.com Manuals
LaCie photon20visionII
User’s Manual
9. Appendix 1 – TCO’ 95
page 39
its power consumption to a lower level, in one or more stages. The length of time to reactivate the computer shall be
reasonable for the user.
Labeled products must meet strict environmental demands, for example, in respect of the reduction of electric and magnetic
fields, along with physical and visual ergonomics and good usability.
The following is a brief summary of the environmental requirements met by this product. The complete environmental criteria
document may be ordered from:
TCO Development Unit
Linnegatan 14, S-11494 Stockholm, Sweden
FAX +46-8 782 92 07
E-mail (Internet): [email protected]
Current information regarding TCO’95 approved and labeled products may also be obtained on the Internet using the
address:
http://www.tco-info.com/
TCO’95 is a co-operative project between:
Environmental requirements
Brominated flame retardants are present in printed circuit boards, cabling, casings, and housings, and are added to delay the
spread of fire. Up to 30% of the plastic in a computer casing can consist of flame-retardant substances. These are related to
another group of environmental toxins, PCBs, and are suspected of giving rise to similar harm, including reproductive
damage in fish-eating birds and mammals. Flame retardants have been found in human blood, and researchers fear that
they can disturb fetus development. Bio-accumulative* TCO’95 demands require that plastic components weighing more than
25 grams must not contain flame retardants with organically bound chlorine or bromine.
Lead can be found in picture tubes, display screens, solder, and capacitors. Lead damages the nervous system and in higher
doses causes lead poisoning. The relevant bioaccumulative TCO’95 requirement permits the inclusion of lead, as no
replacement has yet been developed.
Downloaded from ManualMonitor.com Manuals
LaCie photon20visionII
User’s Manual
9. Appendix 1 – TCO’ 95
page 40
Cadmium is present in rechargeable batteries and in the color-generating layers of certain computer displays. Cadmium
damages the nervous system and is toxic in high doses. The relevant bio-accumulative TCO’95 requirement states that
batteries may not contain more than 25 ppm (parts per million) of cadmium. The color-generating layers of display screens
must not contain any cadmium.
Mercury is sometimes found in batteries, relays and switches. Mercury damages the nervous system and is toxic in high
doses.
The relevant bio-accumulative TCO’95 requirement states that batteries may not contain more than 25 ppm of mercury and
that no mercury is present in any of the electrical or electronic components concerned with the display unit.
CFCs (freons) are sometimes used for washing printed circuit boards and in the manufacture of expanded foam for
packaging. CFCs break down ozone and thereby damage the ozone layer in the atmosphere, causing increased reception on
Earth of ultraviolet light with consequent increased risks of skin cancer (malignant melanoma).
The relevant TCO’95 requirement: Neither CFCs nor HCFCs may be used during the manufacture of the product or its
packaging.
*Bio-accumulative means that the substance accumulates within living organisms.
Shipping Package
The packaging material can be recycled, or you can save it to return the monitor to a service center for repair or disposal.
CFC Compounds in Distribution Packaging
Cushioning material used for shipping finished monitors are not manufactured with nor do they contain any CFC compounds.
Design for Disassembly/Recycling
These monitors have been designed for easy end-of-life disassembly and recycling. Fasteners are generally of the same type
for efficient disassembly. Components made of different materials can be easily separated and plastics have been identified
using
international symbols to aid in recycling.
Monitor Disposal
If you need to dispose of a monitor, ask a qualified service representative for the proper procedure.
Improper disposal could result in personal injury from implosion.
Caution!
Downloaded from ManualMonitor.com Manuals
LaCie photon20visionII
User’s Manual
10. Appendix 2 – TCO’ 99
page 41
10. Appendix 2 – TCO’ 99
Congratulations!
You have just purchased a TCO’99 approved and labeled
product! Your choice has provided you with a product
developed for professional use. Your purchase has also
contributed to reducing the burden on the environment and
also to the further
development of environmentally adapted electronics
products.
Why do we have environmentally labeled computers?
In many countries, environmental labeling has become an
established method for encouraging the adaptation of
goods and services to the environment. The main problem,
as far as computers and other electronics equipment are
concerned, is that environmentally harmful substances are
used both in the products and during their manufacture. Since it is not so far possible to satisfactorily recycle the majority of
electronics equipment, most of these potentially damaging substances sooner or later enter nature.
There are also other characteristics of a computer, such as energy consumption levels, that are important from the viewpoints
of both the work (internal) and natural (external) environments. Since all methods of electricity generation have a negative
effect on the environment (e.g. acidic and climate influencing emissions, radioactive waste), it is vital to save energy.
Electronics equipment in offices is often left running continuously and thereby consumes a lot of energy.
What does labeling involve?
This product meets the requirements for the TCO’99 scheme which provides for international and environmental labeling of
personal computers. The labeling scheme was developed as a joint effort by the TCO (The Swedish Confederation of
Professional Employees), Svenska Naturskyddsforeningen (The Swedish Society for Nature Conservation) and Statens
Energimyndighet (The Swedish National Energy Administration).
Approval requirements cover a wide range of issues: environment, ergonomics, usability, emission of electric and magnetic
fields, energy consumption and electrical and fire safety.
The environmental demands impose restrictions on the presence and use of heavy metals, brominated and chlorinated flame
retardants, CFCs (freons) and chlorinated solvents, among other things. The product must be prepared for recycling and the
Downloaded from ManualMonitor.com Manuals
LaCie photon20visionII
User’s Manual
10. Appendix 2 – TCO’ 99
page 42
manufacturer is obliged to have an environmental policy which must be adhered to in each country where the company
implements its operational policy.
The energy requirements include a demand that the computer and/or display, after a certain period of inactivity, shall reduce
its power consumption to a lower level in one or more stages. The length of time to reactivate the computer shall be
reasonable for the user.
Labeled products must meet strict environmental demands, for example, in respect of the reduction of electric and magnetic
fields, physical and visual ergonomics and good usability.
Below you will find a brief summary of the environmental requirements met by this product. The complete environmental
criteria document may be ordered from:
TCO Development
SE-114 94 Stockholm, Sweden
Fax: +46 8 782 92 07
Email (Internet): [email protected]
Current information regarding TCO’99 approved and labeled products may also be obtained via the Internet, using the
address: http://www.tco-info.com/
Environmental requirements
Flame retardants
Flame retardants are present in printed circuit boards, cables, wires, casings and housings. Their purpose is to prevent, or at
least to delay the spread of fire. Up to 30% of the plastic in a computer casing can consist of flame retardant substances. Most
flame retardants contain bromine or chloride, and those flame retardants are chemically related to another group of
environmental toxins, PCBs. Both the flame retardants containing bromine or chloride and the PCBs are suspected of giving
rise to severe health effects, including reproductive damage in fish-eating birds and mammals, due to the bioaccumulative*
processes. Flame retardants have been found in human blood and researchers fear that disturbances in fetus development
may occur.
The relevant TCO’99 demand requires that plastic components weighing more than 25 grams must not contain flame
retardants with organically bound bromine or chlorine. Flame retardants are allowed in the printed circuit boards since no
substitutes are available.
Cadmium**
Cadmium is present in rechargeable batteries and in the color-generating layers of certain computer displays. Cadmium
damages the nervous system and is toxic in high doses. The relevant TCO’99 requirement states that batteries, the color
Downloaded from ManualMonitor.com Manuals
10. Appendix 2 – TCO’ 99
LaCie photon20visionII
User’s Manual
page 43
generating layers of display screens and the electrical or electronics components must not contain any cadmium.
Mercury**
Mercury is sometimes found in batteries, relays and switches. It damages the nervous system and is toxic in high doses. The
relevant TCO’99 requirement states that batteries may not contain any mercury. It also demands that mercury is not present in
any of the electrical or electronics components associated with the labeled unit.
CFCs (freons)
The relevant TCO’99 requirement states that neither CFCs nor HCFCs may be used during the manufacture and assembly of
the product. CFCs (freons) are sometimes used for washing printed circuit boards. CFCs break down ozone and thereby
damage the ozone layer in the stratosphere, causing increased reception on earth of ultraviolet light with e.g. increased risks
of skin cancer (malignant melanoma) as a consequence.
Lead**
Lead can be found in picture tubes, display screens, solders and capacitors. Lead damages the nervous system and in higher
doses, causes lead poisoning. The relevant TCO’99 requirement permits the inclusion of lead since no replacement has yet
been developed.
* Bio-accumulative is defined as substances which accumulate within living organisms
** Lead, Cadmium and Mercury are heavy metals which are Bio-accumulative.
EPA (U.S.A only)
ENERGYSATR is a set of power-saving guidelines issued by the U.S. Environmental
Protection Agency(EPA).
Downloaded from ManualMonitor.com Manuals
LaCie photon20visionII
User’s Manual
Glossary
page 44
Glossary
Bit - Representing a value of 0 or 1, a bit is the smallest unit of memory in a computer.
Bit depth - The measurement of the amount of color information in an image for display or print. Higher bit depth translates
to more color and more accurate color information in the digital image.
BMP - Bitmap images, also called raster images. Bitmap files use a grid of pixels to represent images, with every pixel in an
image given a specific location and color value. The number of pixels combined make up the image data. Dependent on
resolution, bitmap images are best used to show gradations of color. Bitmap images cannot be enlarged unless you change
the resolution first, or the images will blur.
Brightness - The balance of light and dark shades in an image. Brightness is distinct from contrast, which measures the range
between the darkest and lightest shades in an image. Brightness determines the intensity of shades; contrast determines the
number of shades you get.
Byte - The smallest amount of computer memory needed to store one character of data.
CMYK (Cyan, Magenta, Yellow, Black) - The base colors in the printing process. When printing, you should change the color
mode for your images to CMYK to give them a better representation of colors.
Color Calibration - The process of ensuring accurate reproduction of color for images. Full color calibration is usually a twostep process: calibrating your input device, such as a scanner; and calibrating your output device, such as a printer or
monitor. By calibrating input and output devices correctly, color is accurately captured by your scanner and is reproduced
faithfully on your monitor or printer as well.
Compression - To compress is to decrease in size. Compressing a file makes it smaller and makes it take up less space on a
hard drive or other storage device.
Contrast - The relationship between the light and dark areas of an image. Contrast is the range between the darkest and
lightest shades in an image, while brightness is the balance of light and dark shades. Contrast determines the number of
shades you get; brightness determines the intensity of the shades. An image with low contrast tends to look dull and flat.
Dot pitch - The measure of how much space there is between a monitor display's pixels. Smaller is better, and packing pixels
closer together is fundamental to achieving higher resolution.
Downloaded from ManualMonitor.com Manuals
LaCie photon20visionII
User’s Manual
Glossary
page 45
DPI - Dots per inch; the measurement of resolution. DPI equals the number of dots that fit horizontally and vertically into a
one-inch measurement. Typically, the higher the dpi, the more detail in an image. DPI varies, depending on the output device.
A web-page resolution is almost always 72 dpi; a printer 300-1440 dpi (varying according to the printer).
Driver - An integral piece of software that provides a computer the necessary information to communicate with a peripheral
device. For example, you must install a specific driver for each device (printer or scanner) attached to your computer. Most
peripherals that are sold come with the driver stored in a disc, or the drivers are available by visiting the company's Web site
for downloading.
Exposure - The amount of light in an image. The exposure of an image can be changed by increasing or reducing available
light.
Gamma - The contrast affecting the mid-level grays or midtones of an image. Adjusting the gamma of an image allows you
to change brightness values of the middle range of gray tones without dramatically altering the shadows and highlights.
Gigabyte (GB) - A measurement of storage capacity. One gigabyte equals 1,024 megabytes.
Grayscale - An image type that contains more than just black and white, and includes actual shades of gray. In a grayscale
image, each pixel has more bits of information encoded in it, allowing more shades to be recorded and shown. 4 bits are
needed to reproduce up to 16 levels of gray, and 8 bits can reproduce a photo-realistic 256 shades of gray.
Highlights - The lightest portions of an image.
Histogram - A graphic representation of how bright and dark pixels are distributed in an image. A histogram skewed heavily
to the left indicates a dark image, while a histogram skewed to the right indicates a bright image.
Hue - The characteristic of a color that distinguishes it from another color; i.e., what makes a color red or green or blue.
Interpolated resolution - Resolution enhanced through software; also known as software-enhanced resolution. Interpolated
resolution may capture less detail than optical resolution, but it is useful for certain tasks, such as scanning line art or
enlarging small originals.
Maximum monitor resolution - The number of individual dots of color, or pixels, contained on a display. Resolution is
typically expressed by measuring the number of pixels on the horizontal axis (row) and the number of pixels on the vertical
axis (column); e.g., 640x480.
Megabyte (MB) - A unit of computer memory capacity equal to 1,048,576 bytes.
Downloaded from ManualMonitor.com Manuals
LaCie photon20visionII
User’s Manual
Glossary
page 46
Midtones - The parts of an image between the lighter and darker areas, at around 50% gray.
Moiré - An undesirable pattern in color printing that results from incorrect screen angles of overprinting halftones. Moires
usually result when you scan a halftone or when you scan images taken directly from a magazine (instead of scanning a
photographic original or a transparency).
Pixel - A picture element, or a single unit of a graphic image used by the computer to represent image information in a
digital format. An image file, for instance, is simply a representation of hundreds (or thousands) of pixels arranged closely
together in a grid so that they appear to form a picture.
Refresh rate - The number of times that the image on the monitor display is drawn each second. If the monitor has a refresh
rate of 75 Hz, all the pixels from top to bottom are cycled at 75 times a second. Refresh rates are important because they
control flicker, and higher refresh rates are better to eliminate eye strain and headaches that result from low refresh rates and
flickering.
Resolution – The number of pixels that are contained on a monitor display, referenced by the number of pixels on the vertical
and horizontal axes.
Reflective media - Media capable of reflecting light; e.g., photographs, magazine prints.
RGB (Red, Green, Blue) - A color model in which every color is composed of a varying amount of the colors red, green, and
blue.
Saturation - The intensity of a color, or the degree of color in a particular hue. For example, the green leaves in a tree will
appear "more green" if the color is saturated.
Shadows - The darkest areas of an image.
Downloaded from ManualMonitor.com Manuals