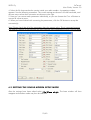
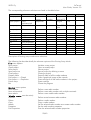
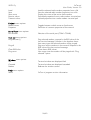
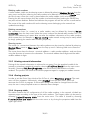
1
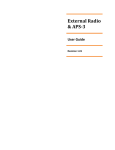
SaTerm 4 Software USER GUIDE Version 2.0 SATEL Oy SaTerm 4 User Guide, Version 2.0 1 INTRO DUCTIO N ................................ ................................ ....................... 4 2 SAFETY INSTRUCTIO NS ................................ ................................ .............. 5 3 INSTALLATIO N ................................ ................................ .......................... 6 4 MAIN MENU ................................ ................................ ............................. 8 5 TERMINAL W INDO W M O DE ................................ ................................ ....... 10 5.1 OPENING THE TERMINAL WINDOW...................................................................... 10 5.2 SERIAL PORT SETUP ............................................................................................... 10 5.3 DESCRIPTION OF TERMINAL WINDOW SELECTIONS ............................................. 12 5.4 TRANSMIT WINDOW ............................................................................................. 13 5.5 SCRIPT SETUP WINDOW ....................................................................................... 14 5.6 LOG FILE .............................................................................................................. 14 5.7 PRINT ................................................................................................................... 14 5.8 PRINTER SETUP ..................................................................................................... 14 5.9 EDIT MENU ........................................................................................................... 15 5.10 WINDOW MENU – SELECTION OF DISPLAY MODES....................................... 15 5.11 CLOSING THE TERMINAL WINDOW ............................................................... 15 6 SINGLE M O DEM SETUP M O DE ................................ ................................ ... 16 6.1 6.2 6.3 6.4 6.5 6.6 6.7 6.8 6.9 CREATING A NEW SINGLE RADIO MODEM ........................................................... 18 OPENING AN EXISTING SINGLE RADIO MODEM FROM A FILE .............................. 19 CHANGING THE RADIO MODEM SETTINGS ......................................................... 19 RECEIVING VALUES FROM THE RADIO MODEM .................................................... 19 SAVING SINGLE RADIO MODEM SETTINGS TO A FILE ........................................... 19 TRANSMITTING VALUES TO THE RADIO MODEM................................................... 20 PRINTING THE SETTINGS ...................................................................................... 20 CHANGING THE .SMF FILE TYPE ACCORDING TO THE SOFTWARE VERSION ........ 20 EXITING THE SINGLE MODEM SETUP MODE ......................................................... 21 7 RO UTING SETUP M O DE ................................ ................................ ............ 22 7.1 DEFINING A NEW NETWORK ................................................................................ 25 7.2 DRAWING THE NETWORK .................................................................................... 26 7.2.1 Properties window ................................................................................................................... 27 7.2.2 Multiple terminals .................................................................................................................... 28 7.2.3 Mobile stations ........................................................................................................................ 28 7.2.4 Saving a design ....................................................................................................................... 29 7.2.5 Opening a design project ........................................................................................................ 29 7.2.6 Editing a design ...................................................................................................................... 29 7.2.7 Printing network information ..................................................................................................... 30 7.2.8 Closing projects ...................................................................................................................... 30 7.2.9 Property table .......................................................................................................................... 30 7.3 TRANSMITTING THE SETTINGS INTO THE RADIO MODEM..................................... 32 7.4 READING SETTINGS FROM THE RADIO MODEM ................................................... 32 8 FLASH UPDATE ................................ ................................ ......................... 33 9 APPENDIX: M ESSAG E RO UTING ................................ ................................ . 35 9.1 FEATURES OF MESSAGE ROUTING ....................................................................... 36 2/43 SATEL Oy SaTerm 4 User Guide, Version 2.0 9.2 9.3 9.4 9.5 9.6 9.7 9.8 LIMITATIONS OF MESSAGE ROUTING................................................................... 36 GETTING STARTED WITH MESSAGE ROUTING ...................................................... 36 SATERM 4 AND THE CONFIGURATION OF THE MESSAGE ROUTING .................... 37 MANUAL CONFIGURATION OF THE MESSAGE ROUTING ..................................... 37 CONFIGURATION OF THE PROTOCOL IN MESSAGE ROUTING............................ 38 OPERATING MODES OF MESSAGE ROUTING ....................................................... 39 DETAILED DESCRIPTION OF ROUTING OPERATION .............................................. 40 9.8.1 Source Mode Routing .............................................................................................................. 40 9.8.2 Virtual Mode Routing ............................................................................................................... 41 9.8.3 Overhop function in Source Mode Routing ................................................................................ 42 9.8.4 Special protocols ..................................................................................................................... 43 9.8.5 Network ID ............................................................................................................................. 43 3/43 SATEL Oy SaTerm 4 User Guide, Version 2.0 1 INTRODUCTION SaTerm 4 is a software package designed by SATEL Oy to assist in the configuration, testing and reprogramming of the radio modems manufactured by SATEL Oy. The program works in Windows 95, Windows 98, Windows NT 4.0, Windows 2000, or Windows XP operating systems. SaTerm 4 has four main modes: • Terminal Window • Single Modem Setup • Routing Setup (graphical radio modem network design) • FLASH Update (software update of a radio modem) Terminal Window This is the main window and is used for monitoring traffic on the serial interface, validating a radio link, viewing and reprogramming modem settings as well as sending files and character strings when evaluating an installation. Single Modem Setup This is used to set up and store the settings of an individual modem. This is particularly useful when a number of modems are required to be configure in the same manner, or should the original settings need to be restored. Routing Setup This window is for the graphical design of a radio network and is used by simply drawing the links between the modems and then by activating the automatic upload function of these settings to the individual modems. Please refer to the Appendix for a more detailed description of message routing. Flash Update This is used for updating the radio modem software. The new software will be saved in the modems FLASH. Warning: Please read the "FLASH UPDATE" section carefully and familiarize yourself with the information contained therein, before updating the radio modems software. Note: This User's Manual describes essential features and functions of the SaTerm 4 software only. Information relating to radio network design or technical details of the different SATEL radio modem models, including the recommended settings, can be found in the manuals delivered with each product. It is recommended that this SaTerm manual be used in conjunction with the appropriate radio modem manual for your installation. Note: SaTerm 4 follows a standard common to most Windows compatible programs, in which the use of ESC equals Cancel and ENTER equals OK. 4/43 SATEL Oy SaTerm 4 User Guide, Version 2.0 2 SAFETY INSTRUCTIONS All rights to this manual are owned solely by SATEL OY (later called also SATEL). All rights reserved. The copying of this manual without the written permission from the owner of the rights by printing, copying, recording or by any other means or the full or partial translation of the manual to any other language including all programming languages using any electrical, mechanical, magnetic, optical, manual or other methods or devices is forbidden. SATEL reserves the right to change the technical specifications or functions of its products or to discontinue the manufacture of any of its products or to discontinue the support of any of its products without any written announcement and urges its customers to ensure, that the information at their disposal is valid. SATEL software and programs are delivered ”as is”. The manufacturer does not grant any kind of warranty including guarantees on saleability and guarantees pertaining to applicability to a certain application. Under no circumstances is the manufacturer or the developer of a program responsible for any possible damages caused by the use of a program. The names of the programs as well as all copyrights relating to the programs are the sole property of SATEL. Any transfer, licensing to a third party, leasing, renting, transportation, copying, editing, translating, modifying into another programming language or reverse engineering for any intent is forbidden without the written consent of SATEL. SATEL PRODUCTS HAVE NOT BEEN DESIGNED, INTENDED NOR INSPECTED TO BE USED IN ANY LIFE SUPPORT RELATED DEVICE OR SYSTEM RELATED FUNCTION NOR AS A PART OF ANY OTHER CRITICAL SYSTEM AND ARE GRANTED NO FUNCTIONAL WARRANTY IF THEY ARE USED IN ANY OF THE APPLICATIONS MENTIONED. Salo, FINLAND 2011 5/43 SATEL Oy SaTerm 4 User Guide, Version 2.0 3 INSTALLATION First, copy the SaTerm 4 program to your working directory. Then, to start SaTerm 4 simply run saterm.exe. When used for the first time, SaTerm 4 will create the file called saterm.ini, which contains the internal settings of the SaTerm 4. It does NOT contain settings of any individual radio modems. Note: All SaTerm 4 related files including the radio modem specific files must be in the same directory! File types of SaTerm 4 The file types and the modes of SaTerm 4 in which they are used in: Terminal Window Single Modem Setup Routing Setup .smf Yes Yes .ssf Yes Yes .spf Yes .sff .sf2 - Flash Update Yes Yes .smf (SaTerm Modem File) This type of a file is radio modem type specific. SaTerm 4 reads the values of the radio modem settings necessary both in the Single Modem Setup and also in the Routing Setup mode, from an appropriate .smf file. The naming convention of the .smf files is <type><software version>.smf. For example, 3AS_107.smf is intended for SATELLINE-3AS(d) radio modems having the software version 1.07. SaTerm 4 asks for confirmation, if the settings received from a radio modem have a different software version than any of the .smf-files in the SaTerm 4 –directory. The appropriate .smf files are available from SATEL. .ssf (SaTerm Settings File) This type of a file is used to save the settings of a single modem. This file only contains values. Any .ssf file also includes the name of the .smf file. This prohibits the values being loaded in to the wrong radio modem. .spf (SaTerm Project File) All the settings of a project drawn in the Routing Setup are saved here. .sff (SaTerm Flash File) Includes the radio modem software held in an encrypted format for the modems with software versions 0.xx...2.xx. .sf2 (SaTerm Flash file2) New software format for the radio modems labelled with the "E2" marking (Software versions 3.xx - ). 6/43 SATEL Oy SaTerm 4 User Guide, Version 2.0 Note: Do NOT alter any files with the extension .ssf, .smf, .spf, .sff, or .sf2 manually, or they will not work. Note! The flash update of software versions starting from 3.00 requires SaTerm version 4.0 or later. SaTerm recognizes whether the software to be updated matches the hardware of the radio modem. 7/43 SATEL Oy SaTerm 4 User Guide, Version 2.0 4 MAIN MENU When starting SaTerm 4, the main window (below) will first appear along with the main menu and toolbar, visible in their basic formats. First, make a selection from the Mode menu. All the different options of the main menu selections are shown in the table below. MAIN MENU OPTIONS MODE Open terminal icon Single modem setup icon Routing setup icon Flash update icon Exit WINDOW Cascade Tile HELP About Redraw Description of main menu selections Mode menu contains the following options Open terminal Opens the Terminal Window mode Single modem setup Opens Single Modem Setup mode Routing setup Opens Routing Setup mode Flash update Opens the radio modem software update mode Exit Exits the SaTerm 4 program Window menu contains the following alternatives Tile Terminal windows will be tiled Cascade Terminal windows will be cascaded Redraw Redraw graph window Help menu contains the following alternatives About SaTerm 4 software revision information 8/43 SATEL Oy SaTerm 4 User Guide, Version 2.0 Toolbar Overview of the icons from left to right: • Open new Terminal Window • Change Terminal Window port settings (only in Terminal Window) • Toggles between programming mode and normal mode port settings (only in the Terminal Window) • Start Routing Setup • Start Single modem Setup • Start Flash Update • Copy (only in Terminal Window or Routing setup mode) • Paste (only in Terminal Window or Routing setup mode) • Print • Printer setup • Help • Close All / Open All (for Terminal Window ports) 9/43 SATEL Oy SaTerm 4 User Guide, Version 2.0 5 TERMINAL WINDOW MODE SaTerm 4 includes a terminal window mode, which allows the user to send and receive characters using the selected COM-port. Within the Terminal Window there is a special Transmit window, where the user can specify and send, selected character strings or files at requested intervals. Frequently used character strings can be defined as macros in the script setup. 5.1 OPENING THE TERMINAL WINDOW A new terminal window is opened by selecting Mode|Open terminal from the main menu options. Initially a Serial Port setup window opens, where the serial port and other related parameters effecting the operation of the terminal are defined. Close All / Open All option in the top bar disables / enables the COM ports the Terminal windows are using. By right mouse clicking and selecting Close port / Open port, the selected COM port can be controlled. 5.2 SERIAL PORT SETUP The Serial port setup window may be used to select the serial port parameters and the other terminal window settings. Settings can be individual for each terminal window. Port number The serial port number chosen is the first free port. If the OK-button is pressed, and if the port is available for use, the corresponding terminal window will open. The maximum number of simultaneously open terminal windows is eight (8), providing that the computer or terminal device used contains the same number of physical serial ports as requested. Baud rate Selects the baud rate for serial communication. 10/43 SATEL Oy SaTerm 4 User Guide, Version 2.0 Handshake Selects the handshaking method • None - no handshake used • Hardware - hardware handshaking (RTS/CTS) used • Software - software handshaking (Xon/Xoff) used Parity Selects the parity bit for character • None - no parity bit used • Odd - odd parity used • Even - even parity used • Mark - parity bit used and always ’1’ • Space - parity bit used and always ’0’ Data bits Selects the number of data bits in a character • 7 - seven data bits • 8 - eight data bits Stop bits Selects the number of stop bits in character • 1 - one stop bit • 2 - two stop bit View Text in the terminal window may be displayed in three different ways: • ASCII – characters received are displayed as text, for example "Hello". Special characters are not displayed, for example <Enter> is not shown. • HEX - characters received are displayed as hexadecimal numbers. Hexadecimal numbers always have the prefix ‘\’ (marked in blue on screen). It is not possible to type hexadecimals directly to terminal window. Transmit window should be used if needed. For example: \48\65\6C\6C\6F\0D\0A ( "Hello" and <Enter> (CR/LF) in hexadecimal) • MIXED - received characters are displayed as text, except the special characters, which are displayed as hexadecimals. Miscellaneous • Mirror – will send the same character simultaneously in all other terminals, which have the mirror-selection set to active. • Local echo – will display sent characters in the terminal window. • CR/LF – will add the line feed (LF) after carriage return (CR) when sending characters from the keyboard. • Packet interval – if the interval of incoming packets is longer than the specified time unit, a line feed (LF) is automatically added before a new packet. Note! This function may be disabled by setting the interval value to 0. • Time stamp – will add the date and time of a reception before displaying a new packet. The time stamp is displayed in a brown-red colour in the beginning of a packet. The time is obtained from the operating system and the resolution is 1 second. 11/43 SATEL Oy SaTerm 4 User Guide, Version 2.0 5.3 DESCRIPTION OF TERMINAL WINDOW SELECTIONS The picture below presents a Terminal Window. Description of Terminal Window selections The Terminal Window menu options and the submenu options are listed in the table below. Mode Open terminal Settings Transmit Script setup Log file.. Print.. Printer setup Close terminal Exit Mode menu Open terminal Settings Transmit Script setup Log file Print Printer setup Close terminal Exit Edit Cut Copy Paste Select all Window Cascade Tile Redraw Help About Opens a new terminal window Changing the settings of the active terminal window Transmit mode Macro string setup Starts / stops the saving of the terminal window contents Prints out the contents of the terminal window Printer settings Closes the active terminal window Closes the program 12/43 SATEL Oy SaTerm 4 User Guide, Version 2.0 Edit menu Cut Copy Paste Select all Cut text Copy text Paste text and transfer it also to the serial port Selects all text Window menu Cascade Tile Redraw Terminal windows will be cascaded Terminal windows will be tiled Redraw graph window Help menu About SaTerm 4 program revision information 5.4 TRANSMIT WINDOW Transmit function is activated by selecting the Mode|Transmit option from the main menu, or directly from the Pop-up-menu (press right mouse-button when the cursor is over the terminal window and select Transmit). Character strings or files, may by sent by using the Transmit window. Character strings are sent as a single message to the terminal window, where the characters are sent one at a time. An automatic linefeed (CR/LF) may be added to the end of the character string by selecting option Put CR/LF to end. Mixing hexadecimal numbers and standard text is achieved by selecting the Mixed text option. Hexadecimal numbers are separated from normal characters with a separator character ‘\’ (back slash). Hexadecimal numbers must have 2 digits. For example "abc123" and CR/LF would be abc123\0D\0A . Continuous option should be selected if the transmission is to be repeated continuously, in which case the desired delay between packets should be entered into the Delay field. The Counter option will add a separate serial number to each sent packet. File/Text option is used to determine whether the text is to be sent from the Text Box window or from an open file. Edit selection contains the usual Cut, Copy and Paste commands. 13/43 SATEL Oy SaTerm 4 User Guide, Version 2.0 5.5 SCRIPT SETUP WINDOW A separate Script setup window is used to save any standard character strings, which can then be activated by pressing a function button. Script setup window can be activated by selected from the main menu Mode|Script setup or from the Pop-up-menu (press right mouse button when the cursor is over the terminal window and select Script setup). If the transmission of hexadecimal characters is required the Mixed option must also be selected. 5.6 LOG FILE The incoming characters of the Terminal Window can be saved by selecting Mode|Log file…. from the main menu. This selection will initiate the saving of all data received to the terminal window into a defined file. The recording is terminated by clicking Mode|Log file… again. 5.7 PRINT The information displayed in the terminal window can be printed in full by selecting Mode|Print... and then OK. It should be noted that the buffer may contain a substantial amount of data, and that the corresponding print job may take a considerable time to finish. If only a portion of the buffer contents is to be printed, select the required data in usual fashion by using the mouse and cursor, and by then click Mode|Print… followed by OK. 5.8 PRINTER SETUP The printer settings can be changed if needed. Possible settings are computer, operating system and printer dependent. 14/43 SATEL Oy SaTerm 4 User Guide, Version 2.0 5.9 EDIT MENU Edit menu contains all the usual functions, such as Cut, Copy, Paste and Select all. • Cut Cut text to Clipboard • Copy Copy text on to Clipboard • Paste Paste text from Clipboard to be transmitted by the radio modem • Select all Select all text from the active terminal window 5.10 WINDOW MENU – SELECTION OF DISPLAY MODES Window menu selects whether the windows are displayed in a Cascade or Tile and can be used to select a specific window when multiple windows are displayed. 5.11 CLOSING THE TERMINAL WINDOW The terminal window is closed using Mode|Close terminal from the main menu. This option will close the active terminal window (visible as the topmost terminal window). This can also be achieved by clicking the close-button (top-right corner of the window). Mode|Exit option will close all terminal windows and also the program. Close All / Open All option in the top bar disables / enables the COM ports the Terminal windows are using. By right mouse clicking and selecting Close port / Open port, the selected COM port can be controlled. 15/43 SATEL Oy SaTerm 4 User Guide, Version 2.0 6 SINGLE MODEM SETUP MODE The purpose of this mode is to allow the operator to produce their own standard configuration of the SATELLINE-3AS(d) or Epic radio modems within an installation. This then guarantees that all modems are setup in exactly the same manner and that future modems added to the system follow the same standard configuration. These settings are created and saved (with a user selectable name) in the Single Modem Setup mode. Later, the operator can copy the setup to several radio modems by opening the file and clicking a mouse. Note: An appropriate .smf file corresponding to the software version of your radio modems must be stored in the SaTerm 4 directory. For further explanation take a look at the Installation chapter. To start the single modem setups select Mode|Single modem setup from the main menu or click on the icon. The following window will appear: Description of Single Modem Setup mode selections: File New single Open single Save single Save single as Close single Property table Print properties Print setup Exit Modem New modem New multiterminal New mobile Connect Delete Copy Master Properties Print properties Load Save Show route Receive values Transmit values Serial Port Port number 16/43 Window Cascade Tile Redraw Help About SATEL Oy File menu options New single Open single Save single Save single as Close single Property table Print properties Print setup Exit SaTerm 4 User Guide, Version 2.0 Initialize a new single modem settings Opening a saved single modem settings file (.ssf file) Saving a single modem settings file (.ssf file) Saving a single modem settings file to a new name (.ssf file) Closing a single modem setup mode Shows settings of the radio modem Prints the properties of the radio modem Printer settings Closes the program Modem menu options New modem Define a new radio modem New multiterminal Define a new radio modem with multiple terminals New mobile Define a new mobile radio modem (Mobile routes must be active) Connect Define routes between radio modems Delete Delete a radio modem Copy Copy a radio modem Master Set the selected radio modem as a master radio modem Properties Set the radio modem properties Print Properties Print the selected radio modem properties Load Load the selected radio modem properties from a file Save Save the selected radio modem properties into a file Show route Display the routes of the active radio modem Receive values Download properties from a radio modem via serial port Transmit values Upload properties into a radio modem via serial port Serial Port menu options Port number Selection of the serial port (COM1-COM8) Window menu options Cascade Tile Redraw Terminal windows are displayed cascaded Terminal windows are displayed tiled Redraws the window content Help menu options About SaTerm 4 program revision information The Pop-up -menu contains the most used commands. The contents of the Pop-up -menu are updated according to the location of the mouse cursor when right-clicked, either on top of a radio modem icon or on top of the drawing screen. 17/43 SATEL Oy SaTerm 4 User Guide, Version 2.0 6.1 CREATING A NEW SINGLE RADIO MODEM 1. Start by selecting the Modem|New modem option from the main menu. 2. Select the type of the new modem i.e. the right .smf file corresponding the software of your radio modem from the Pop-up -menu. The .smf file must be located in the same directory as saterm.exe. 3. Drag-and-drop the icon of the radio modem. A property window specific to your will appear; see the adjoining example on right. This may take a while depending on the processor speed of the computer used. 4. Fill in the desired values and confirm these by selecting OK. Now the user can either transmit the setup to a radio modem or save the setup to a file. Please note that the settings are computer values. If you want to see the real settings, they must be read from the radio modem by selecting Receive values. Connect the radio modem to the serial port and select it from the Serial port | Port number=>COM1COM8. Choose Modem|Receive values. The values are received from the radio modem and updated to the properties window. 18/43 SATEL Oy SaTerm 4 User Guide, Version 2.0 6.2 OPENING AN EXISTING SINGLE RADIO MODEM FROM A FILE To recall a previously saved settings file choose File|Open single from the main menu. These files are identified by a special extension (.ssf). If a radio modem was active previously, it will first be closed. 6.3 CHANGING THE RADIO MODEM SETTINGS Radio modem settings can be changed either from the properties window or loaded from a file (.ssf). The settings -file is opened by selecting Modem|Load. Please note that the settings here are only changed on the screen and they must be saved into a file or transmitted to the radio modem. 6.4 RECEIVING VALUES FROM THE RADIO MODEM In order to achieve this, the radio modem must be in Programming Mode. Connect the serial port and select the Serial port | Port number=>COM1-COM8, now select Modem|Receive values to receive from the modem. A small transfer window is opened for the initial data transfer and, following a successful transfer, the properties window is opened. If the data transfer is not successful, an error message will be displayed. An example of an error message appearing after Receive values command. 6.5 SAVING SINGLE RADIO MODEM SETTINGS TO A FILE After all the single radio modem settings are entered, the settings and the modem type may be saved by choosing File|Save single as… from the main menu and by then entering a name for the file to be saved. Alternatively, if the settings have already been saved earlier, the appropriate selection is File|Save single. Saved single modem settings files are identified by a special extension (.ssf). 19/43 SATEL Oy SaTerm 4 User Guide, Version 2.0 6.6 TRANSMITTING VALUES TO THE RADIO MODEM Connect the radio modem to the serial port and select it from the Serial port|Port number=>COM1-COM8. Choose Modem|Transmit values. The values are transmitted to the modem. A small transfer window is opened during the data transfer. Remember to set the radio modem to Programming Mode. Should the given value be invalid i.e. exceeds the internal limits of the actual radio modem model (for example, the radio frequency could be over the allowed range), the Properties window will appear and a suggested alternative value is displayed in red. An example of a successful Transmit value operation. 6.7 PRINTING THE SETTINGS Settings may be printed by choosing File|Print properties. 6.8 CHANGING THE .SMF FILE TYPE ACCORDING TO THE SOFTWARE VERSION SaTerm uses .smf files specific to each software version to create single setup files (.ssf) or project files (.spf). In order to read the setup values from a radio modem, or to transmit them to a radio modem using SaTerm, you need a correct .smf file, which must match the software version residing inside your radio modem. Consequently, when the software of a radio modem has been changed (which is done by uploading the desired flash file (.sff) to a radio modem), also the SaTerm setup files (.ssf) created by the user should be converted to match the actual version of software. This can be done as follows. 1. Select the icon of the radio modem. 2. Click the right mouse button. A popup window will appear. 3. Select Change smf-file type to. A list of available .smf files (the files are named according to the corresponding software versions) in your working directory appears. 20/43 SATEL Oy SaTerm 4 User Guide, Version 2.0 4. Select the file that matches the version inside your radio modem. A properties window appears. See the following screenshot. The current settings are shown in the left hand side, and the new setup values after conversion are shown on the right. 5. Now you can convert each parameter individually, or you can choose the Conv all button to convert all values at once. 6. When you have finished with converting the parameters, click the OK button to accept the conversion(s). Note! Please check that all of the parameters have the correct value This is important because two different versions of the software may have different setup parameters or their use may differ. 6.9 EXITING THE SINGLE MODEM SETUP MODE After the settings have been edited select File|Close single. The base window will then reappear and another mode may then be selected. 21/43 SATEL Oy SaTerm 4 User Guide, Version 2.0 7 ROUTING SETUP MODE The Routing Setup Mode of SaTerm 4 provides a graphical tool for easy configuration of the SATELLINE-3AS(d) or Epic radio modems utilizing their Message Routing feature. The main principle of the Message Routing is that terminal device messages will be automatically routed over the network of radio modems to the correct recipient terminal. To configure a Message Routing network, SaTerm 4 is used throughout the configuration process: • • • First, a picture of all the radio modems in the network must be drawn. Secondly, the required settings are defined in the drawing. Finally, the radio modems are connected physically one by one to the COM-port after which the settings can easily be uploaded to the radio modems with just by clicking the mouse button. Note: Please use this function in conjunction with the information given in the SATELLINE-3AS(d) and Epic manual as well as related Application Notes concerning Message Routing. Note: The Routing Setup Mode only supports systems, which have a single master station, and polling scheme. The Routing Setup Mode window is presented below: 22/43 SATEL Oy SaTerm 4 User Guide, Version 2.0 The corresponding submenu selections are listed in the table below: File New project Modem New modem Open project New Multiterminal New mobile Save project Save project as Close project Property table Print project Print setup Exit Project Mobile routes Properties Serial Port Port number Connect Test net Ping selected (1) Ping all Window Cascade Clear RSSI infos Ping count Redraw Help About Tile Delete Copy Master Properties Print Properties Load Save Show route Receive values Transmit values Description of Routing setup mode menu selections The following list describes briefly the submenu options of the Routing Setup Mode. File menu options New project Initialize a new project Open project Open a saved project Save project Save a project Save project as Save a project by defining a name Close project Closing a project Property table Property table of all the radio modems Print project =>Graph Prints a graphical image of the network Print project =>Properties Prints settings of all the radio modems in the project Printer setup Printer settings Exit Closes the program Modem menu options New modem New multiterminal New mobile (Mobile routes must be active) Connect Delete Copy Master Properties Print Properties Define a new radio modem Define a new radio modem with multiple terminals Define a new mobile radio modem Define routes between radio modems Delete a radio modem Copy a radio modem Set the selected radio modem as a master radio modem Set the radio modem properties Print the selected radio modem properties 23/43 SATEL Oy SaTerm 4 User Guide, Version 2.0 Load Save Show route Receive values Transmit values Load the selected radio modem properties from a file Save the selected radio modem properties into a file Display the routes of the active radio modem Download properties from a radio modem via serial port Upload properties into a radio modem via serial port Project menu options Mobile routes Properties Toggles between mobile routes or fixed routes Definition of common properties of the network Serial Port menu options Port number Selection of the serial port (COM1-COM8) Test net menu options Ping selected (1) Ping all Clear RSSI infos Ping count Ping selected modem; respond is the RSSI value of the last received message. Number in the brackets shows how many times the selected modem will be pinged. Ping once all the modems in the network. Respond is the RSSI value of the last received message. Clear shown RSSI values. How many times the modem will be pinged with “Ping selected” option. Window menu options Tile Cascade Redraw Terminal windows are displayed tiled Terminal windows are displayed cascaded Redraws the window content Help menu options About SaTerm 4 program revision information 24/43 SATEL Oy SaTerm 4 User Guide, Version 2.0 7.1 DEFINING A NEW NETWORK When designing a new network start by selecting File|New project. A Project properties window will appear in which the basic characteristics of the network are defined. • • • • • • Name of network – This is the user reference name of the network and is not used in the actual radio data transfer. Network ID (text) – Identification code of the radio modem network. This distinguishes the radio modem network from other possible radio modem networks operating in the vicinity. This is used in the radio data transfer. Please note: the maximum ID code is 8 characters in length. Protocol information - Defines the user protocol (i.e. the protocol of the terminal equipment). Current options are: • User Defined requires that the user will set all protocol related variables (default). • IEC60870-5-101 requires the length of address to be set correctly. • RP570/571 requires no setting. Offset of address – Defines the number of bytes before the terminal address field in the user message. Length of address – Defines the length of the terminal address in bytes. Routing type – Select the routing method to be either Source routing or Virtual routing. After the common characteristics for the network have been defined and accepted by pressing OK, the graphical design window appears. Individual radio modems may then be placed on the drawing window. 25/43 SATEL Oy SaTerm 4 User Guide, Version 2.0 7.2 DRAWING THE NETWORK The network of radio modems can be drawn in the Routing Setup Mode window as follows: Add the first radio modem (i.e. modem icon) of the network by selecting Modem|New Modem|modem type on the menu bar, or by clicking the right mouse button in the design window. The icon may be dragged and dropped into the desired location on the screen by clicking the left mouse button. After dropping the icon, a properties window will appear. The correct properties of the radio modem are then completed in the form. Repeat the process until the network design has been completed and the properties for all the modems defined. NOTE: The radio modem representing the master station must be marked as Master by activating its icon and selecting Modem|Master on the menu bar or pop-up menu. Draw the radio connections between the radio modems. Activate a radio modem (a blue frame will appear around the icon). Choose Modem|Connect (on the menu bar or the pop-up menu). Drag the connection to the desired icon and confirm the route by clicking the left mouse button. Note: Solid lines present fixed routes, dotted lines show mobile routes (the mobile routes are shown only if Project|Mobile routes is set active). Note: The arrows point the direction from the master station towards a substation. Each radio modem may have only one arrow pointing towards it. Should a second arrow be drawn towards a radio modem, the program will automatically prompt the user to see if the new arrow is to replace the existing arrow. NOTE: SaTerm 4 only supports drawing systems that use a single master station, and the polling scheme. Once complete, recheck the design details and edit if necessary. Finally save the design into a SaTerm Project File (.spf) Note: In order to draw the network, the appropriate SaTerm Modem Files (.smf) matching the software of the radio modems that are to be used must be located in the same directory as SaTerm 4. 26/43 SATEL Oy SaTerm 4 User Guide, Version 2.0 7.2.1 Properties window Properties window settings are as follows: • Name - name of a radio modem. NOTE! This is a reference name only and it is not saved inside a radio modem. • No terminal address – this selection is made if the radio modem is not connected to a terminal device (i.e. the radio modem is acting only as a repeater). • Terminal address – address of the terminal device connected to the radio modem in hexadecimal format. • Modem address –Radio modem address is in hexadecimal format and configured by the SaTerm 4 software. This cannot be change by the user. • The contents of all the other drop-down menus depend on the type radio modem used. See the radio modem's documentation for details. 27/43 SATEL Oy SaTerm 4 User Guide, Version 2.0 7.2.2 Multiple terminals In situations where a radio modem has multiple terminals connected to it, there is a special multiple terminal icon, which must be added to the drawing. This icon can be selected from the Modem|New multiterminal option on the menu bar of the pop-up menu. The multiple terminal addresses are specified in the properties window by clicking the button with the three dots next to the terminal address. Each terminal address is given in a separate line, and in hexadecimal format. See the screenshots below for the outline of the icon and the property field. 7.2.3 Mobile stations In addition to fixed routes, also mobile stations (with mobile routes) can be defined. They are special in the sense that they are able to move within the coverage are of several repeaters. The routing of mobile stations thus differs from the routing of fixed stations. An example of a mobile application is a vehicle mounted radio modem. Mobile station routes may only be defined in the Source routing mode. Mobile stations are visible on the drawing screen and can only be edited when the main menu selection Mobile routes has been selected. The menu selection Project|Mobile routes will show a tick mark beside the name of the selection, when Mobile routes mode is active. Mobile routes are displayed with dotted line (Mobile routes mode must be active). A mobile route must be defined in a way that guarantees that the operating area is maximally covered. 28/43 SATEL Oy SaTerm 4 User Guide, Version 2.0 7.2.4 Saving a design After all the radio modems in the network have been placed on the drawing screen and their parameters and the corresponding connections between individual radio modems have been defined, the whole design can be saved to a SaTerm Project File (.spf) by choosing File|Save project as… from the main menu. Alternatively, if the project has already been saved earlier, the appropriate selection is File|Save project. It should be noted that the name of the project and the name of the file define different things. 7.2.5 Opening a design project A design project saved earlier can be opened by choosing File|Open project … from the main menu. 7.2.6 Editing a design Properties The properties of a single radio modem may be visibly checked by choosing either Modem|Properties from the main menu or Properties from the Quick-menu (when the cursor is above the icon of the radio modem in question). The properties of the selected radio modem (depicted by a blue frame around the icon) may be made visible by simply pressing ENTER or by double-clicking the icon in question. The setup window may be switched from radio modem to another by clicking on any radio modem the properties of that specific radio modem are then updated into the window. If any properties, which have been edited, are to be saved this can be done by selecting the OK or the edits are to be aborted by selecting Cancel. Copying radio modems By copying the radio modems already on the drawing screen time can be saved when creating a new modem configuration. Copying may be done in one of two ways, either by choosing Modem|Copy from the main menu and by then clicking the radio modem icon to be copied, or by choosing Copy from the Pop-up -menu with the cursor above the radio modem icon to be copied. The copy icon is now in the drag-and-drop mode, and may be dragged into the desired location and dropped by pressing the left mouse button. The properties of the newly created copy of the radio modem are defined in similar fashion as when creating a new radio modem. Moving radio modems on the screen Radio modems visible on the drawing screen may be moved around the screen by placing the cursor first above the radio modem to be moved and by then pressing and holding the left mouse button and by then dragging it to the new location and by finally releasing the mouse button. 29/43 SATEL Oy SaTerm 4 User Guide, Version 2.0 Deleting radio modems A radio modem visible on the drawing screen is deleted by selecting Modem|Delete from the main menu and by then selecting the radio modem to be deleted, or by choosing Delete from the Quick-menu when the cursor is placed above the radio modem (icon) to be deleted. Pressing the left mouse button while the modem is selected and then pressing the DELETE-key may also achieve deletion. Before final deletion the program will ask the user for a confirmation. The routes of the radio modems left on the drawing screen belonging to the network are updated accordingly. Deleting connections The connection lines (i.e. routes) to a radio modem may be deleted by choosing Delete connection from the main menu when the cursor is above the desired radio modem icon. The deletion and redrawing of routes does not alter the address information of the radio modem, which means that, for example, in Source routing mode network routing may be easily edited by simply updating the master radio modem (properties). Showing routes The routes (i.e. connections) between the radio modems may be viewed or checked by selecting Modem|Show route or Show route from the Pop-up menu. Selecting Hide route closes the window. The routes shown have the format <terminal address><radio modem address> and are shown using the direction of master to the substation. The terminal address has 8 digits and the radio modem address 4 digits. 7.2.7 Printing network information Printing of the network information is achieved in two steps. First, the graphical model of the network is printed as a graphical image by choosing File|Print|Graph from the main menu. Secondly, choosing File|Print|Properties prints the technical characteristics of radio modems. The printout will consist of successive pages arranged in a page per modem manner. 7.2.8 Closing projects In order to exit the Route Setup Mode of the SaTerm 4, select File|Close project. The main menu will then reappear. Alternatively, select File|Exit from the main menu, which will terminate the SaTerm 4 program. If the network design was edited or changed since the last save, the user is now prompted to save or abandon these changes. 7.2.9 Property table This table contains the full configuration of all the radio modems in the network, divided into separate pages according to the type of the radio modems. The Property table can be seen by choosing Project|Property table from the main menu. The table is closed by choosing Function|Close pro table from the main menu or by closing the properties table from the upper right corner. 30/43 SATEL Oy SaTerm 4 User Guide, Version 2.0 Please note that the settings of the radio modems may also be changed through the property table. The corresponding property table of the radio modem is opened by double clicking the desired column. File|Print pro table from the main menu will print the properties; alternatively if the table is visible it may be saved as a text file by choosing File|Save as text file… Each page is printed separately. The table may also be copied by choosing Edit|Select all and Edit|Copy, in which case the contents may be pasted onto some other documentation environment (for example Microsoft Excel). 31/43 SATEL Oy SaTerm 4 User Guide, Version 2.0 7.3 TRANSMITTING THE SETTINGS INTO THE RADIO MODEM Connect the desired radio modem to the serial port and select it from the Serial port|Port number=>COM1-COM8. Choose Modem|Transmit values, which then initiate the transmitting of the values to the modem. A transfer window is opened during this period. Remember to switch the radio modem to the Programming Mode by connecting its PROG pin to ground (GND) before initiating the transfer. See the appropriate radio modem user manual for more information. Once the serial port is properly connected, the radio modem icon to be configured is activated on the drawing screen by clicking it. The Modem|Transmit values from main menu or Transmit values from the Pop-up -menu is then selected. The opening and closing of the serial port is done automatically. SaTerm 4 checks the formal validity of the properties of the network design. If the information is insufficient (or outside the operational limits of a radio modem, e.g. frequency) in any of the radio modems of the network, SaTerm 4 will output an error message and open the property window of the erroneous radio modem. The window will display the mismatched property field in red. 7.4 READING SETTINGS FROM THE RADIO MODEM The radio modem settings (excluding Name, Terminal address and Modem address) may be read directly from radio modems. First the icon of the desired radio modem is activated on the screen. Then Modem|Receive values from main menu or Receive values from the popup-menu are selected. 32/43 SATEL Oy 8 SaTerm 4 User Guide, Version 2.0 FLASH UPDATE SATELLINE-3AS(d) or Epic radio modems include a feature, which allows the software to be updated by using the special Flash update mode of the SaTerm 4 program. The actual software of the radio modem is in an encrypted format inside the appropriate .sff or .sf2 file. Software versions starting from 3.0 apply to the radio modems labeled with the "E2" marking. The name extension of these Flash files is .sf2 instead of .sff. The software versions 0.xx...2.xx apply to the radio modems which do NOT have the marking "E2". The name extension of these Flash files is .sff. The procedure for performing a Flash Update 1. Take care that the power is OFF before making any connections. Connect the radio modem to the serial port of your terminal (PC) and the power supply. 2. Switch the power ON. 3. Start SaTerm 4 and select the Flash update. 4. Select the serial port number to which the radio modem is connected. 5. Set the radio modem to the Programming Mode by switching the PROG pin to ground (GND). See the appropriate radio modem user manual for more details. 6. Open the program file of the radio modem. The program files can be distinguished by an extension .sff or .sf2 on their filenames. 7. Enter the Key code (if delivered with the radio modem) or the default Key Code (all zeros). 8. NOTE! The Update tick box must be selected. 9. Press the Flash-button. The progress of the update may be monitored on the barograph meters. If the data transfer has to be cancelled for any reason (NOT recommended), press the Cancel-button. 10. When the update is complete, remember to switch the PROG pin OFF the ground (GND) before using the radio modem. The update is ready now. 33/43 SATEL Oy SaTerm 4 User Guide, Version 2.0 This error message indicates that wrong software version (sff instead of sf2 or vice versa) has been selected for the hardware of the radio modem. WARNING: After a possible interrupt, which has occurred during the transfer of the initialisation code, the radio modem must be restarted in order to get it back into operative condition. IF THE INTERRUPTION OCCURRED D URING THE TRANSFER OF THE PROGRAM CODE, THE RADIO MODEM WILLS NO LONGER FUNCTION AND IT MUST BE SENT TO AN AUTHORIZED SERVICE REPRESENTATIVE. 34/43 SATEL Oy SaTerm 4 User Guide, Version 2.0 9 APPENDIX: Message Routing The Message Routing is a mode of operation specific to the SATELLINE-3AS(d) and Epic radio modems. In short, Message Routing is the method by which messages from terminal devices can be automatically routed over a network of radio modems to a specified recipient terminal. A brief overview of Message Routing: • A radio modem reads any message coming from the terminal(s) attached to it. • The radio modem then detects the terminal address of the recipient, by seeking a preset position inside the message for the address. • The radio modem checks its internal route table to see if there exists route information, which corresponds to the address it has just detected. • The radio modem transmits a radio frame, which includes o the network id (see later) o the route information o the original encapsulated user message o Redundant information such as checksums used in error checking etc. • The radio modems along the route relay the frame over the network to the radio modem at the recipient terminal. • The radio modem at the recipient terminal first checks the validity of the received radio frame, then extracts the original user message, and finally outputs it to the terminal device attached to it. T S M T R T R S S T R T Mob S S T T T The figure left illustrates a possible structure of a radio modem network. M = Master station (Central station) R = Repeater station S = Slave station T = Terminal device Mob = Mobile terminal Terminals are usually PLC devices that send and receive messages according some specific user protocol. Note: The term repeater used in the context of the Message Routing should not be mixed with the Repeater Mode, which is a feature independent from the Message Routing. 35/43 SATEL Oy SaTerm 4 User Guide, Version 2.0 9.1 FEATURES OF MESSAGE ROUTING SATELLINE-3AS(d) and Epic Message Routing is designed to be transparent and as fast as possible to fit real time systems. The features include: • Transparent to, and designed to work with, the majority of user protocols. • Easy network construction containing several repeaters. • Any radio modem may operate as a repeater so that separate repeaters are not usually needed. • Large areas of coverage may be implemented by using only one radio channel. • The mobile substations may be used to some extent. • The system will be fully deterministic, i.e. transmission delays are predictable. Because of that, the principle of Message Routing is connectionless. • A failing radio modem can be, in certain cases, bypassed with another radio modem positioned in the same coverage area thus creating added redundancy. • Message Routing is intended mainly for the protocols based on polling scheme and a single master station. 9.2 LIMITATIONS OF MESSAGE ROUTING • • • It is assumed that the position of the address field in the user messages is fixed (some special protocols can be supported though). It is assumed that there is only one message at a time inside the network, simultaneous messages could cause collisions. The maximum number of the routes depends on the hardware used and on the software version. 9.3 GETTING STARTED WITH MESSAGE ROUTING The design of any radio modem system requires very precise planning. Once the choices between devices, their location, installation, maintenance etc. are clear, the Message Routing for the system can be implemented. In order to get Message Routing working: 1. Decide which mode of the Message Routing suits the system - Source Mode or Virtual Mode. See the following paragraphs for details. 2. Design a layout of the system describing the settings like protocol, addresses of the terminal equipment, radio frequencies and so on. 3. Configure the radio modems accordingly. There are two ways to configure the parameters related to the Message Routing: • SaTerm 4 PC-program • Manual configuration in the setup menu. In either case, please check also the chapter Settings before changing the setup of the radio modems. Finally, when all the radio modems have correct settings, they are ready for further installation. 36/43 SATEL Oy SaTerm 4 User Guide, Version 2.0 9.4 SATERM 4 AND THE CONFIGURATION OF THE MESSAGE ROUTING SaTerm 4 has a graphical user interface for easy drawing of your network. First, a picture of the network is drawn, including all the radio modems together with the link connections i.e. routes between them. Secondly, the required settings are defined in the drawing. Finally, the setup of each physical radio modem can be uploaded by connecting the actual radio modems one by one to the COM port, switching them to the Programming Mode, and clicking the transmit button of SaTerm 4. The figure below shows a typical snapshot taken from a SaTerm 4 screen. 9.5 MANUAL CONFIGURATION OF THE MESSAGE ROUTING The radio modems can be configured manually via their programming menu. However, this is recommended only, if the structure of the network is very simple, or if it is desirable to define such special functions which are not possible to draw using the graphical interface of SaTerm 4. Examples of such cases are networks, which are not tree-structured, and the use of same repeaters in several overlapping networks. The operation of the Message Routing must be clearly understood before configuring the radio modems manually. 37/43 SATEL Oy SaTerm 4 User Guide, Version 2.0 9.6 CONFIGURATION OF THE PROTOCOL IN MESSAGE ROUTING A radio modem detects the address employed by the user protocol from the message received via the serial interface. On the basis of this user address, all necessary information needed to relay the message to destination is fetched from an internal routing table inside a radio modem. The user protocol is not interpreted; instead, the user address is searched according to its location in the message. The beginning of the packet is located by a preceding pause in the byte stream. Message Routing can therefore be applied to most protocols with fixed address field position. The position and length of the address is defined by two settings: Offset and Length. Offset defines the number of bytes (0…15) preceding the address. Length is the length of the address in the user protocol expressed in bytes (1…4). O ffset Length USER ADDRESS USER DATA Byte length Start of data packet, Offset=2, Length=3 A transmitting radio modem adds a routing header and a tail to the user message. Consequently, a radio modem that receives the message removes the header and footer – thus making the Message Routing scheme transparent to the user protocol. 38/43 SATEL Oy SaTerm 4 User Guide, Version 2.0 9.7 OPERATING MODES OF MESSAGE ROUTING The Message Routing has two different operating modes: • Source Mode Routing • Virtual Mode Routing The most important differences between the two modes are shown in the table below. Property Summary Radio interference tolerance Support for mobile stations Addition of substations to a network Source Mode Routing Slower, more functions Yes, overhop function Yes Only master station needs to be reconfigured Changing routes Only master station needs to be reconfigured 16 jumps Yes Yes Centralised 10+ 2 times the number of hops Maximum length of route Overhop function Network ID Storing of routing information Message Routing overhead (bytes) Maximum length of user protocol message (bytes) Virtual Mode Routing Faster, less functions No No Master station and consecutive repeaters need to be reconfigured All radio modems need to be reconfigured No limit No Yes Dispersed 9 1kB – Message Routing overhead 1kB – Message Routing overhead Other issues common to the both modes: • The maximum number of terminals depends on the radio network structure and the number of routes. • Multiple terminal addresses may be attached to a radio modem. • The maximum length of a terminal address (in the user's protocol) is four bytes (FFFFFFFF in hexadecimal). • The maximum length of the address of a radio modem is two bytes (FFFF in hexadecimal). 39/43 SATEL Oy SaTerm 4 User Guide, Version 2.0 9.8 DETAILED DESCRIPTION OF ROUTING OPERATION 9.8.1 Source Mode Routing 3 0 1 Z X System Y Z 2 Modem 1, 2 1, 3 Y The above figure represents a network containing four (4) radio modems. Each radio modem is given a unique address (0…3). A terminal device has been attached to the three of the four radio modems and they communicate with each other using addresses X, Y and Z, respectively. Radio modem 0 and terminal device X together constitute the base station of the network and all routing information of the network has been programmed into this base station. When the terminal device X transmits a packet to (e.g.) terminal Y, radio modem 0 will detect the address Y from the data received through the serial port. From the routing table a route 1,2 can be found to which the radio modem also adds its own address to define the route for return data. Radio modem 1 repeats the packet and radio modem 2 removes the address information from the received data packet thereby transferring only the original data to the serial interface. The address information received together with the packet is reversed (2,1,0) and saved to be use in the transmission of subsequent reply packets. 40/43 SATEL Oy SaTerm 4 User Guide, Version 2.0 9.8.2 Virtual Mode Routing 3 1 C A 2 X< ‐> 3 B 4 Z X Y < ‐> 2 Z < ‐> 1 1< ‐> 3 2< ‐> 4 D X< ‐> 4 Y The above figure represents the same network, which has now been configured using the Virtual Mode Routing. The difference being that logical links are numbered instead of the radio modems. Operation is easy to understand by thinking of a telephone network realized with traditional overhead wiring. Each radio modem contains a routing table in its internal memory, which defines both its relative dependencies (in relation to the links to that it forms with other radio modems in the network), as well as terminal device addresses and link dependencies. Terminal device X transmits a packet to terminal device Y. The routing table of radio modem contains the required route, and the packet is transmitted with link ID 2 attached to it. Of the radio modems in reception mode, only the routing table of radio modem B contains a link ID 2, and because of this match will receive the packet. Re-sending (relaying) will be made with ID 4. Radio modem C has a routing table containing information, which defines link 4 as being connected to a serial interface. This means that radio modem C will transfer the packet to the serial interface and the terminal device attached to it, after first removing the link ID added by radio modem A. All links are bidirectional, so the reply message will arrive back to the terminal device X via radio modem A in a similar way. 41/43 SATEL Oy SaTerm 4 User Guide, Version 2.0 9.8.3 Overhop function in Source Mode Routing t Master TD Radio R1 Master R2 Substation RD M R1 R2 TD S RD When using repeaters the same packet is sent on a (radio) channel several times. A radio modem situated in the repeater chain will often hear other radio modems in addition to the immediate neighboring radio modems. In the Source Mode Routing the complete address information sent together with the packets enables also the use of these secondary routes. Usually repeaters have better antennas (and/or antennas placed higher) than normal substations, which means that the distance between two repeaters can be much longer than the distance between a repeater and a substation. Connections to non-neighboring repeater stations are not necessarily reliable under all possible (radio) conditions, but they can often be used to keep the network up and running, at least partly, in case a repeater fails somewhere in the middle of a chain. In addition to this, the likelihood of a transmission error decreases, if it is possible to listen to more than one transmission, since it is more likely that at least one of them will be received error-free. It is also possible, that the radio connection is asymmetrical due to the greater output power of a repeater or due to local interference, in which case data can in fact travel in opposite directions using different routes. When a repeater receives a message, which contains its’ address, but which is not the first address in the address field, the packet is stored in a buffer. If the relayed message from the repeater and the originator is not received (i.e. because of radio modem failure or if the message has an erroneous checksum), the packet already buffered into the memory is resent without any change to the timing (no additional delays are introduced). Because of this, relatively short hop distances can be used without the likelihood of errors being increased (caused by the added number of repeats). In conclusion, a possible error in one of the repeaters does not necessarily cause a total breakdown of traffic. 42/43 SATEL Oy SaTerm 4 User Guide, Version 2.0 R1 M R2 The overhop function also facilitates the use of mobile substations. In the example above, a mobile substation is first located in the coverage area of repeater R2. The route is defined as M, R1, R2 and vehicle. When the vehicle moves to the coverage area of repeater R1, the radio modem picks the packet already given from the transmission of R1, but is then transferred to the serial port using an additional delay. This means that the timing does not differ from the first example when the vehicle radio modem was in the coverage area of repeater R2. In this way a collision of the reply transmission and the transmission by repeater R2 is prevented. When the mobile station is transmitting, it is follows that at least one radio modem defined to be a part of the route receives the transmission. 9.8.4 Special protocols The Message Routing can support most user protocols based on a single master and a polling system. Additionally, at least the following special protocols are currently supported: • • IEC 60870-5-101 is a protocol commonly used in control applications of power lines. RP570 protocol 9.8.5 Network ID Network ID is a character string of up to eight characters, and is used in order to prevent the reception of messages received from any external systems. Radio modems operating in the same system using Message Routing must have the same Network ID. Only the messages with a matching Network ID will be processed further after reception. 43/43