1
Zartek
ZA-180
User’s Manual
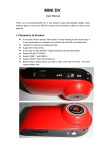
Thank you for buying the Zartek mini DV video recorder.
In order to ensure personal safety and efficiency of the product, please read this manual
carefully before operating.
Keep the manual for future reference.
For any queries please contact Zartek via email: [email protected]
Contents
Product layout……………………………………..………………………………………………………………..…1
I Features and Specifications…………………………………………………………………………………....2
II Operation Guide……………………………………………………………………………………………….……3
1. Charging……………………………………………………………………………………………………3
2. Powering on & recording…………………………………………………………………….…….3
3. Sound activated recording…….…………………………………………………………………..4
4. Time/date stamping..………………..………………………………………………………..…….4
5. Powering off……………………………………………………………………………………….……..5
6. Auto-power off function…………………………………………………………………….………5
7. Connecting to a computer……………………..…………………………………………..……..5
8. PC camera…………………………………………………………………………………………..…….5
9. Reset…………………………………………………………………………………………………..…….6
10. Notice and Warranty..………………………………………………………………………..……..6
Thank you for purchasing the Zartek Mini DV video recorder. It has an ultra-portable design
with a clip for easy mounting. Recording is simple whether doing action, extreme, fun or
security activities.
Product layout:
:
Bracket
1
I
Features
•
•
•
•
•
•
•
•
•
•
•
•
•
Mini video recorder with clip
Records video and audio
High speed recording with quick light response
High resolution image 2 Megapixel vcolor CMOS
Video output 720x480 pixel and 30 frames/second
Micro SD card slot (max 16GB supported)
Easy recording with LED indicator
Recording activated manually or with sound
Different mounting options with swivel stand, silicon case and straps
Time/date stamping
Webcam function for PC or laptop for online video chat
USB charging with video upload / download
1 GB every 20 minutes of video recording
Specifications
•
•
•
•
•
•
•
•
•
•
•
•
•
Resolution: 720 x 480 pixel HD video output, 2.0MP CMOS sensor
Camera view angle: 72 degree
Internet format compatible with all social networks You Tube, My Space, MSN, Skype
etc…
Video decode using motion JPEG, recording for AVI format
USB port compatible with USB 1.1 and USB 2.0
Operation System: Windows 98SE/2000/Me/XP/Vista/7
Running Time: 60 minutes, standby 220 hours
Built in Li-ion rechargeable battery of 200mAH
Charge Time: 2 hours
Dimensions: 66.3 x 28 x 14.5mm
Weight: 22g
Operating temperature range: 0-50°C
1 year limited warranty
2
II Operation Guide
11. Charging
The device is fitted with a built-in lithium rechargeable battery, so when you use it for the
first time, please charge fully. The method for charging as following:
1.) Connect computer: use supplied USB cable to connect to the computer’s USB port.
2.) Use USB adaptor (not included): connect charger plug with USB cable, then plug into
electrical connector receptacle, it can be charged.
When you charge both the blue light and red light will shine continuously. Charge time is
approximately 2 hours and the blue light will turn off indicating full.
Notice: when battery power is very low, the device will enter into protection mode, and
cannot be turned on. It will need to be charged.
2. Powering on and Recording
1. Press Power button slightly and the blue indicator light begins to shine indicating
that it is in start-up mode.
2. Wait 5 seconds for the device to enter ready mode. Power will automatically shut
off if no button is pressed for 30 seconds.
3. To begin recording, press the Record button slightly and the red indicator light
starts to flash slowly which is recording mode.
4. Point the mini dv in the area to record. Both video and audio are recorded. If a
mount is used make sure to test the picture angle and position of the device for
proper recording. The resolution of the camera is 2 Megapixel and the video file is
720*480 pixels. Speed is 30 frames per second and lightness is automatically
adjusted when recording in change lighting areas.
5. To stop recording press the Record button so the video is stopped and saved
automatically. The red light will flash showing that the file is being saved.
6. If the power off button is pressed during a recording, the file will be automatically
saved and the device will switch off.
7. Follow same procedure to repeat recording. 1 GB of memory is used per 20 minutes
of recording. Once memory is full, recording is not possible until some memory is
cleared
Notice:
• Make sure a Micro SD card has been inserted, if not, the device will power off
automatically after 10 seconds.
• The maximum capacity of card is 16GB.
3
•
•
•
Saving file operation needs some time, so please don’t press any operation button
continuously in order to avoid corrupt saving and generating an incomplete file.
When making a video, clarity will depend on light levels and video stability. Picture
may become distorted if the lighting level is low and the device is moved excessively.
Keep the camera lense clean and free from scratches so recording quality is kept
clear.
3. Sound activated recording
1. Press Power button slightly and the blue indicator light begins to shine indicating that it
is in start-up mode.
2. Wait 5 seconds for the device to enter ready mode. Power will automatically shut off if
no button is pressed for 30 seconds.
3. In ready mode press MODE button slightly, to enter into sound activation video mode.
Blue indicator light will shine and red indicator light will flash quickly indicating sound
activation standby mode. A sound level over 60 decibels will activate the video to begin
recording automatically and the red light will flash slowly.
4. Recording will last for 2 minutes and then be saved automatically. If the sound level is
still high, recording will not be stopped but continue until there is no sound for 2 minutes.
Once recording is saved, the device will remain in sound activation standby mode for 5
minutes and then power off.
5. Sound activation is used to record video hands-free.
4.
.Time/date stamping
1. This feature places the time and date on to all videos.
2. Load the CD supplied with the device, there is a file called TAG.TXT, copy the file to
the desktop or dedicated folder for easy loading in the future.
3. Copy the text file TAG.TXT to the root directory of the card (connect device to
computer and open the first folder of the device).
4. Open TAG. TXT file using Wordpad, Notepad etc, and enter current date and time
according to format below. Do not change format in any other way.
Details as following:
[date]
need space with newline
2009/07/22 need space with newline
12:00:00
5. Save the file and disconnect the device from computer and turn device off.
6. Now power on, record a 5-10 second video and stop recording. The device will check
and analyze TAG.TXT, then set system time according to file time. After that the text
file will be deleted by system automatically. Reconnect the device and play the video
to check that the time and date stamping is correct. If not, repeat process again and
make sure all steps are followed in order.
7. If the device is used for a long time, the battery charge will run out, and time / date
stamping will need to be setup again.
4
5.
.Power off
Press the Power button for 3 seconds and the device will switch off. If the device is turned
off during a video recording, the video file will be saved automatically first.
6. Auto-power off function
• If the battery power level gets low whilst recording, the video file will be saved
automatically and the device will switch off.
• If the memory capacity gets used up whilst recording, the video file will be saved
automatically and the device will switch off.
7.
.Connecting to a computer
• Plug the supplied USB cable into the device and the other side into the USB port on a
PC or laptop.
• The device can be connected whilst powered on or in standby mode. It is possible to
access the memory card to edit the folder, delete files, add files etc.
• To play video files, select the video and open using a media program. Not all files are
compatible on all programs as some codec may be needed.
• When the device is connected to the PC, the blue light will indicate battery charging
and the red light indicates that it is connected.
• If the computer does not recognize the device or card in 30 seconds, disconnect and
reinsert.
• Large video files should be copied onto the computer’s hard disk as playing directly
from the device may be slow or unsmooth.
8. PC Camera
• The PC camera can be used as a webcam on social media or to capture videos from
your computer.
•
Install the driver from the supplied CD. The driver name is
SPCA1528_V2237_W…Setup.exe. Run this program and follow the prompts to install.
Once installation is complete an icon called AMCAP will appear on the desktop.
•
Use the supplied USB cable to connect the camera to a computer. Press the MODE
button to switch into PC camera mode. Open the AMCAP program to use as PC
camera to capture videos and change settings.
•
To stop the PC camera function, first close the AMCAP program and then remove the
device from the computer.
5
9.
.Reset
If the device freezes up or does not operate properly it may need to be reset. Use a fine
point such as a pin to press the Reset button located on the side of the device.
10. Notice
•
Only use for suitable applications and follow the state's law regarding observing signs
where cameras are not allowed.
•
If the device experiences any compatibility issues it may need a software upgrade.
Please contact the supplier to get the software upgrade.
•
Only use is normal temperatures and do not expose the camera to hot surfaces, open
flames and direct sunlight for extended periods.
•
Check that the mounts are secure before using as the device may get unfastened and
fall.
•
Do not expose the camera to humid, damp or wet environments.
•
Do not aim the camera directly at the sun and other strong light sources in order not
to damage any optical parts.
•
•
Keep the lense clean and do not operate in very dusty, sandy or dirty areas.
In order to avoid explosion, please do not throw the product into fire.
Warranty
There is a 12 month factory warranty on the unit. Warranty does not cover battery or
accessories. The product must be only used for the intended purpose and not subjected to
willful or accidental damage. Incorrect charging voltage or supply can damage the battery. If
the product has been tampered with in any way, the warranty shall be considered null and
void.
6