1
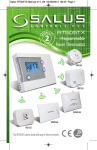
iT500BM Installer Resized 003_Layout 1 13/11/2013 09:31 Page 1
iT500BM Internet Thermostat
I N S TA L L E R M A N U A L
iT500BM Installer Resized 003_Layout 1 13/11/2013 09:31 Page 2
1. Product compliance & safety information
These instructions are applicable to the SALUS Controls model stated on the front
cover of this manual only, and must not be used with any other make or model.
This accessory must be fitted by a competent person, and installation must
comply with the guidance provided in the current IEE Wiring Regulations and
current Building Regulations. Failure to comply with the requirements of these
publications could lead to prosecution.
Always isolate the AC Mains supply before installing or working
on any components that require 230 VAC 50Hz supply.
When fitting batteries, do not mix old and new batteries together.
Do not use rechargeable batteries.
Please leave these instructions with the end user where they should be kept in
a safe place for future reference.
02 iT500BM Installer Manual
iT500BM Installer Resized 003_Layout 1 13/11/2013 09:31 Page 3
2. Installation of the boiler module
RXVBC605
RXWBC605
RXBC605
Page 03 - 05
Page 06 - 09
Page 10 - 11
INTRODUCTION
The RXVBC605 is an integral plug-in RF boiler control. The RF boiler control is a direct
replacement for the basic time clock or blanking plate usually supplied with the boiler.
Installing the RF boiler control takes minutes. Once installed, you will benefit from all
the control features of the Salus room thermostat.
INTEGRAL RF BOILER CONTROL
The Integral RF boiler control is the RF receiving unit for your RF room thermostat. This
unit uses a plug-in connection to connect directly to your boiler and provides the ON/OFF
switching.
Features
• LED status indication
• Plug-in connection to boiler
• 3 position switch
• 868 MHz communication
Mounting the RF Integral Boiler Control to the boiler
DANGER!
• 24V & 230V: Do not touch electrical components or circuits
• Isolate mains electricity supply before starting any
work and observe all relevant safety precautions
• Follow electro static discharge precaution
• Do not touch any visible PCB parts or components
iT500BM Installer Manual 03
iT500BM Installer Resized 003_Layout 1 13/11/2013 09:31 Page 4
2. Installation of the boiler module RXVBC605
RXVBC605 RECEIVER
For ECOTEC post April 2012 remove and discard pins.
For ECOTEC models prior to
April 2012, use as supplied.
1. Switch off the boiler at its main supply.
2. Remove cover panel or existing control.
3. Insert the integral boiler control ensuring correct location
of the rear connection pins.
04 iT500BM Installer Manual
iT500BM Installer Resized 003_Layout 1 13/11/2013 09:31 Page 5
2. Installation of the boiler module RXVBC605
Before switching the boiler on at its mains
supply, ensure the module switch is in the
OFF position.
To ensure the boiler control is connected
properly, please now move the switch to
ON . The boiler should now go on and
the LED on the your boiler control should
illuminate.
Now move the switch back to AUTO
.
iT500BM Installer Manual 05
iT500BM Installer Resized 003_Layout 1 13/11/2013 09:31 Page 6
2. Installation of the boiler module RXWBC605
RXWBC605 RECEIVER
INTRODUCTION
The RXWBC605 comprises of an integral plug-in RF boiler control. The RF boiler
control is a direct replacement for the basic time clock or blanking plate usually
supplied with the boiler. Installing the RF boiler control takes minutes. Once
installed, you will benefit from all the control features of the Salus thermostat.
INTEGRAL RF BOILER CONTROL
The Integral RF boiler control is the RF receiving unit for your thermostat.
This unit uses a plug-in connection to connect directly to your boiler and provides
the ON/OFF switching.
Features
• LED status indication
• Plug-in connection to boiler
• 3 position switch
• 868 MHz communication
Mounting the RF Integral Boiler Control to the boiler
DANGER!
• 24V & 230V: Do not touch electrical components or circuits
• Isolate mains electricity supply before starting any
work and observe all relevant safety precautions
• Follow electro static discharge precaution
• Do not touch any visible PCB parts or components
06 iT500BM Installer Manual
iT500BM Installer Resized 003_Layout 1 13/11/2013 09:31 Page 7
2. Installation of the boiler module RXWBC605
RXWBC605 RECEIVER
RF Transmission
The receiving range between your thermostat and the RF Boiler Control is around
100 metres in open air, however many factors can affect the RF transmission
and shorten the operating distance, e.g. shielding by thick walls, foil back
plasterboard, metal objects such as filing cabinets, general RF interference, and
so on. The operating range is generally around 30 metres, which is large enough
for most household applications.
A
B
C
1. Switch off the boiler at its main supply.
Remove the outer casing and front fascia to
allow access to the main control panel.
2. Remove cover panel A upwards to remove.
3. Pull top tab B upwards, then outwards to
remove blanking plate or existing control.
First plug in the connector block C ensuring
correct orientation. Remember to ensure
the block is fully connected.
iT500BM Installer Manual 07
iT500BM Installer Resized 003_Layout 1 13/11/2013 09:31 Page 8
2. Installation of the boiler module RXWBC605
RXWBC605 RECEIVER
A
Now locate the boiler control’s four hooks then
press in and down. Replace cover panel A.
Replace the front fascia and boiler’s outer casing.
Before switching the boiler on at its mains supply,
ensure the module switch is in the OFF position .
08 iT500BM Installer Manual
iT500BM Installer Resized 003_Layout 1 13/11/2013 09:31 Page 9
2. Installation of the boiler module RXWBC605
RXWBC605 RECEIVER
To ensure the boiler control is connected
properly, please now move the switch to
ON . The boiler should now fire and the LED
on the your boiler control should illuminate.
Now move the switch back to AUTO
.
iT500BM Installer Manual 09
iT500BM Installer Resized 003_Layout 1 13/11/2013 09:31 Page 10
2. Installation of the boiler module RXBC605
RXBC605 RECEIVER
INTRODUCTION
The RXBC605 comprises of an integral plug-in RF boiler control. The RF boiler
control is a direct replacement for the basic time clock or blanking plate usually
supplied with the boiler. Installing the RF boiler control takes minutes. Once
installed, you will benefit from all the control features of the Salus thermostat.
INTEGRAL RF BOILER CONTROL
The Integral RF boiler control is the RF receiving unit for your thermostat. This
unit uses a plug-in connection to connect directly to your boiler and provides the
ON/OFF switching.
Features
• LED status indication
• Plug-in connection to boiler
• 3 position switch
• 868 MHz communication
DANGER!
Always isolate the AC Mains supply
before opening or removing the unit
from the boiler.
10 iT500BM Installer Manual
iT500BM Installer Resized 003_Layout 1 13/11/2013 09:31 Page 11
2. Installation of the boiler module RXBC605
RXBC605 RECEIVER
INSTALLING THE RF BOILER CONTROL
1. Remove the front panel from the boiler.
2. Pull out the mechanical timer.
3. Do not remove boiler loop.
4. Connect the electrical plug.
5. Push fit boiler control into housing.
6. Replace the front panel ensuring a good seal is made.
7. Power up the boiler and check the correct operation.
Connections:
1 - Neutral input
2 - Live input
3 - Common input
4 - Normally open output
iT500BM Installer Manual 11
iT500BM Installer Resized 003_Layout 1 13/11/2013 09:31 Page 12
3. Installation of wall bracket docking (optional)
1
Attach the wall mounting bracket to a
suitable wall using the fittings supplied
and the built in level.
2
After first ensuring that the bracket is
secure, clip the iT500 into place by
aligning the recess on the back of the unit
to the bracket and clipping into place.
3
i
Once clipped into place, ensure the unit is
securely seated on the bracket.
12 iT500BM Installer Manual
For best results mount the
iT500 1.5m from ground level.
iT500BM Installer Resized 003_Layout 1 13/11/2013 09:31 Page 13
4. Desk mount option iT500
For the desk mounted option, simply clip the clear
stand supplied separately into the back of the unit.
iT500BM Installer Manual 13
iT500BM Installer Resized 003_Layout 1 13/11/2013 09:31 Page 14
5. Connecting the Gateway to your existing router
Flashing red light
on setup.
Constant green light when the iT500 is
connected to the SALUS Controls Server.
14 iT500BM Installer Manual
iT500BM Installer Resized 003_Layout 1 13/11/2013 09:31 Page 15
6. Inserting the batteries in the iT500 Thermostat
1
Remove the battery cover from
the base of the iT500 Thermostat.
3
With the unit face down, insert the first
battery supplied into the right hand side
of the base of the iT500 Thermostat.
2
Make a note of the serial number printed
in the base of the iT500 Thermostat.
4
Insert the second battery supplied into the left
hand side of the base of the iT500 Thermostat.
iT500BM Installer Manual 15
iT500BM Installer Resized 003_Layout 1 13/11/2013 09:31 Page 16
6. Inserting the batteries in the iT500 Thermostat
5
6
Ensure the batteries are fitted securely
in the base of the iT500 Thermostat.
Why not make a note of your STA
number here for future reference.
S T A
16 iT500BM Installer Manual
Replace the battery cover to the
base of the iT500 Thermostat.
iT500BM Installer Resized 003_Layout 1 13/11/2013 09:31 Page 17
7. Setting up the iT500 Thermostat
After powering up iT500 for the first time the display will go through the following sequence.
4
1
OTA* Revision number
2
The globe icon
will appear
when the unit automatically
connects to the internet via
the SALUS iTG500 Gateway.
This should take approximately
20 seconds.
i
3
* Over The Air operated software
iT500 Software revision
iT500BM Installer Manual 17
iT500BM Installer Resized 003_Layout 1 13/11/2013 09:31 Page 18
8. LCD Overview
LCD ICONS
DESCRIPTION
FUNCTION
Day of the week
Temperature indicator
Clock display
Program number indicator
Heat mode indicator
Heat indicator
Hot water mode indicator
RF signal indicator
Displays the number of the day of the week. 1 being Monday
Displays set or measured temperature
Displays time
Displays the number of the active (selected) program
Indicates heating output is turned on*
Indicates heating zone
Indicates hot water output is turned on*
Indicates the unit is transmitting a wireless signal to the
iT500RX or is receiving the signal from the iT300*
Indicates touch lock is activated
Indicates battery is low
Indicates holiday operation mode is selected
Indicates connection to iTG500 and SALUS server
Automatic program mode
Off mode
Manual override or settings mode
Touch lock indicator
Battery status
Holiday indicator
Internet indicator
AUTO indicator
OFF indicator
Setting indicator
18 iT500BM Installer Manual
iT500BM Installer Resized 003_Layout 1 13/11/2013 09:32 Page 19
System configuration - iT500 time zone* and DST
i
* If the iT500 is to be used in
the UK, then there is no need
to enter system configuration
setup, please proceed to
bottom of page 17.
i
At any time press and hold
for 5 seconds to
return to the home screen.
iT500BM Installer Manual 19
iT500BM Installer Resized 003_Layout 1 13/11/2013 09:32 Page 20
System configuration - iT500 time zone* and DST
Select for heating application
Centigrade to Fahrenheit
GMT Time setting**
20 iT500BM Installer Manual
iT500BM Installer Resized 003_Layout 1 13/11/2013 09:32 Page 21
9. European Time Zones
GMT
GMT+1 Hour
UK
IRELAND
PORTUGAL
ICELAND*
i
AUSTRIA
POLAND
GERMANY
CZECH
SPAIN
FRANCE
ITALY
SWITZERLAND
LUXEMBOURG
HOLLAND
BELGIUM
DENMARK
SWEDEN
NORWAY
MALTA
CROATIA
SERBIA
BOSNIA
SLOVENIA
GMT+2 Hour
ESTONIA
TURKEY
CYPRUS
GREECE
ROMANIA
RUSSIA
UKRAINE
BULGARIA
LITHUANIA
BELARUS*
FINLAND
MOLDOVA
LATVIA
GMT+3 Hour
RUSSIA*
The countries marked with * do not
observe Daylight Saving Time
iT500BM Installer Manual 21
iT500BM Installer Resized 003_Layout 1 13/11/2013 09:32 Page 22
With DST (daylight saving time) ON will automatically
change your time from summer to winter.
On is default
OR
10. Pairing the iT500 with boiler modules
22 iT500BM Installer Manual
iT500BM Installer Resized 003_Layout 1 13/11/2013 09:32 Page 23
10. Pairing your RXVBC605
2
1
Ensure the switch on the RF integral boiler
module is in the AUTO
3
Gently press and hold the SYNC button with a blunt
object. After 3 seconds the Boiler Control LED will
flash once every second to indicate it is ready to pair
and ready to receive a signal from the thermostat*.
4
+
iT500BM Installer Manual 23
iT500BM Installer Resized 003_Layout 1 13/11/2013 09:32 Page 24
10. Pairing your RXVBC605
i
5
When the RXVBC605 Receiver and the iT500
Thermostat have paired then the LED on the
RXVBC605 will go out. Press
OR
to
return to the home screen.
10. User controls for your RXVBC605
USER CONTROLS
Integral RF Boiler Control
A. LED This will be on when the thermostat is
demanding heat.
B. Mode Switch
ON – Boiler will be on continuous
AUTO – will follow instructions from the thermostat
OFF – Boiler is off
C. SYNC Button - This is used only for pairing the
RF communications.
24 iT500BM Installer Manual
6
iT500BM Installer Resized 003_Layout 1 13/11/2013 09:32 Page 25
10. Pairing your RXWBC605
2
1
Ensure the switch on the RF integral boiler
module is in the AUTO
3
SYNC Button
Gently press and hold the SYNC button with a blunt
object. After 3 seconds the Boiler Control LED will
flash once every second to indicate it is ready to pair
and ready to receive a signal from the thermostat*.
4
+
iT500BM Installer Manual 25
iT500BM Installer Resized 003_Layout 1 13/11/2013 09:32 Page 26
10. Pairing your RXWBC605
i
5
When the RXWBC605 Receiver and the iT500
Thermostat have paired then the LED on the
RXWBC605 will go out. Press
OR
to
return to the home screen.
10. User controls for your RXWBC605
USER CONTROLS
Integral RF Boiler Control
A. LED - This LED will be on when
the thermostat is demanding heat.
B. Mode Switch ON – Boiler will be on
continuous AUTO – will follow time
and temperature program in the
transmitter OFF – Boiler is off.
C. SYNC Button - This is used only for
pairing the RF communications.
26 iT500BM Installer Manual
6
iT500BM Installer Resized 003_Layout 1 13/11/2013 09:32 Page 27
10. Pairing your RXBC605
2
1
MANUAL
SYNC Button
AUTO
Ensure the switch on the RF integral boiler
module is in the AUTO
3
Gently press and hold the SYNC button with a blunt
object. After 3 seconds the Boiler Control LED will
flash once every second to indicate it is ready to pair
and ready to receive a signal from the thermostat*.
4
+
iT500BM Installer Manual 27
iT500BM Installer Resized 003_Layout 1 13/11/2013 09:32 Page 28
10. Pairing your RXBC605
5
i
When the RXBC605 Receiver and the iT500
Thermostat have paired then the LED on the
RXBC605 will go out. Press
OR
to
return to the home screen.
28 iT500BM Installer Manual
iT500BM Installer Resized 003_Layout 1 13/11/2013 09:32 Page 29
11. Registering and operating your iT500 online
1
© Salus Controls 2012
Privacy Policy
Disclaimer
Site Map
Go to the SALUS controls website. www.salus-controls.com and select your relevant country
2
© Salus Controls 2012
Privacy Policy
Disclaimer
Site Map
Click on the register iT500 icon on the left hand side of your country’s website
iT500BM Installer Manual 29
iT500BM Installer Resized 003_Layout 1 13/11/2013 09:32 Page 30
11. Registering and operating your iT500 online
3
© Salus Controls 2012
Privacy Policy
Disclaimer
Site Map
Disclaimer
Site Map
Click on REGISTER
4
© Salus Controls 2012
Privacy Policy
Fill in the online form and click REGISTER
30 iT500BM Installer Manual
iT500BM Installer Resized 003_Layout 1 13/11/2013 09:33 Page 31
11. Registering and operating your iT500 online
5
© Salus Controls 2012
Privacy Policy
Disclaimer
Site Map
The above screen will show and a confirmation email will be sent to you
6
You will receive a confirmation email. Click on the link to complete your registration
7
© Salus Controls 2012
Privacy Policy
Disclaimer
Site Map
Now use your username and password to log in
iT500BM Installer Manual 31
iT500BM Installer Resized 003_Layout 1 13/11/2013 09:33 Page 32
11. Registering and operating your iT500 online
8
© Salus Controls 2012
Privacy Policy
Disclaimer
Site Map
Enter the iT500 STA number (Please refer to page 8). Then press REGISTER
9
© Salus Controls 2012
Privacy Policy
Disclaimer
Site Map
Your iT500 will appear as above and is now ready to be controlled or
viewed via your PC or Smartphone. Just click on the iT500 icon on your PC
32 iT500BM Installer Manual
iT500BM Installer Resized 003_Layout 1 13/11/2013 09:33 Page 33
12. Download Smartphone App
Once you have registered your iT500 online you can also download the smartphone App from the iPhone App
Store or the Android App Store depending on which kind of Smartphone you are using. Find the iT500 App on
the App Store and click download. The App will automatically download to your Smartphone, and once
downloaded you can begin controlling your iT500 Thermostat.
www.salus-controls.com
Go to the salus-controls.com website.
Click on the relevant App Store Icon.
Find the SALUS iT500 App and click download.
iT500BM Installer Manual 33
iT500BM Installer Resized 003_Layout 1 13/11/2013 09:33 Page 34
13. Adding or renaming the iT500 in your device list
1
2
Enter your user ID and
password. Press
4
3
When you first open the iT500
App your iT500 will appear in
the device list and you can
begin controlling it with your
Smartphone.
If you add more than 1 iT500
to your device list, you may
wish to rename the iT500 to
“DOWNSTAIRS” for example.
Click on
and enter
a new name.
i
For full information on PC and Smartphone
operation please refer to the user manual.
If you forget your password,
follow the on screen instructions.
34 iT500BM Installer Manual
iT500BM Installer Resized 003_Layout 1 13/11/2013 09:33 Page 35
14. Warranty
SALUS Controls warrants that this product will be free from any defect in materials or
workmanship, and shall perform in accordance with its specification, for a period of two
years from the date of installation. SALUS Controls sole liability for breach of this warranty
will be (at its option) to repair or replace the defective product.
Customer Name: ................................................................................................
Customer Address: ..............................................................................................
.......................................................................... Post Code: ...............................
Tel No: ......................................... Email: ...........................................................
Engineers Company: ..........................................................................................
Tel No: ......................................... Email: ...........................................................
Installation Date: ................................................................................................
Engineers Name: ...............................................................................................
Engineers Signature: .........................................................................................
iT500BM Installer Manual 35
iT500BM Installer Resized 003_Layout 1 13/11/2013 09:33 Page 36
SALUS Controls plc
SALUS House
Dodworth Business Park South,
Whinby Road,
Dodworth, Barnsley S75 3SP
UK.
SALES:
T: +44 (0) 1226 323961
E: [email protected]
TECHNICAL: T: +44 (0) 1226 323961
E: [email protected]
www.salus-controls.com
SALUS Controls is a member of the Computime Group
Maintaining a policy of continuous product development SALUS
Controls plc reserve the right to change specification, design and
materials of products listed in this brochure without prior notice.
Issue Date: Nov 2013
00086/2