1
_________________________
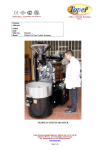
TKMSX 1 CAFEMINO ELECTRIC COFFEE
ROASTING MACHINE
USER MANUAL
_________________________
Attention: Any wrong assembly may cause service and material damage, injury or risk of death.
Please make sure you do have a deep consideration by looking at this user manual.
PLEASE READ CAREFULLY THIS USER MANUAL!
Dear customer we do suggest you to read all the articles in this user manual about our Machine
which is built up with the latest technology for your current use efficiently. For this reason we
suggest you to read all these details which is written in this Manual from the beginning to the
end step by step and please keep it in a safe please where you can reach easily.
This User Manual;
•
will help you to install your machine rapidly in a safe way.
•
Please read this manual carefully before you start up the machine.
•
Please keep this user manual in a safe place where you can reach it easily.
Rev. Date: 21.05 2011
2
_________________________
CONTENTS
1) DEFINITION OF THE MACHINE AND SPECIFICATIONS_______________________4
• General View and Definitons___________________________________________4
• Current Parts of the Machine ___________________________________________4
• Technical Specifications _______________________________________________8
2) WARNINGS______________________________________________________________8
• Transportation of the Machine _____________________________________________8
• Safety for Electricity Usage________________________________________________9
• Energy Saving _________________________________________________________10
• Some Important Notes __________________________________________________10
3) INSTALLATION_________________________________________________________10
• General Information _________________________________________________10
• Electrical Connections________________________________________________10
• Mounting the Parts __________________________________________________11
4) MACHINE UTILIZATION ________________________________________________13
• Switching On the Machine _______________________________________________13
• Switching Off the Machine _______________________________________________13
• Some small details that you should know for roasting good coffee ________________13
• Coffee Roasting Values__________________________________________________17
• If your machine does not start up __________________________________________18
5) MAINTANANCE OF THE MACHINE _______________________________________19
• Periodical Maintenance __________________________________________________19
• Cleaning the Chaff Collector______________________________________________20
• Cleaning of Cooling Tray________________________________________________21
• Cleaning the exhaust fan_________________________________________________21
• Sampling Window Cleaning______________________________________________22
• Cleaning of Cooling Tray Dust Collector____________________________________22
• Checking the burners____________________________________________________24
• Drum Adjustment______________________________________________________24
• Lubrication of the front and the rear part of the Drum__________________________25
• Mixer safety adjustment__________________________________________________27
• Lubricating of Reducer__________________________________________________28
6) THINGS TO DO IN EMERGENCIES_________________________________________28
7) DISPOSAL OF THE MACHINE______________________________________________29
8) SPARE PART LIST________________________________________________________29
Warranty Certificate _______________________________________________________30
Service__________________________________________________________________31
_________________________
1. DEFINITION OF THE MACHINE AND SPECIFICATIONS
General View and Definitions
Green Bean
Loading Hopper
Chaff Collector
Control Unit
Roasted Bean
Discharging Valve
Cooling
Mixer
Roasting Drum
Figure 1
Roasted and
Cooled Bean
Discharging
Valve
Current Parts of the Machine
You can roast 1 kg green coffee beans at one batch with our durable Gas Roasting
machine which we built it up with our fifty years old experiences currently. During your
roasting you can use cooling mixer at the same time as well. This machine is a unique
one for roasting any type of coffee with using a gas source.
4
_________________________
3
14
9
18
6
7
8
5
15
1
17
Figure 2
16
_________________________
12
13
2
10
4
13
10
11
Figure 3
6
_________________________
Current Parts of the Machine
1- ELECTRICAL CONTROL PANEL: It’s used fo controlling all the electronical
components by managing this electrical panel.
2- CHAFF COLLECTOR GATE VALVE : It’s used for cleaning inside the Chaff
Collector.
3- GREEN BEAN HOPPER : It’s used for feeding green beans to send them all from top
of the Roaster on top inside through Roaster Drum.
4- CHAF COLLECTOR : It helps to collect all the dusts and chaffs which are arised
during roasting progress from inside the Drum and all these materials preserved inside
this Chaff Collector without sending any of them to outside by exit pipes.
5- BURNER: It’s heating source for roasting beans which gives enough heating to roast
coffee beans.
6- THERMOCOUPLE: It helps to measure current drum temperature.
7- SAMPLER SPOON: It’s used for checking the roasting results during coffee roasting
progress by taking some sample beans from inside the drum.
8- VIEWING WINDOW : It’s used for checking the roasting results during coffee
roasting progress by having a look from the front of the drum.
9- GREEN BEAN INLET VALVE: It’s the mechanism which helps you to let the green
beans sent from Hopper on top through inside the drum.
10- COOLING MIXER: It’s the are which is used for roasted bean cooling. In this process
also chaff and dust will be removed and cleaned from roasted beans.
11- COOLING MIXER LID: This Lid is used for cleaning inside the Mixer.
12- EXHAUST EXIT PIPE: This is the pipe which connects Exhaust and Chaff Collector.
13- DRUM DISCHARGING VALVE: It helps to discharge roasted beans from drum
inside to Cooling Mixer.
14- EXHAUST VALVE: It helps to adjust current suction of the Blower. You can heat the
drum up easier if you switch this valve off completely. Additionally you can get
different flavors if you switch it off like 2 minutes before you switch of the Burner for
discharging the beans.
15- DIGITAL THERMOSTAT: It’s used for arranging current temperature for
machine.This is the electronical component which checks the current temperature
accordingly and keeps it at the same set value upon your request.
16- ON / OFF BUTONS ON CONTROL PANEL: They are used for switching on / off
mode for the Motors and Burner which is in use on the main system.
17- COOLING VALFE: It helps to control suction process during cooling progress on
mixer.
18- LAMP: It helps you to check the real color of the beans while checking with the sampler
spoon
_________________________
Technical Specifications
TYPE
Drum Capacity
Capacity per hour
Weight
Width
Length
Height
Heating Capacity
Heating Source
Voltage
Roasting Time
•
•
•
•
•
•
•
•
TKMSX- 1E ( Cafemino)
1 kg Green Coffee Beans
6 kg/hour middle roast - 4 kg/hour dark roast
80 kg
103 cm
59 cm
81 cm
16.500 BTU ( 4.800 kw )
Elektrik
Options:
(100/110/208/220/380 Volt, 50-60 HZ )
10 minutes for Middle Roast
15 minutes for Dark Roast
Table 1
2- WARNINGS
Transportation of the Machine
Please take a careful consideration for transportation of the machine which is already
defined on this User Manual.
Protect the machine from any external impact risk during transporting.
Check the machine after you unpack it for the first time and please do not run the
machine if you really find any defected area or part on the machine.
Inform the Manufacturer or responsible service during the first run of the machine.
Put the Machine on a flat surface after you unpack it.
Be sure that the Machine has to be put on a flat surface which does not take any
downthrow risk by fault for any hit or impact
Do not put the machine on a place which contains high rate humidity or wet.
Please ensure that the location has not any humidity in this area even The Machine is still
inside the pack which stays without unpacking.
•
Figure 4
Please use the areas A and B for tranposting the Machine and make sure that you
are using a Forklift for handling.
8
_________________________
•
•
•
•
•
•
Safety for Electricity Usage
Please make sure that you are having a good conditioned or renewed electrical
infrastructure before you start to use the Machine. This is very important for you to use
with the machine efficiently and safely.
Take these steps in order during your electrical system configurations with the machine:
If there is a 3 Phase industrial electricity source at your premise, check first of all motor
rotations if they rotate at the same arrow positioning which is defined near by the motor
of your machine. This is the most important control before you run the machine.
You should set up and make sure that your electrical infrastructure for Ground (Earth)
plug is established properly at your premise before you run the machine.
Cable cross-section has to be like defined below for the most suitable running of your
machine:
Minimum requirement for 220 volt electricity is 2*2,5 mm
Minimum requirement for 380 volt electricity is 3*2,5 mm
You should interfere by a dry type fire extinguisher in case of any fire risk on the
Electrical Control Panel
You should first cut off your incoming electricity from main switch at your premise in
case of any fault in your machine’s electrical system and contact with Authorized Toper
Service for maintenance.
This machine is equipped with triple lead terminal. For this reason you should use a
triple lead electrical plug (Neutral, Phase and Earth included) for your own safety.
Please do not cut or remove your Earth cable from the plug.
Please also do not put this machine on / underneath any overhead unguarded fire risk
surfaces
•
•
•
Figure 5
If the ground connection is insufficient, please make ground connection on the spot that
is shown on the panel as can be seen in the above Picture.
Energy Saving
Please start up your machine when you load your Green Bean Hopper fully.
Switch off the current gas valve when you finished roasting.
_________________________
Some important Notes
• Please make sure that current Chimney pipe equipment is completely done before you
start using the machine.
• Please note that there will not be any air on the atmosphere when you start up running
the machine because of Exhaust Suction Fan runs immediately after you run up the
machine which will be sucking the air in the room after a short while completely if the
room is covered and closed well.
• Please make sure before you start to make any maintenance or cleaning progress for your
machine, all the electricity connection and main switches have to be changed into OFF
mode to protect yourself from any electric shock risk.
• Please ask for an Authorized Service in case of any fault. You should not interfere on
your own for any fault on the machine to be checked.
Basic interferences for the End Users are listed at the end of this User Manual with details.
3- INSTALLATION
General Information
Please read all these articles carefully from the beginning to the end before you start
up using the Machine. Installation has to be done by helping an Expert in this field. Please
follow the instructions step by step for your own safety in use and for warranty period
availability as well.
•
•
•
•
•
•
•
Electrical Connections
Please ask for some responsible technicians for any of electrical components you have
with this machine in case of any needs.
Please check the main electrical line if it is ok for using the Machine first. There are
many different type electrical sources which run with in different voltages and Hz like
100/110/208/220/380 volt, 50-60 Hz and Single – Three Phase options. Toper exports in
124 different countries all around the World. For this reason when Toper receives a new
request from a customer than we provide suitable electrical connection components for
the related market / country which mean machine’s electrical components will be
manufactured properly according to customer preferences. Please check your machine’s
electrical specifications and connect the plugs and components properly.
Total power of the machine is 5500 W. So it is required that electrical connections of the
building should be suitable for this power.
Also the distance between the electrical panel which is located at the entrance of the
building and the machine should be taken into consideration as it may cause some
voltage loss. The diameter of the cable should be at least 4mm2.
Device should be connected 32 Amper fuse.
When the device is operating do not turn on any machine at the same time if it is bigger
than 1000 watt and if they are using the same fuse.
Responsibility of your building's electrical installations belongs to customer.
10
_________________________
Mounting the Parts
Toper sends all TKMSX 1 models mounted and ready to use. You should only connect
gas pipe line and exit chimney pipes those are all you need to do. Please do not forget that you
should complete this step by a helping of an Expert in this field.
Figure 6
Toper suggests you to use elliptic pipes for all corner joint pipe connections like
mentioned on Figure 6.
Figure 7
Please cover and isolate all the connection points with a fireproof aluminum band.
Some Special Notes for Installation of the Machine
• Please get some support from Service Department for replacing a new Gas Type
when you change it.
• Current pipe connections have to be suitable for main pressure rules.
• Exit Pipe on the roof has not be covered with any materials and it has to be
protected from any possibility of closing risk like raining, snowing, birds or any
foreign materials which can cover it. This may affect current suction badly.
• We suggest you to cover exit pipe mouth with a wire fence which will not cover
it completely.
_________________________
•
•
•
All the Chimney Pipes have to be isolated.
Current pipes before exit chimney pipe have to be arranged and all they have to
be smaller sized than main last exit chimney pipe.
Chimney pipe should be built in a suitable size for a good suction. If it is built up
taller than 15 – 20 meters height than it’s suggested you to use an Exit Chimney
Fan for a good suction.
Figure 8
Safe Working Area
Please take it into your consideration for the area of installation of your machine has to
be arranged in a safe working area
12
_________________________
4- MACHINE UTILIZATION
Attention: Please make additional notes for each of your new roasting with your current
roasting experience and all data like roasting time, roasting type, green coffee bean type and etc.
These notes will help you to create new coffee receipts easily with different roasting results.
For Switching On the machine
•
•
•
•
•
Change the main switch into 1 position from current 0 position.
Push the green light buttons for running Drum and Exhaust Motors from Control Panel.
Switch the Burner On.
Set up the desired temperature level according to your needs.
Load the green beans inside the drum when the machine is ready as you set it up. But
don’t forget sacks yarn in green coffee.
• For example if you buy TKMSX 1 Roaster you should load 1 kg green coffee beans for
optimum roasting results. You can follow and check your roasting progress from
Viewing Window in front of the Roaster.
• After you complete your roasting progress you should open Drum Gate first you can lift
it up and push it to the left hand positioning which will be hanged on during this
discharging process. After you completely discharged roasted beans from inside the
drum you can pull the Drum Gate up a little bit and you will see when you leave it the
Gate will be closed.
• Keep the roasted beans cool on the Cooling Mixer (Cooler) in front of the roaster during
5 minutes period after you discharge it from inside the drum.
• Please make sure that you Cooler is On positioning and open the Cooling Valve during
this progress.
• If you want to do same progress again, you can start it running like mentioned on
previous articles in order step by step.
For Switching Off the machine
• Please change the position Burner Off with pushing Red Button for the Burner on the
Control Panel.
• Please do not switch off the Burner till the end of loading green beans progress and till
the end of current temperature will be down under 50 Celsius Degrees. Otherwise drum
material and around may damage in case one of these possibilities.
• Please switch off the Drum / Exhaust key switch.
• Switch off Main key switch.
• Clean inside the Chaff Collector completely.
Some small details that you should know for roasting good coffee:
•
•
•
•
Roasting Time may change upon the things listed below;
Type of the green coffee beans,
Humidity rate inside the beans,
Current temperature of the area which green beans are stored,
Desired flavor and color for the green beans when they roast.
_________________________
•
•
•
•
•
•
•
•
First batch at the beginning of the day may take some more time because of the
things listed below:
Current temperature of the room which you put the machine for roasting.
Machine is cold at the beginning and it will be reached desired set value after a while
inside room which is directly related with the current room temperature.
Roasting Coffee is a process.
When you load green beans into drum, current temperature will be decreasing rapidly for
a while. It’s because of current humidity rate and current temperature on the green beans
you loaded. The drum temperature will be starting up increasing once again in short
while.
Please do not forget that when you roast 1 kg green bean, the result may not be 1 kg
roasted beans because of humidity ratio and coffee volume changed which caused by
heating them up and they have already extracted in this roasting process.
There are too many unbelievable changes during coffee roasting process. Roasted beans
volume is changed as before they were green beans with a humidity ratio for this reason
weight is changing during this roasting process. Coffee beans lose weight when you roast
them even the volume will be bigger in roasted results than green beans. For that reason
you should take this issue into a good planning consideration carefully before you
arrange your green and roasted bean storage area.
During the first couple of minutes of Roasting, green bean color changes into Yellow
which is also the process of chaffs like shell skin on the green beans are separated from
inside the beans.
All these chaffs are sucked and transferred into Chaff Collector automatically by helping
of suction fan on the exhaust motor. After that color of the coffee bean starts to change
into brown coffee color.
You can follow this progress by checking it from Viewing Window in front.
Figure 9
You can check the color and quality of roasting beans during roasting process by using
Sampler Spoon which stays in front of the Roaster.
14
_________________________
Heating Buzzer
Temperature Digital
Display Control Unit
For Thermocouple
Burner Warning Light
Green Switching On
Buttons
Main Switch
Red Switching Off
Buttons
Emergency Stop Button
Control Panel Lock
Figure 10
General view of Control Panel
Main Switch: This is main switch for Control Panel. It’s used for making on / off the Machine.
Emergency Stop Button: When you push this button in case of an emergency all the activities
will be stopped automatically on time.
Red Switching Off Buttons: They are used for switching off Drum, Exhaust, Burner and
Cooler in order when you push any of them you would like to stop.
Green Switching On Buttons: They are used for switching on Drum, Exhaust, Burner and
Cooler in order when you push any of them you would like to start.
Digital Display Control Unit For Thermocouple: It’s used to set up a temperature which is
also try to keep it on the same level as you programmed.
Heating Buzzer: It gives you beeping alert when the temperature reaches the value which you
set up.
Burner Warning Light: When the burner is on mode this light shows that the burner has the
flame and running actively.
_________________________
4
6
Fill in the hopper with
green beans until it is
full
5
Adjust the
roasting color as
you check the
beans with
sampler spoon
during roasting.
When the drum is
heated enough lift the
handle upward and get
the beans inside the
drum.
At the end of the
roasting open the
drum gate by lifting
the handle up and
get the beans inside
the cooling tray
7
Adjust the drum
temperature
3
2
8
Get the roasted and
cooled beans out of
the cooling tray
1
Switch on
the main
power
1) As a first step push DRUMEXHAUST button.
2)Push the Burner button.
3) 10 seconds before opening
the drum gate, turn on MIXER
and COOLER.
Figure 11
16
_________________________
Figure 12
Adjusting temperature from the control unit.
Coffee Roasting Values
Roasting Levels
Time
Temperature
Specification
Light roasting
Lightest roasting
( Table 3, figure 4)
10 Mn
180°C190°C
High acidity, Light Brown color and little taste
Cinnamon roast
Light roast
( Table 3, figure 7)
11 Mn
180°C190°C
Partial acidity,Cinnamon color, American Type, Turkish Coffee
Medium roasting
Light dark roasting
( Table 3, figure 8)
12 Mn
180°C190°C
Acid and heavy taste, nut color, American type
High roast
Light dark roasting
( Table 3, figure 10)
13 Mn
180°C190°C
More powerful acidity then bitter
City roasting
Medium-medium
( Table 3, figure 12)
14 Mn
180°C190°C
Standart taste. An optimal taste flovor from New York city.
Full city roast
Medium Dark roasting
( Table 3, figure 14)
14 Mn
180°C190°C
More Powerfull bitter then acidity. Like ice tea …
French roast
Dark roasting
( Table 3, figure 16)
15 Mn
180°C190°C
Powerfull, bitter, reach and uniqe taste. French Style, Europe
Coffee, iced coffee
Table 2
_________________________
Table 3
Note: Values in this table are tested in current ambient conditions and by using Brazilia
Riominas coffee.
If your machine does not start up
PROBLEM
Friction Sound coming from
Possible Reasons
Possible Solutions
Drum adjustment needed
Adjust the drum
Bearing needs to be greased
Grease the bearings
KLAVUZDAKİ KAZAN AYARLAMA KISMINA
BAKINIZ.
Green Beans coming out of
drum
Drum adjustment needed
Roasted beans in different
colors
2 minutes before getting the beans out, turn of
Roasting system may not be applied well
Different type of green coffee inside the beans
Roasting time is too long
Adjust the drum. Please refer to the related
section of the user manual.
the burner and go on roasting.
•
Roast different types seperately
Green Coffee inlet hopper left open
Cloese the inlet hopper
Voltage is low
Ensure the enough voltage
Exhaust Valfe adjustment needed
Adjust the exhaust air valve
Exhaust fan is dirty and blocked
Clean the exhaust fan
Chimney pipes are dirty and blocked
Clean inside the pipes
Mixer not turning.
Mixer bolts may have been loosen.
Screw well the bolts.
Roasted beans left inside the
Electricity was cut of and the machine is in warning
drum
position.
Turn the machine to “normal” from the warning
18
_________________________
Failure or problem of the electricity of the machines
Check the electrical system
Check the voltage
If the contacter and the thermic is off turn it to on
Drum Motor not turning
Drum motor on failure or warning position
position.
If still does not work please call the technical
Exhaust motor not turning
Exhaust motor on failure or warning position.
Mixer motor nor turning
Mixer motor on failure or warning position
service.
Low Voltage problem
Chaff Collector gate burnt
Chaff collector and pipes were not cleaned on time
Clean inside the chaff collecter every 6 roasting
Sieves of the cooling tray is dirty.
Clean the sieves of the cooling tray
Exhaust fan is dirty
Clean the exhaust fan
Chimney pipes are dirty
Clean the chimney pipes
Cooling time for roasted
beans is long
Table 4
5- MAINTANANCE OF THE MACHINE
•
•
•
•
•
•
Maintanance of the machine should be done at leat once in a year. For this please call a
techinical service.
While cleaning the surface of the machine, it should be turned off.
Disconnect the electrical connection.
When a cleaning is needed, a fabric can be used with a little alcahol. Please ensure that
any health threating material should be avoided while cleaning such as diesel oil etc..
Even the surface of the machine should not be washed. Just use a a wet fabric. Dry it
very well.
If you want to roast different products please make some cleaning in order to prevent any
aroma, oil etc.. mixture.
If the damaged parts are not changed with the originals from the Producer, there is no
warranty issue any more.
_________________________
Periodical Maintanance
Chaff Collector
: every 5 roasting
Cooling tray
: every 500 hours
Exhaust Fan
: every 500 hours
Sampler Window
: every 500 hours
Cooling tray chaffcollector
: every 30 hours
Check burner
: every 30 hours
Check the drum adjustment
: every 30 hours
Grease the front and back side of the drum
: every 120 days
Cleaning the Chaff Collector:
Figure 13
To clean the chaff collector, open the handle under it As soon as you open it you will see the
chaffs falling downIt would be to your benefit to use a bag to collect the dust / Chaff.
20
_________________________
Cleaning of Cooling Tray
Figure 14
Use the special cleaning tool that has been sent with the machine, place it into the holes and
move it back and forth thus you will have the cooling tray and holes cleaned up.
Cleaning the exhaust fan
Figure 15
Remove the bolts holding the engine to the exhaust hood with the help of the key number 10
_________________________
Figure 16
Remove and clean all the internal parts of the fan as shown in the figure.
Sampling Window Cleaning
Figure 17
Remove the screws holding the Sampling window by using number 3 Allan Key.
22
_________________________
Figure 18
Clean the sampling window that you have taken out with a cloth
Cleaning of Cooling Tray Dust Collector
Figure 19
Open the door of the cooling tray pan and clean the dusts and chaffs that have been
accumalating with the help of a loth or vacuum cleaner.
_________________________
Drum Adjustment
Figure 20
Figure 21
Bearings that is show with number 1 is adjusted with the key that is shown by number 2 This
Adjustment should be done while the machine is warm. C. This temperature must be at least
150.To adjustt the drum, loosen counter nut with a suitable key. Then, make the adjustment by
turning the main bearing in the same style
If you rotate clockwise gap increases. If you turn the other way the gap is reduced. This gap
range should be 1 mm when the machine ishot.
24
_________________________
Lubrication of the front and the rear part of the Drum
Allen Key
Figure 22
Figure 23
In order to lubricate the drum back bearing, please remove the motor housing by using Allan
Key.Lubricate the point as shown in the figure with the oil pump.
Note: Fort his aplication please use Mobiltemp SHC 460 Special grease oil or like the sama
speficitaions.
Figure 24
The front of the drum adjustment cover should be lubricated as well with the oil pump
_________________________
Mixer safety adjustment;
In the middle of the mixer there is a safety system with clutch. This system works only when the
mixer faces with an obstruction. It prevents any possible damage to the mixer motor. So even
the motor goes on working mixer does not turn.
To re-set the safety system of the mixer:
1-Loosen the safety bold which is in the middle of the mixer.
1- Get this screw out and you will see the clutch bearing turning again.
3-Tighten the bold again.
Figure 25
Fgure 26
26
_________________________
Lubricating of Reducer
Drum reducer oil
Figure 27
Mixer reducer oil plugin
Figure 28
Tablo 6 ( Lubricating Table )
Lubricate the above shown lubrication points with the suitable grease / oil as shown in the table.
_________________________
6- THINGS TO DO IN EMERGENCIES
Using Emergency Stop buttom
Rotate into right (clock wise )
Figure 29
Figure 30
In order to avoid undesired situations during the usage, stop all process by pressing the Emergecny Stop
button which is on the control panel. In order to re-activate the machine (to change it normal position) turn
the button clock wise.
28
_________________________
7- DISPOSAL OF THE MACHINE
The machine that you have purchased will serve you for long years if you take
care of it. But like any of the material it has a life time. When the life time of the
machine ends you can make a good usage of it and make a benefit to the Country
Economy, Please contact with Recycling Companies.
8- SPARE PART LIST
Spare parts are avilable from the reseller or from the authorised agent or from the Toper Factory.
To order a spare unit you will just need to tell the part number and model name. Some of the
parts can be replaced by your own without presence of an expert. This parts will be delivered to
you with installation guide.
Product label is on the back
left side of the machine when
you look from the front.
Figure 31
_________________________
TOPER
KARAKUNDAKOĞLU DEĞ. MAK. SAN. VE TİC. LTD. ŞTİ.
Warranty Conditions:
1.
WARRANTY PERIOD IS ONE (1) YEAR STARTING FROM THE INVOICE DATE.
2. WARRANTY COVERS DEFECTED MACHINE AND PART PRODUCTION.
3.
WARRANTY DOES NOT COVER THE DEFECTS AND DAMAGES THAT OCCUR DURING THE
TRANSPORTATION, WRONG USAGE OF THE MACHINE, DEFECTS THAT OCCURS BECAUSE OF
INSUFFICIENT ELECTRIC CONNECTIONS.
4.
ANY FIXING OR PART REPLACING NOT DONE BY THE AUTHORISED SERVICE MAKES THE
WARRANTY INVALID..
5.
ANYD MODIFICATION & ALTERATION THAT IS DONE WITHOUT THE KNOWLEDGE AND
PERMISSION OF THE MANUFACTURER MAKES THE WARRANTY INVALID.
6.
TOPER (MANUFACTURER) DECIDES THE PLACE FOR FIXING THE UNIT.
7.
WARRANTY PRICE CANNOT EXCEED THE PRICE OF THE MACHINE..
8.
SERVICE PRICE, SPARE PARTS ARE ALL UNDER WARRANTY.
9-
THE DAYS THAT PASS DURING THE SERVICE ARE ADDED TO THE WARRANTY PERIOD.
MODEL
: TKMSX 1 ( CAFEMINO )
PURCHASER NAME AND ADDRESS
:
INVOICE DATE & NUMBER
:
CHASE / SERIAL NUMBER
: ( Please look at The Picture 31 )
30
_________________________
CONTACT FOR THE
SERVICE:
TOPER
KARAKUNDAKOĞLU DEĞİRMEN
SAN. VE TİC. LTD. ŞTİ
5912 SOKAK NO: 3 KARABAĞLAR İZMİR TÜRKİYE
TEL : + 90.232.254 01 21
FAX: + 90.232.237 21 27
www.toper.com