1
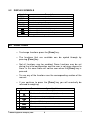
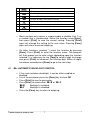
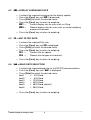
Adam Equipment
AELP
PALLET BEAMS SCALES
(P.N. 4327, Rev. A6, June 2005)
Software revision: LAT 504
© Adam Equipment Company 2005
© Adam Equipment Company 2005
CONTENTS
1.0
INTRODUCTION ........................................................................................................... 2
2.0
TECHNICAL SPECIFICATIONS ................................................................................... 3
3.0
UNPACKING THE SCALE ............................................................................................ 4
4.0
SETTING UP THE SCALE ............................................................................................ 4
5.0
KEYPAD AND DISPLAY ............................................................................................... 5
5.1
KEY DESCRIPTION .................................................................................................. 5
5.2
DISPLAY SYMBOLS.................................................................................................. 6
6.0
FUNCTIONS.................................................................................................................. 6
6.1
BL = AUTOMATIC BACKLIGHT CONTROL................................................................ 7
6.2
AVE = DISPLAY AVERAGING RATE .......................................................................... 8
FIL = ADC FILTER RATE ............................................................................................ 8
6.3
6.4
BOD = BAUD RATE SELECTION ................................................................................. 8
CONT = CONTINUOUS PRINTING ............................................................................... 9
6.5
6.6
PIECE = PARTS COUNTING........................................................................................ 9
STEPS = CHECK-WEIGHING FUNCTION (LOW-OK-HIGH) ..................................... 11
6.7
6.8
CALIBR = CALIBRATION ROUTINE .......................................................................... 12
REPL = RESULTS PRINTED AUTOMATICALLY OR MANUALLY ............................. 12
6.9
6.10 STAB = PRINT WHEN STABLE OR INSTANTANEOUS ............................................. 13
6.11 AUT = AUTOZERO FUNCTION ................................................................................. 13
6.12 T1 = AUTOMATIC POWER SWITCH OFF ................................................................ 14
6.13 TOP = HOLD MAXIMUM VALUE ................................................................................ 14
6.14 NE = WEIGH IN NEWTONS ...................................................................................... 14
6.15 SUPP = POWER SUPPLY VOLTAGE TO PCB .................................................................... 15
7.0
COMMUNICATION WITH A COMPUTER/PRINTER.................................................. 15
7.1
PARAMETER........................................................................................................... 15
7.2
CONNECTION......................................................................................................... 15
7.3
OUTPUT FORMAT .................................................................................................. 16
7.4
INPUT COMMANDS FORMAT ................................................................................ 16
© Adam Equipment Company 2005
1
1.0 INTRODUCTION
AELP Pallet Beam Scales come with the following standard features:
•
•
•
•
•
•
•
•
Lightweight for ease of handling
Supplied complete with the AE 106 Indicator in plastic housing
Precision load cells for accurate weighing results every time
5 weighing units for flexibility
Handles for portability
Low profile beams to allow easy weighing of pallets
2 beams per set
Mains adapter supplied as standard
© Adam Equipment Company 2005
2
2.0 TECHNICAL SPECIFICATIONS
Models
AELP 500
AELP 2000
Maximum Capacity
500 kg
Readability
200 g
500 g
200 g
500 g
200 g
500 g
200 g
1000 g
Up to 60,000 divisions
Full
Typically 3 seconds
Resolution
Repeatability
Linearity (±)
Internal counting resolution
Tare range
Stabilisation time
Units of measure
Kg, g, t or lb
RS-232 bi-directional Interface
Interface
Operating temperature
Power supply
Calibration
Display
0 to 40°C
10.5 VAC external adapter
6 x AA size Alkaline Dry-cell batteries are suggested
Push button calibration
16 mm LCD displays
1250 x 80 x 60 mm
Pan size
Net weight
Functions
Other features
© Adam Equipment Company 2005
2000 kg
28.3 kg
Averaging level, baud rate, print when
scale becomes stable or manually, print when
stable or at any time, auto-zero disable,
automatic power off, enable maximum value
hold, enable weighing in Newtons
Parts Counting and Check-weighing
3
3.0 UNPACKING THE SCALE
• Remove the 2 sets of pallet beams using the handles provided.
• Take care while removing the beams to avoid banging or injury.
• Remove the Indicator and the power supply adapter packed seperately.
• Place it on a levelled and firm floor.
• Position the beams side by side.
4.0 SETTING UP THE SCALE
• Plug in the Indicator into the socket provided at the back of the
pallet beam (the one having two sockets).
• Ensure both the beams are connected via the beam-to-beam
cable.
• Attach the Power Supply adapter to the Indicator and switch the
main supply to ON.
• The Indicator can also be operated by using 6 x AA size
batteries. (Alkaline batteries suggested).
• Read this User Manual before starting the weighing operation.
•
Place the pallets on the beams for weighing.
© Adam Equipment Company 2005
4
5.0 KEYPAD AND DISPLAY
5.1
KEY DESCRIPTION
[On/Off]
[Print]
[Func]
[Zero]
[Tare]
Turns the scale on or off
Initiates the RS-232 transmission
Sets functions
Sets the display to zero with no weight on the platform.
Sets the display to zero by storing the current weight in the tare memory
• Turn the scale on using the [On/Off] key. After the display is
zero, place an item to be weighed on the platform. The display
will show the weight. The unit will be grams or kilograms as set by
the supplier.
• To zero the display with no weight on the platform, press [Zero].
• If a container is placed on the platform press [Tare] to zero the
display. As material is added to the container only the weight of
the material will be displayed. If necessary press [Tare] again to
add more material if desired. Trying to tare a negative value will
give the error “- VAL”.
• If the weight on the platform exceeds the permissible range of the
[Zero] key (±4% of capacity) the message “VAL 4” will be shown
briefly. Either remove some weight or press [Tare] to zero the
display.
© Adam Equipment Company 2005
5
5.2
DISPLAY SYMBOLS
Symbol
Description
ZERO
STAB
PCS
kg or g or t
BAT-LO
TARE
Scale in auto zero range (indication = accurate zero)
Result is stable
Scale in parts counting mode
Scale in weighing mode
Batteries are weak, after 5 minutes the scale will turn off
Scale has been tared
When weight is above the High setpoint
When weight is between the setpoints
When weight is below the Low setpoint
During parts counting sample size is too small
- Lo -
6.0 FUNCTIONS
• To change functions press the [Func] key.
• The functions that are available can be cycled through by
pressing [Func] key.
• Not all functions may be enabled. Some functions may be set
during the initial configuration and the user is not given access to
them. In this case those will not be seen when the [Func] key is
pressed.
• To use any of the functions see the corresponding section of the
manual.
• If you continue to press the [Func] key you will eventually be
returned to weighing.
Function
1.
2.
3.
4.
5.
6.
bL
AVE
bod
FIL
cont
PIECE*
Functions Available
Description
Enables / disables the backlight (if used)
Changes averaging of weighing result
Changes baud rate for RS-232 transmission speed
Changes ADC filtering
Enables or disables continuous printing
Enters parts counting
© Adam Equipment Company 2005
6
7.
8.
9.
10.
11.
12.
13.
14.
15.
StEPS*
CALIbr
rEPL
StAB
Aut
t1
toP
nE
SuPP
Enters check-weighing
Calibration routine
Sets RS-232 to transmit automatically or manually
Sets the RS-232 to print only when stable or at any time
Enables/disables the autozero function
Enables/disables the automatic turn off
Enables/disables the maximum hold feature
Changes to measuring in Newtons
Displays the power supply voltage
• Most functions only require a simple enable or disable (0 or 1) or
a number that is incremented. Select the function using [Func],
then press [Print] to view the current setting. Pressing [Print]
again will change the setting to the next value. Pressing [Func]
again will return to normal weighing.
• On other functions (marked *) select the function by pressing
[Func]. Press [Print] to enter the function menu. The program
will then prompt you to enter values depending upon the function
selected. It is necessary to use [Tare] to select a digit to change
and press [Print] to increment the flashing digit. When all digits
have been entered press [Func] to go to the next step.
6.1
bL = AUTOMATIC BACKLIGHT CONTROL
• If the scale includes a backlight, it can be either enabled or
disabled.
• To set the parameter press the [Func] key to show “bL”
• Press [Print] to see the parameter.
• Press [Print] to select either “bL= 0” or “bL= 1”.
“bL= 0 “
Backlight is enabled.
“bL= 1”
Backlight is disabled.
• Press the [Func] key to return to weighing.
© Adam Equipment Company 2005
7
6.2
AVE = DISPLAY AVERAGING RATE
It selects the required averaging for the display update.
Press the [Func] key until AVE is displayed.
Press [Print] to select the desired value.
Press the [Func] key to return to weighing.
AVE 1 =
Fastest display rate for uses such as filling.
AVE 5 =
Slowest display rate for uses such as animal weighing
or poor environment.
• Press the [Func] key to return to weighing.
•
•
•
•
6.3
FIL = ADC FILTER RATE
•
•
•
•
It selects the required filter rate.
Press the [Func] key until FIL is displayed.
Press [Print] to select the desired value.
Press the [Func] key to return to weighing.
FIL 1 =
Fastest rate for speed.
FIL 4 =
Slowest rate for poor environment.
• Press the [Func] key to return to weighing.
6.4
bod = BAUD RATE SELECTION
• It selects the required baud rate for the RS-232 communications.
• Press the [Func] key until ”bod” is displayed.
• Press [Print] to select the desired value.
bod 1
= 300 Baud
bod 2
= 600 Baud
bod 3
= 1200 Baud
bod 4
= 2400 Baud
bod 5
= 4800 Baud (default)
bod 6
= 9600 Baud
• Press the [Func] key to return to weighing.
© Adam Equipment Company 2005
8
6.5
cont = CONTINUOUS PRINTING
This parameter is used to configure to print continuously whenever
there is any weight on the balance or only when [Print] is pressed.
• To set the parameter press the [Func] key to show “cont”
• Press [Print] to see the parameter.
• Press [Print] to select either “cont= 0” or “cont= 1”.
“cont= 0” Continuous output is disabled. Prints only when the
[Print] key is pressed.
“cont= 1” Continuous printing is enabled.
• Press the [Func] key to return to weighing.
6.6
PIECE = PARTS COUNTING
• Parts counting is used to display the number of items placed on
the balance after a sample of the items is used to calibrate the
balance.
• Place a container on the pan and press [Tare] to zero the display.
Place a quantity of items to be counted in the container. The
number of items is the sample size.
• To enter parts counting mode, press the [Func] key until ”PIECE” is
displayed.
• Press [Print] to enter parts counting mode. The sample size is
displayed. To select a different sample size use the [Tare] key to
select a digit and the [Print] key to increment the value. The
sample size can be set in the range of 1 to 100,000.
• When the desired sample size is shown, press the [Func] key.
• The display will show “LOAd”. If the sample is not already on the
pan, place it now.
• Press the [Func] key.
• The display will show the number of items in the sample. The
display may show “contr” briefly while it is computing the number
© Adam Equipment Company 2005
9
of parts. If more items are added or removed from the balance,
the display will show the new quantity.
Note that the display is limited to 6 digits, i.e. 999,999 pieces. If
the quantity on the scale exceeds 999,999 the left most digits and
any leading zeros will be lost, for example 1,002,305 will display
as 2,305 pieces.
• When in use the balance can be tared normally to eliminate the
package weight from the gross weight.
• To return to weighing, press the [Func] key to select ”PIECE” and
then press [Tare].
Counting Accuracy
• The best accuracy is obtained with larger sample sizes. It is
possible to use a smaller sample size to determine a larger
sample accurately. This larger sample can then be used for
counting a greater number of parts.
• If the items to be counted are not uniform, the results may be
inaccurate.
• Care is needed not to exceed the capacity of the balance. The
display will show "FULL-2" if the capacity is exceeded.
© Adam Equipment Company 2005
10
6.7
StEPS = CHECK-WEIGHING FUNCTION (LOW-OK-HIGH)
• The check-weighing function will show a symbol on the left side of
the display to indicate if the current weight displayed is:
- above the High setpoint
- between the setpoints
- below the Low setpoint
• To enable the check-weighing function and set the value of the
setpoints press the [Func] key until “StEPS” is displayed.
• Press [Print] to enter the function. The display will then show all
zeros and the left most digit will be flashing. The LOW
symbol will be on.
• Use the [Tare] key to set the digit to be changed and the [Print]
key to set the value for the low setpoint. When the value is correct
press [Func] to go to the high setpoint.
• Set the high setpoint and press [Func] to return to weighing.
• The display will indicate when the weight shown is below the low
setpoint, between the setpoints or above the high setpoint.
• To disable the function press the [Func] key until either “PIECE” or
“StEPS” is displayed and then press the [Tare] key.
© Adam Equipment Company 2005
11
6.8
CALIbr = CALIBRATION ROUTINE
• To set the parameter press the [Func] key to show “CALIbr”.
• Remove all weight from the platform.
• Press [Print] and the display will show “noCAL” while the scale is
measuring the initial mass (pan must be empty).
• Then the display will show “LOAd xxx” where xxx is the required
calibration weight.
• Place the weight on the platform then press [Print] – display will
show “CAL” and then (after calibration) “unLoAd”.
• Remove the calibration weight – the scale will return to normal
weighing.
6.9
rePL = RESULTS PRINTED AUTOMATICALLY OR MANUALLY
• This parameter controls the operation of the RS-232 interface.
• The balance can be configured to either print automatically when
the balance becomes stable or only when [Print] is pressed.
• To set the parameter press the [Func] key to show “rePL”.
• Press [Print] to see the parameter.
• Press [Print] to select either “rePL= 0” or “rePL= 1”.
“rePL= 0” Manual output when [Print] key is pressed.
“rePL= 1”
Automatically print when the results are stable.
• Press the [Func] key to return to weighing.
© Adam Equipment Company 2005
12
6.10 StAb = PRINT WHEN STABLE or INSTANTANEOUS
• When the scale is set to manual print (rePL = 0), the balance can
be set to print either immediately after the [Print] key is pressed
or only after the balance is stable. The function can also be
enabled from the RS-232 interface. See Section 3:
Communication with a Computer or Printer.
• To set the parameter press the [Func] key to show “StAb”.
• Press the [Print] key to see the parameter. Press [Print] to select
either “StAb= 0” or “StAb= 1”.
“StAb= 0” Sends weight results only when the balance is stable.
“StAb= 1” Sends the results immediately after [Print] is pressed.
NOTE: If “StAb= 0” then “rePL” should be set to “rePL= 0” also.
• Press the [Func] key to return to weighing.
6.11 Aut = AUTOZERO FUNCTION
The scale has an autozero function to automatically rezero the balance. This
function will reset the zero if it should drift from the initial zero condition. The
autozero function is normally enabled to ensure a stable zero condition.
However some operations may be affected by the autozero function.
Examples are filling applications where the material flows very slowly and
evaporation, if the user tares the balance with the sample on the pan and is
looking for the amount of material that might evaporate. In these conditions,
the autozero may be disabled.
• To set the parameter press the [Func] key to show ZERO.
• Press [Print] to see the parameter.
• Press [Print] to select either “Aut = 0” or “Aut = 1”.
“Aut = 0”
“Aut = 1”
Autozero function is enabled.
Autozero function is disabled.
• Press the [Func] key to return to weighing.
© Adam Equipment Company 2005
13
6.12 t1 = AUTOMATIC POWER SWITCH OFF
The scale includes an internal battery. The typical operation time using only
the battery is 50 hours if one load cell is used and about 12 hours if four are
used. The scale includes the “t1” function to turn the power off after 5 minutes
if it is not being used. This function can be disabled if the balance is powered
from the main power supply or if the disruption of power affect the weighing
procedure.
• To set the parameter press the [Func] key to show “t1”
• Press [Print] to see the parameter. Press [Print] to select either
“t1=0” or “t1=1”.
“t1= 0” Automatic switch off is enabled.
“t1= 1” Automatic switch off is disabled.
• Press the [Func] key to return to weighing.
6.13 toP = HOLD MAXIMUM VALUE
The display will hold the maximum value weight placed on the pan until the
balance is tared. When a weight is placed on the pan the display will hold the
highest reading until the operator presses [Zero] to reset the display to zero.
When the function is enabled it will show a symbol
at the second digit.
• To set the parameter press the [Func] key to show “toP”.
• Press [Print] to see the current parameter.
• Press [Print] to select either “toP = 0” or “toP = 1”.
“toP = 0”
Hold function is disabled.
“toP = 1”
Hold function is enabled.
• Press the [Func] key to return to weighing.
6.14 nE = WEIGH IN NEWTONS
The balance can display the unknown weight in Newtons. When Newtons are
selected the weight legend on the display will be turned off and a dash
symbol
will be turned on underneath the 2nd digit from the left.
• To set the parameter press the [Func] key to show “nE”.
• Press [Print] to see the current parameter.
• Press [Print] to select either “nE= 0” or “nE= 1”.
“nE= 0”
Weigh in kilograms.
“nE= 1”
Weigh in Newtons.
• Press the [Func] key to return to weighing.
© Adam Equipment Company 2005
14
6.15 SuPP = Power supply voltage to PCB
•
•
•
•
To set the parameter press the [Func] key to show “SuPP”.
Press [Print] to see the parameter.
The display will show the current voltage to the PCB.
Press any key to return to normal weighing.
7.0 COMMUNICATION WITH A COMPUTER/PRINTER
The following applies only to scales supplied with an RS-232 interface.
• Press the [Print] key to transmit weighing data (value and unit of
mass) to a computer or printer.
• The AE 106 indicator can be connected to a printer for printing
the results of the weighing or to a computer to either display or
control the balance through the RS-232 interface. The commands
can tare the balance or request the weight be printed.
7.1
PARAMETER
The interface parameters are:
300 - 9600 Baud as selected, see section 2.3, default 4800 baud
8 data bit
No parity
1 stop bit
7.2
CONNECTION
Depending upon case style the output is either using a 9 pin D-subminiature
connector or a 6 pin Audio Connector.
If the output connector is a 9 pin D-subminiature plug. The output pins are:
Pin 2 Input
Pin 3 Output
Pin 5 Signal Ground
It is necessary to jumper pin 7 to pin 8 to enable the RS-232 interface
circuits. Do not connect these pins to the handshaking pins on the interfaced
device.
© Adam Equipment Company 2005
15
If the output connector is a 6 pin audio connector. The output pins are:
Pin 2 Input
Pin 3 Output
Pin 5 Signal Ground
It is necessary to jumper pin 1 to pin 6 to enable the RS-232 interface
circuits. Do not connect these pins to the handshaking pins on the interfaced
device.
7.3
OUTPUT FORMAT
The balance will output the weight with the units of measure on one line. The
output is initiated when the [Print] key is pressed or a command is received
over the RS-232 interface.
±w w w • w w w _ _ u u u <cr><lf>
Sign, weight
unit of weight
Units of weight used are:
kg= kilogram, t= tonne, g= gram, lb= Pounds, pcs= parts.
7.4
INPUT COMMANDS FORMAT
The balance can be controlled with the following commands. The commands
must be sent in upper case letters, i.e. “T” not “t”. The balance will send the
message “ES” if it does not understand a command that is sent to it.
T<cr><lf>
Z<cr><lf>
SI<cr><lf>
The uppercase T will tare the balance. This is the same as pressing [Tare].
The uppercase Z will zero the balance. This is the same as pressing [Zero].
The SI command will cause the weight to be transmitted over the RS-232
interface. This is the same as pressing the [Print] key.
S0<cr><lf> The S0 (S-zero not S “oh”) command will cause the weight to be transmitted
over the RS-232 interface automatically when the results are stable. This is
same as setting the parameter “rEPL = 1”.
S1<cr><lf> The S1 command will cause the weight to be transmitted over the RS-232
interface manually by pressing [Print] or by sending the SI command.
© Adam Equipment Company 2005
16
Manufacturer’s Declaration of Conformity
This product has been manufactured in accordance with the harmonised European standards,
following the provisions of the below stated directives:
Electro Magnetic Compatibility Directive 89/336/EEC
Low Voltage Directive 73/23/EEC
Adam Equipment Co. Ltd.
Bond Avenue
Denbigh East Estate
Milton Keynes, MK1 1SW
United Kingdom
FCC COMPLIANCE
This equipment has been tested and found to comply with the limits for a Class A digital device,
pursuant to Part 15 of the FCC Rules. These limits are designed to provide reasonable protection
against harmful interference when the equipment is operated in a commercial environment. The
equipment generates, uses, and can radiate radio frequency energy and, if not installed and used in
accordance with the instruction manual, may cause harmful interference to radio communications.
Operation of this equipment in a residential area is likely to cause harmful interference in which case
the user will be required to correct the interference at his own expense.
Shielded interconnect cables must be employed with this equipment to insure compliance with the
pertinent RF emission limits governing this device.
Changes or modifications not expressly approved by Adam Equipment could void the user's authority
to operate the equipment.
© Adam Equipment Company 2005
ADAM EQUIPMENT is an ISO 9001:2000 certified global organisation with more than 30
years experience in the production and sale of electronic weighing equipments. Products
are sold through a world wide distributor network -supported from our company locations in
the UK, USA and SOUTH AFRICA. The company and their distributors offer a full range of
Technical Services such as on site and workshop repair, preventative maintenance and
calibration facilities.
ADAM’s products are predominantly designed for the Laboratory, Educational, Medical
and Industrial Segments. The product range can be classified as follows:
Analytical and Precision Laboratory Balances
Top Loading Scales for Educational establishments
Counting Scales for Industrial and Warehouse applications
Digital Weighing/Check-weighing Scales
High performance Platform Scales with extensive software
features including parts counting, percent weighing etc.
• Digital Electronic Scales for Medical use
• Retail Scales for price computing
•
•
•
•
•
Adam Equipment Co. Ltd.
Bond Avenue
Milton Keynes
MK1 1SW
UK
Adam Equipment Inc.
26, Commerce Drive
Danbury, CT
06810
USA
Adam Equipment S.A. (Pty) Ltd.
P.O. Box 1422
Kempton Park 1620
Johannesburg
Republic of South Africa
Phone:+44 (0)1908 274545
Fax: +44 (0)1908 641339
Phone: +1 203 790 4774
Fax: +1 203 792 3406
Phone +27 (0)11 974 9745
Fax: +27 (0)11 392 2587
e-mail:
[email protected]
e-mail:
[email protected]
e-mail:
[email protected]
© Copyright by Adam Equipment Co. Ltd. All rights reserved. No part of this
publication may be reprinted or translated in any form or by any means without the
prior permission of Adam Equipment.
Adam Equipment reserves the right to make changes to the technology, features,
specifications and design of the equipment without notice.
All information contained within this publication was to the best of our knowledge
timely, complete and accurate when issued. However, we are not responsible for
misimpressions which may result form the reading of this material.
The latest version of this publication can be found on our Website.
Visit us at www.adamequipment.com
© Adam Equipment Company 2005