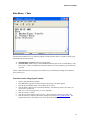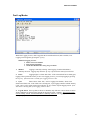
1
XR5 Terminal Mode
XR5 Terminal Mode User’s Guide
Models
XR5-8A-SE
XR5-8B-SE
XR5-8X-SE
March, 2005
Copyright © 2004-2005 Pace Scientific Inc.
All rights reserved.
1
XR5 Terminal Mode
Disclaimer
The following warranty and liability disclaimer apply to this product.
PACE SCIENTIFIC INC (“PACE”) MAKES NO WARRANTIES, EXPRESSED OR IMPLIED, INCLUDING
WITHOUT LIMITATION THE IMPLIED WARRANTIES OF MERCHANTABILITY AND FITNESS FOR A
PARTICULAR PURPOSE REGARDING ITS HARDWARE AND SOFTWARE PRODUCTS. PACE DOES NOT
WARRANT, GUARANTEE OR MAKE ANY REPRESENTATIONS REGARDING THE USE OR THE RESULTS OF
THE USE OF ITS HARDWARE AND SOFTWARE PRODUCTS IN TERMS OF THEIR CORRECTNESS OR
OTHERWISE. THE ENTIRE RISK AS TO THE RESULTS AND PERFORMANCE OF ITS HARDWARE AND
SOFTWARE PRODUCTS IS ASSUMED BY YOU. THE EXCLUSION OF IMPLIED WARRANTIES IS NOT
PERMITTED BY SOME STATES. THE EXCLUSION MAY NOT APPLY TO YOU”
“IN NO EVENT WILL PACE, ITS OFFICERS, EMPLOYEES OR AGENTS BE LIABLE TO YOU FOR ANY
CONSEQUENTIAL, INCIDENTAL OR SPECIAL DAMAGES (INCLUDING DAMAGES FOR LOSS OF BUSINESS
PROFITS, BUSINESS INTERRUPTION, LOSS OF BUSINESS INFORMATION AND THE LIKE) ARISING OUT
OF THE USE OR THE INABILITY TO USE ITS HARDWARE AND SOFTWARE PRODUCTS EVEN IF PACE HAS
BEEN ADVISED OF THE POSSIBILITY OF SUCH DAMAGES. BECAUSE SOME STATES DO NOT ALLOW THE
EXCLUSION OR LIMITATION OF LIABILITY FOR CONSEQUENTIAL DAMAGES, THE ABOVE LIMITATIONS
MAY NOT APPLY TO YOU.
PACE PROVIDES THIS DOCUMENTATION "AS IS" WITHOUT WARRANTY OF ANY KIND, EITHER EXPRESS
OR IMPLIED, INCLUDING, BUT NOT LIMITED TO, THE IMPLIED WARRANTIES OF MERCHANTABILITY OR
FITNESS FOR A PARTICULAR PURPOSE. Some states do not allow disclaimer of express or implied warranties
in certain transactions, therefore, this statement may not apply to you.
This documentation could include technical inaccuracies or typographical errors. Changes are periodically made
to the information herein; these changes will be incorporated in later editions. Pace Scientific Inc. may make
improvements and/or changes in the product(s) and/or program(s) described in this documentation at any time
without notice.
Pocket Logger is a registered trademark of Pace Scientific Inc.
Excel is a registered trademark of Microsoft Corp.
Online is a trademark of Mark/Space Softworks
Printed in the United States of America
2
XR5 Terminal Mode
Contents
INTRODUCTION
5
TERMINAL MODE
HyperTerminal for Windows
7
Online for Palm OS Devices
7
ZTerm for Macintosh
8
Minicom for Linux
8
Vxhpc for Pocket PC
8
USER INTERFACE
Main Menu
9
Data
10
Converting Binary XR5 Data Files
11
Opening an XR5 Data File in Excel
11
Saving an XR5 Data File as an Excel Workbook
11
Status
12
Real Time Mode
14
Setup
15
Channel Setup
16
Slow Logging Modes
19
Fast Logging Modes
21
Start/Stop
25
SMS Message Setup
26
APPENDIX
Screw Terminal Assignments
27
LED Functions
27
Available Models
28
Model Selection Guide
29
Specifications
30
Battery Replacement
33
External Power Supply
33
PACE SENSORS
Temperature Probes
34
Temperature / Humidity Probe
35
Pressure Sensors
36
3
XR5 Terminal Mode
AC Current Sensors
38
AC Voltage Sensors
39
Additional Voltage Ranges
40
Potentiometer Applications
41
Non-PACE Sensor Requirements
42
Pulse output sensors
42
Current Loop Applications
43
ES-1 External Switch
43
Slope / Offset Calculations
4-20ma Transmitters
44
Voltage Output Transducers
45
Manual Dial Out
Landline modem
46
GSM Cellular modem
48
Limited Warranty
50
Service
51
PDAs for the XR5
52
Pocket PC
52
Palm
53
“Top Level” commands
54
Revision History
55
4
XR5 Terminal Mode
XR5 Data Loggers
Introduction
This Guide explains the use of the XR5 Data Logger’s Terminal Mode. XR5 Data Loggers can
communicate using free Pace LogXR Software, currently available for Windows and Linux computers.
The XR5’s Terminal mode enables the XR5 to communicate with any computer or PDA equipped with a
serial port and standard communication software. See page 52 for Palm / Pocket PC recommendations.
Free Software
Pace LogXR Windows Software is a free download from Pace Scientific’s website www.pacesci.com/data-loggers-xr5.htm. LogXR is currently available for Windows 98/ME/NT/2000/XP and Linux
based computers. LogXR Software is recommended for users who communicate with the XR5 using a
Windows or Linux computer. However the XR5’s Terminal mode is available for non-PC computers that
are not able to run Pace LogXR software, including Palm and Pocket PC devices, and Macintosh
computers. A user may access an XR5 using Terminal mode, or LogXR Software, or both methods during
a logging session.
Terminal Mode
All XR5 Data Loggers generate text-based user interface screens when connected to a computer or PDA
running terminal emulation software. Terminal emulation programs are included with (or available for)
most computers including Macintosh, Windows, Palm, Pocket PC, Linux, Unix, and WinCE. One such
program is HyperTerminal, included with Microsoft Windows based computers. For recommended
terminal emulation programs for a variety of computers and PDAs please see pages 7 and 8 or visit
www.pace-sci.com/data-loggers-xr5.htm.
High Accuracy / Large Memory
Using Pace’s precision PT900 series thermistor probes, temperature data is accurate to +/-0.15°C at 25°C
with no calibration. Voltage inputs are accurate to +/-0.25% of full scale with no calibration. The XR5’s
non-volatile memory can store 63,642 time-stamped readings (standard models), or 260,250 readings (–M
models).
Free Lifetime Firmware Updates
Using LogXR Software, the XR5’s internal firmware can be updated with a single click. Firmware updates
are posted on the Pace website.
Fast or Slow Logging
Any log interval between 1 second and 12 hours may be selected, or fast log rates from 2Hz to 1000Hz.
Individual Alarms
All analog inputs have individual high and low alarm limits. Alarm activity can trigger a variety of
responses, including logging data, sending a detailed SMS message to a cell phone (GSM modem
required), setting an external alarm output, blinking the XR5’s Alarm LED, and/or dialing out to a
computer (modem required).
5
XR5 Terminal Mode
Powerful Recording Modes
Logging may be triggered (and stopped and re-triggered) by alarm conditions, an external trigger, or by the
Logging | Start/Stop menu selections. Readings are stored at the selected log interval. Using the Average
or Peak mode, readings are sampled every second and the Average or Peak value stored at the selected log
interval. Channel pairs may be logged as differential readings (Channel A – Channel B) and differential
readings may be used to generate alarms. Logging can stop when the memory is full, or continue in a
wrap-around mode (overwriting oldest readings). In all but the “Fast Logging” modes, data may be
transferred while logging is active, or real time readings simultaneously displayed.
Cycle Logging
Custom logging “cycles” may be selected. For example: Log for 10 seconds at 100Hz, then pause for 59
minutes and 50 seconds, and then repeat. Another example: Log every minute from 8AM until 5PM, pause
16 hours, and then repeat (until a pre-set time is reached or the memory is full).
Secure Data
The XR5 Data Logger’s rugged EEprom memory retains data for over 100 years in the event of a power
loss. Data may be transferred securely using the industry-standard Xmodem communication protocol. A
two-level password system may be utilized to prevent unauthorized operational changes or data transfers.
Alarm messages on your cell phone
With an optional GSM modem and a GSM cell phone*, the XR5’s SMS text message capability may be
utilized. The phone number of a GSM cell phone and an alarm text message are entered into the XR5 (see
SMS Setup on page 26 for details). Then, when an alarm condition occurs, an SMS message (consisting of
the alarm message, the current reading and a time stamp) is sent to your GSM cell phone.
*GSM carriers in the USA include Cingular, AT&T, Verizon and others.
Real Time Display
When an XR5 Data Logger is connected to a computer or PDA, a Real Time Display is available. When
selected, the current active channels display readings at a user selected update interval. The display update
interval can be set for any time period from 2 seconds to 24 hours. The Real Time Display can function
while simultaneously logging data in all modes except the “Fast Logging” modes.
Note: The real time display provides “true” readings for all sensors that have a linear scale or for
Pace PT900 series precision temperature probes. Non-linear sensors that require a look-up table
display raw a/d readings in real time mode. This limitation does not exist for customers using
LogXR Software.
Long battery life
XR5 Data Loggers are powered by a pair of user-replaceable lithium batteries. Battery life is greater than
2 years under typical usage. The battery voltage is displayed on the XR5’s Status Screen. An external
power input is provided for Pace Power Supply # PS-9V. If external power is used, the batteries will power
the unit during power outages (battery shelf life is 10 years).
Direct-Connect Sensors
PACE offers over 25 precision sensors optimized for XR5 Data Loggers, including Temperature,
Humidity, Pressure, AC Current and AC Voltage. All PACE sensors require no external power.
6
XR5 Terminal Mode
HyperTerminal session for Windows computers
In order to use HyperTerminal, your computer needs an RS232 serial port (also referred to as a COM port).
If your computer does not have a serial port, you will either need to add a serial port board to your
computer or, if your computer has a USB port, you can add a USB to RS232 adapter (available at retail
computer outlets). See the XR5 Data Logger User’s Guide for recommended models.
Hardware Setup
Connect the IC209 Cable from the RS232 Port on the XR5 to a 9 pin male serial connector on your PC typically Com Port 1 or 2 (Com1 or Com2).
Creating a HyperTerminal session
1. Launch HyperTerminal (usually found by selecting Start | Programs | Accessories | Communications). A
“New Connection” screen is displayed.
2. Enter a session name. We suggest “9600comx” (where x is the com port number). You can also select
an icon to launch future HyperTerminal sessions for the XR5 with a single click.
Click OK
3. You are asked for a phone number. Ignore this, and click the down button on the line that begins with
“Connect using”. Then select the Com port you will be using for the XR5. For example: “Direct to
Com1”.
Click OK.
4. Enter the following port settings:
Bits per second: 9600
Data Bits: 8
Parity: None
Stop Bits: 1
Flow control: None
Click OK
5. The terminal screen now appears. Keys pressed on your keyboard are sent to the XR5, and any
characters transmitted by the XR5 appear on your terminal screen. Type the following 4 letters “text” to
enter Terminal Mode. The XR5 Main Menu should appear on your screen.
Note: If the Main Menu does not appear when you type “text”, you may be using (or have selected) the
wrong com port in HyperTerminal. Try connecting the IC209 Cable to a different Com port on your
computer and enter “text” again. If no other com ports are present, try creating a new HyperTerminal
session using a different com port number (follow the procedure above).
Online for Palm OS devices
Online is a terminal emulation program. It is available at
http://palmsource.palmgear.com/index.cfm?fuseaction=software.showsoftware&prodid=2052
Online runs on most Palm PDAs which have an RS232 Serial Port.
Hardware Setup
See page 53 for recommended cables and cable connections.
7
XR5 Terminal Mode
Online Setup
Refer to the Online User’s Manual for instructions to set up and use Online.
Use the following Online settings with the XR5:
Terminal Settings
Emulate: VT100
Font: Large
Return: CR
Backspace: BS
Add LF: Not checked
Display follows cursor: Checked
Auto wrap to next line: Checked
Local echo: Not checked
Pacing: Off
Communication Settings
Method: Serial
Port: Serial
Baud: 9600
Data Bits: 8
Parity: N
Stop Bits: 1
Handshake: None
Macintosh / Linux / Pocket PC
The following terminal emulators can be used to set up an XR5 for a logging session, transfer data, and
display sensor data in real time. If your computer does not have a serial port, please see the XR5 Data
Logger User’s Guide for current USB/Serial Port Adapter recommendations.
Use the following com port settings for any terminal emulator: Bits per second: 9600; Data Bits: 8; Parity:
None; Stop Bits: 1; Flow control: None.
ZTerm for Macintosh
ZTerm, a shareware terminal emulation program for the Macintosh, is available at
http://homepage.mac.com/dalverson/zterm
minicom for Linux
minicom, a terminal emulation program, is included in most Linux distributions. It is also available at
http://alioth.debian.org/projects/minicom/
Note: Pace now offers a free Linux version of LogXR Software for the XR5.
vxhpc for Pocket PC
vxhpc is a terminal emulation program written by Cambridge Computer for the Pocket PC. See
http://www.cam.com/vxhpc.html to obtain a copy.
8
XR5 Terminal Mode
XR5 User Interface
A PC running HyperTerminal is used for the screen illustrations in this manual. Online (for Palm PDAs)
and other terminal emulation programs will display similar screens. Using the Pace IC209 Cable, connect
the XR5 to the com port selected in your terminal emulation program.
To enter Terminal Mode, send ‘text’ (4 characters) to the XR5 and the Main Menu will appear on your
screen.
IMPORTANT!
You must first send ‘text’ (4 characters) to the XR5 to enter Terminal Mode. The Main Menu
appears (see screen below) when you enter Terminal Mode.
Menu Navigation
•
•
•
•
All menu choices must be followed by the Enter (Return) key.
Pressing only the Enter key in any menu will return you to the previous menu.
When prompted for a numerical value, pressing only the Enter key will cause the current value to
be retained.
Pressing the Esc key while transferring data will cause the data transfer to immediately terminate.
Main Menu
9
XR5 Terminal Mode
Main Menu | 1. Data
The Data menu enables a user (or computer program) to transfer binary data to a computer or PDA using
the Xmodem file transfer protocol.
1.
2.
Xmodem Binary Transfer Transfers all logged data.
Transmit Delay: Adds a delay to each transmitted character equal to the “Transmit Delay” value
times 30ms. A delay is needed when transferring data to some slower PDAs to prevent character
over-runs.
NOTE: When a data transfer is in progress, the transfer may be terminated by sending an Esc character
(press the Esc key).
Xmodem transfer using HyperTerminal
1.
2.
3.
4.
5.
6.
7.
8.
Select 1 (Xmodem Binary Transfer).
If the XR5 Data Logger has no data to transfer, the message “No Data” appears.
From the HyperTerminal menu, select Transfer | Receive File…
Click the Browse button to select a different directory if the directory shown is not where you
wish to store your data file.
Make sure “Use receiving protocol:” is set to “Xmodem”.
Click the “Receive” button.
Type in a file name, and we suggest you use a “.bin” extension to signify it is a binary file.
Once the transfer is complete, you need to Unpack the file using Pace LogXR Software. The
Unpacked file can be viewed in Excel or a text editor (like Notepad).
10
XR5 Terminal Mode
Converting Binary XR5 Data Files
1.
2.
3.
4.
5.
Launch LogXR Software
From the main menu, select Utilities | Convert Binary File
Navigate to the saved XR5 binary file and select it.
Click Unpack.
A text file is created with the same name as the binary file but with a .txt extension and can be
opened in a program such as Excel or Notepad.
Opening an XR5 Text File in Excel
1.
2.
3.
4.
5.
6.
7.
8.
9.
Launch Excel and click File | Open.
At the bottom of the Open dialog, change “Files of type:” to display Text Files.
Use the Open dialog to navigate to the XR5 data file (.txt file extension) and select it.
Click Open.
In the Text Import Wizard, select Delimited and then click Next.
Check the “Comma” checkbox and click Next.
Click Finish.
Scroll down past the header info to see your data.
If the time stamps in column A are not visible beside your data, you will need to widen column A.
To do this, move your mouse cursor between the “A” and “B” column headings (column
selectors) and double click.
Saving an XR5 Data File as an Excel Workbook
1.
2.
3.
With a data file open in Excel, click File | Save As…
In “Save as type:” at the bottom of the “Save As” dialog, select Microsoft Excel Workbook.
Click Save.
11
XR5 Terminal Mode
Main Menu | 2. Status
Current status of the XR5. A “snap-shot” of the XR5 Data Logger at the time Status was selected from
the Main Menu. Additional screens may be displayed for Alarm status, the Description field, and Channel
information.
Current State:*
Log Time Until Full:
Log Interval:
Log Mode:
Clock:
Label:
FwRev:
Bat:
Alarms:
Description:
Channel List:
System Log:
Displays “Stopped”, “Logging”, or “Start Logging” + preset time.
Time remaining until memory is full (based on current setup).
Current log interval, selected in Setup.
Current log mode, selected in Setup.
XR5’s time clock reading (static) when Status was initially displayed.
A descriptive label of up to 32 characters.
Internal firmware revision number.
Battery voltage. Battery voltage is the total voltage across both batteries. With
fresh batteries installed, the voltage should be about 7.2V. Replace the batteries
when the voltage is below 5.3V.
Lists alarm status, SMS alarm messages, and current readings.
A line of text entered by the user of up to 64 characters. The Description can
only be viewed in the Terminal mode’s Status Screen and changed via the
Terminal Mode’s Setup menu. This feature is not accessible from LogXR
Software.
Lists channel Status and Descriptions.
Internal system log (for factory system testing).
*Additional details on next page.
12
XR5 Terminal Mode
Status
Current State:
Display
Meaning
‘Stopped’
Not logging, XR5 inactive, any logged data from prior
logging session is available.
‘Start Logging’ + Preset Time
If the Preset Time has been reached, then logging is active.
If the Preset Time has not been reached, then not logging.
(used for ‘Cycle’, ‘Preset’ and ‘Preset Start/Wrap’ logging
modes)
‘Logging’
Logging is active.
OR
If logging mode is ‘Log on Alarms’:
Logging session has begun, but data is being logged
only if one or more alarms are active.
If no alarms are currently active, no data is being
logged.
OR
If logging mode is ‘Log on Ext. Trigger’:
Logging session has begun, but data is being logged
only if selected trigger level (High/Open or
Low/Closed) is present.
If trigger level is not present on Terminal X, no data
is being logged.
13
XR5 Terminal Mode
Main Menu | 3. Real Time Mode
Real Time readings are displayed either at a selectable update interval (from 2 seconds to 24 hours), or
when readings are logged to memory. When the Real Time Mode is active, sending a Carriage Return
character (“Enter” key) causes the Real Time Mode to terminate and the Main Menu to display. The Real
Time Mode can function while logging is active and will not affect the logging session in any way.
The Real Time mode is not available when fast logging (2Hz – 1000Hz) is active.
Real Time Mode Settings
From the Main Menu select 4 (Setup), then 7 (Other), then 4 (Real Time Mode Settings).
Update Interval:
Two selections are available: ‘Time’ and ‘When Logging’.
Time
Real Time readings are updated at the user-selected Interval.
When Logging
Real Time readings are updated only when readings are logged and stored in memory.
For example, if the XR5 is set to Log on Alarms, the Real Time Display will be active
only when Alarms are active, and the Real Time readings will be updated at the selected
Slow Logging Interval.
Auto Stop
Auto Stop automatically terminates the Real Time Display mode after the selected Auto Stop time
period (the default is 1 hour). Auto Stop is disabled by setting it to 0.
Terminal Mode Limitation
The real time display provides “true” readings for all sensors that have a linear scale or for Pace
PT900 series precision temperature probes. Non-linear resistive sensors that require a look-up
table display either raw a/d readings in real time mode, or actual resistance values if the channel
Type has been set to Resistance. This limitation does not exist for customers using LogXR
Software.
14
XR5 Terminal Mode
Main Menu | 4. Setup
1.
Label: Describes the XR5 Data Logger or logging session. May be up to 32 characters in length.
2.
Description: May describe the logging session in more detail. A text string of up to 64 characters.
3.
Slow Interval: Any time interval between 1 second and 12 hours. Defines how often readings are
logged for Slow Logging modes.
Fast Interval: Select a Hz rate (2Hz – 1000Hz). Hz stands for Hertz, a measure of frequency.
For example, 100 Hz is 100 times per second or 1 sample every 10 milliseconds. The Fast
Interval applies only to Fast Logging modes.
Notes:
The selected Interval is for each active channel. For example, if all 8 channels are ON,
and 200Hz is selected, then each channel will store 200 readings per second.
The fastest logging rates function with a reduced number of channels:
Fast Logging Rate
1000 Hz
500 Hz
250 Hz
200 Hz
2 Hz – 100 Hz
4.
5.
6.
7.
Maximum ON Channels
1
2
4
6
8
Channel Setup: (see next page)
Log Mode: (see pages 19 to 22)
Clock: Sets the XR5’s Real Time Clock
Other: (see page 23)
15
XR5 Terminal Mode
Channel Setup:
1.
On/Off
2.
Channel Type
Set individual channels On (active) or Off (inactive).
XR5 model differences in shaded area.
Channel Type selections for the XR5-8A-SE
All Channels:
1. Temperature
Pace Temperature Probe (precision 30k thermistor).
2. Switch
Switch closure or relay contact (Open: 1, Closed: 0).
3. 0-2.5V
0-2.5v input, 10Mohm input impedance.
4. Resistance
Two-wire resistance (Range midpoint: 30k).
Channel Type selections for the XR5-8X-SE
Channels 1,2,3,4:
1. Temperature
Pace Temperature Probe (precision 30k thermistor).
2. Switch
Switch closure or relay contact (Open: 1, Closed: 0).
3. 0-2.5V
0-2.5v input, 10Mohm input impedance.
4. Resistance
Two-wire resistance (Range midpoint: 30k).
Channel 5,6,7,8:
1. 0-5V
(Fixed) 0-5v input, 100k input impedance.
Channel Type for the XR5-8B-SE
All Channels:
1. 0-5V
(Fixed) 0-5v input, 100k input impedance.
For Channel X:
1. Pulse Count pulses (4095 maximum counts per log interval).
2. Trigger Trigger input for “Log on Ext. Trigger” logging mode.
For Channel Y:
1. Pulse (Fixed) Count pulses (4095 maximum counts per log interval).
For Channel Z:
1. Pulse Count pulses (4095 maximum counts per log interval).
16
XR5 Terminal Mode
2.
Ext. Alarm
no alarms).
Alarm output (3.3v: One or more alarms active, 0v:
3. Channel Mode
1. Standard
Log reading at sample interval.
2. Average*
Internally sample every 1 second, store
average value at selected Slow Logging interval.
3. Peak*
Internally sample every 1 second, store peak
value at selected Slow Logging interval.
4. Differential** (Displays for even numbered channels only)
Log the difference of 2 adjacent channels:
Channel
Log value of
2
Channel 1 - Channel 2
4
Channel 3 - Channel 4
6
Channel 5 - Channel 6
8
Channel 7 - Channel 8
Notes:
*Average and Peak channel modes only function in the following
Slow Logging modes: Manual, Manual Start/Wrap, Preset, Preset
Start/Wrap and Cycle.
**Differential mode only functions with PT900 Series Temperature
Probes and sensors/signals with linear scaling
To log Switch closure ON time as percent of Logging Interval:
Select Average Mode with Channel Type: Switch
For example:
If the selected log interval is 10 minutes, and the switch is closed for a
total of 60 seconds during a 10 minute interval, then the data will read
“10.0” for that 10 minute interval, meaning that the switch was closed
for 10% of the time (600 seconds total time vs 60 seconds closed time).
4. Scaling Values
Applies only if Channel Type is 0-2.5v or 0-5v.
Slope and Offset Values for all PACE Sensors are listed in the Appendix.
The Slope and Offset may be decimal values in the range of -163.84 to 163.84, or
whole numbers in the range of -16384 to 16384.
To read and transfer data as actual volts, enter the following:
Input Range Slope Offset
Range of Readings
0-2.5v
1
0
0.000 - 2.500
0-5v
1
0
0.000 - 5.000
Units
Volts
Volts
To read and transfer data as “raw” 12 bit readable values (0 – 4095) enter the
following:
Range
Slope
Offset
0-2.5v
1638
0
0-5v
819
0
5. Descriptions Channel description of up to 24 characters.
17
XR5 Terminal Mode
6.
Alarms
A high and low alarm limit may be entered.
Using the XR5’s Terminal Mode, alarm limits can not be entered as readable
values but must first be converted to equivalent raw a/d values (whole numbers
from 0 to 4096).
A utility program is available from Pace Scientific to convert alarm values.
With Pace LogXR Software, simply enter the desired alarm limits and the
software internally converts these values to the necessary raw A/d values.
The following formula may be used to manually calculate XR5 raw a/d alarm
limits:
((Desired alarm limit) – Offset) * 4095 / (Slope * maximum voltage range)
For example, the Pace P1000-25 Pressure Transducer (0-25 psig) has an Slope
of 6.25 and an Offset of -3.12. To calculate an alarm limit of 20 psig, substitute
into the above formula as follows:
(20 – (-3.12)) * 4095 / (6.25 * 5) = 3030 (round to nearest whole number).
So an alarm limit of 20 psig, is entered as 3030 (the equivalent raw a/d value).
Enter 0 to disable low alarm generation.
Enter 4096 to disable high alarm generation.
If an alarm condition occurs after a Logging Session is started, the Red LED
will blink every 5 seconds. The Red LED will continue to blink until a new
logging session is started.
State: Must be set to ON for an alarm condition to be generated.
SMS Message: See page 26 for details.
7. Excitation Time
The time duration that the sensor excitation terminals (D and
E) are powered just prior to logging readings. Available selections are 30 milliseconds,
150 milliseconds, 1 second, 5 seconds and 10 seconds. The D terminal is 2.50 volts (5ma
maximum draw), and the E terminals are 5.00 volts (25ma combined maximum draw, D
and E Terminals).
PACE P300, P1500 and P1000 Pressure Sensors require 30ms of excitation time.
The PACE TRH-160 Temperature Humidity Probe requires 150ms of excitation time.
Select the longest excitation time required among all the sensors connected to the XR5.
For example, if a TRH-160 Probe and a P300 Sensor are connected to an XR5, the
excitation should be set to 150ms.
Notes:
1. Unless a longer excitation time is required, set Excitation Time to 30ms for best
battery life.
2. If the logging interval is less than or equal to the excitation time, sensor excitation will
be ON continuously and will significantly reduce battery life.
3. If a Fast Log mode is selected, sensor excitation will be ON continuously.
18
XR5 Terminal Mode
Slow Log Modes
While Slow Logging is active, you can do any of the following without affecting the logging session:
¾
¾
¾
Use the Menu screens.
Use the Real Time Mode.
Transfer Logged data.
1.
Manual
Logging begins between one and two seconds from the time Start is selected
from the Main Menu. Logging will continue until the memory is full, or may be manually stopped
using the Start/Stop selection from the Main Menu. Logging may be manually stopped and started
any number of times (until the memory is full) using the Start/Stop selection from the main menu.
2.
Preset
A future start time and optional end time is entered. If the end time is already
past, logging will continue until the memory is full. Logging may be manually stopped using the
Start/Stop selection from the Main Menu. If the Start Time entered is already past, logging will
never start.
3.
Cycle
Select a future “Start” time, “Active” logging time duration, “Pause” time
duration and an “End” time. If the “End” time is past, Cycle logging continues until the memory
is full. Cycle logging can be stopped from the Main Menu’s Start/Stop selection. While the XR5
is in the ‘Pause’ part of the cycle, the ‘Current State:’ of the Status screen displays ‘Waiting’. If
the Start Time entered is already past, logging will never start.
4.
Log On Alarm Log data (on all active channels) only while one or more alarms are active.
Alarm limits are checked at each Log Interval, so an Alarm level must be maintained for one Log
Interval to insure that it will be logged. Controlled by the alarm status, any number of
independent “data sets” may be logged in this mode until the memory is full. The logging session
must be initially ‘started’ from the Main Menu’s Start/Stop selection. The logging session
continues until the memory is full or logging is stopped from the Main Menu. Once the logging
session is stopped, if logging is re-started via the Start/Stop menu selection, a new data set begins
and old data is lost.
19
XR5 Terminal Mode
5.
Log on Ext. Trigger
Log data only while the external trigger terminal (#X) is either
High/Open or Low/Closed (user selectable). The trigger input is polled at the selected Log
Interval, so data logging will begin within one Log Interval after the trigger becomes active.
Controlled by the trigger input, any number of independent “data sets” may be logged in this mode
until the memory is full. The logging session must be initially ‘started’ from the Main Menu’s
Start/Stop selection. The logging session continues until the memory is full or logging is stopped
from the Main Menu. While the trigger input is in the inactive state, the ‘Current State:’ of the
Status screen displays ‘Waiting’. Once the logging session is stopped from the Main Menu or
stopped because the memory is full, if logging is re-started using the Start/Stop menu selection, a
new logging session begins and all prior logged data is lost.
6.
Manual Start/ Wrap
Logging is started using the Start/Stop selection from the Main Menu.
Logging will continue indefinitely in a wrap-around mode. Once logging is stopped from the
Main Menu, if logging is re-started, a new logging session begins and all prior logged data is lost.
7.
Preset Start/ Wrap
Logging begins at a selected future Start time. Once logging is stopped
from the Main Menu, if logging is re-started, a new logging session begins and all prior logged
data is lost. If the Start Time is already past, logging will never start.
20
XR5 Terminal Mode
Fast Log Modes
While Fast Logging is active, data is logged at the selected Hertz Interval (2Hz to 300Hz). Fast
Logging can be stopped by pressing the “Q” key.
While Fast Logging is active:
¾ Menu screens are disabled.
¾ Pulse logging is disabled.
¾ Alarms are disabled unless using “Log on Alarm”.
1.
Manual
Logging is started by selecting “Start Logging” from the Main Menu’s
Start/Stop selection. Logging stops when the “Q” key is pressed or the memory becomes full.
2. Preset
Logging begins at a future Start Time. If the selected End Time is already past,
logging will stop when the memory is full. Once logging is active, you can stop logging by pressing
the “Q” key. If the Start Time is already past, logging will never start.
3. Cycle
Enter a future “Start” time, “Active” logging time duration, “Pause” time
duration and “End” time. If the “End” time is already past, Cycle logging continues until the memory
is full. Once Cycle Logging is started, pressing the “Q” key will also stop the logging session. If the
Start Time is already past, Cycle Logging will never start.
4. Log On Alarm Fast Log data (on all active channels) only while one or more alarms are active.
Alarm conditions are checked at the selected fast log interval (2Hz – 1000Hz). The logging session
must be initially ‘started’ from the Main Menu’s Start/Stop selection. The logging session ends when
the “Q” key is pressed or the memory becomes full.
21
XR5 Terminal Mode
5. Log on Ext. Trigger
Log data according to the state of the external trigger input (Terminal
#X). The trigger is user selectable (active when High/Open or active when Low/Closed). The trigger
input is polled at the selected Hz interval, so data logging will begin within one selected Hz interval
after the trigger becomes active. For example, if 100Hz is the selected Hz interval, logging will begin
within 10ms after the trigger becomes active. The logging session must be initially ‘started’ from the
Main Menu’s Start/Stop selection. The logging session ends when the “Q” key is pressed or the
memory becomes full.
22
XR5 Terminal Mode
Setup (continued)
7. Other
1.
Temperature Scale
2.
ID#:
Select Fahrenheit or Celsius.
May be used as a “permanent” identification number or label for the XR5.
3. Security
1.
Change password The XR5 is shipped with the password ‘password’.
IMPORTANT! You can not change the password unless you know the current
password.
2.
Security Level
1.
2.
3.
4.
Password -> Setup: Password is required to make changes to
Setup parameters.
Password -> System: Password is required before any user
interaction can take place.
No Password: Password functions disabled.
Real Time Mode Settings (See page 14 for detailed description)
1. Timestamp: Show/Hide.
2. Auto Stop: The number of hours before the Real Time Mode will automatically
stop (if the Real Time Mode is continuously active). Enter 0 to disable.
3. Update Interval: Controls when Real Time readings are updated.
23
XR5 Terminal Mode
5.
Regional Settings
Select decimal point symbol, data value separator & time format to conform to your
international region.
1. Decimal Point [ . ]* or [ , ]
2. List Separator [ , ]* or [ ; ]
3. Date Separator [ / ]* or [ . ]
4. Date/Time Format [ mm/dd/yy ]* or [ dd/mm/yy ]
* select for USA.
6.
Dial out Please see pages 46 - 49 for details
24
XR5 Terminal Mode
Main Menu | 5. Start/Stop
1.
Start Logging
Starts a logging session for all logging modes except Cycle, Preset, and Preset/Wrap (which
automatically start at a pre-selected time).
2.
Stop Logging
If Manual slow logging mode is selected:
Logging stops but logging session remains “open”. In Manual slow logging mode, if logging is
re-started (using menu choice #1), prior logged data is retained.
For all other slow logging modes:
Permanently ends the logging session.
Fast Logging:
If Fast Logging is active, press the “Q” key to stop logging; the XR5’s menu screens are disabled
while Fast Logging is active.
3.
Erase Logged Data
Use to maximize the capacity of the XR5 to store new data. Be careful using this selection! Once
logged data is erased, it can not be recovered. Only Logged Data is erased. The setup
configuration is retained.
Nate: Logged data is erased (an OK/Cancel message first appears) whenever the user
changes a logging related Setup parameter.
25
XR5 Terminal Mode
SMS Message Setup
[Requires optional Pace GSM Modem Package]
4. SMS Message Setup A unique alarm message may be entered for each channel.
Reached from: Main Menu | 4. Setup | 4. Channel Setup | 6. Alarms | Channel # | 4. SMS Message Setup
1. Phone # with country code. Enter your GSM cell phone number. Enter the same number you
would use to call the cell phone.
2. Message. Enter a text message that describes the alarm, including a site description. Up to 59
characters may be entered. For example, “Temperature Alarm, ABC Cold Storage, 121 Central
St, Unit 4”. The current reading and time stamp are appended to this Message when it is sent to
the cell phone.
For a channel to generate an SMS Alarm message, its Alarm State must be set to ON and the desired High
and Low alarm limits entered.
9. SMS Message control. (Common to all channels).
Reached from: Main Menu | 4. Setup | 4. Channel Setup | 6. Alarms | 9. SMS Message Setup
1. Disable No SMS messages will be sent.
2. Enable An SMS message is sent when an alarm condition occurs. If the alarm
condition is maintained, additional SMS messages are sent at the user-selected Message
Repeat Time.
Message Repeat Time
Specifies the repeat rate of an SMS alarm message when an alarm condition is
maintained.
26
XR5 Terminal Mode
Appendix
XR5 Data Loggers
Screw Terminal Assignments
Q
C
X
Y
Z
D
E
E
1
C
2
3
C
4
5
C
6
7
C
8
Regulated 9vdc Power Input. Not required. Powers XR5 if present, otherwise power is supplied
from internal batteries.
Warning: Voltage levels higher than 11v on terminal Q can damage the XR5.
Do not use an unregulated 9vdc Power Supply.
Use PACE part # PS-9V (120vac adapter) to externally power the XR5.
Ground
Channel X Pulse input or External Trigger input (user selectable).
Channel Y Pulse input
Channel Z Pulse input or External Alarm output (user selectable).
2.5 vdc precision excitation (typically used to excite potentiometers).
5.0 vdc precision excitation (typically used to power pressure and humidity sensors and
accelerometers).
5.0 vdc precision excitation (two terminals are provided for 5v excitation).
Channel 1 input
Ground
Channel 2 input
Channel 3 input
Ground
Channel 4 input
Channel 5 input
Ground
Channel 6 input
Channel 7 input
Ground
Channel 8 input
Screw Terminal use
CAREFUL! Before inserting a wire into a terminal, use a screwdriver to rotate the terminal screw
counter-clockwise until the terminal’s clamp cage is fully open.
Use stranded wires if more than one wire must be terminated in a screw terminal. Mixing solid
and stranded wires, or using multiple solid wires in a single terminal can result in faulty
connections.
LED Functions
Green
Logging Session Active.
If Slow Logging is active, blinks every 5 seconds.
If Fast Logging is active, blinks every 1 second or multiple
times per second depending on fast logging rate selected.
If Cycle Logging Slow is active, the Green LED is OFF while
the XR5 is in the “pause” part of the logging cycle.
Red
Alarm.
If Slow Logging is active, blinks every 5 seconds if an
alarm becomes active. Continues blinking until a new
Logging session is started (irrespective of alarm status).
Disabled (always off) if Fast Logging is active.
27
XR5 Terminal Mode
Available models
The XR5 Data Logger is available in three analog input configurations:
XR5-8A-SE
Channels 1-8 ‘Type A’ inputs.
XR5-8B-SE
Channels 1-8 ‘Type B’ inputs.
XR5-8X-SE
Channels 1,2,3,4: ‘Type A’ inputs; Channels 5,6,7,8: ‘Type B’ inputs.
Extended memory option:
An extended memory version (260,250 readings) of each of the above models is available. Add a
“–M” to the model number to specify the extended memory version.
‘TYPE A’ INPUT
User selectable for Temperature, Switch Closure, 0-2.5v or Resistance.
Temperature:
Switch closure:
0-2.5v:
Resistance:
Connects to a PACE PT900 series Temperature Probe.
Connect to an unpowered contact closure.
0 to 2.5 volt input, 10Mohm input impedance.
Connect to a 2-wire resistance (midpoint = 30k ohms, highest
resolution is from 1k to 300k ohms).
For 4-20ma signals, use a 0-2.5v input with a shunt resistor (part# INP124ohm). When monitoring multiple 4-20ma signals, all shunt resistors connect
to a shared common.
External ‘Input Cables’ are available to convert any ‘Type A’ input to a ‘Type
B’ 0-5v input, or a 0-10v, 0-15v, 0-30v, or 0-60v input. See page 40 for details.
‘TYPE B’ INPUT
Fixed 0-5v input with 100k input impedance.
Connect to any PACE Pressure Sensor.
External ‘Input cables’ (see page 40) do not work with ‘Type B’ inputs.
‘Type B’ inputs may be modified at the factory for a fixed range of 0-15.3v or 030.6v (100k input impedance).
Note: All XR5 SE models have three 24 bit pulse inputs (X, Y and Z).
28
XR5 Terminal Mode
Selection guide
XR5-8A-SE
If your primary need is for up to eight channels of temperature, contact closures, 0-2.5v or 4-20ma signals,
or up to 4 temperature and 4 humidity, we would recommend the ‘8A-SE’. PACE Pressure Sensors do not
directly connect to the ‘8A-SE’.
XR5-8B-SE
If you need to log primarily 0-5v signals (which accept a 100k load), and/or PACE Pressure or AC Current
Sensors, the ‘8B-SE’ is a good choice. The ‘8B-SE’ will not accept PACE Temperature Probes, AC
Voltage Sensors or Contact closures.
XR5-8X-SE
If you need to simultaneously log Pressure, and Temperature the ‘8X-SE’ is a good choice. All PACE
sensors and probes directly connect to the ‘8X-SE’.
PULSE INPUTS
All XR5 SE models have 3 pulse inputs, which may be directly connected to pulse output Wind Speed or
KWH Transducers, Rain Gages, Water Meters and Gas Meters. One pulse input may by used as a
dedicated External trigger input (for the ‘Log on Ext. Trigger’ logging modes). One pulse input may be
used as an Alarm Output.
ADDITIONAL COMMENTS
XR5-8A-SE
Direct connect to PACE sensors and probes (up to 8 of any type, or any combination of up to 8) except
PACE Pressure Sensors.
Logs up to eight 0-2.5v or 4-20ma signals (each 4-20ma signal requires a PACE resistor #INP-124ohm).
Log up to eight contact closures.
XR5-8B-SE
Eight fixed 0-5v inputs with 100k input impedance. Only PACE AC Current and PACE Pressure Sensors
direct connect to the ‘8B-SE’.
XR5--8X-SE
Direct connect to all PACE sensors and probes (up to 2 Temp/RH Probes or up to 4 of any other type).
Logs up to four 0-5v signals (which accept a 100k load), and up to four 0-2.5v signals or 4-20ma signals
(each 4-20ma signal requires a PACE shunt resistor #INP-124ohm). Directly logs up to four contact
closures.
The XR5-8X-SE is a versatile Data Logger. It will directly connect to all PACE sensors and probes. For
example, you could connect 2 AC Amps sensors, 2 Pressure Sensors, one Temperature/Relative Humidity
Probe, a second Temperature Probe, and one contact closure to a single XR5-8X-SE. The three pulse
inputs (existing on all XR5 SE models) could be used to log Water consumption*, kilowatt hours*, and Gas
consumption*.
*Pulse output sensors available from other vendors. See page 42 for more information.
29
XR5 Terminal Mode
Specifications
TYPE A INPUT1
Temperature Accuracy:2
+/- 0.15°C from 10 to 40°C
+/- 0.3°C from -25 to 85°C
Temperature Resolution: 0.02°C at 25°C (12 bits)
0.06°C or better from -25 to 75°C
-40 to 150°C
Temperature Range:2
0-2.5v range:
Accuracy:
+/- 0.25% F.S.
Resolution:
1 part in 4095 (12 bits)
Input impedance: >10Mohm (true for all logging modes and when
inactive or not logging).
Switch closure:
Unpowered contact: Open = 1, Closed = 0
Voltage signal: 2V to 12V = 1, 0V to 1V = 0.
1
See page 28 for available analog input configurations.
Assumes use of Pace PT900 series Temperature Probe or equal.
2
TYPE B INPUT3
0-5v range
Accuracy:
+/- 0.25% F.S.
Resolution:
1 part in 4095 (12 bits)
Input impedance: 100k ohms
3
See page 28 for available analog input configurations.
PULSE INPUTS
Three pulse inputs (X,Y,Z) are provided. Pulse inputs accept voltage pulses or dry (unpowered)
contact closures. Two pulse inputs (X and Z) may be configured for alternate functions: X as an
external trigger input, and Z as an alarm output.
Pulse Type (selected in setup)
Mechanical Switch
Solid State Switch
Maximum Rate
15 Hz
900 Hz
Maximum count (per Log Interval):
Active edge
Input Type
Minimum Hold Time
30ms
0.5ms
Debounce Time
30ms
0.5ms
16,777,215
Falling edge
Schmitt Trigger
Dry contact
Bias voltage (from XR5)
Current when contact is closed
3.3 v
2.2 microamps
Positive range:
Negative range
2.3 to 3.6 v
0 to 0.6 v
(If selected on Terminal Z)
100k output impedance
0V inactive, 3.3V active
Voltage pulse
Alarm Output
INPUT PROTECTION
All analog and pulse inputs meet the following surge protection requirements:
IEC 61000-4-2 (ESD) 15kV (air) 8kV (contact)
IEC 61000-4-4 (EFT) 40Amps (5/50ns)
Maximum Continuous fault voltage:
Type A (0-2.5v) input:
+/-3.6v
Type B (0-5v) input:
+/-7.25v
30
XR5 Terminal Mode
GENERAL SPECIFICATIONS
Overall dimensions:
4.88” length, 2.21” width, 1.28” height. (124mm x 56.2mm x 32.5mm).
Length includes mounting ears, width includes detachable terminal
block.
Weight (with batteries): 4.2 ounces; 120 grams
Mounting:
Two 0.187” dia. mounting holes on enclosure centerline, spaced 4.5”
(114.3mm) apart.
Input termination:
Detachable 20 position screw terminal block.
Screw terminals (20):
Recommended wire size: 16 to 28 awg, solid or stranded.
Use stranded wire if multiple wires are terminated in a single terminal
block.
Operating limits:
-40 to 70°C; -40 to 158°F
5-90% R.H. non-condensing
Case material:
Tough, Flame Retardant ABS Plastic
UL flammability rating 94V-O
IP Protection rating:
IP50
Memory capacity:
Time stamped, twelve bit readings:
Standard models: 63,642
Extended memory (-M) models: 260,250.
Data retention:
Over 100 years with no power.
Number of channels:
Eight analog inputs channels, three pulse input channels.
Communication interface: Serial, 3 wire, EIA/TIA-562 signal levels (RS232 compatible), 9600
bps.
LED indicators (2)
Green: 5 second blinks: Slow logging is active.
Fast blinks:
Fast Logging is active.
Red:
5 second blinks: One or more active Alarms.
Note: The Red LED does not function when Fast Logging.
Logging modes:
Manual Start/Stop, Pre-set Start/Stop, Log on Alarm, Cycle Logging
(start time, active period, pause period, stop time), Log on Ext. Trigger,
Manual Start/Wrap, Preset Start/Wrap.
Manual Start/Stop, Log on Alarm, Log on External Trigger and Cycle
Logging may have any number of individual data segments, limited
only be available memory.
Sampling modes:
Standard, Average* (1 second internal sampling), Peak* (1 second
internal sampling), Differential (Channel (x-1) minus Channel x, where
x is channel 2, 4, 6, or 8).
*Peak and Average sampling are only available when using the
following Slow Logging modes: Manual, Preset, Manual Start/Wrap,
Preset Start/Wrap and Cycle.
Logging interval:
Any time interval from 1 second to 24 hours, plus 2Hz to 1000Hz for
Fast Logging modes. During Fast Logging, the pulse inputs are
disabled, and the User interface is disabled except to stop logging.
Alarming capabilities:
All eight analog channels have individually adjustable high and low
alarm limits. Configurable alarm responses for all slow logging modes
include activate Alarm output, dial out to a host computer (modem
required), send a descriptive SMS alarm message to a cell phone (GSM
modem required). Alarms are disabled for all fast logging modes
except ‘Log on Alarm’.
Real time mode:
Current readings of all active channels and optional time stamp.
Updated: When readings are logged to memory or at any time interval
from 2 seconds to 24 hours (user selectable). Can be active while any
slow logging mode is active with no effect on the logging session.
31
XR5 Terminal Mode
Data transfer:
Clock accuracy:
Battery life:
Battery type:
External power input:
Excitation terminals:
Data may be transferred while any Slow Logging mode is active (or
when not logging). All data is transferred via the Xmodem protocol at
9600bps in a binary format. Pace LogXR Software must be used to
convert XR5 binary files into a readable text files compatible with
Excel or a text file viewer (like Notepad).
+/- 1 minute per month at 25°C.
+/- 2.5 minutes per month from -10 to 60°C.
Clock accuracy is also Time Stamp accuracy for all logging modes and
logging intervals.
Battery life is dependent on logging rate and Real Time Mode use*
Logging Interval
Battery life
1 second
2 months
10 seconds
1 year
1 minute
5 years
*Displaying data constantly in Real Time reduces battery life. For
example, if real time mode is constantly active (24/7) with a 2 second
update interval, the batteries will discharge in about 3 months.
Lithium, ½ AA size, 3.6 volt (2 required).
Voltage range: 8.0 – 10.0 vdc (9vdc nominal)
Warning! A voltage higher than 11vdc on the External Power Input
may damage the unit.
Maximum current draw (sampling and communication active) is
approx 5ma (higher if external sensors are drawing power from the
XR5’s excitation terminals). Average power draw is approx 10
microamps (0.01 milliamps).
E: 5vdc, maximum current draw D + E terminals: 25ma. (current
limited).
D: 2.5vdc, maximum current draw: 5 ma. (current limited).
Note: Power from the excitation terminals is pulsed for the duration of
the selected Excitation Time, just prior to logging readings or reading
Real Time data. If Fast Logging (2 Hz – 1000 Hz), excitation terminals
are continuously powered ON for the duration of the Logging Session.
Specifications subject to change without notice. Revised 28 March 2005
32
XR5 Terminal Mode
Battery Replacement
If the XR5’s battery voltage reads below 5.4v, the batteries should be replaced (the battery voltage displays
on the Status screen and in the header portion of all data files).
Battery replacement clears the XR5’s time clock. All other configuration settings and logged data
are retained after battery replacement.
1. Remove the 4 screws from the underside of the XR5. Place the unit “right side up” on a flat surface.
2. Starting at the end opposite the round communication jack, carefully lift off the top of the enclosure.
3. Remove the two batteries by pulling each one straight up using your thumb and forefinger.
4. Install 2 new batteries, following the polarity markings on the battery holder (+ terminal towards the
middle of the XR5).
5. Align one end of the cover on the communication jack, and then bring the opposite end down so that it
gently “snaps” over the end of the 20 position terminal block.
6. Re-install the 4 screws – do not to over-tighten.
7. After replacing the batteries, the XR5’s Time Clock must be re-set from the Setup Menu.
External Power Supply
Pace Scientific offers a regulated 9vdc power supply for the XR5 Data Logger, part # PS-9V.
Wiring:
Color
Black
White/Black
Function
Ground
+9volts
XR5 Terminal
‘C’ terminal
‘Q’ terminal
When the external supply is active, the internal batteries are not used. The internal batteries power the XR5
upon loss of 9v external power. The battery voltage displays in the Status Screen and in the header portion
of all data files. Actual battery voltage continues to display in the Status Screen even if the XR5 is
powered externally. Although not recommended, the XR5 will run on external power if the internal
batteries are discharged or not present.
Other regulated 9vdc power supplies may be used, but it is the user’s responsibility to insure that the Q
terminal does not go above 10vdc (continuous).
WARNING! Using an Unregulated 9vdc power supply would expose the Q terminal to voltages above
11vdc and damage the XR5.
If the XR5Data Logger is externally powered at all times, its batteries will remain in good condition for at
least 10 years.
33
XR5 Terminal Mode
Temperature Probes
Pace PT900 Series Temperature Probes may be directly connected to the XR5-8A-SE and XR5-8X-SE.
Using PACE temperature probes, system accuracy is +/-0.15°C and resolution is 0.02°C at 25°C. Other
thermistor probes which conform to the PACE PT900 resistance vs temperature table may also be used –
contact PACE for details.
Compatibility
Model
XR5-8A-SE
XR5-8B-SE
XR5-8X-SE
Maximum # of PT900 Series Probes
8
0
4
XR5 Setup
Select ‘Temp’ for the channel that will connect to the Temperature Probe. See page 16 for details.
Wiring
Connect one lead of the Temperature Probe to the Channel #. Connect the other lead to ‘C’.
34
XR5 Terminal Mode
Temperature / RH Probe
The PACE TRH-160 Temperature / Humidity Probe connects directly to two Type A inputs (one input for
Temperature and one for Humidity). Up to 4 PACE TRH-160 Probes may be connected to the XR5-8ASE. Accuracy is +/-2%RH and +/-0.15°C at 25°C.
XR5 Setup
Select the ‘Temp’ input range for the channel that will log Temperature (see page 16 for details).
Use a 0-2.5v input range for the channel that will log Relative Humidity.
Compatibility
Model
XR5-8A-SE
XR5-8B-SE
XR5-8X-SE
Wiring
Lead
Red
Black
Green
White
Maximum # of TRH-160 Probes
4
0
2
XR5 Terminal
1, 3, 5, or 7
C
2, 4, 6, or 8
E
Function
Temperature
Ground
Relative Humidity
5v Excitation for RH Sensor.
NOTE: For compatibility with LogXR Software, please select an odd numbered channel for TRH-160’s
temperature lead, and the very next (higher) channel number for the humidity lead. For example, use
channel 3 for temperature and channel 4 for humidity.
Scaling Values
Enter the Slope and Offset values listed on the TRH-160 Probe. See page 17 for details on entering scaling
values.
Excitation Time
The TRH-160 requires 150ms Excitation time. (see page 18 for details).
Temperature Compensation
If the TRH-160 Probe is used in a temperature range from 15 to 35°C (59 to 95°F), temperature
compensation is not required. If any temperature data is outside this range, the following temperature
compensation formula should be applied to the RH data set for best accuracy:
RHc = RH/(1.0546 - 0.00216 * T)
Where:
RH = %RH (not temperature compensated).
T = Temperature of TRH-160's temperature sensor (in °C).
RHc = %RH (compensated for TRH-160 Probe temperature).
Temperature compensation is built into Pace LogXR Software.
Installation Orientation
In moist environments, the TRH-160 Probe should be mounted with the stainless steel filter pointing down.
This will allow any water condensate to drain out the sensor and not collect inside the sensor where it could
damage the electronic circuitry within the body of the probe.
35
XR5 Terminal Mode
Pressure Sensors
PACE offers a variety of direct-connect Pressure Sensors for the XR5 SE Data Logger. All require no
external power.
P1000 and P1500 / P1510 Pressure Sensors
Connect directly to an XR5 SE Data Logger’s 0-5v input channel; no external power required.
Recommended for high and low side refrigeration and air conditioning systems, chilled water, hot water,
air, gas, oil and steam pressure. P1000 pressure ranges are currently stocked include 0-5 psig, 0-25 psig,
Vac (-15) to 120 psig and VAC (-15) to 600 psig. P1500 Pressure Sensors are available in 0-100, 0-250, 0500, 0-1000, 0-2500, 0-5000, and 0-10,000 psig ranges.
Compatibility
Model
XR5-8A-SE
XR5-8B-SE
XR5-8X-SE
Max # of P1000 Sensors
0
8
4
Max # of P1500 / P1510 Sensors
0
5 (due to higher power requirement of P1500/P1510)
4
Wiring
P1500 or P1000 if leads are Green, Black and White
Lead Color
XR5 Terminal Function
Black
C
Ground
White
E
Excitation
Green
Any 0-5v input Pressure Signal
P1500 or P1510 if leads are Red, Black and White
Lead Color
XR5 Terminal Function
Black
C
Ground
Red
E
Excitation
White
Any 0-5v input Pressure Signal
P1000 if leads are Red, Yellow and White
Lead Color
XR5 Terminal Function
White
C
Ground
Red
E
Excitation
Yellow
Any 0-5v input Pressure Signal
XR5 Setup
Use a 0-5v input range for the pressure sensor’s input channel.
Excitation Time
All P1000 Pressure Sensors require 30ms of Excitation time
All P1500 / P1510 Pressure Sensors require 150ms of Excitation time (see Setup, page 9 for details).
Scaling Values
The Slope and Offset scaling values for PACE Pressure Sensors are listed below. The values are listed for
units of PSI. To read pressures in a different measurement unit, contact PACE Technical Support for the
Slope and Offset values. See page 16 for additional details on Slope / Offset scaling values.
Model Range
P1000 0 - 5 psig
0 - 25 psig
Vac (-15) - 120 psig
Vac (-15) - 600 psig
Slope
1.25
6.25
33.75
153.75
Offset
-0.62
-3.12
-31.87
-91.87
36
XR5 Terminal Mode
Model
P1500 / P1510
Range
0 – 25 psig
0 – 50 psig
0 – 100 psig
0 – 250 psig
0 – 500 psig
0 – 1000 psig
0 – 2500 psig
0 – 5000 psig
0 – 7,500 psig
0 – 10,000 psig
Slope
6.25
12.0
25.0
62.5
125
250
625
1250
1875
2500
Offset
-3.15
-6.25
-12.5
-31.5
-62.5
-125
-312
-625
-937.5
-1250
P300 Pressure Sensors
For indoor air applications including Lab/Clean Room Pressurization, Filter Differential Pressure, Fan
Static Pressure, Absolute Pressure and Barometric Pressure. Pressure media: dry air, nitrogen, oxygen,
hydrogen, helium, neon, argon, krypton, xenon.
Compatibility
Model
XR5-8A-SE
XR5-8B-SE
XR5-8X-SE
Maximum # of P300 Sensors
0
8
4
Wiring
Lead Color
Black
White
Green
XR5 Terminal
C
E
Any 0-5v input
Function
Ground
Excitation
Pressure Signal
XR5 Setup
Use a 0-5v input range for the channel that will log the pressure sensor.
Excitation Time
All PACE Pressure Sensors require 30ms of Excitation time (see page 9 for details).
Scaling Values
The Slope and Offset scaling values for PACE Pressure Sensors are listed below. To read pressures in a
different measurement unit, contact PACE Technical Support for the Slope and Offset values. See page 17
for details on entering scaling values.
Model Range
P300
0-1 inch H20 gauge
0-5 inch H20 gauge
0-10 inch H20 gauge
0-30 inch H20 gauge
±1 inch H2O Differential
±5 inch H2O Differential
±10 inch H2O Differential
±30 inch H2O Differential
0-15 psig or psia
0-30 psig or psia
Slope
0.25
1.25
2.5
7.5
0.5
2.5
5.0
15.0
3.33
6.67
Offset
-0.16
-0.31
-0.62
-1.87
-1.12
-5.62
-11.25
-33.75
-0.83
-1.67
37
XR5 Terminal Mode
AC Current Sensors
Connect directly to an XR5 input channel; no external power required. Self powered, split core design in a
rugged plastic housing.
Compatibility
Model
XR5-8A-SE
XR5-8B-SE
XR5-8X-SE
Wiring
Lead Color
Black
Red
Maximum # of PACE AC Current Sensors
8
8
8
XR5 Terminal
C
Any 0-2.5v or 0-5v input
Function
Ground
Signal
XR5 Setup
Pace Current Sensors may be connected to either 0-5v input or a 0-2.5v input. Using a 0-2.5v input causes
the AC amps range to be reduced by a factor of 2.
Enter the Slope and Offset scaling values listed below.
Using a 0-2.5v input:
Model
SC100A
SC200A
SC500A
SC1500A
Range (ac amps)
0-50
0-100
0-250
0-750
Slope
20.0
40.0
100.0
300
Offset
0.0
0.0
0.0
0
Resolution
0.01 amps
0.02 amps
0.06 amps
0.18 amps
Slope
20.0
40.0
100.0
300
Offset
0.0
0.0
0.0
0
Resolution
0.02 amps
0.05 amps
0.12 amps
0.36 amps
Using a 0-5v input:
Model
SC100A*
SC200A
SC500A
SC1500A
Range (ac amps)
0-100
0-200
0-500
0-1500
*Because of its higher output impedance, we recommend connecting the SC100A to a 0-2.5v input for best
accuracy. For all other PACE AC Current Sensors, using either a 0-2.5v or 0-5v input will give excellent
performance.
38
XR5 Terminal Mode
AC Voltage Sensors
Connect directly to an XR5 input channel; no external power required. Self powered design in a rugged
plastic housing.
WARNING - SHOCK HAZARD!! - Disconnect AC Power BEFORE connecting sensor to AC Voltage
Source.
IMPORTANT! AC Voltage Sensor(s) must be mounted in a box, panel or suitable enclosure.
Compatibility
Model
XR5-8A-SE
XR5-8B-SE
XR5-8X-SE
Maximum # of SVN Series AC Voltage Sensors
8
0
4
Wiring
Follow wiring instructions printed on sensor.
Special notes for SVN600 AC Voltage Sensor:
The SVN600 AC Voltage Sensor must be wired to the included potential transformer. Follow the
wiring diagram on the sensor. Sensor and transformer must be mounted in a box or suitable
enclosure.
IMPORTANT!
The potential transformer's serial number must match the serial number on the AC Voltage Sensor.
Transformer and sensor are factory calibrated as a pair.
Once wired, the potential transformer's input leads can be connected to AC voltages within the
range of 0 to 600vac.
XR5 Setup
Use a 0-2.5v input range for the channel that will log the AC Voltage.
Enter the Slope and Offset scaling values listed below.
Model
SVN300
SVN600
Range (ac volts) Slope
0-300
120
0-600
240
Offset
0
0
Resolution
0.07 volt
0.15 volt
XR5 input
0-2.5v
0-2.5v
First generation PACE AC Voltage Sensors may be connected to a XR5 0-2.5v input. The AC Input
Voltage Range of the SV300 and SV600 is half scale when used with the XR5.
Model
SV300
SV600
Range (ac volts) Slope
0-150
60
0-300
120
Offset
0
0
Resolution
0.04 volt
0.08 volt
XR5 input
0-2.5v
0-2.5v
PACE AC Voltage Sensors are not recommended for use with the XR5’s 0-5v input range. Doing
so will result in a measurement error of about 4%.
39
XR5 Terminal Mode
Additional Voltage Ranges
Pace offers external ‘INP Cables’ that provide alternate input ranges for any 0-2.5v ‘Type A’ analog input.
Part #
INP-5V
INP-10V
INP-15V
INP-30V
INP-60V
INP-124ohm
Input Range
0-5vdc
0-10vdc
0-15vdc
0-30vdc
0-60vdc
4-20ma
Input Impedance
100k
100k
100k
100k
100k
124 ohm
Pace INP Cables can not be used on 0-5v ‘Type B’ inputs.
XR5 Setup
Select the 0-2.5v input range, and enter the following scaling values to read the input signal as a voltage.
Part #
INP-5V
INP-10V
INP-15V
INP-30V
INP-60V
Input Range
0-5vdc
0-10vdc
0-15vdc
0-30vdc
0-60vdc
Slope
2
4
6
12
24.05
Offset
0
0
0
0
0
INP-124ohm
4-20ma
(see page 44 for slope and offset calculation for 4-20ma signals)
40
XR5 Terminal Mode
Potentiometer Applications
The XR5 Data Logger can log analog readings from potentiometric devices. The potentiometer should be
10kohms or higher. Potentiometric devices include inclinometers and linear displacement sensors.
Important: Wires should be kept as short as possible. The D terminal is the internal 2.5v reference for the
XR5’s A/D converter. Noise conducted on wires connected to the D terminal can result in noise and
measurement errors in Real Time and Logged data. If long wires are necessary we recommend connecting
an external 2.5v supply to the potentiometer in place of the D terminal. Powering a 2.5v reference from the
XR5’s E terminal is a self-powered solution if long wires are necessary – contact PACE for details.
Compatibility
Model
XR5-8A-SE
XR5-8B-SE
XR5-8X-SE
Maximum # of Potentiometric Sensors
8
0
4
XR5 Setup
Use a 0-2.5v input range for the channel that will log the potentiometer.
Scaling
Depends on the application. To log potentiometer readings as % of full scale [0 to 100] use a Slope of 40
and an Offset of 0.
Wiring
Drawing shows potentiometer connected to channel 1, but any channel with a 0-2.5v range can be used.
D
1
XR5
C
Potentiometer
10K minimum
1M maximum
41
XR5 Terminal Mode
Non-PACE Sensor Requirements
The XR5 Data Logger will accept a variety of sensors from other manufacturers. Sensors must meet the
following requirements:
Sensors powered by XR5’s internal batteries
Excitation voltage
5 volts dc
Maximum current draw 25ma (total draw for all sensors powered from the E terminals)
Maximum warm-up time 10 seconds
Signal Output
A voltage output within the range of 0-5vdc.
Output Signal Load
100k for XR5 0-5v input range.
10M for XR5 0-2.5v input range.
Voltage output sensors, externally powered
Excitation voltage
Any, user provides necessary power supply.
Maximum current draw Any, user provides necessary power supply.
Warm-up time
Any, if power is applied to sensor for duration of logging session.
Signal Output
A output voltage within the range of 0-5vdc. Examples: 1 to 3v; 0.5 to
4.5v, 0.25 to 4.75v.
Output Signal Load
100k for XR5 0-5v input range.
10M for XR5 0-2.5v input range.
.
4-20ma Sensors, externally powered
Excitation voltage
Any, user provides necessary current loop power supply.
Warm-up time
Any, if power is applied to sensor for duration of logging session.
Signal Output
4-20ma
Output Signal Load
124 ohms for XR5 0-2.5v input range (use PACE # INP-124ohm resistor).
Important: XR5 inputs are not isolated; multiple 4-20ma signals share a common ground. In some cases, 420ma isolators may be required. See next page for more details.
Pulse Output Sensors
All XR5 SE Data Loggers have 3 pulse inputs with the following specifications:
Each Pulse Input can be set for a Mechanical Switch (dry contact) or a Solid State Pulse.
Mechanical Switch:
Solid State Pulse:
Voltage Pulse
Dry Contact
Maximum Rate
Debounce & Min. Hold Time
Maximum Rate
Debounce & Min. Hold Time
15 Hz
30 ms
900 Hz
0.5 ms
Positive amplitude range:
Positive-going input threshold:
Negative-going input threshold
Bias (pull-up) voltage
Bias resistance
2.3 to 3.6 v
2.3 v
0.6 v
3.3 v
1.5 Mohm
Guidelines for compatible devices:
For remote installations, a device that employs an unpowered magnetic reed switch to generate pulses is
preferred because no power is required. A magnetic reed switch is used in tipping bucket rain gages and
many gas and water meters. A device which outputs an electrical pulse will work if the pulse frequency is
30Hz or less and the pulse amplitude (with respect to ground) is between 2.5 volts and 3.6 volts. A device
with an “open collector” pulse output will work, but a constant external power source (3 to 3.6 volts dc)
must be supplied for the duration of the logging session.
42
XR5 Terminal Mode
Current Loop Applications
An XR5 Data Logger’s 0-2.5v input can be configured to directly monitor a current loop if a PACE INP124ohm resistor is wired to its terminal block.
PACE offers a precision, low temperature coefficient, 124 ohm resistor for current loop applications - part
# INP-124ohm. A common 120 ohm resistor may be used with reduced accuracy – if you do so, we
strongly recommend soldering stranded wires to each resistor lead. Terminating a resistor’s solid wire with
another wire in the terminal block can result in a poor electrical connection.
WARNING
XR5’s inputs are not isolated; all inputs share a common ground, which is also the XR5’s RS232
ground. The Data Logger's 'C' terminal should be wired to the negative terminal of the Current
Loop power supply. If this can not be done, do not communicate with the XR5 using a grounded
PC. If you must communicate to the XR5 using a grounded PC and the negative terminal of the
current loop power supply is not at earth ground, use an RS232 isolator between your grounded
PC and the XR5. Call PACE technical support for a recommended model.
Compatibility
Model
XR5-8A-SE
XR5-8B-SE
XR5-8X-SE
Maximum # of Current Loops
8
0
4
XR5 Setup
Use a 0-2.5v input for the channel that will log the current loop.
Scaling
See page 44 for Slope / Offset calculation examples.
Wiring (assumes current loop on channel 1)
Lead
XR5 Terminal 4-20ma Transmitter
124ohm
1*
124ohm
C
Loop PS (-)
C
Loop PS (+)
+ terminal
1*
- terminal
*Substitute the actual channel # for 1 if using a different XR5 channel.
ES-1 External Switch
PACE offers an external switch designed for battery powered 4-20ma current loop applications. The
external switch is wired in series with the current loop. Sensing wires from the ES-1 are wired to an XR5
Data Logger’s E and C terminals. In this way an external battery can be switched on, powering the current
loop just prior to logging transmitter readings, and then be switched off. With the ES-1, a remote site can
log readings from 4-20ma transmitters for extended periods of time using a relatively small external battery
to power the current loop.
43
XR5 Terminal Mode
Calculating Slope and Offset
4-20 ma Transmitters
Please note: Our free LogXR Software has a “Calculate Slope and Offset” button in the Setup screen’s
Channel tab that can calculate a 4-20ma transmitter’s slope and offset for you. Simply fill in the blanks
and click “Calculate” and the slope and offset values are displayed.
Use the following formula to calculate Slope and Offset values:
Transmitter reading at 20ma – Transmitter reading at 4ma
Slope = ---------------------------------------------------------------------Input voltage at 20ma – Input voltage at 4ma
Offset = Transducer reading at 4ma + (-1 * slope * Input Voltage at 4ma)
Example 1: Level Transmitter with a measurement range of 0 to 25,000 liters.
0 liters = 4ma, 25,000 liters = 20ma. Input voltage = resistance * current. Using INP-124ohm resistor,
Slope / Offset calculations would be as follows:
Slope = 25,000 – 0 / ((124 * 0.020) – (124 * 0.004)) = 25,000 / (2.48 – 0.496) = 12601
Offset = 0 + ( -1 * 12601 * 124 * 0.004) = -6250
For a 4-20ma Transmitter with a range of 0 to 25,000 liters:
Slope = 12601, Offset = -6250 (using a 124 ohm resistor).
Example 2: Temperature Transmitter with a measurement range of 0 to 1000ºC.
0ºC = 4ma, 1000ºC = 20ma. Input voltage = resistance * current. Using INP-124ohm resistor:
Slope = 1000 – 0 / ((124 * 0.020) – (124 * 0.004)) = 1000 / (2.48 – 0.496) = 504
Offset = 0 + ( -1 * 504 * 124 * 0.004) = -250
For a 4-20ma Transmitter with a range of 0 to 1000ºC:
Slope = 504, Offset = -250 (using a 124 ohm resistor).
Example 3: Differential Pressure Transmitter with measurement range of +/-10inch W.C.
(-10inch = 4ma, +10inch = 20ma, 0inch = 12ma). Input voltage = resistance * current. Using INP-124ohm
resistor, Slope / Offset calculations would be as follows:
Slope = 10 – (-10) / ((124 * 0.020) – (124 * 0.004)) = 20 / (2.48 – 0.496) = 10.08
Offset = -10 + ( -1 * 10.08 * 124 * 0.004) = -15.00
For a 4-20ma Transmitter with a range of -10 inch water column to 10 inch water column:
Slope = 10.08, Offset = -15.00 (using a 124 ohm resistor)
44
XR5 Terminal Mode
Calculating Slope and Offset
Voltage output Transducers
Please note: Our free LogXR Software has a “Calculate Slope and Offset” button in the Setup screen’s
Channel tab that can calculate a transducer’s slope and offset for you. Simply fill in the blanks and click
“Calculate” and the slope and offset values are displayed.
Use the following formulas to calculate Slope and Offset values:
Transducer maximum reading – Transducer minimum reading
Slope = --------------------------------------------------------------------------------------------------------------------Transducer output voltage at maximum reading – Transducer output voltage at minimum reading
Offset = Transducer minimum reading + (-1 * slope * Transducer output voltage at minimum reading)
Example 1: Pressure Transducer with a measurement range of 0 to 100 psig.
0 psig = 0.5v, 100 psig = 4.5v
Slope = 100 – 0 / (4.5 – 0.5) = 100 / 4 = 25
Offset = 0 + (-1 * 25 * 0.5) = -12.5
For a Pressure Transducer with a range of 0 to 100 psig, and a voltage output from 0.5v to 4.5v:
Slope = 25, Offset = -12.5
Example 2: Differential Pressure Transducer with a measurement range of -30 to +30inch W. C.
-30 inch w.c. = 0.25v, 30 inch w.c. = 4.75v
Slope = 30 – (-30) / (4.75 – 0.25) = 60 / 4.5 = 13.33
Offset = -30 + (-1 * 13.33 * 0.25) = -33.33
For a Differential Pressure Transducer with a range of -30 to 30inch w.c., and a voltage output of 0.25v to
4.75v:
Slope = 13.33, Offset = -33.33
Converting to other measurement units:
The XR5 can scale transducer / transmitter readings to any desired measurement unit. For example,
pressure readings can be scaled to Bar, pascal, millibar, inchMg, and any other unit of pressure. To do this,
in the Slope formula (above), replace the transducer’s maximum and minimum readings with equivalent
readings in the desired pressure unit, and in the Offset formula (above), replace the transducer’s minimum
reading with the equivalent reading in the desired pressure unit.
45
XR5 Terminal Mode
Manual Dialout:
Landline modem connected to the XR5
An XR5’s data may be transferred over phone lines by connecting a modem to the XR5 (the remote
modem) and using a second modem with your Computer or PDA (the host modem). The following
instructions explain how to set up an XR5 with a modem and call it from a local (Host) computer or PDA.
IMPORTANT! It is strongly recommended that the following procedure be fully tested in a local setting (for
example, in an office) using two phone lines, to confirm that the hardware has been correctly set up. Once
the hardware is functioning correctly in a local setting, the XR5 and remote modem can be installed with
confidence at the remote site.
Required Hardware:
Host Computer or PDA and modem (host modem)
Remote modem
IC211 Cable
Two phone lines: one for the remote modem, and one for the host computer’s modem
Recommended Modem (2 recommended)
Zoom Model 2949 or 2836 External Faxmodem. We recommend using this modem at the remote XR5
end and also at the Host end. However, using the Zoom 2949 or 2836 at the remote end with a different
modem at the host end will often give satisfactory results.
Remote Modem Initialization Strings
The following strings must be sent to the remote modem. Use HyperTerminal or a similar program set to
9600 bps to send the strings to the modem. See page 7 for instructions on setting up HyperTerminal. The
modem will store the parameters defined by this string in non-volatile memory, so that the parameters will
be retained even if the modem is powered off.
Note: In the following strings:
First String:
Second String:
Third string:
“0” is the number 0 not the letter O.
“<Enter>” is the Enter key.
AT&F<Enter>
The modem should respond with “OK”
AT&FE&D&KS0=1&W0<Enter> The modem should respond with “OK”
ATQ1&W0<Enter>
The modem will not respond.
Remote Modem / XR5 Cable
After the remote modem has been initialized, disconnect it from your computer or PDA and connect it to
the remote phone line and the XR5 using the IC211Cable.
Initiating the Dial-out
1. Use your terminal emulator or communication program (like HyperTerminal) to initialize the host
modem by keying AT&F<Enter>. The modem should respond with “OK”.
2. Manually call the remote modem from your Computer or PDA by dialing the remote modem’s phone
number (still using the terminal emulator). The required key sequence to initiate a call is
ATDTxxx<Enter> where xxx is the phone number of the remote modem. After the remote modem has
answered the call, the modems attempt to establish a connection (audible chimes). When the host modem
responds with “CONNECT”, the connection is successfully established. Once a connection has been
established, the XR5 functions just as if it was connected directly to your Computer or PDA.
Accessing the XR5
While connected, data may be transferred from the remote XR5, a new logging session may be launched,
Status and Real Time Mode may be displayed (as explained earlier in this manual). When you are finished
accessing the XR5, terminate the phone connection by keying three plus signs “+++” and after a pause of at
46
XR5 Terminal Mode
least 1 second, key ATH<Enter>. Once the local modem goes “on hook”, terminating the call, the remote
modem will go “on hook” also, ending the Manual Dial-out session.
47
XR5 Terminal Mode
Manual Dialout:
GSM Cellular modem connected to the XR5
An XR5’s data may be transferred wirelessly by connecting a GSM Cellular modem to the XR5 and using
a second modem with your Computer or PDA (the host modem). The following instructions explain how
to set up an XR5 with a GSM Cellular modem and call it from a local (Host) computer or PDA.
IMPORTANT! It is strongly recommended that the following procedure be fully tested in a local setting (for
example, in an office) to confirm that the hardware has been correctly set up. Once the hardware is
functioning correctly in a local setting, the XR5 and GSM modem can be installed with confidence at the
remote site.
Required Hardware:
Host Computer or PDA and modem (host modem)
Pace GSM Cellular modem package (see details below)
A phone line for the host computer’s modem
Recommended Host Modem
Zoom Model 2949 or 2836 External Faxmodem. An existing (different) internal or external modem may
give satisfactory results.
GSM Modem Setup
The Pace GSM Cellular Modem package consists of the following items:
Wavecom GSM modem, pre-configured to communicate with the XR5.
Model M1213A 900/1900MHz (North America and some South American countries)
Model M1203A 900/1800MHz (Europe and Asia).
To confirm the GSM frequency used in your country, please see
http://www.gsmworld.com/roaming/gsminfo/index.shtml
GSM Antenna (magnetic mount with connecting cable)
Antenna connector adapter (mates GSM Antenna cable to GSM modem)
Power supply (linear 9vdc 1 amp)
IC-W15 Communications cable, XR5 to modem
Sim Card Installation
The GSM modem requires a Sim card (available from a local cellular service provider) which has been set
up for data calls. Install the Sim card by pushing the button on the side of the GSM modem to extract the
SIM card carrier (use a pointed object like a ball point pen). Place the SIM card in the carrier with the gold
pads on the SIM card facing up (visible). Slide the carrier back into the GSM modem (SIM card gold pads
facing up), and press the carrier firmly in place.
GSM Modem Mounting Brakets
Metal brackets are included with the GSM modem and may be used to securely mount the modem if
desired.
Antenna Installation
Screw the supplied Antenna connector adapter into the GSM modem’s Coax connector. Screw the
Antenna cable into the Antenna connector adapter. Place the Antenna on a suitable metallic surface (the
Antenna contains an internal magnet to simplify mounting.
48
XR5 Terminal Mode
Communication Cable Installation
Connect the IC-W15 Cable to the GSM modem’s 15 pin high density “D-sub” connector. Use the slotted
thumb screw on the IC-W15 to fasten the IC-W15 securely. Insert the other end of the IC-W15 Cable into
the XR5’s communication port.
Power Cable Installation
The GSM modem comes with a fused power cable. Insert this cable into the 4 position power connector
(located beside the “D-sub” connector). The other end of the cable is terminated with a Plug-in modular
power supply. Plug the power supply into an AC power receptacle.
Initiating the Dial-out
1. Use your terminal emulator or communication program (like HyperTerminal) to initialize the host
modem by keying AT&F<Enter>. The modem should respond with “OK”.
2. Manually call the remote modem from your Computer or PDA by dialing the remote modem’s phone
number (using the terminal emulator). The key sequence to initiate a call is ATDTxxx<Enter> where xxx
is the phone number of the remote modem. After the remote modem has answered the call, the modems
attempt to establish a connection (audible chimes). When the host modem responds with “CONNECT”,
the connection is successfully established. Once a connection has been established, the XR5 functions just
as if it was connected directly to your Computer or PDA.
Accessing the XR5
While connected, data may be transferred from the remote XR5, a new logging session may be launched
(by sending a Setup to the XR5), Status and Real Time Mode may be displayed (as explained earlier in this
manual). When you are finished accessing the XR5, terminate the phone connection by keying three plus
signs “+++”, and after pausing at least 1 second, key ATH<Enter>. Once the local modem goes “on hook”,
terminating the call, the remote GSM modem will go “on hook” also, ending the Manual Dial-out session.
49
XR5 Terminal Mode
Limited Warranty
All XR5 Data Loggers are warranted against defects in materials and workmanship for three years from
date of shipment. All other Pace Scientific products are warranted against defects in materials and
workmanship for one year from date of shipment. During the warranty period, we will repair or, at our
option, replace at no charge a product that proves to be defective, provided you return the product, shipping
prepaid, to Pace Scientific Inc.
This warranty gives you specific legal rights, and you may also have other rights that vary from state to
state.
This warranty does not apply if the product has been damaged by accident or misuse or as the result of
modifications or repair by anyone other than Pace Scientific Inc. No other express warranty is given. The
repair or replacement of a product is your exclusive remedy. ANY OTHER IMPLIED WARRANTY OF
MERCHANTABILITY OR FITNESS IS LIMITED TO THE DURATION OF THIS WRITTEN
WARRANTY. Some states do not allow limitations on how long an implied warranty lasts, so the above
limitation may not apply to you. IN NO EVENT SHALL PACE SCIENTIFIC INC. BE LIABLE TO YOU
FOR ANY DAMAGES, INCLUDING LOST PROFITS, LOST SAVINGS OR OTHER INCIDENTAL
OR CONSEQUENTIAL DAMAGES ARISING OUT OF THE USE OF OR INABILITY TO USE SUCH
PRODUCT, EVEN IF PACE SCIENTIFIC OR AN APPROVED RESELLER HAS BEEN ADVISED OF
THE POSSIBILITY OF SUCH DAMAGES, OR FOR ANY CLAIM BY ANY OTHER PARTY.
Some states do not allow the exclusion or limitation of incidental or consequential damages, so the above
limitation or exclusion may not apply to you.
Products are sold on the basis of specifications applicable at the time of manufacture. Pace Scientific Inc.
shall have no obligation to modify or update products once sold.
50
XR5 Terminal Mode
Service
Technical Support
Call Pace Scientific at (704) 799-0688, Monday - Friday between 8AM and 5PM Eastern Standard Time.
Or email [email protected]
Repair
Contact technical support to confirm that the product is not functioning properly. If repair is needed,
support will issue an RMA number.
Once an RMA number is issued, return item for repair to:
Pace Scientific Inc.
Attention: Service Dept. / RMA# your RMA# here
542 Williamson Rd Unit 6
Mooresville NC 28117
USA
51
XR5 Terminal Mode
PDAs for the XR5
The following comments and recommendations cover a few of the more popular PDAs. In order to
communicate with the XR5, the PDA must have an RS232 Serial Port.
Some PDAs only have a USB port. A PDA’s USB Port can not communicate with an XR5.
Pocket PC
Hardware
As long as the Pocket PC device has an RS232 serial port and an RS232 Cable, it should be
compatible with the XR5. The iPAQ H1900 is not compatible because it lacks a serial port.
Dell Axim
An RS232 cable is available for the Dell Axim, but because RS232 handshaking signals are
required for the cable to work, it is not a good match for the XR5’s 3-wire RS232 Interface. The
Axim RS232 cable also contains active circuits which require a power source. For these reasons,
we do not recommend the Dell Axim.
RS232 Cable
Ideally, a Pocket PC RS232 serial cable should have a 9 pin connector with male pins. This type
cable will mate with the XR5’s IC209 Cable without additional adapters. However, most Pocket
PC serial cables are designed to connect to a PC’s serial port and have a female 9 pin connector.
This type cable requires a 9pin male to 9 pin male null modem adapter to mate with the XR5’s
IC209 Cable. This adapter is available from Pace, part# AN-9M.
Pocket PC Cable sources
Our first choice:
RS232 Cable (with male connector) for iPAQ Pocket PC - various models
http://www.serialio.com/products/adaptors/iPaqSerial_RS232.htm
Connections:
iPAQ <> RS232 Cable (with male connector) <> Pace IC209 Cable <> XR5
The following cables require a Pace AN-9M Adapter:
RS232 Cable (with female connector) for iPAQ Pocket PC H3600,H3700 Series
http://www.suntekstore.com/pm-cb-rs232-ipaq3600.html
RS232 Cable (with female connector) for iPAQ Pocket PC H3800,H3900 Series
http://www.suntekstore.com/pm-cb-rs232-ipaq3800.html
Connections:
iPAQ <> RS232 Cable (with female connector) <> Pace AN-9M Adapter <> Pace IC209 Cable <> XR5
Pace AN-9M substitute
A 9pin male to 9pin male “Gender Changer” connected to a 9pin female to 9pin
male Null Modem Adapter is a replacement for the Pace AN-9M Adapter.
Communications Software
For Pocket PC’s, we recommend ‘vxhpc’ by Cambridge Computer.
http://www.cam.com/vxhpc.html
52
XR5 Terminal Mode
Palm
Hardware
Palm OS devices with an RS232 port include
Palm:
Tungsten models T, T2, T3, T5, C and W;
i705, m515, m505, m500, m130, m125, Zire 71
m105, m100, VII, Vx IIIe
Sony:
CLIE S and N series.
Palm RS232 Cable
A Palm RS232 Cable connects to the Pace IC209 Cable which connects to the XR5.
An RS232 Cable from serialio.com is available for the following Palms:
Tungsten models T3, T2, T, C and W
Zire 71, m500, m505, m515, m125, m130, i705
http://www.serialio.com/products/adaptors/PalmSerial_RS232.htm
An RS232 Cable from pcables.com is available for the
Tungsten T5
http://www.pcables.com Part# PLPT5-M9-6.
Cable connections: Palm PDA <> RS232 Cable <> Pace IC209 Cable <> XR5
Using a Palm Serial HotSync Cable
A Palm Serial HotSync Cable can be used to communicate with the XR5 but requires one or two
additional adapters to make it work with the XR5.
Cable connections with Pace AN-9M Adapter:
Palm PDA <> Serial HotSync Cable <> Pace AN-9M Adapter <> Pace IC209 Cable <> XR5
Cable connections with 9 pin male Gender Changer and Null Modem Adapter:
Palm PDA <> Serial HotSync Cable <> male Gender changer <> Null Modem Adapter <> Pace IC209 Cable <> XR5
Communication Software
We recommend Online which runs on the Palm and Sony PDAs listed above. It is available from
PalmSource at
http://palmsource.palmgear.com/index.cfm?fuseaction=software.showsoftware&prodid=2052
See page 7 for additional details.
53
XR5 Terminal Mode
“Top Level” Commands
When inactive, the XR5 is normally in the “Top Level” command state. In the “Top Level” state, the XR5
will respond to 3 commands detailed below. All other combination of characters is ignored.
Command
text
Total characters Result
4
Sends the Text Interface “Main menu”. Sending an Esc character
from the Main menu puts the XR5 back into the “top level”.
r
1
Sends a readable text string consisting of the current date and time, and
the current scaled value of each active channel. Each value is separated
by a comma. The XR5 continues to respond to any “top level”
command.
h
1
Enters the LogXR communications protocol. Commands in this
mode are binary commands with CRC checksums. Sending an Esc
character puts the XR5 back into the “top level”.
Terminal Mode Limitations
Using the Terminal Mode, a PDA (or computer) may be used to launch a logging session, view readings in
Real Time, read current XR5 Status, start/stop logging, and transfer logged data as a binary data file.
However, binary data files must be converted to readable files using Pace LogXR Software.
Terminal Mode includes a Real Time selection that sends current sensor values as readable character string
at a user selected rate (for example, every 2 seconds). A similar “real time” string may be sent using the
“r” command. All linear sensors / transducers and the Pace PT9xx Series Temperature Probes display
scaled, readable values. However, other non-linear 2-wire sensors display either raw A/D values or
actual resistance if the channel Type was set to Resistance. Non-linear 2-wire sensors include the
LS100 Light Sensor, the PT510 / PT520 Platinum RTD, and if the XR5 has a millivolt option, all
thermocouples.
For use with the Terminal Mode, the XR5 can store a single non-linear scaling table in internal memory.
The XR5-SE ships with a 30k thermistor table (for Pace PT9xx Series Temperature Probes) loaded in
memory. However, an alternate non-linear sensor table may be loaded into the XR5, to allow a different
non-linear sensor to be readable from Terminal Mode. For example, a table for the Pace PT510/PT520
Sensors, or a table for the YSI #44004 Thermistor (2252 ohm) may be loaded into the XR5. These tables
and others are available from Pace on request.
54
XR5 Terminal Mode
Revision History
XR5 Terminal Mode User’s Guide
Revision Date
2 March 2004
29 March 2004
Changes
Last prior revision
Pg. 28: Excitation Terminals: Changed 2.5v excitation to 5ma max. (was
incorrectly specified at 2ma max.). Added note concerning Excitation function.
Updated to include extended memory –M models.
30 April 2004
Minor Revisions and Corrections
28 May 2004
Excitation: Changed 5v excitation to 25ma max.
20 July 2004
Changed recommended modem for remote communication.
Changed pulse input specifications to reflect enhanced pulse input performance.
10 Nov 2004
Updated to reflect new “text” entry into Terminal Mode.
Minor revisions and corrections.
28 March 2005
Pg. 52-53: Updated Pocket PC and Palm pages.
Pg. 54: Added “Top Level” command description and Terminal Mode
Limitations.
55