1
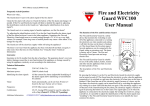
INNOHOME
Stove Guard SGK300
user manual
www.innohome.com
smart safety for your kitchen
Congratulations!
You now own one of the most intelligent
cooker safety products in the world.
Control Unit SGC500-2
Intelligent Heat Sensor SGS300
Control Unit SGC500-3
CONTENTS
1. Innohome Stove Guard and how to use it
1-7
1.1. A quick guide
1
1.2. Structure of the Stove Guard
2
1.3. Stove Guard use and features
2-4
1.4. Meaning of alarm signals
5-6
1.5. Automatic fault diagnosis
7
1.6. Additional devices
7
2. Monthly Maintenance
3. Low battery alarm
4. Intelligent Heat Sensor Installation
5. Control Unit Installation and Setup
6. Testing after Installation
8
8
9-10
11
12
6.1. Intelligent Heat Sensor test
12
6.2. Alarm Signal Detection test
12
6.3. Safety Lock test (if activated during the installation)
12
7. Changing the hob type setting
8. Checking the Control Unit settings
9. Setting the sensitivity level of the Intelligent Heat Sensor
10. Alarm output
11. Troubleshooting
12. Technical Information
13. Warranty
14. EU Declaration of Conformity
smart safety for your kitchen
13
13
14
15
15-17
18
18
18
STOVE GUARD SGK300 USER MANUAL
1. Innohome Stove Guard and how to use it
1.1 A quick guide
When the Stove Guard is signalling, press the Intelligent Heat Sensor push-button once.
Also note that:
When the Intelligent Heat Sensor is emitting a pre-alarm signal, a short sound followed by a long break (--____--____), it has identified a hazardous situation. If the
situation is not hazardous, press the Intelligent Heat Sensor push-button once during
the pre-alarm signal. The Stove Guard will learn that this kind of a situation is a normal
cooking situation.
al
ar
m
When the cooker has been turned off and the Stove Guard is signalling, first turn all
cooker knobs to ‘0’, then press the Intelligent Heat Sensor push-button once. In cookers that are operated by touch, just press the Intelligent Heat Sensor push-button
once.
7
1
STOVE GUARD SGK300 USER MANUAL
1. Innohome Stove Guard and how to use it (cont.)
1.2 Structure of the Stove Guard
The Stove Guard is composed of an Intelligent Heat Sensor, attached underneath the cooker hood, on the wall or
on the cooker panel, and a Control Unit, connected to the
cooker. With the additional Innohome Smart Socket, various distance alarms, like flashing lights or vibrating alarms,
can be linked to the system. The Intelligent Heat Sensor, the
Control Unit and the Smart Socket communicate using a
radio connection.
The Stove Guard can also be used with gas and dual-fuel
cookers, with the additional gas installation kit, including
an electric valve that is fitted into the cooker gas supply.
The Control Unit has an alarm output that enables the
Stove Guard to be linked to social alarm systems, such as
Telecare.
2
1
The push-button (1) resets the alarm, reconnects the gas/electricity supply to the cooker
and turns off the Safety Lock. Green light (2)
lights up at one-minute intervals and when
the Sensor push-button is being pressed.
A red light flashes during an alarm.
Distinguishing the Stove Guard type: Stove Guard SGK300-2 includes a Control Unit SGC500-2
with one blue connector, SGK300-3 includes a Control Unit SGC500-3 with two white connectors.
1.3 Stove Guard use and features
Stove Guard use
When the cooker has been turned off and the Stove Guard is signalling, first turn all cooker knobs to ‘0’, then press the Intelligent Heat Sensor push-button once. In cookers that are
operated by touch, just press the Intelligent Heat Sensor push-button once.
An intelligent Heat Sensor pre-alarm signal, that has a short sound and a long break
(--___--___ ), sounds one minute before turning the cooker off. If the situation is not hazardous, press the Intelligent Heat Sensor push-button once during the pre-alarm signal. The Intelligent Heat Sensor will learn that the situation was not hazardous.
A Control Unit pre-alarm signal (sounds from behind the cooker), that has a short sound and
a long break (--___--___ ), indicates that the Intelligent Timer will turn the cooker off after one
minute’s time. By pressing the Intelligent Heat Sensor push-button once, you will get more
time to use the cooker.
If the Safety Lock has ‘locked’ the cooker, you can get it back in use by pressing the Intelligent Heat Sensor push-button once.
2
STOVE GUARD SGK300 USER MANUAL
1. Innohome Stove Guard and how to use it (cont.)
Stove Guard features
a) Overheating Monitor
The Intelligent Heat Sensor, installed above the cooker, reacts to a dangerously high temperature or steep temperature rise. The Sensor’s self-adjusting technology ‘learns’ the users’ cooking styles, making hazard recognition precise, with no false alarms. The rate of temperature
increase alarm is based on the steep temperature rise that happens when the cooking vessel’s
liquid has dried out. Reacting to the temperature rise allows for an early detection and prevention of fire risk situations.
The Intelligent Heat Sensor will first sound a one minute-long pre-alarm signal (see Intelligent
Heat Sensor pre-alarm signal, on previous page), after which the cooker is turned off. Resetting
the pre-alarm signal causes the Intelligent Heat Sensor to become less sensitive.
The Intelligent Heat Sensor alarm is also reset automatically in about two minutes, after the
cooker has been turned off and the temperature starts to drop.
After automatic alarm reset, the cooker is turned back on normally: first turn all cooker knobs
to ‘0’, then press the Intelligent Heat Sensor push-button once. In cookers that are operated by
touch, the electricity supply is returned automatically (burners are off after the electricity cutoff ).
N.B. The Overheating Monitor alarm is not triggered if the hob’s temperature is too low for a
hazardous situation to be identified, or if the cooker automatically limits a temperature increase. When the alarm has been reset manually it cannot be triggered by the rate of temperature change for 30 minutes, but can still be triggered by the heat level. The Stove Guard is an
additional safety device that does not necessarily cover all possible hazardous situations, but
does significantly improve cooker safety.
b) Intelligent Timer
Electric cookers: The Intelligent Timer identifies a burner that has been accidentally left on by
monitoring burner heat adjustments. If a burner has been left on, the cooker is turned off
within a time period between 30 minutes and 3 hours, depending on the burner setting - the
higher the setting the sooner the cooker is turned off (in some cookers, the oven is not turned
off ). Before the cooker is turned off, the Control Unit will emit a one-minute long pre-alarm
signal (see Control Unit pre-alarm signal, on previous page). Resetting the pre-alarm signal will
restart the Timer.
Note that in some cookers that are operated by touch or have a clock, and with the SGK300-3
model in all electric cookers, the Intelligent Timer does not necessarily start if the burner is on
a very low heat setting.
3
STOVE GUARD SGK300 USER MANUAL
1. Innohome Stove Guard and how to use it (cont.)
Gas and dual-fuel cookers’ timer: The timer has a fixed time and starts when the hob temperature starts to rise. The cooker is turned off after two hours (in some dual-fuel cookers the oven
is not turned off ). Before the cooker is turned off, the Control Unit will emit a one-minute long
pre-alarm signal (see Control Unit pre-alarm signal on page 2). Resetting the pre-alarm signal
will give two hours more time.
c) Alarm Signal Detection (fire, carbon monoxide and gas alarms)
The Stove Guard identifies external (fire, carbon monoxide or gas) alarm signals using sound
detection. An alarm signal emitted by an external alarm triggers the Stove Guard to turn the
cooker off (in some cookers the oven is not turned off ).
d) Cooker knob Safety Lock
The Safety Lock can only be used with the SGK300-2 model and only on electric cookers with
mechanical knobs (excluding cookers with a clock). The Safety Lock ‘locks’ the cooker so that it
cannot be turned on accidentally, for example, by a child, a person with memory disorders, or
a pet. To use the cooker, press the Intelligent Heat Sensor push-button once or turn one of the
cooker knobs on and off three times, at one second intervals (on, off – wait one second – on,
off – wait one second – on, off ). The Control Unit emits two signals as the cooker is ready for
use. The Safety Lock feature can be activated or deactivated by carrying out the Control Unit
setup (see section 5).
4
STOVE GUARD SGK300 USER MANUAL
1. Innohome Stove Guard and how to use it (cont.)
1.4 Meaning of alarm signals
The Intelligent Heat Sensor signal has a higher tone than the Control Unit signal. The Intelligent Heat Sensor is attached above the cooker, the Control Unit signal sounds from behind
the cooker.
Sound
Meaning
Course of Action
Intelligent Heat Sens o r : a s h o r t ‘ b e e p’
every few seconds
The Intelligent Heat Sensor has identified
a high temperature or a steep temperature
rise above the cooker (Overheating Monitor). This is the Intelligent Heat Sensor prealarm signal, that is emitted one minute
before the cooker is turned off. Reset the
pre-alarm signal if it was triggered by a
normal cooking situation – this will cause
the Intelligent Heat Sensor to reduce its
sensitivity automatically and will prevent
the cooker shutdown.
Press the Intelligent Heat
Sensor push-button once
during the pre-alarm signal.
Intelligent Heat Sens o r : re p e t i t i ve f a s t
‘beep, beep, beep’
The Intelligent Heat Sensor has identified
a high temperature or a steep temperature
rise above the cooker (Overheating Monitor alarm) – the cooker has been turned
off.
First turn all cooker knobs to
‘0’, then press the Intelligent
Heat Sensor push-button
once. In cookers that are
operated by touch just press
the Intelligent Heat Sensor
push-button once.
Control Unit: a short
‘beep’ every few seconds
This is the Control Unit pre-alarm signal,
that sounds for one minute before the
Intelligent Timer turns the cooker off.
By pressing the Intelligent Heat Sensor
push-button once during the pre-alarm
signal, the cooker shutdown can be prevented.
Press the Intelligent Heat
Sensor push-button once
during the pre-alarm signal.
5
STOVE GUARD SGK300 USER MANUAL
1. Innohome Stove Guard and how to use it (cont.)
Sound
Meaning
Course of Action
Control Unit: a short
signal at approximately 5 second intervals
The cooker has been turned off due to the
Intelligent Timer function, detecting the
alarm signal of an external (smoke, carbon
monoxide or gas) alarm, or the Overheating Monitor detecting a dangerously high
temperature or a steep temperature rise.
First turn all cooker knobs to
‘0’, then press the Intelligent
Heat Sensor push-button
once. In cookers that are
operated by touch just press
the Intelligent Heat Sensor
push-button once.
Control Unit: a short
signal, followed by a
long signal (‘be-beep’),
at approximately 5
second intervals
The cooker has been turned off due to the
automatic fault diagnosis detecting a temporary error in the Intelligent Heat Sensor’s
connection to the Control Unit or in the
functioning of a part of the system. The
automatic fault diagnosis alarm can also
be triggered by the Intelligent Heat Sensor
not being in its original installation location, or if the Sensor has not been installed
correctly.
First turn all cooker knobs to
‘0’, then turn the electricity
off for around 15 seconds,
using the main switch. Ensure that the Intelligent Heat
Sensor is in its original installation location. If the problem
persists, contact the product
retailer.
Control Unit: two short
beeps (after turning
the Safety Lock off )
The Safety Lock has been turned off and
the electricity reconnected to the cooker.
The cooker can now be used.
Control Unit: a signal
every hour or half hour
There has been an error in the identification of the cooker.
Repeat the setup procedure
as described in section 11
under the heading ‘the Control Unit signals every hour or
half hour’.
Intelligent Heat Sensor
(and the Control Unit):
a signal once a minute
The Intelligent Heat Sensor has a low battery.
Replace the batter y (see
section 3). Pushing the
push-button on the Intelligent Heat Sensor once will
delay the battery alarm for 12
hours.
6
STOVE GUARD SGK300 USER MANUAL
1. Innohome Stove Guard and how to use it (cont.)
1.5. Automatic fault diagnosis
Electric cookers: The automatic fault diagnosis ensures that the Stove Guard is working perfectly each time the cooker is used for cooking (the diagnosis will not start if the cooker is only
used for a short period of time eg. to boil water). The diagnostic tool analyses the function of
the Intelligent Heat Sensor and the Control Unit, and the radio communication link between
the devices. The automatic fault diagnosis alarm can also be triggered by the Intelligent Heat
Sensor not being in its original installation location, or if the Sensor has not been installed correctly.
If the fault diagnosis detects something abnormal in the functioning of the system, the Control Unit will emit a fault signal (a short signal, followed by a long signal ‘be-beep’, at approximately 5 second intervals), and after a minute’s time, it will turn the cooker off.
If the fault diagnosis is signalling, press the Intelligent Heat Sensor push-button once during
the first minute of the alarm. If the fault diagnosis alarm was triggered by a temporary glitch
or by the Intelligent Heat Sensor not being in its original installation location, the cooker shutdown will be prevented and cooking can be continued normally. If the fault diagnosis alarm
was caused by an actual fault situation, the alarm cannot be reset and the cooker is turned off.
If the cooker has been turned off by the fault diagnosis (the Control Unit carries on signalling
the fault alarm signal), it can be turned back on by first turning all cooker knobs to ‘0’, then by
turning the electricity supply off for 15 seconds, using the main switch. If the fault diagnosis
has detected a problem, first make sure that the Intelligent Heat Sensor is in its original installation location. If the automatic fault diagnosis carries on detecting a problem, contact the
product retailer.
For gas/dual-fuel cookers: Refer to the gas kit manual.
1.6. Additional devices
With the Innohome Smart Sockets, additional signalling devices can be joined to the system.
Several additional signalling devices, such as flashing light or vibrating alarms, can be linked
and placed around the house.
The Control Unit has an external alarm output that enables the alarms to be transferred to social alarm systems, such as Telecare.
See more detailed information about using and installing additional devices from
www.innohome.com.
7
STOVE GUARD SGK300 USER MANUAL
2. Monthly Maintenance
Electric cookers: Since the automatic fault diagnosis tests the Stove Guard operation every time
the cooker is used for cooking, only the Alarm Signal Detection feature needs to be tested on
a monthly basis. For the Alarm Signal Detection test, refer to the section 6.2.
Gas/dual-fuel cookers: Refer to the gas kit manual.
Clean the Intelligent Heat Sensor by wiping it with a cloth dampened with a mixture of household detergent and water. Only use a cloth that does not leave fibres.
Ensure that all other alarms being used with the Stove Guard are cleaned and their batteries
changed according to their instructions.
3. Low battery alarm
A low battery in the Intelligent Heat Sensor causes both the Intelligent Heat Sensor and the
Control Unit to emit a signal once a minute. The battery alarm can be postponed for 12 hours
by pushing the Intelligent Heat Sensor push-button once. The Control Unit will carry on emitting the battery alarm signal after the Intelligent Heat Sensor battery has been changed (or
after it has run out). Reset the Control Unit battery signal by turning the cooker electricity off
and then back on using the cooker switch/the main switch. In gas cookers, turn the power of
the Control Unit off, using the main switch or the socket switch. Empty battery in the Intelligent Heat Sensor does not affect the safety features of the Control Unit.
Unscrewing the screw on the bottom of the Sensor (see image 2 on page 19) opens the cover
for changing the battery. Use CR2032 type batteries.
When detaching the Intelligent Heat Sensor, mark the Sensor’s original installation location, if
necessary - it is important to ensure that after procedures, the Sensor is returned back to its original
installation location. An Intelligent Heat Sensor that is attached with screws can be removed
by sliding it sideways (see image 8 on page 20).
8
STOVE GUARD SGK300 USER MANUAL
4. Intelligent Heat Sensor Installation
1. Remove the Intelligent Heat Sensor from its packaging and allow about 15 minutes
for it to reach room temperature.
2. The Intelligent Heat Sensor uses different settings for electric and gas burners. Carry out
initialization as described below, depending on hob type. If later you wish to change the hob
type setting, see ‘Changing the hob type setting’ section
7.
Electric burners: Remove the protective plastic strip (see
image 1 on page 19) from the Intelligent Heat Sensor.
The Sensor will emit a signal when the battery is connected. Initialize the Intelligent Heat Sensor by pressing
the push-button once.
1
Gas burners: Press the Intelligent Heat Sensor push-button and hold it down. Whilst holding the push-button,
remove the protective plastic strip (see image 1 on page
19) from the Sensor. The Intelligent Heat Sensor will emit
2 3
two signals signifying that the battery is connected, and
that the Sensor has been initialized and set to gas burners setting. After hearing the signals,
release the push-button.
If the Intelligent Heat Sensor only emits one signal while connecting the battery the gas burners
setting was not implemented successfully. In this case see ‘Changing the hob type setting’, section 7.
3. Attach the Intelligent Heat Sensor underneath the cooker hood with magnets, as close to
the central point of the cooker as possible. If the cooker hood has lights, make sure there is
at least 10 cm (4’’) distance between the lights and the Intelligent Heat Sensor. If the magnets
do not stick to the hood, the Intelligent Heat Sensor can be attached using magnetic tape (1).
If using magnetic tape, first make sure that the attaching surface is cleaned and dry. With gas
cookers, the Intelligent Heat Sensor needs to be installed at the minimum height of 65 cm (26’’).
If the cooker has no cooker hood, the Intelligent Heat Sensor can be installed on the wall or if
the cooker has a panel on the back, on the cooker panel. Install the Sensor on the wall using
screws (see images 2 – 6, pages 19 and 20), at the height of approx. 40 cm (16’’) above the
cooker for electric burners, 65 cm for gas burners. The Sensor is installed on the cooker panel
using a bracket (available separately).
4. The sensitivity level is factory set to suit most installations. However, if the Intelligent Heat
Sensor is installed higher than 65 cm (26’’) for electric burners or higher than 70 cm (27,5’’) for
gas burners, or if one wants to pre-adjust the sensitivity level to a certain level (when used in
9
STOVE GUARD SGK300 USER MANUAL
4. Intelligent Heat Sensor Installation (cont.)
supported housing, for example), set the sensitivity level manually (section 9).
The screw (2, see image on previous page) on the bottom of the Intelligent Heat Sensor opens
the cover for changing the battery.
Options:
Optional features are turned on/off using jumpers (3, see image on
4 3 21
previous page). A jumper is a type of a short conductor that can be
removed or changed to another position. When detaching the Intel- 4
ligent Heat Sernsor, mark the Sensor’s original installation location, if
5
6
5
necessary - it is important to ensure that after procedures, the Sensor is
returned back to its original installation location. An Intelligent Heat
Sensor that is attached with screws can be removed by sliding it sideways (see image 8 on
page 20).
Silent alarm: Remove the jumper (4) from the 4-5 position.
Disabling the Alarm Signal Detection feature: Change the jumper (5) from the position 2-3
to the position 1-2.
Using external power supply
The connection cable is available separately.
Establishing communication with the Innohome Smart Socket
The communication link between the Intelligent Heat Sensor and the Smart Socket starts automatically. Occasionally, devices that use X10 transmission may interact with the Smart Socket. In this case change the house address of the Smart Socket manually (see the Smart Socket
user manual).
Return to factory settings
This may be required if you change your cooker to a new one.
Detach the Intelligent Heat Sensor. An Intelligent Heat Sensor that is attached with screws can
be removed by sliding it sideways (see image 8 on page 20).
Open the cover by undoing the screw (see image 2 on page 19). Detach the battery, then
place it back. Push the push-button down and hold it until you hear three separate signals,
then release the push-button. The Intelligent Heat Sensor has now been returned to its factory
settings.
10
STOVE GUARD SGK300 USER MANUAL
5. Control Unit Installation and Setup
If the cooker is connected to the mains electricity via a plug and a socket, the Control
Unit can be installed by the user. In any other case, the installation needs to be carried
out by a qualified electrician.
Turn the electricity off at the main switch. Attach the Control Unit to the wall using screws or
adhesive tape, near the electricity outlet, and as close to the floor level as possible. Attach the
Control Unit so that the connectors are facing downwards.
Installation by the user: connect the Control Unit between the cooker’s plug and the socket.
Installation by an electrician: connect the Control Unit to the cooker using an Innohome Junction Box or an Innohome Connection Cable.
Turn the electricity back on at the main switch. The connection between the Intelligent Heat
Sensor and the Control Unit will start automatically. After approximately 5 seconds carry out
the setup procedure described below (note - start the procedure within 30 seconds). Cookers that are operated by touch, cookers that have a clock, or when using the SGK300-3
model: no setup procedure is needed. The Control Unit will emit two signals after a moment,
meaning that the Stove Guard is ready for use.
Setup procedure and programming the Safety Lock
Gas cookers: Press the Control Unit setup button (1, see image 7 on page 20) until you hear a
signal, then release the button and press it again until you hear a signal. After a short moment,
the Control Unit will emit another signal which signifies that the Stove Guard setup has been
completed.
Electric cookers with mechanical knobs when you want to activate the Safety Lock: Press
the Control Unit setup button (1, see image 7 on page 20) until you hear a signal, then release
the button and press it again until you hear a signal. (If you hear two signals when releasing
the button, the Safety Lock has already been activated and you can finish here.) Turn any of
the hotplates on for 5 seconds, then turn it off. Wait until you hear a signal to signify the end of
setup time.
Electric cookers with mechanical knobs when you want to deactivate the Safety Lock:
Press the Control Unit setup button (1) until you hear a signal, then release the button and
press it again until you hear a signal (or sometimes two signals, depending on the previous
setting). Turn a hotplate on, wait until you hear a beep from the Control Unit, then turn it off.
External safety systems, Telecare
The Stove Guard is connected to an external system via the alarm output (2, see image 7 on
page 20). More detailed instructions can be found at www.innohome.com.
External (smoke, carbon monoxide and gas) alarms
All external (smoke, carbon monoxide and gas) alarms need to be installed within 5 metres
distance of the Stove Guard Control Unit. After installation, test alarm signal detection as advised in section 6.2.
11
STOVE GUARD SGK300 USER MANUAL
6. Testing after Installation
6.1 Intelligent Heat Sensor test
Turn a burner on. Press the Intelligent Heat Sensor push-button and hold it down until you
hear a signal. The Control Unit will turn the cooker off by cutting its gas/electricity supply and
start to emit a signal. To turn the cooker back on, first turn the burner off (not required in cookers that are operated by touch), then press the Intelligent Heat Sensor push-button once.
6.2 Alarm Signal Detection test
Turn the smallest burner to medium heat and test the fire, carbon monoxide and gas alarms,
one at a time. When the Control Unit detects an alarm signal, it turns the cooker off and starts
to emit a signal. To turn the cooker back on, first turn the burner off (not required in cookers
that are operated by touch), then press the Intelligent Heat Sensor push-button once. The
Stove Guard is factory set to identify most alarm signals. If the Stove Guard does not react to
the external alarm signal, adjust the signal recognition frequency as advised in ‘Troubleshooting’, section 11.
6.3 Safety Lock test (if activated during the installation)
Make sure the hob is turned off. In approximately 20 minutes, the Safety Lock ‘locks’ the cooker. Test the Safety Lock by trying to turn the burners on one by one.
Turn the Safety Lock off by pushing the Intelligent Heat Sensor push-button once or turn one
of the cooker knobs on and off three times at one second intervals (turn on, turn off - wait 1
sec. - turn on, turn off - wait 1 sec. - turn on, turn off ).
The Control Unit will emit two signals after a short pause, indicating that the electricity has
been reconnected and the cooker can be used normally.
12
STOVE GUARD SGK300 USER MANUAL
7. Changing the hob type setting
The Intelligent Heat Sensor uses different settings for gas and electric burners.
Changing the hob type setting may be required if the gas burners setting was not successfully
implemented during the Intelligent Heat Sensor setup, or if you later change your cooker to a
different type.
Changing the setting
Remove the Intelligent Heat Sensor from its location and mark the Sensor’s original installation
location, if necessary - it is important to ensure that after procedures, the Sensor is returned
back to its original installation location. An Intelligent Heat Sensor that is attached with screws
can be removed by sliding it sideways (see image 8 on page 20). Open the cover by undoing
the screw (see image 2 on page 19). Insert a plastic or cardboard card (or the plastic slip that
was originally used to separate the battery) in between the battery and its connection so that
the card/slip separates the battery. Press the Intelligent Heat Sensor push-button down. Whilst
holding the push-button, remove the card/slip, which connects the battery again. After the Intelligent Heat Sensor emits a signal/two signals release the push-button. The Intelligent Heat
Sensor will emit either one or two signals depending on the setting it has been changed to.
One signal signifies electric burners setting, two signals signifies gas burners setting. Close the
cover by fastening the screw.
8. Checking the Control Unit settings
The Control Unit settings can be checked by turning the power of the cooker off using the
cooker switch/the main switch and turning it back on after 15 seconds. In gas cookers, turn
the power of the Control Unit off, using the main switch or the socket switch. The Control Unit
will then emit signals to inform you about its settings.
BEEP - 20 seconds break - BEEP - BEEP
SGK300-3 or SGK300-2 in a cooker that has a clock or
that is operated by touch.
BEEP - BEEP - 20 seconds break - BEEP
SGK300-2 in a cooker with mechanical knobs, Safety
Lock activated.
BEEP - 20 seconds break - BEEP
SGK300-2 in a cooker with mechanical knobs, Safety
Lock deactivated.
BEEP - 20 seconds break - BEEP-BEEP-BEEP
SGK300-2 in a gas cooker.
13
STOVE GUARD SGK300 USER MANUAL
9. Setting the sensitivity level of the Intelligent Heat Sensor
The sensitivity level determines the level of heat and the rate of temperature change required
to trigger an alarm.
The Intelligent Heat Sensor reduces its sensitivity automatically, when the user presses the
Intelligent Heat Sensor push-button during the Intelligent Heat Sensor pre-alarm signal (see
section 1.3). If the Intelligent Heat Sensor is installed to a cooker hood that is higher than
65 cm (26’’) for electric burners or higher than 70 cm (28’’) for gas burners, or if one wants to
pre-adjust the sensitivity to a certain level (when used in supported housing, for example), set
the sensitivity level manually.
Electric burners: see recommended sensitivity level from the table below.
Gas burners: see the table in the gas installation kit manual. Note that when the Intelligent
Heat Sensor is installed on the wall, it needs to be attached at the height of approx. 40 cm (16’’)
for electric burners, 65cm (26’’) for gas burners.
cm
inch
level
120 90 80 70 60 50 40 - - 30
39 35 32 28 24 20 16 - - 11
1
2 3 4 5 6 8 - - 16
Electric burners sensitivity level. The grey area indicated in the table (30 – 65 cm, 11 - 26’’)
shows where manual setting of the sensitivity level is not required (unless it is pre-adjusted to
a certain level). The level is indicated by the numbers 1 to 16, where 1 represents the most sensitive level, and 16, the least sensitive. The factory setting is 5.
Setting the sensitivity level manually:
1. a) For a new Intelligent Heat Sensor: Remove the protective plastic strip from the Intelligent
Heat Sensor. In the following 20 seconds carry out the procedure described below in steps
2-5.
b) For an Intelligent Heat Sensor that has already been installed:
Detach the Intelligent Heat Sensor. Mark the Sensor’s original installation location, if necessary - it is important to ensure that after procedures, the Sensor is returned back to its
original installation location. An Intelligent Heat Sensor that is attached with screws can be
removed by sliding it sideways (see image 8 on page 20). Open the cover by unscrewing
the screw on the bottom of the Sensor (see image 2 on page 19). Disconnect the Intelligent
Heat Sensor battery; then reconnect it. In the following 20 seconds carry out the procedure
described below in steps 2-5. After completing step 5 close the Intelligent Heat Sensor cover
by tightening the screw on the bottom of the Sensor.
2. Hold the Intelligent Heat Sensor push-button for about 5 seconds, until you hear a signal.
3. Release the push-button and hold again until the Intelligent Heat Sensor emits a signal.
4. Now press the push-button as many times as the level (1-16) you wish to set it to. Wait that
the Sensor light turns off before pressing again.
5. The Intelligent Heat Sensor will now emit twice as many signals as the level it is set to, in two
lots: 2+2 signals for level 2, 3+3 signals for level 3, 4+4 signals for level 4, and so on.
14
STOVE GUARD SGK300 USER MANUAL
10. Alarm output
The alarm output is a 3.5 mm stereo jack found
on the Control Unit. The alarm output is potential
free and normally open (opto). It closes for one
second when the Control Unit cuts the gas or
electricity supply.
CN1
OC1
Alarm
out NO
If the alarm output does not work properly,
change the polarity of the cable connecting to
the alarm output.
11. Troubleshooting
The cooker has been turned off and no signal sounds
• The Control Unit overheating protection has turned the Control Unit and the cooker off. This
has probably happened due to a wrong installation place that becomes apparent when the
cooker is used on a high power setting. The cooker can be turned back on by turning the
electricity off for a moment using the main switch. If the overheating protection turns the
cooker off again change the Control Unit installation location to a cooler one or to one that
has better ventilation.
The Intelligent Heat Sensor alarm sounds in a non-hazardous situation
• When the Intelligent Heat Sensor is first installed, it needs to adjust to the kitchen environment and ‘learn’ the users’ cooking styles. If the Intelligent Heat Sensor starts to signal in a
normal cooking situation, press the Sensor push-button during the pre-alarm signal. This
will cause the Intelligent Heat Sensor to reduce its sensitivity automatically.
The Intelligent Heat Sensor does not signal when it should
• Test the Intelligent Heat Sensor as advised in section 6.1. If the Intelligent Heat Sensor neither emits a tone nor flashes its light, the battery may be flat. See section 3 for instructions
for changing the battery.
• If the Intelligent Heat Sensor is installed higher than 65 cm for electric burners or higher
than 70 cm for gas burners, the sensitivity level needs to initially be set to a more sensitive
level (after which it will self-adjust to the environment and to the cooking styles of the user(s)). If you are not certain whether the level was pre-set, set the level again, see section 9.
• If the Intelligent Heat Sensor still does not work, contact the product retailer.
15
STOVE GUARD SGK300 USER MANUAL
11. Troubleshooting (cont.)
The Control Unit emits a short signal, followed by a long signal (‘be-beep’), at approximately 5 second intervals
• The automatic fault diagnosis has detected that the Intelligent Heat Sensor is not in its original installation location, or that there is a temporary problem in the connection between the
Intelligent Heat Sensor and the Control Unit, or in the functioning of some part of the system. The fault diagnosis alarm can also be triggered by the Intelligent Heat Sensor not being
installed correctly. To turn the cooker back on, first turn all cooker knobs to ‘0’, then turn the
electricity off for about 15 seconds, using the main switch.
• Ensure that the Intelligent Heat Sensor is in its original installation location.
• If the automatic fault diagnosis carries on finding a problem, contact the product retailer.
The Control Unit signals every hour or half hour
• There has been an error in the identification of the cooker. Repeat the setup procedure in
the following manner; 1) Turn the electricity off for 15 seconds, using the main switch. 2) Let
the electricity be on for 5 seconds. 3) Turn the main switch off again for another 15 seconds.
After turning the electricity back on, the Control Unit will emit a signal signifying that the
setup has been completed. Then carry out the Safety Lock activation/deactivation if applicable (only SGK300-2 in electric cookers with mechanical knobs excluding cookers with a
clock). Activation: Turn any of the hotplates on for 5 seconds, then turn it off. Wait until you
hear a signal. Deactivation: Turn a hotplate on, wait until you hear a beep from the Control
Unit, then turn it off.
The Control Unit did not identify the alarm signal of the
smoke/CO/gas alarm
• Clean the alarm with a vacuum cleaner.
• Change the batteries in the alarm if necessary.
Frequency adjustment
• Check that the alarm is not located too far from the Control
Unit. The alarms should be located at a maximum distance of
16.5ft (5 metres).
• Adjust the signal recognition frequency by turning the trimmer on the Control Unit using a
screwdriver (frequency adjustment, see the picture). Turn the trimmer slowly between tests
until the Control Unit identifies the signal.
The Control Unit responds to other sounds e.g. a telephone ringing or noise from a television
• Change the telephone’s ring tone or turn down the volume on the television. If the signal
that causes the false alarm cannot be disabled, adjust the signal recognition frequency by
turning the trimmer on the Control Unit using a screwdriver (frequency adjustment, see picture above): turn the trimmer slowly, approx. 0.5mm at any one time, then see if the sound
16
STOVE GUARD SGK300 USER MANUAL
11. Troubleshooting (cont.)
still triggers a false alarm. When a false alarm is no longer triggered, then make sure that the
Stove Guard still responds to the alarm signals of external alarms by re-testing the Alarm
Signal Detection feature as advised in section 6.2.
• It is also possible to disable the Alarm Signal Detection feature, see section 4 ‘Disabling the
Alarm Signal Detection feature’.
Sometimes when a burner is on a low heat setting the cooker lights shut down for a couple of seconds
• This is a normal function of the Stove Guard. In electric cookers with mechanical knobs (except in cookers with a clock), when a burner is turned on a very low heat, the Stove Guard
performs a check every 15 minutes to see if the cooker is still being used.
The Safety Lock did not activate within 20 minutes
• Check the setting of the Control Unit as advised in section 8. If the Safety Lock was not activated, redo the setup process as described in section 5.
The Intelligent Timer did not cut off the electricity supply in 3 hours
• In some cookers that are operated by touch or that have a clock, and with the SGK300-3
model in all electric cookers, the Intelligent Timer will not start when a hotplate is on a very
low setting.
What to do when changing the cooker to a new one?
• If your hob type has changed (ie. you used to have an electric cooker, and now you have a
dual-fuel cooker with gas burners) change the hob type setting (see section 7).
• Return the Intelligent Heat Sensor to its factory settings, see section 4. If it is installed higher
than 65cm (26’’) for cookers with electric burners or 70cm (28’’) for gas burners, set the sensitivity level manually (see section 9).
What to do when replacing the Intelligent Heat Sensor or the Control Unit with a new
one?
• See www.innohome.com for device pairing instructions.
17
STOVE GUARD SGK300 USER MANUAL
12. Technical Information
Certification CE, Casing IP20
Patent FI 117526, FI 117878, PCT pending
Unit
Connection
Voltage/power
Cut-off time
Features
Control
Unit
SGC500
1-3 phase
SGC500-2: 230VAC,
1-phase and star
connection, 1 x 32A
or 2 x 16A
SGC500-3: 400VAC,
delta connection,
3 x 16A, without N
1W
0,5 - 3 h
(Intelligent Timer)
Alarm Signal Detection
Intelligent Timer
Safety Lock (only
SGC500-2)
Automatic fault diagnosis
Alarm output
Connection for powering external units
Overheating and overload protection
Intelligent
Heat Sensor SGS300
Wireless
433MHz
10mW X10
(A1 NO),
Alarm 85 dB /
10 cm
Battery (5 years
lifespan)
or external power
supply (5V)
3 - 25 min
(Overheating
Monitor)
Intelligent Heat Sensor
Max sensing distance
1.2 m (3.9 ft)
Adjustable sensitivity
Manual and automatic
alarm reset
13. Warranty
This product has a 5 year warranty that covers defects in material or workmanship, starting
from the date of purchase. The warranty does not cover any indirect damage caused by a malfunctioning appliance, damage caused by negligence, or damage caused by failure to follow
the instructions properly.
14. EU Declaration of Conformity
See www.innohome.com/EUdeclaration.
18
IMAGES
1
2
3
4
19
IMAGES
6
5
2
2
1
7
8
20
smart safety for your kitchen
Innohome Ltd
www.innohome.com
[email protected]
www.facebook.com/innohome
Linnoitustie 4B
FI-02600 Espoo
Finland
smart safety for your kitchen
SGK300-000UU1