1
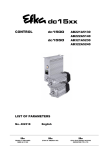
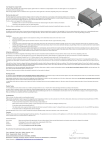
STOVE GUARD SGK500 USER MANUAL
INNOHOME
Stove Guard SGK500
user manual
1
www.innohome.com
smart safety for your kitchen
Congratulations!
STOVE GUARD SGK500 USER MANUAL
You now own one of the most intelligent
cooker safety products in the world.
Before using this product, please read the information in ‘safety instructions’ first, then
familiarize yourself with the information provided in the user manual. Always observe
all safety instructions. For any questions or uncertainties about using the product,
ask a specialist or obtain information online from www.innohome.com. The user
manual is an integral part of the product and contains important information about
use, installation and handling. After reading, store the manual in a safe place, and if
passing the product to third parties, make sure to include the manual.
Control Unit SGC510-2
Intelligent Heat Sensor SGS510
Control Unit SGC500-3
2
Safety instructions
STOVE GUARD SGK500 USER MANUAL
This product is not suitable for use in professional kitchens.
Avoid having the heat sensor closer than 15 cm distance to the
ear while signalling an alarm, due to risk of damage to hearing.
Do not leave small children unsupervised with the product, its
parts or packaging, due to risk of fatal injury from choking.
Do not disassemble.
The Stove Guard alarm is not triggered if the hob’s temperature
is too low for a hazardous situation to be identified, or if the cooker
automatically limits a temperature increase.
When the heat sensor signal has been reset manually, the alarm
cannot be triggered by the rate of temperature change for 30
minutes.
Do not damage any gas, electricity, water or telecommunication
lines during drilling or fixing work, due to risk of personal or fatal injury.
Also see safety instructions in the installation chapters (3 and 4) and
in the quick connection guide.
Batteries
Do not short-circuit or charge batteries, due to risk of fatal injury
from explosion.
Do not attempt to open or burn batteries due to risk of explosion.
If the batteries are leaking, avoid skin contact by using suitable
protective gloves and clothing, due to risk of injury from corrosive acid.
3
CONTENTS
STOVE GUARD SGK500 USER MANUAL
USE
1. Innohome Stove Guard and how to use it
1-8
1.1. A quick guide
1
1.2. Innohome Stove Guard
2
1.3. Stove Guard use
3
1.4. Stove Guard features
4-6
1.5. Meaning of alarm signals
7-8
2. Monthly Maintenance
8
INSTALLATION
3. Intelligent Heat Sensor Installation
4. Control Unit Installation
9-10
11-12
SETTINGS
5. Additional features setup and testing
12-15
5.1. Activating Audible Alarm Detection
12
5.2. Activating other additional features
13-15
6. Changing settings manually
6.1. Setting the Sensor sensitivity level manually
15-17
15-16
6.2. Stove Guard factory settings
16
6.3. Changing the mode
17
6.4. Changing the X10 house address
17
7. Checking settings
17-18
7.1. Checking the Sensor sensitivity level
17
7.2. Checking the Control Unit settings
18
ADDITIONAL INFORMATION
8. Low battery alarm
9. Troubleshooting
10. Technical Information
11. Disposal
12. Warranty
13. EU Declaration of Conformity
4
smart safety for your kitchen
18
19-22
23-24
25
25
26
STOVE GUARD SGK500 USER MANUAL
1. Innohome Stove Guard and how to use it
1.1 A quick guide
When the Stove Guard is signalling, press the Intelligent Heat Sensor cover
once.
Also note that:
When the Stove Guard is emitting a pre-alarm signal, a short sound followed by a long
break (
), it has identified a hazardous situation. If the situation is not hazardous, press the Intelligent Heat Sensor cover once during the pre-alarm signal. The
Stove Guard will learn that this kind of situation is a normal cooking situation.
When the Stove Guard has turned the cooker off and the Control Unit/Sensor is signalling, first turn all cooker knobs to ‘0’, then press the Intelligent Heat Sensor cover once.
In cookers that are operated by touch, just press the Intelligent Heat Sensor cover
once.
al
ar
m
Please also see ‘Stove Guard use’, chapter 1.3.
7
1
STOVE GUARD SGK500 USER MANUAL
1.2 Innohome Stove Guard
Package contents
• Control Unit SGC510-2 or SGC500-3
• Intelligent Heat Sensor SGS510
• Country-specific installation kit
Stove Guard SGK500 is compatible with all electric cookers.
1
The Stove Guard system is composed of an Intelligent
Heat Sensor, attached above the cooker, and a Control
Unit, connected to the cooker.
2
The whole Intelligent Heat Sensor cover works as a
push-button, but it is recommendable to press it at the
3
point of the round light (1). Pressing the cover resets the
alarm, reconnects the electricity supply to the cooker and turns off the Safety Lock. Green
light (2) lights up at one-minute intervals and when the Sensor is being pressed. During an
alarm, a red light flashes. Solar panels (3) power the Sensor.
Telecare compatability
Information about the Stove Guard alarms can be transferred to a Telecare centre or another
social alarm system (Innohome FireSafety Socket required). Innohome Stove Guards are compatible with the UMO platform, and can be joined to a Vivago health/activity/alarm monitoring system.
Additional signalling devices (light, sound, vibration)
Additional signalling devices, such as additional sound alarms, light or vibrating alarms, can
be joined to the system using the Innohome FireSafety Socket. Several additional signalling
devices can be linked and placed around the house.
Cooker hood control
The extractor fan can be set to automatically turn on for the duration of cooker use, or to turn
off if the Stove Guard alarm is triggered (TM13 receiver required).
The Intelligent Heat Sensor outlook can be changed with optional colour covers.
See more detailed information about using and installing additional devices from
www.innohome.com.
2
STOVE GUARD SGK500 USER MANUAL
1.3 Stove Guard use
When the cooker has been turned off and the Stove
Guard is signalling, first turn all cooker knobs to ‘0’, then
press the Intelligent Heat Sensor cover once. In cookers that
are operated by touch, just press the Intelligent Heat Sensor
cover once.
An Intelligent Heat Sensor pre-alarm signal, a short beep
), sounds before turning
followed by a long break (
the cooker off. If it signals during normal cooking situation,
press the Sensor cover once during the pre-alarm signal. The
Sensor will learn that the situation was a normal cooking situation.
A Control Unit pre-alarm signal (sounds from behind the
cooker, lower sound), a short beep followed by a long break
(
), tells that the Intelligent Timer will turn the cooker
off after one minute. By pressing the Sensor cover once, you
get more time to use the cooker.
If the Safety Lock has ‘locked’ the cooker, you can get it
back in use by pressing the Sensor cover once.
If the Sensor is removed from its mounting plate it will sound an
alarm and the cooker is turned off (Sensor Dislocation Alarm).
The cooker is reactivated by returning the Sensor back to its
mounting plate.
3
STOVE GUARD SGK500 USER MANUAL
1.4 Stove Guard features
The Stove Guard safeguards the cooker in several different ways. The factory setting includes the
Overheating Monitor as specified in the EU standard: the Intelligent Heat Sensor, above the cooker,
detects dangerously high temperature and steep temperature rise. Automatic Fault Diagnosis ensures that the system is always working perfectly and if the Intelligent Heat Sensor is accidentally
removed, an alarm signals and cooker use is prevented.
Additional protection is provided by the Intelligent Timer: the Stove Guard intelligently monitors
hotplate heat adjustments, identifying if the cooker has been left abandoned. The Stove Guard can
also be used with external carbon monoxide/smoke alarms (compatible with most alarms).
If you are an owner of a traditional mechanical cooker, you can benefit from the additional features
of Intelligent Timer+ helping to prevent burns and the automatic Safety Lock that prevents the
cooker from being turned on accidentally.
See more detailed information below.
Standard features (factory setting)
a) Overheating Monitor
The Intelligent Heat Sensor, installed above the cooker, reacts to a dangerously high temperature or steep temperature rise. The Intelligent Heat Sensor includes heat sensors that
self-adjust according to the users’ cooking styles. This makes hazard recognition precise, with
no false alarms. The rate of temperature increase alarm is based on the steep temperature rise
that happens when the cooking vessel’s liquid has dried out. Reacting to the temperature rise
allows for an early detection and prevention of fire risk situations.
The Intelligent Heat Sensor will first sound a pre-alarm signal (
cooker is turned off, and the Sensor starts to emit an alarm signal (
telligent Heat Sensor alarm signal stops automatically in 15 seconds.
), after which the
). The In-
When the Stove Guard is installed, it will first go through an adjustment period, during which
it learns the user(s)’s way of cooking and the installation environment, adjusting its sensitivity
accordingly. During this time, some false alarms may be triggered. If the Stove Guard
signals in a normal cooking situation, press the Intelligent Heat Sensor cover once during the pre-alarm signal. This will cause the Sensor to adjust its sensitivity slightly. The false
alarms may be triggered a few times before the Stove Guard has adjusted to the individual
setting.
The Intelligent Heat Sensor may interpret placing a hot oven tray on the cooker or removing a
pot from a hot hotplate as a hazardous situation and signal a short alarm.
4
STOVE GUARD SGK500 USER MANUAL
b) Automatic fault diagnosis
The automatic fault diagnosis ensures that the Stove Guard is working perfectly. The diagnostic tool analyses the function of the Intelligent Heat Sensor and the Control Unit, and the
radio communication link between the devices. The automatic fault diagnosis alarm can also
be triggered by the Intelligent Heat Sensor not being on its mounting plate. If the fault diagnosis detects something abnormal in the functioning of the system, the Control Unit will emit
a fault signal (a short signal, followed by a long signal ‘be-beep’, at approximately 5 second
intervals), and after a minute’s time, it will turn the cooker off.
If the fault diagnosis is signalling (the fault diagnosis alarm can trigger even though the cooker
is not in use), press the Intelligent Heat Sensor cover once during the first minute of the alarm.
If this does not resolve the issue, double check that the Sensor is installed correctly and press
its cover once. If this does not reset the alarm, turn all cooker knobs to ‘0’ (not required in
cookers that are operated by touch), then turn the electricity supply off for 15 seconds using
the main switch or the cooker fuse. If the fault diagnosis alarm triggers again, contact the
product retailer. Meanwhile, the cooker can be used for 5 minutes as an ‘emergency use’ by
switching the power off for 15 seconds as described above.
c) Sensor Dislocation Alarm
The Sensor Dislocation Alarm ensures that the Intelligent Heat Sensor is not accidentally
removed from its location. If the Sensor is removed from its place, it sounds an alarm (four
signals) and the Control Unit disconnects the cooker electricity supply. The cooker electricity
supply is restored when the Sensor is returned back to its mounting plate.
Information about an activated Sensor Dislocation alarm can be transferred to a Telecare service or another homecare provider.
If the Sensor cannot be returned, the alarm can be reset by switching the Control Unit power
off for a moment, using the main switch or the cooker fuse. The cooker can be used without
the Intelligent Heat Sensor for around 5 minutes after which it will be turned off again.
5
STOVE GUARD SGK500 USER MANUAL
Additional features available for all electric cookers
d) Intelligent Timer
The Intelligent Timer identifies a burner that has been accidentally left on by monitoring burner heat adjustments. If a burner has been left on, the cooker is turned off within a time period
between 1 hour and 3 hours, depending on the cooker type and the burner setting - the
higher the setting the sooner the cooker is turned off. The Intelligent Timer does not start if
the hotplate is on a low heat setting. Before the cooker is turned off, the Control Unit will emit
). Resetting the pre-alarm signal will rea one-minute long pre-alarm signal (
start the Timer.
e) Audible Alarm Detection (smoke and carbon monoxide alarms)
The Stove Guard identifies external (smoke and carbon monoxide) alarm signals using sound
detection. An alarm signal emitted by an external alarm triggers the Stove Guard to turn the
cooker off.
f) Intelligent Heat Sensor fault diagnosis
Works together with the standard fault diagnosis (point b), providing additional protection by
identifying if the Sensor has collected too much dirt or fat or is in some other way covered.
Extra features available for mechanical cookers
These features can be used in addition to all previously mentioned features. They are
available for cookers with mechanical knobs that do not have electronics. Usually these
types of cookers are traditional, free standing cookers with iron or ceramic plates, and
without a display (such as a clock). Halogen hobs with mechanical controls and no display also fall into this category.
g) Intelligent Timer+
Intelligent Timer+ offers upgraded protection for mechanical cookers identifying low-heat
hazard scenarios, that are unable to produce a fire but can cause burns. The Timer+ follows
hotplate heat adjustments, similarly to the standard Intelligent Timer (described in point d)),
but it is also able to identify low heat hazard scenarios (eg. when a hotplate is on the lowest
setting). Intelligent Timer+ does not sound a pre-alarm signal prior to switching off the cooker.
h) Cooker knob Safety Lock
The Safety Lock ‘locks’ the cooker so that it cannot be turned on accidentally, by deactivating
the cooker knobs (in some cookers the oven knobs are not deactivated). The cooker is activated by pressing the Intelligent Heat Sensor cover once. The Control Unit emits two short beeps
as the cooker is ready for use. The cooker is ‘locked’ 20 minutes after last use.
6
STOVE GUARD SGK500 USER MANUAL
1.5 Meaning of alarm signals
The Intelligent Heat Sensor signal is a high-tone beep, the Control Unit signal a lower
frequency ‘buzzing’ beep. The Intelligent Heat Sensor is attached above the cooker, the
Control Unit signal sounds from behind the cooker.
Sound
Meaning
Course of Action
Intelligent Heat
Sensor: a short beep
every few seconds
The Intelligent Heat Sensor has identified
a high temperature or a steep temperature
rise above the cooker (Overheating Monitor). This is the Intelligent Heat Sensor prealarm signal, that is emitted before the
cooker is turned off. If the alarm was triggered by a normal cooking situation, press
the Intelligent Heat Sensor cover during the
pre-alarm signal – this will cause the Intelligent Heat Sensor to reduce its sensitivity
automatically and will prevent the cooker
shutdown.
If the alarm was triggered
during a normal cooking situation, press the Intelligent Heat
Sensor cover once while the
pre-alarm signal sounds.
Intelligent Heat Sensor: repetitive fast
‘beep, beep, beep’
The Intelligent Heat Sensor has identified
a high temperature or a steep temperature
rise above the cooker (Overheating Monitor
alarm) – the cooker has been turned off.
First turn all cooker knobs to ‘0’,
then press the Intelligent Heat
Sensor cover once. In cookers
that are operated by touch just
press the Intelligent Heat Sensor cover once.
Control Unit: a short
beep every few seconds
This is the Control Unit pre-alarm signal,
that sounds for one minute before the
Intelligent Timer turns the cooker off. By
pressing the Intelligent Heat Sensor cover
once during the pre-alarm signal, the cooker shutdown can be prevented.
Press the Intelligent Heat Sensor cover once during the prealarm signal.
Control Unit: a short
b e e p a t a p p rox i mately 5 second
intervals
The cooker has been turned off due to one
of Stove Guard’s safety features: the Sensor
detecting a high temperature or a steep
temperature rise, the Intelligent Timer detecting an abandoned cooker, or triggered
by the alarm signal of an external (smoke or
carbon monoxide) alarm.
First turn all cooker knobs to ‘0’,
then press the Intelligent Heat
Sensor cover once. In cookers
that are operated by touch just
press the Intelligent Heat Sensor cover once.
7
STOVE GUARD SGK500 USER MANUAL
Sound
Meaning
Course of Action
Control Unit: a short
beep and a long
beep (‘be’ – ‘beep’),
at 5 second intervals
The cooker has been turned off due to the
automatic fault diagnosis detecting a temporary error in the Intelligent Heat Sensor’s
connection to the Control Unit or in the
functioning of a part of the system. The
automatic fault diagnosis alarm can also be
triggered by the Intelligent Heat Sensor not
being on its mounting plate, or if the Sensor
has not been installed correctly.
First turn all cooker knobs to
‘0’ (not required in cookers
that are operated by touch),
then turn off the electricity for
around 15 seconds, using the
main switch or the cooker fuse.
Ensure that the Intelligent
Heat Sensor is on its mounting
plate. If the problem persists,
contact the product retailer.
Control Unit: two
short beeps (after
turning the Safety
Lock off )
The Safety Lock has been turned off
and the electricity reconnected to the
cooker.
The cooker can now be used.
Control Unit: a beep
every hour or half
hour
There has been an error in the identification
of the cooker.
Repeat the setup procedure as
described in chapter 9 under
the heading ‘the Control Unit
signals every hour or half hour’.
Intelligent Heat Sensor (and the Control
Unit): a beep once a
minute
The Intelligent Heat Sensor has a low battery.
Replace the Sensor (see chapter 9). Pressing the Sensor’s
cover once delays the battery
alarm for 12 hours.
2. Monthly Maintenance
Since the automatic fault diagnosis tests the Stove Guard operation, only the Audible Alarm
Detection feature needs to be tested on a monthly basis (if activated). For the Audible Alarm
Detection test, refer to the chapter 5.2.
Clean the Intelligent Heat Sensor by wiping it with a cloth dampened with a mixture of household detergent and water. Only use a cloth that does not leave fibres. Do not immerse the device in water.
Ensure that all other alarms being used with the Stove Guard are cleaned and their batteries
changed according to their instructions.
8
STOVE GUARD SGK500 USER MANUAL
3. Intelligent Heat Sensor Installation
Allow the Stove Guard to first adjust to the
room temperature.
Choosing the installation location
Choose the installation location underneath the cooker hood, being as close
to the central point of the cooker as
possible, but at least 10 cm from the
cooker hood lights – 5 cm is enough
for LED lights. See image for preferable
installation locations – area marked with
number 1 is the preferred location, area
marked with number 2 is the second
option. The Sensor cannot be installed in areas marked with ‘X’. Clean the surface of dirt and
grease using a detergent, and dry it well.
The Intelligent Heat Sensor can also be installed on the wall using a special bracket (sold separately).
Safety instructions: The Intelligent Heat Sensor must be installed according to instructions
and not too close to light sources. Check that the Sensor fits tightly on the mounting plate
and that there are no gaps. A significant number of alarms may result in a shortened usage
life.
1
Setup
1. Remove the mounting plate by lifting it up (1). This releases the battery disconnection piece (2) (the Sensor emits
a beep). Press the Sensor cover once. Remove the battery
disconnection piece (keep for possible later use).
2. If the cooker hood is higher than 65 cm over the cooker,
set the sensitivity level manually (see chapter 6.1).
2
3. The Sensor must be installed using the mounting plate. Put the plate back on the Sensor,
remove the protecting sheet and attach the plate and the Sensor. To ensure that the plate
is attached properly, remove the Sensor for a moment and press around the plate with firm
presses. Put the sensor back and ensure that it fits tightly on the plate.
9
STOVE GUARD SGK500 USER MANUAL
The Intelligent Heat Sensor is now installed. Go to chapter 4 for Control Unit installation.
Note if detaching the Sensor after installation, the Sensor will emit four beeps (Sensor Dislocation Alarm) and the cooker is turned off.
Optional features:
Silent alarm
Open the cover (see ‘Opening and closing the Intelligent Heat Sensor cover’ on the previous
page). Turn the DIP switch 2 to ‘off’ position (see image 3 on page 27 – the image shows the
switch in ‘on’ position). Place the cover back according to instructions.
Turning off the red alarm light (flashes during an alarm)
Open the cover (see ‘Opening and closing the Intelligent Heat Sensor cover’ on the previous
page). Turn the DIP switch 1 to ‘off’ position (see image 3 on page 27 – the image shows the
switch in ‘on’ position). Place the cover back according to instructions.
Opening and closing the Intelligent Heat Sensor cover (see images 1 – 2 page 27)
Use the tip of a screwdriver to carefully detach the cover, one end at a time (image 1).
To put the cover back, put both ends in at the same time.
Make sure that the black round sensor goes through the opening in the cover
(image 2).
Establishing communication with the Innohome FireSafety Socket
Pair the devices according to instructions in the FireSafety Socket manual.
10
STOVE GUARD SGK500 USER MANUAL
4. Control Unit Installation
If the cooker is connected to the mains electricity via
a plug and a socket, the Control Unit can be installed
by the user. In any other case, the installation needs
to be carried out by a qualified electrician. If the
Stove Guard is installed before installing the cooker,
see Quick Installation Guide for instructions (on a
separate sheet).
2
2
1
Installing the Control Unit
1. Turn the electricity off using the main switch or the cooker fuse (s) (all phases).
Attach the Control Unit to the wall using screws, near the electricity outlet, and as close to the
floor level as possible.
Safety instructions: The Control Unit must be installed according to instructions. It should be
installed behind the cooker, in a place that has free ventilation and where it cannot be accidentally covered (do not install inside a cupboard). Do not install the Control Unit in a location
where water can splash on it. The Control Unit should not be installed near the sink. If activating
optional features, place the Control Unit so that you can access the setup button (1) during setup procedures (the access is only required during the setup).
Measure the Perilex connections prior to installation. Ensure that the terminal screws are tight
and that the connectors are properly connected. Before turning the electricity on, double check
that there is no short circuit in the cooker side of circuit, and that the installation is done correctly, using appropriate wiring (installation by an electrician).
2.
Installation by the user: connect the Control Unit between the cooker’s plug and the
socket.
Installation by an electrician: connect the Control Unit to the cooker using an Innohome Junction Box or an Innohome Connection Cable (see connection guide).
The Intelligent Heat Sensor and the Control Unit are factory paired.
3.
Turn the electricity back on. The Control Unit emits a beep. The connection between the
Sensor and the Control Unit starts instantly. Wait for approximately 20 seconds until you hear
another beep.
11
STOVE GUARD SGK500 USER MANUAL
4.
Turn one of the hotplates on. Press the Intelligent Heat Sensor cover until you hear a beep
from the Sensor. The Sensor will emit a test alarm and the cooker electricity is cut off. Restore
the cooker electricity by pressing the Sensor cover once.
The standard features installation is now complete. For activating additional features,
go to chapter 5.
External safety systems, Telecare
The Stove Guard is connected to an external system using an Innohome FireSafety Socket or
via the alarm output (2, see image on previous page). Innohome FireSafety Socket and the additional cable (for connecting via the alarm output) are sold separately. More detailed instructions can be found from www.innohome.com.
SETTINGS
5. Additional features setup
5.1 Activating Audible Alarm Detection
All external (smoke and carbon monoxide) alarms need to be installed in the same room, within 5 metres distance of the Control Unit.
If you later wish to deactivate the feature, carry out the same procedure again.
1. Press the Intelligent Heat Sensor cover so that the green light illuminates.
2. Place the battery disconnection piece into the hole underneath the Sensor (2, see image on
previous page). Place the Intelligent Heat Sensor on its mounting plate for 5 seconds.
3. Remove the Sensor (the Sensor emits a beep). Put the Sensor back on the plate for another
5 seconds (the Sensor emits a beep when being lifted up).
4. Remove the battery disconnection piece. Save it for possible later use.
5. Press the Sensor cover once. The Sensor will now emit beeps confirming its new setting:
one beep signifies that the Audible Alarm Detection is activated, two beeps signifies that
the feature is deactivated.
6. Test the feature as advised at the end of chapter 5.2.
If you have lost the battery disconnection piece, you can alternatively use a screwdriver to carefully
press the button on the bottom surface of the Sensor (see image 4 on page 27). To avoid pressing
the cover switch simultaneously, detach the Sensor cover before carrying out the setup operation.
To avoid damage to the Sensor, detach and place back the cover according to instructions (see ‘
Opening and closing the Intelligent Heat Sensor cover’, below).
12
STOVE GUARD SGK500 USER MANUAL
5.2 Activating other additional features
Choose the mode
Mode 1 Standard features - activated by factory default, does not need further setup
procedures: Overheating Monitor, Automatic fault diagnosis, Sensor Dislocation Alarm (in
compliance with the EU standard EN50615/B))
Mode 2 Additional features for all electric cookers: (includes mode 1 features) Intelligent
Timer, Sensor fault diagnosis
Mode 3a / 3b Extra features for mechanical cookers
(includes mode 1 and 2 features) Intelligent Timer+, Cooker knob Safety Lock activated/deactivated
1. Set the mode Choose ONE of the following setup options:
Mode 2 – all electric cookers
Includes: basic features, Intelligent Timer and Intelligent Heat Sensor Fault diagnosis
- Press the Control Unit setup button (1, see image on page 11) and hold it down. After 10
seconds the Control Unit emits a beep, and after a moment another beep. Release the setup
button.
- Wait for approximately 30 seconds, until you have heard two beeps.
If the Control Unit beeps one or three times, the mode was not set properly, and the procedure
should be carried out again.
- Go to point 2., Finishing off.
Modes 3a and 3b – mechanical cookers only
Modes 3a and 3b are available for cookers with mechanical knobs that do not have electronics. Usually these types of cookers are traditional, free standing cookers or hobs with
iron or ceramic plates, and without a display (such as a clock). Halogen hobs with mechanical controls and no display also fall into this category. If you are not certain whether your
cooker has electronics or not, it can be tested by activating the mode 3b, and then testing
the Safety Lock feature as advised at the end of this chapter. If the Safety Lock does not activate, the cooker has electronics and cannot be used in 3-modes.
Mode 3a
Includes: basic features, mode 2 features and Intelligent Timer+
- Press the Control Unit setup button (1, see image on page 11) and hold it down. After 10
seconds the Control Unit emits a beep, and after a moment another beep. Release the setup
button.
- Wait for 10 seconds.
- Turn on the largest hotplate. Wait until you hear three beeps from the Control Unit, then
turn the hotplate off.
If the Control Unit emits one or two beeps, the mode was not set properly, and the procedure should
be carried out again.
13
- Go to point 2., Finishing off.
STOVE GUARD SGK500 USER MANUAL
Mode 3b
Includes: basic features, mode 2 features, Intelligent Timer+ and Cooker knob Safety
Lock
- Press the Control Unit setup button (1, see image on page 11) and hold it down. After 10
seconds the Control Unit emits a beep, and after a moment another beep. Release the setup
button.
- Wait for 10 seconds.
- Turn the largest hotplate on for 5 seconds, then turn it off. The Control Unit will emit three
beeps after a short moment.
If the Control Unit emits one or two beeps, the mode was not set properly, and the procedure should
be carried out again.
- Go to point 2., Finishing off.
2. Finishing off
If the Audible Alarm Detection feature and/or the Safety Lock feature (mode 3b) is activated, test
these features first (see instructions at the end of this chapter).
- Turn the cooker electricity off for 15 seconds, using the main switch or the cooker fuse. As the
electricity is turned back on, the Control Unit confirms its current setting by emitting beeps
(signals described in chapter 7.2).
- Straight after the signals do a test alarm: turn a hotplate on, then press the Intelligent Heat
Sensor cover until the Sensor emits a beep. The Sensor will emit an alarm and the Control Unit
turns the cooker off. Turn the hotplate off. Reset the test alarm by pressing Sensor cover once.
The test alarm is an essential part of the setup procedure. Not doing a test alarm will influence
Stove Guard’s functionality.
The installation is now complete. For the next 15 minutes, do not turn the cooker on as
the Control Unit identifies and adjusts to its installation environment (the Control Unit
will emit a beep as the cooker is ready for use).
Testing of additional features
Audible Alarm Detection test
Turn the smallest burner to medium heat and test the smoke and carbon monoxide alarms,
one at a time. When the Control Unit detects an alarm signal, it turns the cooker off and starts
to emit a beep every 5 seconds. To reconnect the electricity to the cooker, first turn the burner
off (not required in cookers that are operated by touch), then press the Sensor cover once. The
Stove Guard is factory set to identify most alarm signals. If the Stove Guard does not react to
the external alarm signal, adjust the signal recognition frequency as advised in ‘Troubleshooting’, chapter 9.
14
STOVE GUARD SGK500 USER MANUAL
Safety Lock test (activated in mode 3b)
Make sure the hob is turned off. In approximately 20 minutes, the Safety Lock ‘locks’ the cooker
by deactivating the cooker knobs (in some cookers the oven knobs are not deactivated). Test
the Safety Lock by trying to turn the burners on one by one.
Turn the Safety Lock off by pushing the Intelligent Heat Sensor cover once.
The Control Unit will emit two short beeps indicating that the electricity has been reconnected and the cooker can be used normally.
6. Changing settings manually
6.1. Setting the Sensor sensitivity level manually
The sensitivity level determines the level of heat and the rate of temperature change required
to trigger an alarm.
If the Intelligent Heat Sensor is installed to a cooker hood that is higher than 65 cm (electric
burners), or if one wants to initially adjust the sensitivity to a certain level, set the sensitivity
level manually. After this the Sensor will go through the adjustment period as normal (see
chapter 1.4 a) Overheating Monitoring).
See recommended sensitivity level from the table below.
cm
level
120 90 80 70 60 50 40 - - 30
1
2
3
4
5
6
8
- - 16
Electric burners sensitivity level. The grey area indicated in the table (30 – 65 cm) shows where
manual setting of the sensitivity level is not required (unless it is pre-adjusted to a certain level). The level is indicated by the numbers 1 to 16, where 1 represents the most sensitive level,
and 16, the least sensitive. The factory setting is 5.
When detaching the Intelligent Heat Sensor, the Sensor will emit four beeps (Sensor Dislocation Alarm) and the cooker is turned off.
Setting the sensitivity level manually:
1. Put the battery disconnection piece into the hole on the bottom surface of the Sensor (2,
see image on page 9). Place the Sensor on a surface where the magnets stick (eg. a cooker) for about five seconds. If the mounting plate is already attached you can put it on the
mounting plate.
2. Lift the Sensor up (the Sensor emits a beep). Remove the battery disconnection piece and
save it for possible later use. Press the cover once.
3. Press the Intelligent Heat Sensor cover for about 5 seconds, until you hear a beep.
15
STOVE GUARD SGK500 USER MANUAL
4. Press the cover again, until you hear a beep.
5. Press the cover as many times as is the sensitivity level you want to adjust the Sensor to,
with short presses. Wait for the light to go off between the presses.
6. The Intelligent Heat Sensor now confirms its sensitivity level with beeps:
Beeps (given in four lots)
Sensitivity level
2+2+x+y
2
3+3+x+y
3
4+4+x+y
4
...
...
16 + 16 + x + y
16
6.2 Stove Guard factory settings
The Stove Guard is returned to its factory settings upon changing to a new cooker, or if the Control
Unit is not acting as described in the user manual.
If you only want to return the factory settings for the Intelligent Heat Sensor, turn the cooker electricity supply off (using the main switch or the cooker fuse) prior to carrying out the procedure. Returning the factory settings does not influence connection between the Control Unit and the Sensor.
1. Place the battery disconnection piece into the hole on the bottom surface of the Sensor (2, see
image on page 9). Place the Sensor on its mounting plate (or a surface where the magnets stick,
eg. a cooker), for five seconds.
2. Remove the Sensor from the mounting plate and press the Sensor cover and hold it down until
you have heard three separate beeps. The Intelligent Heat Sensor will emit signals to signify that
its factory settings have been restored.
3. The Control Unit will restart and emits a beep. After approximately 30 seconds the Control Unit
will emit another beep. The Control Unit has now been returned to its factory settings (mode 1). If
you want to activate additional features go to chapter 5.
If you have lost the battery disconnection piece, you can alternatively use a screwdriver to carefully press
the button on the bottom surface of the Sensor (see image 4 on page 27). Before using the screwdriver,
open and remove the Sensor cover according to instructions (see chapter 3 ‘ Opening and closing the Intelligent Heat Sensor cover’), to avoid pressing the cover switch simultaneously. After the procedure, close
the Sensor cover carefully, according to instructions.
16
STOVE GUARD SGK500 USER MANUAL
6.3 Changing the mode
The Control Unit mode can be changed in the following manner:
Change to modes 2, 3a or 3b: Carry out the procedure described above, starting from point 1.
Change to mode 1: Return the Stove Guard to its factory settings, see chapter 6.2.
6.4 Changing the X10 house address
1. Place the battery disconnection piece into the hole on the bottom surface of the Sensor (2, see
image on page 9). Place the Sensor on its mounting plate (or a surface where the magnets stick,
eg. a cooker), for five seconds.
2. Press the Sensor’s cover for around 10 seconds, until the Sensor emits two beeps.
3. Press Sensor cover again until it emits a beep.
4. Press the Sensor cover the appropriate number of times for the desired address (1 press = A, 2
presses = B, 3 presses = C … 16 presses = P). Wait for the light to go off between each press of the
button.
7. Checking settings
7.1 Checking the Sensor sensitivity level
To check which sensitivity level the Sensor has been set to, carry out the procedure below.
1. Press the Intelligent Heat Sensor cover for about five seconds, until you hear a beep.
2. Press the cover again, until you hear a beep.
3. The Intelligent Heat Sensor now confirms its sensitivity level with beeps:
Beeps (given in two lots)
Sensitivity level
2+ x
2
3+x
3
4+x
4
...
...
16 + x
16
17
STOVE GUARD SGK500 USER MANUAL
7.2 Checking the Control Unit settings
The Control Unit settings can be checked by turning the electricity off for 15 seconds using the main
switch or the cooker fuse. The Control Unit will then emit signals to inform you about its settings.
Mode 1 Standard features: Overheating Monitor, Automatic fault diagnosis, Sensor Dislocation
Alarm (in compliance with the EU standard)
Mode 2 Additional features for all electric cookers: (includes also mode 1 features) Intelligent
Timer, Sensor fault diagnosis
Mode 3a / 3b Extra features for mechanical cookers
(includes also modes 1 and 2 features) Intelligent Timer+, Cooker knob Safety Lock activated/deactivated
BEEP - 20 seconds break - BEEP
Mode 1 = standard features
BEEP - 20 seconds break - BEEP-BEEP
Mode 2 = additional features activated
BEEP - 20 seconds break - BEEP-BEEP-BEEP
Mode 3a = extra features for mechanical cookers activated, no Safety Lock.
BEEP-BEEP - 20 seconds break - BEEP-BEEP-BEEP
Mode 3b = extra features for mechanical cookers activated, Safety Lock in use.
ADDITIONAL INFORMATION
8. Low battery alarm
The Intelligent Heat Sensor is powered by solar panels and batteries. The working life of the
Sensor is on average 10 years, based on the number of alarms. A low battery in the Intelligent
Heat Sensor causes both the Sensor and the Control Unit to emit a short beep once a minute.
The battery is fixed and cannot be changed. When the Sensor is at the end of its working life,
please take care to recycle the old Sensor appropriately.
The low battery alarm can be postponed for 12 hours by pushing the Intelligent Heat Sensor
cover once. When the Sensor battery has completely run out (or the Sensor is removed), the
Control Unit will turn the cooker off and carry on emitting the battery alarm signal. Reset the
Control Unit battery signal by turning the electricity off for 15 seconds using the main switch
or the cooker fuse. When the Sensor is not operational, the cooker can only be used for 5
minutes at a time (emergency use). To reconnect the cooker electricity for 5 minutes, turn the
cooker electricity off for 15 seconds, as advised above.
18
STOVE GUARD SGK500 USER MANUAL
9. Troubleshooting
The cooker has been turned off and no signal sounds
• The cooker has been turned off either due to the Sensor Dislocation Alarm (the Intelligent
Heat Sensor being removed from its location or it not being on its mounting plate), or due
to Control Unit overheating protection. First check that the Intelligent Heat Sensor is on its
mounting plate.
• If the Sensor is on its mounting plate, the Control Unit overheating protection has turned
the Control Unit and the cooker off. This has likely happened due to a wrong installation
place that becomes apparent when the cooker is used on a high power setting. The cooker
can be turned back on by turning the electricity off for a moment using the main switch or
the cooker fuse. If the overheating protection turns the cooker off again change the Control
Unit installation location to a cooler one or to one that has better ventilation.
The Intelligent Heat Sensor pre-alarm sounds in a normal cooking situation
• When the Intelligent Heat Sensor is first installed, it learns the kitchen environment and
the user(s)’s cooking style. During this adjustment period, some alarms may be triggered
during normal cooking situations. If the Intelligent Heat Sensor starts to signal in a normal
cooking situation, press the Sensor cover during the 30 – 60 second long pre-alarm signal
(
). This will cause the Intelligent Heat Sensor to reduce its sensitivity automatically.
• If the Intelligent Heat Sensor alarm keeps being triggered, set its sensitivity manually to be
less sensitive, see chapter 6.1. To check the current sensitivity level setting, see chapter 7.1.
The Intelligent Heat Sensor does not signal in a hazardous situation
• If the Intelligent Heat Sensor is installed underneath a cooker hood that is higher than 65
cm above the cooker, the sensitivity level needs to initially be set to a more sensitive level
(after which it will self-adjust to the environment and to the cooking styles of the user(s)).
If you are not certain whether the level was pre-set, check the Sensor sensitivity level as instructed in chapter 7.1.
• If the Intelligent Heat Sensor is installed on a wall a special bracket needs to be used (available separately).
• The Intelligent Heat Sensor does not always signal immediately in a hazardous situation.
This is because it needs to take into account different cooking scenarios, including frying
at high temperatures, and not trigger too easily. The Intelligent Heat Sensor alarm triggers
when a certain temperature (or rate of increase) is reached, always long before the ignition
of a fire. If you would rather have the Sensor to react earlier, increase its sensitivity by one or
two levels (see chapter 6.1). To check the current sensitivity level setting, see chapter 7.1.
19
STOVE GUARD SGK500 USER MANUAL
I accidentally reset the pre-alarm signal even though the alarm was triggered by a hazardous situation. Has the Intelligent Heat Sensor now become too insensitive?
• Resetting the pre-alarm signal changes the Intelligent Heat Sensor’s sensitivity but only to
such a small extent, that even if it were to be accidentally changed for a couple of times, the
Sensor would not become too insensitive. The Intelligent Heat sensor will always cut the
power in a dangerous situation in accordance with EU standard EN50615.
The Control Unit emits a short beep, followed by a long beep (‘be’ - ‘beep’), at approximately 5 second intervals
• The automatic fault diagnosis has detected that the Intelligent Heat Sensor is not on its
mounting plate, or that there is a problem in the connection between the Intelligent Heat
Sensor or in the functioning of some part of the system.
• Ensure that the Intelligent Heat Sensor is on its mounting plate and press its cover once.
• Reconnect the cooker electricity by first turning all cooker knobs to ‘0’ (not required in cookers that are operated by touch), then turning the electricity off for about 15 seconds, using
the main switch or the cooker fuse.
• If the fault diagnosis alarm carries on triggering, contact the product retailer.
• If the fault diagnosis has turned the cooker off, it can only be used 5 minutes at a time
(emergency use). To reconnect the cooker electricity for 5 minutes, turn the cooker electricity off for 15 seconds using the main switch or the cooker fuse.
The Control Unit signals every hour or half hour
• There has been an error in the identification of the cooker (modes 2, 3a and 3b). Repeat the
setup procedure and check the setting of the Control Unit in the following manner;
1. Turn the electricity off for 15 seconds, using the main switch or the cooker fuse.
2. The Control Unit will confirm its setting with beeps as the electricity is reconnected. Compare the signals to the table in chapter 7.2. If the Control Unit’s setting was not correct carry
out the mode setup again, go to chapter 5.2.
3. Within one minute of the last signal, press the Intelligent Heat Sensor cover until you hear a
beep. The Sensor will emit an alarm and the Control Unit turns the cooker off. Reset the alarm
by pressing the Sensor cover once.
4. For the next 15 minutes, do not turn the cooker on as the Control Unit identifies and adjusts
to its installation environment.
The Control Unit did not identify the alarm signal of the smoke/CO alarm
• Clean the alarm with a vacuum cleaner.
• Change the batteries in the alarm if necessary.
• Check that the alarm is not located too far from the Control
Unit. The alarms should be located in the same room, at a maximum distance of 5 metres.
Frequency adjustment
• Adjust the signal recognition frequency by turning the trimmer on the Control Unit using a screwdriver (frequency adjustment, see the picture): turn
20
STOVE GUARD SGK500 USER MANUAL
the trimmer first approximately 0.5mm to the right, then do a test alarm with the external
alarm. If the Control Unit does not react to the alarm signal, then turn the trimmer 0.5mm
to the left counting from the original position and repeat the test alarm. If the Control Unit
does not identify the signal, then move the trimmer this time 1 mm to the right. Keep repeating test alarms and moving the trimmer with an ever expanding movement, moving
from right to left until the Control Unit identifies the signal.
The Control Unit responds to other sounds e.g. a telephone ringing or noise from a television
• Change the telephone’s ring tone or turn down the volume on the television. If the signal
that causes the false alarm cannot be disabled, adjust the signal recognition frequency by
turning the trimmer on the Control Unit using a screwdriver (frequency adjustment, see picture on previous page): turn the trimmer first approximately 0.5mm to the right, then see if
the sound still triggers a false alarm. If a false alarm is still triggered, then turn the trimmer
0.5mm to the left counting from the original position and try again. If the false alarm is still
triggered, move the trimmer this time 1 mm to the right. Keep repeating and moving the
trimmer with an ever expanding movement, moving from right to left until no false alarm
is any more triggered. When the correct position is found, then make sure that the Stove
Guard still responds to the alarm signals of external alarms by re-testing the Audible Alarm
Detection feature as advised in chapter 5.2.
• Alternatively, the Audible Alarm Detection Feature can be deactivated, see chapter 5.1.
The cooker lights shut down for a couple of seconds / the Control Unit makes noises
when I am using the cooker
• When the Control Unit is set in mode 3a or 3b, it performs a check every 15 minutes to see
if the cooker is still being used. This is a normal function of the Stove Guard.
The Safety Lock did not activate within 20 minutes
• Check the setting of the Control Unit as advised in chapter 7.2. If the Safety Lock was not
activated, set the Control Unit mode again, go to chapter 5.2.
The Intelligent Timer did not cut off the electricity supply in 3 hours
• Check that the Intelligent Timer is activated (mode 2/3a/3b) by checking the Control Unit
settings (see chapter 7.2)
• The standard Intelligent Timer, activated in mode 2 does not cut the electricity off if the hotplate is on a low heat setting. The Intelligent Timer+, available for mechanical cookers only
(modes 3a and 3b), also reacts when a hotplate is left on at low heat.
21
STOVE GUARD SGK500 USER MANUAL
The Stove Guard turned the cooker off when I was using the oven.
• On some cases when a convection oven is used on high heat setting (modes 2 or 3a/3b),
the Stove Guard fails to identify that the oven is being used, hence turning the cooker off.
The cooker shutdown can be prevented by pressing the Intelligent Heat Sensor cover once
when starting to use the oven (just before or after), or when the Stove Guard starts signalling (‘be’ - ‘beep’) before the cooker shutdown.
• Alternatively, the Stove Guard can be set to mode 1. To change to mode 1, return the Stove
Guard to its factory settings, see chapter 6.2.
The Stove Guard turns the cooker off and the Control Unit starts to signal even though
the cooker is not in use / The Stove Guard turns the cooker off every 15 minutes when using the cooker
• There has been disruption in the process of the Control Unit adjusting to the cooker (only in
modes 2, 3a and 3b). Initiate the process again by carrying out the ‘finishing off’ procedure,
described in chapter 5.2 point 2.
The Control Unit is not acting as described in the user manual or you are not certain
whether its settings are correct
• Return the Stove Guard to its factory settings, see chapter 6.2.
What to do when changing the cooker to a new one/moving house?
• Return the Stove Guard to its factory settings (see chapter 6.2). This can be done both when
the Control Unit is still attached to the old cooker or after having been connected to the
new cooker.
• If the Intelligent Heat Sensor is installed higher than 65cm over the cooker, set the sensitivity level manually (see chapter 6.1). If it is installed on a wall, a special bracket needs to be
used (purchased separately).
What to do when replacing the Intelligent Heat Sensor or the Control Unit with a new
one?
• See www.innohome.com for device pairing instructions.
22
STOVE GUARD SGK500 USER MANUAL
10. Technical Information
- certified, Casing IP20, indoor use only
Patent FI 117526, FI 117878, PCT pending
Unit
Connection
Voltage/power
Cut-off time
Control Unit
SGC510-2 or
SGC500-3
Control Unit model:
- 1-3 phase cookers: SGC500-3
- 1-2 phase cookers: SGC510-2
- Potential free alarm output/
input: 3.5mm 4-pin jack. Alarm
output = NO (normally open),
max 70 V, max 6 mA (optocoupler). Alarm input = 3-15 V
(optocoupler).
- SGC510-2: 230VAC, 1 – 2
-phase cookers, star connection, 1 x 32A or 2 x 16A (also
3-phase cookers if 3-phase is
connected past Control Unit)
- SGC500-3: 230/400VAC
3x16A/3X10A 3-phase cookers,
star or delta connection, with
or without N
Power consumption < 1W
1 – 3 h (Intelligent Timer:
cut-off time depends on heat
adjustments
and hotplate
power)
Intelligent
Heat Sensor
SGS510
Communication:
- Wireless 433MHz/10mW RF,
X10, PT2622
- Alarm transfer with FireSafety Socket SSC100
- Audible alarm 80 dB at 100
cm
Solar powered with a battery
back-up. Working life approx.
10 years (a significant number
of alarms may reduce battery
life).
3 – 25 min
(Overheating
Monitor)
Features
Mode 1 (factory setting)
Features in compliance with the EU standard EN50615*:
- cooker electricity supply cut-off in hazardous temperatures (self-learning maximum temperature
and rate of temperature increase) (patented)
- fault diagnosis (patented)
- Sensor Dislocation Alarm
- audible alarm signal > 65dB / 100 cm
- alarm light
- cooker ‘emergency use’ in a fault situation 5 min
Pre-alarm signal prior to cutting the electricity
Option for automatic operation of the extractor fan
Audible alarm signal recognition (deactivated as default)
Potential free alarm input/output
Power outlet for powering external appliances
Control Unit three-level overheating protection
Sensing distance (from the cooker top) 50 cm - 120 cm hood installation, 40 cm wall installation
16 adjustable sensitivity levels (learning) (patented)
23
STOVE GUARD SGK500 USER MANUAL
Manual alarm reset
Automatic alarm reset (patented)
Silent alarm
Red alarm light deactivation
Mode 2 (in addition to the mode 1 features)
Intelligent Timer (patented)
Sensor automatic fault diagnosis (patented)
Mode 3 (in addition to the mode 1 and 2 features)
Intelligent Timer+ (low-heat detection) (patented)
Cooker knob Safety Lock
* Tested in an accredited, third-party test laboratory (VTT Technical Research Centre of Finland).
Alarm output:
The alarm output is a 3.5 mm 4-pin jack found on the Control
Unit. The alarm output is potential free and normally open
(opto). It closes for one second when the Control Unit cuts
the cooker’s electricity supply.
If the alarm output does not work properly, change the polarity of the cable connecting to the alarm output.
24
CN 1
O C1
Alarm
out NO
STOVE GUARD SGK500 USER MANUAL
11. Disposal
Information on Disposal for Users of Waste Electrical & Electronic Equipment (private
households)
EU Directive 2002/96/EC for Waste Electrical and Electronic Equipment recycling (WEEE)
This symbol on the Stove Guard product and accompanying
documents indicates that this product should not be mixed with
general household waste. For proper treatment, recovery and
recycling, please take this product(s) to designated collection
points where it will be accepted free of charge. Alternatively, in
some countries you may be able to return your products to your
local retailer upon purchase of an equivalent new product.
Disposing of this product correctly will help save valuable resources and prevent any potential negative effects on human
health and the environment, which could otherwise arise from
inappropriate waste handling.
12. Warranty
In addition to the statutory warranty from the first vendor, this product has a 5 year manufacturer’s warranty that covers defects in material or workmanship, starting from the date of purchase. This warranty does not affect your legal rights. The warranty covers use of the product
in normal conditions in private households and housing associations. The warranty is limited
to the replacement or repair of faulty components. It does not include batteries.
The warranty applies only when the product is used according to instructions. It does not
cover damage arising from misuse, improper handling, application of force, dust, dirt, water or
other environmental factors, or from batteries.
In case of a warranty claim, please contact the vendor for instructions. Only authorised returns with a full description of the fault are accepted. After the warranty period, repairs will be
charged and are not always possible.
Warranty claims do not extend the original warranty period and the warranty of the replacement parts expires with the warranty of the product. Unless there is a statutory obligation, the
manufacturer is not responsible for further claims, including personal or material damages,
arising from the use of the product or from non-functioning or mis-functioning of the product.
25
STOVE GUARD SGK500 USER MANUAL
13. EU Declaration of Conformity
We declare under our sole responsibility that this product is in conformity with the
Low Voltage Directive 2006/95/EC
EMC Directive 2004/108/EC
R&TTE Directive 1999/5/EC
Restriction of Hazardous Substances (RoHS) Directive 2011/65/EU
and the following harmonised standards and technical specifications have been applied:
Devices for fire prevention for hobs (cooktops) EN 50615:2015 (Cat. B) *
EN 60730-1:2011
Appliances requirements EN 60335-2-31:2003 + A1:2006 + A2:2009, Clause 30
Electromagnetic Compatibility Radio Spectrum Matters (ERM) EN 300 220-1, EN 300 220-2
v2.4.2
Electromagnetic Compatibility and Radio Spectrum Matters (ERM) EN 301 489-3 V1.6.1 (2013)
and EN 301 489-1 V1.9.2 (2011)
RoHS EN 50581:2012
* EN 50615:2015 European Standard for Stove Guards, approved on 5 Jan 2015.
Full title of the standard: Household and similar electrical appliances - Safety - Particular requirements for devices for fire prevention and suppression for electric hobs (cooktops)
This European standard deals with the safety of electric devices used for detection, prevention and
suppression of fire originated from a cooking process or from flammable material left on the hob.
Category B = Preventive power cut-off.
Technical Director Matti Myllymäki
26
IMAGES
1
2
3
1
of
fo
n
2
4
27
STOVE
GUARD SGK500
MANUAL
smart
safety
for USER
your
kitchen
Innohome Oy
www.innohome.com
[email protected]
www.facebook.com/innohome
Linnoitustie 4B
FI-02600 Espoo
28
Finland
smart safety for your kitchen
SGK500-200UE3-002