1
UNIT INSTALLATION
Please read all of the instructions before beginning the installation. Recommend
having your unit installed by a professional installation shop.
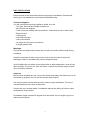
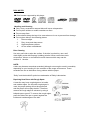
Tools and Supplies:
You will need these tools and supplies to install your unit:
- Torx type, flat-head and Philips screwdrivers
- Wire cutters and strippers
- Tools to remove existing radio (screwdriver, socket wrench set or other tools)
- Electrical tape
- Crimping tool
- Volt meter/test light
- Crimp connections
- 16 gauge wire for power connections
- 8 gauge speaker wire
Warnings:
Choose the mounting location where the unit will not interfere with the safe driving
conditions.
Install the unit where it does not get in the driver's way and can not injure the
passenger if there is a sudden stop, like an emergency stop.
Avoid installing the unit where it would be subject to high temperature, such as from
direct sunlight, or from hot air, from the heater, or where it would be subject to dust,
dirt or excessive vibration.
Cautions:
Before finally installing the unit, connect the wiring temporarily and make sure it is all
connected up properly, the unit and the system work properly.
Use only the parts included with the unit to ensure proper installation. The use of
unauthorized parts can cause malfunctions.
Consult with your nearest dealer if installation requires the drilling of holes or other
modifications of the vehicle.
If installation angle exceeds 30 degrees from horizontal, the unit might not give its
optimum performance.
6