1
MANUAL
OWLHM2B / OWLHM2W
Introduction
High-Speed Mobile Internet with 3G Connectivity
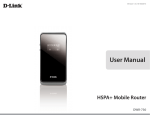
The OWLHM2 HSPA+ Mobile Router gives you high-speed access to the Internet wherever
you are and lets you share it on the go.
The built-in 3G antenna provides a reliable connection to your 3G service provider, and a
separate Wi-Fi antenna gives extended coverage to the computers and mobile devices
connected to the OWLHM2.
Mobile Internet for All of Your Devices
With the OWLHM2, you can get online with your notebook, smartphone, tablet, or any other
wireless device using a single 3G mobile connection. The OWLHM2 provides high-speed
Wireless N coverage to give high-speed wireless access to everybody – whether you are with
colleagues on a business trip, or travelling with friends and family.
Built-in Software for Instant Access Anywhere
The OWLHM2 is truly plug and play, with drivers built right into the router so you can
connect without the need to install anything. Open a browser,
connect the router, and you can set up your network right from a web interface. This means
that notebooks and netbooks without a CD‑ROM drive can
connect and get up and running in no time. Once the device is set up, you can simply power
it on to start up your portable mobile network, meaning
that you can share your mobile Internet connection without even needing a computer.
Designed for True Portability
The OWLHM2 HSPA+ Mobile Router is small and slim enough to carry around in your purse,
bag, or pocket. It features a MicroSD card slot for optional
removable storage (up to 32 GB), allowing you to always have your files and contacts on
hand.
Installation
This section will guide you through the installation process.
Connect to Your Network
1. Ensure that your OWLHM2 + Mobile Router is powered off.
2. Slide your (U)SIM card into the slot provided, ensuring that the alignment is the same as
indicated by the logo next to the slot. The gold contacts on the card should be facing
downwards.
Caution: Always unplug and turn off the router before installing or removing the SIM card.
Never insert or remove the SIM card while the router is in use.
3. After a few moments, the OLED display will show the current status of the router’s various
functions.
Insert a microSD Card
1. Ensure that your OWLHM2 HSPA+ Mobile Router is powered off.
2. Open the cover of the microSD slot on the side of the router.
3. Insert the microSD card into the slot and push it in until it locks into place.
Driver Installation
When you plug the OWLHM2 into your computer, any necessary drivers will immediately
install (with your permission).
Note: These drivers are Windows-only. Mac and Linux users will still be able to configure the
OWLHM2 using the web configuration utility described in Configuration Utility”.
Note: For Windows systems, if there are any problems while installing the driver, please
make sure you have installed Windows Media player version 11 or higher.
Wireless Installation Considerations
The OWLHM2 can be accessed using a wireless connection from anywhere within the
operating range of its wireless network. Keep in mind that the quantity, thickness, and
location of walls, ceilings, or other objects that the wireless signals must pass through may
adversely affect wireless signals. Ranges vary depending on the types of materials and
background RF (radio frequency) noise in your home or office. The key to maximizing the
wireless range is to follow these basic guidelines:
1. Minimize the number of walls and ceilings between the router and other network devices.
Each wall or ceiling can reduce your adapter’s range
From1 to 90 feet (1 to 30 meters).
2. Be aware of the direct line between network devices. A wall that is 1.5 feet thick (0.5
meters) appears to be almost 3 feet (1 meter) thick at a 45-degree angle. At a 2-degree
angle it appears over 42 feet (14 meters) thick. Position devices so that the signal will travel
straight through a wall or ceiling (instead of at an angle) for better reception.
3. Try to position access points, wireless routers, and computers so that the signal passes
through open doorways and drywall. Materials such as glass, metal, brick, insulation,
concrete, and water can affect wireless performance. Large objects such as fish tanks,
mirrors, file cabinets, metal doors, and aluminum studs may also have a negative effect on
range.
4. If you are using a 2.4 GHz cordless phone, make sure that the 2.4 GHz phone base is as far
away from your wireless device as possible. The base
transmits a signal even if the phone is not in use. In some cases, cordless phones, X-10
wireless devices, and electronic equipment such as ceiling fans, fluorescent lights, and home
security systems may dramatically degrade wireless connectivity.
Configuration
Initial Connection to the Router
This section will show you how to configure your new mobile router using the configuration
utility that can be obtained through a software interface or a web-based user interface.
When configuring the router for the first time, you will need to establish a direct connection
with the router in order to access the web-based configuration utility. This can be done
using the included USB, or by connecting wirelessly to the OWLHM2. Once you have
configured your router, you will be able to connect using the Wi-Fi settings that you have
specified in the configuration process. Ensure that the router is powered on and has
sufficient battery power before commencing the setup process.
Connect via USB
To connect to the router via USB, plug the provided micro USB cable into the micro USB port
on the bottom of the router, and plug the other end
into an available USB port on your computer. Your router is now ready for configuration,
please refer to “Configuration Utility” on page 12 to continue the setup process.
Connect via Wi-Fi
Note: The following example uses Windows 7’s built-in wireless connection utility. If you are
using a different operating system, or a third party connection utility, the process may be
different. Please refer to the documentation that came with your operating system or
wireless client for further information on how to connect to a wireless network.
To connect to the router using Wi-Fi, open your operating system’s wireless networking
utility and scan for available networks to connect to. By default, the network name (SSID)
of the OWLHM2 will be in the format OMEGA,the default password is 1234567890
Once you have located this network with your wireless utility, connect to the network using
your wireless networking utility.
You will then be prompted to enter the network security key for your router. The unique
security key for your router will be displayed on a sticker in the router’s battery bay. Enter
the security key in the box provided and click OK. Your wireless connection utility should
confirm that the connection is successful, and you can move to the next step to continue to
configuration process.
Web-based Configuration
To access the configuration utility, open a web browser (such as Internet Explorer) and enter
the IP address of the router, which is 192.168.0.254 by default.
Configuration Utility
Once you have reached the configuration utility through the installed software or your web
browser, you will need to log in. Enter admin as the username and the password . You can
also select your language from the drop-down menu.
Click Login to continue.
Throughout the interface you will find a menu bar at the top of the page which includes tabs
for easy navigation, and a summary bar in the upper right corner with a quick view of
essential information.
Home: The Home tab will return you the home page, where a summary of the system
information is shown.
Wizard: Click on this tab to start the setup wizard, which will guide you through the basic
setup process.
Internet: The WAN tab gives you Internet setup and settings options.
Network: The Network tab allows you to configure the network settings for your Local Area
Network (LAN).
SMS: From the SMS you can view and send SMS messages via your mobile network.
Wi-Fi: The Wi-Fi allows you to configure your Wi-Fi network, as well as add new devices
using WPS.
Advanced: Use this tab to configure advanced network settings such as routing and IPv6.
Security: The Security allows you to configure firewall and security settings to protect your
network from WAN-side
intrusions.
system: From this tab, you can manage the administrative configuration of your router, such
as time and date, firmware,
language, and remote management.
Device Status
A summary of the device’s current status will be displayed on the information panel at the
top of the right-hand side of the navigation bar. The following is a description of the
indications, from left to right.
SIM: This icon shows whether or not a compatible (U)SIM card has been inserted into the
device.
SMS: The number to the right of this icon indicates the number of unread messages in the
SMS inbox.
Signal Strength: Indicates the current strength of the mobile network signal being received.
Operator Name: The name of the mobile network operator to which the device is currently
connected.
Internet: Indicates that there is an Internet connection present
Wi-Fi Network: Indicates that the router’s Wi-Fi network is currently active. The number to
the right of this icon indicates the number
of wireless clients currently connected to the router’s Wi-Fi network.
Logout: Click this button to log out of the configuration interface.
Home
The Home page acts as a dashboard to quickly display your configuration settings and
provide a summary of the current status of your network’s status.
System Resources: This area displays the percentage of the router’s memory and CPU
currently being used by the system.
LAN: This area displays a summary of the current settings for the router’s LAN.
2G/3G Modem: This area shows the current status of your 2G or 3G mobile network
connection.
WAN: This area displays a summary of the router’s current WAN settings. These details will
reflect the mobile network connection which is being received from the service provider.
Traffic Statistics: This area shows the amount of data which has been sent (TX) and
received (RX) over the mobile network. This information may not reflect the amount
recorded by your mobile service provider.
Wizard
The Wizard page will guide you through the steps required to configure the basic settings of
your router such as the IP address, network name (SSID), and password. Click on the Wizard
button on the navigation bar to commence the wizard.
LAN Configuration
IP Address: If you wish to change the router’s IP address, enter the new address here. If you
change the IP address from the default, you will need to enter the new address in your
Internet browser’s address bar in order to access the web-based configuration utility.
IP Subnet Mask: If you wish to change the router’s subnet mask, enter it here.
Click Next to continue.
2/3G Configuration
\If you wish to change the 2G or 3G service provider or connection type, click on a profile in
the list to highlight it, and click Set to set that profile as the default.
Click Next to continue, or Back to return to the previous step.
Wi-Fi Configuration
Password Setting: Choose a password for your wireless security. Clients will need this
password in order to access your network wirelessly. If you are currently connected to the
router using Wi-Fi, you will need to reconnect to the router using your new password once
the wizard has been completed.
SSID: If you wish to change your wireless network name (SSID), enter a new name in the field
provided. If you change the SSID, you may need to re-connect to the router using the new
SSID before you can access your network or the configuration utility.
Click Done to complete the wizard, or click Back to return to the previous page.
After you have clicked Done, a confirmation window will appear. Click OK to save the
configuration.
WAN
This page allows you to configure the Internet settings for your mobile network connection.
Use the tabs in the left-hand column to navigate through the different settings categories.
Connection Operation
Flight mode :Flight mode turns off all communications so that the device can be powered on
safely when in an aircraft. Select whether you want to Enable or Disable flight mode from
the dropdown menu, and click Change to effect the change.
Preferred Cellular Network: Select your preferred cellular network connection mode:
Auto Mode - The router will automatically connect to your preferred mobile network and
remain connected while the device is powered on.
Manual Mode - You must manually connect to the preferred mobile network.
On Demand - The router will connect to the preferred mobile network when Internet access
is required.
Click Change to effect the change.
Roaming Mode :Select whether you would like to Enable or Disable mobile network roaming
from the drop-down menu.
Caution: Roaming on networks other than your own may incur additional usage charges.
Connection: Shows the type and status of the current mobile connection. To change the
connection profile, select a user profile from the table below and click Set to activate the
profile. Click Disconnect to manually disconnect the current mobile data service.
Profiles: The profiles table shows the details of currently configured user profiles. To add a
new user profile, navigate to the User Profile tab at the top of this section.
User Profile
Click Add to add a new user profile.
Name: Enter a name to identify the new user profile.
APN: Enter the Access Point Name (APN) for the connection. If you do not know this
information, please contact your service provider.
Protocol: Select the protocol to be used for the connection from the drop-down menu.
User: Enter the username to be used for this connection.
Password: Enter the password to be used for this connection.
Delete: Click the delete icon to delete this profile from the list. Click OK to save the profile.
Click Apply to apply the profile settings and return to the Internet menu.
Configuration
This section allows you to specify the settings for your Internet connection depending on the
type of connection you wish to use, or as specified by your Internet Service Provider. Use the
IPv4 and IPv6 tabs at the top of the section to select the IP address mode.
IPv4 - PDP Context
Connection Type: Select PDP Context from the drop-down menu.
DNS Setting: Enter up to three DNS servers as provided to you by your service provider.
Click Apply to apply the changes.
IPv4 - Static Setting
Use this setting if your Internet Service Provider has supplied you with a static (nonchanging) IPv4 address. If you are missing any of the information required in this section,
please contact your ISP.
Connection Type: Select Static Setting from the drop-down menu.
IP Address: Enter the static IP address provided to you by your ISP.
Mask: Enter the subnet mask provided to you by your ISP.
Gateway: Enter the default gateway provided to you by your ISP.
MTU: Enter the maximum transmission unit for this connection.
The default MTU is 1400.
DNS Setting: Enter up to three DNS servers as provided to you by your ISP.
Click Apply to apply the changes.
IPv4 - DHCPv4
Use this setting if your Internet connection settings and IP address are to be obtained
automatically from your ISP.
Connection Type: Select DHCPv4 from the drop-down menu.
DNS Setting: Enter up to three DNS servers as provided to you by your service provider.
Click Apply to apply the changes.
2G/3G Modem
This section displays information about your 2G or 3G modem connection.
Information
Information: Displays information about your 2G or 3G modem.
Settings
Network: Select your preferred modem type from the drop-down menu:
Auto - The modem will automatically select the modem type depending on the network it is
connected to.
3G Only - The modem will only connect to 3G networks.
2G Only - The modem will only connect to 2G networks.
If you wish to change the modem type, select your new modem type and click Change to
effect the change. Re-enter the new PIN code.
Click Apply to apply the changes.
SIM
This section allows you to turn SIM lock on or off for the SIM card which is currently inserted
into the router.
PIN Code: Enter the PIN code for the SIM card. Click Enable to turn on SIM lock, or click
Disable to turn off SIM lock.
PLMN
This page allows you to view available Public Land Mobile Networks (PLMN). This page can
also be used to select a preferred network when you are roaming outside of your home
network.
Mode: Select Automatic to allow the router to automatically connect to the first available
network when roaming. Select Manual to choose your preferred roaming network from the
list below.
If you have selected Manual mode, click on the preferred network to select it, and then click
the Update button to select that network as the preferred network. Click Query to refresh
the list of available networks.
Note: You will need to manually disconnect the current mobile data service before selecting
a network using PLMN.
Network
The Network pages allow you to check the current status of your Local Area Network (LAN),
and make changes to LAN Settings settings.
LAN
IPv4
IP Address:Enter the IPv4 address for your Wi-Fi network. If you change this address, you will
need to enter the new address in your web browser’s address bar in order to access the
web-based configuration utility.
IP Subnet Mask:Enter the IPv4 subnet mask for your Wi-Fi network.
DNS Name
DNS Device Name: Enter your router’s DNS device name in the field provided.
DHCP
DHCP Server
DHCP Mode: Select the desired DHCP mode from the drop down menu:
None - Turns off DHCP functionality
Server - The router will act as a DHCP server and assign IP addresses to connected devices.
Relay - The router will act as a relay between DHCP clients and a DHCP server on another
subnet.
Start IP: Enter the starting address for the DHCP pool.
End IP: Enter the ending address for the DHCP pool.
Lease Time: Enter the lease time (in minutes) for assigned IP addresses.
Relay IP: If you selected Relay above, enter the IP address of the DHCP server to be relayed.
Metric Number: Enter the metric number to be used for the DHCP server.
DNS Server
First/Second/Third DNS Server: Select None from the drop-down menus if you do not wish
to specify a first, second, or third DNS server. Select User Define to specify a DNS server, and
enter the address of the server in the field provided.
NTP Server
First/Second/Third NTPServer: Select None from the drop-down menus if you do not wish to
specify a first, second, or third Network Time Protocol server. Select From ISP to use the
automatic settings supplied by your ISP, or select User Define to specify an NTP server, and
enter the address of the server in the field provided.
Static DHCP
Use this option to specify a DHCP address reservation to a particular device or machine
based on MAC address. To add a new reservation, click Add.
MAC Address: Enter the MAC address of the device or machine for which you wish to make
the DHCP reservation.
IP Address: Enter the IP address that you wish to reserve. This address must be within the
DHCP address pool.
Click OK to save the reservation.
Leased Hosts
This table shows the details of clients currently receiving a DHCP address from the DHCP
server. Click Refresh to update the table.
NAT
This section allows you to configure functions related to Network Address Translation (NAT)
such as port triggering, and the Demilitarized Zone (DMZ)
Port Trigger
Use this option to have inbound traffic automatically forwarded to a dynamic address on the
LAN when triggered by outbound traffic. To add a new port triggering rule, click Add.
Active: Check the box to activate this rule.
Name: Specify a name to identify the rule.
Trigger Protocol: Select TCP or UDP as the protocol for the trigger ports from the drop-down
menu.
Trigger Port: Enter the starting and ending trigger port for the rule.
Open Protocol: Select TCP or UDP as the protocol for the ports to be opened from the dropdown menu.
Open Port(s): Enter the starting and ending ports to be opened when the trigger occurs.
Delete: Click the Delete icon to delete the rule.
Click OK to save the rule. Click Apply to apply the current rules and return to the Network
page.
DMZ
If a machine on your network is having trouble running an application from behind the
router’s firewall, you can choose to enable the DMZ, which will expose the selected machine
completely to the Internet. It is recommended that this is only used as a last resort, and that
you understand the security implications before enabling the DMZ.
DMZ Enable: Check the box to enable the DMZ function.
DMZ Host: Enter the IP address of the machine that you wish to place in the DMZ. If this
machine receives an IP address from the DHCP server, you should make a DHCP reservation
to ensure that the machine always receives the same IP address.
Click Apply to save the settings and return to the Network page.
ALG
Application Level Gateways (ALG) allow certain applications to augment a network’s firewall
or NAT. This section enables you to enable various ALGs as required by specific applications.
To enable an ALG, check the box next to the name of the rule.
SIP Port: Enter the Session Initiation Protocol (SIP) port required by your applications.
Click Apply to save the settings and return to the Network page.
DDNS
The DDNS feature allows you to host a server (web, FTP, game server, etc.) using a domain
name that you have purchased (www. yourdomain.com) with your dynamically assigned IP
address. Most broadband Internet service providers assign dynamic (changing) IP addresses.
Using a DDNS service provider, users can enter in your domain name to connect to your
server regardless of your IP address.
Enable: Check the box to enable the NAT64 function.
Service Provider : Select your DDNS service provider from the drop-down menu.
Service type: Select the DDNS service type from the drop-down menu.
Domain Name: Enter the domain name for your DDNS service.
Login Name: Enter the username associated with your DDNS account.
Login Password: Enter the password for your DDNS account.
IP Update Policy :Select the preferred IP update policy from the drop-down menu.
User Defined IP: If you selected User Defined above, enter the IP address for updates.
Wildcards: If your service provider supports wildcards, you can enable this option to have
wildcard addresses associated with your host domain.
MX: Check this box to enable mail exchange (MX) for your DDNS domain.
Service
Backup MX: Check this box to enable the backup MX for your DDNS domain.
MX Host: Enter the host name for your MX service.
SMS
The OWLHM2 can send a receive SMS text messages through the mobile network’s SMS
function. In this section you can check the SIM card’s inbox and outbox, as well as send new
messages.
New Message
Send To: Enter the phone number that you wish to send the message to
Messages: Enter the body of the message to be sent.
Local
Inbox
This tab shows a summary of SMS messages in the inbox.
Outbox
This tab shows a summary of messages in the outbox which are yet to be sent.
Wi-Fi
The Wi-Fi pages allow you to check the current status of your Wi-Fi network, and
make changes to Wi-Fi settings.
Basic
This section allows you to configure your Wi-Fi network and specify the wireless security
method to be used to secure your network.
Enable: Check the box to enable to Wi-Fi function.
Mode: Select the desired 802.11 wireless mode from the dropdown menu. You should make
your selection based on the standards supported by the wireless clients which will be
connecting to your network.
Channel: To have the router automatically select the optimal wireless channel, select Auto
from the drop-down menu. If you wish to select a particular channel, select if from the dropdown menu.
802.11N Channel Width: If you are using the 802.11n standard, you can manually select the
channel width which best suits your network environment.
Beacon Interval: The beacon interval determines how often information about the wireless
network is broadcast. It is recommended that you do not adjust this setting unless instructed
to do so.
DTIM Period: The Delivery Traffic Indication Message broadcasts information about buffered
data to clients that are currently in low-power mode. Enter the desired DTIM period as a
number of beacon intervals.
SSID: Enter the SSID (network name) to identify your wireless network.
Hide SSID: Check the box to hide the SSID of your network. If the SSID is hidden, wireless
clients must manually enter it in order to connect to your network.
Encryption Type: Select the wireless encryption method that you wish to use from the dropdown menu. If you do not wish to enable wireless security, select None from the drop-down
menu. Click Apply to save the current settings.
Wireless Security
It is recommended that you enable wireless security on your router in order to protect your
wireless network from unauthorized access. You should select a wireless security protocol
that is compatible with the wireless clients which will be accessing your network.
Wired Equivalent Privacy (WEP)
Wired Equivalent Privacy (WEP) is an older wireless security standard, which although
providing more protection than no security at all, has some weaknesses which could make it
vulnerable to intrusion. It is recommended that you only use WEP if your wireless clients do
not support Wi-Fi Protected Access (WPA). WEP is not supported by the 802.11n standard,
and therefore you will not be able to achieve 802.11n speeds if using WEP.
Encryption Type: Select WEP from the drop-down menu.
Authentication Method: Select the desired authentication method from the dropdown
menu:
Auto - The router will automatically determine the authentication method based on the
client that is connecting to it.
Open System - Clients do not require authentication in order to associate with the router.
The encryption key will be used to encrypt data packets sent over the network.
Shared - The encryption key is used for authentication as well as to encrypt data packets.
WEP Encryption Length: Select the length of the encryption key to be used.
64-bit - A 64-bit key comprises a string of 10 hexadecimal characters, or 5 ASCII characters.
128-bit - A 128-bit key comprises a string of 26 hexadecimal characters, or 13 ASCII
characters.
Key 1-4: You can predetermine up to 4 WEP keys. Select the WEP key you wish to use by
clicking on the radio buttons next to the keys. Select whether you wish to use HEX or ASCII
characters in your key using the drop-down menu. Enter the desired key in the field
provided. Click Apply to save the current settings.
Wi-Fi Protected Access (WPA)
Wi-Fi Protected Access (WPA) is a newer and more secure encryption protocol which makes
significant improvements over WEP. There are two versions of WPA; the original WPA, and
the newer WPA2.
Encryption Type: Select WPA Personal from the drop-down menu.
WPA Mode: Select the desired authentication method from the dropdown menu:
Auto (WPA or WPA2) - The router will automatically determine the version of WPA to be
used based on the client that is connecting to it.
WPA - Clients will only be able to associate with the router using the WPA standard.
WPA2 - Clients will only be able to associate with the router using the WPA2 standard.
Clients which do not support WPA2 will not be able to associate with the router.
Cipher Type: Select the desired cipher type from the drop-down menu:
TKIP - This cipher is used by the WPA standard.
AES - A newer cipher used by the WPA2 standard. Use of this cipher type is required in order
to achieve 802.11 speeds.
Pre-Shared Key: The pre-shared key is the password which clients will require in order to
connect to your network. Enter a password of between 8 and 63 characters in length.
Click Apply to save the current settings
WLAN Authentication and Privacy Infrastructure (WAPI)
WLAN Authentication and Privacy Infrastructure (WAPI) is a wireless security standard which
is implemented in China. You should only use this protocol if your wireless clients do not
support any of the other security methods provided by the modem.
Encryption Type: Select WAPI Personal from the drop-down menu.
WAPI Pre-Shared Key: Select whether your key should use ASCII or HEX characters using the
drop down menu. Enter your desired key in the field provided.
Click Apply to save the current settings.
Wi-Fi Protected Setup (WPS)
Wi-Fi Protected Setup (WPS) enables you to quickly and securely add compatible devices to
your wireless network.
Enable: Check the box to enable the Wi-Fi Protected Setup feature.
Configure State: Shows the current status of the WPS function.
Configure Method: Select the WPS method that you wish to use. If your device supports
Push Button Connection (PBC), simply select this option and click Apply to start the
connection process. You will then have 120 seconds to press the WPS button on your
wireless device in order to initiate the connection. If your device does not support PBC, you
can select the PIN method and continue to the next step.
Current PIN: A PIN is a unique number that can be used to add the router to an existing
network or to create a new network.
Generate PIN: For extra security, a new PIN can be generated. Click Generate to create a
new PIN. The current PIN will be shown in the field next to Current PIN. This PIN can be used
by wireless clients to join your network using the PIN method
Enrollee PIN: If the device you are trying to add to the network was provided with a PIN
number, select this option and enter the device’s PIN in the field. Click Apply to commence
the connection process.
MAC Filter
The MAC filtering option allows you to allow or deny access to wireless clients based on their
MAC address.
Enable MAC Address Filter: Check the box to enable the MAC filtering feature
Mode: Select the filtering mode from the drop-down menu. You can choose to Deny Listed
Stations access to your network, or Allow Listed Stations access.
Listed Stations Table
To add a new filtering rule, click Add.
Active: Check the box to activate the rule.
Name: Enter a name to identify the machine or station which will be filtered.
MAC Address: Enter the MAC address of the machine or station which you wish to filter
Delete: Click the Delete icon to delete the rule from the table.
Click OK to save the current rule and add it to the table. Click Apply to save all changes and
return to the Wi-Fi page.
Station List
The Station List tab shows a list of all wireless clients currently connected to your wireless
network.
Advanced
Static Route
The Static Route feature allows you to customize specific routes for data through your
network
IPv4
The IPv4 routing table lists all current routing rules. Click Add to add a new routing rule.
Destination IP: Enter the destination IP address for your route.
Destination Mask: Enter the destination mask for your route.
Next Hop Type: Select Interface or IP Address as the hop type from the drop-down menu.
Next Hop Interface: Select either LAN or WAN as the next hop interface from the drop-down
menu.
Metric: The metric will determine your route selection process. Enter a metric between 1
and 255 in the field provided.
Click Apply to save the routing rule.
RIP
The Routing Information Protocol (RIP) uses metrics to prevent routing loops from being
propagated. Use this section to configure your router’s RIP settings.
Setting
Enable: Check the box to enable RIP. The table will show details of your RIP settings.
LAN
Direction: Select the desired direction in which to apply RIP. Select RX/ TX to apply RIP in
both inbound and outbound directions, RX for inbound only, and TX for outbound only.
Version: Select the RIP version that you wish to use from the dropdown menu.
Authentication: Select the desired authentication type from the drop-down menu.
WAN
Direction: Select the desired direction in which to apply RIP. Select RX/ TX to apply RIP in
both inbound and outbound directions, RX for inbound only, and TX for outbound only.
Version: Select the RIP version that you wish to use from the dropdown menu.
Authentication: Select the desired authentication type from the drop-down menu.
Click Apply to save the current configuration
Security
The Security tab allows you to configure your router’s firewall settings and enable features
to protect your network from outside intrusions and malicious attacks.
Firewall
IP Filter
Active: Check the box to active the IP filter rule.
Source IP: Enter the source IP address to be filtered.
Source From Port: Enter the starting port on the source IP.
Source To Port: Enter the ending port on the source IP.
Destination IP: Enter the destination IP address to be filtered.
Destination From Port: Enter the starting port of the destination IP.
Destination To Port: Enter the ending port of the destination IP.
Protocol: Select the protocol for the IP filter rule.
Delete: Click the icon to delete the IP filtering rule.
MAC Filter
The MAC filter allows you to allow or deny access to your wireless network based on a
client’s MAC address.
Blacklist/Whitelist: Select Blacklist to deny access to only the MAC addresses listed below.
Select Whitelist to allow access to only the MAC addresses listed below.
Active: Check the box to activate the MAC filter rule.
Source MAC: Enter the MAC address of the machine or device which you wish to filter
packets coming from.
Destination MAC: Enter the MAC address of the machine you wish to filter packets going to.
Day: Check the box for each day that you wish to activate the MAC filtering rule.
Start Time: Enter the starting time at which you wish to activate the MAC filtering rule each
day.
End Time: Enter the ending time at which you wish to deactivate the MAC filtering rule each
day.
Delete: Click the icon to delete this MAC filtering rule.
Click Add to add the current rule to the rules list.
DDOS
This section allows you to enable various security features to protect against Denial of
Service (DoS) attacks.
DoS Prevention Filters: Check the box next to the rule to enable prevention against that
specific kind of DoS attack.
Click Apply to save the current configuration
Content Filter
The content filter allows you to allow or deny access to specific URLs.
Enable URL Filter: Check the box to enable URL filtering.
Blacklist/Whitelist: Select Blacklist to deny access to only URLs listed in the rule table. Select
Whitelist to allow access to only URLs listed in the rule list.
Active: Check the box to activate the URL filtering rule.
URL: Enter the URL that you wish to allow or deny access to. If you enter a domain name, all
URLs under this domain will be allowed or denied access. Delete: Click the icon to delete the
rule.
Click Add to save the rule and add it to the rule table.
System
This tab allows you to configure the router’s administrative functions, such as time & date,
remote access, firmware, and access the system log.
About
This tab shows the router’s basic information.
Configuration
Backup
Click Backup to save the router’s current configuration to a file on your computer. You will
be then be prompted with a “save file” dialogue, where you can choose where to save the
configuration file.
Restore
Click Browse to locate a previously saved configuration file on your computer. Once you
have located the file, click Restore to configure the router according to the selected
configuration file.
Reset to Default
Click Reset to restore the router’s settings to the factory defaults.
Important: All settings stored on the router will be lost following a factory reset.
Firmware Upgrade
You can upgrade the firmware of the router here. Make sure the firmware file you want to
use is on the local hard drive of the computer.
Click Browse to locate a previously downloaded firmware file on your computer. Once the
file has been located, click Update to carry out the firmware upgrade process.
Important: All current settings will be restored to their factory defaults following a firmware
upgrade.
Remote Control
This section allows you to configure your router’s remote management feature. With
remote management, you can access your router’s configuration interface remotely using
any Internet connection.
OMA-DM
Enable: Check the box to enable remote management using the Open Mobile Alliance (OMA)
Device Management (DM) protocol.
Server URL: Enter the URL of the server you will use to manage the device.
Server Port: Enter the port for the server.
Prefer Auth Type: Select your preferred authentication type from the dropdown menu.
Server Auth Type: Select the server’s authentication type from the drop-down menu.
Server ID: Enter the ID of the server.
Server Password: Enter the password for the server.
Server Nonce: Enter the number to be used by the server as the nonce for communications.
Client Auth Type: Select the client authentication type from the drop-down menu.
Client ID: Enter the client ID,
Client Password: Enter the client password
Client Nonce: Enter the number to be used by the client as the nonce for communications.
Periodical Client initiated Enable: Check to enable client initiation.
Periodical Client initiated Interval: Enter the interval period for client initiation.
HTTP
HTTP Server Enable: Check the box to enable remote management using the HTTP protocol.
HTTP Server Port: Enter the port for the HTTP server.
Accept Request From WAN: Check to enable WAN request acceptance.
HTTPS
HTTPS Server Enable: Check the box to enable remote management using the HTTPS
protocol.
HTTPS Server Port: Enter the port for the HTTPS server.
Accept Request From WAN: Check to enable WAN request acceptance.
Accept Request From LAN: Check to enable LAN request acceptance
TELNET
TELNET Server Enable: Check the box to enable remote management using the TELNET
protocol
TELNET Server Port: Enter the TELNET server port.
Accept Request From WAN: Check to enable WAN request acceptance.
Accept Request From LAN: Check to enable LAN request acceptance.
SSH
SSH Server Enable: Check the box to enable remote management using the Secure Shell
protocol.
SSH Server Port: Enter the SSH server port.
Accept Request From WAN: Check to enable WAN request acceptance
Accept Request From LAN: Check to enable LAN request acceptance
TR069
Enable: Check the box to enable automatic remote configuration of your router using the
TR-069 protocol.
Fixed Client Port: Enter the fixed port for the client device.
Server URL: Enter the URL for the TR-069 server to be used.
Bootstrap Enable: Enable the router to act as a bootstrap device.
ACS Username: Enter the Auto Configuration Server username.
ACS Password: Enter the Auto Configuration Server password.
Periodical Inform Enable: Check to allow the router to send messages to the ACS server to
announce its presence.
Periodical Inform Interval: Enter the interval for periodical inform messages.
Connection Request Username: Enter the username for connection requests.
Connection Request Password: Enter the password for connection requests.
Password
This page lets you change the configuration interface passwords for the Administrator
(Admin) and User accounts.
Select the user to change password: Select whether you wish to change the password for the
admin or user account from the drop down menu.
Old Password: Enter the existing password for this account.
New Password: Enter the new password for this account.
Retype New Password: Type the new password again to confirm.
Date and Time
This page lets you set the time and date for your router, and also configure automatic time
synchronization and daylight savings time.
Date
Current System Time: Displays the current time and date according to the router’s system
clock.
Mode: Select Manual to manually set the time and date, or select Get from Time Server to
have the router automatically synchronize the time with a Network Time Protocol (NTP)
server.
New Time: If you selected Manual mode, enter the current time.
New Date: If you selected Manual mode, enter the current date.
Time Protocol: If you selected Get time From Server, select the desired time protocol from
the drop-down menu.
Time Server Address 1-4: Enter up to four NTP server addresses which will be used to
synchronize the router’s system time and date.
Click Apply to save the current settings.
Time Zone
Time Zone: Select your time zone from the drop-down menu.
Enable Daylight Saving: Check the box to enable automatic adjustment for daylight saving.
Start Date: Enter the details of the starting date and time for daylight saving time in your
region.
End Date: Enter the details of the ending date and time for daylight saving time in your
region.
Click Apply to save the current settings.
Language
Language: Select your preferred language from the drop-down menu.
Click Apply to save the current configuration.
System Log
The system log displays a record of all events which occur while the router is running.
Log Setting
Enable Log: Check the box to enable the router’s log-keeping function.
Click Apply to save the current configuration.
Log Display
Refresh: Click to update the log display.
Clear Log: Click to clear all log entries.
Display Log Level: Select the level of log event which you wish to view from the drop-down
menu
Reboot
Press ok to reboot the device