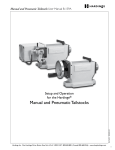
1
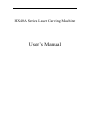
HX40A Series Laser Carving Machine
User’s Manual
User’s Manual of HX-40A Series Carving Machine
1.
Technical Parameters
a) Power
AC220V/50HZ
b) Operation Area (mm)
HX40A: 250*210
c) Resolution
0.0254mm
2. Installation Instruction
a) Lay the laser carving machine horizontally on a table;
b) Install the exhausting fan and pipes;
c) Install the cooling water pump, and then connect the water pipe. The water
within the system should be pure water which has no impurity;
d) Remove the fixture of laser head and beam track. After pushing the small
dolly and large dolly gently with hand, they should move smoothly without
any disturbance;
e) Connect the exhausting fan, cooling pump, power of laser carving machine,
and install the ground wire;
f) Start the pump. After the cooling water could properly circulate, start the
exhausting fan, and then turn on the switch of laser carving machine, and the
laser head should reset automatically;
g) Turn off the power of laser carving machine, and connect one end of the
printing wire to the DB jack of laser carving machine, the other end to the
parallel interface of the computer (install encryption dongle first if needed by
software);
h) Install software (refer to software instructions for detailed procedure).
3. Operation Instruction
a) Instruction for control panel
Power Switch: used for turn on or off the laser carving machine;
Electric current indicator: used for indicating the value of carving current;
Current adjustment: the potentiometer used for adjusting the carving current;
Lighting switch: used for switching on or off the light inside the laser carving
machine;
Laser Switch: used for controlling the radiating status of laser, and it should be pushed
when carving;
Laser test: used generally for adjusting light path; the laser should radiate
after pushing down the switch, and then adjust the potentiometer to modify
the value of carving current.
b) The proper start-up sequence should be: first start the cooling pump, and then
2
User’s Manual of HX-40A Series Carving Machine
turn on the laser carving machine, and at last turn on the exhausting fan when
carving the designed pattern.
c) Start the layout software of carving system, and design the needed picture,
set the carving location (refer to software instruction for detailed procedure),
fix the carving stuff to the clamping device, and then everything is ready for
carving.
d) The carving current should be adjusted according to the technical
requirements for different carving stuff.
4. Notice
a) Laser carving machine should be placed on a table horizontally. Tilting is
prohibited.
b) Loosen the screws below the crossbeam before turning on the machine,then
push the fixed ring to a suitable position to avoid hitting the beam.
c) When moving laser carving machine, fix large dolly and small dolly first to
avoid intensive shaking for the equipment;
d) Exhausting pipe should be installed to outdoor place where it has the
minimum influence to environment.
e) If the machine is used for the fist time or it has just been moved, make sure to
check if the high voltage wire has fell off to avoid electric shock to the
operator.
f) Since high voltage exists inside the laser carving machine, to avoid electric
shock, no one other than professional technical staff should open the cover
for repairing.
g) The AC 220V/50Hz power source should be used for laser carving machine,
exhausting fan and cooling pump;
h) The cover of carving machine should be well connected to ground, and the
ground resistance should be less than 4 Ω;
i) When the laser is radiating, be sure to avoid laser damage to people,
especially to eyes.
j) Prevent water from entering the machine or operation environment too moist;
k) Dissembling components when the machine is power on is strictly prohibited.
l) The internal lens should be cleaned in time using anhydrous alcohol or
acetone, and it should be cleaned and handled gently;
m) Make sure to keep the cooling water circulate properly and the water should
be clean to avoid broke of laser tube because of bad cooling;
n) Pay attention to avoid broke of laser tube because of icing of cooling water,
over-heat, incrustation or jam caused by junk, bumping etc.
o) Pay attention to avoid corrosion and damage of components inside the
machine cabinet caused by smog, too much moisture etc.
3
User’s Manual of HX-40A Series Carving Machine
5.
Troubleshooting
a) The laser head does not function after the carving output order is sent
i.
Make sure if the laser carving machine is online;
ii.
Check if the printing wire has fell off;
iii.
The printing interface has been locked, and it could be resolved by
shutting down both laser carving machine and the PC, and then restart
the computer;
iv.
Check if the software needs encryption dongle to be installed.
v.
Check if the 24VDC indicator of the carving main board is lighted up; if
not, the power of main board has not provided 24VDC power.
b) No laser when carving
i. Check if the laser switch on the operation panel has been pushed down;
ii. Check if the current adjustment knob on the is operation panel in the
minimum position;
iii. Check if the cooling water is circulating properly;
iv. Check if the light path is proper;
v. Check if the laser tube is damaged or exceeds its service life;
vi. Laser power board malfunction, please replace;
vii. Check if flyback transformer line has fallen off.
c) When carving, the picture is normal, but the quality is not good
i.
Check if the carving plane coincides with focus;
ii.
Check if the light path is proper;
iii.
Check if the laser tube is aging;
iv.
Check if the service life of the plotter is reaching its end.
d) When small dolly and large dolly reach the end, abnormal sound appears
i. Wrong connection of stepping motor;
ii. Bad contact of inserting parts on the optic-control switch or optic board;
iii. Tilting or dropping of optic-control switch countercheck;
iv. Bad contact of inserting parts on the carving main board or the driving
circuit of motor could not function properly.
e) The machine could not reset after it has been started or it could not operate
properly when carving
i. The wire of motor has fallen off;
ii. The flat wire has broken or inserting part is failure;
iii. The main board has not provided 24VDC or 5VDC power;
iv. The main board of carving machine malfunctions, replace it with a new
one;
v. The printing interface has been locked, and it could be resolved by
shutting down both laser carving machine and the PC, and then restart
the computer.
4