1
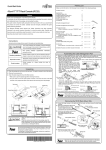
Dog Training Collar
with Wireless Remote
CC-710
Product User Guide
Copyright 2014 Cujo Control. All Rights Reserved.
Contents
Overview ................................................................................................................ 2
Parts List ................................................................................................................. 3
Charging the Remote and Receiver ....................................................................... 4
Fitting the Collar Properly ...................................................................................... 5
Using the Remote................................................................................................... 6
Programming the Remote...................................................................................... 9
Syncing Remote & Receiver ................................................................................. 11
Using 2 Collars ...................................................................................................... 12
Sleep Mode .......................................................................................................... 12
Contact Us ............................................................................................................ 13
1|www.cujocontrol.com
Overview
Thank you for purchasing your new CC-710 Dog Training Collar. Here at Cujo Control, we strive to
provide the highest quality pet supplies, with a customer support team truly above the rest. As
always, all of our products are backed by our lifetime warranty. If you ever need anything, please
contact us and we will do everything possible to accommodate you.
We are fully committed to your satisfaction and the happiness of your dog. This user guide will
provide you everything you need to get started training your dog correctly and safely. Please read
this guide carefully before using the training collar for the first time.
2|www.cujocontrol.com
Parts List
What’s In The Box
3|www.cujocontrol.com
Charging the Remote and Receiver
Both the Remote Control and Receiver (the receiver is the black plastic device connected to the
collar) use lithium batteries that can be recharged. For best results, please charge the remote and
the receiver for 3 hours each before using the first time.
There are 3 bars to show the battery power level. 3 bars means the
remote is fully charged.
To charge the Remote, simply slide the black rubber
cover on the top of the remote to the side, and insert
the charger into the charging hole. Since this is a USB
charger, you can charge the remote from a computer,
or you can charge it from a wall outlet.
To charge the Receiver, simply open the protective rubber cover and insert
the charger into the charging hole. Note: The same charger is used to
charge both the remote and the receiver.
When charging, a red LED light will blink on the receiver to indicate that it is
being charged correctly. When the receiver is fully charged, the light will stop blinking.
4|www.cujocontrol.com
Fitting the Collar Properly
Step 1
Choosing the Appropriate Length of Contact Points
This is a critical step and is often overlooked. If you don’t have the proper
length Contact Points, the collar won’t work correctly. For smaller dogs, the
short contact points should be used. For larger dogs, or dogs with a heavier
hair coat, you should use the longer contact points.
Step 2
Fit the Collar to your Dog
The collar needs to be placed relatively high on the dog’s neck, usually just a
couple of inches below the ears. The collar should be pretty snug on the dog’s
neck, and it should not dangle. If the collar is too loose, the contact points will
not be touching your dog, and it will not work. A good indicator that the collar
is fit properly is if you can fit two fingers under the collar.
Step 3
Brush Coat and Check Skin Daily
When first using, you should check under the dog's neck to make sure there is
no irritation. It is also a good idea to brush their coat and check their skin daily.
5|www.cujocontrol.com
Using the Remote
Power Button
Functions
To Use
Turns the remote on/off and wakes the remote from sleep mode
Press and hold the power button for 2-3 seconds to turn the remote on or off. Press
the power button once to awaken remote from sleep mode
6|www.cujocontrol.com
Collar Tone Button
Functions
To Use
Produces an audible beep tone from the collar
Press the button once to cause the collar to make an audible beep tone. Hold the
button down, and the collar will continue to beep until released. When in
programming mode, this button is used to decrease the value being programmed.
Shock Button
Functions
To Use
Produces a shock from the collar
Press the button once to cause the collar to produce a shock through the metal
prongs. Hold the button down, and the shock will continue until released.
Menu Button
Functions
To Use
Let's you choose the collar A, B, or AB. Enters the remote into programming mode.
Used to cycle through program settings.
Press the button once to select the collar mode. Hold down the button for 2-3
seconds to enter remote into programming mode. Repeat to exit programming
mode. When the remote is in programming mode, pressing the button quickly will
scroll through the features to be programmed.
Vibrate Button
Functions
To Use
Produces a vibration from the collar
Press the button once to cause the collar to produce a vibration through the receiver.
Hold the button down, and the vibration will continue for 5-6 seconds.
7|www.cujocontrol.com
Remote Tone Button
Functions
To Use
Produces an audible beep tone from the remote
Press the button once to cause the remote to make an audible beep tone. Hold the
button down, and the remote will beep until released. When in programming mode,
this button is used to increase the value being programmed.
Charging Port
Functions
To Use
Charges the remote control
Plug in the USB charger. When the battery indicator shows 3 bars, the remote is fully
charged.
8|www.cujocontrol.com
Programming the Remote
Enter Program Mode
To program the remote, you must first enter programming mode. To do this, press and hold the
menu button for 2-3 seconds. The remote will beep once and the collar channel (A, B, or AB) will
begin flashing.
First choose which collar channel you want to program. Press the collar tone button or remote
tone button to cycle through the collar channels. Select either A, B, or AB. Select Channel A If you
only have one collar.
9|www.cujocontrol.com
Press the menu button to cycle through the programming features. When finished programming,
press and hold the menu button again for 2-3 seconds to exit programming mode.
Collar Tone
This tone setting can be set to L, M, or H. If "L" is selected, the collar will beep one time when the
collar tone button is pressed. "M" - the collar beeps twice. "H" - the collar beeps three times. To
set this function, press the menu button until the collar tone icon (dog) is flashing on the screen.
Press the collar tone button to decrease this setting, and the remote tone button to increase this
setting.
Shock
This shock setting can be set as low as 1 bar, or as high as 8 bars. The more bars selected, the
higher the intensity of the shock. It is recommended to start with the lowest bar setting first, to
test how your dog responds. Then you can slowly increase the intensity. To set this function, press
the menu button until the shock icon (lightning) is flashing on the screen. Press the collar tone
button to decrease this setting, and the remote tone button to increase this setting.
Vibrate
This vibration setting can be set as low as 1 bar, or as high as 8 bars. The more bars selected, the
faster the collar will vibrate. To set this function, press the menu button until the vibrate icon is
flashing on the screen. Press the collar tone button to decrease this setting, and the remote tone
button to increase this setting.
10 | w w w . c u j o c o n t r o l . c o m
Remote Tone
This tone setting can be set to L, M, or H. If "L" is selected, the remote will beep one time when
the remote tone button is pressed. "M" - the remote beeps twice. "H" - the remote beeps 3 times.
To set this function, press the menu button until the remote tone icon (remote) is flashing on the
screen. Press the collar tone button to decrease this setting, and the remote tone button to
increase this setting.
Syncing Remote & Receiver
When your collar arrives, it will already be synced to the remote. If something happens and it
becomes disconnected from the remote for any reason, you can simply reset the receiver and resync the remote.
To RESET the receiver:
On the receiver, there are two holes. One is the charging port, and one is the reset hole. Simply
pull the rubber protector up so that the reset hole is visible. Insert a paperclip, or something
similar into the reset hole. You only need to tap once and the red LED light will begin blinking. This
will let you know the receiver has been reset and is ready to sync to the remote
To SYNC the remote to the receiver:
First, make sure the red LED light is blinking on the receiver. If it is not, refer to the steps above.
Then choose which channel you want assigned to this collar. Choose A, B, or AB on the remote
and press either the remote sound, shock, or vibrate button on the remote. This will cause the
red LED light to blink rapidly and then stop. Now your remote and receiver are properly synced.
11 | w w w . c u j o c o n t r o l . c o m
Using 2 Collars
One remote can be used to control two separate collars. Follow the syncing steps above if you
wish to sync another collar, for up to two dogs. Select Channel A or Channel B to control each
collar individually. Or you can select AB on the remote, and this will control both collars
simultaneously.
Sleep Mode
To save on battery life, the remote and receiver are programmed to enter Sleep Mode if they
don't sense any movement or activity for a certain period of time.
The remote will enter sleep mode if there is no activity for one and a half minutes. To wake the
remote from sleep mode, simply press the Power Button, or press the Menu Button.
The receiver will enter sleep mode if there is no movement from the collar for one minute. To
wake the receiver from sleep mode, simply touch or move the Receiver.
12 | w w w . c u j o c o n t r o l . c o m
Contact Us
Phone Number
Address
E-mail Address
Website
626-667-4730
6 Kingsbridge Rd, Suite 2A
Fairfield, NJ 07004
[email protected]
www.cujocontrol.com
13 | w w w . c u j o c o n t r o l . c o m