1
Table of Contents
ProFuel User Manual
ProFuel Reference Manual – Version 3.0
Page 2
Table of Contents
ProFuel User Manual
Table of Contents
INTRODUCTION ........................................................................................................................6
System Requirements ..........................................................................................................................................................8
Loading and Initialization....................................................................................................................................................8
Registration..........................................................................................................................................................................8
Installing on a Network .......................................................................................................................................................9
System Navigation ...............................................................................................................................................................10
Main Screen.......................................................................................................................................................................10
System Set-Up ......................................................................................................................................................................12
Overview ...........................................................................................................................................................................12
Logical Order of Modules Setup ...................................................................................................................................12
System Set-Up Screens..................................................................................................................................................12
Required Fields..............................................................................................................................................................13
Record Navigation.........................................................................................................................................................13
Search Window Feature.............................................................................................................................................14
Data Functions Menu.....................................................................................................................................................14
Products Database ...............................................................................................................................................................16
Discount Groups ........................................................................................................................................................16
Adding a New Product...............................................................................................................................................17
Editing Product Information ......................................................................................................................................18
Deleting a Product .....................................................................................................................................................18
Locating a Product.....................................................................................................................................................18
Product Groups ...................................................................................................................................................................18
Adding a New Product Group ...................................................................................................................................19
Editing Product Group Information...........................................................................................................................19
Deleting a Product Group ..........................................................................................................................................20
Locating a Product Group..........................................................................................................................................20
Locations Database..............................................................................................................................................................20
Adding a New Location.............................................................................................................................................21
Editing Location Information ....................................................................................................................................21
Deleting a Location....................................................................................................................................................21
Locating a Location ...................................................................................................................................................22
Location Groups ..................................................................................................................................................................22
Adding a New Location Group..................................................................................................................................23
Editing Location Group Information .........................................................................................................................23
Deleting a Location Group ........................................................................................................................................23
Locating a Location Group........................................................................................................................................24
Tanks Database....................................................................................................................................................................24
Adding a New Tank...................................................................................................................................................25
Editing Tank Information ..........................................................................................................................................25
Deleting a Tank .........................................................................................................................................................25
Locating a Tank .........................................................................................................................................................26
ProFuel Reference Manual – Version 3.0
Page 3
Table of Contents
ProFuel User Manual
PCU Setup ............................................................................................................................................................................26
Adding a New PCU ...................................................................................................................................................27
Setting Up Pumps ......................................................................................................................................................27
PCU Setup Information - Communications...............................................................................................................28
Setting Up Autopoll / Manual Polling .......................................................................................................................29
PCU Transaction Setup..............................................................................................................................................30
Editing PCU Setup Information.................................................................................................................................31
Deleting a PCU..........................................................................................................................................................31
Locating a PCU .........................................................................................................................................................31
Taxes .....................................................................................................................................................................................32
Setting Up Tax Groups ..............................................................................................................................................32
Tax Groups Names ....................................................................................................................................................33
Accounts Database...............................................................................................................................................................34
Adding a New Account .............................................................................................................................................36
Editing Account Information .....................................................................................................................................36
Deleting an Account ..................................................................................................................................................37
Locating an Account..................................................................................................................................................37
User Database ......................................................................................................................................................................37
Adding a New User ...................................................................................................................................................38
Editing User Information...........................................................................................................................................39
Lost Card – Re-issuing ..............................................................................................................................................40
Deleting a User ..........................................................................................................................................................40
Locating a User..........................................................................................................................................................40
Communications ..................................................................................................................................................................41
AutoPolling................................................................................................................................................................41
Update PCU – Card Information ...............................................................................................................................42
Manual Polling ..........................................................................................................................................................42
Limits and Variances...........................................................................................................................................................43
Fuel Limits.................................................................................................................................................................44
Odometer Variance....................................................................................................................................................44
All Transactions...................................................................................................................................................................44
Adding a New Transaction(s) ....................................................................................................................................46
Editing Transaction Information................................................................................................................................46
Deleting a Transaction...............................................................................................................................................46
Locating a Transaction ..............................................................................................................................................47
Reports .................................................................................................................................................................................48
Creating Reports ........................................................................................................................................................48
Invoices (ProFuel Plus Only) ..............................................................................................................................................49
Creating Invoices / Billings .......................................................................................................................................50
Databases, Logs and Archives ............................................................................................................................................51
Database Tools ..........................................................................................................................................................51
Transaction Archive...................................................................................................................................................52
System Operations...............................................................................................................................................................54
ProFuel Reference Manual – Version 3.0
Page 4
Table of Contents
ProFuel User Manual
1. Downloading of Cards/Numbers to PCU ......................................................................................................................54
Download Cards ........................................................................................................................................................55
Manual Authorization of Cards .................................................................................................................................55
Card Downloading Problems.....................................................................................................................................56
2. Polling Your PCU.........................................................................................................................................................56
Automatic Polling..........................................................................................................................................................57
AutoPoll - Configuring ..............................................................................................................................................57
Setting Up Autopoll / Manual Polling .......................................................................................................................58
Manual Polling ..........................................................................................................................................................59
AutoPoll Transactions ...............................................................................................................................................59
3. Creating Reports ............................................................................................................................................................60
Creating Reports ........................................................................................................................................................60
ProFuel Reference Manual – Version 3.0
Page 5
Table of Contents
ProFuel User Manual
ProFuel Reference Manual – Version 3.0
Page 6
Introduction
ProFuel User Manual
Introduction
ProFuel is a dynamic new program, which harnesses the power of
Windows programs to provide a complete solution for the
management, reporting, and billing of automated fuel records
generated by all models of Computrol Pump Control Units (PCU's).
ProFuel will operate under Windows 95, 98, and NT.
With easy to operate data screens and new automated routines,
ProFuel simplifies the task of daily fuel management and provides a
wealth of new features including:
•
•
•
•
•
•
•
•
•
Managing your vehicle fuels in a complete Windows environment.
Tracking and reporting fuel movement by account, by vehicle, and by
employee.
Tracking and reporting pump deliveries and tank inventories by
product, location, and cost.
An optional unattended polling routine allows you to schedule
transaction data collection any time, any day, from any of your fuel
sites
Automated routines allow you to quickly download customer, vehicle
and personnel authorizations for the ProFuel database to any or all of
the PCU’s in your network. You can even download PINs, meter
readings and fuel limits where PCU software permits.
Universal Users Screen allows you to track all individual fuel users,
whether customers, vehicles, or personnel.
Universal Transaction Screen allows you to manually enter noncardlock transactions and to enter bulk fuel deliveries.
Download routines allow you to quickly update your customer card
tables
Powerful and flexible Crystal reports provides on demand, a wide
range of selectable reports on fuel usage and vehicle performance.
All data is managed in Microsoft's powerful Access Database, which
allows you to move key data to other Windows applications including
your accounting and fleet management programs.
Microsoft, Access and Windows are trademarks of Microsoft Corporation. Crystal Reports is a trademark of Crystal Computer Services
Inc. All other product names are registered trademarks of their respective owners
ProFuel Reference Manual – Version 3.0
Page 7
Getting Started
ProFuel User Manual
Getting Started
System Requirements
In order to run ProFuel you will require:
•
Pentium class computer c/w Windows 95/98
•
32 MB of RAM
•
An 800x600 Display
•
At least 20 MB of free hard disk space
•
COM port connected to your PCU via landline or modem
Loading and Initialization
The following loading sequence is required:
1.
Put the disk in the computer.
2.
Go to the Windows 'START' Menu
3.
Click on 'Run ...'
4.
Type in 'D:\setup' where 'D' is the letter of your CDROM or Floppy
drive
5.
Click 'OK'
The setup will then copy all necessary files to your computer and set up the
program icon. The default installation directory is 'C:\Program Files\ProFuel\'.
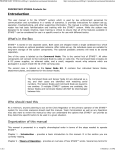
Registration
When Setup is complete, the ProFuel icon will appear in the start window. Click
on the icon and you will be prompted to enter your registration code. Each
package shipped to a licensed customer requires that the customer enter a name
and key code in order to activate the program. Computrol will supply the name
and registration code with your new system. They must be entered exactly.
ProFuel Reference Manual – Version 3.0
Page 8
Getting Started
ProFuel User Manual
Screen 1 – Registration
Please Note: When entering your company Name on the registration
screen, if your Company Name uses a comma e.g. Fuelstop, Inc. then you
must enter the name in quotation marks e.g. “Fuelstop, Inc.”
Installing on a Network
Should you wish to provide access to the ProFuel database from more than one
workstation, you should note that later versions of ProFuel can be installed so
that the database resides on your Server, while daily operating functions are
handled by one or more workstations.
Each workstation running ProFuel requires a license from Computrol. Contact
the factory or your dealer for details.
To install ProFuel in your principal workstation, i.e. the station connected to the
Pump Control Units, simply load the CD as detailed on the previous page.
To install the ProFuel database on your Server, follow these steps:
1. Copy the file named ‘main.mdb’ to the network directory.
2. Rename existing file ‘main.mdb’ to ‘main.org’
3. Select Windows Explorer and go to Tools. Click on ‘Map Network Drive’ to
map dbase directory.
4. Using Notepad, select ‘profuel.ini’ and edit path to network database
directory. Note: the last character must be a ‘\’ e.g. K:\ProFuel\
ProFuel Reference Manual – Version 3.0
Page 9
Getting Started
ProFuel User Manual
System Navigation
Main Screen
Initially the splash screen will appear with your registration name, followed
immediately by the Main program window and button bar. Each button accesses
the database that is indicated by the name on the button. e.g. Accounts, location
etc.
Screen 2 – Main Button Bar
In addition to the nine principal buttons shown above, there are three other
essential times and one optional setup item, which must be accessed through the
“Main Tables” menu shown below.
The three essential selections are Location Groups, Product Groups, Limits and
Variances. The optional selection is Tax Group which is only available in
ProFuel Plus.
Available only in
ProFuel Plus
Screen 3 – Main Tables
ProFuel Reference Manual – Version 3.0
Page 10
Getting Started
ProFuel User Manual
Other system configuration items that are accessed from the Main Menu bar
include the Data Functions menu and the Options menu. These menu selections
are shown below and discussed in detail in this section.
Screen 4 – Data Functions Menu
Screen 5 – Options Menu
ProFuel Reference Manual – Version 3.0
Page 11
Setting Up
ProFuel User Manual
System Set-Up
Overview
ProFuel uses multiple inter-related records to process incoming transactions into
comprehensive consumption and performance reports. In order to run the
ProFuel system, you must first set up these records based on the unique
characteristics of your fuelling operation. The order in which you program your
database records may vary, but it is suggested that you follow the sequence listed
below.
Logical Order of Modules Setup
The set up sequence is as follows:
1. Products – identify each unique product you dispense. Product names are
used to define Product Groups, Tanks and PCU’s (Pump control Unit)
2. Product Groups – set up the authorizations for certain or all fuels. Every
card must be assigned a Product Group
3. Locations – identify the individual sites where the PCU’s are installed.
4. Location Groups – each card must be assigned a location group – whether
one or multiple sites.
5. Tanks – used to program PCU properties and for inventory control.
6. PCU’s – details of each PCU (Pump Control Unit)
7. Taxes – optional to allow re-sellers to define various levels of taxes
8. Accounts – customer details, addresses discounts, etc.
Please Note: Detailed instructions regarding each of the above modules
and screens are found in this section of this manual.
System Set-Up Screens
All modules of the ProFuel system can be accessed through the Main Menu
button bar shown below and through the Main Menu drop menus. Details of
each of these buttons and menus are described in this section of the manual.
Screen 6 - Main Screen - Menu button bar
ProFuel Reference Manual – Version 3.0
Page 12
Setting Up
ProFuel User Manual
Please Note:New customers should note that the PCU's maintain
independent tables that contain lists of authorised cards and
pumps/products. They must be programmed separately from the ProFuel
program. Authorisation of cards/vehicles is accomplished through the
Manual Communication window (Page 16).
Required Fields
On each of the main screens there are certain required fields that must be
entered. They are indicated by red field labels, instead of the normal black.
Required
Field in RED
Optional
Field
Screen 7 – Locations Screen
Record Navigation
Last Record
First Record
Previous Record
Screen 8 - Record Navigation bar
Next Record
To move from record to record in the selected database you can use the
navigation buttons located on the Record Navigation bar. These buttons will
allow you to move to the first record, the previous record, move to the next
record, and move to the last record. You can also add a new record, delete a
record, save or cancel changes to a record and close the database.
Record Search
There are two main methods used to search for a record. You can either use the
search feature located under the Data Functions menu. (see next section) or you
can use the Search Window Feature.
ProFuel Reference Manual – Version 3.0
Page 13
Setting Up
ProFuel User Manual
Search Window Feature
To search for random data in any field:
1. Open the appropriate master screen
2. Place the cursor on the field to be searched
3. Press Ctrl + F on the keyboard to bring up the ‘Search Window’
4. Enter the data to be searched for
5. Click <OK> to bring up the record.
Screen 9 - Search Window Screen.
Data Functions Menu
Screen 10 – Data Function menu
For each of the tables in the database (accounts, users, etc.), you can Add,
Delete, Save and Search the table. These functions are accessed though the Data
Functions menu. All the items have a 'hotkey' or 'keyboard shorcut' to make
their use quick, simple, and efficient.
Add New creates a new record in the database and fills in any default values. If
you are adding multiple records, Add New also saves any edits in progress.
ProFuel Reference Manual – Version 3.0
Page 14
Setting Up
ProFuel User Manual
Delete Current removes the current record (the one displayed on your screen)
from the database. There is no 'Undelete', but you will be prompted for
confirmation.
Find First is used to locate the first record in the database matching your search
criteria. You simply type in the value for the field you want to search and click
Find First. If it finds a match then the matching record becomes the current
record, otherwise the old value in that field is restored and you are informed that
the search was unsuccesful. All fields may be searched in this way. You may
also use Wildcards when searching (i.e. '*' and '?') to represent missing words or
letters. Searches are not case sensitive. Find Next begins searching from the
curent record and not from the begining.
Move Next is used to move forward one record, Move Previous is used to move
back one.
Refresh can be used to re-read field values from the database. This is useful if
you are editing in more than one screen at a time.
Save Current saves the values in the current record to the database. Once a
value has been saved, it cannot be 'unsaved'. Records are also saved when you
move to another record, click Add New, or close a window.
Cancel Update can be used to Cancel changes to a record (Undo). It must be
done before the record is saved.
ProFuel Reference Manual – Version 3.0
Page 15
Setting Up
ProFuel User Manual
Products Database
The Products database is used to record the names of the products that are sold.
Products are used in the setup of various tables in the system including Tanks,
Product Groups, and PCU pump setup.
button from the button
To access the Products screen, select the
menu at the top of your screen. It can alternatively be accessed by selecting the
Products option under the <Main Table> menu also located at the top of your
screen.
Group names are
accessed through the
<Options> menu.
Discount shown in
cents on the dollar.
Screen 11 – Products
Name – Type in the name of the fuel or other product. 18 character maximum.
Group 1 – 9 – Type in the Discount as related to each of the products in cents on
the dollar.
Please Note: The Group Names are accessed through the <Options>
menu at the top of the Main Screen in the Main Menu bar. Details are
shown in the following section.
Discount Groups
The Configurations screen used to add / change a Discount Group, is accessed
through the <Options> menu at the top of the Main Screen, then to the
<Configurations> button.
Screen 12 – Options Menu
ProFuel Reference Manual – Version 3.0
Page 16
Setting Up
ProFuel User Manual
Selecting the <configurations> button will cause the Configurations screen to
appear. This screen can be used to configure Discount Groups and Tax Groups.
Screen 13 – Configuration Screen
Adding / Editing Discount Group
Highlight the name shown in any of the Discount Group names and type over the
name with the desired new name. Select <Apply> and the name will be changed
Adding a New Product
Place your mouse cursor in the NAME field immediately below the last entry.
When you start typing, an additional line will be added automatically. Continue
to enter information in as many fields as you require. As many new records as
required can be added using this method. Alternately, using the screen
navigation buttons, select the
described above.
button with your mouse and proceed as
You can navigate in this screen by selecting the individual fields with your
mouse cursor or by using your [TAB] key.
Please Note: The name cannot be longer than 18 characters.
.
ProFuel Reference Manual – Version 3.0
Page 17
Setting Up
ProFuel User Manual
Editing Product Information
Locate the record that you wish to edit by using the navigation buttons to scroll
through the database, or by using the search feature accessed through the Data
Function menu. Using your mouse, select the field that you want to add
information in or with your mouse highlight the data that you want to change.
button. The
Type in the information as you want it then select the
information has now been saved. This procedure can be done as many times as
required.
Deleting a Product
Locate and highlight the record that you wish to delete by selecting the record
with your mouse and dragging on the entire record or by clicking on the far-left
button of the record. Once you are satisfied that this is the record that you wish
button. As soon as you select this button, a
to delete, select the
warning screen will appear asking you if this is the record that you wish to
delete.
If the record you have selected is the correct record, then select the
button. If you do not wish to delete the record select the
button.
Locating a Product
Specific records can be located using the screen navigation buttons located on
the bottom of each database screen. Alternatively, records can be searched and
specific records located using the advanced search features found in the Data
Functions menu at the top of each screen.
Full details of the use of these features can be found in the System Setup section
of this manual
Product Groups
This Screen is used to restrict Users (cards/vehicles) to certain types of fuel only
during the automatic download of authorizations.
Products are assigned to each card/vehicle and are linked in the database to the
product names in all PCU Screens (Screen 12).
Example:
ProFuel Reference Manual – Version 3.0
Page 18
Setting Up
ProFuel User Manual
If a user was allowed to pump Diesel only, and Diesel was on pump 1 at one
PCU but pump 2 at another PCU, he would be able to use both pumps, but not
pumps containing other fuels.
To access the Product Groups screen, select Product Groups option under the
<Main Tables> menu located at the top of your screen. (See previous heading for
an example)
Screen 14 – Product Groups
Adding a New Product Group
Using the screen navigation buttons, select the
button with your
mouse. This will clear all the fields of their information so that you are able to
enter in the new information.
You can navigate in this screen by selecting the individual fields with your
mouse cursor or by using your [TAB] key.
By checking or unchecking a product, it is respectively included or removed
from the Product Group. The Group Name may be up to 20 characters.
Each Group can include one location only or any combination of products.
Product names are entered into the database via the Product database screen.
Editing Product Group Information
Locate the record that you wish to edit by using the navigation buttons to scroll
through the database, or by using the search feature accessed through the Data
Function menu. Using your mouse, select the field that you want to add
information in or with your mouse highlight the data that you want to change.
button. The
Type in the information as you want it then select the
information has now been saved. This procedure can be done as many times as
required.
ProFuel Reference Manual – Version 3.0
Page 19
Setting Up
ProFuel User Manual
Deleting a Product Group
Locate the record that you wish to delete and ensure that it is the record that is
showing in the Account / Department screen. Once you are satisfied that this is
button. As soon as you
the record that you wish to delete, select the
select this button, a warning screen will appear asking you if this is the record
that you wish to delete.
If the record you have selected is the correct record, then select the
button. If you do not wish to delete the record select the
button.
Locating a Product Group
Specific records can be located using the screen navigation buttons located on
the bottom of each database screen. Alternatively, records can be searched and
specific records located using the advanced search features found in the Data
Functions menu at the top of each screen.
Full details of the use of these features can be found in the System Setup section
of this manual
Locations Database
The Locations screen is used to identify the name of the site where each PCU
(Pump Control Unit) is installed. Location Names are used to define where one
or more PCU's may be installed so the site can be automatically polled using the
Communication Screen.
Additionally, an enhanced version of ProFuel will provide automated download
of card/vehicle authorizations. Accordingly, the Location names will be used to
create programmable Location Groups (Screen 10) to which cards or vehicles are
restricted.
button from the
To access the Locations screen, select the
button menu at the top of your screen. It can alternatively be accessed by
selecting the Locations option under the <Main Table> menu also located at the
top of your screen.
ProFuel Reference Manual – Version 3.0
Page 20
Setting Up
ProFuel User Manual
Screen 15 – Locations
Adding a New Location
Using the screen navigation buttons, select the
button with your
mouse. This will clear all the fields of their information so that you are able to
enter in the new information.
You can navigate in this screen by selecting the individual fields with your
mouse cursor or by using your [TAB] key.
Please Note: Fields that are identified with a RED heading must be
completed. e.g. in this screen, the Location field must be completed. All
other fields are optional.
Editing Location Information
Locate the record that you wish to edit by using the navigation buttons to scroll
through the database, or by using the search feature accessed through the Data
Function menu. Using your mouse, select the field that you want to add
information in or with your mouse highlight the data that you want to change.
button. The
Type in the information as you want it then select the
information has now been saved. This procedure can be done as many times as
required.
Deleting a Location
Locate the record that you wish to delete and ensure that it is the record that is
showing in the Account / Department screen. Once you are satisfied that this is
button. As soon as you
the record that you wish to delete, select the
select this button, a warning screen will appear asking you if this is the record
that you wish to delete.
ProFuel Reference Manual – Version 3.0
Page 21
Setting Up
ProFuel User Manual
If the record you have selected is the correct record, then select the
button. If you do not wish to delete the record select the
button.
Locating a Location
Specific records can be located using the screen navigation buttons located on
the bottom of each database screen. Alternatively, records can be searched and
specific records located using the advanced search features found in the Data
Functions menu at the top of each screen.
Full details of the use of these features can be found in the System Setup section
of this manual
Location Groups
The Locations Groups screen allows you to set up a group of locations that a
user would be allowed to use.
To access the Location Groups screen, select Location Groups option under the
<Main Tables> menu located at the top of your screen.
Location
Groups
Picture 16 – Main Table dropdown menu
ProFuel Reference Manual – Version 3.0
Page 22
Setting Up
ProFuel User Manual
Screen 17– Location Groups
Adding a New Location Group
Using the screen navigation buttons, select the
button with your
mouse. This will clear all the fields of their information so that you are able to
enter in the new information.
You can navigate in this screen by selecting the individual fields with your
mouse cursor or by using your [TAB] key.
By checking or unchecking a location it is respectively included or removed
from the Location Group. The Group Name may be up to 20 characters.
Each Group can include one location only or any combination of locations.
Location names are entered into the database via the Location database screen.
If you have the enhanced version of ProFuel, this information will be sent to the
appropriate PCU's automatically.
Editing Location Group Information
Locate the record that you wish to edit by using the navigation buttons to scroll
through the database, or by using the search feature accessed through the Data
Function menu. Using your mouse, select the field that you want to add
information in or with your mouse highlight the data that you want to change.
button. The
Type in the information as you want it then select the
information has now been saved. This procedure can be done as many times as
required.
Deleting a Location Group
Locate the record that you wish to delete and ensure that it is the record that is
showing in the Account / Department screen. Once you are satisfied that this is
button. As soon as you
the record that you wish to delete, select the
select this button, a warning screen will appear asking you if this is the record
that you wish to delete.
ProFuel Reference Manual – Version 3.0
Page 23
Setting Up
ProFuel User Manual
If the record you have selected is the correct record, then select the
button. If you do not wish to delete the record select the
button.
Locating a Location Group
Specific records can be located using the screen navigation buttons located on
the bottom of each database screen. Alternatively, records can be searched and
specific records located using the advanced search features found in the Data
Functions menu at the top of each screen.
Full details of the use of these features can be found in the System Setup section
of this manual
Tanks Database
This screen is used to add the tank information into your system. Each storage
tank must be setup with a unique number, a location, a product, and tank volume.
button from the button menu
To access the Tanks screen, select the
at the top of your screen. It can alternatively be accessed by selecting the Tanks
option under the <Main Table> menu also located at the top of your screen.
Required
Fields shown
in RED
Screen 18 – Tanks
ProFuel Reference Manual – Version 3.0
Page 24
Setting Up
ProFuel User Manual
Adding a New Tank
Using the screen navigation buttons, select the
button with your
mouse. This will clear all the fields of their information so that you are able to
enter in the new information.
You can navigate in this screen by selecting the individual fields with your
mouse cursor or by using your [TAB] key.
Please Note: Fields that are identified with a RED heading must be
completed. e.g. in this screen, the Tank Number, Location, Product
and Tank volume (Total) fields must be completed. All other fields are
optional.
Tank Number – enter the tank number
Location – select from the drop-down menu. The entries shown were
previously entered into the database from the Location screen.
Product – select from the drop-down menu. The entries shown have been
previously entered into the database previously using the Product screen.
Tank volume (total) – input the size of the tank
Tank Volume (Current) - is a calculated field and should be left at zero when
the tank is first setup. To first initialize the tank you must add the fuel to the tank
using the All Transactions menu item in the Main Tables menu located at the top
of the Main screen. From there you can add the initial tank balance to the
database, and any subsequent fuel deliveries.
Editing Tank Information
Locate the record that you wish to edit by using the navigation buttons to scroll
through the database, or by using the search feature accessed through the Data
Function menu. Using your mouse, select the field that you want to add
information in or with your mouse highlight the data that you want to change.
button. The
Type in the information as you want it then select the
information has now been saved. This procedure can be done as many times as
required.
Deleting a Tank
Locate the record that you wish to delete and ensure that it is the record that is
showing in the Account / Department screen. Once you are satisfied that this is
button. As soon as you
the record that you wish to delete, select the
select this button, a warning screen will appear asking you if this is the record
that you wish to delete.
ProFuel Reference Manual – Version 3.0
Page 25
Setting Up
ProFuel User Manual
If the record you have selected is the correct record, then select the
button. If you do not wish to delete the record select the
button.
Locating a Tank
Specific records can be located using the screen navigation buttons located on
the bottom of each database screen. Alternatively, records can be searched and
specific records located using the advanced search features found in the Data
Functions menu at the top of each screen.
Full details of the use of these features can be found in the System Setup section
of this manual
PCU Setup
This screen is used to enter information about the PCU’s (Pump Control Units)
that are attached to the system. It provides for information to be entered re: the
individual pumps and the set up for the PCU’s, Autopolling, manually polling
and how the system will handle the transactions.
button from the button
To access the PCU Setup screen, select the
menu at the top of your screen. It can alternatively be accessed by selecting the
PCUs option under the <Main Table> menu also located at the top of your
screen.
Screen 19 – PCU Setup screen
ProFuel Reference Manual – Version 3.0
Page 26
Setting Up
ProFuel User Manual
Adding a New PCU
Using the screen navigation buttons, select the
button with your
mouse. This will clear the top 3 fields of their information so that you are able to
enter in the new information. Each new PCU that is setup will have to have the
Pump, PCU Setup, Automation and Transaction setup sections completed.
Selecting the appropriate tab just below the PCU header information can access
these areas
Once all of the information on each of the 4 screens has been entered, you may
<Save> the information and exit out of the screen
Tabs to select
setup screens
You can navigate in this screen by selecting the individual fields with your
mouse cursor or by using your [TAB] key.
Please Note: Fields that are identified with a RED heading must be
completed. e.g. in the first 3 fields of this screen, the PCU Number and
PCU Location fields must be completed.
PCU Number – this number must be unique.
PCU Location – select a location from the drop-down menu. The entries shown
have been previously entered into the database using the Location screen.
Description – optional field used to describe the PCU
Setting Up Pumps
To access the screen that allows you to enter the pump information as related to
a specific PCU, select the <Pumps> tab on the PCU Setup screen.
Pumps tab
Screen 20 – Pump Setup screen
ProFuel Reference Manual – Version 3.0
Page 27
Setting Up
ProFuel User Manual
To setup each of the 8 possible pumps (hoses), you must select a product to
pump from the drop-down menu, a tank to take the fuel from, and optionally a
price & unit cost for the fuel. This information is used to keep track of tank
balance and optionally the value of the fuel.
PCU Setup Information - Communications
To access the screen that allows you to enter the communication parameters as
related to a specific PCU, select the <PCU Setup> tab on the PCU Setup screen.
This will cause the PCU Setup screen to appear.
Screen 21 – PCU Setup screen
This screen is used to setup the communication specifications of each Pump
Control Unit (PCU).
Com Port - For Polling to work the Comm Port field must be completed. Select
the correct COM port from the drop down menu.
Baud Rate – This field must be completed for polling to work. Select the
appropriate Baud rate from the drop down menu.
Data Bits – This field must be completed for polling to work. Select the
appropriate Data Bits from the drop down menu
Stop Bits - This field must be completed for polling to work. Select the
appropriate Stop Bits from the drop down menu
Arming Character – used for automatic data switches. Set to zero if you do not
use an automatic switch. If used, enter a value in decimal format.
Arming Code – used for automatic data switches. Set to zero if you do not use
an automatic switch. If used, enter a value in decimal format.
Talk Password – Must be completed. Used when communicating with the PCU.
Factory default is ‘T’
ProFuel Reference Manual – Version 3.0
Page 28
Setting Up
ProFuel User Manual
Clear Password – Must be completed. Used when communicating with the
PCU. Factory default is ‘C’
Cold Start Password – Must be completed. Used when communicating with
the PCU. Please Note: Passwords used do not change the password on the PCU,
just in the database.
Modem Number – If the PCU is on a modem, the number must be entered –
otherwise, leave blank
Init. String – If the PCU is on a modem, the initialization string must be entered
– otherwise, leave blank.
Setting Up Autopoll / Manual Polling
To access the screen that allows you to enter the parameters for the setup of
Autopolling and manual polling as related to a specific PCU, select the
<Automation>> tab on the PCU Setup screen. This will cause the Automation
screen to appear.
Screen 22 – Automatic Polling setup screen
The Automatic section of the PCU Setup screen is used to setup the time and
frequency for automated (scheduled) polling. By default scheduled polling is
disabled. The daily poll time is the hour (in 24 hour format) to begin polling that
PCU. You may alternatively set the 'EVERY ... HOURS' to make sure the PCU
never goes more than that many hours without being polled.
The LAST POLL time is also displayed in the window.
Select the ‘Update Odometer Reading After Autopoll’ box if you wish to have
the odometer updated in the system after every fill.
To poll a particular PCU right away, you can just click the
button. You may also select to poll 'All', 'All that are
Autopolled', or All at a particular location.
ProFuel Reference Manual – Version 3.0
Page 29
Setting Up
ProFuel User Manual
With the AUTOPOLL option enabled, the system can operate totally
unattended. In order for the automated polling to work, the computer must be on
and have the program running.
PCU Transaction Setup
To access the screen that allows you to enter the parameters for the setup of the
transaction data for Autopolling and manual polling as related to a specific PCU,
select the <Transaction Setup> tab on the PCU Setup screen. This will cause the
Transaction Setup screen to appear.
Screen 23 – PCU Transaction Setup screen
Header titles
correspond to field
name selection
Field name
selection
In order for the system to process the transaction information that is polled from
a PCU(s), ProFuel needs to identify to what database fields the information
must be stored in so that it can create the required reports in a readable format.
This screen allows you to identify and name the fields that the data will be stored
in. i.e. what each field of information represents e.g. vehicle card, operator card,
vehicle odometer reading etc
As all Computrol transactions are identical up to the end of Pump Name
(Product) you must start with the first authorization item - which in the above
example (see line 1) is 'CARD1'. Because Card 1 is a Vehicle Card, that
definition is selected and entered in ProFuel Field 1 (see line 2). The second
heading is Odometer etc.
In order to view your version of Line 1 (your transaction format), you must first
configure you PCU for the authorization and data capture you require. PCU
configuration or 'Cold Start' is covered on pages 18 to 21 in the PCU Users
Manual. Once configured, you must authorize one or a combination of cards
ProFuel Reference Manual – Version 3.0
Page 30
Setting Up
ProFuel User Manual
and/or keypad numbers and complete at least one actual transaction. This
transaction can then be imported to Line 1 of the Transaction Setup Screen by
using the
button.
In addition to defining the categories of the fields in the transaction, you must
also tell ProFuel by which category fuel transaction will be assigned to
Accounts. In the above example, the transactions will be assigned by Vehicle
Cards.
Editing PCU Setup Information
Locate the record that you wish to edit by using the navigation buttons to scroll
through the database, or by using the search feature accessed through the Data
Function menu. Using your mouse, select the field that you want to add
information in or with your mouse highlight the data that you want to change.
button. The
Type in the information as you want it then select the
information has now been saved. This procedure can be done on all of the
screens related to the PCU Setup screen.
Deleting a PCU
Locate the record that you wish to delete and ensure that it is the record that is
showing in the Account / Department screen. Once you are satisfied that this is
button. As soon as you
the record that you wish to delete, select the
select this button, a warning screen will appear asking you if this is the record
that you wish to delete.
If the record you have selected is the correct record, then select the
button. If you do not wish to delete the record select the
button.
Locating a PCU
Specific records can be located using the screen navigation buttons located on
the bottom of each database screen. Alternatively, records can be searched and
specific records located using the advanced search features found in the Data
Functions menu at the top of each screen.
Full details of the use of these features can be found in the System Setup section
of this manual
ProFuel Reference Manual – Version 3.0
Page 31
Setting Up
ProFuel User Manual
Taxes
The optional Tax Group screen allows re-sellers to define various levels of taxes
per litre / gallon. Taxes can be set as cents or percent, and as included in base
price (See Pumps) or as extra. A Tax Group may be assigned to each Account.
ProFuel Plus reports all tax calculations in its Invoice Module.
Setting Up Tax Groups
To access the Tax Groups screen, select Tax Groups option under the <Main
Tables> menu located at the top of your screen.
Tax Groups
Tax Group names are
accessed through the
<Options> menu at the top
of the Main Menu. Details
are shown at the end of this
section.
Picture 24 – Main Table dropdown menu
ProFuel Reference Manual – Version 3.0
Page 32
Setting Up
ProFuel User Manual
Picture 25 – Tax Groups window
Adding a New Tax Group
To add a new Tax Group, select the <Add New> button from the navigation
menu on the bottom of the Tax Group Window. This will create a new line in
the window to allow you to insert the new Tax Group. Alternatively, place your
cursor on the line that has an asterix * to the left of it and start typing the new
Tax Group, a new line will automatically appear.
TAXID – type in the description of the Tax Group type that you wish to assign a
value to. e.g. PST, GST etc.
Percent – Type a ‘Yes’ or ‘No’ if the tax is to be added as a per cent value. If
‘No’ the tax will be a cent value e.g. 4 cents, 5 cents etc.
Included – Type ‘Yes’ or ‘No’ to indicate whether the tax is included in the
price at the pump or not.
Group 1 – Type in the amount of tax that is charged – whether in per cent or in
cents on the dollar. All other groups that are applicable are filled in like this.
After filling in the required information, select the <Save> button to save your
changes. If you decide to not make any changes, select the <Cancel> button and
the changes that you made will be discarded and the record will not be changed.
Deleting a Tax Group
To delete a Tax Group, highlight the Tax Group line that you wish to delete by
clicking on the grey button to the left of the line that you wish to delete. Once
the line is highlighted, select the <Delete> button from the Control menu located
at the bottom of the screen. You will be asked to confirm that you want to delete
this record. Select ‘Yes” and the record will be deleted.
Tax Groups Names
The Configurations screen used to add / change a Tax Group name, is accessed
through the <Options> menu at the top of the Main Screen, then to the
<Configurations> button.
Screen 26 – Options Menu
Selecting the <Configurations> button will cause the Configurations screen to
appear. This screen can be used to configure Discount Groups and Tax Groups.
ProFuel Reference Manual – Version 3.0
Page 33
Setting Up
ProFuel User Manual
Screen 27 – Configuration Screen
Adding / Editing Tax Group
Highlight the name shown in any of the Tax Group names and type over the
name with the desired new name. Select <Apply> and the name will be changed
Accounts Database
Most system managers require that fuel cards or vehicles be assigned to specific
accounts or cost centers. These centers may be customers, departments, or
divisions. The Accounts Screen allows you to define to which Accounts the fuel
transactions will be billed or charged.
button
To access the Accounts / Department screen, select the
from the button menu at the top of your screen. It can alternatively be accessed
by selecting the Accounts option under the <Main Table> menu also located at
the top of your screen.
ProFuel Reference Manual – Version 3.0
Page 34
Setting Up
ProFuel User Manual
Tax Group names
are accessed
through the
<Configurations>
screen.
Screen navigation
buttons
Screen 28 - Accounts
Account Number – This is a required field
Account/department – This is a required field
Credit Limit – Not required
Tax Group – Used to indicate if taxes for this account are added in at the pump
or are to be added in later. Tax Groups can be edited by using the
Configurations screen accessed through the <Options> button located on the
Main Menu bar.
Tax Groups
The Configurations screen used to add / change a Tax Group, is accessed
through the <Options> menu at the top of the Main Screen, then to the
<Configurations> button.
Screen 29 – Options Menu
Selecting the <Configurations> button will cause the Configurations screen to
appear. This screen can be used to configure Discount Groups and Tax Groups.
ProFuel Reference Manual – Version 3.0
Page 35
Setting Up
ProFuel User Manual
Screen 30 – Configuration Screen
Adding / Editing Tax Group
Highlight the name shown in any of the Tax Group names and type over the
name with the desired new name. Select <Apply> and the name will be changed
Adding a New Account
Using the screen navigation buttons, select the
button with your
mouse. This will clear all the fields of their information so that you are able to
enter in the new information.
You can navigate in this screen by selecting the individual fields with your
mouse cursor or by using your [TAB] key.
Please Note: Fields that are identified with a RED heading must be
completed. e.g. in this screen, the Account Number field and the
Account/Departmental Name field must be completed. All other fields
are optional.
Editing Account Information
Locate the record that you wish to edit by using the navigation buttons to scroll
through the database, or by using the search feature accessed through the Data
Function menu. Using your mouse, select the field that you want to add
information in or with your mouse highlight the data that you want to change.
Type in the information as you want it then select the
ProFuel Reference Manual – Version 3.0
button. The
Page 36
Setting Up
ProFuel User Manual
information has now been saved. This procedure can be done as many times as
required.
Deleting an Account
Locate the record that you wish to delete and ensure that it is the record that is
showing in the Account / Department screen. Once you are satisfied that this is
button. As soon as you
the record that you wish to delete, select the
select this button, a warning screen will appear asking you if this is the record
that you wish to delete.
If the record you have selected is the correct record, then select the
button. If you do not wish to delete the record select the
button.
Locating an Account
Specific records can be located using the screen navigation buttons located on
the bottom of each database screen. Alternatively, records can be searched and
specific records located using the advanced search features found in the Data
Functions menu at the top of each screen.
Full details of the use of these features can be found in the System Setup section
of this manual
User Database
The User database is used to record information about the users of the system.
Each User of the system must have a record in the Users database. A User can be
a Vehicle, an Operator (Customer), both a Vehicle and an Operator, or a Master
card.
ProFuel Reference Manual – Version 3.0
Page 37
Setting Up
ProFuel User Manual
Discount Group names are
accessed through the
<Options> button on the Main
Menu bar.
Screen 31 - User Setup
Adding a New User
Using the screen navigation buttons, select the
button with your
mouse. This will clear all the fields of their information so that you are able to
enter in the new information.
You can navigate in this screen by selecting the individual fields with your
mouse cursor or by using your [TAB] key.
Please Note: Fields that are identified with a RED heading must be
completed. e.g. in this screen, the Number, Account Number, Product
Group and Location Group fields must be completed. All other fields
are optional.
Select the box to indicate what the new user is. The choices are: Operator,
Vehicle, MasterCard. Next select the Enabled box if you wish to have the user
authorized to fuel. De-selecting this box immediately cancels the users
privileges.
Fill out the following fields as required:
Card / Number – enter the card number that will be assigned to a user. Required
field
Account Number – enter the account number that any fuel taken by the user
will be charged to. Required field.
Product Group – from the drop down menu, selct the group of products that the
user is authorized to purchase. The default is ‘All’. Required field
Identification – this feature is used for reporting purposes
ProFuel Reference Manual – Version 3.0
Page 38
Setting Up
ProFuel User Manual
Discount Group – Changes to the Discount Group names can be made through
the <Options> button on the main menu bar. Details are provided in the
Products section of this manual
Location Group - the system defiles to ‘All’ however, any of the location
groups previously entered into the system can be selected from the dropdown
menu.
License – enter the license of the user
Permit – if a permit # is required, enter it here.
PIN Number – Some companies require a PIN # to be used in conjunction with
the fueling card. If the user has a PIN, enter it here.
Date Issued – The system automatically defaults to the current date and time,
however, a different date if required can be entered.
Unit – Enter a number or a description of the unit / vehicle
Miscellaneous – this field can be used for entering other information that can be
reported.
Meter Start – When a vehicle is entered for the first time into the system, enter
the starting odometer reading here.
Odometer – If the user keeps track of miles as opposed to hours operated, the
system automatically fills in this field for vehicles that use the polling feature.
This information is originally entered at the pump by the vehicle operator.
Hours - – If the user keeps track of hours as opposed to mileage, the system
automatically fills in this field for vehicles that use the polling feature. This
information is originally entered at the pump by the vehicle operator.
Variance – Enter the code here that indicates what the allowable mileage
variances for that particular unit. i.e. if the vehicle has a mileage variance
setting of 300 km. and the user enters in a mileage figure where the difference in
mileage between the previous reading and this entry is in excess of this number,
the system will refuse to fuel. This setting is entered into the system in the
Limits and Variances menu available in the Main Table from the Main Screen.
Fuel Limit - Enter the code here that indicates what the allowable number of
fueling units is for that particular unit. i.e the maximum number of litres or
gallons allowed per each fueling. This setting is entered into the system in the
Limits and Variances menu available in the Main Table from the Main Screen.
Last Modified – This date is automatically entered into the system every time
that a change is made to the User Screen and the Save button is pressed.
Editing User Information
Locate the record that you wish to edit by using the navigation buttons to scroll
through the database, or by using the search feature accessed through the Data
Function menu. Using your mouse, select the field that you want to add
information in or with your mouse highlight the data that you want to change.
Type in the information as you want it then select the
ProFuel Reference Manual – Version 3.0
button. The
Page 39
Setting Up
ProFuel User Manual
information has now been saved. This procedure can be done as many times as
required.
Lost Card – Re-issuing
If a user has lost a card, locate the user record by using the navigation buttons to
scroll through the database, or by using the search feature accessed through the
button located on the lower right
Data Function menu. Select the
side of the User screen. The Issue a New Card screen will appear.
Screen 32 – Re-issue Lost Card screen
Enter the new number of the card that has been issued. Select the
button to accept the new card number of select the
the transaction.
button to cancel
Deleting a User
Locate the record that you wish to delete and ensure that it is the record that is
showing in the Account / Department screen. Once you are satisfied that this is
button. As soon as you
the record that you wish to delete, select the
select this button, a warning screen will appear asking you if this is the record
that you wish to delete.
If the record you have selected is the correct record, then select the
button. If you do not wish to delete the record select the
button.
Locating a User
Specific records can be located using the screen navigation buttons located on
the bottom of each database screen. Alternatively, records can be searched and
ProFuel Reference Manual – Version 3.0
Page 40
Setting Up
ProFuel User Manual
specific records located using the advanced search features found in the Data
Functions menu at the top of each screen.
Full details of the use of these features can be found in the System Setup section
of this manual
Communications
The Communications screens are used to initiate the Autopolling feature of
ProFuel as well as initiating Manual polling of one or all PCU’s. This screen
also allows you to send updated card information to individual PCU’s or to all.
button
To access the Communication screen, select the
from the button menu at the top of your screen. It can alternatively be accessed
by selecting the Communication option under the <Main Tables> menu also
located at the top of your screen.
Screen 33 – Polling and Cards screen
AutoPolling
The AutoPoll feature is setup in the PCU Setup screens referenced in a previous
section of this manual. The Polling and Cards screen is used to initiate polling of
individual or specific PCU’s.
With your mouse, select the option that is appropriate for the PCUs that you
want to have Autopolled. These options are:
All PCU’s
All PCU’s that are Autopolled
ProFuel Reference Manual – Version 3.0
Page 41
Setting Up
ProFuel User Manual
All PCUs at ______________Location
PCUs – you can select individual group or range of PCUs
When you have selected the PCUs that you want to poll, you can either let the
system Autopoll according to the time schedule that you have previously set up
or by selecting the
immediately.
button, you can initiate a poll
Update PCU – Card Information
The Polling and Cards screen can also be used to send to a select, selected group
or all PCU’s updated card information. This information is used by the PCU to
determine who has authority to pump fuel, what products and at what locations
etc.
In order to update the PCU’s with the card information, complete the bottom part
of the Polling and Cards screen. The two sections that need to be completed are:
Card Range to Send – with your mouse select the appropriate range of cards
using the persecuted options or enter the card numbers or range of numbers.
PCUs Being Sent to – with your mouse, select the appropriate range of PCUs
that you want to send the updated card information to or enter the PCU’s or
range of PCUs.
Manual Polling
In order to access the screen that allows you to initiate manual polling of the
PCU’s, select the <Manual> tab on the Communication screen. The Manual
screen will appear.
Screen 34 – Manual Polling screen
ProFuel Reference Manual – Version 3.0
Page 42
Setting Up
ProFuel User Manual
Manual communication can be used to issue commands directly to a PCU (like
through a terminal). To initiate a connection, select the PCU to connect to and
click on 'Connect To'. This will dial up (if required) and log you in to the PCU.
To issue a command, type it into the thin text box (beside the Send button) and
hit Enter or click Send. You can save a transaction to a file if you wish by
clicking the 'Save Transaction As...' button, you will be prompted for a file
name.
When you are finished communicating simply click the 'Disconnect from' button
(which was the 'Connect to' button).
The Escape button can be used to cancel a long transfer (like from an 'L T A'
command).
You can use this screen to enable cards, check the version, and configure your
PCU's.
Limits and
Variances
The Limits and Variances screen allows the ProFuel administrator to set up the
maximum fuel limit per each fueling and to set the limit for the variance of
odometer readings between each fueling. These settings add additional control
over false odometer readings and unauthorized large fuel purchases.
To access the Limits and Variances screen, select the Limits and Variances
option under the <Main Tables> menu located at the top of your screen.
Limits and
Variances
Picture 35 – Main tables drop down menu
ProFuel Reference Manual – Version 3.0
Page 43
Setting Up
ProFuel User Manual
Screen 36 – Variance and Fuel Limits
Fuel Limits
This value restricts the maximum number of litres / gallons etc that can be
accessed per each fueling. There are 16 different levels that can be applied.
These levels are from 1 to 16. The value for each of these ranges is user
configurable. To change the value, move your mouse cursor over the value you
want to change, highlight the value and type in the new value.
Odometer Variance
This value is used to set the number of allowable kilometers / mile between each
fueling. The purpose of this value is to ensure that valid odometer readings are
entered into the system by the vehicle operator. At time of fueling, if a valid
reading is not placed into the system an error message will be generated and
fueling will not be allowed to take place. After 3 tries fueling will not be
allowed or if configured at ‘cold startup’ the system will allow fuelling.
There are 9 different levels that can be applied. These levels are from 1 to 9.
The value for each of these ranges is user configurable. To change the value,
move your mouse cursor over the value you want to change, highlight the value
and type in the new value.
All Transactions
The All Transaction screen displays a log of all transactions in the database.
Some fields are directly from the raw transaction (like date/time and pump
number) and some are looked up values (like account, and tank), and others are
calculated values e.g. total price and tank volumes.
ProFuel Reference Manual – Version 3.0
Page 44
Setting Up
ProFuel User Manual
This screen is also used to manually input Fuel deliveries, transactions that aren't
handled by the PCU, and transactions that could not be processed automatically
(rejected) and required editing.
To access the All Transactions screen, select All Transactions option under the
<Main Tables> menu located at the top of your screen.
All
Transactions
Screen 37 – All Transactions
ProFuel Reference Manual – Version 3.0
Page 45
Setting Up
ProFuel User Manual
Adding a New Transaction(s)
Using the screen navigation buttons, select the
button with your
mouse. This will clear all the fields of their information so that you are able to
enter in the new information.
You can navigate in this screen by selecting the individual fields with your
mouse cursor or by using your [TAB] key.
Fueling Tanks
The All Transactions screen is used when a tank is refueled. To refuel a tank you
must create a new record. (see Adding a New Transaction), then fill in the
Tank Number and Fuel Received fields. You may also optionally fill in the
Invoice Number field.
This method is also used to initialize a new tank in the system.
Rejected Transactions
Occasionally transactions will be rejected during a poll. They are stored in a
reject file called 'pcu*.rej', where '*' is the PCU's number. Example, pcu3.rej,
would be rejected transactions from pcu3. The reject files are stored in the
program directory (by default in C:\Program Files\ProFuel).
These transactions may need to be included in the database, and must be put in
manually using the All Transactions screen. You should fill in as much
information as possible about the transaction and leave the other fields as the
defaults. Any fields that can be, will be filled in when the transactions are
processed (such as the Tank Number, Account or Tank Volume).
button when you have finished
Select the
entering all of the transactions. The databases will now be updated.
Editing Transaction Information
Locate the record that you wish to edit by using the navigation buttons to scroll
through the database, or by using the search feature accessed through the Data
Function menu. Using your mouse, select the field that you want to add
information in or with your mouse highlight the data that you want to change.
button. The
Type in the information as you want it then select the
information has now been saved. This procedure can be done as many times as
required.
Deleting a Transaction
Locate the record that you wish to delete and ensure that it is the record that is
showing in the Account / Department screen. Once you are satisfied that this is
button. As soon as you
the record that you wish to delete, select the
select this button, a warning screen will appear asking you if this is the record
that you wish to delete.
ProFuel Reference Manual – Version 3.0
Page 46
Setting Up
ProFuel User Manual
If the record you have selected is the correct record, then select the
button. If you do not wish to delete the record select the
button.
Locating a Transaction
Specific records can be located using the screen navigation buttons located on
the bottom of each database screen. Alternatively, records can be searched and
specific records located using the advanced search features found in the Data
Functions menu at the top of each screen.
Full details of the use of these features can be found in the System Setup section
of this manual
ProFuel Reference Manual – Version 3.0
Page 47
Reports
ProFuel User Manual
Reports
ProFuel includes a set of comprehensive reports that provide the manager or user
an accurate accounting of the transactions in their system. The reports also
include listing of vehicles, users etc. Upon request, special reports can be
created if required.
button from the button
To access the Report menu, select the
menu at the top of your screen. It can alternatively be accessed by selecting the
Report option under the <Main Table> menu also located at the top of your
screen.
Used in ProFuel Plus to create
Billing / Invoice reports.
Screen – 38 Reports
Creating Reports
Creating reports in ProFuel involves 3 very simple steps:
Step 1 – Set the reporting period. The reporting period can be set using the
START DATE and END DATE fields. The period is up to and including the
end date. As an example, the screen above shows a reporting period for the
period April 1, 2001 to April 19, 2001.
Step 2 – If the report applies to only one account, select the account from the
drop down menu in the Only One Account field.
Step 3 – select the appropriate button for the desired report.
See the Appendix for sample reports
Report Outlines
ProFuel Reference Manual – Version 3.0
Page 48
Reports
ProFuel User Manual
Listings – Operator List, Vehicle List, All Users and Account List
Listings are data straight from the database. Users can be listed separately as
Vehicles, Operators or as a complete list of All Users in the database. The list is
grouped by account and sorted by number. Accounts may also be listed. Account
lists show information such as phone number, address, and contact information.
Activity Logs – Operator Activity, Vehicle Activity, Tank Activity
The Operator and Vehicle Activity reports give a detailed, transaction by
transaction listing for each user in an account. The transactions are sorted
chronologically. The totals for each user and for the account are also calculated.
The Tank Activity report provides day & period summaries of fuel issued and
received. The period end tank balance is also displayed.
Unit History – Operator, Vehicle
The Unit History – Operator and the Unit History – Vehicle reports prompt the
operator for the specific Unit # and then will detail all transactions related to the
fuel consumption and usage of that vehicle by a particular operator or driver.
Summary Reports – Active PCU Summary, Operator, Vehicle and Product
Usage
The Active PCU Summary reports the fuel output by each Active PCU in the
database. The report is grouped by pump. This report does not list PCU's or
pumps that had no activity for the period.
The Operator and Vehicle Summary reports summarize all transactions sorted
either by individual operator or individual vehicle number.
The Product Usage Summary report breaks out by Account Number and
Department the litres and costs of the fuel products used.
Vehicle Performance
The Vehicle Performance report calculates by vehicle the fuel used for the
specified period. It also calculates the average litres/kilometres used for that
period as well as total and average for the lifetime of the vehicle.
Custom Reports
ProFuel provides the facility to have custom reports created and recalled as
required. This facility directs the system to the location of the custom reports so
that they can be run.
Invoices (ProFuel
Plus Only)
Computrol has modified ProFuel by adding a powerful new module which
provided the ability to charge discounts and taxes to each fuel transaction and to
generate complete Billing Statements by Account. The new billing program is
known as ProFuel Plus.
The Reports Screen now includes a button for generating Invoices for one
account only, or by all accounts. Additionally, you can choose whether to show
all transactions on your invoice, or provide summarized totals only. To access
ProFuel Reference Manual – Version 3.0
Page 49
Reports
ProFuel User Manual
the Report menu, select the
of your screen.
button from the button menu at the top
Invoice
Button
Screen 39 – Report Screen
Creating Invoices / Billings
Billings (Invoices) can be created after all the pumps have been polled and the
transactions have been processed. See Communications and All Transactions
sections in this manual for details. Billings can be processed for any single
account or all Accounts for any date period. All reports, including Invoices are
run from the Reports screen.
To create a Billing report, select the <Invoice> button from the Report screen.
Screen 40 – Invoice Screen
Enter in the information in the boxes provided to create your report.
ProFuel Reference Manual – Version 3.0
Page 50
Reports
ProFuel User Manual
Account Number – The default is all – if the report is for a specific account, then
select the account number / name from the drop-down box.
Prefix – Enter in the prefix of the Invoice Number – if applicable
Invoice Number – Enter in any number that you wish. Subsequent Invoices will
be numbered sequentially unless manually changed.
Start Date – Enter the date that you wish the report to start from. Report will
start from 00:00:01 on the date you select.
End Date - Enter the date that you wish the report to end. Report will end at
23:59:00 on the date you select.
Invoice Date – If you are selecting only one invoice for this report, enter in the
date for that invoice.
Please Note: If you wish the Billing report to have each Account’s
invoices to appear on a separate page, then select the ‘New Page For
Each Account’ box on the Reports Menu.
Databases, Logs
and Archives
Database Tools
The two database tools Compact Database and Repair Database are accessed
through the <Main Tables> menu located at the top of the screen.
Compact Database - Over time databases can become bloated and inefficient.
This happens because when records are deleted, 'holes' are left in the database.
To remove the holes and improve database efficiency (and reduce hard disk
usage) you should periodically (once a month or more) Compact the database.
All screens must be closed when you issue this command.
Repair Database - Sometimes database corruption is unavoidable (lightning,
power failures, disk errors, etc.). It is sometimes possible to repair errors in the
database using the Repair Database command. You can try this command if
you are experiencing odd behavior in the program (data disappears or appears
garbled, etc.).
Database Backup - A better and more reliable solution for database corruption
is to keep a regular backup of the database file (called 'main.mdb' in the ProFuel
directory). This can be a backup to tape, floppy, or an off site backup service.
Backups should be done regularly (nightly or weekly). The raw transaction
archive ('archive.zip') should also be backed up.
Purge Old Transactions - Transaction data (in a processed form) is also stored
in the database. Over long periods of time (or high volume of transactions) this
can cause the database to grow very large, negatively impacting performance. It
is possible (and recommended) to occasionally purge the database of transactions
ProFuel Reference Manual – Version 3.0
Page 51
Reports
ProFuel User Manual
that will no longer be used. Unused transactions may include old data that has
already been processed and reported on. This could be done yearly, quarterly or
even monthly. Using the Purge Old Transactions command you will be
prompted to enter a date and all transactions before that date will be removed
from the database (but not from the archive). Keeping the database as small as
possible, improves performance and reduces memory usage.
Transaction Archive
Raw transactions are archived when the poll is successful. They are stored in the
file 'archive.zip' in the ProFuel directory (C:\Program Files\ProFuel by default).
The transactions are named like '199809020103.4'. Which means that this file is
the transaction log from, PCU number 4 on September 2, 1998 at 1:03 AM
(YYYYMMDDHHmm.PCU - Year, Month, Day, Hour, minute, PCU)
We have bundled the 'Zip' and 'Unzip' command line programs for accessing the
archive.
ProFuel Reference Manual – Version 3.0
Page 52
Reports
ProFuel User Manual
ProFuel Reference Manual – Version 3.0
Page 53
Operations
ProFuel User Manual
System Operations
1. Downloading of Cards/Numbers to PCU
Cards, Vehicle Numbers or Employee Numbers in your ProFuel database can be
downloaded, either individually or in batches, to your Pump Control Units
(PCU’s). This feature provides for easy broadcast of cards/numbers when
setting up new PCUs or when restoring tables after a service ‘Cold Start’.
To download card/numbers to PCUs, go to the Polling and Cards Screen which
is reached by selecting the <Communication> button on the Main Menu bar
Selecting the
to appear.
button will cause the Communication screen
Screen 41 – Polling and Cards Screen
ProFuel Reference Manual – Version 3.0
Page 54
Operations
ProFuel User Manual
Download Cards
To download card/numbers to the PCU
1. Select the appropriate Card Range Button which is found in the ‘Card Range
To Send’ section of the window.
2. Select the target PCU button which is found in the ‘PCUs Being Sent To’
section of the window.
3. Click on the
button
Advanced Information
The download procedure takes place in 2 separate stages.
1. ProFuel disables the card/numbers that you have specified when you
selected the Card Range Button. If you specify ‘Only cards that have
changes’ or specific card numbers, then only those cards specified will be
disabled individually. If you specify ‘All’ then ProFuel disables all cards
with one command.
2. ProFuel Enables or Authorizes the card/numbers that you have specified.
Please Note: Please remember the the card/numbers downloaded are
controlled by the state of the ‘Enabled’ box at the top of each User
record. If the box is checked, then the card/numbers in that record will be
Enabled/Authorized. If the Enabled box is not checked, then the
card/number will be Disabled.
Manual Authorization of Cards
Users that prefer to Enable/Authorize cards manually can achieve this by
connecting to the PCU through the Manual Tab in the Communications screen
This will cause the Manual screen to appear.
ProFuel Reference Manual – Version 3.0
Page 55
Operations
ProFuel User Manual
Screen 42 – Manual PCU communication screen
Select the PCU you want to connect to then write in the card/numbers that you
want to Enable/Disable.
Fleet model PCU’s recognize the EC/DC (Enable/Disable) command set while
most C600 models recognize the AN/DN (Authorize Number/Deauthorize
Number) sequence. E.g.
Card Downloading Problems
If communication between ProFuel and any one of the PCUs is interrupted
during the download process, it is possible that the cards/numbers that were
disabled during the first stage of the process may not have all been Enabled or
Disabled before the communication failure.
To verify the status of the cards/numbers, connect manually to the PCU and
issue the appropriate command. E.g. LAP, LSN, LAV. The PCU will then echo
its card tables to your screen For example:
2. Polling Your PCU
Polling the PCU’s (Pump Control Units) is the process where ProFuel or ProFuel
Plus contacts each PCU and downloads information about the transactions that
have transpired since the last time that they were polled. This process can either
be initiated automatically or manually. Information that is gathered includes:
ProFuel Reference Manual – Version 3.0
•
Location of PCU
•
Products that were pumped
•
Number of gallons or other units of measure pumped
Page 56
Operations
ProFuel User Manual
•
Card # / Unit # that used the product pumped
•
Date and time of transaction
•
Mileage of unit (if entered)
Automatic Polling
The Communication screens are used to initiate the Autopolling feature of
ProFuel and ProFuel Plus as well as initiating Manual polling of one or all
PCU’s. This screen also allows you to send updated card information as
described in the previous section of this manual.
button
To access the Communication screen, select the
from the button menu at the top of your screen. It can alternatively be accessed
by selecting the Communication option under the <Main Tables> menu also
located at the top of your screen.
Screen 43 – Polling and Cards screen
AutoPoll - Configuring
The AutoPoll feature is setup in the PCU Setup screens detailed in the SETTING
UP / PCU Setup section of this manual and referenced in this section. The
Polling and Cards screen is used to initiate polling of individual or specific
PCU’s.
With your mouse, select the option that is appropriate for the PCUs that you
want to have Autopolled. These options are:
All PCU’s
All PCU’s that are Autopolled
ProFuel Reference Manual – Version 3.0
Page 57
Operations
ProFuel User Manual
All PCUs at ______________Location
PCUs – you can select an individual group or range of PCUs
When you have selected the PCUs that you want to poll, you can either let the
system Autopoll according to the time schedule that you have previously set up
or by selecting the
button, you can initiate a poll immediately.
Setting Up Autopoll / Manual Polling
To access the screen that allows you to enter the parameters for the setup of
Autopolling and manual polling as related to a specific PCU, select the
<Automation>> tab on the PCU Setup screen. This will cause the Automation
screen to appear.
Screen 44 – Automatic Polling setup screen
The Automatic section of the PCU Setup screen is used to setup the time and
frequency for automated (scheduled) polling. By default scheduled polling is
disabled. The daily poll time is the hour (in 24 hour format) to begin polling that
PCU. You may alternatively set the 'EVERY ... HOURS' to make sure the PCU
never goes more than that many hours without being polled.
The LAST POLL time is also displayed in the window.
Select the ‘Update Odometer Reading After Autopoll’ box if you wish to have
the odometer updated in the system after every fill.
To poll a particular PCU right away, you can just click the
button. You may also select to poll 'All', 'All that are Autopolled', or All at a
particular location.
With the AUTOPOLL option enabled, the system can operate totally
unattended. In order for the automated polling to work, the computer must be on
and have the program running.
ProFuel Reference Manual – Version 3.0
Page 58
Operations
ProFuel User Manual
Manual Polling
In order to access the screen that allows you to initiate manual polling of the
PCU’s, select the <Manual> tab on the Communication screen. The Manual
screen will appear.
Screen 45 – Manual Polling screen
Manual communication can be used to issue commands directly to a PCU (like
through a terminal). To initiate a connection, select the PCU to connect to and
click on 'Connect To'. This will dial up (if required) and log you in to the PCU.
To issue a command, type it into the thin text box (beside the Send button) and
hit Enter or click Send. You can save a transaction to a file if you wish by
clicking the 'Save Transaction As...' button, you will be prompted for a file
name.
When you are finished communicating simply click the 'Disconnect from' button
(which was the 'Connect to' button).
The Escape button can be used to cancel a long transfer (like from an 'L T A'
command).
You can use this screen to enable cards, check the version, and configure your
PCU's.
AutoPoll Transactions
When the
appear.
button has been selected, a polling log screen will
Good Transactions
This is where the dialogue re: good transactions go
ProFuel Reference Manual – Version 3.0
Page 59
Operations
ProFuel User Manual
Bad Transactions
This is where the dialogue goes for bad transactions. The Reject screen goes
here and we edit and merge corrected transactions. Also, how to purge the
Reject Screen.
Processing All Transactions
3. Creating Reports
To access the Report menu, select the
button from the button
menu at the top of your screen. It can alternatively be accessed by selecting the
Report option under the <Main Table> menu also located at the top of your
screen.
Used in ProFuel Plus to create
Billing / Invoice reports.
Screen – 46 Reports
Creating Reports
Creating reports in ProFuel and ProFuel Plus involves 3 very simple steps:
Step 1 – Set the reporting period. The reporting period can be set using the
START DATE and END DATE fields. The period is up to and including the
end date. As an example, the screen above shows a reporting period from April
1, 2001 to April 19, 2001.
Step 2 – If the report applies to only one account, select the account from the
drop down menu in the Only One Account field.
Step 3 – select the appropriate button for the desired report. The report will then
be run and can be directed to your screen, a file or to a printer.
ProFuel Reference Manual – Version 3.0
Page 60
Index
ProFuel User Manual
Index
A
Accounts Database, 33
Accounts screen, 34
Activity Logs, 48
Add New record, 13
Adding, 16
a new product, 16
location group, 22
new location, 20
new PCU, 26
new tank, 24
new user, 37
product group, 18
Archive, 51
Arming Character, 27
Arming Code, 27
Automatic Polling setup screen, 28, 57
Autopoll
now, 40, 56
setting up, 28, 57
AutoPolling
initiating, 40, 56
PCU, 30
product group, 19
tank, 24
user, 39
Discount Groups, 15
Discount Groups - editing, 16
F
Find First Record, 14
Fueling Tanks, 45
G
Get Sample button, 29
Getting Started, 7
I
Introduction, 5
Invoice Screen, 49
Invoices - creating, 49
Invoices (ProFuel only), 48
L
B
Baud Rate, 27
C
Clear Password, 28
Cold Start Password, 28
Com Port, 27
Communications, 27, 40
Configuration screen - Tax Groups, 33
Configuration Screen - tax groups, 35
D
Data Function menu, 13
Data Functions, 13
Database
backup, 50
compact, 50
repair, 50
Database Tools, 50
Delete Current, 14
Delete Current record, 14
Deleting, 17, 20, 45
a location, 20
a product, 17
an account, 36
location group, 22
ProFuel Reference Manual – Version 3.0
Limits and Variances, 42
Locating
an account, 36
Location Groups, 9, 21
Location Groups screen, 22
Locations Database, 19
Locations screen, 51
Lost Card
re-issuing, 39
M
Main Button Bar, 9
Main Button Bar screen, 9
Main Screen, 9
Manual Polling, 41, 57
now, 41, 57
Manual Polling screen, 41, 58
Modem Number, 28
N
Navigation, 12
Networks - installing ProFuel, 8
New Account, adding, 35
Page 61
Index
ProFuel User Manual
O
Fields, Required, 12
Odometer Variance, 43
S
P
PCU, 12
PCU Location, 26
PCU Number, 26
PCU Setup, 27
PCU Setup screen, 25
PCU Transaction setup screen, 29
Poll now, 28, 57
Polling and Cards screen, 40, 56
Product - locating, 17
Product Group - Locating, 19
Product Groups, 9, 17
Product Groups screen, 18
Products Database, 15
ProFuel - Order of setting up modules, 11
Pump Setup screen, 26
Pumps
setting up new, 26
R
Record
Save Current, 14
Record Navigation bar, 12
Record Search, 12
Record, Add New, 14
Record, Find Next, 14
Record, Move Previous, 14
Re-Fueling Tanks, 45
Registration, 7
Registration screen, 8
Re-issue Lost Card screen, 39
Rejected Transactions, 45
Reports, 47
creating, 47, 59
descriptions, 47
Reports screen, 47, 59
Required Fields
ProFuel Reference Manual – Version 3.0
Setup, 29
PCU transaction, 29
Setup PCU screen, 27
System - loading on PC, 7
System Navigation, 9
System Requirements, 7
System Set-Up, 11
System set-up screens, 11
T
Talk Password, 27
Tanks Database, 23
Tanks Screen, 23
Tax Group - naming, 34
Tax Groups - naming, 32
Tax Groups - setting up, 31
Tax Groups set up screen, 31
Taxes - Adding Tax Groups, 31
Transaction
archive, 51
Transactions
all transactions, 43
purge old, 50
Transactions screen, 44
U
Update PCU – Card Information, 41
User Database, 36
User Setup screen, 37
V
Variance and Fuel Limits screen, 43
W
Wildcards, 14
Page 62