1
GolfAchiever
Video Analysis System for Professionals
User Manual
GA-VASP Software Version 1.0, February 2005
Document # 77-0009-001, Revision A
w
m
ww
ww
w..ggoollffaacchhiieevveerr..ccoom
TABLE OF CONTENTS
CHAPTER 1 ...............................................................................................4
GETTING STARTED .................................................................................4
SYSTEM RECOMMENDATIONS .......................................................4
INSTALLING GA-VASP......................................................................4
LAUNCHING GA-VASP......................................................................5
SOFTWARE REGISTRATION/ACTIVATION.....................................5
ABOUT THE USER INTERFACE .......................................................6
TEACHING WITH GA-VASP – AN OVERVIEW ................................9
CHAPTER 2 .............................................................................................11
VIDEO PLAYBACK .................................................................................11
LOADING (OPENING) VIDEOS .......................................................11
THE DIGITAL VCR PLAYBACK TOOLS.........................................12
SLIDER BAR .....................................................................................12
IMPACT TABS/KEY FRAMES .........................................................13
COMPARE VIDEOS ..........................................................................14
PLAYBACK OPTIONS......................................................................14
CHAPTER 3 .............................................................................................17
VIDEO RECORDING ...............................................................................17
LIVE VIDEO OPTION ........................................................................17
USING MULTIPLE CAMERAS .........................................................17
RECORDING TRIGGER OPTIONS ..................................................18
MANUAL RECORDING .................................................................18
IMPACT TRIGGER OPTIONS .......................................................18
CAPTURE PREFERENCES .............................................................20
NOTES ABOUT CAMERA POSITIONING .......................................22
NOTES ABOUT LIGHTING (and Camera Shutter Speed) ............23
CHAPTER 4 .............................................................................................24
WORKING WITH VIDEOS ......................................................................24
SAVING VIDEOS...............................................................................24
DELETE .............................................................................................24
FINDING/LOADING VIDEOS............................................................25
IMPORTING VIDEO ..........................................................................26
EXPORTING VIDEO .........................................................................26
CHAPTER 5 .............................................................................................28
DRAWING TOOLS ..................................................................................28
LINES.................................................................................................28
CIRCLE/CLOCK ................................................................................28
1
RECTANGLE/GRID ..........................................................................29
ANGLE...............................................................................................29
FREEHAND .......................................................................................29
UNDO/ERASE ...................................................................................29
TEXT ..................................................................................................30
LINE STYLES ....................................................................................30
SELECT/POINTER............................................................................30
CHAPTER 6 .............................................................................................33
DIGITAL EFFECTS .................................................................................33
SWING PLANE..................................................................................33
PARALLEL LINES ............................................................................33
ZOOM/PICTURE IN PICTURE..........................................................33
FILL....................................................................................................34
RULER...............................................................................................35
CLUB SPEED ....................................................................................35
TEMPO ..............................................................................................36
CLUB TRACK ...................................................................................36
SWING PATH ....................................................................................36
MIRROR.............................................................................................36
STROBE ............................................................................................37
SILHOUETTE ....................................................................................37
ARROW .............................................................................................38
CURVED ARROW.............................................................................38
STICK MAN .......................................................................................38
SWAY TOOL .....................................................................................39
OVERLAY ..........................................................................................39
FAST VIDEOS ...................................................................................39
KEY FRAMES ...................................................................................40
MOVE (COMPARING VIDEOS)........................................................40
PRINTING ..........................................................................................41
FULL SCREEN ..................................................................................42
CHAPTER 7 .............................................................................................44
WORKING WITH STUDENTS – STUDENT DATABASE ......................44
STUDENT INFORMATION ...............................................................44
ENROLLING A NEW STUDENT ......................................................44
LOCATING A STUDENT FILE .........................................................44
EDITING A STUDENT FILE..............................................................45
DELETING A STUDENT ...................................................................45
EMAILING A STUDENT....................................................................45
CHAPTER 8 .............................................................................................46
2
INTERNET LESSONS .............................................................................46
RECORDING AND EMAILING AN INTERNET LESSON ................46
Set Preferences ......................................................................................46
IMPORTING/EXPORTING VIDEOS .................................................47
CHAPTER 9 .............................................................................................48
MORE OPTIONS .....................................................................................48
STUDENT SOFTWARE ....................................................................48
HIDING THE TASKBAR ...................................................................48
INTEGRATED SYSTEMS .................................................................48
GolfAchiever II ..............................................................................48
GolfAchiever CAM ........................................................................49
GolfAchiever Force Plate .............................................................49
REPORTS..........................................................................................49
UTILITIES ..........................................................................................50
PHYSIOLOGY ...................................................................................51
CONTACT US..........................................................................................52
3
CHAPTER 1
GETTING STARTED
SYSTEM RECOMMENDATIONS
The following are recommended system requirements for the GolfAchiever VASP
(GA-VASP) Software:
• Operating System: Windows® XP, Windows® 2000
• CPU: Pentium 4, 2.0 GHz+
• RAM: 512 Mb+
• Hard Drive: Free Space 2 Gb+
• IEEE 1394 Port (Firewire)
• DV Camera(s), or Analog to DV Converters
• Firewire Cable(s)
• CD-ROM Drive
• Call for SPECIFIC Dual- and Multi-Camera Specifications
o Panasonic Cameras/Camcorders
o Desktop Computers
§ BELKIN FireWire 3-Port PCI Card(s) – Belkin Part # F5U503APL
o Laptop Computers
§ ADAPTEC FireConnect for Notebooks PCMCIA Card – Part
# AFW -1430
• Video Requirements: 1024X768X32 (or 16) with 64 Mb+ RAM
• Broadband Internet Connection
• Sound Card with Speakers and PC Microphone
INSTALLING GA-VASP
1. Insert the GA-VASP software CD into the CD-ROM drive.
2. Wait a few moments. Most Windows® systems will detect that a CD has been
inserted, and then automatically launch the “setup.exe” program on the CD.
3. If the installation begins automatically, skip to step 7.
4. Click the Windows® START button and then click RUN…
5. In the Open box, type the letter assigned to the CD-ROM drive followed by a
colon and the word “setup.” (For example, d:setup).
6. Click OK.
7. Follow the on-screen instructions to properly install the software.
8. We recommend accepting the default destination location and the default
program menu folder.
9. GA-VASP will automatically create icons for itself on the desktop and on the
START menu.
10. Now, double-click the GA-VASP software icon from the desktop to begin using
the GA-VASP software.
4
LAUNCHING GA-VASP
To open the GA-VASP Software, double-click on the GA-VASP
software icon found on the desktop. Alternatively, click on the
computer’s START button, then PROGRAMS, then GolfAchiever, and
then GA-VASP to open the program.
SOFTWARE REGISTRATION/ACTIVATION
The GA-VASP Program currently installed is a 30 uses trial version of the software.
GA-VASP software must “activated” for a specific PC. To do this, simply go to the
upper left of the GA-VASP software screen and click on FILE, then click on UPDATE
SECURITY. A new window (as shown below) will appear. The eight (8) character
Serial Number shown in the box must be given to a GolfAchiever Sales
Representative. NOTE: The Serial Number is PC Specific. The Representative will
email the KEY Code to “activate” the GA-VASP software on the specific PC within 48
hours. Enter this KEY Code in the space provided to activate GA-VASP software. It
is recommended to cut and paste the KEY Code to prevent any entry errors.
5
ABOUT THE USER INTERFACE
The main GA-VASP interface is shown below:
The Video Window area is surrounded by GA-VASP’s command buttons, playback
control buttons, slider bar and key frames, video buffer, compare window options,
etc.
The interface can be broken down into the following sections:
• Drawing tools (upper left)
• Digital Effects (mid-left)
• VCR-type Playback Controls (lower left)
• Slider bar and Impact Tabs (bottom center, below video window)
• Video Buffer (bottom center)
• Record Buttons (upper right)
• Video Window/Compare Options (mid right)
• Student Database, Internet Lesson, Student CD, Load File, Fast Videos, Print
(Lower Right)
6
DRAWING TOOLS
The DRAWING TOOLS button group contains the tools that
allow the user to graphically analyze video. Freehand,
lines, angles, circles, boxes, and text tools are located here.
The Eraser for Undo and Erase, the Line Thickness Option,
and the Line Color Option are also located in the
DRAWING TOOLS section.
DIGITAL EFFECTS
The Buttons found in DIGITAL EFFECTS include:
Select/Pointer, Move/Slide, Zoom, Parallel Lines, Swing
Plane, Speed, Ruler, Club Track, Swing Path, Overlay,
Silhouette, Strobe, Mirror, Tempo, and Synchro.
PLAYBACK CONTROLS
The PLAYBACK CONTROLS include Pause, Play, Stop,
Slow Motion, Jump to First Frame, Step (One Frame)
Backward, Step (One Frame) Forward, and Jump to the
Last Frame.
SLIDER BAR
The SLIDER BAR contains the HANDLE (Video Position Adjustment Tab), the 8
Key Frames Impact Tabs, and the Lock Tool.
7
VIDEO BUFFER
The VIDEO BUFFER is located just below the SLIDER BAR (above) and contains
thumbnails of recently recorded video files. When there are more than 7 swings
in the VIDEO BUFFER, the VIDEO BUFFER SCROLL buttons will appear
allowing the user to SCROLL left and right to locate thumbnails of recorded video
files not currently visible in the BUFFER.
RECORD AND MULTI-RECORD
If the One Camera Capture Software has been purchased and/or
the user has only one camera connected to the system, the
recording options appear as shown in the top image. If the Dual- or
Multi-Camera Capture Software has been purchased and there are
two or more cameras connected to the system, the recording
options appear as shown in the bottom image.
VIDEO/COMPARE WINDOWS
The VIDEO WINDOWS Icons, or COMPARE WINDOWS Icons
are shown to the left. The user may select among One, Two,
Three, Four, Five, or Eight Video Windows being displayed at
the same time.
STUDENT DATABASE, INTERNET LESSONS, ETC.
This section of the User Interface includes Student Database,
Internet Lesson, Student CD, Load Swing, Fast Videos, Save
Swing, and Print buttons.
8
NOTES ABOUT BUTTON STATES
Active Buttons are shown in a ‘raised’ position, contrasting background color, or
flashing. To activate a function or button, click it.
Some functions act in “groups”. For example, only one of PAUSE, PLAY, and SLOW
may be active. When you click one of these, the others in the group automatically
de-activate.
Other buttons act as switches. When you click one of these, the function is activated.
When you click again, the function is deactivated. For example, TEMPO, MIRROR,
AND SILHOUETTE tools are as switches as defined above.
Some buttons act simply as momentary buttons – pressing one of these causes an
action, but the button does not remain active, and requires no deactivation. An
example of this is UNDO/ERASE.
Sometimes buttons are and appear inactive (faded/transparent). For example, the
ERASE/UNDO button will be inactive if there are no graphics currently drawn on the
video window. Once graphics are drawn on the video window, ERASE/UNDO
becomes active.
Other buttons act as menus. When you click them, menus with more function
choices appear. Examples of these are PRINT, TEXT, LINE THICKNESS, and LINE
COLOR.
TEACHING WITH GA-VASP – AN OVERVIEW
The first thing the user will always want to do upon starting a lesson is calling up the
Student’s Database file, or creating a new Student File if this is the first time with the
student (Be sure to include as much contact information as possible/available.).
Once selected, the user can browse the student’s available videos, notes, and
handicap record.
From here, one of the first steps is to record a current video of the student’s swing.
Simply click on RECORD and have the student swing away. Capture of the videos
can be automatic with either GolfAchiever II capture or audio hit detection. If neither
device is available, video capture can be done manually by clicking on the mouse at
impact. As swings are captured, thumbnails of the video files available appear in the
VIDEO BUFFER. Once enough swings have been captured and the user wishes to
analyze a swing, either ‘DRAG AND DROP’ a thumbnail into the video window, or
DOUBLE-CLICK on the thumbnail to have it appear in the active video window.
Once the Video appears in the Video Window, the user should set the player’s
IMPACT TABS/KEY FRAMES. Do this by holding down the RIGHT Mouse Button on
the SIXTH tab (IMPACT) and sliding it to the player’s IMPACT Position. Once the
impact position appears on screen, the user lifts up on the RIGHT Mouse Button and
then immediately DOUBLE-CLICKS on the LEFT Mouse Button, instantly setting the
9
other Key Frames. Further adjustments are then made to the other positions by
dragging (right-mouse button) to the correct KEY FRAMES positions. Now, all future
swings saved to that player’s file will have impact tabs set according to the timing of
the original tabs, given a set impact position.
From here, the user can navigate through positions of the swing by using the SLIDER
BAR’s HANDLE, VCR-type PLAYBACK CONTROLS, or clicking on any of the
IMPACT TABS.
Now, the user can decide to use any of the GA-VASP’s DRAWING TOOLS or
DIGITAL EFFECTS to illustrate the video.
The user can also decide to use any of the GA-VASP’s COMPARE WINDOWS to
compare the student to any number of model swings and/or previous student swings
on file.
Once the user determines which swings should be saved to the STUDENT’s
DATABASE FILE, the user can click the SAVE SWING icon and name the Video
File(s) accordingly. It is also a good time for the user to type in any notes and/or
handicap information for inclusion into the STUDENT’s DATABASE FILE.
Near the end of the lesson, the user may determine if the student should receive an
INTERNET LESSON and/or a STUDENT CD*. Other available outputs include Print
Outs*, VHS Tapes*, DVDs*, etc.
*Required Peripheral Equipment not included with GA-VASP Purchase.
10
CHAPTER 2
VIDEO PLAYBACK
LOADING (OPENING) VIDEOS
To LOAD (OPEN) a saved video file for viewing and analysis in the Video Window,
either:
• RIGHT-Mouse Button CLICK anywhere in the video window and select LOAD
VIDEO from the pull down Menu. This will bring up the SELECT VIDEO
Window, from there you will scroll through and select from among the Student,
Drills, and Professional Video Files available. Once you’ve located the Video
File you wish to analyze, simply DOUBLE CLICK on the filename and the
corresponding video file will appear in your Video Window.
•
Click on the LOAD icon located in the lower right of the Main User Interface.
This will bring up the SELECT VIDEO Window, from there you will scroll
through and select from among the Student, Drills, and Professional Video
Files available. Once you’ve located the Video File you wish to analyze,
simply DOUBLE CLICK on the filename and the corresponding video file will
appear in your Video Window.
11
THE DIGITAL VCR PLAYBACK TOOLS
Video controls that appear similar to those found on a VCR
appear on the bottom left of the VASP’s main interface. When a
video is opened, these controls become available.
When the video is not moving, the video is said to be in
PAUSE or STOP mode. To play the video at full speed,
click on the PLAY button found at the top right of the VCR
PLAYBACK TOOLS module. To pause playback, click on
the PAUSE button found at the top left of the module.
When using PAUSE, the video will stop and maintain its position in the video file. To
stop playback and return to the first frame of the video file, click on the STOP button
found at the center left position of the module. To advance the video forward in Slow
Motion, click on the SLOW MOTION button found at the center right position of the
module. To advance the video to the first frame, click the REWIND button on the
bottom left of the module. To advance the video one frame backward, click on the
STEP BACKWARD button found to the immediate right of the REWIND button. To
advance the video one frame forward, click on the STEP FORWARD button to the
immediate right of the STEP BACKWARD button. To advance the video to the last
frame of the file, click the END button found at the bottom right of the module.
SLIDER BAR
Video may be randomly accessed in a quick shuttle fashion by using the video
SLIDER BAR. The SLIDER BAR has a moveable HANDLE (Red Tab) that
represents the position of the video. When the HANDLE is at the far left of the slider,
the video is at its first frame, or fully ‘rewound.’ When the HANDLE is at the far right
of the slider, the video is at its last frame. The user may grab the HANDLE by
moving the cursor over the HANDLE and holding down on the left mouse button and
dragging it right and left. The video will advance (moving right) or rewind (moving
left).
The slider’s handle is automatically repositioned when the position of the video
changes as a result of the use of one of the VCR controls or Impact Tabs. The user
can grab and drag the slider after it has moved through use of the VCR Controls or
Impact Tabs. Upon grabbing the HANDLE, the video will immediately become
updated according to its position along the SLIDER BAR.
12
Scrolling Mouse
If you are using a scrolling mouse, or a mouse with a “wheel”, you may use it to
advance the video frame-by-frame. Pulling down or rolling the wheel down advances
the video, while Pushing up or rolling the wheel up rewinds the video. You may hold
down the scrolling mouse button in either direction for continuous step by step, which
is very similar to slow motion.
IMPACT TABS/KEY FRAMES
GA-VASP will memorize eight KEY FRAMES, otherwise known as IMPACT TABS,
for every video file. To use the IMPACT TABS most effectively, the user will always
set the IMPACT POSITION first. To set the IMPACT POSITION TAB, the user must
move the cursor over the SIXTH TAB, or the IMPACT POSITION TAB. The user will
know when this occurs as the software will illustrate which tab the cursor is currently
floating over. Upon locating the IMPACT TAB, hold down on the RIGHT MOUSE
BUTTON and drag it until the video position is at IMPACT (the frame in which contact
is made or the frame after contact is made). Once the user has moved the IMPACT
TAB to the correct position, the other tabs can automatically be repositioned to their
correct or near correct positions according to a default timing setting. This setting is
either based on a previously saved swing in the student’s file, or based on a default
timing GA-VASP assigns to all golfers until another swing has been modified to exact
positions. To accomplish this, once the IMPACT TAB has been dragged to the
correct position, the user should lift up from the RIGHT MOUSE button and
Immediately DOUBLE CLICK ON THE LEFT MOUSE BUTTON. This will cause the
other KEY FRAMES TABS to move into default positions based on IMPACT
POSITION. Now, the user can quickly go through the key positions quickly,
especially useful in comparing two or more swings. Further, the eight positions will
be shown when hitting the KEY FRAME command in the software. A commonly
used feature in GA-VASP is KEY FRAMES as a PRINT OUT.
13
The eight KEY FRAMES (when looking face-on at the swing) are defined as:
I.
ADDRESS
II.
9 O’CLOCK
III.
12 O’CLOCK UP
IV.
TOP OF SWING
V.
12 O’CLOCK DOWN
VI.
IMPACT
VII.
3 O’CLOCK
VIII. FINISH
Be sure to accurately set the ADDRESS position as the frame before the golfer starts
the back-swing, as well all the other positions correctly. Certain GA-VASP features
either require or work more effectively if the important key positions (address, top of
swing, impact, and finish) are set accurately. These features include TEMPO,
SYNCHRO, CLUB PATH, CLUB TRACE, and STROBE.
COMPARE VIDEOS
GA-VASP’s Video Window may be split to allow the user to open
and control two, three, four, five, or eight videos individually or
simultaneously. To split the Video Window, the user must select
from the options in the COMPARE WINDOWS Module.
Alternatively, the user may right mouse click anywhere in the
Video Window area and a COMPARE WINDOWS menu will
appear. Once the selection for COMPARE WINDOWS is made,
the Video Window area will divide into that many Windows.
Compare to Live Video
With GA-VASP, the user can compare LIVE VIDEO of a golfer
(student) with up to 7 model swings. To accomplish this, the
user must call up the number of compare windows to display,
load the model swings in all but one window and adjust the
swing position for each, then choose which window to display
the live video by clicking the SELECT tool, then clicking on the
window. Then, the user must select RECORD, which will bring
up LIVE VIDEO in the active window, while the other windows
will maintain the set positions of the Loaded Video Files.
PLAYBACK OPTIONS
When comparing videos, all of the Digital VCR Playback Options, the Slider Bar
Handle, and the Impact Tabs are available for any one of the swings or all swings
simultaneously.
14
To have the videos move separately, the user must use the SELECT tool to select
the Window for the Video to be controlled. GA-VASP will indicate the active window
with a BLUE outline. Once a window has been made active, all of the playback
controls are available for that window only. Note: the default active window will
always be the last video loaded.
To make all of the videos move simultaneously, the user must use the
SNYCRHONIZE tool. When the SYNCHRONIZE button has been
clicked, all open videos will begin moving together in SLOW MOTION
from the first frame. The user can then decide to pause the SLOW
MOTION playback by hitting the PAUSE button, and/or any of the IMPACT TABS.
Once the Videos are PAUSED in SYNCHRO mode, the user then may grab the
SLIDER BAR HANDLE to move the videos forward and backward, jump to any
impact tab at once, STEP FORWARD or STEP BACKWARD, and/or use the
SCROLLING MOUSE feature to advance or rewind the videos. Note, when using
SYNCRHONIZE, all videos will be SYNCHRONIZED by IMPACT POSITIONS so that
each video will arrive at each impact position at the same time on the screen, even
though each golfer (video) may have a faster or slower TEMPO.
Set Preferences (PLAYBACK)
There are several playback options found in the GA-VASP’s SET PREFERENCES
module. To access the Playback Options, go to FILE -> SET PREFERENCES.
15
Once the SET PREFERENCES window appears, select the GENERAL TAB. Under
the GENERAL tab, the following playback options are available:
• DEFAULT TO CONTINUOUS PLAY – When Slow Motion or Full Speed Play
is selected, Video will playback in a continuous Loop.
• INSTANTLY REPLAY AFTER RECORD – While in Record Mode, after every
video is captured, GA-VASP will replay the swing at Full Speed PLAY one
time and then immediately return to record mode. This loop continues until the
user clicks Record to end Record Mode. This is a great practice mode and
best when used with an impact detector such as a GolfAchiever system or hit
detector microphone.
• REPLAY IN SLOW MOTION AFTER RECORD – While in Record Mode, after
every video is captured, GA-VASP will replay the swing in SLOW MOTION
one time and then immediately return to record mode. This loop continues
until the user clicks Record to stop Record Mode. This is a great practice
mode and best when used with an impact detector such as a GolfAchiever
system or hit detector microphone. NOTE: INSTANTLY REPLAY AFTER
RECORD must also be selected for this option to work.
• PLAY VIDEO WHEN LOADED – Upon Loading a Video, GA-VASP will play
the Video at Full Speed once.
• START SLOW MOTION FROM ADDRESS – GA-VASP will start Slow Motion
playback from the Address Position when this option is selected.
• AUTO LOAD LAST VIDEO CAPTURED – After Recording, GA-VASP will
automatically Load the last Video Captured.
16
CHAPTER 3
VIDEO RECORDING
LIVE VIDEO OPTION
In order to see live video from any of the connected cameras on the GA-VASP
Screen, the user needs to click one of the RECORD buttons.
If the user has purchased the SINGLE CAMERA version of GA-VASP, or has only
one camera connected, the GA-VASP will immediately show live video from the
camera in the active window.
If the user has purchased the DUAL- or MULTI-CAMERA version of GA-VASP, and
has two or more cameras connected, there are a couple options to choose from. If
the user wishes to see live video from only one camera, click on the RECORD
button. Once RECORD has been clicked, all of the AVAILABLE CAMERAS will
show up in a drop down list from the RECORD BUTTON. Once the user selects
which camera to be shown, it will appear in the active video window.
USING MULTIPLE CAMERAS
If the user has purchased the DUAL- or MULTI-CAMERA Version of GA-VASP, and
has two or more cameras connected, Multiple Cameras can be shown on the screen
at the same time.
The first step for the user is to select MULTI-RECORD from the list of Menu Options
located across the top of the GA-VASP Main Interface. A drop down list will show all
connected and available cameras. The user must click on each camera listed to
make that camera available in DUAL- or MULTI-CAMERA Recording mode. By
clicking on the cameras in the list, the user will see a CHECKMARK appears next to
the cameras, signaling that they are now available for DUAL- or MULTI-CAMERA
mode.
Once the user has selected the cameras to be available in MULTI-RECORD, the next
step is to choose from the Video Window Options matching the number of cameras
available. Now the user must click on the MULTI-RECORD icon and live images will
appear in each of the video windows.
NOTE: There is an option in FILE -> SET PREFERENCES -> CAPTURE where the
user can have GA-VASP AUTOMATICALLY SWITCH SCREENS FOR MULTIRECORD. This eliminates the need for the user to select the Video Window Option
17
matching the number of cameras available in MULTI-RECORD, as the system will
automatically select the proper Video Windows Option when the MULTI-RECORD
function has been clicked. Also see CAPTURE PREFERENCES below.
RECORDING TRIGGER OPTIONS
The basic Recording Trigger Options in GA-VASP are as follows:
• Manual
• Impact Triggers
o Audio Microphone Hit Detector
o GolfAchiever System Detection
Regardless if RECORD (one camera at a time) or MULTI-RECORD (more than one
camera at a time) is being used, the RECORDING TRIGGER OPTIONS work the
same.
MANUAL RECORDING
Manual Recording is used when there is no hit detection device, such as an Audio
Microphone or GolfAchiever System, being used.
To initiate MANUAL RECORDING:
1. Click the LEFT MOUSE BUTTON on the RECORD or MULTI-RECORD icons
in the GA-VASP interface.
2. Once clicked, live camera image(s) appear on screen in the Video Window(s).
3. Then, while keeping the CURSOR over the RECORD or MULTI-RECORD
button, CLICK the RIGHT MOUSE BUTTON immediately upon completion of
the player’s swing, OR, CLICK the Left Mouse Button AT IMPACT anywhere
in the video window area.
This process CAPTURES the swing(s). Once a swing(s) has been captured, GAVASP immediately creates a THUMBNAIL image of the first frame of the
CAPTURED VIDEO and places it in the BUFFER. If MULTI-RECORD is used,
MULTIPLE THUMBNAILS will be created and appear in the BUFFER as the
swing is captured.
IMPACT TRIGGER OPTIONS
Impact Trigger Options include Input Devices such as an Audio Microphone Hit
Detector, GolfAchiever II, or GolfAchiever CAM to signal GA-VASP that a swing has
occurred. Impact Trigger Options allow the user the hands free capture of golf
swings. Impact Trigger Options are a great way to practice, especially when using
GA-VASP in INSTANTLY REPLAY SWING AFTER RECORDING and INSTANTLY
REPLAY SWING AFTER RECORDING SLOW MOTION modes.
Audio Microphone Hit Detectors
Any computer microphone will work well. First, plug the Microphone into the
computer’s sound card or microphone input. Then, go to FILE -> SET
PREFERENCES -> HIT DETECT from the SET PREFERENCES WINDOW. It will
appear as shown below.
18
The arrow to the right of the bar is the HIT DETECT THRESHOLD. Place the
microphone near the golf ball so that it will pick up the sound of impact. Watch the
green bar move up as impact occurs. If the Green Bar moves up past the Arrow
Threshold indicator, GA-VASP will illustrate this with the word “HIT”. If the green bar
does not go past the threshold, “HIT” will not appear. If “HIT” does not appear, the
user has two choices: 1) move the microphone closer to the impact area (ball), or 2)
lower the threshold. Test until HIT appears at impact. Then close the SET
PREFERENCES WINDOW. Select RECORD or MULTI-RECORD, and start hitting
balls. When RECORDING, swings are captured automatically by GA-VASP any time
the sound captured by the microphone surpasses the HIT THRESHOLD.
When using an Audio Hit Detector Microphone, be aware that other sounds in the
area may cause unwanted triggering. Sounds such as wind on the microphone and
closing doors have been known to cause unwanted triggering.
GolfAchiever II/GolfAchiever CAM
The GolfAchiever II System is a Laser Based Launch Monitor and Swing Analyzer.
When using the GolfAchiever II with GA-VASP, the GolfAchiever II can serve as an
IMPACT TRIGGER every time a shot is hit and GA-VASP is in RECORD or MULTIRECORD mode. Additionally, the Swing and Launch data captured by GolfAchiever
II are available for on screen display. To use the GolfAchiever II system with GAVASP, click on FILE -> SET PREFERENCES -> ACHIEVER. Identify the COM
PORT that GolfAchiever II is hooked through on the computer via the drop down list,
19
then be sure to check the Options for INTERFACE WITH ACHIEVER and USE
ACHIEVER FOR HIT DETECTION.
Alternatively, the user may select the
ACHIEVER Menu Option on top of
the GA-VASP Screen to make these
selections. Further, the ACHIEVER
Menu Option on top of the GA-VASP
Screen allows the user to specify
which GolfAchiever parameters will
be reported on the Captured Video
Screen as text overlay. In this way,
the user can determine which
parameters display on screen. The
selected parameters for display on
screen will have a check mark next to
their name. This allows the user to
focus students on particular parameters of their swings. Swings captured with
GolfAchiever II on GA-VASP save the GolfAchiever II data with the video file.
Currently, the GolfAchiever CAM is being integrated with GA-VASP. Although not
ready with this release, as soon as GolfAchiever CAM is integrated, the software
update will be made available to GA-VASP customers.
CAPTURE PREFERENCES
To access the CAPTURE PREFERENCES, click FILE -> SET PREFERENCES ->
CAPTURE. From here, the user is able to set up the screen names for the
Camera(s) connected to the computer and GA-VASP, adjust the time in seconds that
a recording will take place with an Impact Detection Device, adjust the Frames per
Second (the NTSC Video format such as found in the USA is 30 Frames per Second,
while the PAL Video format used in Europe is 25 Frames per Second; NOTE:
Viewable images per second with GA-VASP is 60 per Second and 50 per Second,
20
respectively.), adjust the Main Video Window Width and Height, and also an option
for GA-VASP to Automatically Switch Screens for Multi-Record.
To Adjust Camera Screen Names in GA-VASP, Check Camera and Tape Properties,
and Check Video Format, click on any of the devices listed in the Available
Devices/Local Name Window. Once the user has clicked on one of the devices in
the list, NAME, PROPERTIES, and FORMAT become available options. Click on
NAME to change the Local Name for that Camera/Device in GA-VASP (NOTE:
Windows will keep its assigned device name outside of GA-VASP). A window will
appear where the user can enter the LOCAL NAME for the Camera in GA-VASP.
Click on PROPERTIES or FORMAT to view and/or adjust these items in GA-VASP.
To Adjust the Time in Seconds GA-VASP will record video before and after impact,
the user enters the value in seconds in the input fields SECONDS BEFORE HIT and
SECONDS AFTER HIT.
Depending upon the NTSC or PAL format for a given user application, the user
should enter 30 frames for NTSC Applications and 25 frames for PAL Applications in
the FRAMES PER SECOND field.
21
To Adjust the Main Video Width and Height, the user needs to enter the number of
pixels for each in the user fields MAIN WINDOW WIDTH and MAIN WINDOW
HEIGHT.
If the user wishes GA-VASP to automatically detect the number of cameras selected
for MULTI-RECORD and adjust the VIDEO WINDOWS accordingly when MULTIRECORD is activated, the box AUTOMATICALLY SWITCH SCREENS FOR MULTIRECORD must be checked. This feature will save the user one step when using
MULTI-RECORD as it is then not necessary to select the appropriate VIDEO
WINDOWS layout prior to activating MULTI-RECORD.
NOTES ABOUT CAMERA POSITIONING
Some of the common Camera Positions include the following:
Face On
Height of the camera lens should be at hand- or belt buckle-height. Some users may
go off sternum. Position the camera at a perpendicular angle to the target line,
directly across from the ball. NOTE: By using the zoom feature found on many
cameras, it is possible to capture a close up view of a student’s grip.
Down the Line
Height of the camera lens should be at hand- or belt buckle-height. Some users may
go off sternum. The goal will be to position the camera on the swing plane. This
means that a club should be able to be placed behind the subject’s club at the same
lie angle and the camera and image will show only one club/shaft. If two shafts show
and the subject’s club shows to the outside (to the right for a right-handed golfer), the
camera is positioned too far inside the swing plane. If the subject’s club is inside (to
the left for a right-handed golfer), the camera is positioned too far outside the swing
plane. The importance of Down the Line camera positioning in demonstrating the
swing plane cannot be stated strongly enough.
Rear View
Height of the camera lens should be at hand- or belt buckle-height. Some users may
go off sternum. Position the camera at a perpendicular angle to the target line,
directly across from the ball. NOTE: This is the opposite position to the Face On
View.
Overhead
Mainly limited to indoor facilities, the overhead camera should be positioned directly
over the ball. This gives the capability to capture both left- and right-handed golf
swings without switching camera position, and in relatively the same position. Be
sure to consider your field of view to include right- and left-handed golfers. NOTE:
Some users may position Overhead Camera over the nape of the neck.
22
NOTES ABOUT LIGHTING (and Camera Shutter Speed)
One of the main objectives in capturing the golf swing with video is using high
enough shutter speed to eliminate any blur in the club-head during fast motion
sequences. Using enough shutter speed will capture crisp, stop-action images of the
club-head, while if the shutter speed is too low, blurred club-head images will be
captured. To obtain crisp images of the club-head in Down the Line views, use at
least 1/1000 sec. Shutter speed. To obtain crisp images of the club-head in Face On
and Rear Views, use at least 1/2000 sec. Shutter speed. Generally, it is easy to use
these speeds outdoors and get crisp clear images. However, indoors, it is common
to end up with a dark and grainy image when trying to capture with these shutter
speeds. The solution is simple, yet can be expensive. More light is required,
otherwise, the inferior (dark and grainy) images will be the compromise indoors.
23
CHAPTER 4
WORKING WITH VIDEOS
SAVING VIDEOS
After capturing videos, the user has the option to save them to a Student Database
File (see chapter 7 for Creating Student Database Files). To save the video file to a
STUDENT, PROFESSIONAL, or, DRILL listing in the database, it is necessary to first
bring up or create the Database File to Current Status. Once the Database Listing
has been located or created, the user can save a swing/video file to that database
listing. While the Video File the user wishes to save is in the ACTIVE VIDEO
WINDOW, the user must click on the SAVE button located in the lower right of the
Main Interface Window. This will bring up the Current Database Listing with the
Video Tab pre-selected and an open line for the SWING DESCRIPTION to be
entered. The date is automatically listed as today’s date and the user must enter the
SWING DESCRIPTION. Once the SWING DESCRIPTION has been entered, the
user hits the ENTER key on the Keyboard, or Clicks on the line below the current
Description line to Lock in the Description. GA-VASP will indicate the SWING
DESCRIPTION has been saved. If using a MULTI-CAMERA SYSTEM and MULTIRECORD mode, the user must save every video file separately.
DELETE
To DELETE a swing from the Database, the user must call up the Database file
containing the swing/video file to be DELETED. Once the file and the swing are
found, the user must click on the line containing the video file and RIGHT MOUSE
click. This will bring up a window menu with DELETE VIDEO as one of the options.
24
Clicking on DELETE VIDEO will remove the Swing Video File from the Database and
free up hard disk space.
FINDING/LOADING VIDEOS
Finding a Video is the same process as LOADING a VIDEO, which was described in
Chapter 2. Click on the LOAD Video button to bring up the LOAD Video Dialog Box
or Right Mouse Click anywhere in a Video Window and then Select LOAD from the
list of options to bring up the LOAD Video Dialog Box. Once the LOAD Video Dialog
Box appears, the user can scroll through the following categories: Open Student,
Students, Professionals, and Drills. Swings found under each category will be in
alphabetical order by student listing and the user can expand each category by
clicking on the pluses (+) to sort through the available video files.
25
IMPORTING VIDEO
To Import Video Files, which may have been emailed to the user, into GA-VASP for
analysis and addition to the Swing Database, the video file must first be downloaded
and made available on the computer’s hard drive. Once the swing file to be imported
is available on the hard drive, the user must call up the Database Listing to where the
video file will be imported. Then, go to the VIDEO tab on the Database Listing,
RIGHT MOUSE CLICK on the line just below the last Video File listed, and select
IMPORT AVI FILE from the drop down list. This will bring up the Windows Open
Dialogue box. Click on the file, select Open, and GA-VASP will automatically import
the Video File to the Database listing and the cursor will move to the SWING
DESCRIPTION field to name the Video File. Enter the SWING DESCRIPTION and
hit ENTER on the keyboard to complete the process.
EXPORTING VIDEO
The process of EXPORTING VIDEO is similar to the process of IMPORTING VIDEO
as described above. The first step is to be sure the swing to be EXPORTED has
already been saved in the Student Database. Then, call up the Database Listing
26
containing the swing file. Click on the VIDEO tab. Locate the Video File Description
from the list of saved Video Files and RIGHT MOUSE CLICK. From the menu that
appears, select EXPORT AVI FILE or EXPORT ADDRESS TO END TO AVI FILE.
NOTE: EXPORT ADDRESS TO END [CUSTOM COMPRESSION] is also an option,
however, there may be importing issues for the next user when utilizing this option.
Once the EXPORT option is selected, a Windows Save Dialogue box will appear for
the user to name the Export file. Once the file is saved, the user may email the file or
post it for another GA-VASP user to download. It is also possible for a Non-GAVASP user to download the file, however, they will need a player such as Windows
Media Player or Real Player to view the file and may not be able to perform any
analysis or comparisons.
27
CHAPTER 5
DRAWING TOOLS
GA-VASP’s Drawing Tools allow the user to illustrate videos and compare movement
through swings. The Drawing Tools are a graphics overlay on top of the video(s).
The user selects a Drawing Tool by moving the cursor over the tool and left mouse
clicking to make it active. Some of the Drawing Tools have options, which the user
can access by Right Mouse Clicking on top of a given tool icon.
LINES
GA-VASP features two types of lines. The first type is called VARIABLE
LINE and the second is called CLIP LINE.
Drawing both types of lines works the same. Start drawing either line by clicking the
left mouse button to mark the line’s starting position. Move the cursor to extend the
line. Left mouse click to draw the first part of the line and to set the line again. To
finish drawing, double click on the left mouse button.
The VARIABLE LINE(s) can be drawn at any angle.
The CLIP LINE(s) can only be drawn horizontally or vertically.
The VARIABLE LINE is the default line in GA-VASP. To use CLIP
LINE, the user must move the cursor over the LINE ICON in the
upper left of the GA-VASP Interface and RIGHT MOUSE CLICK.
A pop up menu will appear where the user may select between VARIABLE LINE and
CLIP LINE. Left mouse click on CLIP LINE and the check mark will illustrate that
CLIP LINE is now the LINE Drawing tool. CLIP LINE will remain the LINE tool until
the user goes back and selects VARIABLE LINE.
CIRCLE/CLOCK
The CIRCLE icon holds the CIRCLE and CLOCK tool. CIRCLE is the
default. To draw the CIRCLE or CLOCK, start in the center, hold down the
left mouse button to begin drawing, drag the cursor away from the center,
and lift up on the mouse button when the CIRCLE or CLOCK has been
drawn to the proper size.
28
RECTANGLE/GRID
The RECTANGLE icon holds the RECTANGLE and GRID tool.
RECTANGLE is the default.
To draw the RECTANGLE, start in a corner, hold down the left mouse button, drag to
the opposite corner, and lift up on the mouse button when the RECTANGLE has
been drawn to the proper size.
To draw the GRID, hold down the left mouse button anywhere on the video window.
Drag the position of the GRID until it is properly positioned and lift up on the mouse
button. To make adjustments to the GRID lines, grab the POINTER tool, then double
click on the grid lines to bring up the GRID menu, and make adjustments in the menu
to change line thickness, spacing of the grid lines, and line color.
ANGLE
Left click once to set the first line, move the cursor to the center of the
angle, left click again to set the vertex, move the cursor along its second
line and click when positioned correctly to set the angle. GA-VASP’s
ANGLE tool is interactive – once the vertex is set and the user is moving the cursor
to set the second line, the angle in degrees will be displayed and update as the
cursor is moved. Once the second line is set, the angle in degrees is locked. 180degrees (straight line) is the maximum angle measurement.
FREEHAND
To draw in FREEHAND, hold down the left mouse button and drag
anywhere in the video window. Once the FREEHAND drawing is
complete, lift up on the mouse button.
UNDO/ERASE
A Single-Click on the left mouse button anywhere in an active video
window will UNDO the last drawing object in that active window. A single
left mouse click can be repeated for UNDO until all drawing objects are
removed from that active video window, sequentially, starting with next
most recent object drawn.
A Double-Click on the left mouse button anywhere in an active video window
ERASES all drawing objects currently in that active window.
29
TEXT
To use GA-VASP’s TEXT tool, left mouse click anywhere on the active
video window. This defines where the typed text will appear on screen
and will bring up the TEXT menu. The user then types in the text field
and chooses font type, point size, font style, and color. Click on OK and
the typed text appears on screen where the user originally clicked to
bring up the text menu.
LINE STYLES
GA-VASP allows the user to adjust line styles. The main adjustments are LINE
THICKNESS AND LINE COLOR. Both are options located on the main interface.
Line Thickness
To adjust LINE THICKNESS, click on the LINE THICKNESS icon. This
will bring up the LINE THICKNESS Menu, where the user may increase
or decrease the LINE THICKNESS. The default LINE THICKNESS is 3
pixels.
Line Color
To adjust LINE COLOR, click on the LINE COLOR icon. This will bring
up the LINE COLOR Menu, where the user may choose among the
standard colors, or create a custom color. The default LINE COLOR is
yellow.
SELECT/POINTER
The SELECT/POINTER tool can be used in a number of ways to adjust
the drawings on screen, in any order.
30
To Move a Single Object
To MOVE an object on screen with the SELECT tool, choose the SELECT TOOL (left
click), left-click on the object so its anchor points appear, hold down left mouse button
anywhere on object except the anchor points and drag object to its new location. Lift
up on mouse button to leave the object in its new location.
To Update the Anchor Points of a Single Object
To update the ANCHOR POINTS of a Single Drawing Object and thereby change the
proportion of the Drawing object, choose the SELECT TOOL (left click), then left-click
on the object so its anchor points appear, then hold down the left mouse button on
top of any of the ANCHOR POINTS and drag to change the object’s proportions.
To Delete a Single Object
To DELETE an object on screen with the SELECT tool, choose
the SELECT TOOL (left click), left-click on the object so its
anchor points appear, right mouse click to bring up the options
menu, and choose DELETE object.
To Update Line Color and/or Line Thickness
To update the LINE COLOR and/or LINE THICKNESS of an object already on
screen, choose the SELECT TOOL, then double left-click on the object. The object’s
properties MENU will appear where, depending upon the object, the user can make
adjustments to LINE COLOR, LINE THICKNESS, object HEIGHT, object WIDTH,
object RADIUS, etc.
SAVE DRAWING OBJECTS/LOAD DRAWING OBJECTS
To SAVE GRAPHICS that have been drawn on screen in order to bring them up at a
later time, click on the VIDEO Menu Option on top of GA-VASP’s Interface, then click
on SAVE DRAWING OBJECTS… A new Window will appear with the list of objects
to choose from. Click the options for the drawing objects to save and click OK
(default is to save all). A SAVE AS File Dialogue box will then appear to name the
SAVE GRAPHICS file. Click OK after the SAVE GRAPHICS file has been named.
31
To bring up the SAVED DRAWING OBJECTS, click on VIDEO -> LOAD DRAWING
OBJECTS… -> and choose the filename representing the graphics you wish to
display on screen from the File Dialogue box. This will bring the SAVED DRAWING
OBJECTS to the screen.
32
CHAPTER 6
DIGITAL EFFECTS
SWING PLANE
The SWING PLANE tool is a special drawing tool allowing the user to
draw several plane lines and have the area in between the lines shaded
transparent red. To draw, Select the SWING PLANE tool, start the
drawing at the vertex by clicking once on left mouse button, move up or
down, click to set the first line, move right or left, click to set the second
line from save vertex, move right or left to set the third line, etc. The area
in between the lines will be shaded RED.
PARALLEL LINES
The PARALLEL LINES tool is a special drawing tool allowing the user to
draw two lines perfectly parallel to one another. Left mouse click to start
the first line, move the cursor to any position and click to set the first line.
Then, move the cursor to a new position and the (second) parallel line will
follow the cursor. Click once the second parallel line has been moved to
the proper position in order to set the second line.
ZOOM/PICTURE IN PICTURE
The ZOOM tool works in two ways: ZOOM IN/ZOOM OUT or PICTURE
IN PICTURE ZOOM.
Zoom IN/Zoom OUT
ZOOM defaults with normal ZOOM IN and ZOOM OUT of the video in the active
window. To ZOOM IN, choose the ZOOM tool (left click), move the cursor to the
active video window position it in the center of the area to ZOOM into and left mouse
click. This can be repeated (up to 8 times) to ZOOM IN further. To ZOOM OUT,
click on the right mouse button. ZOOM OUT can be repeated until the video returns
to its original size.
Picture IN Picture Zoom
The ZOOM tool can also be used as a PICTURE IN PICTURE (PiP) ZOOM. To
enable PiP ZOOM, click on the top Menu item OPTIONS -> PiP ZOOM. Now, when
using the ZOOM tool and clicking on the active video window, GA-VASP will display
a separate PiP window where the section of the video window clicked will appear
33
ZOOMed in a separate window. To move the PiP window, use the SELECT TOOL to
drag and drop to a new location within the video window.
FILL
The FILL tool works in conjunction with other closed drawings (Circle, Rectangle, and
specifically drawn lines, for example). First draw a closed object such as a
RECTANGLE. Then right mouse click anywhere in the active video window to bring
up a menu list. Click on NEW -> FILL. FILL is now active. Click either inside or
outside the drawn RECTANGLE to FILL the area as shown below.
34
RULER
The RULER allows the user to define the size of an object in the active
video window. The RULER works in conjunction with CLUB SPEED
and is necessary for CLUB SPEED to be used.
Start by selecting the RULER tool from the list of icons on the main GA-VASP
Interface Screen. Then go on the active video window and draw a line measuring the
length of a known reference object in the screen, usually a golf club. Then, select the
SELECT tool, go back to the RULER line and double click to bring up the RULER
Properties Menu. Select the unit of measurement, enter the measurement value and
hit OK. This process has assigned a measurement value to the pixels on the video
screen, whereby the CLUB SPEED tool can be used effectively.
CLUB SPEED
Once the RULER tool has been used to define the measurement of a
reference object in the active video window, CLUB SPEED can be used
to determine the point-to-point speed of any moving part(s) in that
video, usually a point on the club-head. To use CLUB SPEED, select
CLUB SPEED from the list of icons in GA-VASP’s main interface. Determine a point
on the club-head that will be easy to locate frame to frame. To start from Address,
advance the video to Address by clicking the Address Tab or grabbing the HANDLE
of the Slider Bar and positioning the video at Address, then click on the defined point
(hosel of the club-head, for example). When the defined point has been clicked, GAVASP will advance the video by one frame. Click on the point again in its new
location and you will see the Club Speed (in MPH) shown in the upper left of the
video window. NOTE: Club Speed measurement can be started from any point in
the swing, for example, starting from the TOP or 12 O’ Clock DOWN positions.
Double Click at any point to end the CLUB SPEED readings.
35
TEMPO
TEMPO in the golf swing is often referred to as the time in seconds it takes
a player to go from the address position to the impact position. TEMPO in
GA-VASP is simply a measurement in time (seconds) beginning from the
defined Address position (TAB), which is the zero seconds starting point,
to any position thereafter. To determine a player’s TEMPO as defined above, click
on the TEMPO icon found in the main interface. Then click on the impact tab. This
will automatically show the player’s TEMPO in seconds on the bottom center of the
active video window. NOTE: To use this tool properly, it is essential that the user
define Address as the ONE frame prior to the player beginning the take away (backswing).
CLUB TRACK
CLUB TRACK is the automatic club-tracing feature of GA-VASP. To
use the club track tool, it is critical that the user choose a swing
recorded with the camera on a tripod, with high contrast background,
and where the club head does not disappear from the video window at
any point during the swing. In most recorded videos, CLUB TRACK will not be an
option, with the system being unable to locate the club-head through the entire swing
in subsequent frames. When this is the case, the user will need to use the alternative
SWING PATH tool (below) where the user indicates to GA-VASP the location of the
club-head throughout the swing.
SWING PATH
SWING PATH is the manual club-tracking feature of GA-VASP. To use
SWING PATH, the user chooses the SWING PATH tool from the main
interface and begins clicking on the club-head around the swing. GAVASP will automatically advance the video as the user clicks the clubhead position in each frame. As the clicks are occurring, GA-VASP will trace the
Swing Path of the Club Head around the swing. When finished with the follow
through, the user double clicks to end the tracing. The back-swing will be highlighted
by a yellow line, while the downswing will be traced by a red line. The color transition
occurs at the frame defined as the TOP OF THE SWING (Impact Tabs).
MIRROR
The MIRROR tool flips a golfer from Right- to Left-Handed and viceversa.
36
STROBE
The STROBE tool is a multiple exposure feature showing the positions of
the club and body throughout various time stops in the golf swing.
STROBE has three options: STROBE UP, STROBE DOWN, and
STROBE UP AND DOWN. Further, STROBE has exposure options
ranging from one image every frame to one image every 100 frames. To modify the
exposure options, click on the top MENU Item STROBE STEP and select from the
exposure options listed.
SILHOUETTE
The SILHOUETTE tool can be used to hold a frame (or strobe
exposures) on the screen transparently. This can be great to illustrate
the difference in positions between Address (Press SILHOUETTE) and
Impact. To use the SILHOUETTE tool, position the video at a specific
frame, click on the SILHOUETTE icon from the GA-VASP main interface, and
continue manipulating the video to compare the positions from the SILHOUETTED
position.
HINT: STROBE a swing, then click SILHOUETTE, then playback a video for a
dramatic combination of Advanced Digital Effects.
37
ARROW
The ARROW tool allows the user to draw a line with an arrowhead at its end. To
locate and use the ARROW tool, right mouse click anywhere on the video window.
From the menu list, select NEW -> ARROW. Click anywhere on the active video
window to start drawing the ARROW. Move the cursor to the end position and click –
the arrowhead will appear on the end of the line.
To change the ARROW properties, select the SELECT tool, double click on the
ARROW to bring up the ARROW Properties Menu, and make the desired changes.
CURVED ARROW
The CURVED ARROW tool allows the user to draw a curved line
with an arrowhead at its end. To locate and use the CURVED
ARROW tool, right mouse click anywhere on the video window.
From the menu list, select NEW -> CURVED ARROW. Click
anywhere on the active video window to start drawing the
CURVED ARROW. Move the cursor to the middle position to
create the curve, then move the cursor to the end position and
click – the arrowhead will appear on the end of the curved line.
To change the CURVED ARROW properties, select the SELECT tool, double click on
the CURVED ARROW to bring up the CURVED ARROW Properties Menu, and
make the desired changes.
STICK MAN
The STICK MAN tool can be used to illustrate body positions
throughout the swing for a student. To use the STICK MAN, Right
Click anywhere on the Video Window, Select NEW -> STICK
MAN, then click anywhere on the active video window to drop a
STICK MAN on the screen. Several STICK MEN can be dropped
on the screen. Use the SELECT tool to bring up STICK MAN’s
anchor points and manipulate the swing positions.
38
SWAY TOOL
The SWAY TOOL is used to illustrate sway, or lateral movement,
through the golf swing. To use the SWAY TOOL, Right Click
anywhere on the Video Window, Select NEW -> SWAY TOOL, then
click on the center of the golfer’s head to position the SWAY TOOL.
Most often, it will be necessary to fine-tune the positioning of the
SWAY TOOL. Grab the SELECT tool and click on any of the
objects in the SWAY TOOL. This will bring up the object markers
where the user can reposition the circle on the head and/or widen or
narrow the lines.
OVERLAY
OVERLAY allows the user to bring up a model swing side by side to
another player in a video window. OVERLAY is more than side-by-side
compare. To use the OVERLAY tool, click on the OVERLAY icon from
the main interface window and choose the OVERLAY swing to drop
on to the active video window. Click and drag on top of the overlay figure to
reposition on screen. Using the OVERLAY with SYNCHRO will allow the user to
show the swings in each position at the same time.
Up to eight OVERLAY Swings can be programmed to be available through the main
screen. GA-VASP will come with eight model OVERLAY swings. The user has the
ability to change the order of these OVERLAYS by clicking FILE -> SET
PREFERENCES -> FAST OVERLAYS tab. Here, the user determines the order of
OVERLAYS and determines their Swing Descriptions as they will appear on screen.
FAST VIDEOS
FAST VIDEOS gives the GA-VASP user the ability to identify up to
eight model golf swings that can be instantly accessed without having
to go through the LOAD video process. To access the selected FAST
VIDEOS, the user clicks on the FAST VIDEOS icon located on the
39
main interface and then chooses one of the FAST VIDEOS to instantly call up to the
active video window. Up to eight FAST VIDEOS may be programmed in GA-VASP.
The eight swings (video files) are identified by clicking FILE -> SET PREFERENCES
-> FAST VIDEOS, then click BROWSE to locate the Video Files (Swings), enter
TITLE (Description), and click check box to make active.
KEY FRAMES
The KEY FRAMES tool displays the eight KEY FRAMES of the golfer
in the active video window, along with any graphics currently
illustrating the swing. The eight KEY FRAMES are defined by the
IMPACT TABS.
Hint: PRINT the KEY FRAMES as a handout for customer promotions, corporate
events, and standard lessons.
MOVE (COMPARING VIDEOS)
The MOVE tool allows the user to move a video left or right in order to
center its position in a compare video window, such as in side-by-side
compare. To use the MOVE tool, click on the MOVE icon, go to the
active video window, and hold down on the left mouse button to drag
the video left or right within the compare screen.
40
PRINTING
The PRINT tool allows the user to PRINT whatever is currently being
shown in the video window, along with text and custom graphics, such
as business logos.
To use the PRINT tool, click on the PRINT icon located at the bottom right of the
main interface. This will bring up the VIDEO PRINT DETAILS box, where the user
can type in unique text statements to be printed on the PRINT OUT or hit PRINT for
an immediate PRINT out without text. The user can also call up saved phrases from
this window. To call up a saved phrase, click on the down arrow, view the available
list and click on the statement of choice. To enter several phrases, enter the first line
of text and then click on the line below to move the active field to enter another line of
text. This process can be repeated for several lines.
To save text phrases for quick call up later, click ADD PHRASE. This will bring up
the PHRASE RECORDS Dialogue box. Enter a Phrase and Click OK to save. To
enter a new Phrase, click NEW and type another phrase. Click OK to save. This
process can be repeated to enter and save several phrases. The saved phrases will
now be available from the VIDEO PRINT DETAILS box by clicking the down arrow.
41
To define the Title and Custom Graphics for the Printed Page, click FILE -> SET
PREFERENCES -> PRINTER. There, enter the Title for the Printouts, define the
Logo Header Bitmap, and define the Footer Bitmap artwork that will appear on each
printout. The Logo will appear at the top of the page, while the Footer will appear at
the bottom. The Logo Header should be 200x60, while the footer should be 200x32.
Either size can be increased or decreased, provided the aspect ratios are kept the
same.
FULL SCREEN
GA-VASP features a FULL SCREEN PLAYBACK and RECORD mode. To enter the
FULL SCREEN PLAYBACK mode, Right Mouse Click anywhere in the Active Video
window, click on FULL SCREEN from the drop menu. This will take the video
window into FULL SCREEN mode where the GA-VASP icons will no longer be visible
and the Video will occupy the entire screen. To enter FULL SCREEN mode in Full
Speed Playback or Slow Motion Playback, be sure to click the Playback Option prior
to entering FULL SCREEN mode. Use the Scrolling mouse buttons to advance and
reverse the video once in FULL SCREEN mode. A Right mouse click from the FULL
SCREEN mode will return the user back to the standard mode showing the GAVASP Main interface window. Note that FULL SCREEN mode works with only one
Video File at a time.
Single Camera Record in Full Screen
For SINGLE CAMERA RECORDING in FULL SCREEN mode, click on the top menu
item OPTIONS -> SINGLE CAMERA RECORD in FULL SCREEN. Click RECORD
42
and the system will revert to FULL SCREEN mode of a live image. Left mouse click
after the swing finish for Manual Recording, or if an impact trigger device is being
used, Recording will be automatic. As swings are recorded, they will be stored in the
buffer. Once finished, Right-Mouse Click to return to GA-VASP Main Interface
Window.
43
CHAPTER 7
WORKING WITH STUDENTS –
STUDENT DATABASE
STUDENT INFORMATION
The GA-VASP Student Database can hold the following student information under a
student listing: First Name, Last Name, Coach, Home Phone, Work Phone, Mobile
Phone, Address, Email Address, Handicap Information, Notes, and Video Files
(Swings). Once the information is entered, it is permanently stored in the Student
Database until otherwise updated or deleted by the user.
ENROLLING A NEW STUDENT
To ENROLL a NEW STUDENT, click on the STUDENT DATABASE icon
located on the right side of the GA-VASP main interface window. Click
NEW for a clean STUDENTS window and enter Player Name, Coach,
Phone Numbers, Address, Email Address, Handicap Information, and
Notes. Once the information has been entered, click SAVE.
LOCATING A STUDENT FILE
To locate a STUDENT FILE, click on the MAGNIFYING GLASS located next to the
Student SURNAME filed. This will bring up a listing of the students in alphabetical
order. Arrows allow the user to scroll up and down the list to find a specific student
file. Alternatively, the user may type in a letter, a few letters, or the entire last name
of the student in the SURNAME field and click SEARCH. This will bring up the
student listing, or a listing starting with the letter(s) that match the search. The user
can then click PREV (Previous) or NEXT to scroll through the names until the listing
is found.
44
EDITING A STUDENT FILE
To Update or EDIT a STUDENT FILE in the database, simply fill out the field(s)
accordingly. Once the updates have been entered, click SAVE or UPDATE. This will
automatically update the STUDENT LISTING with the new information.
DELETING A STUDENT
To DELETE a STUDENT from the database, locate the student file and click
DELETE. IMPORTANT NOTE! DELETING A STUDENT FILE from the database will
also automatically DELETE all video files and all information associated with that
STUDENT from the Database.
EMAILING A STUDENT
To send an email to a student, click on the Email icon located to the right of the Email
field. The student’s email address will automatically appear in the “TO:” line of the
user’s default email program, such as MS Outlook Express.
45
CHAPTER 8
INTERNET LESSONS
RECORDING AND EMAILING AN INTERNET LESSON
To RECORD an INTERNET LESSON, Select the RECORD icon
located on the right side of the GA-VASP main interface window. This
will bring up a Save As Dialogue Window to enter the file name for the
Internet lesson. Do not change the file type or file extension when
naming the lesson. Also, be sure to remember the file location/file path. Click SAVE
to start RECORDING the INTERNET LESSON. The INTERNET RECORD button
will stay activated, indicating that the INTERNET LESSON (REAL NETWORK FILE)
is being recorded. While the INTERNET LESSON is active and a microphone is
attached, everything said or done on screen is being copied to the REAL PLAYER
file. To stop Recording the REAL PLAYER file, left click on the INTERNET RECORD
icon. The REAL PLAYER file (Internet Lesson) is now complete. The REAL
PLAYER FILE can now be sent as an analysis including commentary to a student as
an E-mail file attachment. To view the lesson analysis file, the student needs to have
or download REAL PLAYER from www.realpayer.com. REAL PLAYER is free. Note:
A 3-minute analysis at default settings is under 1 Mega-byte.
Set Preferences
The user can adjust the settings for Internet Lessons to enable greater image quality
and/or frames per second. However, great caution must be used when choosing to
modify the default settings as any attempts to improve quality and/or frame rate may
be too great for the computer to process.
46
IMPORTING/EXPORTING VIDEOS
See CHAPTER 4, WORKING WITH VIDEOS, for more information on IMPORTING
and EXPORTING videos.
Working with a TRAVELING Student
A Student such as a Touring Golf Professional wanting to send a swing to a GAVASP user for swing analysis will need to obtain a version of GA-VASP “Student”
software (or the FULL VERSION of GA-VASP) for Swing/Video File Recording,
compression, and sending to the GA-VASP user (EXPORTING). The process will be
similar to the process explained in IMPORTING/EXPORTING Videos in CHAPTER 4.
Once the swing has been exported from GA-VASP, the typical method of sending
swing files is via email.
47
CHAPTER 9
MORE OPTIONS
STUDENT SOFTWARE
Student Software for Traveling Students can be made available. Contact your
GolfAchiever Sales Representative for Details.
Student CDs
Working in conjunction with Student Software, Student CDs can be made to allow
students the ability to view their golf swings when they get home from a lesson, as
well as archive their progress and review it over time. Contact your GolfAchiever
Sales Representative for Details.
HIDING THE TASKBAR
In order to provide a full screen window of GA-VASP (without the TASKBAR sitting in
front of the bottom portion of the GA-VASP Main Interface Window), it is necessary to
hide the TASKBAR. To hide the TASKBAR, click on an open area of the taskbar to
bring up an options menu. Select PROPERTIES and the TASKBAR and START
MENU PROPERTIES window will appear. Check AUTO-HIDE the TASKBAR from
the TASKBAR APPEARANCE section. This will hide the TASKBAR. When the user
wants access to the TASKBAR, move the cursor to the bottom of the screen and the
TASKBAR will appear.
INTEGRATED SYSTEMS
GolfAchiever II
The GolfAchiever II System is a Patented Laser Based Launch Monitor and Swing
Analyzer providing unparalleled accuracy and precision in the measurement and
reporting of all significant ball flight and golf swing data such as Ball Speed, Launch
48
Angle, Azimuth (Push or Pull in degrees), Carry Distance, Back Spin RPMs, Side
Spin RPMs, Club Speed, Club Path, Face Angle, and much more. GolfAchiever II
can be used indoors or outdoors and was designed to be portable, making it ideal for
golf instruction, training, and club-fitting.
The GolfAchiever II System is currently fully integrated with GA-VASP. When using
the GolfAchiever II with GA-VASP, the GolfAchiever II can serve as an IMPACT
TRIGGER every time a shot is hit and GA-VASP is in RECORD or MULTI-RECORD
mode. Additionally, the Swing and Launch data captured by GolfAchiever II are
available for on screen display. See Chapter 3, VIDEO RECORDING, for more
information.
GolfAchiever CAM
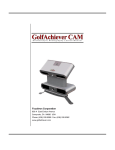
The GolfAchiever CAM is a Dual-Camera Stroboscopic-Photography based Launch
Monitor providing data on Ball Speed, Launch Angle, Azimuth (Push or Pull, in
degrees), Back Spin RPMs, Side Spin RPMs, Carry Distance, Average Carry
Distance, Off-Line, Flight Time, and more. G.A. CAM’s dual camera arrangement
provides superior accuracy by enabling it to reduce the parallax viewing error
inherent in existing single camera launch monitor systems. GolfAchiever CAM is
very portable and can be used indoors or outdoors, making it ideal for golf instruction,
training, and club-fitting.
Currently, the GolfAchiever CAM is being integrated with GA-VASP. Although not
ready with this release, as soon as GolfAchiever CAM is integrated, the software
update will be made available to GA-VASP customers.
GolfAchiever Force Plate
The GolfAchiever Force Plate was designed for Weight Shift Training in the Golf
Swing. During a swing, G.A. Force Plate graphically demonstrates the golfer’s
weight shift pattern and aggregate weight forces in real time. G.A. Force Plate can
also record and archive swing patterns for detailed analysis and follow up review.
With G.A. Force Plate’s Real Time Audio and Visual Feedback, students will learn to
shift their weight properly and know when they’ve got it right. G.A. Force Plate’s
durable hardware and easy to use software make it ideal for use in teaching and
training environments.
Currently, the GolfAchiever Force Plate is being integrated with GA-VASP. Although
not ready with this release, as soon as GolfAchiever Force Plate is integrated, the
software update will be made available to GA-VASP customers.
REPORTS
The REPORT GENERATOR can be used for reports from the database and as a
mail merge utility.
49
UTILITIES
Archive Videos
The Archive Videos function allows the user the ability to choose specific video files
to archive. Double click on the files to archive and select OK.
Create a name for the archive disk as below.
The Volume Name can be anything. However, be sure to remember to write the
volume name onto the archive disk.
Bulk Archive Videos
To BULK ARCHIVE VIDEOS, select a date and how many swings you wish to keep
in each pupil’s folder.
50
Create a name for the disk. See Archive Volume Details above.
Restore Video
To RESTORE archived swing(s) from an archive CD back to the hard drive, double
click on the swing(s) to be RESTORED.
The pop-up menu (as shown below) will come up telling you which disk the swing is
on.
Insert the appropriate disk as shown in the Archive Command and click OK.
Reindex
The RE-INDEX Option is for VASP tech support only.
PHYSIOLOGY
This GA-VASP add-on product can be used with any system. Including the U.K.’s
Ramsey McMasters’ life’s work on the way the body works in the golf swing, the
Physiology add-on is a software only product. Contact your GolfAchiever Sales
Representative for Details.
51
CONTACT US
FOCALTRON CORPORATION
General
830-A East Evelyn Avenue
Sunnyvale, CA 94086 USA
Tel: (408) 530-8588
Fax: (408) 530-8062
[email protected]
www.golfachiever.com
Support
(408) 530-8588, extension 2
[email protected]
Sales
(408) 530-8588, extension 1
[email protected]
PLEASE KEEP A RECORD OF THESE IMPORTANT NUMBERS
SERIAL # _________________________________________
KEY # ____________________________________________
52
NOTES:
53