1
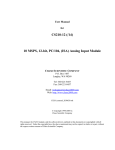
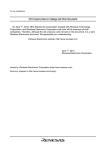
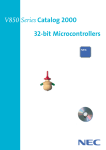
User's Manual SS-V850 In-Circuit Emulation System July 2001. NEC Electronics Inc. Printed in USA. All rights reserved. Document no. 50930 SS-V850 System User's Manual NEC, SS-V850, V850, V850/SA1, V853, and V853A are trademarks or registered trademarks of NEC Corporation in the United States and other countries. Green Hills is a trademark and MULTI is a registered trademark of Green Hills Software, Inc. Red Hat is a trademark or registered trademark of Red Hat, Inc. in the United States and other countries. Microsoft, MS-DOS, Windows, and Windows NT are trademarks or registered trademarks of Microsoft Corporation in the United States and other countries. All other marks are property of their respective holders. 2 SS-V850 System User's Manual Contents 1. Introduction.....................................................................................................5 2. Shipping Contents............................................................................................7 2.1 Main Board Package.........................................................................................................................7 2.2 Emulation Board Package.................................................................................................................8 2.3 Optional Accessories.........................................................................................................................8 3. System Settings...............................................................................................9 3.1 3.2 3.3 3.4 3.5 3.6 Main Board Settings........................................................................................................................10 JP1 Settings ....................................................................................................................................12 U30 Settings....................................................................................................................................13 Host Computer ................................................................................................................................13 Software Settings ............................................................................................................................13 Clock Settings .................................................................................................................................14 3.6.1 Clock Source ........................................................................................................................14 3.6.2 Clock Divider ........................................................................................................................15 3.6.3 CKSEL and PLLSEL.............................................................................................................15 3.7 Default Jumper Settings ..................................................................................................................16 3.8 Optional Features............................................................................................................................17 3.9 110 VAC Power Adapter...................................................................................................................17 3.10 DB-25 Straight-through Parallel Cable........................................................................................17 3.11 Emulation Board Settings ...........................................................................................................18 4. Hardware Assembly........................................................................................ 19 5. Hardware Setup ............................................................................................. 21 5.1 Bidirectional Parallel Port ................................................................................................................21 5.2 Parallel Port Driver ..........................................................................................................................22 5.2.1 Windows 95/98 Driver ..........................................................................................................22 5.2.2 Windows NT Driver...............................................................................................................22 5.3 SS-V85x Software...........................................................................................................................22 6. Software Setup .............................................................................................. 23 6.1 Installing the Software.....................................................................................................................23 6.1.1 Selecting Components .........................................................................................................24 6.1.2 Installing the Red Hat GNU Debugger..................................................................................26 6.2 Testing System Operation...............................................................................................................28 6.2.1 Creating A Shortcut for GDB ................................................................................................30 6.2.1 Creating A Shortcut for MULTI Debugger.............................................................................30 3 SS-V850 System User's Manual 7. Operation...................................................................................................... 34 7.1 GDB Debugger................................................................................................................................34 7.2 MULTI Debugger.............................................................................................................................40 8. Flash Programming ........................................................................................ 45 8.1 Overview .........................................................................................................................................45 8.2 Flash Device ...................................................................................................................................46 8.2.1 On-board Clamshell Socket................................................................................................46 8.2.2 DB9 Connector ...................................................................................................................46 8.2.3 FLASHDLL.EXE Program...................................................................................................47 8.2.4 Installation of FLASHDLL.EXE Program ............................................................................47 8.3 Execution of FLASHDLL.EXE Program...........................................................................................47 8.3.1 Selecting .PRC Parameter File...........................................................................................49 8.3.2 Verifying Hardware Capabilities Against PRC File Requirements ...................................... 49 8.3.3 Check for Flash Device Communication.............................................................................51 8.3.4 Flash Device Detection.......................................................................................................51 8.4 FLASHDLL.EXE Functions .............................................................................................................52 8.4.1 FLASHDLL Program...........................................................................................................52 8.4.2 Silicon Signature Check Operation.....................................................................................52 8.4.3 Blank Check Operation.......................................................................................................53 8.4.4 Erase Operation .................................................................................................................53 8.4.5 Write and Internal Verify Operation ....................................................................................53 8.4.6 Verify Against File Operation..............................................................................................54 8.4.7 Complete Programming Cycle............................................................................................54 8.4.8 Programming of a New Device...........................................................................................54 8.4.9 Programming a Different Device.........................................................................................55 8.4.10 Exiting the FLASHDLL Program .........................................................................................55 9. Troubleshooting............................................................................................. 56 4 SS-V850 System User's Manual 1. INTRODUCTION The SS-V850 in-circuit emulator (ICE) is a low-cost, full-function ICE for developing embedded systems based on NEC’s V850 microcontrollers. The SS-V850 supports comprehensive ICE functions and on-board flash programming. Figure 1. Main Board and Removable Emulation Board The SS-V850 system consists of the SS-V850-MC main board and a removable emulation board that provides family-specific product emulation. The PC-based system connects to the host computer via a bidirectional parallel port. The complete emulation system requires an SS-V850-MC main board and a targetspecific SS-V85x-EM removable emulation board, for example, an SS-V853A-EM board that emulates a V853 microcontroller or an SS-V850SA1-EM board that emulates a V850/SA1 device. The main board and the emulation board are packaged separately so that different combinations can be assembled. 5 SS-V850 System User's Manual Figure 2. System Block Diagram 6 SS-V850 System User's Manual 2. SHIPPING CONTENTS 2.1 Main Board Package • SS-V850-MC main board • 110 VAC power adapter • DB-25 straight-through cable • CD-ROM containing Red Hat GNU debugger package, demonstration programs, and documentation • Evaluation copy of Green Hills MULTI 2000 debugger Figure 3. Main Board Contents Power Adapter SS-V850-MC Main Board CD-ROM with auto-installer, NEC_Server software, Red Hat GNU debugger, flash programming GUI, µPDF703xxx device files, flash programming files, example programs, and user's manuals. 25-Pin Straight-Through Parallel Cable CD-ROM with evaluation copy of MULTI debugger from Green Hills Software 7 SS-V850 System User's Manual 2.2 Emulation Board Package • SS-V85x-EM removable emulation board • 100-pin ribbon cable (cable probe) Figure 4. Emulation Board Contents SS-V85x-EM 100-Pin Emulation Board 2.3 Ribbon Cable Optional Accessories • Emulation probe • Main board with 2 MB external extension memory • Emulation board with coverage memory options 8 SS-V850 System User's Manual 3. SYSTEM SETTINGS The features listed in Table 1 are implemented in SS-V850 hardware, except for external extension memory and coverage memory, which are optional. Table 1. Feature System Features Target Goal Implementation IROM / RAM 1 MB 1 MB program memory Alternate memory 1MB 2 MB alternate memory Additional 2 MB optional extension footprints Total 4 MB Trace memory 64K frames by 152 bits 64K frames by 152 bits Coverage memory Optional Optional on emulation board Branch and pass coverage Read/write C0 coverage M0 coverage SFR memory 1 KB by 2 bits 1 KB by 2 bits Flash programming interface On-board flash programming On-board flash programming Clamshell socket for flash device programming DB9 to user system for in-system programming By V85x EVAchip, host PC, or V85x realchip UART Host interface Bidirectional parallel port Bidirectional parallel port V85x realchip interface V853A and V850/SA1 interface Removable emulation board for all V85x devices Low -voltage emulation LVDD = 3.3-volt support SS-V85x-EM can support various voltages when interfaced with V85x EVAchip Probe 100-pin cable probe NEC-TQPAQ probe footprint Power supply Single 5-volt at 5A LVDD generated using voltage regulator Optional USB 2.0 interface (reserved for future use) Center-positive support (USA) Center-negative support (Japan) Built-in over-voltage detection circuit Physical structure Motherboard combined with emulation board 9 SS-V850 System User's Manual 3.1 Main Board Settings Figure 5. Main Board Layout Note: NEC Electronics ships the SS-V850-MC board with a protective plastic cover. When changing jumper settings, please unscrew the mounting screws and remove the cover. Apply your settings and then replace the cover when done. 10 SS-V850 System User's Manual Figure 6. Jumpers and Switches The SS-V850-MC operates with the SS-V85x-EM removable emulation board. Before connecting power to the main board, please ensure proper configuration of the hardware, as explained in Table 2. Table 2. Setting Main Board Settings Name Description Power supply JP1 Set to center-positive in U.S. Power switch S1 Turn on power for SS-V850 VDD / VDD_QS JP2, JP3 Use when SS-V85X-EM is not attached to main board Set to center-negative in Japan Remove when SS-V85X-EM is attached to main board Pushbutton reset S2 Push to initiate a system reset operation DB25 host interface J2 Connect to host PC DC power jack J1 Connect to power supply Alternate clock oscillator U30 Connect to user-installed clock Select alternate clock frequency via software Alternate host interface P2 Reserved for future use PLD programming port P1 NEC-only use 11 SS-V850 System User's Manual 3.2 JP1 Settings A power supply polarity detection circuit on the SS-V850 causes the red LED to flash when you connect a power supply with the wrong polarity. The over-voltage detection circuit causes the yellow LED to flash if you connect a power supply with higher than 5 VDC power. Figure 7. J1 Power Supply Polarity and Over-voltage Detection Circuits Reverse Polarity Detect 2 4 6 JP1 1 3 S1 Red Light Flashes When Reverse Polarity Detected High Voltage Detect Flashing Red Yellow Light Flashes When High Voltage Detected 5 GND Flashing Yellow For Center-Positive Supply Connect 1-3, 2-4 For Center-Negative Supply Connect 3-5, 4-6 Vcc GND GND Table 3. JP1 Settings Setting Name Description Power supply JP1 Keep power switch (S1) in off position Move jumper block (JP1) to select desired power supply polarity Connect JP1 1-3 and 2-4 to select center-positive (for most power supplies in the U.S.). Connect JP1 3-5 and 4-6 to select center-negative (for most power supplies in Japan). Connect the power supply to the J1 power jack. If the red LED flashes, disconnect the power supply and set JP1 to the reverse polarity. If the yellow LED flashes, disconnect the power supply and replace it with one that is 5 VDC. Turn on the S1 power switch and wait for the green light to indicate that power is on and the system is operational. 12 SS-V850 System User's Manual 3.3 U30 Settings The standard oscillator on SS-V850-MC supplies 6.667 MHz to the CPU. Typically, the on-chip phase-locked loop (PLL) multiplies this clock to produce the main system frequency of 33.33 MHz. To use a nonstandard frequency up to 66.67 MHz, install an alternate clock oscillator and then select the clock type and frequency as described in Section 3.5, "Software Settings." Table 4. U30 Settings Setting Name Description Alternate clock oscillator U30 Use a half-size clock oscillator, DigiKey part number CTXnnn-ND, where nnn = clock frequency Use caution when selecting the frequency of the alternate clock oscillator and the settings for the CKSEL and PLLSEL inputs to the emulation CPU. 3.4 Host Computer The SS-V850 communicates with an IBM-compatible host computer through a standard bidirectional parallel port. Connect the DB-25 male-to-male straight-through cable to J2 on the SS-V850 and to LPT1 on the computer. 3.5 Software Settings SS-V850 settings that affect hardware functionality are defined upon launching of the LV8HW.INI initialization file, located in the working directory from where the debugger is launched. After software installation, the LV8HW.INI file resides in NECEL/NECBox, but you should copy the file to a working directory. The LV8HW.INI file is an ASCII file divided into sections with headings specified within brackets. (Currently, only the [Clock] section is supported.) Within each section, individual settings contain a parameter, an equal sign, and a value, as shown in Figure 8. Figure 8. Example LV8HW.INI File : [Clock] ClockSource=CLK_6MHZ ClockDivider=1 ClockSelect=PLLX5 13 SS-V850 System User's Manual 3.6 Clock Settings Three different settings affect clock rate: the clock source setting, the external clock divider setting, and the clock selection settings of the CKSEL and PLLSEL inputs to the emulation CPU. 3.6.1 Clock Source The SS-V850 uses one of three clock sources: the standard 6.667-MHz system oscillator, the user-installed alternate clock oscillator, or a target-supplied clock to the X1 terminal of the probe. The ClockSource parameter is specified in the [Clock] section of the LV8HW.INI file. Table 5. Setting ClockSource Settings Description ClockSource=CLK_6MHZ Standard system 6.667 MHz oscillator (default) ClockSource=CLK_ALT Alternate oscillator installed in U30 ClockSource=CLK_TX1 Supplied by target at X1 terminal of the probe The CLK_TX1 setting requires the clock source from the target system to be a driven clock, rather than a crystal/capacitor circuit connected to the X1 and X2 terminal because the SS-V850 system does not drive the X2 terminal. NOTE: If there is no driving clock for the source selected (for example, CLK_ALT is selected, but there is no oscillator in U30), the emulation CPU generates its own clock of about 1 MHz. 14 SS-V850 System User's Manual 3.6.2 Clock Divider Each clock source can be divided by hardware that is external to the emulation CPU (µPD703091R) with division factors of 1, 2, 4, 8, or 16. For example, 6.667 MHz can be divided by 4 to produce an input clock to the emulation CPU of 1.667 MHz. If a 40 MHz oscillator is installed in U30, and you specify division by 8, the input clock to the emulation CPU is 5 MHz. Table 6 shows the input frequency for each possible source. Table 6. Setting ClockDivider Settings Source=CLK_6MHZ Source=CLK_ALT Source=CLK_TX1 1 (default) 6.667 MHz ALT TX1 2 3.333 MHz ALT/2 TX1/2 4 1.667 MHz ALT/4 TX1/4 8 0.833 MHz ALT/8 TX1/8 16 0.417 MHz ALT/16 TX1/16 3.6.3 CKSEL and PLLSEL The ClockSelect parameter controls CKSEL and PLLSEL, as shown in Table 7. These pins control operation of the on-board clock control circuitry on the emulation CPU. The emulation CPU, like devices in the V850 family, has a PLL circuit that can multiply the input clock by a factor of 1 or 5, depending on the setting of PLLSEL. The CKSEL pin controls whether the input clock is used directly or routed through the PLL for multiplication. Table 7. ClockSelect CKSEL and PLLSEL Settings CKSEL PLLSEL PLLx5 (default) 0 1 Fx = input clock x 5 PLLx1 0 0 Fx = input clock DIRECT 1 Don’t care (1 is set) Fx = input clock 15 System Clock SS-V850 System User's Manual Clock frequencies for the standard system oscillator are shown in Table 8. Table 8. Standard Clock Frequencies ClockSelect ClockDivider PLLx5 (default) PLLx1 DIRECT 1 33.333 MHz 6.667 MHz 6.667 MHz 2 16.667 MHz 3.333 MHz 3.333 MHz 4 8.333 MHz 1.667 MHz 1.667 MHz 8 4.167 MHz 0.833 MHz 0.833 MHz 16 2.083 MHz 0.417 MHz 0.417 MHz If a 40 MHz oscillator is installed in U30, the ALT frequency is 40 MHz, and the clock frequencies are as shown in Table 9. Table 9. Alternate Clock Frequencies ClockSelect ClockDivider PLLx5 (default) PLLx1 DIRECT 1 200 MHz *** 40 MHz 40 MHz 2 100 MHz *** 20 MHz 20 MHz 4 50 MHz 10 MHz 10 MHz 8 25 MHz 5 MHz 5 MHz 16 12.5 MHz 2.5 MHz 2.5 MHz *** CAUTION: Note that with these settings, you can select a system clock value above the maximum 66 MHz allowable. Do not select a system clock greater than 66 MHz because operation of the SSV850 is not guaranteed under such conditions. 3.7 Default Jumper Settings NEC Electronics ships the SS-V850-MC main board with the following default settings. • JP1:3-5 and JP1:4-6 short for center-negative power supply • JP2 and JP3 open to operate with the SS-V85X-EM emulation board All other jumpers are open. 16 SS-V850 System User's Manual 3.8 Optional Features Alternate memory on the SS-V850-MC main board can be extended by an additional 2 MB. These additional memory devices are factory-installed. The SS-V850-EM emulation board also can be equipped with coverage memory. Contact your local NEC representative to learn more about these optional features. 3.9 110 VAC Power Adapter The 110 VAC power adapter that generates 5 VDC for the SS-V850 emulator. The adapter does not supply power to the target system. Figure 9. Power Adapter Note: The 5 VDC connector has the center pin negative. 3.10 DB-25 Straight-through Parallel Cable The standard straight-through parallel cable connects the SS-V850 emulation system to the host PC. Figure 10. Parallel Cable 17 SS-V850 System User's Manual 3.11 Emulation Board Settings The emulation board allows the emulator system to emulate a specific microcontroller. For instance, the SS-V853A-EM emulation board, together with the SS-V850-MC main board, emulates the V853A microcontroller. For information about how to configure the emulation board, please consult the SS-V85x-EM User’s Manual (document no. 50931). Figure 11. Emulation Board Layout Figure 12. 100-Pin Ribbon Cable (Cable Probe) 18 SS-V850 System User's Manual 4. HARDWARE ASSEMBLY The SS-V850 emulator is shipped in two packages: the SS-V850-MC main board package and the SS-V85X-EM removable emulation board package. This section explains how to assemble, connect, and configure the hardware. Figure 13. Hardware Components Power Adapter Parallel Cable V850-MC Main Board 100-Pin Ribbon Cable V85X-EM Emulation Board TEC Emulation Probe Cable Target System 19 SS-V850 System User's Manual First connect J3 and J4 of the main board to the corresponding P3 and P4 connectors of the emulation board as shown in Figure 14. Figure 14. Board Assembly 1. Connect parallel cable to connector J2 on the main board and to the parallel port of your computer. 2. With power switch S1 off, connect the power supply to the J1 power connector. 3. Proceed with software installation. 20 SS-V850 System User's Manual 5. HARDWARE SETUP This section explains how to connect and test the hardware. 5.1 Bidirectional Parallel Port Operation of the SS-V850 requires a PC with a bidirectional parallel port. Parallel port addresses and modes vary from one computer to another and for help with specific systems, please call the technical hotline at 1-800-366-9782. Most new PCs have one parallel port with a DB-25 female connector on the back of enclosure, with the parallel port usually configured as LPT1 with a base address of 0378H. Some PCs have add-in cards or more than one parallel port in the base system. In those cases, determine from your system documentation which port is LPT1. To check the mode of the parallel port, run a hardware setup program. In some systems, the program may be invoked by pressing a particular key or key combination during bootup. In other systems, it may be possible to invoke the program from the Windows operating system. Check your computer system documentation for information about how to invoke the hardware setup program. In the hardware setup program, it is usually possible to set the parallel printer port to one of several modes. The names of these modes may vary. • Standard output-only mode only allows output of data to a printer. It does not allow the input of data necessary for bidirectional communication and therefore does allow operation of the SS-V850. • Standard bidirectional or PS2 mode allows bidirectional communication on the parallel port and should be selected for use with the SS-V850. • ECP mode allows for higher speed bidirectional communication, but it should not be selected if bidirectional or PS2 mode is available. For systems without bidirectional or PS2 mode, try selecting ECP mode. Operation of the SS-V850 system may be possible in this mode, but it is not guaranteed. • EPP mode allows for extended capabilities on the parallel port, but it should not be selected if bidirectional or PS2 mode is available. For systems without bidirectional or PS2 modes and ECP mode, you can try selecting EPP mode, but operation of the SS-V850 is not supported in this mode. 21 SS-V850 System User's Manual Using the hardware setup program, set the computer parallel port to bidirectional or PS2 mode. It may be possible to view and change the I/O port addresses assigned to LPT1 using the hardware setup program. If so, verify that LPT1 is set to the base address of 0378H. If another address is set, change it, if possible, to 0378H. 5.2 Parallel Port Driver 5.2.1 Windows 95/98 Driver The msip.vxd driver loads automatically during software installation. 5.2.2 Windows NT Driver 1. Log in as "Administrator." 2. Locate NECEL/NTDRIVER/ tvichw32.inf on the CD-ROM. 3. Right-click tvichw32.inf and choose Install to install vchw11.sys in WinNT\Systems32. Restart your computer to load the driver. 5.3 SS-V85x Software SS-V85x-EM software has two major components: • Red Hat GNU and Green Hills MULTI debugger software • NEC low-level server software and flash programming software 22 SS-V850 System User's Manual 6. SOFTWARE SETUP The CD-ROM for the SS-V850-MC main board contains the items shown in Figure 15. Figure 15. CD-ROM Contents → → → → → → → 6.1 Demo programs for Red Hat GDB and MULTI debuggers Demo programs for MULTI debugger Demo programs for Red Hat GDB debugger Flash programming files User's manuals in PDF Microsoft Windows NT driver Red Hat GNU compiler/debugger software Installing the Software This section explains how to install the software. 1. Insert the CD-ROM in your CD-ROM drive. 2. Open Windows Explorer and locate NECEL/SETUP.EXE. Double-click SETUP.EXE and follow the prompts. 23 SS-V850 System User's Manual 6.1.1 Selecting Components The Select Components dialog box allows you to install the MULTI debugger from Green Hills Software (GHS) and the GNU debugger (GDB) from Red Hat, Inc. 6.1.1.1 Installing Green Hills MULTI Debugger The MULTI debugger shipped with the SS-V850 system is an evaluation copy. To purchase an official copy, please contact Green Hills Software directly. 1. Select GHS debugger and then click NEXT. 2. If the MULTI debugger is not installed, select Don’t continue and click NEXT to exit the setup. Install the MULTI debugger and then restart the installation. If MULTI is installed, select Continue and then click NEXT. 24 SS-V850 System User's Manual 4. Specify the path where the MULTI debugger resides. Click NEXT to continue or Browse to specify a different path. 5. Click YES to accept the modified autoexec.bat or NO to return to the previous box. 25 SS-V850 System User's Manual 6. 6.1.2 Click Finish to complete installation and restart your computer. Installing the Red Hat GNU Debugger 1. Select GDB debugger and then click NEXT. 26 SS-V850 System User's Manual 2. Click NEXT to continue or Browse to specify a different path. 3. Click YES to accept the modification to autoexec.bat or NO to return to the previous box. 4. Click Finish to complete the installation and restart your computer. 27 SS-V850 System User's Manual 6.2 Testing System Operation 1. Connect the SS-V850 emulation system to your computer and then turn on power switch S1. 2. From the desktop of your Windows operating system, click the Start button. 3. Click Programs and then select the MS-DOS 4. Execute MDI.EXE to launch the NEC_Server Cmdbox. 5. From the Dialog dialog box, select a device file and click OK. 28 prompt. SS-V850 System User's Manual 6. If the hardware and software are working properly, the program displays Connected To In-Circuit Emulator. 7. If the hardware and software are not working properly, the program displays Failed to connect to In-Circuit Emulator. In that case, close the application and troubleshoot the problem as described later in Section 9. 29 SS-V850 System User's Manual 6.2.1 Creating A Shortcut for GDB 1. From Windows Explorer, locate C:\NECEL\NECBOX\v850ice000310\H-i686-cygwin32\bin\v850e-elf-gdb.exe. 2. Right-click v850e-elf-gdb.exe. 3. Click Send To and then click Desktop[create shortcut]. 4. Right-click the newly created icon. 30 SS-V850 System User's Manual 5. Click Properties and then click the Shortcut tab. 6. Specify the project path in the Start-in field and then click OK. 31 SS-V850 System User's Manual 6.2.2 Creating A Shortcut for the MULTI Debugger 1. From Windows Explorer, locate C:\GREEN\ multi.exe. 2. Right-click multi.exe. 3. Click Send To and then click Desktop[create shortcut]. 4. Right-click the newly created icon. 32 SS-V850 System User's Manual 5. Select Properties. 6. Specify the project path in the Start-in field and then click OK. 33 SS-V850 System User's Manual 7. OPERATION 7.1 GDB Debugger Operation This section explains how to operate the SS-V850 emulator system. 1. From your desktop, double-click the GDB icon. 2. In the Source window, click File and then click Open. 34 SS-V850 System User's Manual 3. In the Load New Executable dialog box, select an *.out file and then click Open. 4. When the source code is visible in the Source window, click the Run icon on tool bar. 35 SS-V850 System User's Manual 5. In the Target Selection dialog box, select V850ICE. 6. Click the check boxes to set target options as explained in Section 7.1.1. and then click OK. 7. Select a device file, for example, DF3003.800, and then click OK. 36 SS-V850 System User's Manual 8. The program executes in the Source window and then stops at breakpoints specified in the target options (Section 7.1.1). 37 SS-V850 System User's Manual 9. Click the Continue icon to continue program execution. 10. To halt execution, click the Stop icon. 38 SS-V850 System User's Manual 7.1.1 Target Options From the Target Selection dialog box, you can set breakpoints and other options for the target program. Options are stored in memory and do not have to be set each time you launch the debugger. 1. For example, click Set breakpoint at ‘main’ to set a breakpoint at the beginning of the ‘main’ function in the program. 2. Click More Options to set additional options, including Attach to Target, Download to Program, Run Program, and Continue from Last Stop. 39 SS-V850 System User's Manual 7.2 MULTI Debugger Operation 1. From your desktop, double-click the MULTI icon. 2. In the Builder for default.bld dialog box, click File and then click Open Project in Builder. 40 SS-V850 System User's Manual 3. In the Load which project? dialog box, select a build (*.bld) file and then click Open. 4. When the file name and file type are visible in the Builder for main.bld window, click the Connect icon. 41 SS-V850 System User's Manual 5. In the Remote command? dialog box, select 850ice32 and then click OK. Automatic connection to the target can be specified in the .RC script file along with the name of the project (for example, main.rc). Afterward, when you launch the MULTI debugger, the NEC_Server connects to the target automatically. 42 SS-V850 System User's Manual 6. Click Debug to launch the MULTI debugger. 7. When the source code appears in the Builder for main.bld window, download the executable code. 8. Type load in the Command window and then press Enter. 43 SS-V850 System User's Manual 9. Click the Go icon to execute the program. When the program stops at ‘main’, click the GO icon to resume program execution. 11. To stop program execution, click the Halt icon or click the Halt execution of program command on the task bar. 44 SS-V850 System User's Manual 8. FLASH PROGRAMMING 8.1 Overview The SS-V850 system performs flash programming for NEC microcontrollers in the V850 family and other families, depending on the emulation board used and the characteristics of the device to be programmed. The circuitry and connectors mounted on the emulation board support flash programming of V850 devices corresponding to that particular board. For some devices, the VDD and VPP programming voltages may be different. For example, the µPD70F3025A in the V853A subfamily requires VDD at 5 VDC and VPP at 10 VDC; the µPD70F3017A in the V850/SA1 subfamily requires VDD at 3.3 VDC and VPP at 7.6 VDC. The SS-V853A-EM emulation board supports VDD at 5 VDC and VPP at 10 VDC and is suitable for programming the µPD70F3025A and other V853A devices requiring these voltages. The board is also suitable for programming of 8-bit K0 and K0S microcontroller families that require these voltages. However, the board does not program the µPD70F3017A microcontroller, which requires VDD at 3.3 VDC and VPP at 7.6 VDC. The SS-V850SA1-EM emulation board for V850/SA1 microcontrollers supports VDD at 3.3 VDC and VPP at 7.6 VDC and is suitable for programming of the µPD70F3017 and other V850/SA1 devices requiring these voltages. The board does not program the µPD70F3025A or other devices requiring VDD at 5 VDC and/or VPP at 10 VDC. Table 10 lists supported devices grouped by VDD and VPP programming voltages and emulation board. Table 10. Programming Voltages Emulation Board SS-V853A-EM SS-V850SA1-EM VDD voltage 5 VDC 3.3 VDC VDC voltage 10 VDC 7.6 VDC V850 devices supported µPD70F3003 µPD70F3003A µPD70F3025A µPD70F3017A µPD70F3040 µPD70F3102 µPD70F3102A µPD70F3107 µPD78F3102A Other devices supported K0S family µPD78F9xxx K0 family µPD78F0xxx 45 SS-V850 System User's Manual 8.2 Flash Device The SS-V850 system has an on-board clamshell socket for loose devices and a DB-9 connector for off-board programming of devices. Off-board devices may be in the target system or in a flash-programming adapter such as the PA-80GG. 8.2.1 On-board Clamshell Socket Flash devices may be inserted or removed from the on-board clamshell socket while power is applied to the SS-V850. The socket has no power unless a flash programming operation is in progress. 1. To use the on-board clamshell socket, lift its latch and insert the flash device. 2. Orient pin 1 of the flash device with the pin 1 mark on the emulation board, which is along the edge of the socket closest to the edge of the emulation board and at the left side of that edge. 3. Close the latch on the clamshell socket and begin flash programming. 8.2.2 DB9 Connector The DB9 connector serves as an interface to an off-board device for three-wire serial I/O programming (VPP pulses = 0). • To use the DB9 connector to program devices in a flash-programming adapter, first ensure that the adapter is wired for the target device to be flash programmed. Refer to the user’s manual for your chosen adapter and then consult NEC technical support about proper wiring. • To use the DB9 connector to program a target device soldered or socketed in a target system, confirm that the target system is connected properly and able to isolate flash programming signals from target system signals. In normal operation, the target device's VPP, RESET, X1, X2, SI, SO, and SCK pins are connected to target system resources. For flash programming, you must disconnect these signals from the target system and connect them to the DB9 connector, either by changing jumpers or by other methods of switching signals. The system supports driving of VDD_FLSH (pin 7 of the DB9 connector) either from the SS-V850 system or by the target system. Upon initialization of the software, the SS-V850 system senses VDD_FLSH to determine whether voltage is applied. If VDD _FLSH is nonzero, the system does not drive this pin. If VDD_FLSH is zero, the SS-V850 drives VDD_FLSH at the start of a flash programming operation with the appropriate VDD voltage. 46 SS-V850 System User's Manual The device socket has no power during a flash programming operation. Therefore, it is not necessary to insert or connect a flash device before starting the FLASHDLL program. You may insert or remove a device at any time, except during flash programming. For connection of flash programming signals to a target device in a target system, please see the flash programming section of the appropriate device data sheet. 8.2.3 FLASHDLL.EXE Program The 32-bit, Windows-based FLASHDLL.EXE program operates the flash programming circuitry of the SS-V850 emulation system and other emulators supplied by NEC, such as the K0S-LCE and K0-LCE low-cost emulators. The FLASHDLL program operates independently of the software debuggers and should not be used while the SS-V850 system is under control of a software debugger. Conversely, the software debuggers should not be used while the SS-V850 system is under control of the FLASHDLL program. 8.2.4 Installation of FLASHDLL.EXE Program Install the FLASHDLL.EXE program in the directory containing the LV8HW.DLL file and other system files. From the Start menu, click the shortcut to FLASHDLL.EXE, which should read <dir>/FLASHDLL.EXE LV8HW.DLL, where <dir> is the directory where the FLASHDLL.EXE program resides. If the shortcut does not exist, create one in the location of your choice. 8.3 Execution of FLASHDLL.EXE Program You can execute FLASHDLL.EXE in one of three ways. • Click the shortcut on the Start menu to launch FLASHDLL.EXE and load the LV8HW.DLL component • Enter a FLASHDLL LV8HW.DLL command after an MS-DOS prompt to start the program and load the LV8HW.DLL component • Double-click the file name in Windows Explorer 47 SS-V850 System User's Manual In the last case, double-clicking the file name in Windows Explorer, the program prompts you to specify a DLL file. In the Open dialog box, select LV8HW.DLL and click OK. The name and location of the .DLL file are stored for future invocation. The program then attempts to communicate with the SS-V850 system. If communication is successful, the program asks you to specify a parameter file. If communication is unsuccessful, an error occurs. Click Yes to terminate the program. Check the power connections and verify that the SSV850 system is connected properly to your computer before attempting to restart the program. 48 SS-V850 System User's Manual 8.3.1 Selecting the Parameter File After the system loads the LV8HW.DLL file, the program prompts you to specify the .PRC parameter file that contains the characteristics of the device to be programmed. Doubleclick the file name to open it for the first time. Otherwise, click Open to open the last .PRC file loaded. 8.3.2 Verifying Hardware Capabilities Against .PRC File Requirements After you select the parameter file, the FLASHDLL program checks the VDD and VPP values specified in the parameter file for the selected device against the VDD and VPP voltages for the emulation board being used. If the VDD voltage of the board does not match the device specifications in the parameter file, the program displays a DLL error message. Click OK to terminate the FLASHDLL program. 49 SS-V850 System User's Manual If the board's VDD voltage matches, but the VPP voltage doesn't, the resulting action depends on how far apart the board VPP and device VPP are. If they differ by more than 0.3 volts, the program displays the following message. Click OK to terminate the program. If the VPP voltages are within 0.3 volts of each other, you may be able to program the target device, depending on device specifications, since there is typically a range of at least ±0.3V for VPP on NEC flash devices. Check the data sheet for the device you are programming for VPP voltages allowed. The program lists the mismatched voltages, allowing you to ignore the mismatch if you so choose. Click NO to exit the FLASHDLL program or YES to ignore the VPP mismatch and continue FLASHDLL program execution. 50 SS-V850 System User's Manual 8.3.3 Check for Flash Device Communication After initialization of communication with the SS-V850 system, the FLASHDLL program checks for communication with a flash device. If it finds no flash device in the clamshell socket or connected to the DB9 connector, the program sends an error message. Click OK to exit the program. If a flash device is inserted in the clamshell socket or connected to the DB9 connector, check for proper pin orientation or signal connection. Since parameters for initialization of the flash device are taken from the .PRC file, it may be possible that the device does not match the .PRC file specifications and cannot be initialized with those parameters. Check that the specified .PRC file matches the device in the socket or connected to the DB9 connector. 8.3.4 Flash Device Detection If the device can be initialized, but the silicon signature in the device does not match the one specified in the .PRC file, you receive an error message stating, for example, that the device detected a 70F3025A but the PRC file specified the µPD78F9177. In this case, click YES to return to the previous dialog box where you can select another .PRC file. Otherwise, click NO to exit the FLASHDLL program. 51 SS-V850 System User's Manual 8.4 8.4.1 FLASHDLL.EXE Functions FLASHDLL Program Once the FLASHDLL program verifies communication with the flash device and opens the .PRC file, it displays the Flash Programming dialog box where you can choose to perform a silicon signature check (SSig Chk), blank check (Blank Chk), Erase, Write, or Verify operation individually or in sequence (Program Sequence). 8.4.2 Silicon Signature Check Operation When you click SSig Chk, the flash programmer checks the signature of the device against the specified parameter file and then displays the part number in the Device box. The Status box briefly shows Ssig Checking… while the operation is in process. If the device signature does not match the parameter file, the program displays an error message and the Device box is blank. 52 SS-V850 System User's Manual 8.4.3 Blank Check Operation 1. To perform a blank check on the device, click Blank Chk. 2. The Status box displays Blank checking…. 3. If the device is blank, the Status box displays Blank. 4. If the device is not blank, the Status box displays Device is not blank. 8.4.4 Erase Operation 1. To erase the entire device, click Erase. 2. Throughout the operation, the Status box shows Erasing…. 3. When the device is erased, the Status box displays Erased. 4. If an error occurs during the erase operation, the program sends a message indicating the type of error and the Status box displays Erase failed. 8.4.5 1. Write and Internal Verify Operation To program the device, click Browse... and select a file with data for writing. The FLASHDLL program currently supports two types of files. • .BIN files that contain a binary image of the data to be written, starting at address 000000 and ending with the last address of the write data • .HEX files that contain data in Intel hexadecimal format that specifies individual records of data with addresses and checksums 2. Click Write to program the device. Programming time varies depending on the size of the file being written, but the Status box displays Writing… throughout the operation. 3. After the program writes the data, it then performs an internal verify operation on the device. After completion, the Status box displays Written and verified. 4. If the program detects an error, it sends an error message and the Status box displays Write failed. 53 SS-V850 System User's Manual 8.4.6 Verify Operation 1. To verify the contents of a device against a file, click Browse…. 2. Select a file and then click Verify. The status box displays Verifying…. When you select this method of verifying, the program sends data to the flash device for all areas of memory, even those outside the area specified by the file. The time to perform a verify operation is generally no longer than the time needed to write a file. 3. After all the data is verified, the Status box displays either Verified or Verify failed, depending on whether the contents of the file exactly match the data in the flash device. 8.4.7 1. Complete Programming Cycle To automate the programming sequence, click Program Sequence to execute the silicon signature check, blank check, erase (if necessary), and write operations in sequential order. During these operations, the status box displays Ssig Checking, Blank Checking…, Erasing… (if the device is not blank), and Writing… as the program cycles through the individual operations. 2. After completion of the sequence, the Status box displays Written and verified. If the program detects an error at any step in the sequence, it displays an error message and aborts programming at that step. 8.4.8 Programming of a New Device Upon completion of any operation or sequence of operations, the program turns off VDD_FLSH and VPP power to the clamshell socket and DB9 connector so that you can safely remove the device from the unit. You can then insert a new device and select another operation. The program performs a silicon signature check on the new device to detect whether it matches the selected parameter file. Several devices may be programmed with the same data. 1. Select a file to be written. 2. Insert a device in the clamshell socket. 3. Click Program Sequence. 4. When programming is complete, remove the programmed device and return to step 2. 54 SS-V850 System User's Manual 8.4.9 Programming a Different Device The signature of the device inserted in the clamshell socket or connected to the DB9 connector is checked before every operation, to guard against accidental programming of the wrong device. If you wish to program a device other than the one specified in the current .PRC file, click Change Device Type and select a .PRC file to match the new device. 8.4.10 Exiting the FLASHDLL Program To exit the FLASHDLL program, click OK. 55 SS-V850 System User's Manual 9. TROUBLESHOOTING 9.1 Command Window Errors When NEC_Server launches for the first time from any working directory, the window appears gray. 1. To open the command window, click Q on the tool bar. 2. Quit the program. 3. Relaunch NEC_Server. 4. The program then saves the configuration in NEC.cfg in your local directory. 56 SS-V850 System User's Manual 9.2 Communication Errors The following message indicates that communication with the SS-V850 is not established. 1. Clicking No in response to the error message generates another error message: Failed to Connect to In-Circuit Emulator. 2. Exit the NEC_Server program. 3. Refer to Section 8.3 for information about how to troubleshoot programming errors 4. Clicking Yes in response to the error message exits the program. 5. Check the power supply connection and polarity setting. 6. Check the parallel cable connection and settings. 7. If communication is still unsuccessful, uninstall NEC_Server in My computer/Control Panel using the Remove Software command in your Windows operating system. 8. Reinstall the software 9. Restart the program. 10. If you still need help, call technical support at 1-800-366-9782. 57 SS-V850 System User's Manual For additional information, visit our web site at www.necel.com, call 1-800-366-9782 or fax 1-800-729-9288. NEC Electronics Inc. The information in this document is current as of July 2001. The information is subject to change without notice. For actual design-in, refer to the latest publications of NEC's data sheets or data books, etc., for the most up-to-date specifications of NEC semiconductor products. Not all products and/or types are available in every country. Please check with an NEC sales representative for availability and additional information. No part of this document may be copied or reproduced in any form or by any means without prior written consent of NEC. NEC assumes no responsibility for any errors that may appear in this document. NEC does not assume any liability for infringement of patents, copyrights or other intellectual property rights of third parties by or arising from the use of NEC semiconductor products listed in this document or any other liability arising from the use of such products. No license, express, implied or otherwise, is granted under any patents, copyrights or other intellectual property rights of NEC or others. Descriptions of circuits, software and other related information in this document are provided for illustrative purposes in semiconductor product operation and application examples. The incorporation of these circuits, software and information in the design of customer's equipment shall be done under the full responsibility of customer. NEC assumes no responsibility for any losses incurred by customers or third parties arising from the use of these circuits, software and information. While NEC endeavors to enhance the quality, reliability and safety of NEC semiconductor products, customers agree and acknowledge that the possibility of defects thereof cannot be eliminated entirely. To minimize risks of damage to property or injury (including death) to persons arising from defects in NEC semiconductor products, customers must incorporate sufficient safety measures in their design, such as redundancy, fire-containment and anti-failure features. NEC semiconductor products are classified into the following three quality grades: “Standard”, “Special” and “Specific”. The "Specific" quality grade applies only to semiconductor products developed based on a customer-designated “quality assurance program” for a specific application. The recommended applications of a semiconductor product depend on its quality grade, as indicated below. Customers must check the quality grade of each semiconductor product before using it in a particular application. "Standard": Computers, office equipment, communications equipment, test and measurement equipment, audio and visual equipment, home electronic appliances, machine tools, personal electronic equipment and industrial robots. "Special": Transportation equipment (automobiles, trains, ships, etc.), traffic control systems, anti-disaster systems, anticrime systems, safety equipment and medical equipment (not specifically designed for life support). "Specific": Aircraft, aerospace equipment, submersible repeaters, nuclear reactor control systems, life support systems and medical equipment for life support, etc. The quality grade of NEC semiconductor products is “Standard” unless otherwise expressly specified in NEC's data sheets or data books, etc. If customers wish to use NEC semiconductor products in applications not intended by NEC, they must contact an NEC sales representative in advance to determine NEC's willingness to support a given application. (Note) (1) "NEC" as used in this statement means NEC Corporation and also includes its majority-owned subsidiaries. (2) "NEC semiconductor products" means any semiconductor product developed or manufactured by or for NEC (as defined above). 58