1
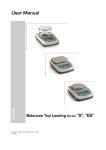
ELECTRONIC BALANCES
models
LB / LBA / LBI /
LBPT
LED version
USER’S MANUAL
Instrucciones LB / LBA / LBI / LBPT, LED version. rev 8
Page 1 of 42
SUMMARY
Summary …………………………………………………………………….
2
Installation instructions ..…………………………………………………… 3
Weighing pan assembly ...………………………………………………... 4-5
Keyboard and display ………………………………………………………
6
Inputs and outputs ………………………………………………………….
7
Inputs and outputs balance LBPT .....………………………………………. 8
Normal weighing ……………………………………………………………. 9
Calibration ………………………………………………………………...10-16
Tare function ……………………………………………………….…….… 17
Alphanumeric keyboard ……………………………………………….….. 18
Manual tare function .......…………………………………………………. 19
Weight units …………………………………………………………….….. 20
PC Interface selection …………………………………………………….. 21
Printer Interface selection ………………...……………………………… 22
Baud rate selection ……………….………………………………………. 23
Filters settings ……………………………………………………………... 24
Autozero function ..………………………………………………………… 25
Piececounting function …………………….…………………………... 26-30
V-Range function ...……………………………………………………….. 31
Determination of solid density for
balances with proper optional software …………………………….. 32
RS232 Interface characteristics ………………………………………. 33-35
Technical characteristics …………………………………….....…………. 39
Warranty .…………………………………………………………………... 41
Conformity declaration ……………………………………………………. 42
Instrucciones LB / LBA / LBI / LBPT, LED version. rev 8
Page 2 of 42
INSTALLATION INSTRUCTIONS
• Remove balance and accessories from the carton.
• Do not install the balance in a place with draughts, heavy thermic changes and
vibrations.
• Place the weighing pan and the support pan on the balance (see page 4-5).
• Level the balance using the level bubble and levelling feet located underneath the
case (see page 7-8 fig. 1a/1b).
• Connect power supply to connector 2 located on the rear panel of the unit (see page
7-8).
• Insert power cord into AC outlet, which shall be easily accessible; after few
seconds the balance will automatically switch on.
• Wait 30 minutes from switch on and calibrate the balance using the mass enclosed
in the package, following the instructions (page 10).
• Calibrate the balance again every time it is removed from previous place.
• Check balance calibration periodically.
• We recommend not to drop heavy objects on balance pan, in order to avoid
damages.
• Assistance service must be effected by specialized staff and the spare parts used
must be original.
Therefore, it is necessary to apply to the seller who sold the equipment.
•
Keep package in case the balance should be sent back to the factory for service.
Instrucciones LB / LBA / LBI / LBPT, LED version. rev 8
Page 3 of 42
WEIGHING PAN ASSEMBLY
Instrucciones LB / LBA / LBI / LBPT, LED version. rev 8
Page 4 of 42
WEIGHING PAN ASSEMBLY
Instrucciones LB / LBA / LBI / LBPT, LED version. rev 8
Page 5 of 42
KEYBOARD AND DISPLAY
Fig. 1 ELECTRONIC BALANCE LB/LBA/LBI
100.00
BEL
ENGINEERING
lb
oz
PRINT
ON
OFF
ct
MENU
g
TARE
CAL
Fig. 2 ELECTRONIC BALANCE LBPT
10000.0
lb
oz
ct
BEL
ENGINEERING
g
PRINT
MENU
CAL
TARE
ON
OFF
ON
OFF
ON/OFF key.
PRINT
It confirms selection from MENU key or
it controls printing.
MENU
It selects setup MENU’.
CAL
CALIBRATION key.
TARE
TARE key.
Indicator of selected weight UNITS.
Instrucciones LB / LBA / LBI / LBPT, LED version. rev 8
Page 6 of 42
Fig. 1a - Rear view
Weighing Pan
CONNECTOR 2
CONNECTOR 1
Levelling feet
9 Pin RS232
Interface Output
for PC/keyboard
and printer
Power supply
connector
B2
B1
Hook for weighing
under balance plan.
P.S. remove hook cap.
B1, B2 and B3 are screws
for balance closing
B3
Fig. 2a - Bottom view
Instrucciones LB / LBA / LBI / LBPT, LED version. rev 8
Page 7 of 42
ELECTRONIC BALANCE LBPT
Weighing pan
Fig. 1b - Rear view
CONNECTOR 1
9 Pin RS232
Interface Output
for PC/keyboard
and printer
CONNECTOR 2
Power supply
connector
Level bubble
Levelling feet
Hook for weighing
under balance plan.
P.S. remove hook cap.
Level bubble
Adjustable
feet
Fig. 2b - Bottom view
Instrucciones LB / LBA / LBI / LBPT, LED version. rev 8
Page 8 of 42
STAND BY
After having connected the balance to
BEL
.
ENGINEERING
MENU
lb
oz
PRINT
CAL
ct
ON
OFF
g
MENU
CAL
TARE
AC outlet, it is now in “STAND BY”
mode.
To bring the balance to working
conditions, press ON/OFF key.
To bring it in “STAND BY” mode, press
ON/OFF key again.
NORMAL WEIGHING
Load the good to weight on the pan and
92.00
BEL
read weight value on display.
ENGINEERING
lb
PRINT
oz
ct
MENU
ON
OFF
g
CAL
TARE
Instrucciones LB / LBA / LBI / LBPT, LED version. rev 8
Page 9 of 42
EXTERNAL CALIBRATION *
* (For all models except Analytical
balance).
The electronic reading balance takes
measurement of mass making use of
gravity (g). Difference in geographic area
and altitude will vary gravity acceleration
(g). Therefore, for accurate
measurement, scale must be adjusted to
the local environment. This adjustment is
--------
BEL
ENGINEERING
ON
OFF
lb
oz
ct
g
MENU
PRINT
CAL
TARE
accomplished by CAL key.
At empty pan, press CAL key.
Dashes are displayed.
200 Gr
BEL
ENGINEERING
lb
oz
PRINT
ct
When calibration weight value starts to
flash, load the weight on the pan.
ON
OFF
g
MENU
CAL
TARE
calib.
weight
The display will stop flashing, indicating
calibration weight value.
Wait for buzzer BEEP to confirm
calibration.
200.00
BEL
ENGINEERING
ON
OFF
lb
oz
PRINT
ct
g
MENU
CAL
TARE
Unload calibration weight from the pan.
The balance is ready for weighing
operations.
0.00
BEL
ENGINEERING
lb
PRINT
oz
MENU
ct
ON
OFF
g
CAL
TARE
calib.
weight
NOTE: if there is an interference during
calibration process, the message
“ERROR” will be displayed.
Instrucciones LB / LBA / LBI / LBPT, LED version. rev 8
Page 10 of 42
(*)Moreover, it is possible to calibrate the
balance with a calibration weight higher
than the one set.
To perform this sort of calibration,press
and keep CAL key pressed at empty pan
until the acoustic alarm will be
deactivated, then release the key and the
following string "- - - - -" will be displayed,
followed by the flashing message
"LOAD" .
-------
BEL
ENGINEERING
ON
OFF
lb
oz
ct
g
MENU
PRINT
CAL
TARE
Now load on the pan a weight equal or
higher than calibration weight set; the
balance will recognise as valid a weight
equal or higher than calibration weight as
long as it is a whole number in
comparison with the most meaningful
digit of calibration weight..
Example: if calibration weight is 200g, it
will be possible to calibrate the balance
with values from 200g,300g,400g up to
the highest limit of balance weighing
range.
peso
calib.
LOAD
BEL
ENGINEERING
ON
OFF
lb
oz
PRINT
ct
g
MENU
CAL
TARE
peso
calib.
The message "LOAD" on display will
stop flashing.
Once calibration has been effected, the
value of calibrated weight will be
displayed.
400.00
BEL
ENGINEERING
ON
OFF
lb
oz
PRINT
ct
g
MENU
CAL
TARE
Remove calibration weight.
The balance is ready for weighing
operations.
0.00
BEL
ENGINEERING
lb
PRINT
oz
MENU
ct
g
CAL
NOTE: if there is an interference during
ON
OFF
TARE
peso
calib.
calibration process, the message
“ERROR” will be displayed.
* (not for Analytical balances)
Instrucciones LB / LBA / LBI / LBPT, LED version. rev 8
Page 11 of 42
EXTERNAL CALIBRATION *
* (Only for Analytical balances
models).
--------
BEL
lb
oz
PRINT
ct
Press CAL key at empty pan.
ON
OFF
ENGINEERING
Dashes are displayed.
g
MENU
CAL
TARE
2
200 Gr
BEL
ON
OFF
ENGINEERING
lb
oz
PRINT
ct
g
MENU
CAL
TARE
As soon as calibration weight value
starts to flash, load calibration weight on
the pan.
calib
weight
-0-
BEL
ENGINEERING
lb
PRINT
oz
ct
MENU
ON
OFF
Wait for the flashing message “- 0 -“ to
TARE
be displayed.
g
CAL
Unload weight from the pan.
If calibration operation has been effected
0.0000
BEL
ENGINEERING
lb
PRINT
oz
MENU
ct
correctly, the balance will return to
ON
OFF
g
CAL
normal weighing conditions. Otherwise,
TARE
calibration’s value will keep on flashing
and the procedure will have to be
repeated starting from point “2”.
Instrucciones LB / LBA / LBI / LBPT, LED version. rev 8
Page 12 of 42
CALIBRATION MODE *
* These functions are available ONLY for models provided with servomotor and internal
calibration mass.
The balance effects mass measurements making use of gravity (g). Differences in geographical
areas and in altitude will vary gravity acceleration (g).
Therefore, in order to have precise measurements, the balance must be adjusted to local
environment. This adjustment is accomplished by calibration function.
There are 4 calibration modes available :
1. Autocalibration
2. Internal calibration
3. External calibration
4. Technical calibration
1. AUTOCALIBRATION
The balance autocalibrates through internal calibration weight every 30 minutes, after checking by
microprocessor that other weighing operations are not being effected. In this mode, in addition to a
calibration every 30 minutes, it is possible to effect calibration with internal calibration weight by
pressing CAL key at any time, being sure there is no weight loaded on the pan.
2. INTERNAL CALIBRATION
The balance autocalibrates through internal calibration weight ONLY on user’s request by pressing
CAL key. Calibration every 30 minutes is excluded.
3. EXTERNAL CALIBRATION
The balance calibrates through external calibration weight (NOT provided on models with internal
calibration weight).
4. TECHNICAL CALIBRATION
This function allows re-storing of internal calibration weight value whenever intervention of
assistance-checking-service require it.
ATTENTION : this procedure must be effected using only calibration weight in class E2.
NOTE: for balances NOT provided with servomotor and internal calibration weight, ONLY
EXTERNAL calibration mode is available.
Instrucciones LB / LBA / LBI / LBPT, LED version. rev 8
Page 13 of 42
CALIBRATION MODE
SELECTION *
* These functions are available ONLY
for models provided with servomotor
and internal calibration mass.
From display zero condition, press MENU
CALIB
BEL
ENGINEERING
lb
oz
PRINT
ct
ON
OFF
key until the message “CALIB” is
TARE
displayed, then press
g
MENU
CAL
key.
Select calibration mode:
AUT-CAL = autocalibration
AUT-CAL
BEL
ON
OFF
ENGINEERING
lb
oz
PRINT
ct
g
MENU
CAL
TARE
I-CAL
= internal calibration
E-CAL
= external calibration
TEC-CAL = technical calibration
by pressing MENU key in sequence.
Press shortly
TEC-CAL
BEL
ENGINEERING
ON
OFF
lb
PRINT
oz
ct
MENU
g
key to confirm
AUT-CAL, I-CAL, E-CAL. Otherwise, to
confirm TEC-CAL, press and keep
CAL
TARE
key pressed until the acoustic alarm is
over.
After selection, the balance returns to
normal weighing conditions.
Instrucciones LB / LBA / LBI / LBPT, LED version. rev 8
Page 14 of 42
AUTOCALIBRATION *(AUT CAL) / INTERNAL
CALIBRATION * (I-CAL)
* These functions are available ONLY
for models provided with servomotor
and internal calibration weight.
Before effecting internal calibration, be
0.00
BEL
ENGINEERING
ON
OFF
lb
oz
PRINT
ct
MENU
sure no weight is loaded on the pan.
g
CAL
TARE
Press CAL key at empty pan.
The message “CAL” will be displayed.
- CAL -
BEL
ON
OFF
ENGINEERING
lb
oz
PRINT
ct
MENU
Internal calibration weight is then loaded.
g
CAL
TARE
When the message “0.00“ will be
0.00
BEL
ENGINEERING
lb
PRINT
oz
ct
MENU
displayed, the balance returns to normal
ON
OFF
g
CAL
weighing conditions.
TARE
The message “ERROR” will be displayed
if calibration is not effected because of
vibrations or draughts.
Instrucciones LB / LBA / LBI / LBPT, LED version. rev 8
Page 15 of 42
TECHNICAL CALIBRATION *
* This function is available ONLY for
models provided with servomotor and
internal calibration mass.
Press CAL key at empty pan.
--------
BEL
ON
OFF
ENGINEERING
lb
PRINT
oz
ct
MENU
CAL
ENGINEERING
lb
PRINT
oz
ct
MENU
TARE
As soon as calibration weight value starts
200 Gr
BEL
Dashes are displayed.
g
ON
OFF
to flash, load calibration weight on the
TARE
pan.
g
CAL
calib
weight
Wait for the flashing message “- 0 -“ to be
-0-
BEL
ENGINEERING
lb
PRINT
oz
ct
MENU
ON
OFF
displayed.
TARE
Unload weight from the pan.
g
CAL
The message “CAL” will be displayed.
The balance will then return to normal
- CAL -
BEL
ON
OFF
ENGINEERING
lb
PRINT
oz
MENU
ct
weighing conditions.
g
CAL
TARE
Instrucciones LB / LBA / LBI / LBPT, LED version. rev 8
Page 16 of 42
TARE FUNCTION
Load the container on the pan.
80.16
BEL
ENGINEERING
lb
PRINT
oz
ct
MENU
ON
OFF
g
CAL
TARE
Press TARE key.
--------
BEL
Dashes will be displayed until stability is
ON
OFF
ENGINEERING
lb
PRINT
oz
ct
MENU
reached.
g
CAL
TARE
The value “0.00” will then be displayed
0.00
BEL
ENGINEERING
lb
PRINT
oz
ct
MENU
when stability is reached.
ON
OFF
g
CAL
TARE
In case stability cannot be reached
because of draughts, vibrations or other
problems, dashes will keep on being
displayed.
90.00
BEL
ENGINEERING
lb
PRINT
oz
MENU
ct
Load the goods to weight in the container.
ON
OFF
Read net weight value on display.
g
CAL
TARE
Instrucciones LB / LBA / LBI / LBPT, LED version. rev 8
Page 17 of 42
OPTIONAL ALPHANUMERIC
KEYBOARD
If you have an alphanumeric keyboard, it
UP
SELECT
TARE
DELETE
TARE M.
ARCHIV.
HELP
STAT.
DOWN
FORMUL.
CLEAR
ESCAPE
INSER
is possible to perform tare pressing
TARE/DELETE key too in the same way
A
B
C
D
E
F
G
H
I
J
K
L
M
N
O
P
Q
R
S
T
U
V
7
8
9
W
X
4
5
6
Y
Z
1
2
3
/
-
.
0
SP
previously described.
NOTE: connecting the alphanumeric
Instrucciones LB / LBA / LBI / LBPT, LED version. rev 8
keyboard to the serial entry line, it is
necessary to select the baud rate at 1200
BAUD (see page 22).
Page 18 of 42
MANUAL TARE FUNCTION *
UP
SELECT
TARE
DELETE
TARE M.
ARCHIV.
HELP
STAT.
DOWN
FORMUL.
CLEAR
ESCAPE
INSER
Having an optional alphanumeric
keyboard, it is possible to insert a value of
a known tare from the keyboard.
Press TARE MAN key on the
0.00
BEL
ENGINEERING
lb
PRINT
oz
ct
MENU
ON
OFF
g
CAL
TARE
alphanumeric keyboard. Three arrows will
appear on the display along with the
previous value of manual tare, if it has
been inserted before.
Press CLEAR key to set at zero the
previous value and digit the new value,
using numerical key located at the bottom
part of the alphanumeric keyboard.
Press INSER to confirm.
13.25
BEL
ENGINEERING
lb
PRINT
oz
MENU
ct
ON
OFF
g
CAL
TARE
Press ESCAPE key to go out from this
condition.
To set at zero the value of manual tare
inserted by keyboard, effect a normal
operation of tare with TARE key located
on the balance, or with TARE/DELETE
key located on the optional alphanumeric
keyboard.
* ONLY for models provided with
alphanumeric keyboard.
Instrucciones LB / LBA / LBI / LBPT, LED version. rev 8
Page 19 of 42
WEIGHT UNITS *
From display zero condition, press MENU
key until the message of unit “UNITS” is
UNITS
BEL
ON
OFF
ENGINEERING
lb
PRINT
oz
ct
MENU
g
CAL
GRAM
BEL
lb
oz
ct
MENU
displayed.
Press
key to confirm.
ON
OFF
ENGINEERING
PRINT
TARE
g
CAL
TARE
The unit “GRAM” will be displayed.
By pressing MENU key again, the message
of unit “CARAT” will be displayed.
Press
key to confirm or MENU to
pass to another weight unit.
CARAT
BEL
ON
OFF
ENGINEERING
lb
PRINT
oz
MENU
ct
g
CAL
TARE
SYMBOL
CONVERSION
FACTOR 1g =
MEASURE UNIT
GRAM
GRAMS
1.
CARAT
CARATS
5.
OUNCE
OUNCES
0.035273962
POUND
POUNDS
0.0022046226
PENN.
PENNYWEIGHTS
0.643014931
ONCETR.
TROY OUNCES
0.032150747
GRANO
GRAINS
15.43235835
TAEL HON
HONG KONG
TAEL
SYNGAPORE
TAEL
0.02671725
* TAEL ROC
R.O.C. TAEL
0.02666666
* MOMME
MOMME
0.2667
* x 10
x 10
10.
* x 100
x 100
100.
* TAEL SGP
0.02646063
* Not available for all models.
Instrucciones LB / LBA / LBI / LBPT, LED version. rev 8
Page 20 of 42
PC INTERFACE SELECTION
Connect the balance to PC with proper
cable (page 7).
PC-PRTR
BEL
ON
OFF
ENGINEERING
lb
PRINT
oz
ct
MENU
g
CAL
TARE
From display zero condition press MENU
key until the message “ PC-PRTR “ is
displayed.
Press
key to confirm.
Press MENU key until the message “PC” is
displayed.
PC
BEL
ON
OFF
ENGINEERING
lb
PRINT
oz
ct
MENU
g
CAL
Press
key to confirm.
TARE
The balance returns to normal weighing
0.00
BEL
ENGINEERING
lb
PRINT
oz
MENU
ct
condition transmitting data continously.
ON
OFF
g
CAL
TARE
NOTE: select baud rate (page 22).
Instrucciones LB / LBA / LBI / LBPT, LED version. rev 8
Page 21 of 42
PRINTER INTERFACE
SELECTION
Connect the balance to the printer with
proper cable (page 7).
PC-PRTR
BEL
ON
OFF
ENGINEERING
lb
oz
PRINT
ct
MENU
g
CAL
TARE
From display zero condition press MENU
key until the message “ PC-PRTR “ is
displayed.
Press
key to confirm.
To select data printer mode press MENU
key until the following messages will be
PRINTER
BEL
ON
OFF
ENGINEERING
lb
oz
PRINT
ct
MENU
g
CAL
TARE
display :
PRINTER: for printing of weight only
PRT TIM: for printing of date,hour and
weight
PRT GLP: for printing of GLP data
(Printing modes PRT TIM and PRT GLP
PRT GLP
BEL
ENGINEERING
lb
PRINT
oz
ct
MENU
ON
OFF
are available only using printer mod.
TARE
CUSTOM DP24E4 )
g
CAL
Press
to confirm.
The balance returns to normal weighing
conditions ready to weigh every time
0.00
BEL
ENGINEERING
lb
PRINT
oz
MENU
ct
ON
OFF
PRINT key is pressed.
g
CAL
TARE
NOTE: select baud rate (page 22).
Instrucciones LB / LBA / LBI / LBPT, LED version. rev 8
Page 22 of 42
BAUD RATE SELECTION
Press MENU key until the message
BAUD RT
BEL
“BAUD RT” is displayed.
ON
OFF
ENGINEERING
lb
PRINT
BEL
oz
ct
MENU
br
CAL
1200
PRINT
oz
ct
key to confirm.
TARE
ON
OFF
ENGINEERING
lb
Press
g
g
MENU
CAL
TARE
Select serial data baud rate (1200-24004800-9600 baud) by pressing MENU key in
sequence.
Confirm baud rate with
BEL
br
9600
ON
OFF
ENGINEERING
lb
PRINT
oz
ct
MENU
key.
g
CAL
TARE
The balance returns to normal weighing
0.00
BEL
ENGINEERING
lb
PRINT
oz
MENU
ct
ON
OFF
condition.
g
CAL
Instrucciones LB / LBA / LBI / LBPT, LED version. rev 8
TARE
Page 23 of 42
FILTERS SETTINGS
It is possible to adapte the balance to
ambient conditions.
FILTER
BEL
ON
OFF
ENGINEERING
lb
PRINT
oz
ct
MENU
Three settings are available :
g
CAL
TARE
FILTER 1 : very stable conditions –
proportion of ingredients
FILTER 2 : stable conditions
FILTER 3 : unstable conditions
Press MENU key until the message
“FILTER” is displayed.
Press
FILTER 1
BEL
ON
OFF
ENGINEERING
lb
PRINT
oz
ct
MENU
key to confirm.
g
CAL
TARE
Select by MENU key FILTER 1, FILTER 2
or FILTER 3.
Confirm selected filter with
FILTER 3
BEL
ENGINEERING
lb
PRINT
oz
ct
MENU
CAL
ENGINEERING
lb
PRINT
oz
MENU
ct
ON
OFF
NOTE: it is suggested to use FILTER 1 for
TARE
operations of proportion of ingredients.
g
0.00
BEL
key.
The balance returns to normal weighing
ON
OFF
conditions.
g
CAL
Instrucciones LB / LBA / LBI / LBPT, LED version. rev 8
TARE
Page 24 of 42
AUTOZERO FUNCTION
Autozero is a drift automatic correction
from zero.
AUTO 0
BEL
ON
OFF
ENGINEERING
lb
PRINT
oz
ct
MENU
g
CAL
TARE
Press MENU key until the message
“AUTO 0” is displayed.
Press
key to confirm.
Select by MENU key :
ON
BEL
ON
OFF
ENGINEERING
lb
PRINT
oz
ct
MENU
g
CAL
OFF
BEL
lb
oz
ON = autozero enabled.
OFF = autozero disabled.
ON
OFF
ENGINEERING
PRINT
TARE
ct
MENU
g
CAL
TARE
Press
0.00
BEL
ENGINEERING
lb
PRINT
oz
MENU
ct
The balance returns to normal weighing
ON
OFF
g
CAL
Instrucciones LB / LBA / LBI / LBPT, LED version. rev 8
key to confirm.
conditions.
TARE
Page 25 of 42
PIECECOUNTING
FUNCTION *
From display zero condition, press MENU
key until the message “ PCount “ is
PCount
BEL
ON
OFF
ENGINEERING
lb
PRINT
oz
ct
displayed.
g
MENU
CAL
TARE
Press
key to confirm.
Select the number of required pieces
BEL
nc
pressing MENU key repeatedly.
10
ON
OFF
ENGINEERING
lb
PRINT
oz
ct
g
MENU
CAL
TARE
The choice of number of pieces (10, 25,
50, 100) is connected to the weight of the
single piece.
Press
key to confirm.
Load on the pan the number of pieces
BEL
LOAD
10
ON
OFF
ENGINEERING
lb
PRINT
oz
ct
Press
g
MENU
CAL
indicated on the display.
key once again.
TARE
Wait for stabilization of the weight.
If the number of samples is enough (for
example n. 10 as in picture) their number
10
BEL
ON
OFF
ENGINEERING
lb
PRINT
oz
MENU
ct
g
CAL
TARE
will appear on the display and it will be
possible to effect counting .
* Not available for all models.
Instrucciones LB / LBA / LBI / LBPT, LED version. rev 8
Page 26 of 42
If the pieces to count have a too smaller
weight than balance readability, the
ERROR
BEL
ON
OFF
ENGINEERING
lb
oz
PRINT
ct
g
MENU
CAL
TARE
message “ERROR” will be displayed.
It is necessary to use a balance at higher
readability.
If the sample weight is acceptable but not
enough, the message “Add” will be
Add
BEL
ON
OFF
ENGINEERING
lb
PRINT
oz
ct
MENU
g
CAL
TARE
displayed.
Add a certain number of pieces so that the
quantity on the display is approx. doubled,
then press
key.
If the quantity of pieces is still not enough,
the message “Add” will be displayed
again. Double again the quantity read on
the display.
On reaching the sufficient number of
30
BEL
ENGINEERING
lb
PRINT
oz
ct
MENU
ON
OFF
it will be possible to proceed to count them
g
CAL
pieces, their quantity will be displayed and
TARE
loading the pieces to count on the pan.
To escape from piececounting mode press
0.00
BEL
ENGINEERING
lb
PRINT
oz
MENU
ct
ON/OFF key, and the balance will return to
ON
OFF
normal weighing conditions.
g
CAL
Instrucciones LB / LBA / LBI / LBPT, LED version. rev 8
TARE
Page 27 of 42
AUTOMATIC UPDATING OF
UNIT WEIGHT
After having effected the sampling, it is
possible to update the average unit weight
as follows :
50
BEL
ON
OFF
ENGINEERING
lb
oz
PRINT
ct
g
MENU
instead of loading all the pieces to count,
TARE
CAL
load a number of pieces equal to the
double of the one loaded on the pan.
Wait for all the arrows to be displayed
followed by a short acoustic message.
Now it is possible to repeat this procedure
100
BEL
ENGINEERING
lb
PRINT
oz
MENU
ct
ON
OFF
to the normal counting of the pieces.
g
CAL
up to a maximum of 255 pieces or proceed
TARE
This mechanism grants a more precise
evaluation of the average unit weight and a
better precision in counting of pieces.
NOTE: the mechanism of the automatic
updating is not active if the sampling has
been effected by insertion of the average
unit weight from alphanumeric keyboard.
Instrucciones LB / LBA / LBI / LBPT, LED version. rev 8
Page 28 of 42
DISPLAY OF WEIGHT IN
PIECECOUNTING CONDITION
To display weight value during the counting
35
BEL
ENGINEERING
lb
PRINT
oz
ct
MENU
g
CAL
107.39
BEL
ENGINEERING
lb
PRINT
oz
ct
MENU
of pieces, press MENU key.
ON
OFF
TARE
This condition is indicated by lighting of all
ON
OFF
g
CAL
display arrows.
TARE
To return to piececounting condition and
35
BEL
ENGINEERING
lb
PRINT
oz
MENU
ct
ON
OFF
proceed with counting, press MENU key
TARE
again.
g
CAL
Instrucciones LB / LBA / LBI / LBPT, LED version. rev 8
Page 29 of 42
MANUAL INSERTION OF THE
UNIT SAMPLE WEIGHT *
MANUAL
BEL
ON
OFF
ENGINEERING
lb
PRINT
oz
ct
MENU
g
CAL
TARE
It is possible to use the optional
alphanumeric keyboard to insert weight of
the unit sample, if it is known.
From zero condition on the display press
MENU key until the message “Pcount” is
displayed.
Press
key to confirm.
Select MANUAL pressing MENU key
repeatedly.
Press
0
BEL
ENGINEERING
lb
PRINT
oz
ct
MENU
CAL
1372
BEL
ENGINEERING
lb
PRINT
oz
ct
MENU
0
ENGINEERING
lb
PRINT
oz
MENU
ct
TARE
ON
OFF
g
CAL
BEL
ON
OFF
g
TARE
ON
OFF
g
CAL
TARE
key to confirm.
Insert unit weight (in grams) of a sample,
using the numerical keys from 0 to 9 and
decimal point.
In case of error, press CLEAR key and
start again.
Press INSER key to confirm.
If the inserted weight is 100 times smaller
than balance readability, the message
“ERROR” will be displayed.
To escape without inserting the weight,
press ESCAPE (on the alphanumeric key)
or ON/OFF.
If the weight is enough “0” will be
displayed; it is now possible to proceed to
count loading the pieces on the pan.
To escape from piececounting function,
press ON/OFF key.
* ONLY for models provided with
alphanumeric keyboard.
Instrucciones LB / LBA / LBI / LBPT, LED version. rev 8
Page 30 of 42
V-RANGE FUNCTION *
1820.2
BEL
ENGINEERING
lb
PRINT
BEL
oz
ct
MENU
.
CAL
0.00
lb
BEL
oz
ct
MENU
.
CAL
ENGINEERING
PRINT
oz
ct
MENU
CAL
ENGINEERING
lb
PRINT
oz
MENU
ct
ON
OFF
TARE
ON
OFF
g
1838.3
BEL
TARE
g
18.06
lb
ON
OFF
g
ENGINEERING
PRINT
* This function is available ONLY for
models double scale VR.
TARE
ON
OFF
g
CAL
TARE
To activate V-RANGE function, press
ON/OFF key.
Now a tare operation is automatically
performed, and at the end it is possible to
operate with the scale at highest
resolution.
In this way it is possible to effect with
precision proportioning of small quantities.
This situation is pointed out by lighting of
decimal point on the digit placed on the
extreme left side of the display.
The scale at highest sensitivity remains
until net weight exceedes in positive max.
value foreseen for lower range or in
negative a fixed limit.
Anyway, it is always possible to disable
this function by pressing ON/OFF key.
In all these cases total weight is displayed.
Balances provided with this function can be
switched off pressing and keeping pressed
ON/OFF key until acoustic message is
deactivated.
Instrucciones LB / LBA / LBI / LBPT, LED version. rev 8
Page 31 of 42
DETERMINATION OF SOLID DENSITY FOR BALANCES WITH
PROPER OPTIONAL SOFTWARE *
Balance program allows to determine solid density through four steps:
- TARE IN AIR;
- TARE IN WATER;
- SOLID WEIGHING IN AIR;
- SOLID WEIGHING IN WATER.
STORAGE OF TARE IN AIR
Tare in air (weight of the small basket in air) is about zeroing of small basket weight in air.
Press TARE key to effect this operation being sure that value displayed is “0”.
STORAGE OF TARE IN WATER
Select density menu by pressing MENU key. The message “DENS” is displayed. By
pressing TARE key the message “t.H20” is displayed. Dip the small basket in water and
press TARE key once again. The message starts flashing until stability is reached, then an
acoustic alarm is given out. Tare value in water is stored until balance is switched off, and it
can be changed repeating the same sequence of operations above mentioned.
DETERMINATION OF SOLID DENSITY
Select “DENS” by pressing MENU key and then press CAL key. The message “S.AIR” will
be displayed. Load a solid in the small basket and press CAL key. The message starts
flashing. As soon as it is stable, an acoustic alarm is given out and the message “S.H2O” is
displayed. Dip the small basket with the solid in water and press CAL key once again. The
message will flash. As soon as stability is reached, an acoustic alarm is given out and
density value is displayed.
Press MENU key to return to weight display.
Press PRINT key to print the value displayed.
* Not available for all models
Instrucciones LB / LBA / LBI / LBPT, LED version. rev 8
Page 32 of 42
SERIAL INTERFACE RS 232
1) General characteristics
The balance sends the value displayed in serial form RS232C, allowing to print weight on
PC monitor or on a serial printer. In case of connection with PC, it is also able to get
commands, always in RS232C format, that allow to effect all operations with balance
keys through PC keyboard. Baud rate is selectable trough MENU and
keys, as
shown previously, at 1200, 2400, 4800, and 9600 baud. The format of character is of 8
bit preceded by a start bit and followed by a stop bit. Parity is not considered.
2) Interface selection for PC
Selecting PC output (personal computer
CODE
FUNCTION
IBM compatible) through MENU and
“T” = H54
TARE
keys, weight is sent continuously at the
“C” = H43
CALIBRATION
same frequency with which weight
“E” = H45
ENTER
indication is updated on display. It is
“M” = H4D
MENU
possible to effect all balance functions
“O” = H4F
ON/OFF
directly from PC keyboard, sending to the
balance ASCII cods indicated in the list.
“o” = H6F
The connector to use for PC connection is
n.1 (fig.1 page 33).
Prolonged pressure
ON/OFF key for
balance V-RANGE
version.
3) Interface selection for printer
Otherwise, if it has been selected output for serial printer, weight value will be printed,
once this will be stable, pressing PRINT key. If weight does not become stable in 10
seconds, the message “ERROR” will be displayed and an acoustic alarm will be emitted.
The connector to use for printer connection is n.1 (fig. 1 page 33).
4) Display format
The string sent is composed of 14 characters:
- first character : weight symbol (space or -) ;
- second - ninth character : weight or pieces number ;
- tenth - twelfth character : measure unit symbol ;
- thirteenth character : carriage return ;
- fourteenth character : line feed.
Possible non-meaningful zeroes are spaces.
Instrucciones LB / LBA / LBI / LBPT, LED version. rev 8
Page 33 of 42
ATTENTION
When the balance is in over range condition, weight value transmitted is replaced by
strings “over” and “under” (only if PC output has been selected).
5) Connecting balance to PC
For connecting balance to PC, use connector 1 on the rear side of the balance as shown
in the following figure :
Balance
Side
2
3
3
2
Connector 1
5
7
6
6
4
20
2
2
3
3
5
5
6
6
4
4
Balance
Side
Connector 1
PC
Side
25 Poles
PC
Side
9 Poles
6) Connecting balance to serial printer
To print weight, connect connector 1 of the balance to serial printer as shown below :
Balance
Side
Connector 1
2
Input data
4
Busy signal
5
GND
Printer
Side
7) Connecting balance to optional keyboard
Connector 1, used for connection to PC, can also be used for possible connection to
alphanumeric keyboard.
Instrucciones LB / LBA / LBI / LBPT, LED version. rev 8
Page 34 of 42
Connectors located on the rear panel of the balance
Fig. 1 Rear view panel of balance
Connector 2 :
Supply
connector
Connector 1 :
Keyboard/PC/
Printer
Fig. 2 Rear view panel of balance Mod. K
CONNECTOR 1
FOR KEYBOARD OR PC OR PRINTER
9
5
pin 1
= +5v for keyboard
8
4
pin 2
= Tx signal (PC)
7
3
pin 3
= Rx signal (PC)
6
2
pin 4
= busy signal
1
pin 5
= Gnd
pin 4-6 = connected one with other
by PC transmission
Fig. 3
Instrucciones LB / LBA / LBI / LBPT, LED version. rev 8
Fig. 4
Page 35 of 42
NOTE:
Instrucciones LB / LBA / LBI / LBPT, LED version. rev 8
Page 36 of 42
NOTE:
Instrucciones LB / LBA / LBI / LBPT, LED version. rev 8
Page 37 of 42
NOTE:
Instrucciones LB / LBA / LBI / LBPT, LED version. rev 8
Page 38 of 42
205x325x
7.4
315
LBA210E
205
0.0001
205
0.0001
+
0.0003
≤ 4 sec.
3 filters +10......
select +30 °C
ON-OFF
±3
ppm/°C por Menu
80
205x325x
7.4
315
LB160
160
0.001
160
0.0005
+ 0.001 ≤ 2 sec.
LB220
220
0.001
220
0.0005
+ 0.001
LB330
330
0.001
330
0.0005
+ 0.002
LB500
500
0.001
500
0.0005
+ 0.002
LB1700
1700
0.01
1700
0.005
± 0.01
≤ 2 sec
LB2200
2200
0.01
2200
0.005
± 0.02
LB3100
3100
0.01
3100
0.005
LB4100
4100
0.01
4100
0.005
Instrucciones LB / LBA / LBI / LBPT, LED version. rev 8
3 filters
select
3 filters
≤ 2 sec
select
3 filters
≤ 2 sec
select
3 filters
≤ 2 sec
select
+10......
+30 °C
+10......
+30 °C
+10......
+30 °C
+10......
+30 °C
±4
ppm/°C
±4
ppm/°C
±4
ppm/°C
±4
ppm/°C
205x325x
165
205x325x
165
205x325x
165
205x325x
165
ON-OFF
por Menu
110
ON-OFF
por Menu
110
ON-OFF
por Menu
110
ON-OFF
por Menu
110
3 filters +10......
select +30 °C
ON-OFF
±5
ppm/°C por Menu
160
205x325x
4.5
95
≤ 2 sec
3 filters +10......
select +30 °C
ON-OFF
±5
ppm/°C por Menu
160
205x325x
4.5
95
± 0.02
≤ 2 sec
3 filters +10......
select +30 °C
ON-OFF
±4
ppm/°C por Menu
160
205x325x
4.5
95
± 0.03
< 2 sec.
3 filters +10......
select +30 °C
ON-OFF
±4
ppm/°C por Menu
160
205x325x
4.5
95
4.5
4.5
4.5
4.5
230 o 115Vac
± 15%
230 o 115Vac
± 15%
230 o 115Vac
± 15%
230 o 115Vac
± 15%
230 o 115Vac
± 15%
230 o 115Vac
± 15%
230 o 115Vac
± 15%
230 o 115Vac
± 15%
230 o 115Vac
± 15%
230 o 115Vac
± 15%
g 100
(E2)
g 200
(E2)
g 100
(F1)
g 200
(F1)
g 200
(F1)
g 200
(F1)
g 1000
(F1)
g 1000
(F1)
g 2000
(F1)
g 2000
(F1)
Interface (optional)
80
Power consumption
(average)
ON-OFF
±3
ppm/°C por Menu
Calibration weight
3 filters +10......
select +30 °C
Line voltage Freq. 50-60 Hz
≤ 4 sec.
Net weight (Kg)
Response time
(average)
+
0.0003
Housing dimensions
(WxDxH) (mm)
Linearity (g)
0.0001
Pan size (mm)
Reproducibility (g)
(standard deviation)
120
Autozero
Tare range (g)
0.0001
Sensitivity drift
+10..+30°C
Readability (g)
120
Operating
temperature range
Weighing capacity (g)
LBA120E
Adaption to ambient
conditions
Model
MARK
TECHNICAL CHARACTERISTICS
VA 14 RS232C
VA 14 RS232C
VA 14 RS232C
VA 14 RS232C
VA 14 RS232C
VA 14 RS232C
VA 14 RS232C
VA 14 RS232C
VA 14 RS232C
VA 14 RS232C
Page 39 of 42
205x325x
4.5
95
LB8000
8000
0.1
8000
0.05
± 0.2
< 2 sec
3 filters +10......
select +30 °C
ON-OFF
±6
ppm/°C por Menu
195x175
205x325x
4.5
95
230 o 115Vac
± 15%
230 o 115Vac
± 15%
g 2000
(F1)
g 2000
(F1)
LBA120I
120
0.0001
120
0.0001
±0.0003
< 4 sec
3 filters +10......
select +30 °C
ON-OFF
±3
ppm/°C por Menu
80
205x325x
315
230 o 115Vac Automática
calibración VA 14 RS232C
± 15%
internta
LBA210I
205
0.0001
205
0.0001
±0.0003
< 4 sec
3 filters +10......
select +30 °C
ON-OFF
±3
ppm/°C por Menu
80
205x325x
8.5
315
230 o 115Vac Automática
calibración VA 14 RS232C
± 15%
internta
LBI500
500
0.001
500
0.0005
±0.003
< 2 sec
3 filters +10......
select +30 °C
ON-OFF
±4
ppm/°C por Menu
110
205x325x
165
230 o 115Vac Automática
calibración VA 14 RS232C
± 15%
internta
LBI1000
1000
0.001
1000
0.0005
±0.003
< 2 sec
3 filters +10......
select +30 °C
ON-OFF
±4
ppm/°C por Menu
110
205x325x
8.5
165
230 o 115Vac Automática
calibración VA 14 RS232C
± 15%
internta
LBI4000
4000
0.01
4000
0.005
±0.03
< 2 sec
3 filters +10......
select +30 °C
ON-OFF
±4
ppm/°C por Menu
160
205x325x
95
230 o 115Vac Automática
calibración VA 14 RS232C
± 15%
internta
LBP30T
30000
0.1
30000
0.05
± 0.2
< 3 sec
3 filters +10......
select +30 °C
ON-OFF
±6
ppm/°C por Menu
210x330
Instrucciones LB / LBA / LBI / LBPT, LED version. rev 8
Page 40 of 42
8
8
9
325x295x
10
95
230 o 115Vac
± 15%
Kg 10
(F1)
Interface (optional)
Calibration weight
195x175
Power consumption
(average)
Line voltage Freq. 50-60 Hz
ON-OFF
±6
ppm/°C por Menu
Net weight (Kg)
3 filters +10......
select +30 °C
Housing dimensions
(WxDxH) (mm)
Response time
(average)
< 2 sec
Pan size (mm)
Linearity (g)
± 0.1
Autozero
Reproducibility (g)
(standard deviation)
0.05
Sensitivity drift
+10..+30°C
Tare range (g)
6500
Operating
temperature range
Readability (g)
0.1
Adaption to ambient
conditions
Weighing capacity (g)
6500
Model
MARK
LB6500
VA 14 RS232C
VA 14 RS232C
VA 14 RS232C
WARRANTY CONDITIONS
1. Duration of warranty is of 24 months from the date of purchase proved by invoice
concerning the product or by delivery note.
2. Warranty covers all parts resulting defective at the origin. It does not cover mechanical
or electronic parts damaged by wrong installation, tampering or incorrect use.
3. Warranty does not cover damages caused by impacts, balance drops or drop of objects
on weighing pan.
4. Carriage to and from service centre should be borne by the customer.
Instrucciones LB / LBA / LBI / LBPT, LED version. rev 8
Page 41 of 42
CE DECLARATION CONFORMITY
Giropès, society domicilied in Vilamalla, calle F. Parcela 11, Girona, España, declares that
the models of electronic balances
LBA120I, LBA210I, LBA120E, LBA210E, LB160, LB220, LB330, LB500, LB1700, LB2200,
LB3100, LB4100, LB6500, LB8000, LB10000, LBI500, LBI1000, LBI4000, LBP30T.
They are in agreement to the exigences of 89/336/CEE electromagnetical compatibility and
77/23/CEE of electrical security according to following european norms:
EN 55104: EN 61000-4-2/-4/-5/-11, ENV 50140, ENV 50141
EN 50081-1: EN 55014, EN 55022, EN 60555-2/-3
Reason why we sent the present declaration of conformity.
Jordi Ribalta Busquets.
Instrucciones LB / LBA / LBI / LBPT, LED version. rev 8
Page 42 of 42