1
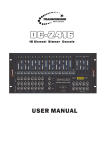
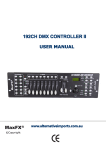
STAGE 12-P DMX
12CH Dimmer Console
USER'S MANUAL
POWER
A
B
POWER
STAND BY
HEATING
READY
FOG MACHINE
Contents
General Instruction
1
Safety Instructions
Front Panel
2
3
Rear
Panel
6
Main Function
7
Operation
Programming
13
13
Quick Programming
13
Fader Programming
14
Audio Effect Programming
16
Run a Pattern
Run a Pattern with Speed Fader
17
Run a Pattern at audio effect
17
MIDI In & Out
18
MIDI Transmitting & Receiving
19
Power Input Wiring
20
Technical Specification
21
General Introduction
Thank you for purchasing this WORK product STAGE 12-P DMX.
This unit provides 24 patterns and 12 channels to control various
lighting devices. The main features are that simple free programming,
12 Dimmer Packs and the embedded functions, e.g. Stand By, Audio,
Tap Sync, Dark, Full on, Blackout.
Main Features
12 Channel DMX Dimming Console
16 programable patterns and 8 built-in patterns
Audio, Speed, Fade Time and Master Control
12 free adjustable Faders
Sound active
Quick programming and Fader programming
Catch and hold the present scene temporarily
Fog Machine trigger
Remote control in connection with foot switch
USITT DMX-512 protocol with 3 pin XLR
1
Safety Instructions
Read the instruction in this manual carefully and throughly, as they give
important information regarding safety during use and maintenance. Please
keep this manual with the unit for reference in the future.
!
Warnings
Be careful of high voltage connected with this unit.
DO NOT make any inflammable liquids, water or metal objects contact
the unit.
STOP using the unit immediately in the event of serious operation
problem and contact your local dealer without hesitation.
DO NOT open the unit --there is no user serviceable parts inside.
NEVER try to repair the unit yourself.
!
Cautions
This unit must be earthed.
Be sure that your product is not damaged and all accessories are
not missing.
This unit must only be operated by adults. DO NOT allow children
to tamper or play with it.
DO NOT dismantle or modify the unit when charging it.
To reduce the risk of electrical shock or fire, do not expose this unit
rain or moisture.
2
Front Panel
22
POWER
A
23
B
1
POWER
21
20
19
2
3
STAND BY
HEATING
4
READY
9
11
16
14
12
FOG MACHINE
5
6 7 8 10 13 15 17
1. Channel Faders
These 12 Faders can adjust the levels of each channel
to contro l the intensity of external lights/ fixtures indicated
by 12 LEDs related to the specific channels.
2. Flash Keys
These 12 keys are used to give an individual channel
a full intensity and also used for quick programming.
3. Pattern Keys
The 16 Pattern Keys are used for activating any of
the 16 static scenes or chase patterns which have
been programmed before.
4. Built-in Pattern Keys
The 8 keys can activate built-in patterns stored in
the unit.
5. Add Keys
The 3 Add keys are used to set modes of the patterns
in rows between Single/Mix mode and Kill mode.
3
Front Panel
6.
Fog Machine
Key
This key can trigger the external connected Fog
Machine, indicated the states heating and ready
by two separate LEDs.
7.
Stand By Key
This key can enable/ disable the Stand By function,
which can shutter all the outputs.
8.
Tap Sync Key
Repeatedly tap the key establishes the chase rate.
9.
Glide key
Enable the Fade Time between the two steps in the
Glide Mode.
10. Step key
Press this key to go a step of a chase. Set Lock
Function when combined with Blackout key.
11. Program key
Press to enter Program Mode.
12. Go key
Press this key to hold the set channel intensity.
13. Dark key
Press to turn off all output.
14. Manual key
When this key is pressed down, real time operation
of the channel Fader level will be provided.
15. Full on key
Press to output all at full intensity.
16. Audio key
Activate audio sync of chase rate or set a scene at
audio effect.
4
17. Blackout key
This key is used to clear Program, Go, Pattern,
Manual Mode. When used with the Step key,
Lock function is enabled to be set.
18. LED Window
It shows current programming or function state
including Program Lock State, Manual Lock State,
MIDI Receive State , and also reads some relative
values like dimmer, chase rate, steps of a
programming chase etc.
Front Panel
19. Kill Key
It can enable/disable the Kill mode.
20. Audio Fader
It can control the sensitivity of the audio automatic
gain control circuit. Adjust it for best effects with
external audio device.
21. Speed Fader
This fader controls the speed of the patterns (chases)
or sets the Fade Time in the Glide Mode.
22. Fade Time Fader
It can set the initial fade in and out of a chase, Go
function, Manual state etc.
23. Master Fader
Pushing the Master fader can control the output
values of all the 12 channels.
5
Rear Panel
11
E SU
11
9
E SU
F
HSUP
F
HSUP
FUSE:
F6.3A 250V
5x20mm
7
5
3
E SU
E SU
E SU
F
HSUP
FUSE:
F6.3A 250V
5x20mm
FUSE:
F6.3A 250V
5x20mm
FUSE:
F6.3A 250V
5x20mm
FUSE:
F6.3A 250V
5x20mm
10
8
6
4
2
F US E
F US E
F US E
F US E
F US E
PUSH
PUSH
PUSH
PUSH
PUSH
FUSE:
F6.3A 250V
5x20mm
FUSE:
F6.3A 250V
5x20mm
FUSE:
F6.3A 250V
5x20mm
FUSE:
F6.3A 250V
5x20mm
FUSE:
F6.3A 250V
5x20mm
FUSE:
F6.3A 250V
5x20mm
CH1 - 6 OUTPUT: 5A/CH, TOTAL 16A Max.
MIDI
OUTPUT:
FUSE:
F6.3A 250V
5x20mm
PUSH
CH7-12 OUTPUT: 5A/CH, TOTAL 16A Max.
1/4"stereo jack
AC 230V~ 50Hz
GND
OUTPUT: 1.5A/CH, 6A/Total(CH1-6)
POWER INPUT:
F
HSUP
F US E
OUTPUT: 1.5A/CH,6A/Total(CH7-12)
CHINA
1
E SU
F
HSUP
12
1
POWER INPUT:
F
HSUP
Full on
Stand by
1
2
DMX Polarity
Select
AC 220V~ 50Hz
3
5A/CH, 16A/Total(CH1-6)
OUTPUT: 5A/CH,16A/Total(CH7-12)
Line Input: 0.1V ~ 1Vp-p
2
2-,3+
REMOTE
AUDIO
FUSE(Internal): F1A 250V 5x20mm
FOG MACHINE
3
IN
OUT
4 5
THRU
6
2+,3-
DMX OUT
8
7
CAUTION!
RISK OF ELECTRIC SHOCK
DO NOT OPEN
N'OUVREZ PAS..RISQUE DE
CHOC ELECTRIQUE
WARNING:THIS APPARATUS
MUST BE EARTHED
Power Input: AC 230V~ 50Hz, 16A /PHASE Max.
POWER
9
10
Phase A: CH. 1 - 6
Phase B: CH. 7 - 12
12
1. Channel Output
This unit provides 12 Dimmer packs for easy and
convenience operation.
2. Audio input
Audio input line for music signals or built-in microphone
signals, with amplitude ranging from 100mV to 1v.
3. Fog Machine
Connector
4. MIDI In
MIDI data input
5. MIDI Out
MIDI data output
6. MIDI Thru
MIDI data transmitting
7. DMX Out
Standard DMX signal output
Connects with a fog machine.
8. Remote Control Connects a remote controller to enable Stand By
and Full On function
9. DMX Polarity
Select
Used to select DMX polarity
10. Power switch
Switch on/ off this unit.
11. Channel Fuse
F6.3A/CH, 250V, 5 x 20mm
12. Power Input: AC 230V~ 50Hz, 16A /PHASE Max.
( Phase A: CH. 1 - 6
6
Phase B: CH. 7 - 12 )
Main Function
Patterns ( 16 + 8 )
There are total 24 patterns in charge of pattern keys in which 16 are
edited programs and the other 8 are built-in programs (chases).
For the built-in patterns, they can be selected for application , complying
with the real controlled channels of external lighting devices.
Pattern Number
Pattern 1,2
Pattern 3,4
Pattern 5,6
Pattern 7,8
Way Number
4 way
6 way
8 way
12 way
Channels of lighting device
4 channels
6 channels
8 channels
12 channels
A tap of any of the patterns keys will light the pattern LEDs and causes
the scene or chase stored in memory to fade at the set fade rate.
A second tap will cause Pattern LED to go off and the current channel
LEDs will fade out at the set fade rate.
24 Pattern keys are arranged with 3 rows and each row has an Add
key , which determine Kill Mode or Add Mode.
Pattern key works normally in the Kill Mode, whereas pressing one
key will disable other patterns that are active and cause them fade out
while the selected pattern fades in.
Pressing the Add key will put the patterns in the Add Mode and all
patterns will operate independently of each other.
7
Main Function
ADDs ( 3 )
The Add mode is activated by pressing the Add key. When the Add
mode is turned on, multiple patterns of the row will be selected every
time.
Add mode consists of Single and Mix modes.
Single mode:
Press the appropriate Add key, indicated by the ADD LED flashing.
The Single mode is active. Tap the desired Pattern keys in the row, the
patterns will chase in sequence from left to right.
Mix mode:
Press the appropriate Add keys until the ADD LED lights, the Mix
mode is active. Tap the desired Pattern keys in the row, the patterns
will chase in unison.
To change between Single and Mix mode, press the appropriate Add
key until its LED lights/flashes from flashes/lights.
Kill
Press Kill key until its LED lights. In Kill Mode, pressing any Flash keys
will disable any other channel outputs. A second tap of Kill key will
return normal Add Mode in which tap of any Flash keys will not affect
other outputs.
8
Main Function
Glide
The Glide key is used to turn on and off the Glide Mode. When the Glide
is activated, any pattern selected will fade in afer the previous pattern.
The rate of the change is determined by the Speed fader between steps
( chase rate) .
Press the Glide key again to exit the Glide mode. And turning on or off
the Glide Mode will not affect patterns that are already running.
Go
The Go key causes all channels to fade to the present level represented
by the setting of the Channel Fader. The lighting level will be added to
the present scene. Compared to the present level of each channel, the
higher level of each corresponding channel of any other active scenes
or functions will have precedence to control the intensity.
Pressing the Go key additional times will cause the old scenes to fade
out and the new scenes to fade in.
A tap of Blackout key will cancel Go State.
Manual
Press Manual key until its LED light up. In the Manual State, each
channel controls its channel intensity.
A second tap of Manual key or Blackout key can turn off Manual
State.
Note: In manual Lock State a second tap of Blackout key can not turn off
Manual State.
9
Main Function
Audio key/ Fader
Audio chase sync may be activated by tapping the Audio key, indicated
by Audio LED lighting up. Then adjusting the sensitivity control for
desired effects. The patterns will sequence on the audio beat. In this case
the Tap Sync key and Speed fader can not affect these patterns.
Audio intensity effects may be programmed into any channel by Program
key. This can enable the desired channels to flash following the audio
signal whenever the Audio mode is on.
Tap Sync
The Tap Sync key is used to set and synchronize the chase rate
(the rate at which all patterns will sequence) by pressing the key
several times. The chase rate will synchronize to the interval time of
last two taps. The LED above the Tap Sync key will flash.
Tap Sync key will override any previous setting of the chase rate
control Fader until the Fader move again.
Blackout
Each tap of Blackout key will clear or deactivate functions in the
following order: Program mode, Go Function, Patterns and Manual
Mode.
The Blackout LED will light up when all the above function completely
deactivated. Lights affected by each function will fade out at the set fade
rate.
10
Main Function
Master Fader
Pushing this fader can control the maximum output of 12 channels.
The output of each channel can't be beyond the set max. value.
However pressing the Flash key or Full key may change the output
temporarily.
Fade Time Fader
This Fader is used to adjust Fade Time. The time changing of 12
channels intensity can be determined by this function. But when
the Flash key or MIDI key is enabled, the present Fade Time setting
can not be used at all.
If the LED shows 1.1, it represents 1.1second and if it shows 1:10,
the fade time is 1 minute and 10 seconds. Fade time ranges from 0
to 10 minutes.
Speed Fader
Pushing this fader up/ down to the desired position can adjust the
rate of chase. The rate must range from 0.05 second to 10 minutes.
If the LED shows 1.10, it indicates that the rate can be 1.10
seconds. And when the LED shows 1:10, it means that the rate can
be one minute and ten seconds.
Power A/B
Power A indicates the work state of phase A . When its LED lights up,
phase A can be powered on. On the contrary, there is no electricity
passing in phase A.
Power B indicates the work state of phase B . When its LED lights up,
phase B can be powered on. On the contrary, there is no electricity
passing in phase B.
11
Main Function
Remote Control
Connecting a foot switch will give a remote control of Full on and Stand by
states.
.
Full on: makes all channel output full on.
Stand by: shuts down output but do not affect the intensity of LEDs.
Stand by fails in Full on state.
Its LED will flash when stand by state is activated.
Manual ( Program) Lock
Press and hold Step key and Blackout key , their LEDs will flash at the
same time. Do not release and press the Manual ( Program) key. The LED
shows On/Off, which indicates Manual ( Program) Lock or Unlock states.
In Manual Lock State, Black out key can not control and only pressing the
Manual key can turn off Manual State.
While in Program Lock State, any entry key for programming will be disabled.
And only setting the unlock state can allow to use Program function.
Erase all recorded chases
Press Pattern key 3, 6, 10 and 15. Do not release and turn off the unit.
Turn on the console again after several seconds and all recorded chases
will be deleted.
Note: Deleted chases can not be recovered. Please be cautious when
performing this function.
12
Operation
Programming
Quick Programming
POWER
A
B
POWER
STAND BY
HEATING
READY
FOG MACHINE
1
Press Program Key to enable Program function,
indicated by its LED lit up.
Note: If the LED can't be on, Program Key may be
set in Lock State (see Lock Function)
Select a desired Pattern for program and press it.
Its LED will flash, indicating that Program Mode
can be active.
Press and hold the desired Flash key(keys) as a
scene.
Releasing these Flash key(keys) will automatically
record the present scene as one step of the chase.
All LEDs of 24 patterns will have a flash, indicating
the successful storing. And the LED will show the
present step number for quick programming.
13
Operation
Programming
Note: If there can be Flash key(keys) in the holding state, this
unit will wait for you to release it ( them ) for storing the scene.
Repeat step 3 and 4 until all desired steps are include in the chase.
Note: Every Pattern can record no more than 100 steps.
6
Tap the Blackout key to exit Program Mode.
Fader Programming
Static Scenes or Chase Sequences with adjustments of levels may
be programmed into any of Patterns using Channel Faders.
1
Press Program key until its LED lights up.
If its LED is off, indicating that the program may
be locked.
2
14
Select the pattern to program by tapping one of
the 16 Pattern keys and its LED will start to
flash.
Program
Operation
Programming
3
Move the channel level Fader to the desired level
for this step.
Note: Channel LED does not light up except in
Manual Mode.
4
Press Program key and this step will be
automatically programmed into memory.
5
Repeat step 3 and step 4 until all your desired
steps are completely programmed.
10
10
8
8
6
6
4
4
2
2
0
0
Program
Note: Every Pattern can record no more than
100 steps.
6
Press Blackout key to exit.
Black out
Note: Quick programming and Fader programming can
be used together according to your requirements.
15
Operation
Audio Effect Programming
The Audio Mode could be programmed to flash desired channels to the
intensity of the Audio signal whenever the Audio Mode is on by following
these steps:
1
Tap the Program key until its LED lights. If the LED
does not light, the memory lock is on.
Program
10
2
3
Select channels to be affected by audio by moving
the corresponding channel Faders to the maximum,
and move other channel Fader to minimum.
10
8
8
6
6
4
4
2
2
0
0
Tap the Audio key to program the audio intensity
into memory.
Audio
3
16
Operation
Run a Pattern
Run a pattern with Speed Fader
Tap the Pattern key stored your desired program
to run and its LED lights.
10
8
6
6
4
Move Speed Fader to adjust to your wanted value.
10
8
Speed
4
2
2
0
0
Run a Pattern at audio effect
1
Tap the Audio key to enter Audio Mode.
Audio
2
3
10
3
Move the Audio Fader slowly up until the desired
effect is reached.
10
8
8
6
6
4
4
2
2
0
0
Audio
Audio
17
Operation
MIDI In & Out
1.
After turning off the power, press and hold Built-in keys 5, 6, 7, 8 at
the same time. Continues to hold these keys and then switch on the
power. You will be allowed to set the states of MIDI and value display
mode, indicated by Pattern LED 1, 2, 3 and 4 flashing.
2.
Press Pattern key 1 to access the setting state of MIDI Receiving. The
LED will show " IN : XX" and XX refers to the relative receiving
channel( 1 ~ 12 ). Press the Pattern 7 (Pattern 8) to increment
(decrement) the channel number to the desired receiving channel of
MIDI. Press Blackout key to confirm the new setting and automatically
return the previous setting state.
3.
Press Pattern key 2 to access the setting state of MIDI transmitting. The
LED Display will show " OU : XX" and XX refers to the relative
transmitting channel(1 ~ 12). Press the Pattern 7 (Pattern 8) to increment
(decrement) the channel number to the desired transmitting channel of
MIDI. Press Blackout key to confirm the new setting and automatically
return the previous setting state.
4.
Value display settings ( decimal and percent mode)
Pressing pattern 3 will allow to set the decimal display mode.
Then the LED displays " 255". Press Blackout key to confirm the new
setting and automatically return the previous setting state.
And pressing pattern 4 will enable the percent display mode, indicated
by the LED displaying "100".
Also press Blackout key to confirm the new setting and automatically
return the previous setting state.
5.
18
Press the Blackout again to exit from this setting state.
Operation
MIDI Transmitting & Receiving
This unit can transmit and receive Note On/ Off data to enable some preset
functions.
NOTE NUMBER
VELOCITY
Turn on or off patterns 1-24
22 - 45
46 - 57
FUNCTION
channel intensity
Turn on or off channels 1-12
62 - 64
Turn on or off Add State (1-3)
65
DARK
66
FULL -ON
67
Manual Function
68
Activate Glide function
69
Turn on or off AUDIO
70
Step
71
BLACK OUT
72
Standby
19
Power Input Wiring
Two phases input Wiring :
L1
L1
L2
L2
N
N
Earth
20
Earth
Power input
AC 230V ~ 50HZ
Technical Specifications
Power input
Power Input: AC 230V~ 50Hz, 16A /PHASE Max.
( Phase A: CH. 1 - 6
Phase B: CH. 7 - 12 )
Channel output
CE:
1.5 A/CH, 6A total ( CH 1-6 )
1.5 A/CH, 6A total ( CH 7-12 )
CHINA:
5A/CH, 16A total (CH1-6)
5A/CH,16A total (CH7-12)
Audio input
Line input 0.1v ~ 1Vp-p
MIDI in/out/thru
5-pin Multi connector
DMX output
3 pin XLR female socket
Remote control
1/4" stereo jack
Cooling
Powerful fan thermo-controlled
Circuit fuse
F1A 250V 5x20mm
Channel fuse
F6.3A 250V 5x20mm
Dimension
482x266x182mm
Weight
8.6 kg
21
ALL RIGHTS RESERVED
REV 1.1 Apr, 2003
( 24-004-0976 )