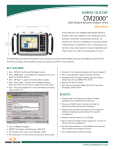
1
Portable Programming Device (PPD) Software
Installation and Operating Instructions
Versions up to V1.0X
THERMAL MANAGEMENT SOLUTIONS
EN-DigiTracePPDsoftware-IM-H57402 04/13
1 / 24
Contents
Vital Information.................................................................................................................................... 3
License Agreement............................................................................................................................... 3
User Responsibilities............................................................................................................................ 5
Safety Warnings.................................................................................................................................... 5
Technical Support.................................................................................................................................. 5
Section I – Overview..........................................................................................................................................6
1-1 System Requirements.................................................................................................................... 6
1-2 Initial Setup..................................................................................................................................... 6
1-3 Installing the PPD Software............................................................................................................ 6
1-3-1 Installing ActiveSync.............................................................................................................. 6
1-3-2 Establishing a Connection to Your PC.................................................................................... 7
1-3-3 Installing or Upgrading using a New PC............................................................................... 8
1-3-4 Installing or Upgrading using an Existing PC........................................................................ 9
1-4 Uninstalling the Software............................................................................................................... 9
1-4-1 Removing the Software from your PDA................................................................................. 9
1-4-2 Removing the Software from your PC................................................................................. 10
Section II – Software Basics...........................................................................................................................11
2-1 Navigating the Software............................................................................................................... 11
2-2 Program Setup.............................................................................................................................. 11
2-3 Editing a Parameter...................................................................................................................... 13
2-4 Online Help................................................................................................................................... 14
Section III – Using the Software with DigiTrace T2000 Systems.....................................................................15
3-1 Features........................................................................................................................................ 15
3-2 Preparation................................................................................................................................... 15
3-3 Connecting to an AC2000+............................................................................................................ 16
3-4 AC2000+ and CM2000/CM2000+ Support..................................................................................... 16
3-4-1 Configure GCC...................................................................................................................... 17
3-4-2 Install HTC............................................................................................................................ 17
3-4-3 Delete HTC........................................................................................................................... 18
3-4-4 GCC Alarms.......................................................................................................................... 18
3-4-5 Edit GCC Tag......................................................................................................................... 19
3-4-6 Configure HTC...................................................................................................................... 19
3-4-7 Monitor HTC......................................................................................................................... 19
3-4-8 HTC Alarms.......................................................................................................................... 20
3-4-9 Edit HTC Tag......................................................................................................................... 20
3-5 Tools Menu.................................................................................................................................... 21
3-5-1 Using Tools........................................................................................................................... 21
3-5-2 AC2000+ Port Configuration................................................................................................ 22
3-5-3 Upgrade AC2000+ Flash ROM.............................................................................................. 22
3-5-4 Save AC2000+ Configuration................................................................................................ 23
3-5-5 Update AC2000+ Configuration............................................................................................ 23
Appendix A – Troubleshooting........................................................................................................................24
A-1 Communication Error................................................................................................................... 24
THERMAL MANAGEMENT SOLUTIONS
EN-DigiTracePPDsoftware-IM-H57402 04/13
2 / 24
Vital Information
IMPORTANT: All information, including illustrations, is believed to be reliable. Users, however,
should independently evaluate the suitability of each product for their particular application.
Pentair Thermal Management makes no warranties as to the accuracy or completeness of the
information, and disclaims any liability regarding its use.
Pentair Thermal Management' only obligations are those in the Pentair Thermal Management
Standard Terms and Conditions of Sale for this product, and in no case will Pentair Thermal
Management or its distributors be liable for any incidental, indirect, or consequential damages
arising from the sale, resale, use, or misuse of the product. Specifications are subject to change
without notice. In addition, Pentair Thermal Management reserves the right to make changes—
without notification to Buyer—to processing or materials that do not affect compliance with any
applicable specification.
License Agreement
DigiTrace Portable Programming Device (PPD) Software - License Agreement
This agreement is a legal agreement between you, “the end user” and Pentair Thermal
Management, LLC (“Pentair Thermal Management”). By installing or otherwise accessing this
program, you are agreeing to become bound by the terms of this agreement. If you do not agree
to the terms of this agreement, do not install or access this program. If installing or otherwise
accessing this program by opening a sealed disk package, promptly return the unopened disk
package and the other items (including written materials or other containers) to the place where
you obtained them.
1.
GRANT OF LICENSE. The DigiTrace Portable Programming Device (PPD) Software (the
“Software”) is licensed, not sold, to you for use only under the terms of this Agreement,
and Pentair Thermal Management reserves any rights not expressly granted to you.
Pentair Thermal Management grants to you, the end user, the right to use this copy,
including written materials if any, of the Software on a single computer at the location
(company and address) to which Pentair Thermal Management issued this copy of the
DigiTrace Portable Programming Device (PPD) Software. The Software is owned by
Pentair Thermal Management LLC and is protected by United States copyright laws
and international treaty provisions. You agree not to alter, merge, duplicate distribute,
decompile or reverse engineer, create derivative works, copy for use on any other
computer or at any other location, or otherwise make this program available to any
person or entity outside this location. All copies made by you are subject to the terms and
conditions of this Agreement.
2.
OTHER RESTRICTIONS.
1. You may not sublicense, rent or lease the DigiTrace Portable Programming Device
(PPD) Software to anyone.
2. You agree to notify Pentair Thermal Management promptly if “bugs” or seemingly
incorrect or anomalous behavior is discovered when using the Software.
3. You agree that the DigiTrace Portable Programming Device (PPD) Software, including
written materials (if any) and all copies in whole or in part, will be destroyed or
returned to Pentair Thermal Management at the written request of the Pentair
Thermal Management Product Manager.
4. By installing or otherwise accessing the DigiTrace Portable Programming Device
(PPD) Software, you acknowledge that you have read and understood Pentair Thermal
Management’ Disclaimer of Warranty and Limitation of Liability, set forth below.
5. You agree to use reasonable efforts to protect against the unauthorized copying and
use the DigiTrace Portable Programming Device (PPD) Software by others.
THERMAL MANAGEMENT SOLUTIONS
EN-DigiTracePPDsoftware-IM-H57402 04/13
3 / 24
3.
DISCLAIMER OF WARRANTY. The digitrace portable programming device (ppd) software
and accompanying written materials are provided “as is” without warranty of any kind. The
entire risk as to the results and performance of the digitrace portable programming device
(ppd) software is assumed by you. Pentair thermal management does not warrant that the
functions contained in the software will meet your requirements or that the operation of
the software will be uninterrupted or error-free, or that program defects will be corrected.
4.
LIMITED WARRANTY – MEDIA. The medium on which the program is encoded is warranted
to be free from defects in material and workmanship under normal use for a period of
sixty (60) days from the date of delivery to you as evidenced by a copy of your receipt.
Although pentair thermal management believes the media and the program to be free of
viruses, the medium and the program are not warranted to be virus free. Pentair thermal
management’ liability and your exclusive remedy if the medium is defective or includes
any virus shall be prompt replacement of the medium with a new digitrace portable
programming device (ppd) software pre-encoded disc.
5.
EXCLUSION OF ALL OTHER WARRANTIES. Except as expressly provided above, pentair
thermal management disclaims all warranties, either express, implied or statutory,
including but not limited to any warranty of merchantability or fitness for a particular
purpose, even if pentair thermal management has been advised of such purpose. This
agreement gives you specific legal rights. Some states or countries do not allow the
exclusion of warranties so the above exclusion may not apply to you.
6.
LIMITATION OF LIABILITY. Pentair thermal management shall not be liable for any loss,
damage or delay during shipment or for any loss of profits, loss of use, interruption
of business, nor for indirect, special, incidental or consequential damages of any kind
whatever under this agreement or otherwise, whether or not pentair thermal management
has been advised of the possibility of such damages.
7.
TERMINATION. The license granted herein will automatically terminate without notice
from Pentair Thermal Management if you fail to comply with any term or condition of
this Agreement. You agree, upon such termination, to remove the DigiTrace Portable
Programming Device (PPD) Software from any memory and/or storage media or device,
and to return the DigiTrace Portable Programming Device (PPD) Software, including all
media and written materials, or destroy the same and certify such destruction to Pentair
Thermal Management, along with any backup or other copies in your possession.
8.
COMPLETE AGREEMENT – MODIFICATION IN WRITING. This Agreement constitutes
the sole and complete understanding between the parties with respect to the DigiTrace
Portable Programming Device (PPD) Software and its use, and may not be varied except by
a writing signed by an officer of Pentair Thermal Management. You agree that you may not
rely on any representations concerning the DigiTrace Portable Programming Device (PPD)
Software to the extent they vary from this Agreement, and such representations, if any, will
neither add to nor vary the terms of this Agreement.
9.
CHOICE OF LAWS. This Agreement is governed by the laws of the State of California and
the United States, including U.S. Copyright Laws.
10.
EXPORT LAWS. The DigiTrace Portable Programming Device (PPD) Software may require
a license from the U.S. Department of Commerce or other governmental agency before
it may be exported. The term “export” includes many acts (such as transferring the
DigiTrace Portable Programming Device (PPD) Software to a foreign citizen within the
United States), in addition to sending or taking the DigiTrace Portable Programming Device
(PPD) Software outside the United States. You agree to ascertain the necessary licensing
procedures and obtain any required licenses before exporting the DigiTrace Portable
Programming Device (PPD) Software. You also agree to indemnify Pentair Thermal
Management and assume all financial responsibility for any losses it may suffer if you do
not comply with this paragraph.
11.
Government Restricted Rights. User acknowledges that the DigiTrace Portable
Programming Device (PPD) Software has been developed at private expense and is
provided with “Restricted Rights.” Use, duplication or disclosure by the Government is
subject to restrictions as set forth in subparagraph (b)(3) and paragraph (c) of the Rights
in Technical Data clause at 48 C.F.R. 252.227-7013, or subparagraphs (c)(1) and (2) of the
Commercial Computer Software – Restricted Rights clause at 48 C.F.R. 52.227-19, as
applicable. This provision applies to the DigiTrace Portable Programming Device (PPD)
THERMAL MANAGEMENT SOLUTIONS
EN-DigiTracePPDsoftware-IM-H57402 04/13
4 / 24
Software acquired directly or indirectly by or on behalf of any government. The DigiTrace
Portable Programming Device (PPD) Software is a commercial product, licensed on
the open market at market prices, and was developed entirely at private expense and
without the use of any government funds. Any use, modification, reproduction, release,
performance, display, or disclosure of the DigiTrace Portable Programming Device (PPD)
Software by any government shall be governed solely by the terms of this Agreement
and shall be prohibited except to the extent expressly permitted by the terms of this
Agreement, and no license to the DigiTrace Portable Programming Device (PPD) Software
is granted to any government requiring different terms.
12.
ASSIGNMENT. You may neither assign any right nor delegate any obligation under this
Agreement and attempted assignment or delegation shall be void. Pentair Thermal
Management may freely assign this agreement and its rights and obligations thereunder to
any third party.
13.
INVALID PROVISIONS. If any of the provisions of this provisions Agreement are invalid
under any applicable statute or rule of law, they are to that extent deemed omitted.
Should you have any questions concerning this Agreement, or if you desire to contact Pentair
Thermal Management for any reason, please write to:
Pentair Thermal Management
307 Constitution Drive
Menlo Park, California 94025-1164
U.S.A.
User Responsibilities
The performance, reliability and safety of your heat-tracing system depend on proper design,
selection and installation. The DigiTrace Portable Programming Device (PPD) Software will
help you configure and monitor a system that meets your requirements, but it is only a tool.
It assumes that your input is accurate, that you are familiar with heat-tracing system design
and configuration, and that you will ensure that all components of the heat-tracing system
are installed, maintained and used as intended. The configuration of the DigiTrace Portable
Programming Device (PPD) Software should be reviewed by a knowledgeable engineer to ensure it
is appropriate for your application. Additional information relating to safety, design and installation
is contained in Design Guides, Installation Manuals, Data Sheets, and other literature available
from Pentair Thermal Management. Be sure to consult these documents as needed.
Safety Warnings
There are important safety warnings shipped with our products and printed in our literature. Be
sure to read and follow them to reduce the risk of fire, shock or personal injury. If you have any
questions, contact you local Representative or Pentair Thermal Management directly.
Technical Support
Local Representatives – Contact your local Pentair Thermal Management representative for help.
For the most up-to-date and complete listing, go to www.thermal.pentair.com, click Heating >
Customer Support, select your region, click Go, choose an application, enter your postal code, if
prompted, and click Find. Contact information for your local representative will appear.
THERMAL MANAGEMENT SOLUTIONS
EN-DigiTracePPDsoftware-IM-H57402 04/13
5 / 24
Section I – Overview
The Portable Programming Device (PPD) Software is a Windows CE based software utility
designed to configure various DigiTrace devices. This version of the software supports the
following products:
• AC2000+ Alarm/Communications Interface
• CM2000 and CM2000+ Heat Tracing Controllers
The software provides several features to help you configure and maintain your DigiTrace devices.
This document is not intended to provide a detailed explanation of the specific features of each
product, but rather to show the user how to access various parameters within the devices using
the PPD software. The user should refer to the documentation for the specific product being used
for detailed information about the products’ use.
The PPD kit includes the following items:
• Industrial PDA (Personal Digital Assistant), charger, and user guide
• Synchronization cable to connect the PDA to your Personal Computer (PC),
• Set of communications cables to allow the PDA to be connected to various DigiTrace
products (AC2000+, etc.),
• Software CD
• PPD Software User Manual
For specific details regarding the use, maintenance, and repair of the particular PDA included with
the PPD kit, refer to the PDA Manufacturer’s User Guide.
1-1 System Requirements
To effectively use the software, you must have the following minimum configuration:
• Pocket PC running Windows CE 3.0 or higher
• Intel™ StrongArm or XScale processor
• At least 2 megabytes of free memory space
• 1 available serial or USB port
• The appropriate serial or USB interface cable kit
• While the software may run on various 3rd party devices, it has been specifically tested
to operate with the Pentair Thermal Management PPD-IND and PPD-HAZ Portable
Programming Devices and accessories.
1-2 Initial Setup
The PPD software is designed to run on a Windows CE device (See Section 1-1 System
Requirements for supported devices). If you have purchased a complete PPD-IND or PPD-HAZ kit
from an authorized Pentair Thermal Management distributor, the PPD software will have been
pre-installed on the PDA at the Factory.
You must fully charge your PDA prior to initial use -- follow the Manufacturer’s instructions in the
PDA’s User Guide for more details.
1-3 Installing the PPD Software
If the PPD software has not been installed on your CE device, or you wish to upgrade an existing
version of the software to a newer version, follow the steps below.
1-3-1 Installing ActiveSync
To load the PPD software into a compatible device, or to update an existing copy, you must
establish a connection between the device and a desktop computer that contains Microsoft’s
ActiveSync software. Before you run the software installation, you must successfully connect your
PC to the Windows CE device using the ActiveSync software.
If you do not have ActiveSync installed on your computer, you can obtain a copy from the Microsoft
Website by accessing the following link: www.microsoft.com/downloads/search.asp, searching
on “ActiveSync”, and downloading the latest version. Follow the setup instructions to install
ActiveSync onto your PC.
THERMAL MANAGEMENT SOLUTIONS
EN-DigiTracePPDsoftware-IM-H57402 04/13
6 / 24
1-3-2 Establishing a Connection to Your PC
To install the PPD software, connect the PDA to your computer using the cable provided with your
PPD kit and perform the following steps:
1) Establish a connection with your PC. Some models of PDA (such as the PPD-HAZ,
DI-225) will automatically initiate the communications when you connect the cable.
Other types (such as the PPD-IND, Jett-CE) may require that you manually initiate
communications from the PDA by running a connection utility. Refer to the user
manual provided with your PDA for detailed instructions.
2) Once a connection has been made, you may be asked whether you wish to create a PC
to PDA partnership. This type of synchronizing connection is not required but may be
set up if you desire. However, usually this question is answered with a “no”. You should
now be connected as a Guest.
Figure 1-3-1 ActiveSync Connection Type Selection
Figure 1-3-2 Connected to ActiveSync as a Guest
3) Next, insert the CD labeled “DigiTrace Portable Programming Device (PPD) Software”
into the computer’s CD ROM drive.
4) Click the Start button, select Run, and then click on Browse.
5) Select the CD ROM drive and navigate to the appropriate PPD folder (PPD-HAZ or PPDIND) depending on the type of PPD you have purchased.
6) Select the folder for the specific PDA type for which you are installing the software (for
example: DI-225, or Jett-CE, etc.)
7) Select the SETUP.EXE entry and click OK to start.
THERMAL MANAGEMENT SOLUTIONS
EN-DigiTracePPDsoftware-IM-H57402 04/13
7 / 24
IMPORTANT: You MUST install the correct version of PPD Software for the specific type of device
that you are using. The software will not operate if the wrong version is installed.
Figure 1-3-3 Installation Wizard Screen
1-3-3 Installing or Upgrading using a New PC
The next few steps apply when your PC has never before been used to install or upgrade the PPD
software. Refer to the next section if you are using a PC that has previously been used to install or
to upgrade a PPD’s software.
Continuing from section 1-3-2 above, perform the following steps:
8) You will be prompted to enter your name and agree to the Microsoft License
Agreement. You must agree to continue the installation process. If you disagree, the
process will terminate.
9) Select the “Complete” installation process and follow any on screen instructions.
Figure 1-3-4 Complete Installation Selection
10)If your PDA already has a version of the PPD software installed on it, the installation
process will detect this and you may be asked to confirm that you want to reinstall or
upgrade the software. Answer “yes” to proceed.
11)Answer “yes” when prompted to install the software into the default directory/folder.
12)You will now be asked to check the mobile device (PDA) to perform any additional
steps. If the PPD software has been previously installed on the PDA, you may be asked
to confirm that you want to reinstall or upgrade the software. Answer “yes” to proceed.
13)Once complete, return to the PC screen and complete the installation process by
following any additional instructions.
THERMAL MANAGEMENT SOLUTIONS
EN-DigiTracePPDsoftware-IM-H57402 04/13
8 / 24
1-3-4 Installing or Upgrading using an Existing PC
The next few steps apply when your PC has previously been used to install or upgrade the PPD
software. Refer to the previous section if you are using a PC that has never before been used to
install or to upgrade a PPD’s software.
Continuing from section 1-3-2 above, perform the following steps:
8) Select the “Repair” installation process and follow any on screen instructions. This will
reinstall all program components that were installed by a previous setup.
Figure 1-3-5 Selection of “Repair” Process
9) If your PDA already has a version of the PPD software installed on it, the installation
process will detect this and you may be asked to confirm that you want to reinstall or
upgrade the software. Answer “yes” to proceed.
10)Answer “yes” when prompted to install the software into the default directory/folder.
11)You will now be asked to check the mobile device (PDA) to perform any additional
steps. If the PPD software has been previously installed on the PDA, you may be asked
to confirm that you want to reinstall or upgrade the software. Answer “yes” to proceed.
12)Once complete, return to the PC screen and complete the installation process by
following any additional instructions.
THERMAL MANAGEMENT SOLUTIONS
EN-DigiTracePPDsoftware-IM-H57402 04/13
9 / 24
1-4 Uninstalling the Software
Use of this feature is best accomplished using a stylus, as the interface is not optimized for access
using a finger on the touch screen. When the PPD software is installed, a copy is placed on your
PC’s hard drive and a copy is written directly into the PDA’s memory.
1-4-1 Removing the Software from your PDA
To uninstall the software on the PDA:
1) Use the Windows CE Start button to navigate to the Pentair Thermal Management
folder (Program\Pentair Thermal Management).
2) Select “Uninstall PPD” to uninstall the PPD software.
3) Follow the instructions on the screen.
Figure 1-4-1 Uninstall PPD Software
1-4-2 Removing the Software from your PC
To uninstall the software from your PC:
1) Use the Windows Start button to navigate to the Control Panel.
2) Select “Add or Remove Programs”
3) Select the “DigiTrace PPD Software …” entry in the list.
4) Select the “Change/Remove” button to uninstall the PPD software.
5) Follow the instructions on the screen.
THERMAL MANAGEMENT SOLUTIONS
EN-DigiTracePPDsoftware-IM-H57402 04/13
10 / 24
Section II – Software Basics
2-1 Navigating the Software
When you launch the PPD software, you will see the main screen (See Figure 2-1-1). The screen
may be set up in landscape or portrait mode depending on the type of PDA you are using. This
document provides examples of each type of display throughout this document. The functionality
of the PPD software is the same for both landscape and portrait mode.
The main screen includes version and copyright information, as well as four navigation buttons.
The function of these four buttons will change depending on the feature you are using. On the
main screen, these buttons are Connect, Tools, Exit and Setup.
Using these four buttons, you can navigate and control all functions of the PPD software. Pressing
and holding the Up and Down buttons will cause the selection cursor to move up or down
repeatedly, or to increment/decrement a numeric field if it one is being edited.
Note also that the small square blocks on the lower right-hand side of the screen serve as a
reminder to the user of the current menu level relative to the main screen. The deeper the menu
level, the more blocks will be displayed.
The following screens are considered main screens: Device Selection, Tools, and Setup.
IMPORTANT: When the software is run for the first time, you need to edit the program setup – see
Section 2-2 that follows.
Figure 2-1-1 Main Screen
2-2 Program Setup
Program setup includes configuration of COM Port Settings and General Settings.
Figure 2-2-1 Program Setup
THERMAL MANAGEMENT SOLUTIONS
EN-DigiTracePPDsoftware-IM-H57402 04/13
11 / 24
The COM Port Settings include: the COM Port, Baudrate, Parity, Stopbits, Protocol, Timeout, and
Retries parameters.
To edit the COM Port parameters, press the Setup button on the main screen to display the
Program Setup screen. On this screen, the COM Port Settings item is selected as the default.
Press the Next button to display the COM Port Settings screen. You can use the Up or Down
buttons to select the COM Port parameter to modify, and use the OK button to save your changes.
To go back to the previous screen, use the Back button.
The COM port settings must match the communications port settings on the target device to
establish a connection with the PPD.
Figure 2-2-2 Communications Port Settings
The General Settings include: the Language and Temperature Units parameters. This version of
the PPD software only supports an English language display. Temperature units may be displayed
in degrees Fahrenheit or Celsius.
Figure 2-2-3 General Settings
THERMAL MANAGEMENT SOLUTIONS
EN-DigiTracePPDsoftware-IM-H57402 04/13
12 / 24
2-3 Editing a Parameter
Editing of numeric and alpha-numeric parameters is supported by the PPD software using a popup, multi-function keyboard.
Figure 2-3-1 Pop-up Keyboard
The keyboard provides buttons that are large enough to be pressed by a gloved finger, and
supports both numeric and alphabetic character entry. Four buttons (Num, Alpha 1, Alpha 2, and
Alpha 3) are located below the main keys, allowing the user to define the function of each of the
twelve keys in the keyboard as follows:
NUM Key
This key shows the default state, and allows you to enter the numbers 0 through 9, and a decimal
point into the parameter that is being edited. When this mode is selected, the large text on each
key will represent a specific character, as defined by the first character in the text along the top of
each key.
ALPHA 1 Key
When this key is pressed, you will be allowed to enter the characters A, D, G, J, M, P S, V, Y, (, and
“.” into the parameter that is being edited. When this mode is selected, the large text on each key
will represent a specific character, as defined by the second character in the text along the top of
each key.
ALPHA 2 Key
When this key is pressed, you will be allowed to enter the characters B, E, H, K, N, Q, T, W, Z, ),
and “-” into the parameter that is being edited. When this mode is selected, the large text on each
key will represent a specific character, as defined by the third character in the text along the top of
each key.
ALPHA 3 Key
When this key is pressed, you will be allowed to enter the characters C, F, I, L, O, R, U, X, #,
<space>, and “/” into the parameter that is being edited. When this mode is selected, the large text
on each key will represent a specific character, as defined by the fourth character in the text along
the top of each key.
IMPORTANT: The Backspace key is available in all four keyboard modes to allow you to clear an
entry. If you are editing a numeric parameter, the Alpha mode keys will not allow you to enter
alphabetic characters or special symbols. You may use the UP and DOWN buttons to quickly
increase or decrease a numeric value without using the keyboard.
THERMAL MANAGEMENT SOLUTIONS
EN-DigiTracePPDsoftware-IM-H57402 04/13
13 / 24
2-4 Online Help
The PPD software includes an online help feature. Access to this feature is best accomplished
using a stylus, as the interface is not optimized for access using a finger on the touch screen.
To access Help text, press the “?” symbol on the upper right-hand corner of the display.
Figure 2-4-1 Help Screen
THERMAL MANAGEMENT SOLUTIONS
EN-DigiTracePPDsoftware-IM-H57402 04/13
14 / 24
Section III – Using the Software with DigiTrace T2000 Systems
3-1 Features
This version of the PPD software will allow you to perform the following for each of the products
listed below:
AC2000+ Alarm/Communications Card
1) Setup the parameters for each of the three communications ports.
2) Save and Restore the communications port configurations from/to a disk file.
3) Upgrade the AC2000+ with the latest version of firmware.
4) Edit AC2000+ configuration parameters.
5) Install/Uninstall a CM2000/CM2000+ to/from an AC2000+.
6) Edit the tag of an AC2000+.
7) View and Reset alarms in an AC2000+.
CM2000 and CM2000+ Heat Tracing Controllers
1) Edit CM2000/CM2000+ configuration parameters.
2) View and reset CM2000/CM2000+ maintenance data.
3) Edit the tag of a CM2000/CM2000+.
4) View and Reset alarms in a CM2000/CM2000+.
5) Monitor CM2000/CM2000+ parameters in real time.
IMPORTANT: The PPD and PPD Software are NOT compatible with older T2000 systems using
an AC2000 Alarm/Communications Interface card. For information on how to upgrade an existing
system, contact your local Pentair Thermal Management representative.
3-2 Preparation
Before you begin, make sure your PPD is properly connected to the DigiTrace AC2000+ using one
of the communications cables provided with the PPD kit. You may connect the PPD to the local port
located on the front of the AC2000+ card or to the chassis-mounted communications connector on
a T2000 control panel.
IMPORTANT: The AC2000+ may be set to either CONFIG or RUN mode. You must change the
dip switch setting on the AC2000+ to place the unit into configuration (CONFIG) mode. After you
have saved the configuration changes, you must change the dip switch setting back to place the
AC2000+ into RUN mode. See the DigiTrace T2000 User Manual for more information on AC2000+
dip switch settings.
THERMAL MANAGEMENT SOLUTIONS
EN-DigiTracePPDsoftware-IM-H57402 04/13
15 / 24
3-3 Connecting to an AC2000+
Before you can configure an AC2000+ and/or CM2000/CM2000+, you must use the Connect button
and enter the communications address of the AC2000+.
Once the connection is established, you can perform configuration changes, view and reset
alarms, add/remove HTCs, view maintenance data, perform maintenance functions, and edit the
device’s tag. The following Section will provide more detailed information on how to use these
functions.
Figure 3-3-1 Establish a Connection
IMPORTANT: The AC2000+ must be in RUN mode for the connection to be successful.
3-4 AC2000+ and CM2000/CM2000+ Support
Once a successful connection to the AC2000+ has been established, the Device Selection screen
will be displayed. This screen will show at least one device (the AC2000+) at the top of the list.
Any installed CM2000/CM2000+ controllers will be displayed after the AC2000+. Use the Up or
Down buttons to select the device upon which you wish to perform operations.
The following Group Communications Controller (GCC) operations are available when the AC2000+
is selected:
1) Configure GCC
2) Install HTC
3) Delete HTC
4) GCC Alarms
5) Edit GCC Tag
The following HTC operations are available when a CM2000/CM2000+ is selected:
1) Configure HTC
2) Monitor HTC
3) HTC Alarms
4) Edit HTC Tag
Figure 3-4-1 Device Selection
THERMAL MANAGEMENT SOLUTIONS
EN-DigiTracePPDsoftware-IM-H57402 04/13
16 / 24
3-4-1 Configure GCC
The GCC Configuration screen includes Alarm Settings, Global Alarm Priorities Settings,
Load Shedding Settings, and Miscellaneous Settings. Each of these Settings contains a set of
parameters that you can edit. Use the Up and Down buttons to choose the desired Setting and the
Next button to select it. After you’ve made your changes, use the OK button to save them.
Figure 3-4-2 GCC Operations
IMPORTANT: Some parameters are dependent on other settings. The software will automatically
hide selections that should not be available.
Figure 3-4-3 GCC Configuration
3-4-2 Install HTC
This screen allows you to install an HTC into an AC2000+. Select the TAG or ADDRESS fields
using the Select button, and edit the selected parameter by pressing the Edit button. Enter an
appropriate tag and address for the new HTC, then press the Install button. The tag must be 19
characters or less, and the valid address range is 1 to 16777216.
Figure 3-4-3 Install an HTC
THERMAL MANAGEMENT SOLUTIONS
EN-DigiTracePPDsoftware-IM-H57402 04/13
17 / 24
3-4-3 Delete HTC
This screen allows you to delete an HTC from the AC2000+. Use the Up and Down buttons to select
the HTC. Press the Delete button to delete it. After you press the Delete button, the software will
prompt you to confirm the deletion. If you select Yes, the HTC will be permanently removed from
the AC2000+ installed HTC list.
Figure 3-4-4 Delete an HTC
3-4-4 GCC Alarms
This screen displays all active alarms for the AC2000+ and will refresh automatically every 5
seconds. To view HTC alarms please see Section 3-4-8 HTC Alarms. To reset a GCC alarm, use
the Up and Down buttons to select an alarm, and then press the Reset button. The software will
display a prompt that allows you the option to reset the selected alarm, reset all alarms, or cancel
the operation.
Once an alarm is reset, the alarm is removed from the GCC Alarms screen.
Figure 3-4-5 GCC Alarms
THERMAL MANAGEMENT SOLUTIONS
EN-DigiTracePPDsoftware-IM-H57402 04/13
18 / 24
3-4-5 Edit GCC Tag
This screen allows you to edit the AC2000+ tag. Enter a valid tag then press the OK button to save.
The tag must be 19 characters or less, and valid characters include the following:
• A to Z
• a to z
• 0 to 9
•/,-,.,(,),#,
Figure 3-4-6 Edit GCC Tag
3-4-6 Configure HTC
The HTC Configuration screen includes the HTC Temperature Settings, Temperature Alarm
Settings, Electrical Settings, Other Temperature Settings, and Miscellaneous Settings. Each of
these selections contains a set of parameters that you can edit. You can use the Up and Down
buttons to choose the desired setting and the Next button to select it. After you’ve made changes
to a parameter, use the OK button to save the changes.
Figure 3-4-7 HTC Configuration
IMPORTANT: Some parameters are dependent on other settings. The software will automatically
hide selections that should not be available.
3-4-7 Monitor HTC
The HTC Monitor screen includes the Temperature Readings, Electrical Readings, Maintenance
Readings, Reset Max/Min Values, the Test Trace feature, and the Set Monitor Interval parameter.
To monitor HTC data, use the Up or Down buttons to select Temperature Readings, Electrical
Readings, or Maintenance Readings. Once you have chosen one of these screens, the software
will automatically scan the HTC and refresh the screen once every Monitor Scan interval. The
default Monitor Scan interval is 5 seconds. You can edit the Monitor Scan Interval with the Set
Monitor Interval option.
THERMAL MANAGEMENT SOLUTIONS
EN-DigiTracePPDsoftware-IM-H57402 04/13
19 / 24
The Reset Max/Min Values selection includes Reset Max/Min Temperatures, Reset Hours in Use,
Reset Power Accumulator, and Reset Contactor Count functions. For each of these functions, the
software will prompt you to confirm the choice before it executes the command.
The Test Trace Selection can be used to force the HTC output on for a number of seconds (the Test
Trace period). In this screen, use the Up or Down buttons to set the test trace period then press
the OK button to initiate the test trace feature.
Figure 3-4-8 Monitor HTC
3-4-8 HTC Alarms
This screen displays all active alarms for a CM2000/CM2000+ and will refresh automatically every
5 seconds. To view GCC alarms see Section 3-4-4 GCC Alarms. To reset an HTC alarm, use the
Up or Down buttons to select an alarm, then press the Reset button. The software will display
a prompt that allows you the option to reset the selected alarm, reset all alarms, or cancel the
operation.
Once an alarm is reset, the alarm is removed from the HTC Alarms screen.
Figure 3-4-9 HTC Alarms
3-4-9 Edit HTC Tag
This screen allows you to edit the CM2000/CM2000+ tag. Enter a valid tag then press the OK
button to save. The tag must be 19 characters or less, and valid characters include the following:
• A to Z
• a to z
• 0 to 9
•/,-,.,(,),#,
THERMAL MANAGEMENT SOLUTIONS
EN-DigiTracePPDsoftware-IM-H57402 04/13
20 / 24
Figure 3-4-10 Edit HTC Tag
3-5 Tools Menu
The Tools menu screen provides access for configuration of the AC2000+ communication ports,
upgrading the Flash ROM (program memory), saving AC2000+ configuration to a disk file and
Updating the AC2000+ configuration from a disk file. See the sections below for more information
on how to use these functions.
Note that the functions in this menu are intended for advanced users. The user interface is not
optimized for use with a gloved finger, so a stylus may be required to easily navigate through the
various parameters.
IMPORTANT: The AC2000+ must be in CONFIG mode before you can use the tools menu. Refer to
the AC2000+ User Manual for detailed instructions on how to place it into CONFIG mode.
3-5-1 Using Tools
The Tools screen includes AC2000+ Port Configuration, Upgrade Flash ROM, Save AC2000+
Configuration, and Update AC2000+ Configuration function items.
Figure 3-5-1 Tools Menu
IMPORTANT: The communications parameters for an AC2000+ in CONFIG mode are fixed at
38400 Baud, No Parity, 1 Stopbit, and RTU protocol. The PPD software will dynamically set its
communications parameters to match when the Tools button is pressed.
3-5-2 AC2000+ Port Configuration
The AC2000+ has three communications ports: a Remote Port, a Local Port, and an Ethernet port.
Each communications port must be setup appropriately in order for upstream software such as
DigiTrace Supervisor™ to communicate to it.
THERMAL MANAGEMENT SOLUTIONS
EN-DigiTracePPDsoftware-IM-H57402 04/13
21 / 24
Each port has its own independent set of communications parameters. Consult the AC2000+ User
Manual for details regarding these parameters.
Figure 3-5-2 Port Settings
IMPORTANT: If the HTC Bus Baud Rate is changed, you must cycle the power on all controllers
connected to this AC2000, otherwise HTC communications failure alarms will occur.
3-5-3 Upgrade AC2000+ Flash ROM
Use of this feature is best accomplished using a stylus, as the interface is not optimized for access
using a finger on the touch screen.
The Upgrade Flash ROM screen contains two selections: one to update the Flash Configuration file
and the second to update the Boot Monitor file. Select the appropriate binary file using the browse
function and then press the Next button to start the upgrade operation. Once the Flash Upgrade
operation starts, it will take several minutes to complete.
Figure 3-5-3 Upgrade Flash ROM
IMPORTANT: Do not cancel the upgrade operation while it is in process or the AC2000+ will likely
be left in an inoperable state.
THERMAL MANAGEMENT SOLUTIONS
EN-DigiTracePPDsoftware-IM-H57402 04/13
22 / 24
Figure 3-5-4 Browse for a File
3-5-4 Save AC2000+ Configuration
Use of this feature is best accomplished using a stylus, as the interface is not optimized for access
using a finger on the touch screen.
The Save AC2000+ Configuration function will save the current AC2000+ configuration settings
(communications port settings, installed HTC list, etc.) to a file. You may specify the location to
save the file using the browse function. The default file name is ‘CONFIG.CFG’, although you may
change this to any valid file name that you choose.
3-5-5 Update AC2000+ Configuration
Use of this feature is best accomplished using a stylus, as the interface is not optimized for access
using a finger on the touch screen.
The Update AC2000+ Configuration function will update the AC2000+ configuration settings from a
previously saved configuration file of your choice. Select the file using the browse function.
THERMAL MANAGEMENT SOLUTIONS
EN-DigiTracePPDsoftware-IM-H57402 04/13
23 / 24
Appendix A – Troubleshooting
A-1 Communication Error
Modbus Timeout
If the PPD software reports a Modbus Timeout error, verify the following:
1. The cable from the PPD to the target device (AC2000+, etc.) is properly connected.
2. The communications parameters for the PPD are set to match the target device.
IMPORTANT: If you are upgrading the Flash ROM and you get Modbus timeout, try increasing
the number of retries allowed. If upgrading an AC2000+ with an Ethernet port connection, try
disconnecting the Ethernet cable to the AC2000+ during the upgrade process.
WWW.THERMAL.PENTAIR.COM
NORTH AMERICA
Europe, Middle East, Africa
Asia Pacific
Latin America
Tel:+1.800.545.6258
Fax:+1.800.527.5703
Tel:+1.650.216.1526
Fax:+1.650.474.7215
[email protected]
Tel:+32.16.213.511
Fax:+32.16.213.603
[email protected]
Tel:+86.21.2412.1688
Fax:+86.21.5426.2917
[email protected]
Tel:+55.11.2588.1400
Fax:+55.11.2588.1410
[email protected]
Pentair and DigiTrace are owned by Pentair or its global affiliates. All other trademarks are the property of their respective owners. Pentair reserves the
right to change specifications without prior notice.
© 2003-2013 Pentair.
THERMAL MANAGEMENT SOLUTIONS
EN-DigiTracePPDsoftware-IM-H57402 04/13
24 / 24