1
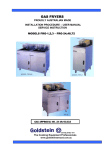
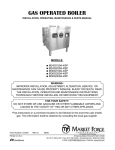
GAS FRYER
PROUDLY AUSTRALIAN MADE
INSTALLATION PROCEDURE – USER MANUAL
SERVICE INSTRUCTION
MODEL VFG1
GAS APPROVAL NO. 7732
ESTABLISHED 1911
The Cooking Equipment Professionals
www.goldsteineswood.com.au
TABLE OF CONTENTS
1.
INTRODUCTION
Page 3
2.
INSTALLATION
Page 4 & 5
3.
COMMISSIONING
Page 6
4.
OPERATING INSTRUCTIONS
Page 7- 8 & 9
5.
LIGHTING INSTRUCTIONS
Page10
6.
DRAINING & FILTERING INSTRUCTIONS
Page 11
7.
TECHNICAL DATA
Page 12
8.
SERVICING
Page 13
9.
TROUBLE SHOOTING
Page 14-16
10.
WIRING DIAGRAM
Page 17
11.
CONTROLS
Page 18
12.
DRAWING
Page 19
13.
SPARE PARTS
Page 20
14.
WARRANTY
Page 21
15.
BRANCHES
Page 22
2
IM085B1 – September 2010
1.
INTRODUCTION
Congratulations for purchasing your Goldstein commercial cooking appliance.
J. Goldstein & Co. is a wholly owned Australian company and has been
operating since 1911, building high quality products. The information in this
manual will assist your installer and ensure correct location and connection.
Thoroughly read the user instructions and the user maintenance sections, as
understanding your products, its operation, and its cleaning and service
requirements will provide you with long and satisfactory service. Failure to do
so could shorten the life of the product and decrease its efficiency. Please
ensure only authorised service technicians are called to any difficulties that
may arise.
INTRODUCTION
GOLDSTEIN GAS FRYER
MODELS VFG1
GOLDSTEIN FRYERS are designed to give long and satisfactory service and
incorporate the best possible materials and workmanship. Proper installation,
adjustment and preventative maintenance are vitally important if efficiency and
appearance are to be maintained.
A freestanding vee tank automatically controlled gas-operated fryer. The fryer
is mounted on 4 legs with a clearance from floor of 152mm. The fryer is
equipped with a splash back incorporating a top venting flue outlet. Pan outer
case and outer surround of stainless steel, cooking pan of Stainless steel.
Read these instructions carefully as they contain important safety information
regarding the installation, use and maintenance of the appliance.
OIL TEMPERATURE
Keep the oil temperature in the fryer to a maximum of 180ºC. Higher temperatures
will cause rapid breakdown of the oil and give you no faster cooking.
At 205ºC to 210ºC the life of the oil is only one third of its life at 180ºC. In addition
increased decomposition causes the oil to smoke badly even if the temperature is
lowered to 180ºC again.
High temperatures give you no advantage, cost you money and increase the fire
danger.
“THE EQUIPMENT MUST BE INSTALLED BY A
LICENSED GASFITTER
3
IM085B1 – September 2010
2. INSTALLATION
RECEIVING INSPECTION – PRE-INSTALLATION
• Check crates for handling damage.
After carefully uncrating, check for
“concealed” damage. Report any damage immediately to carrier and to dealer.
• Remove and check all loose items as found on back of Warranty Card.
• Check type and capacity of gas supply.
• The type of gas for which this fryer is factory adjusted can be seen on
the rating plate, located on the inside of the door.
PRE-INSTALLATION OF THE FRYER
• Check that there is sufficient clearance between doors and passageways to move
equipment into the cooking area.
• Check the rating plate to ensure appliance is suitable for the gas supply to which it
will be connected and for information relative to gas input pressure and
consumption.
• SPECIAL attention must be paid to fire hazards from combustible surfaces.
• REGULATOR The fryer gas control incorporates a gas pressure regulator which
meets the requirements of AS4563-2004, Section 2.2. Therefore, no appliance
regulator is required to be connected into the supply line, unless supply gas
pressure is greater than 6 Kpa.
Assemble legs to fryer
Tilt fryer to rear and screw in 2 legs supplied. Tilt fryer to front then screw legs into
rear. The Fryer should be levelled left to right with a 3mm fall from the back to the
front.
Ventilation
Adequate ventilation must be provided, preferably by a hood with vent and exhaust
fan. Never make a direct connection between the flue of the appliance and the vent
flue.
INSTALLATION
NOTE:
The appliance must be installed by an authorised person and in accordance
with the regulations of the local Gas Authority, AS5601/AG601 and any other
authority having jurisdiction. The appliance has been tested and preset before
leaving our factory, but small adjustments may be necessary to suit local
conditions.
Correct operation of the appliance must be tested as part of the installation
procedure.
4
IM085B1 – September 2010
2. INSTALLATION Cont’d
Please follow these instructions carefully
1.
Set unit in desired position. If rear and side wall is of combustible material
ensure there is a minimum distance of 150mm between the back or side of the
unit and the wall. (Minimum 1000mm overhead clearance to combustible
material. The appliance should be installed on a fire proof base.)
2.
Adjust feet till they are all touching the floor and using a spirit level from front
to rear and left to right. This operation is important as a floor variation of
25mm to 75mm in a floor is found to be common.
NOTE: The above levelling procedure is critical for the fryer to work according
to the manufacturers specifications.
3.
Have a licensed gas fitter connect the appliance to the mains supply. 19mm
(3/4 inch) BSP for rear gas entry. The appliance must be installed in
accordance with the rules of any authority having jurisdiction.
CAUTION
NEVER ALLOW BURNER TO OPERATE WITH FRYPOT EMPTY
THIS DAMAGES THE FRYPOT AND VOIDS WARRANTY
DO NOT TURN ON MAIN BURNER UNLESS THE OIL IS FILLED
TO THE CORRECT OIL LEVEL MARKED AT THE REAR OF PAN.
IF SOLID SHORTENING IS USED, BE CERTAIN SHORTENING IS
PRE-MELTED.
NOTICE
PLEASE RETURN YOUR WARRANTY CARD
FAILURE TO DO SO WILL VOID WARRANTY
ON THE EQUIPMENT
5
IM085B1 – September 2010
3. COMMISSIONING
COMMISSIONING APPLIANCE – DETAILS, TESTING, CHECKING
PRESSURE ETC.
COMMISSIONING CHECK LIST
1.
CHECK FOR DAMAGE AND MISSING PARTS.
2.
REMOVE ALL PLASTIC COATING FROM S/STEEL PANELS.
3.
MAKE SURE ALL PARTS ARE IN THEIR CORRECT POSITION E.G.
BURNERS, KNOBS.
4.
MAKE SURE ALL ELECTRIC AND GAS CONNECTIONS ARE CORRECT
AND TIGHT.
5.
LEVEL OFF UNIT LEFT TO RIGHT AND ALSO MAKE SURE THAT FRONT
IS JUST 3-4 MM LOWER TO ALLOW FOR FLUING.
6.
FILL WITH OIL TO MARK INDICATED IN TANK.
7.
TURN ON GAS OR ELECTRICITY.
8.
ADJUST GAS PRESSURE WITH THE UNIT RUNNING, ADJUST GAS
PRESSURE.
NATURAL GAS
1.0 KPA
LPG
2.5 KPA
The gas pressure test point is located on the gas control.
9.
SHOW CUSTOMER
A)
B)
C)
10.
HOW TO WORK EQUIPMENT
HOW TO CLEAN
ALSO WHAT NOT TO DO, E.G. WATER WITH ELECTRICAL,
GREASE AND OIL IN CONTROLS.
CHECK TO MAKE SURE MANUALS AND WARRANTY CARDS ARE
THERE.
ALSO GO THROUGH MANUAL WITH CUSTOMER E.G. LIGHTING,
CLEANING.
NOTE
WASH HOSES SHOULD NEVER BE USED ON THE APPLIANCE.
USE OF HOSES WILL VOID WARRANTY
6
IM085B1 – September 2010
4. OPERATING INSTRUCTIONS
1. BEFORE FIRST USE
Clean protective oil from bright parts and interior of pan with a solution of washing
soda or other grease dissolving material. If required, the pan may be boiled using a
water and detergent solution filled to the oil fill line on the fryer. Drain through valve
in bottom then rinse thoroughly. (Note: It must be completely rinsed out for even a
small particle of cleaner in the pan will ruin the cooking medium). Also clean baskets
and strainer.
Wipe out and make sure NO water remains.
.
2.
FILLING
Fill pan with frying medium to level indicated on back of pan. The VFG fryer takes
approximately 20 Litres of oil. Do not overfill your fryer pan. Overfilling causes
“foam over” and messy frying conditions.
3. DAILY OPERATION
OPENING:
At opening time, always visually check the fryer for:
a)
Combination or main gas valve “off”
b)
To light the fryer, see instructions on back of the door.
GENERAL USE OF THE FRYER:
a)
For consistent product quality, convenience and long-term savings, use a high
quality liquid frying compound.
b)
If using solid shortening, never attempt to melt a block of shortening by setting
it on the fryer tank. This is inefficient, dangerous and will cause damage to the
frying vessel.
c)
Temperature of frying compound. Although 180 degrees is the usual
temperature recommended for most cooking operations, frying should be
carried out a lowest temperature, which will produce a high quality end product
while ensuring maximum life of the frying compound. When the fryer is not in
use, the temperature controller or operating thermostat should be set lower
than that used during cooking. Light loads, too, may be cooked at lower
temperatures. A good operator will experiment to determine the best
temperature and load conditions for the various foods to be cooked.
7
IM085B1 – September 2010
4. OPERATING INSTRUCTIONS Cont’d
GENERAL USE OF THE FRYER cont’d
d.
Salting. Operators sometimes salt the food over the frying vessel. This
practice should be avoided, as salt deteriorates the frying compound quickly
and flavours everything being cooked, not just the batch being salted.
FILTERING
The frying compound should be filtered at least daily, or even more frequently if
cooking is heavy. This assures the longest life possible for the frying compound
gives a better taste to the food being prepared and minimizes flavours being
transferred from batch to batch.
If using solid shortening, always make sure the filter return lines are clear before
turning off the filter motor and hang any flexible lines up to drain. Solid shortening will
solidify as it cools and clog the lines.
CLOSING
When closing at night, filter the oil in all fryers and drain the filter lines. Cover the
open tanks of oil. Turn the power switch on the fryer panel “off” and turn the control
knob on the combination gas valve to “off”.
SHUT DOWN
When shutting down for longer than just overnight, drain the frying compound clean
the vessel thoroughly, either discard the frying compound or return it filtered to the
vessel and then cover it.
Turn the manual off/on valve on the incoming gas service line ”off”
4. CLEANING AND MAINTENANCE
GENERAL
Any piece of equipment works better and lasts longer when maintained properly and
kept clean. Cooking equipment is no exception. Your VFG Fryer must be kept clean
during the working day and thoroughly cleaned at the end of each day.
DAILY
a)
Remove and wash all removable parts.
b)
Clean all exterior surfaces of the body. Do not use, steel wool, or any other
abrasive material on stainless steel.
c)
Filter the cooking oil and replace if necessary. The oil should be filtered more
often than daily under heavy use.
8
IM085B1 – September 2010
4. OPERATING INSTRUCTIONS Cont’d
WEEKLY
a)
Completely drain the fryer vessel into either the filter or steel container. Do not
use a plastic bucket or glass container.
b)
Clean the vessel with a good grade of cleaner or hot water and a strong
detergent.
d)
Bring to a rolling boil, turn the heat down and let the mixture stand until
deposits and/or carbon spots can be rubbed off with a brush.
e)
Scrub the tank walls, then drain the vessel and rinse in clear water.
f)
Refill with clear water and boil again.
g)
Drain, rinse and dry thoroughly
h)
Refill with cooking oil or frying compound as directed above.
PERIODIC
Your VFG Fryer should be checked and adjusted anually by
qualified service personnel as part of a regular kitchen maintenance program.
STAINLESS STEEL
All stainless steel body parts should be wiped regularly with hot, soapy water during
the day and with a liquid cleaner designed for this material at the end of each day.
CAUTION do not let water splash into the tank of hot oil. It will splatter and can cause
severe burns.
DO NOT USE STEEL WOOL, ABRASIVE CLOTHS, CLEANSERS OR POWDERS!
If it is necessary to scrape stainless steel to remove encrusted materials, soak the
area with hot cloths to loosen the material, and then use a wood or nylon scraper.
DO NOT USE a metal knife, spatula, or any other metal tool to scrape stainless
Steel. Scratches are almost impossible to remove
WARNING
IF GAS ODOURS ARE DETECTED, AND PERSIST FOR MORE THAN 2 MINUTES
THE FRYER GAS SUPPLY MUST BE SHUT OFF AT THE MAIN SHUT-OFF
VALVE AND AN AUTHORIZED SERVICE AGENT CONTACTED FOR SERVICE.
9
IM085B1 – September 2010
5. LIGHTING INSTRUCTIONS
LIGHTING INSTRUCTIONS
LIGHTING, RELIGHTING AND SHUT DOWN INSTRUCTION
IMPORTANT: DO NOT TURN ON MAIN BURNER UNLESS
THE OIL IS FILLED TO THE CORRECT OIL
LEVEL MARKED AT THE REAR OF THE PAN
1.
2.
Depress and turn gas valve knob to off position. If flame goes out
wait five (5) minutes before reigniting.
Turn knob counter-clockwise to pilot position, depress knob
and light pilot. Continue to depress knob until pilot remains
alight when knob is released (approximately one minute).
Turn knob to ON position.
3.
Set thermostat as desired.
Thermostat will actuate gas flow to the main burner. For
temporary or permanent shutdown, depress and turn gas
Valve knob to OFF position.
JGSD-125-100-0
OVER TEMPERATURE SAFETY CONTROL
Your VFG fryer is fitted with an over temperature safety device which prevents the
fryer medium being heated over 235 degrees C. The detector bulb is located under a
cover at the front of the fryer pan, 85mm below the static oil level. If the over
temperature cut-out is tripped, it must be manually reset. The red manual reset button
is located above the temperature control knob.
.
LIGHTING
Follow lighting instructions shown above and repeated on plate fastened behind door
of unit. (Note: Air trapped in manifold system must bleed off before pilot burner will
ignite causing initial ignition of a newly connected fryer to be abnormally slow)
10
IM085B1 – September 2010
6. DRAINING & FILTERING INSTRUCTION
A. DRAINING
WARNING
Draining and filtering of frying medium must be accomplished with care to avoid the
possibility of a serious burn caused from careless handling. Fryers should be allowed
to cool to 50 degrees C before draining or filtering to minimise the risk of burns.
WARNING
The burner MUST NOT be turned on when the fry pot is empty. A few minutes of
burner operation with an empty fry pot will destroy the fry pot and void the warranty.
1. USE PROTECTIVE CLOTHING GLOVES, APRON, ETC. WHEN HANDLING
HOT LIQUIDS.
2. Position a metal container with sealable cover under the drainpipe. The metal
container must be of sufficient design to withstand the hot oil / fat and must be
able to hold hot liquids. If you are using a filter cone holder and cone, be sure
that the cone holder rests securely on the metal container.
3. Open the drain slowly to avoid splattering.
extreme caution.
If splattering occurs, exercise
4. If the drain valve becomes clogged with food particles, use a wooden or wire
cleaning tool. This tool must be used from INSIDE the fry pot ONLY. Do not
hammer on the drain valve, as damage to the ball inside will cause it to leak.
NEVER insert a cleaning tool into front of the drain valve in an attempt to
unclog the valve; hot material may rush out creating the potential for injury.
5. The drained oil/fat should be allowed to cool to 45ºC or lower before
transporting the container and removing drain pipe. Oil / fat temperature of
60ºC or higher can result in severe burns.
6. After draining the contents, clean all food particles and residual oil / fat
from the fry pot before refilling.
7. Close the drain valve and refill the fry pot with clean, filtered fryer medium.
11
IM085B1 – September 2010
7. TECHNICAL DATA
A. GAS PRESSURE SETTING AT THE MANIFOLD
GAS TYPE
N.G.
L.P.G.
INJECTOR mm
1 x 1.4, 8 x 1.5
1 x 0.85, 8 x
0.95
kPa
1.0
2.5
The gas pressure test point is located on the Gas control.
B. DIMENSIONS:
WxDxH
395mm x 740mm x 1145mm
Bowl Size
350mm x 386mm 390mm
C. CONVERSION INSTRUCTIONS N.G. TO L.P.G.
1
Remove injectors from manifold and change injector to suitable orifice (see
gas injectors details table above).
2.
Remove pilot assembly. Change pilot injector NG= 0.51 LP = 0.35
Stamped on head of pilot this Number not a dimension.
3.
Re-assemble pilot assembly.
4.
Remove the regulator cover screw.
6.
If inlet pressure is over 6 kPa install L.P. regulator.
7.
Affix caution label to top of cover screw.
8.
Check all connections for leaks.
9.
Adjust the T.P.P. to suit L.P.G.
10.
Change Rating Plate.
12
IM085B1 – September 2010
8. SERVICING
ACCESSING FRYERS FOR SERVICING
WARNING
Moving a fryer filled with hot oil / fat may cause splattering of the hot shortening and
severe burns. Extreme care must be exercised.
1.
2.
3.
4.
Disconnect quick-disconnect hose.
Remove restraining devices typically applied to the bottom or back of fryer.
Relocate fryer so that access can be obtained to perform necessary
maintenance.
After servicing has been completed, reconnect quick-disconnect hose;
and reattach restraining devices.
SHUTTING FRYER(S) OFF FOR SHORT PERIODS
VENTILATION AND CLEARANCE.
One of the important considerations of efficient fryer operation is ventilation. The
fryer must be installed so that products of combustion are removed efficiently and
the kitchen ventilation system does not produce drafts that interfere with the proper
burner operation. The fryer flue opening must not be placed close to the intake of the
exhaust fan.
The fryer must never have its flue extended in a “chimney” fashion. An extended
flue will change the combustion characteristics of the fryer causing it to be slow to
recover and frequently causing delayed ignition.
PARTS ORDERING
Customers may order parts directly from their local Authorised Parts Distributor.
For this address and phone number, call the factory. Factory address and phone
numbers are on the back of this manual.
IMPORTANT
GOLDSTEIN & CO WHOSE POLICY IS ONE OF CONSTANT IMPROVEMENT,
RESERVES THE RIGHT TO AMEND SPECIFICATIONS OF ANY PART OR
ASSEMBLY AND THE MATERIALS AND FINISHES COMPRISING THE COOL
ZONE FRYER AND ITS ACCESSORY EQUIPMENT WITHOUT PRIOR NOTICE.
WARNING
“DO NOT SPRAY AEROSOLS IN THE VICINITY OF THIS APPLIANCE WHILE
IT IS IN OPERATION”.
13
IM085B1 – September 2010
9. TROUBLE SHOOTING
TROUBLE SHOOTING.
These troubleshooting procedures must be carried out only by a Goldstein
Authorised Maintenance & Repair Centre or Company specialising in commercial
Cooking appliances. The problems and possible solutions given below cover those
Most commonly encountered.
FACTORY APPROVAL MUST BE OBTAINED PRIOR TO ANY WARRANTY
WORK
BEING DONE OR GOLDSTEIN CANNOT BE HELD RESPONSIBLE.
PILOT BURNER MALFUNCTIONS
a)
b)
Pilot will not ignite
No evidence of gas at pilot
Pilot burner ignites but will
not remain lit when gas cock
Manual knob is released.
*
Check that gas valve is open and
gas is present at that valve.
*
Remove pilot gas supply line and
check for dirt.
*
Blow out if necessary then re-install.
*
Check pilot burner orifice for dirt.
*
Check that the thermopile leads
are firmly screwed into pilotstat power
unit on gas control.
*
Thermopile defective – replace.
*
Pilot flame may be too high or too
low.adjust flame by turning pilot flow
adjustment on Valve.
Check over-temperature thermostat
reset button if tripped. Manually
reset by
pushing button home.
*
*
Check milivolts on Power Generator
should be 350-500 with Thermostat
off.
*
Check millivolts on Power generator
with valve on should be no lower than
110 mv.
14
IM085B1 – September 2010
9. TROUBLE SHOOTING Cont’d
c)
Pilot flame of proper size but
unstable. Flame wavers and
does not envelope the
thermocouple completely at
all times.
*
Check for drafts which might be
caused air conditioning equipment
or make-up air apparatus. Turn
these off and recheck the pilot.
MAIN BURNER MALFUNCTIONS
a)
b)
d)
Main burner will not come on; *
No gas present at main burner.
*
Main burner flames are small
and appear lazy; frying
compound does not come up
to temperature quickly.
Signs off excessive temperature, frying compound
scorches and quickly was
discoloured.
Check that gas valve is open.
Check that the pilot is ignited and
is operating properly. The
combination gas Control valve may
be defective; replace if necessary
*
Check the high temperature safety
switch. Replace if defective.
*
Check gas pressure at the test
point of the combination gas valve
(refer to the illustration of the
Manufacturer’s bulletin). Use a
standard water type U-gauge
manometer. With the burner in
operation, the pressure should be
1.00 kPa and 2.5 kPa on natural and
propane gas respectively.
If not, unscrew cover of pressure
regulator adjustment. Use screwdriver to turn adjusting screw clockwise to increase gas pressure to
burner (or counter clockwise to
to decrease the pressure).
*
Replace cover & plug.
*
Check operating thermostat. May be
out of calibration. Recalibrate in
accordance with instructions provided
With thermostat when Fryer
purchased.
*
Check gas pressure as outlined
above.Cooking compound of interior
quality or used too long. Replace.
*
Cooking compound of inferior quality
or used too long. Replace.
15
IM085B1 – September 2010
9. TROUBLE SHOOTING Cont’d
CAUTION
DO NOT ATTEMPT TO TURN THE ADJUSTMENT PAST THE STOPS OR THE
CONTROLLER WILL BE DAMAGED
e)
Fryer will not reach
temperature setting and/
or runs erratic.
f)
Fryer temperature cannot
be controlled runs to high
limit temperature.
*
Operating thermostat, replace
Operating thermostat, replace
16
IM085B1 – September 2010
10. WIRING DIAGRAM
17
IM085B1 – September 2010
11. CONTROLS
LIGHTING,
INSTRUCTION
RELIGHTING AND SHUT DOWN
IMPORTANT: DO NOT TURN ON MAIN BURNER UNLESS
THE OIL IS FILLED TO THE CORRECT OIL
LEVEL MARKED AT THE REAR OF THE PAN
1.
Depress and turn gas valve knob to off position. If flame goes out
wait five (5) minutes before reigniting.
2.
Turn knob counter-clockwise to pilot position, depress knob
and light pilot. Continue to depress knob until pilot remains
alight when knob is released (approximately one minute).
Turn knob to ON position.
3.
Set thermostat as desired.
Thermostat will actuate gas flow to the main burner. For
temporary or permanent shutdown, depress and turn gas
Valve knob to OFF position.
JGSD-125-100-0
18
IM085B1 – September 2010
12. DRAWINGS
19
IM085B1 – September 2010
13 SPARE PARTS
MODEL VFG1
ITEM No.
1
2
3
4
5
6
7
7
8
9
10
11
12
13
14
15
16
17
18
19
20
21
22
23
23
24
CODE
ESPVFG01
ESPLFG1
MCK00005
GCUVFG01
MBKFG180
FRV00T01
JINFV170
JINFV100
FRV00T02
FRV00M04
GTCIFVG1
GPGVFG01
GPIBVFG1
MTAC0032
MCA00002
STG00P36
FRV00P23
MLEPLBF1
MLEPLA01
MKNPLTS8
MKNEP001
MTH00255
MTH20195
GIJVFG01
GIJVFG02
GPICVFG1
DESCRIPTION0
SPARKER – PIEZO C/W WASHER, NUT
LEAD –H/T 500 FOR SPARKER
LPG CONVERSION KIT
NAVA GAS CONTROL
BASKET – FRG18 (STANDARD)
BURNER
INJECTOR – 1.4/1.5mm NG
INJECTOR – 0.85/0.95mm LPG
DRAIN PIPE (1 ¼”)
SHELF
THERMOCOUPLE
THERMOPILE
BODY – PILOT
BALL VALVE 1 ¼”
CATCH – DOOR MAGNET
DOOR HANDLE
BASKET HOLDER
FEET – PLASTIC BULLET 2D
STAINLESS STEEL LEG WITH ADJ PLASTIC INSERT
KNOB – FRG THERMOSTAT
PLATE – ESCUTCHEON
THERMOSTAT – GAS OVERTEMP. (235 °C)
THERMOSTAT – (95~195) (GOLD CON.)
PILOT SPUD N/G 0.51
PILOT SPUD LPG 0.35
ELECTRODE – CERAMIC
20
IM085B1 – September 2010
14. WARRANTY
Installation must be carried out according to local regulations by qualified trade
persons.
Isolating switch(es), shut-off valves etc must be within easy reach of the machine for
future service and maintenance requirements.
If in doubt call GOLDSTEIN/ESWOOD or their representative for further information.
No responsibility will be accepted for defects or damages by improper installation, for
changes to the product not authorised by GOLDSTEIN/ESWOOD or for operation
outside the technical specifications.
GOLDSTEIN/ESWOOD warrants their products to be free from defects in material
and workmanship under “normal use and service”. This does not include normal
wear and tear of parts. GOLDSTEIN/ESWOOD will repair or replace any parts, which
in GOLDSTEIN/ESWOOD’s sole judgement are defective in material or
workmanship, in accordance with the warranty offered.
This undertaking covers the provision of labour and parts for 12 months from the date
of delivery to the purchaser. This undertaking applies only to state capitals. Remote
areas are not covered by this commitment and special enquiries should be made.
(Note: Travel time not covered by warranty).
“To the maximum extent permitted by law, any liability on Goldstein/Eswood’s part or
on the part of its servants or agents for loss or damage of any kind whatsoever in
connection with the products, including liability for or in respect of any claim arising
out of contract, negligence or statute, shall not, in any event, exceed $100”
Labour under warranty is supplied free of charge during normal working hours,
Monday to Friday. Should warranty work be requested outside of our normal working
hours a labour charge will be applied equivalent to a normal hour rate, without out of
hours penalty rates. (Refer to last page of this manual for your closest branch for
warranty repair services).
21
IM085B1 – September 2010
14. GOLDSTEIN/ESWOOD BRANCHES
For inquiries and access to 24/7 service backup, please call:
1800 013 123
This number will automatically access your nearest State office, or the technician on
duty if after hours. After hours charges apply.
22
IM085B1 – September 2010