1
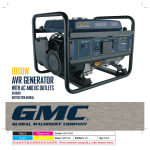
SAFETY
LIMITED WARRANTY
t$BSFGVMMZSFBEBMMPQFSBUJOHJOTUSVDUJPOTCFGPSFVTJOHUIFUFTUFS.
tWFBSFZFQSPUFDUJPOXIFOXPSLJOHBSPVOECBUUFSJFT
t #
FTVSFFBDIUFTUJTDPNQMFUFECFGPSFSFNPWJOHMPBEDMBNQTUPQSFWFOUBSDJOH BOEQPUFOUJBMFYQMPTJPOGSPNCBUUFSZ
Manufacturer guarantees this product to be free from defects in materials and workmanship for a period of 1 Year from
original date of purchase (dated sales receipt required).
This warranty extends to each person who acquires lawful ownership within one year of the original retail
purchase, but is void if the product has a broken meter seal, has been abused, altered or misused, or has been
improperly packaged and damaged when returned for repair.
t ,
FFQIBJSIBOETBOEDMPUIJOHBTXFMMBTUFTUFSMFBETBOEDPSETBXBZGSPNNPWJOHCMBEFTBOECFMUT
t1SPWJEFBEFRVBUFWFOUJMBUJPOUPSFNPWFDBSFYIBVTU
t JOHMPBE%POPUBUUFNQUUP-PBETFTUPS
DIBSHFBCBUUFSZVOEFSEFHSFFT"MMPXUIFCBUUFSZUPXBSNUPSPPNUFNQFSBUVSFCFGPSFUFTUJOHPSDIBSHJOH
t W
arning! /FWFSBUUBDIUIFVOJUUPBCBUUFSZUIBUJTDPOOFDUFEUPBOZPUIFSUFTUFS PSDIBSHJOHVOJU%BNBHFNBZSFTVMU
CAUSE OF BATTERY FAILURE
Incorrect Application:
Incorrect Installation:
-PPTFCBUUFSZIPMEEPXOTDBVTFFYDFTTJWFWJCSBUJPOXIJDIDBOSFTVMUJOEBNBHFUPUIFQMBUFT
Improper Maintenance:
BffFDUCBUUFSZQFSGPSNBODF
Age of Battery:
*GUIFEBUFDPEFPOUIFCBUUFSZJOEJDBUFTJUJTGBJSMZPMEUIFGBJMVSFNBZCFEVFUPOBUVSBMDBVTFT
Overcharging:
0WFSDIBSHJOHDBVTFECZBIJHIWPMUBHFSFHVMBUPSTFUUJOHPSJODPSSFDUCBUUFSZDIBSHJOHDBODBVTFFYDFT
TJWFHBTTJOHIFBUBOEXBUFSMPTT
Undercharging:
6OEFSDIBSHJOHDBVTFECZBGBVMUZDIBSHJOHTZTUFNPSMPXWPMUBHFSFHVMBUJPODBODBVTFMFBETVMGBUFUP
HSBEVBMMZCVJMEVQBOEDSZTUBMMJ[FPOUIFQMBUFTHSFBUMZSFEVDJOHUIFCBUUFSZTDBQBDJUZBOEBCJMJUZUPCF
SFDIBSHFE
THE TERMS OF THIS LIMITED WARRANTY CONSTITUTE THE BUYER’S SOLE AND EXCLUSIVE REMEDY.
THE IMPLIED WARRANTIES OF MERCHANTABILITY AND FITNESS FOR A PARTICULAR PURPOSE ARE LIMITED
IN DURATION TO THIS EXPRESS WARRANTY. AFTER ONE YEAR FROM DATE OF PURCHASE, ALL RISK OF LOSS
FROM WHATEVER REASON SHALL BE PUT UPON THE PURCHASER.
MANUFACTURER SHALL NOT BE LIABLE FOR INCIDENTAL AND CONSEQUENTIAL DAMAGES UNDER ANY
CIRCUMSTANCES: MANUFACTURER’S LIABILITY, IF ANY, SHALL NEVER EXCEED THE PURCHASE
PRICE OF THIS MACHINE REGARDLESS OF WHETHER LIABILITY IS PREDICATED UPON BREACH OF
WARRANTY (EXPRESS OR IMPLIED), NEGLIGENCE, STRICT TORT OR ANY OTHER THEORY.
PLEASE RETURN UNIT TO THE POINT OF SALE FOR ANY WARRANTY CONSIDERATIONS.
DO NOT SEND BACK TO THE MANUFACTURER.
ATD-5489
500 Amp Carbon Pile Battery Tester
User’s Manual
Some states do not permit the limitation of warranties or limitation of consequential or incidental damages, so the above
have other rights which vary from state to state.
BATTERY INSPECTION
VBMJEBVUPNPUJWFFMFDUSJDBMTZTUFNUFTUJOHEFQFOETPOBMMUIFDPNQPOFOUTCFJOHJOHPPEPQFSBUJOHDPOEJUJPO
BOZFMFDUSJDBMEJBHOPTJT
VISUAL CHECK
t Inspect Battery for terminal corrosionMPPTFPSCSPLFOQPTUTDSBDLTJOUIFDBTFMPPTFIPMEEPXOTMPXFMFDUSPMZUF
MFWFMNPJTUVSFBOEEJSUBSPVOEUIFUFSNJOBM
t Important Note :"LOPXOEFGFDUJWFCBUUFSZNVTUCFSFQMBDFECFGPSFQSPDFFEJOHXJUIBOZUFTUPOUIFDIBSHJOHPSTUBSUJOH
TZTUFN
t * nspect Belts for cracksHMB[FETVSGBDFBOEGSBZJOHTJHIUFOMPPTFCFMUT
*OTQFDUCFMUUFOTJPOFSGPSQSPQFSBMJHONFOU
t Inspect Starting System.$IFDLTUBSUFSTPMFOPJEBOEBMUFSOBUPSGPSMPPTF DPOOFDUJPOTMPPTFNPVOUTBOEGSBZFEPSDSBDLFEXJSFT
www.atdtools.com
WARNING
Failur e to follow instructions may cause damage or explosion, always shield
eyes. Read entire instruction manual before use.
Warning: This product contains chemicals, including lead, known to the State
of California to cause cancer, birth defects and other reproductive harm. Wash
hands after handling.
OPERATING INSTRUCTIONS
OPEN CIRCUIT VOLTAGE TEST
LOAD TEST THE BATTERY
Note: If tester has not been used for a period of time, moisture may have condensed between carbon pile discs. This
This is normal and is not a malfunction of the
tester. (Do not confuse this with heat due to overloading the tester.)
NOTE: BOTH JAWS OF EACH CLAMP MUST FIRMLY ENGAGE BATTERY TERMINAL OR IT WILL NOT FUNCTION PROPERLY.
Note: The battery must have at least 75% state of charge before load testing and the battery should not have been
heavily used or tested within the last 10 minutes. On vehicles with multiple batteries, only one battery at a time should be
tested.
1. Make sure load knob is in the OFF position.
2. Connect tester positive (+, Red) lead to battery (+) terminal.
3. Connect tester negative (–, Black) lead to battery (–) terminal
4. If voltmeter reading is less than 12.4 Volts, battery must be charged and retested before continuing. (If battery voltage
is less than 12.4 Volts after charging, replace battery.)
PREPARING TO TEST
Be sure area around battery is well ventilated while battery is being tested. Gas can be forcefully blown away by using a
piece of cardboard or other non-metallic material as a fan.
REMOVING THE SURFACE CHARGE
Clean battery terminals. Be careful to keep corrosion from coming in contact with eyes, skin or clothing.
If your open circuit voltage reading is above 12.6 Volts, remove the surface charge before load testing. Failure to do so
will result in inaccurate test readings.
Inspect the battery for cracked or broken case or cover. If visible signs of damage are present, do not test battery.
Perform load tests only on batteries above 60°F(16°C).
battery, make sure all accessories in the vehicle are o to ensure you do not cause an arc.
CALCULATE BATTERY STATE OF CHARGE
Before a battery can be load tested, you MUST determine its state of charge.
A hydrometer is a great tool to assess the condition of each cell, but on batteries with non-removable caps, a voltmeter is
battery should not vary more than 50 points between cells. If the variance is more than 50 points (0.050), replace the battery.
In case of a deeply discharged battery, a longer period of time for charging may be required. After charging, remove
the surface charge from the battery. If charging the battery will not bring the charge to 1.230 or greater, then the battery
should be replaced.
Three possible ways to remove a surface charge:
1.Turn headlights (high beam) on for 3 to 5 seconds.
2. Disable ignition: crank starter over for 10 to 15 seconds.
3. Using a variable carbon pile load tester, load battery for 10 to 15 seconds at 150 amp load.
Make sure load knob is in the OFF position before connection is made or removed.
After removing surface charge, let battery stand for 10 minutes to stabilize
CALCULATE THE LOAD
WARNING: VARIABLE LOAD CARBON PILE TESTERS PRODUCE HEAT WHEN IN USE. CARE MUST BE TAKEN TO
ALLOW SUFFICIENT TIME TO COOL DOWN BETWEEN TESTS TO AVOID INJURY DUE TO HEAT BUILD UP.
1. Look for either the “Cold Cranking Amps (CCA)” rating or the “Amp Hour (AHr)” rating on the battery decal.
2. If the CCA rating is provided, the load placed on the battery should be on half (1/2) of the Cold Cranking Amps rating.
Example: 600CCA battery – load to 300A.
3. If the Amp Hour rating is provided, the load placed on the battery should be 3 times the Amp Hour rating. Example: 70
AHr battery – load to 210A.
4. If neither the CCA rating nor the Amp Hour rating are not available, refer to battery catalog for recommended CCA rating.
5. Sometimes the rating cannot be located, in that case the engine size may be used as a guide to determine the battery’s
ampere rating. However, it is recommended to use the manufacturers recommendations whenever they can be located.
Engine Size Cubic Inches
Small
100 to 200
Medium 200 to 350
Large
350 to 500
Maintenance free and sealed batteries have an indicator built into the battery cover
gravity condition of the battery:
– If the green ball is visible, the battery is charged.
– If the indicator is dark and the green ball is not visible, the battery is partially discharged.
DO NOT ATTEMPT RECHARGING OR TESTING IF THE INDICATOR IS YELLOW.
It is highly recommended that maintenance free batteries should be tested with a voltmeter to determine state of charge.
Cu. Centimeter
1600 to 2400
2400 to 5600
5600 to 8000
Recommended Battery Load
100-150 Amps
125-200 Amps
175-300 Amps
1. Connect Tester leads to battery (+) and (–) terminals. Read AMPS position. Make sure load knob is in the OFF position
before connecting.
2. Apply a load to the battery as determined in “CALCULATING THE LOAD.”
3. Hold load for 15 seconds.
4. Read voltage at the end of the 15 seconds and turn off load.
5. Compare reading with PASS/FAIL voltage chart on side of tester, or use chart shown below to compensate for battery
temperature.
Battery Temperature
70º (21º)
60º (16º)
50º (10º)
40º (5º)
30º (-1º)
20º (-7º)
10º (-12º)
0º (-18º)
Voltage Should Not Drop Below
9.6 Volts
9.5 Volts
9.4 Volts
9.3 Volts
9.1 Volts
8.9 Volts
8.7 Volts
8.5 Volts
6. Battery is GOOD if voltage is at or above Volt readings shown on chart. Battery is BAD if voltage drops below Volt readings
shown on chart.
CHARGING SYSTEM (ALTERNATOR/REGULATOR) TEST
This test assesses charging system output to ensure it is within the proper range, a key factor for long battery battery life.
Note: Do not turn on the load switch at any point during this test.
1. Connect the tester the same as for battery testing.
2. Start the engine and allow it to reach normal operating temperature.
3. Run engine at 1200 to 1500RPM.
CAUTION: Stay clear of moving engine parts.
4. Read the voltmeter. A reading in the red band area indicates a problem in the charging system that will undercharge a
battery; if the meter is beyond the OK area, the charging system is likely to overcharge the battery.
Note: If you observe an out of range reading, check alternator connections, including ground connection. Also, check
STARTER MOTOR TEST (12 VOLT VEHICLES)
Note: ENGINE MUST BE AT NORMAL OPERATING TEMPERATURE FOR THIS TEST
1. Connect positive (+, red) clamp to the positive (POS, P, +) battery post. Connect negative (–, black) clamp to the negative
(NEG, N, –) battery post. Rock clamps back and forth while connecting to ensure a good electrical connection.
2. Disable the ignition system so the car will not start.
3. Crank the engine and observe the lowest voltage reading during cranking.
4. A meter reading of below 9.5V indicates excessive current draw. This may be due to a failing battery, bad battery/starter
connections or a failing starter motor. Or, the battery is too small for the vehicle’s requirements.