1
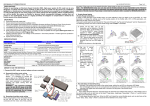
Next, move the transmitter to the full throttle point and press the switch once. The green
LED flashes twice and the motor sounds "Beep Beep" once.
Then, move the transmitter to the full brake point and press the switch once. The green
LED flashes 3 times and the motor sounds "Beep Beep Beep" once.
Finally, wait for 3 seconds, then the motor can be controlled properly.
3. Switch ON/OFF the ESC and LED Status In Normal Running
WARNING: The ESC may be very hot after running with high load. In such
cases, if you want to switch off the ESC, please wait for several minutes to let
the ESC’s metal case cool down and then press the switch with caution. You can also
use the transmitter to switch off the ESC remotely by keeping full brake for 6 seconds.
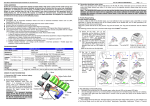
► After connecting to the battery, press the switch button once to switch on the ESC. The
LED will light up red.
► If the throttle stick is in the neutral range, the LED will be solid red or blinking red (if
using NO-TIMING software)
► The LED will blink green when you start to apply throttle or brake, and will turn solid
when full throttle or full brake is reached.
► To switch off the ESC, press the switch button once whilst the esc is on. In the situation
the motor is still running when the switch is pressed, the ESC will not be turned off. This is
to prevent the unexpected shutdown by accident in a race.
PROGRAMMABLE ITEMS LIST
Please check the table at page 17 and 18.
EXPLANATION FOR EACH PROGRAMABLE ITEM
Within the ESC software, there are four basic sections for programmable options.
Section 1 – General Settings
Section 2 – Throttle Settings
Section 3 – Brake Settings
Section 4 – Timing Settings
SECTION 1 – GENERAL SETTINGS
These settings define the basic operating parameters for the ESC.
1A - Running Mode: There are three options available for setting of the running mode;
Option 1: “Forward Only with Brake” - The car will only go forward and have
brakes, but reverse is disabled. This mode is suitable for competition purposes.
Option 2: “Forward/Reverse with Brake” – This mode provides a reverse function,
which is suitable for practice. Note: The reverse function is engaged by a Double
click method. On the first application of backwards throttle, brakes are applied. On
returning to the neutral point, and then applying the backwards throttle for a
second time, the reverse function will be engaged. However, if at this time the motor
is still moving forward (i.e. in a double braking action from high speed), the ESC will
not go into reverse. The motor must be at 0 rpm to engage reverse. This is a
protection function for the drivetrain of the vehicle.
Option 3: “Forward/Reverse” – W h e n m o v i n g f ro m t h e f o r w a rd zone to the
backward zone, the ESC will engage reverse immediately. This mode is intended for
rock crawling applications, where instant control is required.
05
WWW.HOBBYWING.COM
1B – Reverse Speed: This setting alters the speed of the car when in reverse, as a
percentage of the forward speed.
Options: 25%, 50%, 75%, 100%
1C – Voltage Cutoff: This setting defines the low voltage cutoff for use with LiPo
batteries, preventing over discharging. The ESC detects the battery’s voltage at any time,
if the voltage is lower than the threshold for 2 seconds, the output power will be reduced
70%, after 10 seconds the output power will be completely shut off and the red LED
flashes in such a way: “☆-☆-, ☆-☆-, ☆-☆-”. There are three main options for the
cutoff setting.
Option 1: “None” – No voltage cutoff is used. Select for use with NiCd or NiMH
battery types.
Option 2: “Auto” – The ESC detects the number of cells present in the battery pack
used, and selects a suitable cut-off voltage.
Option 3: “User Selected” – The level of the voltage cutoff is defined by the user. The
setting selected is for the overall battery voltage. The cutoff can be set from 3.0v –
11.1v, with steps of 0.1v
1D – ESC Overheat Protection: If this function is selected, the output power will be cutoff if the internal temperature of the ESC hits the set level for 5 seconds. When the
protection activates, the green LED will flash in the following sequence “☆-, ☆-, ☆-”
(Single flash).
Options: 85°C, 105°C, 125°C, Disabled
1E – Motor Overheat Protection: If this function is selected, the output power will be
cut-off if the internal temperature of the Motor hits the set level for 5 seconds. When the
protection activates, the LED will flash in the following sequence “☆-☆-, ☆-☆-, ☆-☆
-” (Double flash).
Options: 85°C, 105°C, 125°C, Disabled
Note: The motor overheat function is only available for sensored brushless motors
made by HOBBYWING. For other manufacturers’ motors, this function may not be
available, or the sensor inside the motor may not match the ESC design. For such a case,
please disable this function.
SECTION 2 – THROTTLE CONTROL
These settings control the action of the forward throttle for the ESC.
2A, 2B & 2C – Punch Rate Control: This group of settings is used to define the starting
mode of the ESC. There are a number of the sub-options for this setting. The software has
the option to include a dual stage punch rate, which is helpful in allowing a different
punch setting for different areas of the forward throttle.
Note: If you use a high punch setting, y o u m u s t u s e good quality battery
packs with powerful discharge ability. Otherwise these modes cannot get the burst start
effect as you want. If the motor cannot run smoothly (the motor is trembling), it may
caused by a weak discharge ability of the battery pack.
06