1
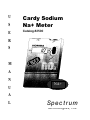
U
S
E
Cardy Sodium
Na+ Meter
Catalog #2500
R
S
M
A
N
U
NA+
A
L
Spectrum
Technologies, Inc.
CONTENTS
Specifications................……….... ..
General Overview........................ ..
Meter Components.......................…
Meter Component Functions........…
Care for Meter.............................. ..
Calibration..................................… ...
Measurement of Tissue Sap.....…….
Measuring Samples..................... …
Soil Test Installation...................… ...
Maintenance and Service..........……
Service and Support..................…….
Warranty...................................…….
Product Return.......................……. .
Calibration:
• 2 - point calibration by STD/
SLOPE controls using
standard calibration solutions
Weight:
• 1.4 oz approximately 40 g.
Repeatability:
• ±20% of indication value
Compensated Sample Temp.:
• At ambient temp.
2
2
3
3
4
5
5
5
6
6
8
8
8
GENERAL OVERVIEW
Congratulations on the purchase of your
Cardy Sodium meter. This manual
describes how to use your Cardy meter
and how to keep it working accurately for
many years. Read it thoroughly in order to
make effective use of your meter.
This manual will familiarize you with the
features and operation of your Cardy
Sodium Meter. Please read this manual
thoroughly before using your meter. For
customer support or to place an order call
Spectrum Technologies, Inc. at 800-2488873 or (815) 436-4440 between 7:30 am
and 5:30 PM CST, or FAX at 815-4364460, or E-Mail at [email protected].
Website: www.specmeters.com
The Cardy Sodium meter presents a
completely new concept in sample
measurement. This self contained digital
meter delivers high quality answers to
sodium level questions in soils, plants, and
water based solutions.
Spectrum Technologies, Inc. at 23839 W.
Andrew Rd. Plainfield, IL 60544
The replaceable flat sensor makes the
measurement of small samples much more
convenient.
When replacement of the
sensor is required, the sensor cartridge
snaps in and out of the meter at a touch.
SPECIFICATIONS
The readout of the measurement value is
an LCD display. It a has a total display
range of 0 - 9900 PPM. This is provided by
three automatically switched ranges, the X
1 range (0-99 ppm), the X10 range 100990 ppm), and the X 100 range (1000 9900 ppm ). To get the final value you
simply multiply the reading on the LCD
display by the proper number, 1, 10, or
100, as indicated by the small arrow on the
right side of the display window.
Display:
• LCD two digit display
Display Range:
• 0 - 99 x 100 ppm (9,900 ppm 0)
Battery:
• 2 - CR 2025 (lithium) user
replaceable
Battery Life:
• Approximately 500 Hrs
continuous use
Resolution:
• 1ppm for 0 - 99 ppm
• 10ppm for 10-99 x 10 ppm
• 100ppm for 10 - 99 x 100 ppm
2
METER COMPONENTS AND ACCESSORIES
Meter Components and Functions
1. Power Switch - Turns the power ON or OFF
2. STD dial - calibrates the Cardy with Standard
3. SLOPE volume - Calibrates the Cardy to the SLOPE calibration solution.
4. LCD display - Expressed as ppm Na+. Displayed by one of three
automatically switched ranges.
X 1 (0 - 99 ppm)
X 10 (100 - 990 ppm)
X 100 (1000 - 9900 ppm)
5. Sensor pad - Ion-specific electrode principle: replaceable.
6. Sensor cover - protects the sensor during storage
7. Battery box - contains two CR - 2025 lithium cells. A “B” shows up in the display if the batteries are
low.
8. Tweezers - Use for handling sample sheet. Use the head of the tweezers for adjusting the SLOPE
volume screw.
9. Sampling sheet - Use for measuring samples and calibrating meter. Assures that the solution
bridges across the sensor pad properly.
10. Pipette - Use for depositing solutions on the sensor for measurement.
11. Standard Solutions - Use for calibrating the meter.
12 Yellow Seal - Use to cover the sensor (reference junction) when meter is idle for more than 30 days.
3
CARE FOR YOUR CARDY METER
1. If the sensor is new or has been inactive for over a month, drip 3 to 4 drops of either one of the
standardizing solutions onto the sensor pad using a sampling sheet to “warm-up” the sensor for 20 to
30 minutes. The meter can be off. This improves sensor response time and reduces the drift of the
readings.
2. A stable meter reading occurs when the value on the LCD display has not changed for a period of
three (3) seconds.
3. Wait 30 to 45 seconds after the solution has been placed on the sensor pad when calibrating or
making a reading. A functional sensor should reach a “stable” reading during that time.
4. When measuring a sample, make sure that the sample is covering the two black round sensors in
the sensor pad. The ion concentration cannot be measured if the electrodes are not covered by the
sample.
5. Use clean tweezers to handle the sampling sheet.
6. In order to obtain measurement values of high repeatability, maintain identical conditions as much as
possible.
7. Any kind of soft wiping tissue may be used to blot the sensor pad dry after rinsing. Sometimes there
will appear to be some liquid on a spot of the small electrode. It is normal. Simply rinse and blot dry.
4
CALIBRATION
Follow these steps to gather and care for
your sample:
2 - Point Calibration (Perform at least once a
month)
1.) Do not sample plants which show
obvious signs of nutrient deficiency or
damage from disease, insects, or
chemicals unless these plants are the
subject of a study. Plants which have been
under stress for a period of time may not
give a true picture of the nutrient status of
the field.
1. Turn the power ON.
2. Open the sensor cover, and wipe the
sensor pad clean with a piece of sampling
sheet or tissue, etc. Rinse with deionized
water then wipe dry with a piece of sampling
sheet or tissue, etc. Repeat rinsing and blot
dry.
2.) The leaves or parts of leaves selected
should be of the same age and relative
position on the plant. The most recently
matured leaves should be used. These are
the leaves that have stopped expanding in
size. The petiole or leaf stem of the leaf or
appropriated plant material should be used
for the test.
3. Place a piece of sampling sheet onto the
sensor pad and drip 2 to 5 drops of the
standard STD solution on it (or drip the solution
directly onto the sensor pad).
4. After the readout has stabilized, adjust the
STD dial so that the display reads 20 X 100.
5. After cleaning the sensor according to step
(2), apply the standard 15 X 10 SLOPE
solution as in step (3). After the readout has
stabilized, pull the rubber plug and use the
driver end of the tweezers to adjust the SLOPE
until the display reads 15 X 10.
3.) A minimum of 25 petioles or leaves
should be collected. This is enough to
represent a five to ten acre field if the field
HOW TO MEASURE
SAMPLES
1. Measurement can be aided by placing
the sample onto a piece of sampling sheet.
Using the pipette included in the case,
transfer 3 to 5 drops of the pressed plant
liquid onto the sensor pad. A sampling
paper may also be placed on the sensor
and saturated with the liquid.
Note: the plant sap press may be ordered
from Spectrum Technologies, Inc., or your
distributor.
2. After the value has stabilized (30 to 45
seconds), read the results from the display.
6. After cleaning several times with distilled
water, measure the standard STD solution
again. Recalibrate if the reading is not (20±2)
X 100.
MEASUREMENT OF
TISSUE SAP
Sample Collection:
When conducting a test on plant materials,
the biggest source of error is due to
sampling.
This error results when a
sample is not representative of the source.
5
Maintenance and
Service
3. Rinse the sensor pad with the distilled
water and blot it dry with tissue or a paper
towel. Repeat rinse and blot dry.
Important: Do not make measurements
with the meter (sensor) in direct
sunlight.
Battery:
When the meter LCD display shows the
battery symbol “B”, batteries need
replacing. To replace batteries, turn the
meter over and remove the circular battery
cover. Release the cover by placing a coin
in the slot and turning it in the direction
shown to open.
Place new batteries
(CR2025) with the positive terminal up and
under the metal tab. Replace the battery
Soil Test Instructions
Soil testing of mineral soil requires the Soil
Test Kit. A starter kit is included with the
Cardy Na+ meter #2500. Additional supplies
can be ordered through a distributor or by
calling Spectrum Tech. directly.
Measurement Procedure:
1. Measure 1 level measuring spoon (11cc)
full of dry soil into the soil sample cup. The
soil should be pulverized and sifted through a
flour sifter.
2. Add “2” (50cc) measuring spoons of
distilled water to the cup of soil.
Replace both batteries at the same time.
Do not throw old batteries into a fire. Do
not leave old batteries in reach of children.
If a child does accidentally swallow a
battery cell, call a doctor immediately.
3. Mix the soil and the solution by stirring with
the spoon for at least 2 minutes, making sure
the soil sample is thoroughly mixed with the
distilled water. Let stand for 1- 2 minutes
Sensor:
4. Fold a circular filter in half ‘twice’ and open
it up to form a cone. Place it in the soil
suspension as far as possible. The filtration
will take place from the outside of the filter to
the inside.
The field replaceable sensor has a life of
approximately 200 - 400 measurements
depending on the sensor age, frequency of
use and maintenance. The sensor is worn
out when a) the sensor will not calibrate to
the “slope” standard (there is no more
adjustment in the slope screw) or b) the
meter drifts from its calibration standards
when rechecking the two (2) point
calibration. Repeat the calibration and
check for drift.
5. As soon as sufficient filtrate accumulates
in the filter, use the small pipette to transfer
the soil extract onto the sensor of the Cardy
Meter.
6. After the value has stabilized (30 - 45
sec.), read the value from the digital display.
Multiply the display value by 10 to correct for
the dilution. For lbs/acre, multiply by 2.
Samples likely to damage the sensor pad
include organic solvents, surface
activators, cement, alcohol, strong acid,
strong alkali, etc. The sensor pad is a thin,
soft film. Do not handle in such a way that
will scratch or damage the sensor.
7. Rinse sensor and blot dry. Display should
read “0” with distilled water on it, if not rinse
again.
6
If samples have a small amount of oil, it
may be necessary to clean the sensor with
a mild detergent solution.
To replace the sensor, turn the meter over
and take the sensor off both hooks with the
tweezers or a similar tool. Attach the new
sensor to the meter properly until it makes
a clear click sound.
Replacement sensors can be ordered from
your distributor or Spectrum Technologies,
Inc.
7
SERVICE AND SUPPORT
c.) When the CARDY has been repaired,
modified and dismantled by persons other
than a HORIBA designated agent or
service shop.
d.) In the event of changes in external
appearance (such as scratches or dirt
caused during use) or battery fluid leakage.
e.) In the event of unsuitable movement,
dropping or accidents such as fire,
earthquake, floods or burglary.
f.)
When replacing consumables and
accessories.
g.) When cause of trouble lies not in the
CARDY itself.
h.) When this warranty is not shown and
when necessary particulars have not been
written in the warranty.
For technical service and support, call your
distributor or Spectrum Technologies, Inc.
When calling for technical support have a
detailed explanation of the problem that
you are experiencing.
The more
information you can provide, the faster and
easier a technical support person will be
able to assist you.
For technical support call 1-800-248-8873
or (815) 436-4440.
WARRANTY
Our obligation under this warranty is to
repair or replace the CARDY free of charge
in accordance with the conditions laid down
herein. Accordingly, this warranty does not
limit your specific legal rights.
The
warranty card must be completed and
mailed promptly in order to register your
CARDY under our warranty.
This product has been brought to you
having passed severe quality control
inspections.
Should any trouble occur
during the course of normal use, the
CARDY shall be repaired or replaced free
of charge in accordance with the
stipulations laid down herein. The term of
this warranty shall be for three months from
date of purchase. This warranty excludes
batteries, sensor and accessories.
PRODUCT RETURN
If for any reason you are not satisfied, or the
meter has failed and you need to return the
product for service, you will need to contact
Spectrum Technologies, Inc.
Warranty Stipulations:
1.
The product shall be repaired or
replaced free of charge should any trouble
occur during the course of normal use if
returned within the warranty period (three
months from date of purchase). In which
event, contact the dealer of purchase.
Return CARDY with proof of date of
purchase.
Before returning a failed unit, you must obtain
a Returned Goods Authorization (RGA)
number from Spectrum. You must ship the
product(s), properly packaged against further
damage, back to Spectrum (at your expense)
with the RGA number marked clearly on the
outside of the package. Spectrum is not
responsible for any package that is returned
without a valid RGA number or for the loss of
the package by any shipping company.
2. Expenses shall be incurred in the
following instances within the warranty
period. (Costs such as postage shall be
borne by the customer)
a.) When the date of purchase and store
name is not written on the warranty.
b.) When trouble or damage has been
incurred due to misuse, abuse, and/or
improper handling.
Spectrum Technologies, Inc.
23839 W. Andrew Rd
Plainfield IL 60544
(800) 248-8873 or (815) 436-4440
Fax (815) 436-4460
E-Mail [email protected]
8