1
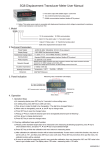
Massage Chair EC-3700 USER MANUAL For Home Use Be sure to read this manual thoroughly in order to ensure proper use. In particular, make certain to read the section. “IMPORTANT SAFETY INSTRUCTIONS” Keep this manual in safe place so that it can be found easily. FUJI MEDICAL INSTRUMENTS MFG. CO., LTD. Contents IMPORTANT SAFETY INSTRUCTIONS ............................................................................. 1 Before Use............................................................................................................................ 5 Name and Functions of Components ................................................................................. 10 Before Starting Massage .................................................................................................... 12 How to Adjust the Chair...................................................................................................... 13 How to Use the Auto Mode Course .................................................................................... 16 How to Use the Quick Mode............................................................................................... 21 How to Adjust during Massaging with Auto Mode Course or in Quick Mode ..................... 24 How to Registration in the Memory .................................................................................... 29 Basic Massaging Movements............................................................................................. 32 How to Use the Mecha. (knead balls) Massage Functions ................................................ 33 How to Adjust during the Movement of Mecha. (knead balls) Massage Functions ............ 36 How to Use Air-massaging Functions ................................................................................ 39 How to Use Twisting Massage Functions........................................................................... 40 How to Use Air-massage Functions for Shoulders/Arms ................................................... 41 How to Make Adjustment while in Air-massage ................................................................. 43 How to Combine Air-massage with Mecha. (knead balls) Massage .................................. 45 When Changing the Massage on the Way ......................................................................... 49 Other Functions .................................................................................................................. 53 Maintenance and Storage .................................................................................................. 55 Q & A .................................................................................................................................. 56 Trouble-shooting................................................................................................................. 57 Specifications ..................................................................................................................... 59 (Effect and Efficacy) Substitution of professional masseur 5HFRYHU\IURPIDWLJXH 3URPRWLRQRIEORRGFLUFXODWLRQ 5HPRYDORIPXVFXODUIDWLJXH 5HOLHIRIPXVFXODUVWLIIQHVV $OOHYLDWLRQRIQHXUDOJLDRUPXVFXODUSDLQ 7KDQN\RXIRU\RXUSXUFKDVLQJRI0DVVDJH&KDLU(& 5HDGWKLVPDQXDOFDUHIXOO\EHIRUHKDQGWRXVHWKHSURGXFWSURSHUO\ $IWHUUHDGLQJWKURXJKNHHSWKLVPDQXDODWDVDIHSODFHZKHUH\RXFDQFRQVXOWZKHQHYHULWLV necessary. IMPORTANT SAFETY INSTRUCTIONS When using an electrical appliance, basic precautions should always be followed, including the following: Read all instructions before using this appliance. DANGER To reduce the risk of electric shock: 1. Always unplug this appliance from electrical outlet immediately after using and before cleaning. 2. Improper connection of the equipment-grounding conductor can result in a risk of electric shock. Check with a qualified electrician or serviceman if you are in doubt as to whether the product is properly grounded. Do not modify the plug provided with the product - if it will not fit outlet, have a proper outlet installed by a qualified electrician. WARNING To reduce the risk of burns, fire, electric shock, or injury to persons: 1. An appliance should never be left unattended plugged in. Unplug from outlet when not in use, and before off parts. 2. Do not operate under blanket or pillow. Excessive heating can occur and cause fire, electric shock, or injury to persons. 3. Close supervision is necessary when this appliance is used by, on, or near children, invalids, or disabled persons. 4. Use this appliance only for its intended use as described in this manual. Do not use attachments not recommended by the manufacturer. 5 Never operate this appliance if it has a damaged cord or plug, if it is not working properly, if it has been dropped or damaged, or dropped into water. Return the appliance to a service center for examination and repair. 6. Do not carry this appliance by supply cord or use cord as a handle. 7. Keep the cord away from heated surfaces. 8. Never operate the appliance with the air openings blocked. Keep the air openings free of lint, hair, and the like. 9. Never drop or insert any objects into any opening. 10. Do not use outdoors. 11. Do not operate where aerosol (spray) products are being used or where oxygen is being administered. 12. To disconnect, turn all controls to the off position, then remove plug from outlet. 1 IMPORTANT SAFETY INSTRUCTIONS WARNING 13. Grounding Instructions This product must be grounded. If it should malfunction or breakdown, grounding provides a path of least resistance for electric current to reduce the risk of electric shock. This product is equipped with a cord having an equipment-grounding conductor and a grounding plug. The plug must be plugged into an appropriate outlet that is properly installed and grounded in accordance with all local codes and ordinances. This product is for use on a nominal 120-volt circuit, and has a grounding plug that look like the plug illustrated in sketch A. A temporary adapter that looks like the adapter illustrated B and C may be used to connect the plug to a 2-pole receptacle as shown in sketch B if a properly grounded outlet is not available. The temporary adapter should be used only until a properly grounded outlet (sketch A) can be installed by a qualified electrician. The green colored rigid ear, lug, or the like extending from the adapter must be connected to a permanent ground such as a properly grounded outlet box cover. Whenever the adapter is used, it must be held in place by a metal screw. GROUNDING METHODS - Sketch A - - Sketch B - Grounded outlet - Sketch C - Adapter Grounded outlet box Grounding pin Metal screw Tab for grounding screw Save these instructions 14. Massager is intended for Household Use Only. 15. Be sure to check that there is not anybody (children in particular), pet or obstacle behind prior to inclining the Backrest. Otherwise, it may result in a cause of injury or trouble. 16. Be sure to check that there is not anybody (children in particular), pet or obstacle behind prior to lowering the Footrest. Otherwise, it may result in a cause of injury. 17. Be careful not to operate the Backrest with the cord wound on the main unit, or with the cord hooked to the other obstacle. Otherwise, the unreasonable force may be applied to the cord, probably resulting in a cause of fire or electric shock. 18. Be careful not to put the hand into the clearance at the underside of Backrest or to the clearance between the Backrest and Armrest. Otherwise, it may result in a cause of injury. 2 IMPORTANT SAFETY INSTRUCTIONS WARNING 19. Do not attempt to stand on the Armrest, Footrest or Backrest. Otherwise, the massager may fall down, resulting in injury. 20. Do not use the massager on the head, arm, knee or abdomen. As well as, do not put your hand or leg between knead ball. Otherwise, the user may feel sick or an injury may occur. 21. Do not attempt to plug/unplug the power plug with wet hands. Otherwise, it may result in injury or electric shock. 22. When the cover cloth is broken (when the built-in mechanism is exposed), do not use such massager, but send it for repair. Otherwise, it may result in a cause of accident, or injury. 23. Never attempt to disassemble the massager. Do not allow any personnel other than repair engineer to disassemble or repair the massager. Otherwise, it may result in a cause of fire, electric shock or injury. 24. (1) The following persons should not use the chair (for fear of the possible occurrence of physical disorder.) Ɣ 7KRVHZKRDUHDGYLVHGE\DSK\VLFLDQQRWWRJHWDPDVVDJHIRUH[DPSOHWKRVHZLWKWKURPERVLV HPEROLVPVHYHUHDQHXU\VPDFXWHYDULFRVLW\GHUPDWLWLVRUVNLQLQIHFWLRQVLQFOXGLQJLQIODPPDWLRQVRI subcutaneous tissue). (2) The following persons should consult a physician before use. Ɣ 7KRVHKDYLQJDPHGLFDOHOHFWURQLFGHYLFHHPEHGGHGLQWKHERG\VXFKDVDSDFHPDNHUVXVFHSWLEOHWR the electromagnetic interference. Ɣ7KRVHZLWKPDOLJQDQWWXPRUV Ɣ7KRVHZLWKKHDUWGLVHDVHV Ɣ7KRVHXQGHUXQVWDEOHFRQGLWLRQVRISUHJQDQF\RUDIWHUFKLOGELUWK Ɣ7KRVHZLWKVHQVRU\GLVWXUEDQFHFDXVHGE\SHULSKHUDOYDVFXODUGLVRUGHUVXFKDVGLDEHWHV Ɣ7KRVHZLWKLQMXULHV Ɣ7KRVHLQQHHGRIUHSRVH Ɣ7KRVHZLWKDERG\WHPSHUDWXUHVRIq&RUPRUHLQS\URJHQHWLFFRQGLWLRQIRUH[DPSOHDWWKHWLPHRI the manifestation of acute inflammatory symptoms such as malaise, chill, anisopiesis, or when under weak conditions. Ɣ 7KRVHZLWKRVWHRSRORVLVIUDFWXUHGYHUWHEUDRUDFXWHSDLQV Ɣ7KRVHZLWKDEQRUPDOLW\LQWKHEDFNERQHYHUWHEUDRUZLWKWKHEDFNERQHEHQWWROHIWRUULJKW Ɣ7KRVHZLWKLQIODPPDWRU\GLVHDVHVVXFKDVVSUDLQRUPXVFOHVWUDLQ Ɣ7KRVHZLWKKHUQLDWHGGLVN Ɣ7KRVHZLWKDQ\DEQRUPDOLW\RQWKHERG\RUXQGHUPHGLFDOWUHDWPHQW 25. If sickness or pain is felt during use, stop using the massager and consult a doctor immediately. Otherwise, it may result in injury. 3 IMPORTANT SAFETY INSTRUCTIONS WARNING 26. Attempt to use the massager up to 15 minutes for each use. Limit the use of massager at one point, up to 5 minutes. Otherwise, the use of massager at one point for a long time continuously may result in adverse effect. 27. Check the knead ball position for the sake of safety before leaning on the massager slowly. Do not twist the body, but lean on the massager straight, so that the backbone is located at center of knead ball. Otherwise, leaning on the massager abruptly may injure the backbone or result in injury. 28. Do not pull the cord, but the plug, when unplugging the massager. Otherwise, the electric shock or short-circuit may occur, resulting in fire. 29. Do not use the massager with bare skin. Otherwise, it may result in a cause of injury. 30. Do not move the massager with a person on it. Otherwise, the massager may fall down. 31. After use, be sure to set the POWER switch to [OFF] position. Otherwise, it may result in accident or injury due to child's mischief. 32. Do not attempt to pull the Back Pad forcibly or hang from the Back Pad. Otherwise, the Back Pad may come off, probably resulting in injury or broken massager. 33. Do not attempt to damage, bend, pull, twist, or bundle the cord forcibly. Otherwise, the cord may break, resulting fire or electric shock. 34. Do not use the massager on other than the designated voltage. Otherwise, it may result in a cause of fire or electric shock. 35. Do not use the massager in the bathroom, or places where humidity is high. Otherwise, it may result in electric shock or damage. 36. When the massager becomes inoperative, disconnect the power plug immediately for prevention of accident, and ask the sales agent for inspection/repair information. Otherwise, it may result in fire due to electric shock, leaking current, short circuit, etc. 37. Switch the power [OFF] instantly at the time of power failure, as well as pull the power plug out from the socket. Otherwise, it would become dangerous at the time of power comeback. 38. Be careful not to fall asleep during massage. Otherwise, it may result in a cause of accident or injury. 39. Do not use the massager with other medical instruments (excluding foot type massager). Otherwise, it may result in an accident or injury. 40. Place the massager main unit at a level floor surface. Otherwise, if it is placed at an unstable place, it may fall down, probably resulting in a cause of injury. 41. The maximum permissible weight of the massager is 100 kilograms. Do not use the massager with those who weigh more than 100 kilograms. Otherwise, an accident may happen or damage to the machine may result. 4 Before Use Take out the main body and the accessories from the box. Shoulder unit ACCESSORIES MAIN BODY Left Front Arm unit Right Right Rear Rear Pillow Front Left Back pad Grounding cable USER MANUAL Reverse side Shoulder cap (2 pcs.) Mounting screws (4 pcs.) * The grounding cable may not be packed depending on countries or regions of destination. QUICK OPERATION GUIDE Hexagonal wrench for the shoulder unit Remote controller stand Hexagonal wrench for the remote controller stand Attention Do not use any accessories other than those packaged. Mounting screws (2 pcs.) How to assemble and fold the backrest. Raise the backrest to the arrow direction, and make sure that the stopper (encircled) is locked, when a click sound can be heard. Press down the stopper (encircled) to the arrow direction, and turn the backrest slowly forward. * Be careful not to turn the backrest quickly. * The backrest cannot be turned when it is equipped with the shoulder unit and the arm unit. Lock Release Stopper Stopper CAUTION CAUTION Be careful not to have hands or fingers pinched between the armrest and the backrest. When using the stopper, be careful not to touch any part other than the encircled. 5 Before Use How to install the arm unit. 1. Install the arm unit with the backrest at the upright position. 2. Insert the arm unit convex into the hole of the armrest. Arm unit Convex * 3. Press down the arm unit until a click sound can be heard. When removing the arm unit, insert the hexagonal wrench in the hole. Pull it upward while pressing the button. Backrest Button Arm unit Locking mechanism enlarged Hexagonal wrench for the remote controller stand Hole * The hole of the arm unit at the opposite side is on the backrest. CAUTION Attention Install the other arm unit at the opposite side in the same manner. To remove it, take the procedure as illustrated at the right side. Make sure that the arm unit is installed tightly. Should air leak, or should the arm unit drop down, trouble or accident may happen. How to install the shoulder unit. 1. Install the shoulder unit with the backrest at the upright position. 2. Insert the shoulder unit convex and the air joint into the hole of the backrest. Shoulder unit Hole Convex Air joint 3. Fix the shoulder unit with the mounting screws at 2 places. 4. Cover the surface with the shoulder cap. Mounting screws * In tightening the mounting screw, use fingers first until it reaches the innermost. When you find it difficult to tighten it, try to press the shoulder unit with hand. With the screw at the innermost, fix it with the hexagonal wrench. Attention Shoulder cap Hexagonal wrench for the shoulder unit CAUTION Install the other arm unit at the opposite side in the same manner. In removing it, take the reverse procedure of installation. Make sure that the arm unit is installed tightly. Should air leak, or should the shoulder unit drop down, trouble or accident may happen. 6 Before Use How to install the back pad and the pillow. Install the back pad on the zipper of the backrest. 1. Install the back pad. Back pad Install the pillow on the velcro tape of the back pad. 2. Install the pillow. Zipper Pillow Velcro tape :KHQPDVVDJLQJSODFHWKHSLOORZEHKLQG ,I\RXIHHOPDVVDJLQJVWUHQJWKVWURQJXVHWKHSLOORZ :KHQQRWPDVVDJLQJXVHWKHFKDLUDVWKHUHFOLQHUZLWKWKHEDFNSDGDQGWKHSLOORZLQVWDOOHG CAUTION %HIRUHXVHWXFNXSWKHEDFNSDGWRPDNHVXUHWKDWWKHUHLVQRWHDURQWKHFRYHUFORWKRIWKH backrest and on the other parts. (Should there be any tear, no matter how small it is, discontinue using the chair immediately, disconnect the power cord plug, and ask for repair.) Continued use with the cloth torn may cause electric shock or any hazard on the body. How to install the remote controller stand. * 7KHUHPRWHFRQWUROOHUVWDQGLVXVXDOO\GHVLJQHGWREHLQVWDOOHGDWWKHOHIWVLGH 6KRXOGLWQHHGWREHLQVWDOOHGDWWKHULJKWVLGHWDNHWKHSURFHGXUHDVGHWDLOHGLQWKHQH[WSDJH )L[WKHUHPRWHFRQWUROOHUVWDQGRQ &RYHUWKHUHPRWHFRQWUROOHU 5HPRYHWKHFDSIRUWKH WKHDUPXQLWRQWKHOHIWVLGHDUPUHVW stand with the cap for the DUPUHVWRSHQIURPWKH FRQFDYHRIWKHOHIWVLGHDUPUHVW ZLWKWKHPRXQWLQJVFUHZVDWSODFHV DUPUHVWRSHQ * 7KHUHPRWHFRQWUROOHUVWDQGFDQEHLQVWDOOHG HLWKHUDWWKHOHIWVLGHRUDWWKHULJKWVLGH 5HPRWH controller stand 0RXQWLQJVFUHZ &DSIRUWKHDUPUHVW RSHQ Concave +H[DJRQDOZUHQFK IRUWKHUHPRWH controller stand [How to adjust the remote controller holder] Left side &DSIRUWKHDUPUHVWRSHQ Left side [How to install or remove the remote controller] /RRVHQWKHIL[LQJVFUHZWRDGHVLUHG Installation: SRVLWLRQDQGIL[LWWLJKWO\ 3XVKLWGRZQ 5HPRWHFRQWUROOHUKROGHU IURPXSZDUG )L[LQJVFUHZ Removal: 3XOOLWXS 7LJKWHQ XSZDUG [View of the finished work] *HWDSLHFHRIVWULQJ WKURXJKWKHUHPRWH controller stand WRKDQJGRZQ the QUICK OPERATION GUIDE. Loosen Attention :KHQUHPRYLQJWKHUHPRWHFRQWUROOHUVWDQG WDNHWKHUHYHUVHSURFHGXUHRILQVWDOODWLRQ CAUTION &KHFNWRPDNHVXUHWKDWWKHUHPRWHFRQWUROOHUVWDQGLV LQVWDOOHGWLJKWO\,WVSRVVLEOHGURSRIIPD\FDXVH WURXEOHRUKD]DUGRQWKHERG\ 7 Before Use How to replace the remote controller stand. <In case the remote controller stand, after being installed, needs to be replaced from left to right side.> Introductory Note 5HPRYHWKHSLOORZDQGWKHEDFNSDGVHH3DJH 5HPRYHWKHUHPRWHFRQWUROOHUIURPLWVVWDQG7KHQUHPRYHWKH VKRXOGHUXQLWDQGWKHDUPXQLWDQGWXUQWKHEDFNUHVWIRUZDUG VHH3DJHDQG ,QFDVHWKHUHPRWHFRQWUROOHUVWDQGLVLQVWDOOHGDWWKHULJKWVLGHIURPWKHILUVWWDNHWKHIROORZLQJ procedures starting 1.> 1. Remove the rubber cord grip behind the arm rest. Ԙ Rubber cord grip 2. Remove the remote controller cord from its cord grip. ԙ Caster Cord grip Remote controller cord Remove the rubber cord together with its grip. 3. Hang the remote controller cord on the cord grip at the opposite side. Ԛ 4. Adjust the position of the rubber cord grip so that the cord may not loosen, and insert the grip into the hole of the armrest. ԛ Hole Rubber cord grip Cord grip Attention The cord may snap if it loosens. Cord grip 5DLVHWKHEDFNUHVW7KHQLQVWDOOWKHDUPXQLWDQGWKHVKRXOGHUXQLWVHH3DJH ,QVWDOOWKHUHPRWHFRQWUROOHUVWDQGDWWKHULJKWVLGHDUPUHVWDQGDGMXVWDQDQJOHRIWKHUHPRWH FRQWUROOHUKROGHUVHH3DJH [View of the ,QVWDOOWKHSLOORZDQGWKHEDFNSDGVHH3DJH Loosen finished work] Tighten Rotate the stand at 180q. Fixing screw 8 Before Use Where to place the chair. Place the chair on a level surface with enough space around. عAttention: With the backrest reclined backward, the footrest goes up. Keep space of 70cm or more ahead and 60cm or more behind. عAttention: The chair may damage the floor. Spread a mattress for protection. عAttention: Avoid placing the chair at the place exposed to the direct ray of the sunshine for long hours every day or at the place of high temperature, e.g. close to a heater. The cover cloth may discolor or change in quality. 60cm or more 70cm or more How to move the chair. Lift up the front side of the chair, and push it forward. CAUTION 'RQRWPRYHWKHFKDLUZLWKDSHUVRQRUDQ\REMHFWVHDWHG on it to avoid the possible upset. 'RQRWPRYHWKHFKDLUZLWKLWVFDVWHUVRUGRQRWGUDJLWRQ the floor not to damage the floor surface. 'RQRWKROGWKHVHDWWKHIRRWUHVWRUWKHVKRXOGHUXQLWWR move the chair. %HFDUHIXOZKHQOLIWLQJXSWKHIURQWVLGHRIWKHFKDLU it is very heavy. 9 Lift up the front side of the chair Caster Name and Functions of Components Pillow MAIN BODY Put it behind when massaging. Back pad Backrest Recline on this back pad. Knead-massage the whole back, and air-massage the back and waists. Shoulder Air-massage shoulders. Caution label Remote controller stand Arm Caution tag Air-massage arm. Seat pad Seat Air-massage hips and thighs. Footrest QUICK OPERATION GUIDE Air-massage legs and feet. MASSAGING POSITION Massaging space covered by the mecha. massage (knead balls) Shoulder Power switch Turn OFF after use. Back Waist Arm Hip Thigh Calf Power supply fuse Power cord Power cord plug Caster Ankle Sole 10 Name and Functions of Components REMOTE CONTROLLER LCD display “Quick (1) (2) (3) (M)” button Various functions are available. Select any Auto mode course preprogrammed for each of the standard body shapes. “ON/OFF” button “STOP” button Start or stop massage, and store the knead balls. Discontinue any in-progress movement. (Press this button when you have to discontinue massage at once.) “Auto mode course” button Twelve Auto mode course are available in combination of massaging positions and massage types. “FUNCTION” button Select any one out of 23 massaging options. WAIST/HIP MASSAGE “AIR” button KNEAD UP Four air-massage options are available. NECK RELAX KNEAD DOWN EXTREME KNEAD DEEP KNEAD UP EXTREME TAPPING DEEP KNEAD DOWN ROLLING LEG THIGH/HIP WAIST BACK EXTREME KNEAD WAIST EXTREME TAPPING WAIST STRETCH STRETCH KNEAD UP TAPPING WAIST STRETCH TAPPING WAVELET STRETCH STRETCH WAVELET SHIATSU 3D 3D KNEAD UP RUBBING 3D KNEAD DOWN 3D TAPPING “REPEAT” button 3D WAVELET Repeatedly continue the current option selected from the Auto mode course. “HEIGHT ADJUSTMENT” button Finely adjust the shoulder position while in massage of any Auto mode course or when fixing the shoulder position in the process of selecting any function. “SKIP” button Discontinue the current option and change into another Auto mode course. * The knead balls can be repositioned in the process of selecting any function. * When the knead balls are positioned around shoulders or back in any Auto mode course, a display for finely adjusting the “SHOULDER” position comes out. When they are around waists, a display for finely adjusting the “WAIST” position comes out. Fine adjustment function of the “WAIST” position is available only for “EXTREME KNEAD WAIST” and “EXTREME TAPPING WAIST.” “SHOULDER” button Turn ON or OFF “air-massage of shoulders” or change the massaging strength in one of the 5 steps. “MENU” button Adjust the current option. “ARM” button Select any option in various functions. Select any option out of “ARM KNEAD/ARM GRASP/STOP” functions. Or, adjust the massaging strength at one of the 3 steps. “TWIST” button ³5(&/,1(5Ÿź´EXWWRQ “Cross Key” Adjust an angle each of the backrest and the footrest. The footrest moves in link with the backrest. Set or release “Twisting massage.” * While in reclining, the movements of “AIR”, “TAPPING” and “WAVELET” do not function. “ENTER” button Determine any option. “RESET” button ³)2275(67Ÿź´EXWWRQ ³)25:$5'Ż´RU ³%$&.Ź´EXWWRQ Adjust an angle of the “footrest.” Adjust the footrest length. * “Air” does not function while the footrest goes up or down. * “AIR” does not function while the footrest goes forward or comes backward. 11 Store the backrest and the footrest. * The backrest does not go up completely. Before Starting Massage Power ON. Connect the power cord plug with the receptacle. Power ON. 7KHSRZHUVZLWFKLVEHKLQGWKHOHIWDUPUHVW $IWHUSRZHU21WKH/&'LQWKHLQLWLDOVWDJH displays the screens as shown on the right side alternately. WARNING Do not use the massager on other than the designated voltage. Do not use the chair when the power cord or its plug is damaged, or when the receptacle is loosened. It could electric shock, short circuit or fire. Check items. Check around the chair. Ԙ &KHFNWRPDNHVXUHWKDWWKHUHLVQRERG\QRSHWDQGQRWKLQJDKHDGDQGEHKLQGWKHFKDLU and under the footrest. <Standby position> Press the button to start massage. Then, the footrest automatically comes up at about 50°. * Be sure to check that there is nothing around. Check the main body itself. Ԙ Hold up the back pad, and check to make sure that the cover cloth of the backrest is not torn and that there is no tear in any other parts. * Should there by any tear, no matter how small it is, discontinue using the chair immediately. Disconnect the power cord plug, and contact your dealer for repair. ԙ &KHFNWRPDNHVXUHWKDWQRQHRIWKHSRZHUFRUG the remote controller cord or any other materials is pinched in the main body. Ԛ &KHFNWRPDNHVXUHWKDWWKHUHLVQRGDPDJHLQ the power cord, remote controller cord and the power cord plug and that nothing of dust (e.g. pins) is attached to the plug. ԛ Before seated on the chair, make sure where there are the knead balls. 7KHNQHDGEDOOVDUHXVXDOO\ORFDWHGDWWKHVWRUHG position (in the innermost at the lower part of the backrest) :KHQWKHNQHDGEDOOVDUH not located at the stored position, press the button. They move down to the lowest position. Press it again, and then, they go back to the stored position. Stored position Pillow Ԝ Before seated on the chair, make sure where there is the footrest. Do not be seated forcibly with the footrest at the upright position. Such attempt may result in injury. Press the FOOTREST button or the button. Back pad * Press the 12 button. Then, the backrest is also stored. How to Adjust the Chair How to use the RECLINER. To turn down the backrest, press the RECLINER button. &RQWLQXHWRSUHVVWKH5(&/,1(5EXWWRQ 7KHEDFNUHVWWXUQVGRZQEDFNZDUGDQGWKHIRRWUHVW FRPHVXS 7KHGHHSHULWWXUQVGRZQWKHVWURQJHUWKHNQHDGEDOOV¶ PRYHPHQWEHFRPHV Release your finger from the RECLINER button at a desired angle. $QDQJOHRIWKHIRRWUHVWFKDQJHVLQSURSRUWLRQWR DUHFOLQLQJDQJOHRIWKHEDFNUHVW To raise the backrest, press the RECLINER button. &RQWLQXHWRSUHVVWKH5(&/,1(5EXWWRQ 7KHEDFNUHVWWXUQVXSZDUGDQGWKHIRRWUHVWJRHV GRZQ Upright position WARNING Backward position CAUTION %HIRUHUHFOLQLQJWKHEDFNUHVWEHIRUHUDLVLQJRU ORZHULQJWKHIRRWUHVWRUEHIRUHKDYLQJWKHIRRWUHVW JRLQJIRUZDUGRUFRPLQJEDFNZDUGFKHFNWRPDNH VXUHWKDWWKHUHLVQRERG\QRSHWRUQRWKLQJDKHDG DQGEHKLQGWKHFKDLUDQGXQGHUWKHIRRWUHVW 'RQRWDOORZDQ\ERG\WRULGHRQWKHEDFNUHVWWKH DUPUHVWWKHIRRWUHVWRUWKHVKRXOGHUXQLW 7KHFKDLUPD\RYHUWXUQDQGWKHXVHU PD\IDOOGRZQDQGKXUW KLPVHOIKHUVHOI 1HJOLJHQFHPD\UHVXOWLQDFFLGHQWKD]DUGRQWKHERG\RU GDPDJHLQIXUQLWXUH عAttention: :KHQUHFOLQLQJWKHEDFNUHVWZKLOHLQPDVVDJHWXUQLWOLWWOHE\OLWWOHEDFNZDUG WDNLQJWKHPDVVDJLQJVWUHQJWKLQWRFRQVLGHUDWLRQ 13 How to Adjust the Chair How to use the FOOTREST. To raise the footrest, press the FOOTREST button. &RQWLQXHWRSUHVVWKH)2275(67EXWWRQ 7KHIRRWUHVWFRPHVXS Release your finger from the FOOTREST button at a desired angle. To lower the footrest, press the FOOTREST button. &RQWLQXHWRSUHVVWKH)2275(67EXWWRQ 7KHIRRWUHVWJRHVGRZQ 'RZQZDUGSRVLWLRQ 8SZDUGSRVLWLRQ WARNING %HIRUHORZHULQJWKHIRRWUHVWEHFDUHIXOQRWWR KDYH\RXUIRRWRUKDQGSLQFKHGLQLW&KHFNWR PDNHVXUHWKDWWKHUHLVQRERG\QRSHWRU QRWKLQJXQGHUWKHIRRWUHVW 1HJOLJHQFHPD\UHVXOWLQKD]DUGRQWKHERG\ 14 How to Adjust the Chair How to get the footrest going forward or coming backward. To raise the footrest at a desired angle, continue to press the FOOTREST button. 7KHIXQFWLRQRIJHWWLQJWKHIRRWUHVWJRLQJIRUZDUGRU FRPLQJEDFNZDUGLVQRWDYDLODEOHZKHQWKHIRRWUHVWLV SRVLWLRQHGDW°RUOHVV ,QDUDQJHRI°°WKHOHQJWKRIJRLQJIRUZDUG YDULHV 7KHOHQJWKRIJRLQJIRUZDUGEHFRPHVORQJHVWDWDQ DQJOHRI°RUPRUH To get the footrest going forward at desired length, continue to press the FOOTREST button. &RQWLQXHWRSUHVVWKHEXWWRQ 7KHIRRWUHVWJRHVIRUZDUG To get the footrest coming backward, press the FOOTREST button. &RQWLQXHWRSUHVVWKHEXWWRQ 7KHIRRWUHVWFRPHVEDFNZDUG 7KHVROHSDUWLVVWUHWFKHGRUVKUXQNZLWKDVSULQJ ,WVSRVLWLRQLVDGMXVWDEOH 'RZQZDUG SRVLWLRQ 8SZDUG SRVLWLRQ )RUZDUG SRVLWLRQ 3RVLWLRQZLWKWKH VROHJRLQJIRUZDUG 7KHVROHSDUWQRWXQGHU HOHFWULFDOFRQWURO Attention CAUTION 'RQRWWU\WRVHDW\RXUVHOILQ WKHFKDLURUWU\WRJRGRZQ IURPWKHFKDLUZLWKWKHIRRWUHVW DWWKHXSZDUGSRVLWLRQ CAUTION 'RQRWVWUDLQ\RXUVHOIRQ\RXU IHHWZLWKWKHIRRWUHVWJRLQJ IRUZDUGRUFRPLQJEDFNZDUG *LYHQWKHIRUFHWKHIRRWUHVWPD\EH GDPDJHGRUDVTXHDNLQJ QRLVHPD\EHFDXVHG 'RQRWSXW\RXUKDQGRUIRRW EHWZHHQWKHVHDWDQGWKHIRRWUHVW ZKHQWKHIRRWUHVWLVFRPLQJ EDFNZDUG <RXPD\JHWKXUW *LYHQWKHIRUFHWKH IRRWUHVWPD\EH GDPDJHGRU\RX PD\JHWKXUW How to use the [RESET] button. To store the backrest and the footrest, press the button. 7KHEDFNUHVWLVUDLVHGE\DERXW°DQGWKHIRRWUHVWFRPHVEDFNZDUGGRZQ WRWKHORZHVWSRVLWLRQ 7KH>5(6(7@IXQFWLRQLVDYDLODEOHRQO\ZKHQWKH/&'LVLQDQLQLWLDOVWDJH 7KHEDFNUHVWGRHVQRWPRYHXSFRPSOHWHO\VWRSSLQJKDOIZD\ 7RUDLVHLWXSFRPSOHWHO\SUHVVWKH5(&/,1(5EXWWRQ How to Use the Auto Mode Course Introductory Note $IWHUSRZHURQWKH/&'LQWKHLQLWLDOVWDJH GLVSOD\VWKHVFUHHQVDVVKRZQRQWKHULJKW VLGHDOWHUQDWHO\ :KHQFKDQJLQJDQ$XWRPRGHFRXUVH WRDQRWKHU$XWRPRGHFRXUVHRUZKHQ FKDQJLQJQRQ$XWRPRGHFRXUVHPDVVDJH WRDQ\$XWRPRGHFRXUVHVHH3DJH Press the button. 7KHIRRWUHVWDXWRPDWLFDOO\FRPHVXSWRWKHVWDQGE\SRVLWLRQ 3UHVVWKHEXWWRQWRLQWHUUXSWWKLVPRYHPHQW 7KHVWDQGE\VFUHHQFRPHVRXW %HGHHSO\VHDWHGRQWKHFKDLUDQGUHFOLQH\RXUVHOIVORZO\ ZLWK\RXUKHDGRQWKHEDFNUHVW Press the the button. Or, select “AUTO” with button, and press the button. $OORIWKH$XWRPRGHFRXUVHDUHGLVSOD\HG (YHQLIWKHEXWWRQUHPDLQVQRWWREHSUHVVHG WKLVIXQFWLRQVWDUWVVHFRQGVODWHU 7KHVDPHKROGVJRRGRI WKLVSURFHGXUH Select a desired course with the the button, and press the 6HOHFWRQHRXWRIWKHFRXUVHVRI ³:+2/(%2'<”³6+28/'(5” ³:$,67”³675(7&+´DQG³0,1” 7KHUHDUHVXEFRXUVHVLQWKH ³:+2/(%2'<´FRXUVH DQGVXEFRXUVHVHDFKLQ WKH³6+28/'(5´DQG³:$,67´ FRXUVHV 16 button or button. How to Use the Auto Mode Course The course name selected is displayed. When the Auto mode course starts, a process of detecting your body shape also starts. :KHQWKH³0,1´FRXUVHLVVHOHFWHGWKHSURFHVVRIGHWHFWLQJ \RXUERG\VKDSHLVQRWWDNHQ In the process of detection, the detection points are lighted up, and the detection levels each of the points are indicated with the detection indicator. :KHQQRERG\LVVHDWHGRQWKHFKDLURUZKHQQRWKLQJFDQEH GHWHFWHGDPHVVDJH³&$1127'(7(&7%2'<6+$3(´ FRPHVRXWRQWKH/&',QWKLVFDVHSUHVVWKHEXWWRQ DJDLQDQGWU\WRGHWHFWWKHERG\VKDSHDJDLQ With the body shape detection completed, the knead balls move to the shoulder position as determined. Should you feel the shoulder position not in good fitness, finely adjust its position as desired. While a beep sound is caused, press the button for adjustment, and press the button. $WWKLVWLPHWKHNQHDGEDOOVFDQEHPRYHGIRUZDUGRUEDFNZDUG ZLWKWKHEXWWRQIRUDGMXVWPHQW0DVVDJHLVPDGHZLWKWKH 2QHVFDOH DERXWPP 2QHVFDOH DERXWPP NQHDGEDOOVDWWKHSRVLWLRQDGMXVWHGIRU³1(&.5(/$;´ ³(;75(0(.1($'´DQG³(;75(0(7$33,1*´LQWKH $XWRPRGHFRXUVH7KLVPDVVDJHLVDYDLODEOHRQO\IRUWKH ³5(-89(1$7(´FRXUVHRI³:+2/(%2'<´DQG³6+28/'(5´ FRXUVHV How to Use the Auto Mode Course )LQHDGMXVWPHQWRIWKHVKRXOGHUSRVLWLRQFDQEHPDGHZLWKWKH +(,*+7$'-8670(17EXWWRQV 3UHVVWKHEXWWRQDQGGHWHFW\RXUERG\VKDSH<RXU ERG\VKDSHLVNHSWLQPHPRU\XQWLOWKHPDVVDJHLVFRPSOHWHG 7RFKDQJH\RXUERG\VKDSHLQPHPRU\SUHVVWKH EXWWRQDQGILQLVKWKHPDVVDJH7KHQVWDUWDOORYHUDJDLQ When the allowance time for fine adjustment of the shoulder position is counted up, a message “POINT NAVI FINISHED” is displayed. Your back contour line is displayed. The Auto mode course in progress is displayed on the LCD. 0HFKDNQHDG EDOOVPDVVDJH VWUHQJWK 3UHVHQWPDVVDJHPRGH 1H[WPDVVDJHPRGH $LUPDVVDJH VWUHQJWK $LUPDVVDJHVWUHQJWKRI VKRXOGHUV $LUPDVVDJHVWUHQJWK DQGFRQWHQWRIDUPV 3UHVHQW SRVLWLRQRI 0HFKDNQHDG EDOOVPDVVDJH 5HVWWLPH $LUPDVVDJH RSWLRQIXQFWLRQV $LUPRYHPHQWFRQGLWLRQV 1DPHRI$XWRPRGHFRXUVH 18 How to Use the Auto Mode Course When the Auto mode course is completed, the knead balls automatically return to the stored position. After use, turn the power switch “OFF”. 7KLVVWHSSUHYHQWVWKHFKDLUIURPVWDUWLQJPRYHPHQWHYHQ ZLWKWKHUHPRWHFRQWUROOHURSHUDWHGLQDGYHUWHQWO\ CAUTION $IWHUXVHEHVXUHWRWXUQ WKHSRZHUVZLWFK2)) 0LVXVHE\DFKLOGPD\FDXVH DFFLGHQW To discontinue massage immediately. 3UHVVWKHEXWWRQ 7KHNQHDGEDOOVVWRSPRYHPHQWDWWKHSUHVHQWSRVLWLRQ 7KHVWDQGE\VFUHHQFRPHVRXW To stop massage halfway. 3UHVVWKHEXWWRQ 7KHNQHDGEDOOVPRYHWRWKHVWRUHGSRVLWLRQ :LWKWKHNQHDGEDOOVVWRUHGWKHLQLWLDOGLVSOD\FRPHVRXW RQWKH/&' 19 How to Use the Auto Mode Course For your information: What is POINT NAVI? 32,171$9,LVDIXQFWLRQDYDLODEOHRQO\LQWKH$XWRPRGHFRXUVHZKLFKPHDVXUHV\RXUERG\ VKDSHDQGSRVWXUHEHIRUHPDVVDJHLVVWDUWHG :LWK\RXUFRQWRXUEDFNOLQHLQPHPRU\HIIHFWLYHPDVVDJHFDQEHJLYHQ :KDWRSWLRQVDUHDYDLODEOHLQWKH$XWRPRGHFRXUVH" 7ZHOYHRSWLRQVDUHVHOHFWDEOHLQWKH$XWRPRGHFRXUVHLQFRPELQDWLRQRIERG\UHJLRQVDQGPDVVDJLQJPRGHV 5HMXYHQDWH! &RYHUZKROHSDUW 5HIUHVK! 6ORZ 5HOD[! *HQWOH $LU! $LUPDVVDJHRQO\ 6WUHWFK! :+2/(%2'<FRXUVH$SSUR[PLQ! 0DVVDJHWKHZKROHEDFN 6+28/'(5FRXUVH$SSUR[PLQ! 0DVVDJHWKHQHFNDQGVKRXOGHUVLQWHQVLYHO\ :$,67FRXUVH$SSUR[PLQ! 0DVVDJHWKHZDLVWVLQWHQVLYHO\ 675(7&+FRXUVH$SSUR[PLQ! 6WUHWFKWKHZKROHERG\ 0,1FRXUVH 7KH:+2/(%2'<FRXUVHLVVKRUWHQHGFRPSDFWO\LQDFRXUVHRIDERXWPLQXWHV * 0,1FRXUVHGRHVQRWKDYHWKHERG\VKDSHGHWHFWLRQ )ROORZLQJLOOXVWUDWLRQVKRZVRQO\WKHRXWOLQHIRUTXLFNUHIHUHQFH$OVRWKHDLUPDVVDJHDQGWKHORZHUERG\DUHDEEUHYLDWHG SHOULDER Rejuvenate Course 3RLQWQDYL .QHDGGRZQ .QHDGXS 5ROOLQJ 1HFNUHOD[ .QHDGXS ([WUHPH WDSSLQJ .QHDGGRZQ .QHDGXS ([WUHPHNQHDG 5ROOLQJ ([WUHPHWDSSLQJ :DYHOHW 1HFNUHOD[ .QHDGXS .QHDGGRZQ ([WUHPHWDSSLQJ 6WUHWFKNQHDGXS .QHDGXS 1HFNUHOD[ .QHDGGRZQ 6WUHWFK :DYHOHW )LQDO FRQGLWLRQLQJ ([WUHPH WDSSLQJ 7DSSLQJ ([WUHPH NQHDGZDLVW 6WUHWFK ZDYHOHW ([WUHPH NQHDG ([WUHPH WDSSLQJ .QHDGXS :DYHOHW .QHDGXS .QHDGGRZQ )LQDO FRQGLWLRQLQJ .QHDGXS .QHDGGRZQ ([WUHPH WDSSLQJZDLVW ([WUHPHNQHDG ZDLVW 6WUHWFK ZDYHOHW .QHDGXS .QHDGGRZQ Waist/hip 5ROOLQJ 7DSSLQJ 6WUHWFK ZDYHOHW .QHDGGRZQ ([WUHPH WDSSLQJZDLVW )LQDO FRQGLWLRQLQJ WHOLE BODY Rejuvenate Course 3RLQWQDYL .QHDGGRZQ .QHDGXS :DYHOHW :DYHOHW ([WUHPHNQHDG .QHDGXS WAIST Rejuvenate Course 3RLQWQDYL .QHDGGRZQ 7DSSLQJ 5ROOLQJ 6WUHWFKNQHDGXS 5ROOLQJ Waist/hip .QHDGXS .QHDGGRZQ ([WUHPHNQHDG ZDLVW STRETCH Course 5ROOLQJ 5ROOLQJ 5ROOLQJ 7MIN Course 3RLQWQDYL .QHDGGRZQ .QHDGXS ([WUHPHNQHDG ([WUHPHWDSSLQJ 6WUHWFKNQHDG XS .QHDGXS .QHDGGRZQ ([WUHPHWDSSLQJ :DYHOHW 6WUHWFK 5ROOLQJ .QHDGXS .QHDGGRZQ :DYHOHW 7DSSLQJ ([WUHPHWDSSLQJ 6KLDWVX ([WUHPHNQHDG .QHDGXS :DYHOHW 6WUHWFK .QHDGGRZQ 20 )LQDO FRQGLWLRQLQJ How to Use the Quick Mode What is quick mode? <RXFDQVHOHFWDQ\RQHRIWKHSUHSURJUDPPHG$XWRPRGHFRXUVHVDGMXVWHGWRDVWDQGDUG ERG\VKDSHHDFKGLYLGHGE\ERG\KHLJKW7KLVTXLFNPRGHLVUHFRPPHQGDEOHWR\RXIRUTXLFN VWDUWDVWKH32,171$9,IXQFWLRQLVQRWDYDLODEOHLQLW )RUWKHKHLJKWRIDERXWFP¶ ”) )RUWKHKHLJKWRIDERXWFP¶ ”) )RUWKHKHLJKWRIDERXWFP¶ ”) <RXPD\FKDQJHVRPHRIWKHSUHSURJUDPPHG$XWRPRGH FRXUVHVDQGNHHSWKHPLQPHPRU\IRU\RXURZQFXVWRPXVH VHH3DJH 7KHLQLWLDOYDOXHLVVHWIRUWKRVHZLWKWKHKHLJKWRIFP¶ ” Introductory Note $IWHUSRZHURQWKH/&'LQWKHLQLWLDOVWDJH GLVSOD\VWKHVFUHHQVDVVKRZQRQWKHULJKW VLGHDOWHUQDWHO\ :KHQFKDQJLQJDTXLFNPRGHRSWLRQWRDQRWKHU RUZKHQFKDQJLQJQRQTXLFNPRGHPDVVDJHWR DQ\TXLFNPRGHRSWLRQVHH3DJH Press button. 7KHIRRWUHVWDXWRPDWLFDOO\FRPHVXSWRWKHVWDQGE\SRVLWLRQ 3UHVVWKHEXWWRQWRLQWHUUXSWWKLVPRYHPHQW 7KHVWDQGE\VFUHHQFRPHVRXW Press any of the or buttons. Or, select any of the “1” “2” “3” or “M” buttons with the press the button, and button. $OLVWRIDOOWKH$XWRPRGHFRXUVHLVGLVSOD\HG How to Use the Quick Mode Select any desired course with the button, and press the button. 6HOHFWRQHRXWRIWKHFRXUVHVRI³:+2/(%2'<”, ³6+28/'(5”³:$,67”³675(7&+´DQG³0,1´ 7KHUHDUHVXEFRXUVHVLQWKH³:+2/(%2'<´FRXUVH DQGVXEFRXUVHVHDFKLQWKH³6+28/'(5´DQG³:$,67´ FRXUVHV The course name selected is displayed. The selected Auto mode course starts. The quick mode option of the selected course is displayed on the LCD. 0HFKDNQHDG EDOOVPDVVDJH VWUHQJWK 4XLFNPRGH 3UHVHQWPDVVDJHPRGH 1H[WPDVVDJHPRGH $LUPDVVDJH VWUHQJWK 3UHVHQWSRVLWLRQ RI0HFKD NQHDGEDOOV PDVVDJH $LUPDVVDJHVWUHQJWKRI VKRXOGHUV $LUPDVVDJHVWUHQJWK DQGFRQWHQWRIDUPV $LUPDVVDJH RSWLRQIXQFWLRQV Rest time 1DPHRI$XWRPRGHFRXUVH $LUPRYHPHQWFRQGLWLRQV 22 How to Use the Quick Mode When a quick mode option comes to an end, the knead balls automatically return to the stored position. After use, turn the power switch “OFF”. 7KLVVWHSSUHYHQWVWKHFKDLUIURPVWDUWLQJPRYHPHQWHYHQ ZLWKWKHUHPRWHFRQWUROOHURSHUDWHGLQDGYHUWHQWO\ CAUTION $IWHUXVHEHVXUHWRWXUQ WKHSRZHUVZLWFK2)) 0LVXVHE\DFKLOGPD\FDXVH DFFLGHQW To discontinue massage immediately. 3UHVVWKHEXWWRQ 7KHNQHDGEDOOVVWRSPRYHPHQWDWWKHSUHVHQWSRVLWLRQ 7KHVWDQGE\VFUHHQFRPHVRXW To stop massage halfway. 3UHVVWKHEXWWRQ 7KHNQHDGEDOOVPRYHWRWKHVWRUHGSRVLWLRQ :LWKWKHNQHDGEDOOVVWRUHGWKHLQLWLDOGLVSOD\FRPHVRXW RQWKH/&' 23 How to Adjust during Massaging with Auto Mode Course or in Quick Mode To adjust MECHA. STRENGTH (mecha. massage with the knead balls). Press the button for adjustment, and press the button. 0(&+$675(1*7+LVDGMXVWDEOHLQVWHSV 6WUHQJWKLVLQLWLDOO\VHWDWWKHVWHS To adjust AIR STRENGTH (air-massage strength). Press the button for adjustment, and press the button. $,5675(1*7+LVDGMXVWDEOHLQVWHSV 6WUHQJWKLVLQLWLDOO\VHWDWWKHVWHS $VWRKRZWRDGMXVW$,5675(1*7+RIVKRXOGHUVDUPV VHH3DJH To adjust the shoulder position and the knead ball position. When the knead balls are positioned around shoulders or back, press the HEIGHT ADJUSTMENT or buttons, and press the button. 7KHVKRXOGHUSRVLWLRQLVDGMXVWDEOHZLWKWKHHEIGHT ADJUSTMENT or buttons pressed once, and WKHQHYHQZLWKWKHEXWWRQSUHVVHGDVZHOO $WWKLVWLPHWKHNQHDGEDOOVFDQEHPRYHGIRUZDUG RUEDFNZDUGZLWKWKHEXWWRQIRUDGMXVWPHQW 0DVVDJHLVPDGHZLWKWKHNQHDGEDOOVDWWKHSRVLWLRQ DGMXVWHGIRU³5(/$;1(&.”³(;75(0(.1($'´RU ³(;75(0(7$33,1*´LQWKH$XWRPRGHFRXUVHV7KLV PDVVDJHLVDYDLODEOHRQO\IRUWKH³5(-89(1$7(´ FRXUVHRI³:+2/(%2'<´DQG³6+28/'(5´FRXUVHV 24 Around shoulders or back One scale: about 2mm One scale: about 12mm How to Adjust during Massaging with Auto Mode Course or in Quick Mode To adjust the “EXTREME KNEAD WAIST” or “EXTREME TAPPING WAIST” positions. When the knead balls are positioned around waists, press the HEIGHT ADJUSTMENT or buttons, and press the button. 7KHZDLVWSRVLWLRQLVDGMXVWDEOHZLWKWKH+(,*+7 ADJUSTMENT with the or buttons pressed once, and then even button pressed as well. 0DVVDJHLVPDGHZLWKWKHNQHDGEDOOVDWWKHSRVLWLRQDGMXVWHG for “EXTREME KNEAD WAIST” or “EXTREME TAPPING WAIST” in the Auto mode course. (This massage is available only for the “REJUVENATE” course of “WHOLE BODY” and “WAIST” courses.) One scale: about 12mm Around waist To turn [PULSE] ON or OFF. Press the the button. Select [PULSE] with button, select either “ON” or “OFF” also with the button, and then press the button. 7XUQ>38/6(@21$LUPDVVDJHVWDUWVLQTXLFNSXOVDWLRQDWD KLJKIUHTXHQF\ ([DPSOH$LUPDVVDJHRIZDLVWVDQGEDFNDWWKHVWUHQJWK Regular mode = 1 pulsation in 7 seconds Pulse mode = 7 pulsations in 12 seconds >38/6(@LVLQLWLDOO\VHWDW³21”. 7KHIXQFWLRQVHOHFWHGLVUHYHUVHG * The [PULSE] function is not DYDLODEOHLQWKHDLUPDVVDJHRIDUPV To turn [COMBO FOOTREST] ON or OFF. Press the button. Select [COMBO FOOTREST] with the “ON” or “OFF” also with the button, and then press the %RWK>&20%2)2275(67@DQG>/(*675(7&+@ functions do not work at the same time. >&20%2)2275(67@LVLQLWLDOO\VHWDW³2))”. :LWK>)227$,5@2))WXUQ>&20%2)2275(67@21 Then, [FOOT AIR] is also turned ON. 25 button, select either button. How to Adjust during Massaging with Auto Mode Course or in Quick Mode To turn [LEG STRETCH] ON or OFF. Press the button. Select [LEG STRETCH] with the button, get a list of all the functions displayed with the button, select a desired function, and then press the button. 0RYHWKHIRRWUHVWIRUZDUG,IWKHDQJOHRIWKHIRRWUHVWLVVWLOO low, wait for a while until it comes up. Then, the massage starts. %RWK>/(*675(7&+@DQG>&20%2)2275(67@IXQFWLRQV do not work at the same time. >/(*675(7&+@LVLQLWLDOO\VHWDW³21´ :LWK>)227$,5@2))WXUQ>/(*675(7&+@217KHQ >)227$,5@LVDOVRWXUQHG21 $,5675(1*7+LVDGMXVWDEOHLQVWHSV Strength is initially set at the step 3. 7KHVWUHQJWKFDQEHDGMXVWHGZLWKWKHEXWWRQ 7KHIXQFWLRQRIJHWWLQJWKHIRRWUHVWJRLQJIRUZDUGRUFRPLQJ EDFNZDUGLVQRWDYDLODEOHZKHQWKHIRRWUHVWLVSRVLWLRQHGDW ° or less. ,QDUDQJHRI°°WKHOHQJWKRIJRLQJIRUZDUGYDULHV 26 How to Adjust during Massaging with Auto Mode Course or in Quick Mode To turn [FOOT AIR] ON or OFF. Press the button. Select [FOOT AIR] with the button, select either “ON” or “OFF” also with the button, and then press the button. >)227$,5@LVLQLWLDOO\VHWDW³21´ :LWKERWK>)227$,5@DQG>&20%2)2275(67@21WXUQ >)227$,5@2))7KHQ>&20%2)2275(67@LVDOVRWXUQHG2)) :LWKERWK>)227$,5@DQG>/(*675(7&+@21WXUQ >)227$,5@2))7KHQ>/(*675(7&+@LVDOVRWXUQHG2)) To repeat the present in-progress massage. Press the button. 7KHSUHVHQWLQSURJUHVVPDVVDJHLVUHSHDWHGIRUPRUH seconds. * 7KHDLUPDVVDJHKDVQRUHSHDWLQJIXQFWLRQ * :KLOHLQWKHUHSHDWHGPDVVDJHSUHVVWKHEXWWRQ 7KHPDVVDJHLVUHSHDWHGDJDLQIRUPRUHVHFRQGV * :KLOHLQWKHUHSHDWHGPDVVDJHSUHVVWKHEXWWRQ 7KHUHSHDWLQJIXQFWLRQLVUHVHW To proceed to another course. Press the button. :LWKWKHSUHVHQWLQSURJUHVVPDVVDJHGLVFRQWLQXHG \RXFDQSURFHHGWRDQRWKHUFRXUVH * 7KHDLUPDVVDJHKDVQRVNLSSLQJ IXQFWLRQ 27 How to Adjust during Massaging with Auto Mode Course or in Quick Mode To adjust the strength of shoulder air-massage or to stop it. Press the button once, and then press it again repeatedly for desired strength. Then, press the button. 6+28/'(5$,5675(1*7+LVDGMXVWDEOHLQVWHSV 6WUHQJWKLVLQLWLDOO\VHWDWWKHVWHS $IWHUWKHEXWWRQLVSUHVVHGRQFHPDVVDJLQJVWUHQJWK FDQEHDGMXVWHGZLWKWKHEXWWRQDVZHOO * * * :KLOHLQVKRXOGHUDLUPDVVDJHWKHEDFNDLUEDJLVLQIODWHG :KLOHLQVKRXOGHUDLUPDVVDJHPDVVDJLQJVWUHQJWKRIWKH NQHDGEDOOVPD\EHRQWKHLQFUHDVH :KLOHLQVKRXOGHUDLUPDVVDJHZHDUVRPHWKLQJWRSURWHFW VKRXOGHUVQRWWRH[SRVHWKHP To select the arm air-massage functions. ( “ARM KNEAD” / “ARM GRASP”) 3UHVVWKHEXWWRQDQGVHOHFW>$50.1($' $50*5$63@ZLWKWKHEXWWRQ7KHQSUHVV the button. $UPDLUPDVVDJHLVLQLWLDOO\VHWDW³$50.1($'”. 7KHIXQFWLRQVHOHFWHGLVUHYHUVHG To adjust the strength of arm air-massage or to stop it. Press the button once, and then press it again repeatedly for desired strength. Then, press the button. 0DVVDJLQJVWUHQJWKLVDGMXVWDEOHLQ steps. 6WUHQJWKLVLQLWLDOO\VHWDWWKHVWHS $IWHUWKHEXWWRQLVSUHVVHGRQFH PDVVDJLQJVWUHQJWKFDQEHDGMXVWHGZLWK WKHEXWWRQDVZHOO * :KLOHLQDUPDLUPDVVDJHGRQRWZHDUD ZDWFKRURWKHUPHWDOOLFDFFHVVRULHV How to Registeration in the Memory What can be done by registration? <RXPD\FKDQJHVRPHRIWKHSUHSURJUDPPHG$XWRPRGHFRXUVHVDQGFDQKDYH\RXURZQ FXVWRPXVHRSWLRQVUHJLVWHUHGLQWKHPHPRU\ What can be registered in the memory? ,QIRUPDWLRQRQWKHERG\VKDSH32,171$9,VKRXOGHUSRVLWLRQZDLVWSRVLWLRQ 3RVLWLRQVZKHQXVLQJWKH6.,35(3($7IXQFWLRQV $XWRPRGHFRXUVHVHOHFWHG $LURSWLRQV212))IXQFWLRQVHDFKRI38/6(&20%2)2275(67675(7&+)227675(7&+'28%/( 675(7&+$50.1($'$50*5$636+'5DQG/(* 1RWH 5HJLVWUDWLRQFDQQRWEHPDGHRQWKHPHFKDPDVVDJLQJVWUHQJWKRIWKHNQHDGEDOOVWKHDLUPDVVDJHVWUHQJWKDQGWKH DLUPDVVDJHVWUHQJWKRIVKRXOGHUVDUPV0DNHDGMXVWPHQWRQWKHPHYHU\WLPHZKHQ\RXXVHWKHFKDLU $LURSWLRQVFDQEHUHJLVWHUHGDVWKHILQDOVWDJHHDFKRIWKHFRXUVHV Introductory Note $IWHUSRZHURQWKH/&'LQWKHLQLWLDOVWDJH GLVSOD\VWKHVFUHHQVDVVKRZQRQWKHULJKW VLGHDOWHUQDWHO\ Press the button. 7KHIRRWUHVWDXWRPDWLFDOO\FRPHVXSWRWKHVWDQGE\SRVLWLRQ 3UHVVWKHEXWWRQWRLQWHUUXSWWKLVPRYHPHQW 7KHVWDQGE\VFUHHQFRPHVRXW Press the button for 2 seconds. 'LVSOD\HGDUHKRZWRUHJLVWHULQWKHPHPRU\DQGDOLVWRIDOO WKH$XWRPRGHFRXUVHV 29 How to Registeration in the Memory Select any desired Auto mode course, and get massage of your own preference. 7KHIROORZLQJDUHUHSUHVHQWDWLYHH[DPSOHV 6KRZQDUHWKHNH\SRLQWVRQO\IRUTXLFNRYHUYLHZ,QGHWDLO VHH³+RZWR8VHWKH$XWR0RGH&RXUVH´3DJHDQG ³+RZWR$GMXVWGXULQJ0DVVDJLQJZLWK$XWR0RGH&RXUVHRU LQ4XLFN0RGH´3DJHDQGVHOHFWDPDVVDJHFRXUVH RI\RXURZQSUHIHUHQFH ([DPSOH Ԙ 6HOHFWWKH³5()5(6+´FRXUVHRI³6+28/'(5´ ԙ :LWK32,171$9,FRPSOHWHGDPHVVDJH³5(*,67(5,1*´ FRPHVRXWRQWKH/&' 7KHSURFHVVRIUHJLVWUDWLRQLQ PHPRU\LVGLVSOD\HG Ԛ 0DNHDGMXVWPHQWRIPDVVDJH 38/6(³21´ĺ³2))´ /(*675(7&+³21´ĺ³2))´ 6+28/'(5$,567(1*7+ ³´ĺ³6723´ ԛ 6NLS³'7$33,1*´WKDWLVWRFRPHPLQXWHVDIWHU PDVVDJHLVVWDUWHG5HSHDW³:$9(/(7´WKDWLVWRFRPH PLQXWHVDIWHUPDVVDJHLVVWDUWHG 30 How to Registeration in the Memory With the Auto mode course completed, a display for registration in memory comes out on the LCD. Select “YES” or “NO” with the button, and then press the button. Select “YES”. Registration starts. With the message “Finished” on the LCD, the process of registration is completed. * During the process of registration in memory, do not turn the power OFF. Otherwise, the registration function may be disabled. :LWKWKHUHJLVWUDWLRQFRPSOHWHGSUHVVWKHEXWWRQLQWKH Quick Mode (see Page 21), and start massage. Massage is made in the manner as registered. Example A series of massage courses starts with the information on your body shape kept in memory: ³5()5(6+´FRXUVHRI ³6+28/'(5´ 0HFKD6WUHQJWK³´ $LU6WUHQJWK³´ 6+28/'(56WUHQJWK³6723´ $50.1($'VWUHQJWK³´ /(*675(7&+³2))´ 38/6(³2))´ 6NLS³'7$33,1*´FRPLQJPLQXWHVODWHU 5HSHDW³:$9(/(7´FRPLQJPLQXWHVODWHU One-point advice! You can select another Auto mode course option with the information on your body shape and the information on air-massage option as such. * Registration cannot be made of the mecha. (knead balls) massage strength and the air-massage strength. * Air options can be registered as the final stage each of the courses. With the registration in memory completed, the knead balls automatically return to the stored position. :KDWZDVUHJLVWHUHGLQPHPRU\QHHGVWREHFKDQJHG (overwritten), start all over again as instructed on Page 29. :KDWZDVUHJLVWHUHGLQPHPRU\QHHGVWREHGHOHWHGVHH “Other Functions” ( “To delete the registration in memory”) on Page 53. 31 Basic Massaging Movements Mechanical massage using the knead balls (KNEAD UP) Knead and relieve muscles from bottom to top. (KNEAD DOWN) Knead and relieve muscles from top to bottom. (TAPPING) Rhythmically repeated tapping removes muscular fatigue. (WAVELET) Fine combination of kneading and tapping alleviates fatigue. (RUBBING) Gently rubbing muscles as if massaged with palms. (DEEP KNEAD UP) Knead and relieve muscles deeply from bottom to top. (DEEP KNEAD DOWN) Knead and relieve muscles deeply from top to bottom. (SHIATSU) Relieve stiffness intensively at one place. (NECK RELAX) Relieve stiffness around the neck. (EXTREME KNEAD) Relieve around the shoulders from upward sufficiently (EXTREME TAPPING) Relieve around the shoulders from upward with rhythmical tapping sufficiently. (WAIST/HIP MASSAGE) Relieve stiffness intensively around the waists. (EXTREME KNEAD WAIST) Knead around waists sufficiently (EXTREME TAPPING WAIST) Rhythmically tapping around the waists sufficiently. (ROLLING) Roll over the back, and stretch it out. (STRETCH) Push the back from bottom, and stretch it out. (STRETCH KNEAD UP) Push muscles from bottom, and relieve them. (STRETCH TAPPING) Muscles are tapped repeatedly rhythmically and pushed from bottom. (STRETCH WAVELET) With the fine combination of knead and tapping, muscles are pushed up from bottom. (3D KNEAD UP) Relieve muscles from bottom to top in combination with stereoscopic back-and-forth movements. (3D KNEAD DOWN) Relieve muscles from top to bottom in combination with stereoscopic back-and-forth movements. (3D TAPPING) Relieve muscles with rhythmical tapping in combination with stereoscopic back-and-forth movements. (3D WAVELET) Massages with stereoscopic back-and-forth movements in addition to fine movements of knead and tapping. Air-massage (LEG) Massage the soles, ankles and calves sufficiently. (THIGH/HIP) Push up the thighs and hips alternately from behind. (WAIST) Massage the waists as if they were wrapped. (BACK) Massage shoulder bones as if they were pushed out. (SHOULDER) Massage around the shoulders, and relieve fatigue. (ARM) Massage around the arms and relive fatigue. (PULSE) Massage in quick pulsation at a high frequency with the air bag inflated. (COMBO FOOTREST) Massage the calves simultaneously with other regions. (LEG STRETCH) Stretch feet with the footrest going downward, and massage the calves and thighs with the inflated air-bag behind. * “COMBO FOOTREST” does not work simultaneously with “Air-massage of the shoulders/arms”. 32 How to Use the Mecha. (knead balls) Massage Functions Introductory Note $IWHUSRZHURQWKH/&'LQWKHLQLWLDOVWDJH GLVSOD\VWKHVFUHHQVDVVKRZQRQWKHULJKWVLGH DOWHUQDWHO\ :KHQFKDQJLQJDPHFKDPDVVDJHRSWLRQWR DQRWKHUPHFKDPDVVDJHRSWLRQRUZKHQ FKDQJLQJ$XWRPRGHFRXUVHTXLFNPRGH PDVVDJHWRDQ\PHFKDPDVVDJHRSWLRQVHH 3DJH :KHQFRPELQLQJDLUPDVVDJHZLWKPHFKD PDVVDJHVHH3DJH Press the button. 7KHIRRWUHVWDXWRPDWLFDOO\FRPHVXSWRWKHVWDQGE\SRVLWLRQ 3UHVVWKHEXWWRQWRLQWHUUXSWWKLVPRYHPHQW 7KHVWDQGE\VFUHHQFRPHVRXW Press the button. Or, select “FUNCTION” with the then press the button, and button. $OLVWRIDOOWKHIXQFWLRQVLVGLVSOD\HG (YHQLIWKHEXWWRQUHPDLQVQRWWREHSUHVVHGWKLV IXQFWLRQVWDUWVVHFRQGVODWHU 7KHVDPHKROGVJRRGRIWKLVSURFHGXUH 33 How to Use the Mecha. (knead balls) Massage Functions Select a desired function with the the button, and press the button or button. 7RVHOHFW³:$,67”³675(7&+´RU³'”PRYHWKHFXUVRURQ ³:$,67”³675(7&+´RU³'”SUHVVWKHEXWWRQRUWKH EXWWRQVHOHFWDGHVLUHGIXQFWLRQZLWKWKHEXWWRQRU WKHEXWWRQDQGWKHQSUHVVWKHEXWWRQ ,QFDVHRIKDYLQJVHOHFWHG³1(&.5(/$;”³(;75(0(.1($'” ³(;75(0(7$33,1*´DQG³52//,1*”VHWWKHVKRXOGHUSRVLWLRQ ILUVW$WWKHVDPHWLPHWKHEDFNDQGIRUWKSRVLWLRQRIWKHNQHDG EDOOVFDQEHDGMXVWHGRQO\ZKHQHLWKHU³1(&.5(/$;” ³(;75(0(.1($'´RU³(;75(0(7$33,1*´LVVHOHFWHG 3UHVVWKHEXWWRQRUWKH+(,*+7 $'-8670(17RUWR VHWWKHVKRXOGHUSRVLWLRQ 3UHVVWKHEXWWRQWRVHW WKHEDFNDQGIRUWKSRVLWLRQRI WKHNQHDGEDOOV 7RVHOHFW³(;75(0(.1($' :$,67´RU³(;75(0( 7$33,1*:$,67”DGMXVWWKH ZDLVWSRVLWLRQILUVW 7KHZDLVWSRVLWLRQFDQEH 2QHVFDOHDERXWPP 2QHVFDOHDERXWPP DGMXVWHGZLWKWKHEXWWRQ RUWKHRUEXWWRQ 6HOHFW³52//,1*´ILUVW7KHQ VHOHFWRQHRIWKHIXQFWLRQVRI ³.1($'83”³.1($''2:1” 2QHVFDOHDERXWPP ³7$33,1*´³:$9(/(7” ³58%%,1*”³'((3.1($'83”³'((3.1($''2:1” ³6+,$768”³675(7&+´RU³'” <RXFDQKDYHPDVVDJHRI³52//,1*´FRPELQHGZLWKRQHRI WKHVHIXQFWLRQV How to Use the Mecha. (knead balls) Massage Functions The function selected starts. When the massage option selected is completed, the knead balls automatically return to the stored position. After use, turn the power switch OFF. 7KLVVWHSSUHYHQWVWKHFKDLUIURPVWDUWLQJPRYHPHQWHYHQ ZLWKWKHUHPRWHFRQWUROOHURSHUDWHGLQDGYHUWHQWO\ CAUTION $IWHUXVHEHVXUHWRWXUQ WKHSRZHUVZLWFK2)) 0LVXVHE\DFKLOGPD\FDXVH DFFLGHQW To discontinue massage immediately. 3UHVVWKHEXWWRQ 7KHNQHDGEDOOVVWRSPRYHPHQW DWWKHSUHVHQWSRVLWLRQ 7KHVWDQGE\VFUHHQFRPHVRXW To stop massage halfway. 3UHVVWKHEXWWRQ 7KHNQHDGEDOOVPRYHWRWKHVWRUHG SRVLWLRQ :LWKWKHNQHDGEDOOVVWRUHGWKHLQLWLDO GLVSOD\FRPHVRXWRQWKH/&' 35 How to Adjust during the Movement of Mecha. (knead balls) Massage Functions To adjust MECHA. STRENGTH (knead balls). Press the button for adjustment, and press the button. 0(&+$675(1*7+NQHDGEDOOV is adjustable in 7 steps. 6WUHQJWKLVLQLWLDOO\VHWDWWKH step 4. 6WUHQJWKFDQEHDGMXVWHGZKLOHLQ PDVVDJLQJPRGHVRI³.1($'83”, ³.1($''2:1”³7$33,1*”, “WAVELET”³6+,$768”, ³52//,1*´DQG³675(7&+”. To select massaging part (POINT/WHOLE/PART). Press the button, select [PART] with the button, select “POINT”, “PART” or “WHOLE” with the button, and press the button. ,QFDVHRIKDYLQJVHOHFWHG³:+2/(”, set the shoulder SRVLWLRQILUVW$WWKHVDPHWLPHWKHEDFNDQGIRUWKSRVLWLRQRI WKHNQHDGEDOOVFDQEHDGMXVWHGRQO\ZKHQHLWKHU³1(&. RELAX”³(;75(0(.1($'´RU³(;75(0(7$33,1*´LV selected. 3UHVVWKHEXWWRQRUWKH+(,*+7$'-8670(17 or to set the shoulder position. Press the button to VHWWKHEDFNDQGIRUWKSRVLWLRQRIWKHNQHDGEDOOV One scale: about 12mm One scale: about 2mm * ,QFDVHPDVVDJHZDVLQSURJUHVVLQWKHPRGHRI³1(&. RELAX”³(;75(0(.1($'´RU³(;75(0(7$33,1*´RU ³52//,1*”WKHVKRXOGHUSRVLWLRQGRHVQRWKDYHWREHVHW DVZDVDOUHDG\VHW 36 How to Adjust during the Movement of Mecha. (knead balls) Massage Functions To adjust the height of massaging part (POINT/PART). Adjust the height of massaging position with the HEIGHT ADJUSTMENT or button. 7KHKHLJKWRIPDVVDJLQJSRVLWLRQFDQEHDGMXVWHGZKHQHLWKHU “POINT” or “PART” is selected. To adjust the shoulder position and the back-and-forth position while in massage of “NECK RELAX”, “EXTREME KNEAD” and “EXTREME TAPPING”. Press the HEIGHT ADJUSTMENT or button once. Then, a screen for adjustment comes out. Adjust the shoulder position with the button or the HEIGHT ADJUSTMENT or button, and adjust the back-and-forth position of the knead balls with the button. One scale: about 2mm One scale: about 12mm To adjust the waist position in “EXTREME KNEAD WAIST” and “EXTREME TAPPING WAIST”. Press the HEIGHT ADJUSTMENT or button once. Then, a screen for adjustment comes out. Adjust the waist position with the button or the HEIGHT ADJUSTMENT or button. One scale: about 12mm 37 How to Adjust during the Movement of Mecha. (knead balls) Massage Functions To adjust mecha. (knead balls) massaging speed. Press the button, select “SPEED” with the button, select “SLOW” or “FAST” with the button, and press the button. * This function is available for “KNEAD UP”, “KNEAD DOWN”, “TAPPING”, “WAVELET”, “RUBBING”, “DEEP KNEAD UP”, “DEEP KNEAD DOWN, “STRETCH KNEAD UP” “STRETCH TAPPING” and “STRETCH WAVELET”. To adjust mecha. (knead balls) massaging width. Press the button, select “WIDTH” with the button, select [ “NARROW”/ “NORMAL”/ “LARGE” ] the button, and press the button. * This function is available for “TAPPING”, “SHIATSU”, “ROLLING”, “STRETCH”, “STRETCH TAPPING” and “3D TAPPING”. 38 How to Use Air-massaging Functions Introductory Note $IWHUSRZHURQWKH/&'LQWKHLQLWLDOVWDJHGLVSOD\V WKHVFUHHQVDVVKRZQRQWKHULJKWVLGHDOWHUQDWHO\ :KHQFKDQJLQJDQDLUPDVVDJHRSWLRQWRDQRWKHU DLUPDVVDJHRSWLRQRUZKHQFKDQJLQJ$XWRPRGH FRXUVHTXLFNPRGHPDVVDJHWRDQ\DLUPDVVDJH RSWLRQVHH3DJH :KHQFRPELQLQJPHFKPDVVDJHZLWK DLUPDVVDJHVHH3DJH Press the button. 7KHIRRWUHVWDXWRPDWLFDOO\FRPHV XSWRWKHVWDQGE\SRVLWLRQ 3UHVVWKHEXWWRQWR LQWHUUXSWWKLVPRYHPHQW 7KHVWDQGE\VFUHHQFRPHVRXW Press the the button. Or, select “AIR” with button, and press the button. $OLVWRIDOOWKHIXQFWLRQVLV GLVSOD\HG (YHQLIWKHEXWWRQUHPDLQV QRWWREHSUHVVHGWKLVIXQFWLRQ VWDUWVVHFRQGVODWHU7KHVDPH KROGVJRRGRIWKLVSURFHGXUH Select a desired function with the or the the button button, select “ON” or “OFF” with button, and press the button. $OOWKHIXQFWLRQVDUHLQLWLDOO\VHWDV³21´ 7+,*++,3VHOHFWHGDQGWXUQHG2)) The function selected starts. 39 How to Use Twisting Massage Functions Introductory Note $IWHUSRZHURQWKH/&'LQWKHLQLWLDOVWDJH GLVSOD\VWKHVFUHHQVDVVKRZQRQWKHULJKW VLGHDOWHUQDWHO\ :KHQFRPELQLQJPHFKDPDVVDJHZLWK DLUWZLVWLQJPDVVDJHVHH3DJH :KLOHLQ$XWRPRGHFRXUVHPDVVDJHHYHQLI WKH³7:,67´EXWWRQLVSUHVVHGQRUHDFWLRQLV DWWDLQHG Press the button. 7KHIRRWUHVWDXWRPDWLFDOO\FRPHVXSWRWKHVWDQGE\SRVLWLRQ 3UHVVWKHEXWWRQWRLQWHUUXSWWKLVPRYHPHQW 7KHVWDQGE\VFUHHQFRPHVRXW Press the button. 7KHVFUHHQFRPHVRXWDQGWKHWZLVWLQJPDVVDJHVWDUWV 7RGLVFRQWLQXHWKHPDVVDJHSUHVVWKHEXWWRQ How to Use Air-massage Functions for Shoulders/Arms Introductory Note $IWHUSRZHURQWKH/&'LQWKHLQLWLDOVWDJH GLVSOD\VWKHVFUHHQVDVVKRZQRQWKHULJKW VLGHDOWHUQDWHO\ :KHQFRPELQLQJDLUPDVVDJHRIVKRXOGHUV DUPVZLWKPHFKDPDVVDJHRUDLUPDVVDJH VHH3DJH Press the button. 7KHIRRWUHVWDXWRPDWLFDOO\FRPHVXSWRWKHVWDQGE\SRVLWLRQ 3UHVVWKHEXWWRQWRLQWHUUXSWWKLVPRYHPHQW 7KHVWDQGE\VFUHHQFRPHVRXW To do air-massage of shoulders. 3UHVVWKHEXWWRQRQFHDQGWKHQSUHVVLW DJDLQUHSHDWHGO\IRUGHVLUHGVWUHQJWK7KHQSUHVV WKHEXWWRQ (YHQLIWKHEXWWRQUHPDLQVQRWWREHSUHVVHGWKLV IXQFWLRQVWDUWVVHFRQGVODWHU7KHVDPHKROGVJRRGRIWKLV SURFHGXUH 6+28/'(5$,5675(1*7+LVDGMXVWDEOHLQVWHSV 6WUHQJWKLVLQLWLDOO\VHWDWWKHVWHS $IWHUWKHEXWWRQLVSUHVVHGRQFHPDVVDJLQJVWUHQJWK FDQEHDGMXVWHGZLWKWKHEXWWRQDVZHOO :KLOHLQVKRXOGHUDLUPDVVDJHWKHEDFNDLUEDJLVLQIODWHG :KLOHLQVKRXOGHUDLUPDVVDJHPDVVDJLQJVWUHQJWKRIWKH NQHDGEDOOVPD\EHRQWKHLQFUHDVH :KLOHLQVKRXOGHUDLUPDVVDJHZHDUVRPHWKLQJWRSURWHFW VKRXOGHUVQRWWRH[SRVHWKHP How to Use Air-massage Functions for Shoulders/Arms To select arm air-massage [ “ARM KNEAD”/ “ARM GRASP”] Press the button, and select [ “ARM KNEAD”/ “ARM GRASP” ] with the Then, press the button. button. $UPDLUPDVVDJHLVLQLWLDOO\VHWDW³$50.1($'´ 7KHIXQFWLRQVHOHFWHGLVUHYHUVHG To adjust the strength of arm air-massage or to stop it. Press the button once, and then press it again repeatedly for desired strength. Then, press the button. 0DVVDJLQJVWUHQJWKLVDGMXVWDEOHLQVWHSV 6WUHQJWKLVLQLWLDOO\VHWDWWKHVWHS $IWHUWKHEXWWRQLVSUHVVHGRQFHPDVVDJLQJVWUHQJWK FDQEHDGMXVWHGZLWKWKHEXWWRQDVZHOO * :KLOHLQDUPDLUPDVVDJHGRQRWZHDUDZDWFKRURWKHU PHWDOOLFDFFHVVRULHV When the function selected is completed, a message “Storing” is displayed. How to Make Adjustment while in Air-massage To adjust air-massage strength. 3UHVVWKHEXWWRQIRUDGMXVWPHQW and press the button. $,5675(1*7+LVDGMXVWDEOHLQ 5 steps. 6WUHQJWKLVLQLWLDOO\VHWDWWKH step 3. To turn [PULSE] ON or OFF. Press the button. Select [PULSE] with the button, select either “ON” or “OFF” also with the button, and then press the button. >38/6(@LVLQLWLDOO\VHWDW³2))”. To turn [COMBO FOOTREST] ON or OFF. 3UHVVWKHEXWWRQ6HOHFW>&20%2 )2275(67@ZLWKWKHEXWWRQVHOHFWHLWKHU “ON” or “OFF” also with the then press the button, and button. %RWK>&20%2)2275(67@DQG>/(*675(7&+@IXQFWLRQV do not work at the same time. >&20%2)2275(67@LVLQLWLDOO\VHWDW³2))”. :LWK>)227$,5@2))WXUQ>&20%2)2275(67@217KHQ >)227$,5@LVDOVRWXUQHG21 43 How to Make Adjustment while in Air-massage To do air-massage of “LEG STRETCH”. Press the button. Select [LEG STRETCH] with the button, get a list of all the functions displayed with the button, select a desired function, and then press the button. 0RYHWKHIRRWUHVWIRUZDUG,IWKHDQJOHRIWKHIRRWUHVWLVVWLOO low, wait for a while until it comes up. Then, the massage starts. %RWK>/(*675(7&+@DQG>&20%2)2275(67@IXQFWLRQV do not work at the same time. >/(*675(7&+@LVLQLWLDOO\VHWDW³6723”. :LWK>)227$,5@2))WXUQ>/(*675(7&+@217KHQ >)227$,5@LVDOVRWXUQHG21 $,5675(1*7+LVDGMXVWDEOHLQVWHSV 6WUHQJWKLVLQLWLDOO\VHWDWWKHVWHS 7KHVWUHQJWKFDQEHDGMXVWHGZLWKWKHEXWWRQ 7KHIXQFWLRQRIJHWWLQJWKHIRRWUHVWJRLQJIRUZDUGRUFRPLQJ EDFNZDUGLVQRWDYDLODEOHZKHQWKHIRRWUHVWLVSRVLWLRQHG DW° or less. ,QDUDQJHRI°°WKHOHQJWKRIJRLQJIRUZDUGYDULHV When the function selected is completed, a message “Storing” is displayed. After use, turn the power switch OFF. 7KLVVWHSSUHYHQWVWKHFKDLUIURPVWDUWLQJPRYHPHQWHYHQ ZLWKWKHUHPRWHFRQWUROOHURSHUDWHGLQDGYHUWHQWO\ CAUTION $IWHUXVHEHVXUHWRWXUQ WKHSRZHUVZLWFK2)) 0LVXVHE\DFKLOGPD\FDXVH accident. 44 How to Combine Air-massage with Mecha. (knead balls) Massage To combine air-massage while in mecha. (knead balls) massage To combine air-massage of LEG/THIGH or HIP/WAIST/BACK Press the button. $OLVWRIDOOWKHIXQFWLRQVLVGLVSOD\HG Select a desired function with the button, select “ON” or “OFF” with the button, and press the button. $OOWKHIXQFWLRQVDUHLQLWLDOO\VHWDV³21” 7+,*++,3VHOHFWHGDQGWXUQHG2)) The function selected starts. 7RDGMXVWPDVVDJLQJIXQFWLRQVVHHWKHIROORZLQJLQVWUXFWLRQV $VWR³+RZWR$GMXVWGXULQJWKH0RYHPHQWRI0HFKDNQHDG EDOOV0DVVDJH)XQFWLRQV”VHH3DJH $VWR³+RZWR0DNH$GMXVWPHQWZKLOHLQ$LUPDVVDJH”VHH 3DJH * :KHQSUHVVLQJWKHEXWWRQ WRDGMXVWDQ\IXQFWLRQZKLOHLQ FRPELQDWLRQPDVVDJHDVFUHHQ DVVKRZQRQWKHULJKWVLGH FRPHVRXW 45 How to Combine Air-massage with Mecha. (knead balls) Massage To combine air-massage of the shoulders/arms/twisting while in mecha. (knead balls) massage or in air-massage. 7RFRPELQHDLUPDVVDJHRIWKHVKRXOGHUV Press the button once, and then press it again repeatedly for desired strength. Then, press the button. 6+28/'(5$,5675(1*7+LVDGMXVWDEOHLQVWHSV 6WUHQJWKLVLQLWLDOO\VHWDWWKHVWHS $IWHUWKHEXWWRQLVSUHVVHGRQFHPDVVDJLQJVWUHQJWK FDQEHDGMXVWHGZLWKWKHEXWWRQDVZHOO :KLOHLQVKRXOGHUDLUPDVVDJHWKHEDFNDLUEDJLVLQIODWHG :KLOHLQVKRXOGHUDLUPDVVDJHPDVVDJLQJVWUHQJWKRIWKH NQHDGEDOOVPD\EHRQWKHLQFUHDVH :KLOHLQVKRXOGHUDLUPDVVDJHZHDUVRPHWKLQJWRSURWHFW VKRXOGHUVQRWWRH[SRVHWKHP 7RFRPELQHDLUPDVVDJHRIWKHDUPV Press the button, and select [ARM KNEAD/ ARM GRASP] with the button. Press the button repeatedly to adjust massaging strength. After adjustment, press the button. 0DVVDJLQJVWUHQJWKLVDGMXVWDEOHLQVWHSV ,QLWLDOO\VHWDUH³$50.1($'´RQWKHPDVVDJHPRGHDQG VWUHQJWKLVLQLWLDOO\VHWDWWKHVWHS³´ $IWHUWKHEXWWRQSUHVVHGRQFHPDVVDJLQJVWUHQJWKFDQ EHDGMXVWHGZLWKWKHEXWWRQDVZHOO * :KLOHLQDLUPDVVDJHRIWKHDUPVGRQRWZHDUDZDWFKRU RWKHUPHWDOOLFDFFHVVRULHV 7RFRPELQHWZLVWLQJDLUPDVVDJH Press the button. *<RXFDQQRWKDYHWZLVWLQJDLUPDVVDJHZKLOHLQPDVVDJHRIZDLVWVDQGKLSV 46 How to Combine Air-massage with Mecha. (knead balls) Massage To combine mecha. (knead balls) massage while in air-massage. Press the button. $OLVWRIDOOWKHIXQFWLRQVLVGLVSOD\HG Select a desired function with the or the button, and press the button button. 7RVHOHFW³:$,67”³675(7&+´RU³'”PRYHWKHFXUVRURQ ³:$,67”³675(7&+´ RU³'”SUHVVWKHEXWWRQRUWKH EXWWRQVHOHFWDGHVLUHGIXQFWLRQZLWKWKHEXWWRQ RUWKHEXWWRQDQGWKHQSUHVVWKHEXWWRQ 47 How to Combine Air-massage with Mecha. (knead balls) Massage ,QFDVHRIKDYLQJVHOHFWHG³1(&.5(/$;”³(;75(0( .1($'´ ³(;75(0(7$33,1*´DQG³52//,1*”VHWWKH VKRXOGHUSRVLWLRQILUVW$WWKHVDPHWLPHWKHEDFNDQGIRUWK SRVLWLRQRIWKHNQHDGEDOOVFDQEHDGMXVWHGRQO\ZKHQHLWKHU ³1(&.5(/$;”³(;75(0(.1($'´RU³(;75(0( 7$33,1*´LVVHOHFWHG 3UHVVWKHEXWWRQRUWKH +(,*+7$'-8670(17RU WRVHWWKHVKRXOGHUSRVLWLRQ3UHVVWKH EXWWRQWRVHWWKHEDFNDQGIRUWK SRVLWLRQRIWKHNQHDGEDOOV ,QFDVHRIKDYLQJVHOHFWHG ³(;75(0(.1($':$,67´RU ³(;75(0(7$33,1*:$,67VHWWKH 2QHVFDOHDERXWPP 2QHVFDOHDERXWPP ZDLVWSRVLWLRQ3UHVVWKHEXWWRQ RUWKH+(,*+7$'-8670(17 RUWRVHWWKHZDLVWSRVLWLRQ $IWHUVHOHFWLQJ³52//,1*”VHOHFW HLWKHU³.1($'83”³.1($''2:1”, 2QHVFDOHDERXWPP ³7$33,1*”³:$9(/(7”³58%%,1*” ³'((3.1($'83”³'((3.1($''2:1”³6+,$768” ³675(7&+´RU³'” <RXFDQKDYHDZLGHYDULHW\RI PDVVDJHVFRPELQHGZLWK³52//,1*” The function selected starts. 7RDGMXVWPDVVDJLQJIXQFWLRQVVHHWKHIROORZLQJLQVWUXFWLRQV $VWR³+RZWR$GMXVWGXULQJWKH0RYHPHQWRI0HFKDNQHDG EDOOV0DVVDJH)XQFWLRQV” VHH3DJH $VWR³+RZWR0DNH$GMXVWPHQWZKLOH LQ$LUPDVVDJH”VHH3DJH :KHQSUHVVLQJWKHEXWWRQWR DGMXVWDQ\IXQFWLRQZKLOHLQ FRPELQDWLRQPDVVDJHDVFUHHQDV VKRZQRQWKHULJKWVLGHFRPHVRXW When Changing the Massage on the Way (YHQZKLOHKDYLQJDQ$XWRPRGHFRXUVHPDVVDJH \RXFDQFKDQJHWRDQRWKHUPDVVDJH Auto mode course Ź Another Auto mode course Non-Auto mode course Ź Auto mode course Press the button. $OLVWRIDOOWKH$XWRPRGHFRXUVHLVGLVSOD\HG Select a desired course with the button or the button. button, and press the 7KHWLPHULVUHVHWDWWKLVWLPHDQGWKHPDVVDJHFRQWLQXHVIRU PRUHPLQXWHV $IWHUFRQVHFXWLYHPLQXWHVWKHPDVVDJHVWRSV 49 When Changing the Massage on the Way (YHQZKLOHKDYLQJDQ$XWRPRGHFRXUVHPDVVDJH \RXFDQFKDQJHWRDQRWKHUPDVVDJH Quick mode option Ź Another quick mode option Non-quick mode option Ź Quick mode option Press any of the or buttons. $OLVWRIDOOWKH$XWRPRGHFRXUVHLVGLVSOD\HG Select a desired course with the and press the button. button, 7KHWLPHULVUHVHWDWWKLVWLPHDQGWKHPDVVDJHFRQWLQXHVIRU PRUHPLQXWHV $IWHUFRQVHFXWLYHPLQXWHVWKHPDVVDJHVWRSV When Changing the Massage on the Way (YHQZKLOHKDYLQJDQ$XWRPRGHFRXUVHPDVVDJH \RXFDQFKDQJHWRDQRWKHUPDVVDJH Mecha. (knead balls) massage option Ź Another mecha. (knead balls) massage option Auto mode course Ź Mecha. (knead balls) massage option Quick mode option Ź Mecha. (knead balls) massage option Press the button. $OLVWRIDOOWKHIXQFWLRQVLVGLVSOD\HG Select a desired function with the or the button, and press the button button. ,QGHWDLOVHH³8VLQJWKH0HFKDNQHDGEDOOV0DVVDJH )XQFWLRQV´3DJH :KHQFKDQJLQJDPHFKDNQHDGEDOOVPDVVDJHRSWLRQWR DQRWKHUPHFKDNQHDGEDOOVPDVVDJHRSWLRQWKHWLPHU IXQFWLRQLVLQFRQWLQXDWLRQ :KHQFKDQJLQJDQ$XWRPRGHFRXUVHRSWLRQWRDPHFKD NQHDGEDOOVPDVVDJHRSWLRQRUZKHQFKDQJLQJDTXLFN PRGHRSWLRQWRDPHFKDNQHDGEDOOVPDVVDJHRSWLRQ WKHWLPHULVUHVHWDWWKLVWLPHDQGWKHPDVVDJHFRQWLQXHVIRU PRUHPLQXWHV $IWHUFRQVHFXWLYHPLQXWHVWKHPDVVDJHVWRSV When Changing the Massage on the Way (YHQZKLOHKDYLQJDQ$XWRPRGHFRXUVHPDVVDJH \RXFDQFKDQJHWRDQRWKHUPDVVDJH Air-massage option Ź Another air-massage option Auto mode course Ź Air-massage option Quick mode option Ź Air-massage option Press the button. $OLVWRIDOOWKHIXQFWLRQVLVGLVSOD\HG Select a desired function with the select “ON/OFF” with the press the button, button, and button. $OOWKHIXQFWLRQVDUHLQLWLDOO\VHWDW³21´ILUVW :KHQFKDQJLQJDQDLUPDVVDJHRSWLRQWRDQRWKHU DLUPDVVDJHRSWLRQWKHWLPHUIXQFWLRQLVLQFRQWLQXDWLRQ :KHQFKDQJLQJDQ$XWRPRGHFRXUVHWRDQDLUPDVVDJH RSWLRQRUZKHQFKDQJLQJDTXLFNPRGHRSWLRQWRDQ DLUPDVVDJHRSWLRQWKHWLPHULVUHVHWDWWKLVWLPHDQGWKH PDVVDJHFRQWLQXHVIRUPRUHPLQXWHV $IWHUFRQVHFXWLYHPLQXWHVWKHPDVVDJHVWRSV Other Functions Introductory Note ,QWKHLQLWLDOVWDJHDIWHUSRZHURQWKHIROORZLQJ screen are displayed alternately on the LCD display. To delete the registration in memory. Ԙ In the initial stage, press both the and buttons at the same time for 2 seconds. A screen for reconfirmation of deleting the registration is displayed. ԙ6HOHFW³<(6´RU³12´ZLWKWKHEXWWRQ and press the button. Ԛ Select “YES”. While the registration is in the process of being deleted, “Deleting” is displayed. When it is completely deleted, “Finished” is displayed. * In the process of deleting the registration, do not turn the SRZHU2))7KHUHJLVWUDWLRQFDQQRWEHGHOHWHGFRPSOHWHO\ * When the registration is deleted, the human sign over the “M” button in the standby screen is dim. 53 Other Functions For “Child lock on” 7KH³&KLOGORFNRQ´IXQFWLRQLVXVHIXOWRSUHYHQWLQJFKLOGUHQ IURPGRLQJHUURQHRXVRSHUDWLRQ,WGLVDEOHVDOOWKHIXQFWLRQV RIEXWWRQV Ԙ,QWKHLQLWLDOVWDJHSUHVVERWKWKHDQG EXWWRQVDWWKHVDPHWLPHIRUVHFRQGV 7KHEX]]HUEHHSVDQGWKH³&KLOGORFNRQ´ VFUHHQDSSHDUVRQWKHGLVSOD\ 7KLVPHVVDJHLVRQGLVSOD\ZKLOHWKHUHPRWHFRQWUROOHULV XQGHUWKH³&KLOGORFNRQ´FRQGLWLRQV 7RUHOHDVHWKH³&KLOGORFNRQ´WDNHWKHVDPHSURFHGXUHRI WKHDERYHԘRUWXUQWKHSRZHUVZLWFK2)) To turn ON the Backlight. :KHQ\RXFDQQRWUHDGWKHUHPRWHFRQWUROOHU/&'LQGDUNQHVV WXUQ21WKH%DFNOLJKW Ԙ,QWKHLQLWLDOVWDJHSUHVVWKHEXWWRQ IRUVHFRQGV 7KHEX]]HUEHHSVDQGWKH%DFNOLJKWLVWXUQHG 21 7RWXUQ2))WKH%DFNOLJKWWDNHWKHVDPHSURFHGXUHRIWKH DERYHԘRUWXUQWKHSRZHUVZLWFK2)) 54 Maintenance and Storage Main Body: Cover cloth, back pad, pillow and seat pad (made of PVC leather) Attention: Wipe the PVC leather first with a cloth dipped in neutral detergent, then with a cloth dipped in water, and then with a dry cloth. Thereafter, leave it to be air-dried. (Be careful not to overuse neutral detergent. It may damage the PVC leather.) Wipe the coated surface with a dry cloth. Attention: Keep the chair away from high temperature, high humidity and dust. CAUTION CAUTION Before doing maintenance work, be sure to disconnect the power cord plug. Be careful that hands must not be wet. Avoid the use of benzene, thinner, alcohol or insecticides. Negligence may result in electric shock or injury. The use of these chemicals may cause electric shock or catch fire. MAIN BODY CAUTION To clean the plastics, the pipes and the armrest, use a cloth first dipped in neutral detergent and then use a squeezed cloth, and then wipe with a dry cloth to completely remove neutral detergent. Avoid the use of benzene, thinner, alcohol, solvents or abrasives. The use of these chemicals may cause scratch, discoloration or crack on the surface. * Wipe the coated surface with a dry cloth. Remote controller CAUTION To clean the remote controller, use a dry cloth. Do not use a wet towel. Negligence may cause trouble in the chair. Back pad, pillow and seat pad CAUTION For cleaning, wipe first with a cloth dipped in neutral detergent, then with a cloth dipped in water, and then with a dry cloth. Thereafter, leave it to be air-dried. Avoid the use of an iron. Storage After cleaning, keep the chair away from humidity. In case of no use over long time, protect the chair from dust with a cover cloth. CAUTION For storage, avoid the place exposed to direct sunlight for long time or the place of high temperature, e.g. close to a stove. Negligence may result in discoloration or deterioration of the chair. 55 Q&A Those with less than 150cm(4’9”) or with more than 185cm(6’1”) in height can use the chair, can’t they? There is difference in strength between left and right. Massaging position appears not to be aligned with left and right not in parallel. Why? Displacement of A mechanism is used knead balls to allow the two knead balls tapping alternately for making massage comfortable. As a result, a small gap may be produced in the position between them, and it may give rise to different massaging strength. This phenomenon does not come from the trouble of the chair. Yes, they can. There is a possibility that the body shape may not be properly detected at the VKRXOGHUSRVLWLRQHYHQLILWLVILQHO\DGMXVWHG %HDGYLVHGDVIROORZV 7KRVHZKRDUHQRWWDOO3XWWKHEDFNUHVWDWWKH upright position, and raise the footrest. 7KRVHZKRDUHWDOO5HFOLQHWKHEDFNUHVW and lower the footrest. My arm does not reach the armrest. How can I do so? 3XWWKHEDFNUHVWDWWKHXSULJKWSRVLWLRQDQGDGMXVW the arm position. Is there any way to strengthen the massage strength? Try to: 5HFOLQHWKHEDFNUHVW 5HPRYHWKHEDFNSDG %HGHHSO\VHDWHGDQGSXW\RXUERG\ZHLJKWRQ the backrest. $GMXVWWKHPDVVDJHVWUHQJWKWREHVWURQJHU After having air-massage of the shoulders and the arms, the skins turn red. Why? A trace of massage may persist on the shoulders and the arms. This is nothing but a result of the treatment. It gradually fades away. In having air-massage of the shoulders, be sure to wear something to protect shoulders not to expose them. The remote controller stand is unstable. Why? Try to: Tighten the fixing screws again. Should the remote controller holder be unfastened, loosen the fixing screws first, and then tighten them. Check to make sure that the remote controller stand is not unfastened. If so, tighten it with a hexagonal wrench. The shoulder position does not fit in with me, even after my body shape is detected. Why? After body shape is detected, the knead balls ought to move to the shoulder position as preprogrammed. If the shoulder position still does QRWILWLQZLWK\RXPDNHILQHDGMXVWPHQWRIWKH shoulder position. The footrest does not fit in with my legs. Why? Can the chair be used with the shoulder unit and the arm unit removed? 3XWWKHIRRWUHVWIRUZDUGRUEDFNZDUGIRUDGMXVWPHQW If you are not tall, try to put the backrest at the upright position, and raise the footrest. No, you cannot. With the air suction/exhaust ports exposed, dust comes inside, and may cause trouble in the chair. I am a patient under the treatment at a hospital. Is there no problem in using the chair? ,QWKHSURFHVVRIWKH³'28%/(675(7&+´RU ³)227675(7&+´PDVVDJHWKHFKDLU occasionally makes a “bang” sound. Why? Please get your physician’s advice. Massage relieves the muscles’ stiffness by giving pressure, and promotes blood circulation. As it may have adverse effects in certain diseases, be sure to consult your physician. Indeed a “bang” sound may occur, but it is not trouble of the chair. Mechanically, the electromotive actuator is designed to be separable from the footrest. When the actuator retracts with the legs held by the foot air bags, the footrest is separated from it momentarily. This sound occurs at this moment. Is there no problem in placing a hot carpet under the chair? Never do so. Fire may outbreak. The heat element, if damaged, may cause fire. In the process of the Auto mode course, is it possible to nullify the air-massage function? The footrest does not come up automatically to the standby position. Why? 1RLWLVQRW$GMXVWDEOHLQWKHSURFHVVRIWKH$XWR PRGHFRXUVHDUH³38/6(”³&20%2)2275(67”, ³/(*675(7&+´DQG³)227$,5´RQO\ When the footrest is positioned at an angle higher than 55°, it does not come up to the standby position, even if the button is pressed. 56 Trouble-shooting WARNING Absolutely do not modify, disassemble or repair by yourself. Negligence may cause fire or mechanical trouble of the chair which may result in hazard on the body. You may encounter the following phenomena while in massage. As being due to the mechanical design, they have nothing to do with the product life. $³FODWWHU´QRLVHRFFXUVZKHQWKHNQHDGEDOOVJRXSDQGGRZQ $³FUHDN´QRLVHRIWKHJHDUDQGWKHPRWRURFFXUVZKLOHLQPDVVDJH $IULFWLRQQRLVHRFFXUVZKHQWKHNQHDGEDOOVUXEWKHFRYHUFORWK (particularly while in the process of knead.) $UDWWOLQJQRLVHRFFXUVZKLOHLQWKH³7$33,1*´RU³:$9(/(7´ massage (particularly when the massage moves from the shoulders to the back). ,QWKH³.1($'´³7$33,1*´RU³:$9(/(7´PDVVDJHPDVVDJLQJ speed may vary with the knead balls’ strength changed. $QRLVHEHFRPHVGLIIHUHQWZKHQWKHPDVVDJLQJVSHHGLVFKDQJHG $URDULQJQRLVHRIWKHPRWRURFFXUVZKHQORDGLVJLYHQWRWKHFKDLU $³FXFNRR´QRLVHRFFXUVZKLOHLQWKH$XWRPRGHFRXUVHWKHNQHDG balls are automatically adjusted to the back-and-forth position to have the chair fitting in with the user’s body shape. 7KHFRPSUHVVRU’s noise and the air exhausting noise occur while in air-massage. $QRLVHRFFXUVZKHQWKHDLUEDJLVLQIODWHG $VFUHDPLQJQRLVHRFFXUVZKLOHLQPDVVDJHRIWKHVKRXOGHUV $JULQGLQJQRLVHRFFXUVZKHQWKHEDFNUHVWLVUHFOLQHG 7KHNQHDGEDOOVDUHQRWDOLJQHGLQSDUDOOHOEHWZHHQOHIWDQGULJKW (A mechanism is used to allow the two knead balls tapping alternately. As a result, a small gap may be produced in the position between them. This phenomenon is not due to the trouble of the chair.) Trouble-shooting Refer to Page Is the power cord plug connected? Connect the power cord plug with the receptacle. 10, 12 Is the power switch turned OFF behind the armrest? Turn the power switch ON. Is the backrest in touch with the wall or the like? Move the chair away from the wall or the like. Turn the power switch OFF behind the armrest, and then turn it ON. 9, 10, 12 Is there any load given to the knead balls? (Should there be any load given to the knead balls, a safety mechanism works to stop all the functions.) Raise your body off the backrest, turn the power switch OFF behind the armrest, and then turn it ON. To restart, press any function button. 10, 12 The backrest cannot be reclined. Is the power cord plug connected? Connect the power cord plug with the receptacle. 12, 13, 14 Is the backrest in touch with the wall or the like? Move the chair away from the wall or the like. 9, 13, 14 Service receptacle cannot use. Is the power supply fuse turned OFF? Replace the fuse. Symptoms The chair does not start up. The chair stops halfway. (The remote controller does not work.) Check points 57 10, 12 10 Trouble-shooting Attention: When part of your body or something is pinched, by accident, between the knead balls and the seat while in massage or while the knead balls are moving, the protect function runs. The knead balls go up a little, and then stop. At this stage, displayed on the LCD is the following message: “Protect function” “Switch on Power then ”. Eliminate the causal factors, and following this instruction, turn the power switch OFF and ON. The following message may be displayed on the LCD: “ERROR” “Switch on Power then ”. In this case, following this instruction, turn the power switch OFF and ON. * Should the chair not work even with the above steps taken, or should the same symptoms be repeated, turn the power switch OFF, disconnect the power cord plug from the receptacle, and contact your dealer. Inspection Inspection Important! Be sure to make inspection for longer use. Are there these symptoms? 7KHFKDLUHPLWVDVFRUFKLQJVPHOO 7KHSRZHUFRUGRUWKHSOXJLVRYHUKHDWHG (OHFWULFLW\UXQVRQRURIIZLWKWKHSRZHUFRUG moved. 7KHUHDUHVRPHRWKHUDEQRUPDOLWLHV Discontinue use For prevention of accident or trouble, turn the power switch OFF, disconnect the power cord plug with the receptacle, and contact your dealer. Attention: When using the chair after long storage, check to make sure that it operates properly. After-sale service When any abnormal condition persists after checking in accordance with Page 57, stop the use, disconnect the power cord plug from the receptacle and consult your dealer. )RUDQ\RWKHUTXHVWLRQV ,I\RXKDYHDQ\TXHVWLRQVUHJDUGLQJWKHDIWHUVDOHVHUYLFHVLQFOXGLQJWKHUHSDLUGXULQJWKH warranty period, etc., please contact your dealer. 7LPHIRUUHWHQWLRQRIIXQFWLRQDOSDUWVIRUUHSDLU Functional parts for repair of this massage chair are retained for six years after the termination of manufacture. The functional parts mean the parts, which are necessary to maintain the functions of product. 58 Specifications Product name Massage chair Model No. EC-3700 Generic name Electric massage chair for home use Rating Power supply (50/60 Hz)* (Varies from country to country.)* Rated time 30 min. Power consumption (50/60 Hz) 115 W Rated voltage AC110V / 120V / 220V /230V / 240V Mechanical Knead 3-step adjustment (approx. 20-30 cycles/min) (knead balls) Tapping 3-step adjustment (approx. 270-650 cycles/min) massage speed Up and down Approx. 4.9 cm/sec. Air pressure for air-massage Approx. 36kPa Mecha. (knead balls) massage strength 7-step adjustment Air-massage strength 5-step adjustment Arm air-massage strength 3-step adjustment Shoulder air-massage strength 5-step adjustment Auto-timer Approx. 15 min Reclining angle Dimensions Backrest Approx. 120 - 170° Footrest Approx. 0 - 75° Backrest not reclined 750 W × 1,240 D × 1,210 H (mm) Backrest reclined 750 W × 2,010 D × 780 H (mm) Weight Approx. 86kg Cover cloth PVC leather * Do not use the massager on other than the designated voltage. Nation Voltage Taiwan Canada USA Hong Kong India Italy Russia Sweden Thailand Turkey Czech UK Finland France Germany Greece New Zealand Singapore Malaysia 110V 120V 120V 220V 220V 220V 220V 220V 220V 220V 230V 230V 230V 230V 230V 230V 230V 230V 240V 59 MEMO 60 MEMO 61 FUJI MEDICAL INSTRUMENTS MFG. CO., LTD. 09/02