1
Updated 9.1.2013
OPTICAL SPORTSHOOTING
OWNERS MANUAL
Laser-products
Page 1/9
Manual Laser-products 2013.01.09_EN_2013.01.09
Table of contents
1
GENERAL DESCRIPTION ............................................................................................................................. 3
2
HOW TO USE THE SYSTEM......................................................................................................................... 3
3
2.1
Start-up .............................................................................................................................................. 3
2.2
Menu ................................................................................................................................................. 4
2.3
Cocking and shooting ........................................................................................................................ 5
ELP-2011 L ................................................................................................................................................. 5
3.1
Sights ................................................................................................................................................. 5
3.2
Trigger unit ........................................................................................................................................ 6
4
BRU-2011 L ................................................................................................................................................ 7
5
P3-E L ......................................................................................................................................................... 8
6
CHARGING THE BATTERY ........................................................................................................................... 8
7
SAFETY INSTRUCTIONS .............................................................................................................................. 9
8
CLEANING AND MAINTENANCE ................................................................................................................ 9
Page 2/9
Manual Laser-products 2013.01.09_EN_2013.01.09
1 GENERAL DESCRIPTION
Eko-Aims optical sport shooting equipment is suitable both for practising and competitions. The core of the
product is its software in the circuit board with an integrated laser module. This equipment is compatible
with the electronic targets approved by the International Modern Pentathlon Union UIPM. The laser beam
can be used with either non-coded beam, or with a code defined by UIPM.
To emulate traditional shooting, the gun has a so-called barrel time; a time a bullet would normally take to
go through the barrel. This shot delay is 8ms. The shooter should thus take into consideration the same
aspects as with a normal gun when pulling the trigger.
These laser products belong to Laser Class 2. Products have been tested by Finnish Institute of
Occupational Health among classification method EN 60825-1:2007 (IEC 60825-1:2007). Please read the
safety instructions carefully.
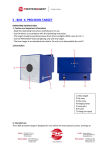
Buttons, connectors and indicator lights.
Switch button
Charging led
Charging plug
Information leds
Speaker
Programming button
2 HOW TO USE THE SYSTEM
2.1 Start-up
The software in the circuit board has two modes; shooting mode and menu. The shooting mode is for
shooting and menu for changing the settings. The gun is automatically in the shooting mode when turned
on. The gun is turned on by using the power button on its left side.
Page 3/9
Manual Laser-products 2013.01.09_EN_2013.01.09
In the menu mode, the user can adjust the settings and options related to sound signal, UIPM code and
targeting mode (continuous beam). All adjustments are made by pressing the power button as follows:
o
o
o
o
start-up (length not defined)
quick press (less than 0.3 sec)
long press (0.3 - 2.0 sec)
stop (over 2 sec)
There are three indicator lights on the side of the weapon. They indicate the activity status of the options,
excluding the charging status of the battery. The information varies between the shooting and menu
modes.
2.2 Menu
To go to the menu, press the power button shortly while in the shooting mode. The first of the led lights
starts flashing. This indicates which of the available options is active (sound signal).
To change the setting, press the power button for 0.3 – 2 seconds (high-pitch sound signal). The next option
is chosen by shortly pressing the button (low-pitch sound signal). The most recent setting is saved,
excluding targeting mode, which can be on only in the menu mode. When the gun is switched back to
shooting mode or is shut down, targeting mode becomes inactive.
Page 4/9
Manual Laser-products 2013.01.09_EN_2013.01.09
Switch on keystroke
Long keystroke
> 0,3 sec
Short keystroke
< 0,3 sec
Shooting mode
Menu mode
Setup
(Signals)
On / Off
Long keystroke
> 0,3 sec
Switch off
Menu mode
Setup
(UIPM code)
On / Off
Long keystroke
> 0,3 sec
Shooting mode
Menu mode
Setup
(Zeroing)
On / Off
Short keystroke
< 0,3 sec
2.3 Cocking and shooting
The gun is cocked by using a cocking rod or a similar device, or automatically after the trigger has been
pulled.
3 ELP-2011 L
3.1 Sights
The laser beam is fixed. The initial zeroing has been done at the factory.
Adjusting the rear sight:
o
o
Turning the screw on the right side clockwise will move the sight to the left.
Turning the screw on top of the sight clockwise will move the sight downward.
Page 5/9
Manual Laser-products 2013.01.09_EN_2013.01.09
3.2 Trigger unit
A micro-switch and a magnet form the basis for the trigger mechanism. The functions of the micro switch
are adjusted at the factory and should not be manipulated. Any unauthorised opening of the trigger
mechanism will remove any guarantee from the manufacturer’s side.
Adjusting the trigger
The trigger adjustments are set at the factory, to ensure that the trigger pulling force meets the ISSFshooting rules and that everything works smoothly. The user may want to adjust the trigger to fit their
personal needs. Adjustments are recommended to be carried out in the following order:
1. Adjust the blade angle. Turning the screw clockwise will turn the blade backwards.
2. Length of double-pull. Turning the screw clockwise will shorten the double-pull (1.5mm Allen
screw).
3. Trigger stop. Turning the screw clockwise will shorten the after-travel of trigger after triggering.
Caution! Too close adjustment will increase the trigger force and finally prevent the trigger
mechanism from travelling over the threshold.
4. Double-pull pressure, 150 – 350g. Turning the screw clockwise will increase the pressure.
5. Pull pressure, ~500g. Turning the screw clockwise will decrease the pressure.
Page 6/9
Manual Laser-products 2013.01.09_EN_2013.01.09
4 BRU-2011 L
The air weapon’s barrel is detached following the manufacturer’s instructions, normally by loosening two
small screws on top of the barrel, and carefully pulling the barrel off. It is replaced with an BRU. The screws
are tightened again. BR units are model-specific. The model can be found on the side of the unit.
For the initial zeroing there are two 1,5 mm screws on right side and under the barrel like ELP-10. When
turning the screw on right clockwise, the beam moves to the right and when turning the screw under the
container clockwise, the beam moves down. Don’t over tight the screws. The final zeroing should be done
by adjusting the sights.
When using the BR unit, the program is automatically set for the next shot. The cocking delay is 0.5
seconds. The trigger unit is cocked manually by using a cocking lever.
Vibration censor
In a BR-unit the shot is recognized by a vibration sensor (G-sensor). The power of impact, caused by trigger
mechanism, differs between pistol types and even between copies of the same pistol type. The sensitivity
of G-sensor has been adjusted by the factory on an average value of your pistol type. If the sensitivity value
is too high, it might cause unintended shots. On the other hand too low value might leave shots
unrecognized.
The sensitivity can be adjusted by using “Eko-Aims Lasergun Setup v1.1” program.
Installation steps:
1. Copy the file ”Eko-Aims Lasergun Setup v1.1_release.zip” on your computer and unzip it. This zipfile includes
a. instructions
b. the driver and
c. the program
2. Run "CDM20814_Setup.exe". This installs USB driver for laser gun.
3. Wait until the driver is installed.
4. Connect the laser gun to the USB port of the PC with USB cable and wait the PC information
a. A new device has been found
b. Adjusting the software
c. A new device is ready to be used.
5. Switch on power to the laser gun.
6. Run "Eko-Aims Lasergun Setup v1.1.exe". Program scans the laser gun automatically.
7. If laser gun is found, program shows status 'Connected', otherwise error note will be shown and
program will terminate.
8. Now it is possible to adjust the G sensor sensitivity by using Read and Set sensitivity- buttons.
9. After adjustment is done, close the program before disconnecting laser gun.
Page 7/9
Manual Laser-products 2013.01.09_EN_2013.01.09
5 P3-E L
For the initial zeroing there is 1,5 mm screw under
the barrel. When turning the screw clockwise, the
beam moves down. Do not over tight the screw. The
final zeroing should be done by adjusting sights.
Vertical adjusting
Horizontal adjusting
The rear sight is used for adjustments. The
adjustment screws are on the right side. The upper
screw is used for steplessly adjusting height. By
turning the screw, the height moves upward and
downward. It does not matter which way the screw
is turned, the sight changes direction after full
round.
The lower screw is for adjusting the sight
horizontally. By turning the screw clockwise, the
sight moves to the right, anti-clockwise moves it to
the left.
6 CHARGING THE BATTERY
A gun is charged via a USB-cable. It can be connected to a USB-port of a computer, or to mains current with
USB-charging device. A green led indicates that the battery is being charged, it turns off when the battery is
full. Re-charging an empty battery takes about three hours. When the battery runs low, the system gives a
warning signal.
Page 8/9
Manual Laser-products 2013.01.09_EN_2013.01.09
7 SAFETY INSTRUCTIONS
LASER RADIATION
DO NOT LOOK DIRECTLY AT THE BEAM
CLASS 2 LASER DEVICE
This is a Class 2 -sport shooting device. The laser follows the standard EN 60825 – 1:2007.
o
o
o
o
o
o
o
o
o
o
o
type E650D1-3-1235
nominal wave length 650 nm
nominal output max 1mW
never direct the laser beam at another person or an animal
do not look at the beam either directly or through any optical devices
do not direct the beam at air planes, cars, windows or other similar objects
use the device only in an area specified for this purpose
keep away from children
do not hand over the device to anyone who does not understand the dangers of using the
laser beam
it is forbidden to open or modify the device, excluding the changing of battery
operating temperature -10 o + 50 o C
WARNING! Failure to follow these instructions may expose the user to dangerous laser radiation.
Read the safety instructions carefully before using the device.
Always follow firearm regulations when handling an optical gun. Carry it in a proper case or bag. A person
not familiar with this kind of equipment may mistake it for a regular weapon, not an optical, and safe, one.
The system is meant for outdoor use as well, and is protected against normal humidity and rain.
Nevertheless, heavy rain may damage the electronic parts. Always cover the gun from rain. Keep it in a
carrying case when not in use.
8 CLEANING AND MAINTENANCE
In ordinary use and normal conditions the gun is maintenance-free and thus does not require any daily
maintenance, except a quick check. In a case of malfunction, please contact the manufacturer via email:
[email protected].
Page 9/9
Manual Laser-products 2013.01.09_EN_2013.01.09