1
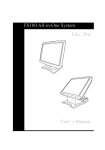
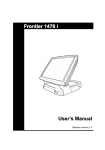
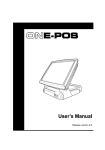
User Manual 10/100/1000Mbps PCIE LAN CARD Contents Chapter 1 Introduction .................................................................................................. 2 1.1 Overview of the product ...................................................................................... 2 1.2 Features............................................................................................................. 2 1.3 LED Status ......................................................................................................... 2 Chapter 2 Installation Guide ......................................................................................... 2 2.1 Hardware Installation .......................................................................................... 3 2.2 Software Installation ........................................................................................... 4 1 Chapter 1 Introduction 1.1 Overview of the product Congratulations on your purchase of this 10/100/1000Mbps PCIe LAN Card. The Adapter provides the bandwidth capability to support high-end servers and workstations. With Auto-negotiation, this card can run on three different speeds: 10Mbps at half and full duplex, 100Mbps at half and full duplex, and 1000 Mbps at full duplex. When running at 1000Mbps, it provides a network throughput of 2 Gbps in full-duplex mode. Instructions for installing and configuring this product can be foun d in this manual. Before you install and use this product, please read this manual carefully for full exploiting the functions of this product. 1.2 Features Compliance with IEEE802.3ab 1000BASE-T Gigabit Ethernet standards, IEEE802.3u Fast Ethernet standards Plug-and-Play installation Support half and full duplex at 10Mbps, half and full duplex at 100Mbps,and full duplex operation at 1000Mbps One build-in RJ45 connector Auto-Negotiation to the highest available speed Support IEEE802.1P Layer 2 Priority Encoding Support Full Duplex flow control (IEEE 802.3x) Support IEEE 802.1Q VLAN tagging Build-in FIFO buffers reduce overhead of memory transfers Support Microsoft NDIS5 Checksum Offload (IP, TCP, UDP) and large send offload Support Jumbo Frame transfers Two LED indicators: 10/100/1000M Link, 10/100/1000M Act Driver support for: Microsoft Windows Series. Linux Novell Netware Series MacOS 1.3 LED Status The Adapter features two LED indicators: LINK/ACT: Steady green indicates good linkage between the adapter and its supporting server or switch. Flashing green indicates activity (transmitting or receiving) between the adapter. 1000M : The LED indicator lights green when one 1000 Mbps device is connected to the adapter. 2 Chapter 2 Installation Guide 2.1 Hardware Installation To install the adapter, please follow these steps listed below: 1. Turn off your computer and unplug the power cord and all cables. 2. Remove your computer’s case cover. 3. Locate an available PCIe slot. 4. Remove the screw that secures the back plate (the small piece of metal that covers the opening for PCIe card on the back panel of your computer), then remove the back plate. 5. Carefully insert the adapter into the PCIe slot. Do not touch the metal connector on the adapter. 6. Secure the adapter to the case using the screw you removed from the back plate. 7. Reinstall your computer’s case cover. 8. Plug in the power cord and other cables, and then turn on your computer. Note: When the hardware has been successfully installed on your computer, you will be prompted 'Found New Hardware Wizard'; please click Cancel, and then follow the Software Installation steps to install driver for your adapter. Found New Hardware Wizard in Windows XP 3 2.2 Software Installation This section will guide you through the installation procedures for Windows XP, Please carefully follow the steps. 1. Insert the Resource CD into the CD-ROM drive. The Autorun setup programs Will display, or you can click on the “Browse CD” to find other OS drivers in the CD. 2. Click Driver Installation button to install. 3. Restart Windows to complete the installation. Besides you can use the following way to install: 1. Insert the Resource CD into the CD-ROM drive. 2. Right-click the icon My Computer on the desktop, and then click Manage. 4 3. The Computer Management window will appear. Click Device Manager, and then you will see the various options on the right. Click Other devices, and then from the drop-down list please find Ethernet Controller. Right-click it, and then select Update Driver…. 4. The Hardware Update Wizard window will show up. Select Install from a list or specific location [Advanced], and then click Next. 5 5. Select Search for the best driver in these locations Click Browse and choose the system driver location of the disk, and then click Next. 6. Wait a few seconds for the installation. 6 7. Click Finish to complete the installation. 7