1
Installation and Setup
Assembling the 90cm Dish
4
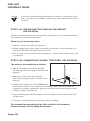
STEP 3.3B: ATTACHING THE MOUNT TO YOUR DWELLING
(90 CM DISH)
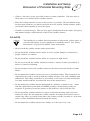
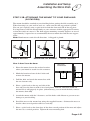
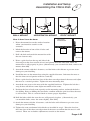
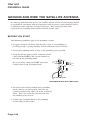
The mount should be attached to your dwelling before putting the dish assembly on it.
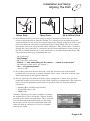
When fastening it to your wall or roof, etc., make sure that the top portion is plumb”.
You can get it right by using a spirit level on both the front and side of the top piece.
It is important to affix the mount firmly to your structure with the appropriate fasteners
so that the wind can’t move it. The dish support mounting assembly requires an area of
approximately 9 square feet to accommodate the mast mount foot and the two support
struts.
Note: Plumb means vertical in all directions. A flagpole is plumb.
90˚
90˚
90˚
WALL MOUNT
HORIZONTAL MOUNT
ROOF MOUNT
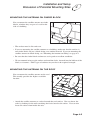
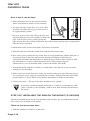
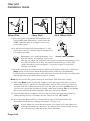
Here is how it can be done:
FRONT VIEW
PRESS LEVEL
AGAINST MOUNT
1. Place the mount foot on the surface location
where you intend to attach it to the structure.
2. Mark the location of one of the 2 holes and
remove the mount.
3. Drill the hole and attach the mount foot with
the one fastener only.
Mountfoot
Mountfoot
4. Place a spirit level on the top and side of the
foot and pivot the foot to make it level and plumb. Drill the other hole while the
mount foot is still properly in place. (Alternatively, you can mark the hole, remove
the mount, then drill)
5. Attach the mount with the 2 fasteners; seal the holes with silicone to prevent water
damage to your dwelling.
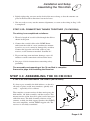
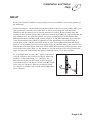
6. Install the mast to the mount foot using the supplied fastener. Orientate the mast so
that the short curved portion will face vertically.
7. Place a spirit level on the front face of the short curved portion of the mast and adjust
the mast to a vertical position. Tighten the mast mounting bolt.
Page 4-21