1
SCHOTT North America, Inc.
Part number: A20870
Serial number:
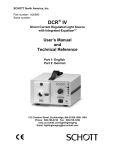
DCR® III Plus
Direct Current Regulated Light Source
with Built-in RS232 Interface
User’s Manual
and
Technical Reference
122 Charlton Street, Southbridge, MA 01550-1960, USA
Phone: 508-765-9744 Fax: 508-765-1299
www.us.schott.com/lightingimaging
Email: [email protected]
Table of Contents
1.0. General Safety Notes.........................................................................................................3
1.1. English............................................................................................................................3
1.2. French ............................................................................................................................3
1.3. Italian ..............................................................................................................................3
1.4. Spanish...........................................................................................................................4
2.0. Quick Start Operation.........................................................................................................5
2.1. Operation........................................................................................................................5
2.1.1. Universal Voltage Input...............................................................................................5
2.1.2. Turning the Light Source “on” .....................................................................................5
2.1.3. Lamp Replacement.....................................................................................................6
3.0. General Instructions ...........................................................................................................7
3.1. Safety Instructions ..........................................................................................................7
3.2. Product Description ........................................................................................................7
3.3. Installation Guidelines ....................................................................................................8
3.4. Lamp Specifications .......................................................................................................8
3.5. Cleaning .........................................................................................................................8
4.0. Intensity Control .................................................................................................................9
®
5.0. DCR III Plus Expansion Connector ..................................................................................9
6.0. Remote Operation............................................................................................................10
6.1. Command Protocol.......................................................................................................10
6.2. Check Sums. ................................................................................................................11
6.3. Negative Acknowledgements. ......................................................................................11
6.4. Command Summary.....................................................................................................12
6.5. Command Details. ........................................................................................................12
7.0. Troubleshooting ...............................................................................................................13
8.0. Appendix ..........................................................................................................................14
8.1. Product Specifications ..................................................................................................14
8.2. Replacement Parts List ................................................................................................15
8.3. Support .........................................................................................................................15
8.4. Service/RMA Policy ......................................................................................................16
User’s Manual DCR III Plus Part 1
1.0. General Safety Notes
1.1. English
Warning
1. Never look directly at the lamp output, or at the Modulamp® light output port, or at
the end of any attached fiber optic cable.
2. Lamp and surrounding surfaces may be hot!
3. Do not use this unit near any liquids or in an area with excessive moisture.
4. Do not place flammable materials on or near the unit.
5. Do not defeat the safety purpose of the 3-prong grounded plug. Use only an
approved three-wire power cord. Route cord so that it will not be pinched, severed or
walked upon.
Within North America use only the approved power cord supplied with the unit.
Outside North America use only grounded power supply cables with suitable
connectors for the respective power outlet shapes.
6. Do not defeat the purpose of the fuse. To reduce fire hazard, replace fuse only with
the fuse type described in the manual and as marked on the unit.
7. Unplug before servicing (servicing is for authorized personnel only). High voltage is
present internally.
8. Refer to the Technical References Section for safety instructions.
1.2. French
Attention
1.
2.
3.
4.
5.
Ne pas regarder directement la lampe quand elle fonctionne.
La lampe et son logement peuvent être chaud.
Ne pas utiliser cette source près de l’eau ou d’une zone particulièrement humide.
Ne pas placer de matériau inflammable près de la source lumineuse.
Ne détruisez pas la sécurité de la prise à 3 branche relié à la terre. A l'intérieur de
L'Amérique du Nord, veuillez utiliser uniquement le cordon d'alimentation agrée
fourni avec l'unité. Défaites le cordon pour qu'il ne soit pas pincé, coupé ou aplati. A
l'extérieur de L'Amérique du Nord veuillez utiliser uniquement câbles d'alimentation
reliés à la terre.
6. Ne pas défaire la protection du fusible. Pour réduire le danger d'incendie, utilisez
uniquement les fusibles décrits dans les conseils d'utilisation ou marqué sur l'unité.
7. Débrancher avant entretien (Le service après-vente se fait uniquement par un
personnel autorisé part le fabricant). Haute tension présente à l’intérieur.
8. Se referer à la section Références Techniques, pour les instructions de sécurité.
1.3. Italian
Precauzioni
1. Mai guardare direttamente la lampadina quando é accessa.
2. La lampadina e la superficie circostante possono essere surriscaldate.
3. Non utilizzare il generatore in presenza di acqua o in aree eccessivamente sporche.
Page 3
User’s Manual DCR III Plus Part 1
4. Non mettere materiali infiammabili vicino al generatore di luce.
5. Non danneggiarc l’isolamento della spina a tre pin.
Within North America use only the approved power cord supplied with the unit.
Route cord so that it will not be pinched, severed or walked upon.
Outside North America use only grounded power supply cables with suitable
connectors for the respective power outlet shapes.
6. To reduce fire hazard Sostituire il fusibile solamente con un fusibile avente le
caratteristiche descritte nel manuale e come indicato sul generatore.
7. Disinscrire la spina prima di efettuare riparazioni -(servicing is for authorized
personnel only): All’interno é presente alta tensione.
8. Per istruzioni sulla sicurezza fare riferimento alla sezione delle informazioni
tecniche.
1.4. Spanish
Attender
Nunca mirar directamenta la lámpara cuando iluminada.
La lámpara y las superficies cerca de la lámpara pueden estar muy calientes.
No use la unidad cerca del agua o en una zona muy humeda.
No ponga material inflamable cerca de la unidad.
No arruine el propósito de seguridad del enchufe a tres puntas
Within North America use only the approved power cord supplied with the unit.
Route cord so that it will not be pinched, severed or walked upon.
Outside North America use only grounded power supply cables with suitable
connectors for the respective power outlet shapes.
6. No arruine el efecto del fusible. To reduce fire hazard Sostituya solamenta con tipo
de fusible descrito en el manual y como indicado sobre la unidad.
7. Desconecte antes de revisar -(servicing is for authorized personnel only). Voltaje
elevado está presente al interno.
8. Refierase a la sección referencias técnicas para las instrucciones de seguridad
1.
2.
3.
4.
5.
Page 4
User’s Manual DCR III Plus Part 1
2.0. Quick Start Operation
2.1.
Operation
2.1.1. Universal Voltage Input
The DCR® III Plus Light Source was designed to accept line voltage in the
range 90 to 264 VAC 47-63 Hz., 224 VA.
2.1.2. Turning the Light Source “on”
1.
2.
3.
4.
5.
6.
7.
8.
9.
Make sure that the captive thumbscrew on the Modulamp® assembly is
firmly tightened.
Make sure the power switch on the front panel is in the “off” position.
Plug the power cord into the back panel connector.
Plug the other end into a power source.
Insert any fiber optic component with a SCHOTT compatible light source
adapter into the Modulamp® receptacle.
Tighten the fiber optic positioning thumbscrew.
Turn the light source power switch to the “on” position.
Adjust the light intensity with the intensity control knob.
To turn the unit off, press the power switch to the “off” position.
Page 5
User’s Manual DCR III Plus Part 1
2.1.3. Lamp Replacement
1. Turn the power switch to the “off” position, disconnect the power cord from
the power source.
2. Remove the fiber optic component.
3. Allow the lamp to cool.
4. Unscrew the Modulamp® assembly captive thumbscrew until the head springs
forward (H).
5. Pull the top of the Modulamp® assembly forward and lift the unit out of the
recess (J). Do not pull the assembly beyond the length of the cable
assembly.
CAUTION: Lamp, lamp socket and surrounding surfaces may be hot!
6. Push back on the lampholder release lever to raise the lamp (L).
7. Gently unplug the ceramic lamp socket (K).
8. Lift the release lever. Insert a new lamp into the lamp holder. Push the
lamp all the way down. Be careful not to touch the bulb or the inside of the
reflector. Fingerprints may affect the light output.
9. Push the ceramic socket on to the two lamp pins until flush with the lamp
base.
10. Return the “Modulamp” assembly into the recess and tighten captive
thumbscrew.
For Complete Modulamp® Assembly removal and installation, repeat this process, but
eliminate steps 7 through 10. You must still observe the handling precautions of Step 9.
Page 6
User’s Manual DCR III Plus Part 1
Technical References
3.0. General Instructions
3.1.
1.
2.
3.
4.
5.
6.
7.
8.
3.2.
Safety Instructions
Read, understand and follow all instructions in this manual.
Keep all safety and operating instructions for future reference.
Do not block ventilation openings on this unit. Do not impede airflow.
Use only standard glass type cleaners. Do not use solvents or petroleum
distillates or any volatile or flammable liquids or foams.
Never spill liquid on the unit or push objects into ventilation openings.
Disconnect power cord when unit will be left unused for long periods of time.
Allow the unit to cool down before servicing, which is limited to lamp
replacement during the warranty period.
Do not service the unit beyond that described in this manual. Return the light
source to an authorized SCHOTT service center. For a Return Material
Authorization, see Section 8.4.
Product Description
Congratulations on the purchase of your DCR® III Plus Light Source with built-in
RS232 interface. This light source provides cool, intense illumination via remote
control. The next generation in DC-regulated light sources, the DCR® III Plus can
control the intensity of up to three additional DCR® III light sources.
The DCR® III Plus provides enhanced communication via embedded error checking
codes in the unit’s programmed settings. The DCR® III Plus automatically restores user
settings at power up, and can interpret commands from multiple light sources as one
unit. New features also include a lamp on/off feature that is independent of intensity
control.
The DCR® III Plus boasts an IR interference filter for cool illumination, soft start “lamp
saver” circuitry, and solid-state dimmer control for continuous dimming. The LED lamp
change indicator light located on the front panel signals the user to replace the lamp.
Light Source limits light fluctuation to ± 0.5% due to line voltage variation. Additional
features include current limiting and transient protection for remote location of the bulb.
The DCR® III Plus Light Source features a heavy-duty, stackable metal industrial
housing with retractable handle. Options include an infinite setting, thirteen-blade
diaphragm to reduce intensity while maintaining color temperature. Choice of three, 150
Watt Halogen lamps - EJA, EKE and DDL for intense, uniform illumination. The
interchangeable Modulamp® Unit offers two lamp positions to maximize individual lamp
efficiencies.
Page 7
User’s Manual DCR III Plus Part 1
3.3.
Installation Guidelines
To insure proper operation of the light source, the following conditions must be
met:
For indoor use only, Installation Category, II; Pollution degree, 2
Maximum Operating Altitude: 2000 Meters
Minimum Clearances:
Rear
Bottom
Sides
3” (76 mm)
5/8” (16 mm)
1” (25 mm)
Do not block any air vents. Proper ventilation must be guaranteed.
Avoid areas of excessive vibration.
Operate the light source only in an environment where people do not require
protective equipment.
CAUTION: Dust accumulation will restrict airflow, which can damage the unit.
(See Section 2.5 for cleaning recommendations.)
3.4.
Lamp Specifications
Lamp Life
The median life of a lamp is generally defined as the point in time by which half of those
lamps being tested fails to light, or its light output falls to 50% or less of its original
value. This means that one half of the lamps will fail at sometime before the Median
life time is reached and the other half will fail at some point after that time. Actual life
may vary depending upon environmental conditions such as thermal shock, vibration,
duty cycle, the total number of starts or power control history. The effect of power
underrating or overrating on lamp life cannot be accurately predicted.
3.5.
Cleaning
The steel housing and the “Lexan” front and back plates have a durable finish that
should retain their original luster for many years to come. Cleaning the exposed areas
with a commercial glass cleaner will help to maintain the finish.
Press the power switch on the front of the unit to the “off” position. Remove the power
cord from the power source. Wipe the exposed areas of the housing and front and back
plates with a soft cloth or paper towel moistened with any commercial glass cleaner.
CAUTION: Do not use detergents, excess water, treated cloths, harsh cleaning or
flammable agents or sprays. If fluid is spilled into the interior, let the unit dry thoroughly
before using.
Periodically, visible dust accumulations should be removed using a vacuum or
commercially available cans of compressed air. Pay special attention to the fan blades
at the rear of the unit, the air vents in the front and bottom of the unit and the Modulamp
assembly.
Page 8
User’s Manual DCR III Plus Part 1
Note: Removal of the Light Source cover prior to the expiration of the warranty period
will invalidate the warranty. After the expiration date of the warranty, only a qualified
electronic technician should have access to the Light Source with its cover removed.
4.0. Intensity Control
The DCR® III Plus Light Source has a power output of up to 150W. Intensity is
controlled by means of the intensity control knob on the front panel or remotely via
RS232 (see section 6).
Rotating the knob from the full CCW, but not yet detented into the “R” position and the
full CW position, will vary the output power from 0-100%. Rotate the knob fully CCW to
the “R” Position (detented) to control the intensity via RS232.
Additional intensity control can be achieved using the Modulamp® assembly with
integrated mechanical iris (either sold separately or specified DCR® III Plus with Iris
Diaphragm bundle). The iris allows dimming of the lamp output while maintaining color
temperature.
5.0
DCR® III Plus Expansion Connector
The DCR® III Plus can control up to 3 attached DCR® III’s using the RS232 interface
and the built-in rear expansion connector. To connect DCR® III’s to the DCR® III Plus,
use the SCHOTT A20665 expansion cable and standard DB9 M-F expansion cables
(both sold separately). Use standard straight thru RS232 expansion cables of desired
lengths to connect the expansion cable to the attached DCR® III’s.
9 -P IN C o n n e c to r
1 5 -P IN C o n n e c to r
S C H O T T E X P A N S IO N
C A B L E (A 2 0 6 6 5 )
C o m p u te r
S e ria l P o rt
U s e r S u p p lie d
R S 2 3 2 M -F
E x te n s io n C a b le s
D C R III P lu s /IV
L ig h t S o u rc e
D C R III L ig h t S o u r c e
D C R III L ig h t S o u r c e
D C R III L ig h t S o u rc e
9 -P IN C o n n e c to r
Connection Example: expanding the DCR III Plus with attached DCR III’s
Page 9
User’s Manual DCR III Plus Part 1
For reference, the pin-out of the expansion connector on the rear of the DCR® III Plus is
given in the following table.
Pin
1
2
3
4
Description
Lamp Fail - B
Unit 5V - B
GND - B
Shutdown - C
Pin
9
10
11
12
Description
Shutdown - B
Analog Control Voltage - B
Lamp Fail - C
Unit 5V -C
5
6
7
8
Analog Control Voltage - C
GND - D
Unit 5V -D
Shutdown - D
13
14
15
-
GND - C
Analog Control Voltage - D
Lamp Fail - D
-
Rear 15 Pin Female D-Shell
®
Letter A designates the DCR III Plus – used only in the command protocol.
®
Letters B, C and D represent the three attached DCR IIIs.
6.0
Remote Operation
The DCR® III Plus can be operated remotely via a built-in RS232 interface. The front
panel power switch must be in the “on” position to operate in the remote mode. Located
on the rear of the DCR® III Plus Light Source is a 9-pin female D-shell connector.
Connect an RS232 DTE equipment to the DCR® III Plus light source (DCE) using a 9
pin straight-through cable.
Control of any of the light sources (DCR® III Plus and 3 attached DCR® III’s) is
dependent on the position of the light intensity control knob for a particular light source;
control of any particular light source is independent on the position of the control knob of
the other light sources. The DCR® III Plus must have it’s control knob in the “R” position
in order to control it’s lamp via RS232. The attached DCR® III’s can be controlled via
RS232 regardless of the position of the DCR® III Plus’ control knob.
6.1 Command Protocol
The DCR® III Plus Light Source can be remotely controlled by any device that can
transmit and receive ASCII characters through RS232. Three Baud rates, non-auto
Page 10
User’s Manual DCR III Plus Part 1
sensing, can be selected via the communications port: 2400, 9600, and 19200. The
format for most command strings are: &yuxxcc<CR> where
& = header character
u = unit device ID, for unit specific commands (“i” and “l”)
y = command character
xx = one or two character command parameter
<CR> = carriage return character “/r” cc = two character checksum, if activated
The unit device ID is “a” for the DCR® III Plus unit and “b”, “c”, or “d” for attached
DCR III units. All units can be controlled with one command by specifying the unit ID
as “m”.
When sending commands, there are certain characters that must be sent in order for
a command to function. Single digit values must be preceded by zeros if the
parameter field requires multiple characters. For example, setting the lamp intensity
for unit “a” to zero is: &ia00. Commands are not case sensitive. However, the DCR®
III Plus will first convert received commands to lower case letters then compute the
checksum based on the lower case letters. The DCR® III Plus buffers ASCII
characters until a carriage return is received. The buffer is automatically cleared
after a command is processed. Invalid commands are also cleared by receiving a
carriage return or after a 10 second command timeout.
6.2 Checksums
The checksum is obtained by summing the ASCII byte values (in HEX) of all
characters in the command string, discarding all but the lower two bytes (value is
logically AND with 0xFF), then encoding both HEX characters as ASCII characters.
For example:
&ia?2f
&k0c1
&f8c
- query channel “a” lamp intensity (ASCII sum = 303 = 0x12f)
- Turn off checksums (ASCII sum = 193 = 0xc1)
- Check firmware level (ASCII sum = 140 = 0x8c)
The DCR® III Plus will not respond to received strings that do not start with the
header. When an improper command is sent, the DCR III Plus will respond with a
Negative Acknowledgement.
6.3 Negative Acknowledgements
Negative acknowledgements are used to indicate that a received command was
invalid. The following negative acknowledgements are supported.
-
-
Invalid Checksum: Command string does not match what the DCR III Plus computes from
the received command string: &nk
Invalid Command: Not a recognized command: &ncx
x = command character received
Value out of Range: Value of the command parameter exceeds the command‘s range:
&nyurxx
y = command character
u = unit device ID
xx = received data
r = constant character denoting out of range
Incorrect Mode: Cannot execute in the DCR® III Plus current mode (unit “a” not in remote
mode or one of the attached units not on). Note that for multiple unit commands individual
negative acknowledgements are not transmitted.
Page 11
User’s Manual DCR III Plus Part 1
-
-
&nyum
y = command character
u = unit device ID
m = constant character denoting invalid mode
Invalid unit ID: Unit ID must be either “a”, “b”, “c”, “d”, or “m”. & nyuc
y = command character
u = unit device ID received
c = constant character denoting invalid unit ID
Command Timeout: If a command is not completed (i.e., a <CR> is not sent) within 10
seconds of when the first character is received the DCR® III Plus will respond with: &ni
6.4 Command Summary
Lamp ON/OFF:
Set Lamp Intensity:
Bulb Status:
Attached Unit Power Status:
Firmware Level
Save Settings After Each change:
Restore Settings on Power Up:
Restore Settings if &r=0:
Restore Factory Defaults:
Set BAUD Rate:
Checksums ON/OFF:
“&lux”
“&iuxx”
“&bu”
“&pu”
“&f”
“&sx”
“&rx”
“&t”
“&o”
“&cx”
“&kx”
u=a,b,c,d,m x=0,1,?
u=a,b,c,d,m x=00-FF, ?
u=a,b,c,d
u=b,c,d
x=0,1,?
x=0,1,?
x=0,1,2,?
x=0,1,?
6.5 Command Details
i. Lamp On/Off: &lux
u = unit device ID.
“a” is the DCR® III Plus,
“b”, “c”, “d” are the attached DCR III units
“m” is all units
x = command parameter
0 = off
1 = on
? = query value
ii. Set Lamp Intensity: &iuxx
u = unit device ID
“a” is the DCR® III Plus,
“b”, “c”, “d” are the attached DCR® III units
“m” is all units
xx = command parameter
00 to ff is value in HEX. 00 = off, ff = full brightness
iii. Check bulb status &bu
u = unit device ID
“a” is the DCR® III Plus,
“b”, “c”, “d” are the attached DCR® III units
return value:
&bu0 - bulb requires replacing
&bu1 - bulb OK
iv. Attached Unit Power Status &pu
u = unit device ID
“b”, “c”, “d” are the attached DCR III units
return value:
&pu0 - unit off
&pu1 - unit on
v. Get firmware version
&f
Page 12
User’s Manual DCR III Plus Part 1
vi.. Save Settings After Each change: &sx
Excessive writes to the FLASH memory for frequent changes to lamp intensity and on/off
control should be avoided. This setting can be used to disable writing to FLASH memory.
x = command parameter
0 = off
1 = on (factory default)
? = query status
vii. Restore Settings on Power Up:
&rx
By default when the DCR® III Plus is turned on the settings for lamp intensity and lamp
on/off status is automatically restored for the DCR® III Plus and any attached DCR® III’s.
This behavior can be disabled with this setting. Use the Restore Settings command (&t)
to restore stored values when &r is set to off
x = command parameter
0 = off
1 = on (factory default)
? = query status
viii. Restore Settings &t
Restores lamp intensity and lamp on/off status. Useful in conjunction with the &s and &r
commands.
ix. Restore Factory Defaults
&o
Restores factory default settings. Values are:
- all brightnesses set to zero
- lamp on/off status set to “on”
- Save Settings After Each change set to “on”
- Restore Settings on Power Up set to “on”
- BAUD Rate set to “9600”
- Checksums set to “off”
x. BAUD Rate: &cx
x = command parameter
0 = 2400
1 = 9600
2 = 19200
? = query value
xi. Checksums ON/OFF:
&kx
x = command parameter
0 = off
(factory default)
1 = on
? = query status
7.0
Troubleshooting
If you are unsuccessful at resolving the following conditions, contact SCHOTT North
America, Inc. See Section 8.4 for a Return Materials Authorization (RMA). Do not
attempt to repair the light source. Removing the cover will void the warranty.
Do not attempt to troubleshoot the light source with any remote control device
connected. If the light source operates after removal of the remote connection, check
your remote set-up.
Fan operates, but low light output.
1. Check the “CHANGE LAMP WHEN RED” indicator, if green, continue to step
two, if red, continue to step three.
2. Check the lamp to ensure that it is fully seated. See Section 2.1.3.
3. Change the lamp.
Page 13
User’s Manual DCR III Plus Part 1
Fan operates, but the light turns on and off. (The light source is running too hot.)
1. Check your installation against Section 3.3, Installation Guidelines.
2. Check air intakes and exhaust areas for dust or dirt accumulation. Clean per
Section 3.5.
Fan operates, but the light turns briefly on and then off.
Fan operates, but no light.
1. Turn the intensity control knob to 100.
2. Change the lamp using the instructions in section 2.1.3.
3. Examine the lamp socket assembly for damage and continuity.
Fan does not operate, light is on.
1. Return to SCHOTT North America, Inc.
Fan nor lamp operates.
1. Make sure the power cord is inserted completely into the IEC connector and also
into the correct power source.
2. Check the power cord for damage.
3. Check the fuse.
8.0
Appendix
8.1 Product Specifications
Physical Dimensions:
Overall Height:
Overall Width:
Overall Depth:
Unit Weight:
Fiber Receptacle:
4.62” (177 mm)
7.27” (185 mm)
8.61” (219 mm)
4.94 lbs. (2.24 kg)
0. 720” (18.3 mm) diameter
Lamp Type
EKE, DDL and EJA lamps
Environmental Conditions:
Operating Temperature Range:
(0 to 45° C)
32 to 113° F,
Storage Temperature Range: -13 to 185° F,
(-25 to 85° C)
Relative Humidity Range: 0 to 95%, Noncondensing
For indoor use only
Installation Category, II; Pollution degree, 2
Maximum Altitude 2000 Meters
Electrical Specifications:
Input Voltage:
90 – 264 VAC, 47 to 63 Hz
Lamp Power:
150 watts
Power Consumption:
224 VA
Compliances:
CSA, CSAUS, CE
Page 14
User’s Manual DCR III Plus Part 1
Plus
8.2
Replacement Parts List
The following replacement parts are available from SCHOTT North America, Inc. to
maintain and support DCR® III Plus Light Source:
Part Number
Description
A09110
A08120
A08130
A08126
A29506
D20800.040
D08375.063
H09050.008
H09050.045
H09063.002
D20870.028
EJA Lamp
EKE Lamp
DDL Lamp
Fuse 3 A, 250VAC, 5x20mm
Lamp Socket Assembly
EMI Cable Clamp
Thumb Screw Assembly, Modulamp
Knob, Control, DCR® III Light Source
Knob, Iris
Power Cord Shielded, IEC
Manual, DCR® III Plus, Technical Reference
Page 15
User’s Manual DCR III Plus Part 1
8.3
Support
SCHOTT maintains a variety of support services to assist you. For immediate
assistance from our Sales Associates or Sales Engineers contact:
For North America:
Lighting and Imaging
SCHOTT North America, Inc
122 Charlton Street
Southbridge, MA 01550-1960
USA
Phone: 508-765-9744
Fax: 508-765-1299
Email: [email protected]
For Europe
Lighting and Imaging
SCHOTT AG
Otto-Schott-Strasse 2
55127 Mainz
Germany
Phone: +49-6131-667796
Fax: +49-6131-667850
Email: [email protected]
Contact your local SCHOTT distributor for an immediate response.
Be sure to have your part number and serial number available, as well as a complete
description of the problem or situation for the quickest, most accurate assistance.
8.4
Service/RMA Policy
Any service required for any reason must be performed by SCHOTT or an authorized
service representative. All service outside warranty will be performed upon the
purchaser’s request according to normal service charges in effect at the time.
To return any item, whether for warranty repair or chargeable servicing, an RMA
number (Return Materials Authorization) must be obtained from SCHOTT. This number
must be clearly visible on the shipping label. All shipping must be prepaid.
SCHOTT guarantees all warranty repairs will be completed within two weeks of receipt.
All units will ship prepaid using our shipping method of choice. Alternate shipping
methods will be shipped freight collect.
Page 16
Lighting and Imaging
SCHOTT North America, Inc.
122 Charlton Street
Southbridge, MA 01550-1960
USA
Copyright 2004. All Rights Reserved.
PHONE: +1 (508) 765-9744
FAX:
+1 (508) 765-1299
E-MAIL: [email protected]
WEB: www.us.schott.com/lightingimaging