1
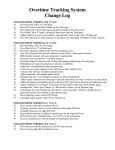
OT Track
User Manual
Introduction............................................................................................................................................................. 3
License Information ................................................................................................................................................ 3
Important Note ........................................................................................................................................................ 3
Features .................................................................................................................................................................. 4
Getting Started ........................................................................................................................................................ 4
First Time Setup .................................................................................................................................................. 4
New Year Preparation ......................................................................................................................................... 6
Upgrading ........................................................................................................................................................... 7
Daily Tour Management ......................................................................................................................................... 7
Overview ............................................................................................................................................................. 7
Monitoring Overtime .............................................................................................................................................. 8
At a Glance ......................................................................................................................................................... 8
Charts .................................................................................................................................................................. 9
Calendar .............................................................................................................................................................. 9
Generating Forms ................................................................................................................................................... 9
The OT Slip......................................................................................................................................................... 9
The Leave of Absence Report (28) ................................................................................................................... 10
The Night Shift Differential Request Form ...................................................................................................... 11
The Overtime 49 and Executive Staff ............................................................................................................... 11
Warranty ............................................................................................................................................................... 12
Support .................................................................................................................................................................. 12
2
OT Track
User Manual
Introduction
OT Track is a program designed for NYPD personnel to manage tour and overtime information. This
user manual will provide an in depth guide to the features of OT Track. I recommend you read this manual to
gain a better understanding of the system. If you notice that something does not function properly or you have a
recommendation on improvements you would like to see in future versions, please email me at
[email protected]. When emailing, please include the version number which is displayed on the bottom
of the Total page.
License Information
This program is released under the Creative Commons Attribution-Noncommercial-No Derivative
Works 3.0 Unported License. It is free to use and distribute by anyone for personal use only. Commercial use
is prohibited. Modifications to the layout, formulas, or underlying code are also not permitted. For more
information, please visit http://creativecommons.org/licenses/by-nc-nd/3.0/. By using this program, you are
agreeing to abide by this license agreement.
Important Note
This program makes heavy use of VBA code. Because of this, macros must be enabled on your
computer for this program to function properly. If macros are disabled, you will receive a popup indicating this.
Also, the main sheets of the program will be hidden and you will only see a single page with instructions on
how to enable macros. To enable macros, open Excel, click on Tools Macro Security. In the new
window are several options. Setting the option to Low will allow all Excel spreadsheets to use macros. This
will work but may be unsafe depending on your usage of Excel. Another choice is to select the option Medium.
This will make Excel prompt you each time you open any file that has macros. If you choose this option, you
must click yes to allow macros on OT Track every time you open the file.
If you are utilizing Excel 2007, open the trust center when prompted and change the equivalent option.
Do not save the file as an Excel 2007 document (file extension .xlsm or .xlsb) as doing so may prevent the
program from functioning properly. When the program is saved as an Excel 2007 document, you will still not
be able to run the macros regardless of your security settings if your antivirus software is unable to scan
encrypted content. This permission setting cannot be changed and can only be avoided by keeping the program
saved a standard Excel file (file extension .xls) or installing antivirus software capable of scanning encrypted
content.
This program is not Mac compatible. Due to the usage of VBA, and Mac OS’s limited capability to
interpret it, there are numerous, uncorrectable errors when running this application on a Mac OS platform.
Running the Windows version of Microsoft Excel through a virtual machine or emulator is a potential solution,
although it is not been fully tested.
3
OT Track
User Manual
Features
Tracks all tours performed for easier completion of Night Diff sheets.
Tracks all overtime performed.
Tracks vacation days, chart days and lost time usage and displays balance remaining.
Provides easy to read graphs to visually represent your overtime.
Automatically prints out overtime slips on any double sided printer.
Automatically prints out leave of absence reports (28’s) on any double sided printer.
Automatically prints the overtime 49 required for executive staff.
Automatically prints night diff forms.
Provides a color coded calendar to easily view what days were worked and which were not.
Getting Started
First Time Setup
The first stop to setup the program is the Options page. New users should also follow these
instructions. On the Options page, you will find all of the fields for your pedigree information. Not all
of the fields will be applicable to every individual, for example the First Swing Length field is for MOS
who work the 5-2/5-3 steady duty chart. You should input the required information into each field that
applies to you. Additionally, if the program is not set up for the current year, utilize the New Year
Preparation function to modify the program (see page 5).
Once your entries are completed, click the Update RDOs button on the Options page. You will
be prompted for a start date. This will designate when you want the RDO change to be effective. Leave
blank to start from the beginning of the year. It will then automatically modify each line of the data
page to reflect your RDOs based on your selected Chart Type and First Tour #. It will convert all nonRDO lines to the “Working” option so perform this function before entering information on the Data
page.
The following is a detailed explanation of each field on the Options page.
First Tour #
This field is what the tour number is on January 1st of the current year. For
st
example, January 1 , 2007 was a Monday. If you work Monday to Friday then the First Tour # for you
this year is 1. If you were RDO Sunday/Monday, then it would be RDO2.
First Swing Length This field is only for use by MOS who work the 5-2/5-3 steady duty schedule.
Input the length of the first swing of the year, whether it is a 2 day or 3 day swing. If you are currently
in your swing on January 1st, then input that swing’s length.
Chart Type
This field designates what chart you are in. (i.e. Patrol, Steady RDO, Detective
Squad, etc.) Choose the chart that fits your schedule.
RDO/Squad
This field designates your squad or steady RDOs depending on your choice for
chart type.
Tour Start
This field is the normal start time for your tour. If your tour is inconsistent, then
input the time you start your tour the most often. An individual day can be modified in the Scheduled
Start field on the Data page.
4
OT Track
User Manual
Chart Number
This field is used on the 28 Slip page. It is not a required field so if you do not
know it, you may contact your payroll office or simply leave it blank.
Reference #
This field is for the reference number found on your pay stub. It replaces your
social security number on the OT slip. This number can be found on your pay stub to the left of the
Employee Name field.
Check Digit #
This field is for the check digit found on your pay stub. It is utilized on the Sight
Diff form. This number can be found on your pay stub to the left of the Employee Name field under the
heading “CD”.
Leave Format
This field modifies the display of vacation and chart days. Selecting the Days
option, will calculate all vacation and chart time as complete days. Choosing the Time option will
convert vacation and chart days to an hh:mm format. This facilitates MOS who need to break up their
time due to their chart, (e.g., MOS working 12 hour tours, some civilian staff, etc.).
This field modifies the program for overtime issues affecting Captains and above
Executive Staff
(see page 9).
Enable OT Colors
This field turns on the color coding of overtime performed on the Calendar page
(see page 8).
Auto Update Check Starting with version 7.0, the Overtime Tracking Program is capable of
connecting to http://www.ottrack.com to download the latest version. The program can be set to never
check online (default setting) or to check at regular intervals.
Default OT Slip
This field determines whether the long or short overtime slip is selected after
clicking the link from the Data page.
Tour & Rate
This set of fields are your normal tour length and the current hourly rate for your
overtime. A word of caution here; different commands have different methods of calculating overtime
for the purposes of a cap. If your command has a cap that is monetary based, make sure you use the
same rate they use or you may inadvertently exceed the overtime cap. There are 8 different tour and rate
combinations that can be utilized (see page 7).
Military Days
This field is to input the number of military days you have as of January 1st.
Vacation Days/Time This field is to input the number of vacation days you have as of January 1st.
Include all days that are accrued for the new year as well as any days you are carrying over from the
previous year. If you work 12 hour tours or any other tour where your vacation days are broken up into
hours and minutes, then fill in the Day Length field first. After that, put in the total amount of vacation
time in hh:mm format.
Chart Days/Time
This field is to input the number of chart days you are carrying over from the
previous year. Do not include any chart days that you will accrue during the current year as that is
handled separately. If you work 12 hour tours or any other tour where your chart days are broken up
into hours and minutes, then fill in the Day Length field first. After that, put in the total amount of chart
time in hh:mm format.
Comp Time
This field is to input the total amount of comp time you are carrying over from the
previous year. Enter it in hh:mm format.
Chart Days per Yr. This field is the number of chart days you receive per year. For example, a P.O.
with steady days off and working an 8:23 tour would receive 12 days per year.
Day Length
This field is only for use by MOS who, because of their chart, have their vacation
and chart days broken up in to hours and minutes. If this applies to you, then put in the value of a
vacation and chart day in hh:mm format. If this does not apply, then make sure to leave this field blank.
5
OT Track
User Manual
Show OT Log #
This field turns on the display of the OT log # on the overtime slip.
Show OT Page #
This field turns on the display of the OT log page # on the overtime slip.
Show Tax #
This field turns on the display of your tax # on the overtime slip.
Show Quarter Totals This field turns on the display of the quarterly cash and time totals on the
overtime slip.
Show Cmd Log Info This field turns on the display of the command log information including time,
date and page of entry.
Show Rate. Column This field turns on the display for the Rate column on the Data page (see page 7).
Show Cash Value
This field turns on the display for the Cash Value column on the Data page (see
page 7).
MOS Type
This field is to select between uniform and civilian member of the service.
Unpaid Meal
This field is for civilian MOS to account for their unpaid meals. Enter the time
you work each day that is not included in your compensation.
Monthly OT Cap
This field is the hourly cap on overtime each month. This number will be used as
a baseline for the alerts on the Total page (see page 7).
Cash OT Owed
This field is the number of hours of overtime in cash that are owed from the
previous year which should be reflected on a current year’s pay check. This is to assist in tracking the
payment of all overtime.
Paid Check
This field is to enter the amount of overtime that was paid on a specific check, in
addition to normally tracked overtime from the Data page.
View User Manual This button will bring up this manual.
Check for Updates
This button will manually connect to http://www.ottrack.com to check for the
latest version.
Upgrade
This button is to import all data from an existing OT Track program. (See the
Upgrading section.)
New Year Prep.
This button will remove all data, except information on the Options page, from
the program and prepare it for the new year. (See the New Year Preparation section.)
RDO Selection
The Update RDOs button will modify each line of the Data page and switch all
RDOs to reflect “RDO” in the Day Off Type. (See the First Time Setup section.)
The following fields are self-explanatory: Rank, First Name, Last Name, Middle Initial, Shield #, Tax #,
Command, Supervisor Name and Supervisor Cmd.
New Year Preparation
When converting the program to track overtime for the new year, you can utilize the New Year
Preparation function on the Options page. Click on the button that says Erase Data and you will be
prompted to save a copy of your file. It is highly recommended that you click yes and save a copy of
your file as this function will erase all data currently in the program, with the exception of information
stored on the Options page. After you save the copy, or click no to that option, the function will remove
all information from the Total and Data pages as well as resetting the OT Slip and 28 Slip pages to there
default options. The pedigree information on the Options page will not be removed. The calendar, and
all other settings, will be configured for the next year. If you need to convert the program to a previous
year, you must input the first pay date of that year directly into the corresponding field on the Total
page. Once your updates are completed, use the RDO Selection function as described previously.
6
OT Track
User Manual
Upgrading
On occasion, it may be beneficial to upgrade to a new version of OT Track in the middle of the
year. For example, a bug fix or new feature may become available and users may wish to utilize them.
The upgrade functionality is meant to automate the importation of all data from an older version of OT
Track. As of version 6.1.0, only versions 5 and later are supported by the upgrade function. If you need
to upgrade from a release prior to version 5, please first upgrade to at least 5.0.0 and use that file to
move to 6.1.0 or later. Additionally, older versions may be upgraded manually. The upgrade function
cannot be used to revert back to an older version.
To upgrade from an older version, open the new version of OT Track and navigate to the Options
page. Click on the button on the bottom left labeled Upgrade. A warning message will appear.
Clicking yes will continue with the upgrade while clicking no will cancel. WARNING: Using the
upgrade function will completely erase any existing data in the new file. Do not use this function if you
have data in the new file that you wish to keep. After clicking yes, you will be prompted to open the old
version of the program that you wish to upgrade from. Navigate to its location and select it, then click
the Open button. The system should now import all information from the old version into the new one.
This process may take a few minutes so do not close Excel until the operation is complete. Any data
that did not exist in the old version will be left blank in the new one. After the prompts are finished,
make sure to save the new file.
Daily Tour Management
Overview
Each day, your tour information can be entered so that the program can calculate your overtime,
vacation and chart days, and comp time. It can also track your sick days and military leave, as well as a
variety of other schedule changes. The Data page will be the primary input area for all daily
information. It contains a single row for each day of the year, including a row reserved for leap year
which is automatically enabled if necessary. Each month listed at the top of the page is a link to the
corresponding month in the data for an easy jump to any information. To input the tour information,
follow these steps:
1.
Enter the time you started working in the Start field.
2.
Enter the time you finished working in the Finish field. You will notice that the total
number of hours worked will appear in the Total field. Any overtime performed will be
automatically listed in the OT field.
3.
If you performed overtime, change the option in the Type field to reflect the type of
overtime, either Cash or Time.
4.
The Reason field should contain any information you want displayed on the OT slip
under the reason. This reason will also be listed on the 28 if applicable.
5.
If your command maintains an OT Log, then the OT LOG field will contain the log
number and the OT PG field will contain the page number.
6.
The EOT PG field contains the command log page number for the overtime entry. In
some commands where there is no command log, this will be the page number you sign
out on after the overtime. Refer to your command’s procedures for specifics.
7
OT Track
User Manual
7.
8.
The Location field is the location where the overtime was performed.
The Sch. Start field is to input the scheduled start time for your tour each day. It is only
required if you adjusted your tour from your normal schedule listed on the Options page.
Please ensure you complete this field as required since the printable forms may function
improperly without this information.
9.
The Rate column is used to designate the day to utilize one of the 8 options for tour and
rate information. If there is a change to your normal tour or overtime rate in the middle
of the year, make sure to select the appropriate option in this column. In instances where
the tour will alternate between multiple different lengths (e.g., detective squad), then you
must select the corresponding option, as appropriate, each day.
The Day Off Type field is used to track RDOs, sick, vacation, chart days, etc. If you are
working, even if you take a partial, make sure to leave this field as Working. If it is your RDO, indicate
that. The same if you take a chart day, vacation day, etc. The Vacation Pick option will allow the
calendar to be color coded for your vacation selection without immediately removing those days from
your totals. The days will be deducted from your total once the date has passed. If you do not take the
vacation pick, remember to change the option back to working.
If you take a partial, put in the partial tour you worked. For example, if you came in at 12:00 but
left at 17:00, put 12:00 into the Start field and 17:00 into the Finish field. The program will
automatically calculate that you took lost time and take the appropriate amount of time from your comp
time. If you take the entire day off from your comp time, then indicate this by selecting Comp Time in
the Day Off Type field.
If you work your vacation, choose Vacation Day or Vacation Pick in the Day Off Type field and
enter the tour you worked. It will calculate the cash value of working vacation, as well as deducting the
days from your leave balance. Overtime performed on these days is treated normally.
The Cash Value column shows the amount of cash that your overtime is worth. This does not
take into account variations such as the difference between your day rate and night rate.
The Day column is the identification for that particular row. Clicking on the date will
automatically take you to the OT Slip or 28 Slip page as appropriate.
Monitoring Overtime
At a Glance
The Total page provides a quick overview of all overtime performed. It also shows the
remaining balance of military days, vacation days, chart days and comp time. (Note: Choosing the Time
option from the Leave Format section on the Options page will change the vacation and chart days to
vacation and chart time respectively.) Overtime is broken down into cash and time as well as by month
and quarter. The Cash column for each month will change color depending on your proximity to the
overtime cap. When you are within 8 hours of the cap, the background for that month will change color
to yellow. When you exceed the cap, the color will change to red.
On the right side, there is a listing of check numbers and pay dates. This area is to enter the
number of hours paid for cash overtime in each check. To use this feature, enter the number of hours
into the Paid field that you were paid on the corresponding check each pay period. This will deduct the
8
OT Track
User Manual
amount of hours from the Total Unpaid field and add it to the Total Paid field. This is an easy way to
track the amount of cash overtime that you have not yet been paid for. Also, the Expected column
indicates the number of hours in cash you can expect to receive on the corresponding check.
Remember, the number of hours actually paid out is dependent on when you submitted your overtime
slip and the timeliness of processing.
On the bottom left of the Total page, there is the Leave Remaining section. This section displays
your total vacation days, chart days and comp time you have remaining. Also in this area, is a yellow
section designated for simple math functions. On many occasions, overtime is broken up into several
blocks on the pay stub. Use this section to quickly add up each section of overtime to get a consolidated
number of hours paid on each check.
Charts
The Charts page provides a graphical overview of all overtime performed. The top chart is a
month by month breakdown of both cash and time overtime. The bottom left and right charts display
monetary cash overtime by quarter and hourly cash overtime by quarter respectively.
Calendar
The Calendar page displays a standard 12 month calendar that can be color coded. To use this
feature, choose the colors for each day off type or overtime type on the bottom of the page. There are
several colors to choose from and colors can be repeated if desired. If you enabled the option to show
OT colors on the Options page, then the colors chosen for Cash and Time overtime will be displayed on
the calendar as well. If this option is not enabled, then those selections will be ignored. The Lost Time
option corresponds to any day where you took the entire day off from your comp time. The Partial
option is any day where you took part of the day off (e.g., left early).
Once you have selected the colors you wish to be displayed, click the Update Calendar button. It
will take a few moments for the calendar to fully update. If you selected to enable OT colors, it will
take slightly longer than if you have that option disabled. Due to the significant processing power
required to modify the calendar, it is not updated automatically. You will have to click the Update
Calendar button anytime you wish to update the calendar.
Generating Forms
The OT Slip
The OT Slip page contains all of the graphics and functions necessary to print out a completed
overtime slip. Basic pedigree information will be included immediately from the fields you completed
during the initial setup on the Options page. Incident specific information is pulled from the Data page
based on the date. Clicking on the date in the Data page will take you to the OT Slip page and
automatically choose that slip to print. You can also type in a date manually in the field labeled Slip
Date on the top right of the OT Slip page. Travel time can be entered directly into the overtime slip.
Make sure to remove these entries when printing other OT slips that do not need it.
The slip should accurately show your starting time for the overtime and the tour number.
However, there are instances where this information can be inaccurate. For example, if you had a tour
9
OT Track
User Manual
change on the day of the overtime, ensure that you completed the Sch. Start field on the Data page or the
program will utilize the default start time from the Options page. Also, if the tour number field on the
overtime slip is inaccurate, usually due to an RDO swap, then utilize the Tour # Override field to force
the program to use any tour number you wish. Additionally, use the Incident Time Override to modify
the incident time on the overtime slip. This field defaults to your scheduled end of tour but this feature
will allow you to modify it to any time you wish. Make sure to remove these overrides after printing as
they will modify any overtime slip that is printed.
There is a variety of information on the overtime slip that can be hidden or displayed as
necessary. Additional information including Tax #, OT Log #, OT Page #, the quarterly totals and
command log entry details can all be hidden through selections on the Options page. Many commands
have different requirements on the amount of information that must be displayed so these options permit
users to show and hide information as required.
When printing the overtime slip, it is recommended to utilize a printer capable of double sided
printing. This will reduce the effort required to properly print out the overtime slip. On some printer
models, there are multiple types of double sided printing. The correct choice for this program would be
Double Sided – Flip on Short Edge, or an equivalent term. The program will also support manually
printing on two sides. See your printer documentation for more information regarding proper double
sided printing.
The Long OT Slip is a reproduction of the Unscheduled Overtime Report. It functions similarly
to the short form with all fillable captions for the back page. When printing the long form, do not use
the "flip on short edge" option. Instead, use standard double sided printing.
The Leave of Absence Report (28)
The 28 Slip page contains all of the graphics and functions necessary to print out a completed
leave of absence report. As with the overtime slip, your basic pedigree information will be displayed
from entries on the Options page. Make sure to check the box on the top indicating either uniform or
civilian member of the service. To generate a 28, ensure that you have selected the proper day off type
on the data page, or in the event of taking a partial, ensure that the day off type is set to working and
whatever part of your tour that was completed is entered in the appropriate fields. Click the date on the
Data page or enter the date directly into the field labeled Slip Date on the 28 Slip page. The number of
days for each 28 is automatically calculated based on contiguous day off types with the same value. The
maximum number of days on a single 28 is 5. When utilizing comp time, days will be reflected as
hours.
As with the overtime slip, there can be an error regarding the start time of the 28. For example if
you adjusted your normal tour, the program will not know this automatically. To correct this error, enter
your scheduled start time in the Sch. Start field on the Data page. Additionally, it may be necessary to
adjust the submission date of the 28. By default, this date is the date of printing. If you wish to change
it, enter any other date into the Date Override field. Be sure to remove this override after printing as it
will modify any 28 that is printed.
The type of leave boxes may be checked and unchecked as necessary. Make sure to check them
before printing as they may have been modified for a previous 28. Also, the reason is automatically
generated depending on the type of 28. For commands that require specific reasons, such as a wedding,
you can type in anything you want into the Reason column on the data page. This information will be
10
OT Track
User Manual
reflected in the reason field on the 28. The Location field on the back of the 28 defaults to residence,
however this can be modified by entering information into the Location field on the Data page. Military
information may be typed into the 28 directly. Make sure to remove these entries when printing 28s for
other purposes.
Printing 28s follows the same guidelines as printing overtime slips. See the preceding section for
detailed information regarding printing.
The Night Shift Differential Request Form
The Night Diff page contains all of the graphics and functions necessary to print out a completed
night shift differential request form. As with the other printable forms, your basic pedigree information
will be displayed from entries on the Options page. Select the month you wish to print by changing the
option under the Select Month field. The Date Override field will modify the submission date shown to
the left of the signature field. Make sure to remove this after printing as it will affect future forms.
The data on this page is automatically calculated based on your entries on the Data page and
Options page. If there is an error in the calculation, ensure you have entered the proper tour and
scheduled start time for the affected date. The form will count all hours worked from 1600 to 0800 as
night differential. However, you may not receive monetary compensation for all listed hours as only
Police Officers and Detectives are paid for all hours. Other ranks still adhere to the original standards
on when night diff is paid. Your timekeeper will note qualifying hours when they submit the slips to
payroll. For further information on the calculation of night diff, please see your timekeeper.
The Overtime 49 and Executive Staff
The Overtime Tracking Program can be easily adjusted to address the specific issues affecting
members of the service in the rank of Captain or above. Changing the option Executive Staff on the
Options page to Yes will make all of the adjustments automatically. Since the changes are widespread,
a warning message will appear asking you to confirm. Once you confirm the change, all overtime types
on the Data page will be switched to Time. Also, additional fields will become visible on the Options
page to enter information pertaining to the overtime 49. A new sheet will also appear to print the 49.
A supplementary feature for executive staff is the ability to differentiate between overtime
accrued as straight time and time and a half. Once the Executive Staff option has been set to Yes, a new
column will be visible on the Data page to allow for the selection between the two types. To best use
these new features, please fill out the Overtime 49 Information section. The fields are as follows:
Full Rank
This option is for your full rank. Do not abbreviate in this field as its
contents are transferred to the 49.
Full Command
This option is for your full command. Do not abbreviate in this field as its
contents are transferred to the 49.
CO Full Name
This option is for the name of your Commanding Officer or whoever signs
your 49s.
CO Rank
This option is for the full rank of your Commanding Officer or whoever
signs your 49s. Do not abbreviate in this field as its contents are transferred to the 49.
CO Command
This option is for the full command of your Commanding Officer or
whoever signs your 49s. Do not abbreviate in this field as its contents are transferred to the 49.
11
OT Track
User Manual
Warranty
This program comes with absolutely no warranty either expressed or implied. I am not responsible for
any negative repercussions due to errors or omissions within or created by the program. Additionally, it is the
user’s responsibility to monitor their overtime, chart days, vacation and comp time.
Support
The primary means of support are the forums available at http://www.ottrack.com. Please utilize these
and search existing threads for users who have had similar issues. Your answer may have already been supplied
by another user. If you are unable to find what you need at the website, send an email to
[email protected]. You will usually receive a response within 48 hours. When requesting support,
please provide the version number of the program you are using. Also, please describe the problem sufficiently
enough for it to be reproduced during testing. Please understand that an error with the program is not the same
as a feature request. Errors will be fixed as soon as possible. Feature requests, if feasible, may be implemented
in future versions.
OT Track is protected from changes through Excel’s password protection and through licensing. This is
in place to prevent changes to the core system. In order to provide the best possible support for the system, the
program must be secured from changes that may affect its functionality. Because of this, requests for the
unlocking password will not be granted. If you are adept at Excel and wish to make modifications to this
project, then please contact me at the above email address and we can discuss it.
12