1
3
OPERATING THE DISK DRIVE & CARTRIDGE
8631AF Controls
3
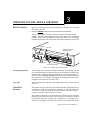
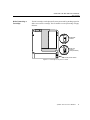
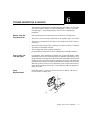
Figure 3-1 illustrates all controls and indicators required for operating
the OptiPac 8631AF.
1. Press the POWER button on the front panel of the OptiPac.
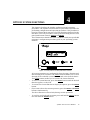
The LCD will display a self-test message and the disk drive model
number. This operation should take less than a minute. If a cartridge is
loaded, a read test will be performed. After the self-test is successfully
completed, the time, date and current ring will be displayed on the LCD.
LCD display
Error LED
Cartridge eject button
and Activity LED
Power
switch
Control buttons
Fixed disk eject button
Figure 3-1: OptiPac 8631AF front panel
Cartridge Eject Button
The cartridge eject button by default is disabled. The cartridge will not
eject when this button is depressed because the OptiPac controller has
issued a lock command to the cartridge drive. The cartridge must be
ejected using the Unload cartridge function in the LCD main menu. The
eject button can be enabled by changing the enabling the drive in the
configurations menu on the front panel.
Error LED
The Error LED turns red and stays illuminated when a system error is
detected.
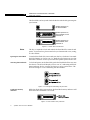
Fixed Disk
Controls
The OptiPac 8631AF contains a removable fixed disk. The fixed disk has
ten volumes called rings. Each ring is 20MB in size. The fixed disk uses
a key lock to power on and lock the drive in place. The eject button
cannot be pressed while the drive is locked.
The OptiPac is shipped to you with the drive locked in place. When the
OptiPac is powered on the drive will also power on. When the OptiPac
is on and the fixed disk is unlocked, a small letter “u” will appear on
the disk’s LCD display. The fixed disk cannot be accessed in this mode.
OptiPac 8631AF User's Manual
7