1
Satellite
®A210/A215
SeriesUser'sGuide
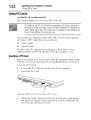
If you need assistance:
o:o Toshiba's Support Web site
pcsupport.toshiba.com
o**oToshiba Global Support Centre
Calling within the United States (800) 457-7777
Calling from outside the United States (949) 859-4273
For more information, see "If Something Goes Wrong" on
page 173 in this guide.
GMAD00132010
05/07
2
Handlingthecordon this productwill exposeyouto lead,a
chemicalknowntothe Stateof Californiato causebirth defectsor
otherreproductiveharm.Washhandsafter flandling.
Model: Satellite ®A210/A215 Series
Recordableand/orReWritableDrive(s) and
Associated Software Warranty
The computer
ReWritable
advanced
system
you purchased
optical media drive(s)
data storage
may include
and associated
technologies
available.
and.or
manuals
enclosed
to do so, this product
may not function
suffer other damage.
TOSHIBA
andor
among the most
As with any new technology_
you must read and follow all set-up and usage
user guides
Recordable
software,
instructions
or provided
properly
AMERICA
in the applicable
electronically.
If you fail
and you may lose data or
INFORMATION
SYSTEMS
INC. ("TOSHIBA"),
ITS AFFILIATES
AND SUPPLIERS
DO NOT
WARRANT
THAT OPERATION
OF THE PRODUCT
WILL BE
UNINTERRUPTED
ITS AFFILIATES
OR ERROR
AND
RESPONSIBILITY
FREE.
SUPPLIERS
FOR DAMAGE
YOU AGREE
SHALL
THAT TOSHIBA
HAVE NO
TO OR LOSS OF ANY BUSINESS
PROFITS,
PROGRAMS,
DATA, NETWORK
REMOVABLE
STORAGE
MEDIA ARISING
FROM THE USE OF THE PRODUCT,
POSSIBILITY
THEREOF.
SYSTEMS OR
OUT OF OR RESULTING
EVEN
IF ADVISED
OF THE
Protection of Stored Data
For yore" important
data, please make periodic back-up copies of all the data
stored on the hard disk o1"other storage devices as a precaution
_ailures, alteration, or loss of the data. IF YOUR
against possible
DATA IS ALTERED
OR
LOST DUE TO ANY TROUBLE,
FAILURE OR MALFUNCTION
OF
THE HARD DISK DRIVE OR OTHER STORAGE
DEVICES AND THE
DATA CANNOT
BE RECOVERED,
TOSHIBA
SHALL
NOT BE
LIABLE
FOR ANY DAMAGE OR LOSS OF DATA, OR ANY OTHER
DAMAGE RESULTING
THEREFROM.
WHEN COPYING
OR
TRANSFERRING
YOUR DATA, PLEASE BE SURE
WHETHER
THE DATA HAS BEEN SUCCESSFULLY
TRANSFERRED.
FAILURE
TOSHIBA
TO COPY
DISCLAIMS
OR TRANSFER
TO CONFIRM
COPIED OR
ANY LIABILITY
FOR THE
THE DATA CORRECTLY
3
Critical Applications
The computer
"Critical
you have purchased
applications"
connections
is not designed
means lil_ support
to inlplanted
for any "critical applications."
systems, medical applications,
medical devices, commercial
thcilities or systems or any other applications
injm T to persons or loss of lil_ or catastrophic
transportation,
nuclear
where product £ailure could lead to
property damage.
ACCORD|NGLY,
TOSHIBA,
ITS AFFILIATES
AND SUPPLIERS
DISCLAIM
ANY AND ALL LIABILITY
ARISING OUT OF THE USE
OF THE
COMPUTER
APPLICATIONS.
PRODUCTS
1N ANY CRITICAL
IF YOU USE THE COMPUTER
CRITICAL
APPLICATION,
FULL RESPONSIBILITY
PRODUCTS
YOU, AND NOT TOSHIBA,
FOR SUCH USE.
IN A
ASSUME
FCC Notice "Declaration of ConformityInformation"
This equipment
has been tested and found to comply with the liruits lbr a ('lass B
digital device, pursuant to Part 15 of the FCC rules. These limits are designed to
provide reasonable
installation.
protection
against hamfful intertErenee in a residential
This equipment generates, uses and can radiate radio frequency enm'gy and, if not
installed and used in accordance with the instructions, it may cause hamfful
interference to radio colranunications. However, there is no guarantee that
interference will not occur in a partienlar insta!lation. If this equipment does
cause harmful interl_rence to radio or television reception, which can be
determined by turuing the equipment offand on, the user is enenuraged to try to
con'ect the intm'ference by one or more of the following measures:
°5. Reorient o1"relocate the receiving antenna.
°5. Increase the sep_ation between the equipruent and receivm'.
°5. Colmeet the equipment to an outlet on a circuit different from that to which
the receiver is colmected.
°:o Consult the dealer or an experienced radio TV teclmician lbr help.
NOTE
OnlyPeripherals
complying
withtheFCCClassBlimitsmaybeattached
tothis
equipment.
Operation
withnoncompliant
peripherals
or peripherals
not
recommended
byToshibaislikelytoresultininterferenceto
radioandTVreception.
Shielded
cablesmustbeusedbetween
theexternal
devices
andthecomputer's
parallelport,monitorport,USBport,PS/2port¢, i.LINK®port,HDMIout portand
microphone
jack(Portavailabilitydependsonmodelselected).
Changes
or
modifications
madetothisequipment
notexpressly
approved
byToshibaor parties
authorized
byToshibacouldvoidtheuser'sauthoritytooperate
theequipment.
4
This device complies with Part 15 of the FCC Rules. Operation
following
is subject to the
m'o conditions:
°.*o This device may not cause harmful interference.
o.*o This device nmst accept any interlErence received,
including interfhrenee
that may cause undesired operation.
Contact either:
°.*o Toshiba's
°:o
Support Web site at pcsupport.toshiba.com.
Or call the Toshiba Global Support Centre:
Within
the United
Outside
States
the United
at (800) 457-7777
States at (949) 859-4273
IndustryCanadaRequirement
This ('lass B digital apparatus
Cet appareil numdrique
Canada.
complies with Canadian
de la classe Best confonnd
ICES-003.
it la nonne NMB-003
du
FCCrequirements
The following information
internal modems.
This equipment
equipment
is pursuant to FCC CFR 47, Part 68 and refers to
complies with Part 68 of the FCC roles. On the bottom of this
is a label that contains, among other mfomlation,
number and ringer equivalence
the infbnnation
the FCC registration
munber (REN) _br this equipment.
nmst be provided
The modem connects to the telephone
USOC RJ11C.
line by means of a standard jack called the
A plug and jack used to connect this equipmmat to the premises
telephone
network must comply with the applicable
requh'ements
compatible
wiring and
FCC part 68 rules and
adopted by the ACTA. It is desimaed to be connected
to a
modular jack that is also compliant.
The REN is used to determine
telephone
If requested,
to the telephone company.
line. Excessive
the number of devices that may be connected
REiNs on a telephone
ringing m response to an incoming
to a
line may result m the devices not
call. In most but not all areas, the snm of
RENs should not exceed five (5.0). To be celtain of the nunther of devices that
may be connected
telephone
to a line, as detm'mmed by the total REiNs, contact the local
company. For products approved after July 23, 2001, the REN fbr this
product is part of the product idmatifier that has the format
US:AAAEQ#:#TXXZxLX.
The digits represented
by the ## are the REiN without a
decimal point (e.g., 03 is a REiN of 0.3). For earlier products,
separately
shown on the label.
the REN is
5
Connection to party line service is subject to state tariff;. Contact the state public
utility conmlission, public service commission or corporation commission thr
mfonnation.
TelephoneCompany Procedures
The goal of the telephone company
is to provide you with the best service it can.
In order to do this, it may occasionally
their equipment,
operations
service or the operation
be necessal y lbr then1 to make changes in
or procedures.
of your equipment,
If these changes mighi affect your
the telephone
company will give you
notice, in writing, to allow you to make any changes necessm T to maintain
uninten'upted
sel-vice.
If Problems Arise
If this equipment
causes harm to the telephone network,
the telephone
will notify you in a&:ance that temporm T discontinuance
required. But if advanced
notify the customer
file a complaint
the telephone
company will
as soon as possible. Also, you will be advised of your right to
with the FCC if you believe it is necessm T.
If trouble is experienced
information,
notice is not practical,
company
of service may be
with this equipment,
for repair or limited warranty
please contact Toshiba Colporation,
Toshiba America Intbrmation
Systems, Inc. or an authorized representative of Toshiba, or the Toshiba Support
Centre within the United States at (800) 457-7777 or Outside the United States at
(949) 859-4273.
telephone
If the equipment
company
is causing harm to the telephone neV,vork, the
may request that you disconnect
the equipment
until the
problem is resolved.
Disconnection
If you should ever decide to permanently
present line, please call the tel@one
disconnect
your modem from its
company and let them know of this change.
FaxBranding
The Telephone Consumer
person to use a computer
Protection
Act of 1991 makes it nnlawful
o1"other electronic device, including
send any message nnless such message
bottom of each transmNed
sending the message
of the business
the date
or other entity, or other
and the telephone number
of the sending
machine
or such business, other entity, o1"individual. (The telephone
provided
may not be a 900 number or any other number Ibr which charges
exceed local or long-distance
In order to pro_am
software instructions
transmission
this inlbrmation
to
clearly contains in a margin at the top or
page or on the first page of the transmission,
and time it is sent and an identification
individual
for any
Fax machines,
number
charges.)
into your lhx transmission,
installed on this computer.
relh" to the l'ax
6
Alarm Equipment
If your home has specially
wired alaml equipment
line, ensure the installation of this equipment
equipment.
connected
to the telephone
does not disable your alarm
If you have questions about what will disable alaml equipment,
consult your telephone company
or a qualified
installer.
Instructions for IC CS-03 Certified Equipment
1
NOTICE: The Industry Canada label identifies certified equipment.
This certification
means that the equipment meets certain
telecommunications
network protective,
operational
and safety
requirements
as prescribed
in the appropriate
Terminal Equipment
Technical Requirements
document(s).
The Department
does not
guarantee the equipment will operate to the user's satisfaction.
Belbre installing this equipment, users should ensure that it is permissible to
be comaected to the facilities of the local telecommunications
company. The
equipment must also be installed using an acceptable method of connection.
The customer should be aware that compliance with the above conditions
may not prevent de m'adation of service in some situations.
Repairs to certified equipment should be coordinated by a representative
designated by the supplier. Any repairs o1"alterations made by the user to
this equipment, o1"equipment malfunctions, may give the
telecomnmnications
company cause to request the user to disconnect the
equipmmat.
Users should ensure for theh" own protection that the electrical _m'ound
colmections of the power utility, telephone lines and internal metallic water
pipe system, if present, are colmected together. This precaution may be
particularly important in rural areas.
Caution: Users should not attempt to make such connections themselves,
but should contact the appropriate electric inspection authority, or
electrician, as appropriate.
2
The user manual of analog eqnipment must contain the equipment's
Ringer Equivalence
Number (REIN) and an explanation
notice similar
to the following:
The Ringer Equivalence Number
label affixed to your computer.
(REIN) of this device can be fbund on the
NOTICE: The Ringer Equivalence Number (PEN') assigned to each
terminal device provides an indication of the maximum number of
temlinals allowed to be colmected to a telephone interface. The temlmation
on an mter_ace may consist of any combination of devices subject only to
the requirement that the sum of the Ringer Equivalence Numbers of all the
devices does not exceed 5.
3
The standard connecting
an'angement
(telephone
eqnipment
is jack type(s): USOC RJ11C.
jack type) for this
7
Wireless Interoperability
The TOSHIBA Wireless LAiN Mini PCI Card products are designed to be
interoperable with any wireless LAiN product that is based on Direct Sequence
Spread Spectrum (DSSS) radio technology, and is compliant to:
°**o The IEEE 802.11 Standard on Wireless LANs (Revision AB/G), as defined
and approved by the Institute of Electrical and Electronics Engineers.
°**o The Wireless Fidelity (Wi-Fi a')certification as defined by the Wi-Fi
Alliance. The "Wi-Fi CERTIFIED" logo is a certification mark of the Wi-Fi
Alliance.
Bluetoot/PandWirelessLANdevicesoperate
withinthe sameradiofrequency
rangeandmayinterferewithoneanother.Ifyou useBluetoothandWireless
LANdevicessimultaneously,
youmayoccasionallyexperience
a lessthan
optimalnetworkperformance
or evenloseyournetworkconnection.
If youshouldexperienceanysuchproblem,immediatelyturn offyour
Bluetoothor WirelessLANdevice.
PleasecontactToshibacomputerproductsupporton Website
http://www.toshiba-europe.com/computers/tnt/bluetooth.htm
inEuropeor
pcsupport.toshiba.com
inthe UnitedStatesfor moreinformation.
RadioFrequencyInterferenceRequirements
Thisdeviceis restrictedto indoorusedueto itsoperationinthe 5.15GHzto
5.25GHzfrequencyrange.FCCrequiresthis productto beusedindoors
for
frequencyrange5.15GHzto 5.25GHzto reducethe potentialforharmful
interference
to co-channelMobileSatellitesystems.
Highpowerradarsareallocatedas primaryusersofthe 5.25GHzto 5.35
GHzand5.65GHzto 5.85GHzbands.Theseradarstationscancause
interference
withand/ordamagethis device.
Wireless LAN andYourHealth
Wireless LAN products,
electromagnetic
like other radio devices, mnit radio frequency
energy. The level of enerw
emitted by Wireless LAN devices
however is far much less than the electromam_etic
devices like fbr example
energy mnitted by wireless
mobile phones.
Because Wireless LAN products operate within the guidelines
lbund in radio
fi'equency safety standards and recommm_dations,
believes Wireless
LAN is safe for use by consumers.
the consensus
TOSHIBA
These standards and recolnmendations
of the scientific comlnunity
and result from deliberations
and committees of scientists who continually
research literature.
reflect
of panels
review and intelpret the extensive
8
In some situations
by the proprietor
organization.
or envirolmlents,
the use of Wireless EAN may be restricted
of the building or responsible
representatives
of the
These situations may lbr example include:
•5°
Using the Wh'eless EAN equipment
•5°
In any other enviro_mlent where the risk of interl_renee
services is perceived
or identified
on board airplanes, or
to other devices or
as harmful.
If you are uncertain of the policy that applies on the use of wireless devices in a
specific organization
authorization
or envirolmlent
(e.g. airports), you are encouraged
to ask lbr
to use the V_ireless LAN device prior to turning on the equipment.
Exposureto Radio Frequency Radiation
The radiated output power of the TOSHIBA Wireless LAN Mini PCI Card is
far below the FCC radio frequency exposure limits. Nevertheless, the
TOSHIBAWireless LAN Mini PCI Card shall be used in such a manner that
the potential for human contact during normal operation is minimized. The
antenna(s) used for this transmitter must not be co-located or operating in
conjunction with any other antenna or transmitter.
Regulatory Information
The TOSHIBA
accordance
Wireless LAN Mini PCI Card must be installed and used in strict
with the manuihcturer's
documentation
following
instructions
as described
in the user
that comes with the product. This device complies with the
radio li_equeney and safety standards.
Canada - Industry Canada (IC)
This device complies with RSS 210 of Industry Canada.
Theinstallerofthisradioequipment
mustensure
thattheantenna
islocated
orpointedsuchthatit doesnotemitRFfieldinexcess
of HealthCanada
limitsforthegeneral
population;
consultSafety
Code6,obtainable
from
HealthCanada's
Websitewww.hc-sc.gc.ca/rpb.
TheRFdeviceshallnotbe
co-located
withanyothertransmitter
thathasnotbeentestedwiththis
device.
Operation
is subject to the lbllowing
cause interl_'ence,
two conditions: (1) this device may not
and (2) this device must accept any interference,
interl_ence
that may cause undesh'ed
Uutilisation
de ce dispositif est soumis anx deux conditions
doit pas produire
de brouillage
et (2) l'utilisateur
accepter tout brouillage radiodlectrique
compromettre
operation
son _bnctiolmement.
including
of this device.
suivantes: (1) il ne
du dispositif doit _tre pr_t
re,u, marne s'il est susceptible
de
9
The teml "IC" before the equipment certification number only signifies that the
Industry Canada teclmical specifications were met.
To prevant radio interI_enee to the licensed so'vice, this device is intanded to be
operated indoors and away from windows to provide maxinmm shielding.
Equipmant (or its transmit antenna) that is installed outdoors is subject to
licensing.
Pour empecher que cet appareil cause du brouillage an service Ihisant l'objet
d'une licence, il dolt etre utilize a l'interieur et devrait etre place loin des fanetres
afin de Foumier un ecram de blindage maximal. Si le matriel (ou son antenne
d'emission) est installe a l'exterieur, il doit fake l'objet d'une licanee.
ON I Thisdeviceis restrictedto indoorusedueto itsoperationinthe 5.15GHzto
5.25GHzfrequencyrange.IndustryCanadarequiresthis productto be used
indoorsfor frequencyrange5.15GHzto 5.25GHzto reducethe potentialfor
harmfulinterierenceto co-channelMobileSatellitesystems.
Highpowerradarsareallocatedas primaryusersofthe 5.25GHzto 5.35
GHzand5.65GHzto 5.85GHzbands.Theseradarstationscancause
intederencewithand/ordamagethis device.
EU Declaration of Conformity
TOSHIBA
declares that this product conforms
Intbrmation:
_
Supplementary
to the lbllowing
Stand_ds:
requirements of the Low Voltage
Directive 7._ _._.EE(, the EMC Directive
*The product andor
complies
with the Directive
89336.EEC
the R&TTE
1999 5/EC.
This product is canting the CE-Mark in accordance with the related European
Directives. The party responsible for CE-Marking is TOSHIBA Europe (hnbH,
Hammfelddanlm 8, 41460 Neuss, Germany.
VCCI Class B Information
I.=._d
< O _ x B N@}.:,t{,_NN"dI_o
z. ®_NI;;:.
_NN_-d_,Nt
r,$ _- ,:'::
10
ModemWarningNotice
ConformityStatement
The equipment
European
has been approved to [Commission
single terminal connection
Decision
"CTR21"]
fur pan-
to the Public Switched Telephone
Network
(PSTN).
However,
due to diligences
cotmtries'regions
of successful
PSTNs wovided
operation on every PSTN network termination
In the event of problems,
instance.
NOTE
between the individual
in difi_ent
the approval does not, of itself give an unconditional
assurance
point.
you should contact your equipment
supplier m the first
TheaboveCaution
information
applies
to products
thatoperate
withan
802.11
adevice.
Taiwan
Article 14
Unless approved,
for any model accredited
low power radio frequency
electric
machine1 T, any company, tradm" o1"user shall not change the frequency,
increase the power or change the features and functions of the original desiNa.
Article 17
Any use of low power radio frequency
aviation safety and interl_e
electric machinery
with legal communications.
shall not aflhet
In the event
inter_hrence is caused, the use of such electric machinery
shall be immediately
discontinued.
only when they are
modified
Operation
of such products can be resumed
and can no longer cause interference.
The legal communications mentioned in the above item refer to radio
conmmnications opm'ated in accordance with teleconmmnication laws and
regulations.
Low power radio frequency electric machine1T shall resist against interference
from legal comnmnications o1"from industrial, scientific and medical radio
emission electric machinery.
Using this Equipment in Japan
In Japan, the li'equeney
bandwidth
of 2,400 MHz to 2,483.5 MHz for second
gmaeration low-powm" data comnmnication
systems such as this equipmmat
overlaps that of mobile object identification
specified low-powm" radio station).
systems _remises
radio station and
11
1. Sticker
Please put the lbllowing
sticker on devices incorporating
this product.
f
The
frequency
same
range
bandwidth
as industrial
devices,
specified
microwave
low power
systems
(RFID)
1 Before
used
using
of this equipment
devices,
may operate
scientific
devices,
within
the
"_
medical
ovens,
licensed
radio stations
and non licensed
radio stations
for mobile object
identification
in factory
product
lines
this equipment,
ensure
that it does
any of the equipment
listed
(Other
Radio
Stations)
not interfere
with
above
2
If this equipment
causes
RF interference
to other radio stations,
promptly
change
the frequency
being used, change
the location
of use, or turn off the source of emissions
3
Contact
caused
TOSHIBA
Direct PC if you have problems
by this product
to Other Radio Stations
with
interference
2. Indication
The indication shown below appears on this equipment.
(1)
(2) (3)
2.4DSOF4i
(4)
1
2.4: This equipment uses a frequency of 2.4 GHz.
2
DS: This equipment uses DS-SS modulation.
OF: This equipment uses OFDM modulation.
3
The interference
4
lira _ roll This eqnipment uses a frequency bandwidth from
2,400 MHz to 2,483.5 MHz.
It is possible
3. TOSHIBA
Monday
range
of this equipment
is less than 40m.
to avoid the band of mobile object identification
systems.
Direct PC
Friday: 10:00
17:00
Toll Free Tel: 0120-15-1048
Direct Dial. 0,_-3457-4850
Fax. 0o-M57-4868
Device Authorization
This device obtains the Technical Regulation
Co_bmlity
Technical
and it belongs
Conditions
radio equipment
stipulated
Compliance
of low-power
data comlnunication
Certification
and the
to the device class of
system radio station
in the Radio Law and the Telecolranunications
The Name of the radio equipment:
computer
Approval,
retEr to the equipment
Business Law of Japan.
label provided
on the
12
JAPAN" APPROVALS
INSTITUTE
FOR TELECOMMUNICATIONS
EQUIPMENT
Approval
Number:
DO 1-i 128JP
TELECOM ENGINEERING
03GZDA0017
The following restrictions
°.*o Do not disassmnble
CENTER
Approval Number:
03NY.A0018,
apply:
or modil_ the device.
°**o Do not install the embedded
wh'eless module
into other device.
°**o 5.17 GHz to 5.23 GHz fbr indoor use only.
RadioApprovalsfor Wireless Devices
NOTE
Tile following information is dependent on what type of wireless device is in
your computer. Not all devices are available on all models.
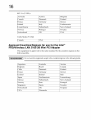
Approved Countries/Regions for use for the Atheros
AR5BMB-43/44 and AR5BMB5 Mini PCI Wireless Network
Adapters
This equipment is approved to the radio standard by the countries,regions in the
following table.
Don0tusethisequipmentexceptinthec0untries/regi0ns
inthe[0110wing
table.
NOTE
This device works on passive scan only.
A peer-to-peer mode is not available in 802.11a and Turbo Mode.
802.11 b (2.4 GHz)
Australia
Canada
Austria
Delmlark
Belgium
Finland
France
Germany
Greece
h'eland
Luxembourg
Italy
Netherlands
Liechtm_stein
New Zealand
Norway
Switzerland
Portugal
UK
Sweden
USA
13
Europe- Restrictions
for useof 2.4 6Hz Frequencies
in
European
CommunityCountries
Belgi_
For private usage outside buildings aeross public _m'onnds over less than
Belgique:
300m no special registration
IBPT_IPT
with IBPT BIPT is required. Registration
m'ounds over more than 300m. For registration
contact IBPT BIPT.
and license please
Voor pri,_-&gebruik buiten gebouw over publieke _oud
kleiner dan 300m geen registxatie bij BIPT.IBPT
over af;tand goter
Voor registratie
dan 300m is wel registratie
bij BIPT.IBPT
of licm_tie kunt u contact opnemen
d'un batiment,
dessus d'un espace public, aucun enregistrement
n'est ndcessaire
License required lbr outdoor installations.
procedure
im Outdoor-Bereich
genehmimmgspflichtig.
abstimmen.
Restricted
Pour les enregistrements
et
Check with reseller fbr
notwendig,
Bande de fi'&luence restremte:
respectivement)
aber nicht
1 to 7 (2400 MHz and 2454
may be used outdoors in France. Please contact
A.R.T. (http:: w_v.art-telecom.fi')
fbr applicable
procedures
to fbllow.
seuls les canaux 1- 7 (2400 et 2454 MHz
doivent etre utilisds endroits extdrieur en France. Vous
pouvez contacter l'Autoritd
de Rdm_lation des Tdldcommunications
(http: ,x_av_v.art-teleeom.fi9
pour la procddnre
fi suivre.
License required fbr indoor use. Use with outdoor installations
allowed.
E'neeessaria
la concessione
Verificare con i rivenditori
ministeriale
la wocedura
License required fbr outdoor installations.
procedure
pour
supdrieure fi 300m un
Bitte mit HSndler die Vorgehensweise
li'equency band: only channels
MHz respectively)
Nederland:
au-
to fbllo_v
AlmMdung
Italia:
nodig.
met BIPT.
Dans le cas d'une utilisation privde, il l'extdrieur
mn'egistrement aupr_s de I'IBPT est requise.
licences, veuillez contacter I'IBPT.
France:
over afstand
nodig; voor gebruik
une distance de moins de 300m. Pour une distance
Deutschland:
to
is required fbr private usage outside buildings across public
not
anche per l'uso intemo.
da segmire.
Check with reseller fbr
to fbllow.
Licentie verplicht
met verkoper
voor gebmik met buitm_antennes. Neem contact op
voor juiste procedure.
14
802.11 a (5 GHz)
Australia
Canada
Austria
Belgium
Delmlark
Finland
France
Germany
Greece
h'eland
Italy
Liechtenstein
Luxembourg
Netherlands
New Zealand
Norway
Switzerland
Portugal
Sweden
UK
USA
Turbo Mode (5 GHz)
]Canada
]USA
Europe- Restrictions
forUseof5 6HzFrequencies
in
EuropeanCommunityCountries
5150-5250 MHz 5250-5350 MHz
ChamMs:36, 40,44, ChamMs:52,56, 60,
48
64
European Comnmnity
Countries
Indoor Only
Austria
Indoor Only
5470-5725 MHz
Chalmels:100,104,108,1 t2,
t16,120,124,
I28,132,136,140
Indoor Ontdoor
O
x
x
Belgium, France,
Switzerland Lichtenstein
O
O
x
Denmark, Finland,
Germany, Greece,
Ireland, Italy,
Luxembou_,
Netherlands, Norway,
Portugal, Swedan, UK
O
O
O
Iceland, Spain
O
O
O
O: allowed
x: forbidden
o.*o To remain in contbrmanee
LAN operation,
with European
spectrum usage laws for Wh'eless
the above 2.4 GHz and 5 GHz channel limitations
apply.
The user should use the wh'eless LAN utility to check the cun'ent channel of
operation.
If operation
is occun'ing
outside of the allowable
frequancies
listed above, the user must cease operating the Wh'eless LAN at that
location and consult the local technical support staffresponsible
wireless network.
°**o The 5 GHz Turbo mode l_amre is not allowed fbr operation
European
Comlnunity
country.
for the
in any
as
15
°*'o This device nmst not be operated m ad-hoe mode using channels m the
5 GHz bands m the European Comnmnity.
Ad-hoc mode provides a dh'eet
comnmnication between two client devices without a Wireless LAN
Access Point.
°**o This device must be used with Access Points that have employed
activated a radar detection
operation
feature required *'or European
and
(;olranunity
m the 5 GHz bands. This device will operate under the control of
the Access Point in order to avoid operating on a channel occupied by any
radar system in the area. The presence of nearby ra&_r operation may result
in temporary
ra&r detection
inten'uption
of operation
of this device. The Access Point's
feature will automatically
restart operation on a chamM free
of ra&r. You may consult with the local teclmical support staffresponsible
for the wireless neV,vork to ensure the Access Point device(s) are properly
confim_red tbr European
Conmmnity
operation.
Approved Countries/Regions for use for the Atheros AR5001X
Mini PCI Wireless Network Adapter
This equipment
lbllowmg
is approved to the radio standal'd by the countries regions in the
table.
Dorl0tusethisequipmerlt
exceptinthec0untries/regi0rls
inthef011owirlg
table.
NOTE
Thisdeviceworksonpassive
scanonly.
Apeer-to-peer
modeisnotavailable
in802.11
aandTurboMode.
802. l lb (2.4 GHz)
Australia
Austria
Belgium
Canada
Delmlark
Finland
France
Ireland
Germany
(h'eece
Italy
Liechtenstein
Luxmnbourg
Netherlands
New Zealand
Norway
Switzerland
Portugal
Sweden
UK
USA
16
802.11 a (5 GHz)
Australia
Canada
Austria
Delmlark
Belgium
Finland
France
Germany
Greece
Irelarul
Euxembourg
Italy
Netherlands
Liechtenstein
New Zealand
N'orway
Switzerlarld
Portugal
UK
Sweden
USA
Turbo Mode (5 GHz)
]Canada
]USA
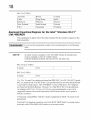
Approved Countries/Regions for use for the Intel®
PRO/Wireless LAN 2100 3B Mini PCI Adapter
This equipment
follovdng
is approved to the radio standard by the countries,regions
in the
table.
D0rl0tusethisequipmentexceptirlthec0untries/regi0ns
irlthet0110wirlg
table.
Argentina
Australia
Austria
Belgium
Brazil
Canada
Chile
Denmark
Finland
France
Germany
Greece
Iceland
Ireland
Italy
Japan
Liechtm'lstein
Luxembourg
Mexico
Netherlands
New Zealand
Norway
Peru
Pollugal
Singapore
Spain
Sweden
Switzerland
I_K
l_?rummy
USA
Venea_ela
17
Approved Countries/Regions for use for the Toshiba Mini PCI
Wireless LAN Card
This equipment
lbllowing
is approved to the radio standal'd by the countries regions in the
table.
D0n0tusethisequipmentexceptinthec0untries/regi0ns
inthef011owing
table.
Australia
Austria
Belgium
(Tanada
Denmark
Finland
France
Gemlany
(h'eeee
Hong Kong
Iceland
h'eland
Italy
Japan
Liechtenstein
Luxembourg
Malaysia
Netherlands
New Zealand
Norway
Philippines
Portugal
Singapore
Spain
Sweden
Switzerland
Thailand
UK
USA
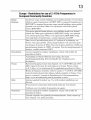
Approved Countries/Regions for use for the
Intel® PR0/Wireless 3945ABG Network Connection
This equipment
lbllowing
is approved to the radio standal'd by the countries regions in the
table.
Do not use this equipment except in the countries/regions in the following
table.
NOTE
Anadhocmodeisavailable
in Ch1-Ch11(802.11b/g),
AnInfrastructure
modeis available
inCh1-Ch11
(802.11b/g)
0h36,40,44,48,52,56,60,64,149,153,157,161,165
(802.11
a)Wake-up
on
wireless
lanfunctionis notavailable
in battery
mode.
802. l lbig (2.4 GHz)
Australia
Brunei
Canada
(TMe
Hong Kong
India
Indonesia
New Zealand
Malaysia
Saudi Arabia
Mexico
Taiwan
USA
Venezmela
Viem_l
18
802.11 a (5 GHz)
Australia
Brunei
Canada
Chile
Hong Kong
India
Indonesia
Malaysia
Mexico
New Zealand
Sandi Arabia
Taiwan
USA
Venezuela
Vietnam
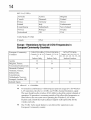
Approved Countries/Regions for the Intel ® Wireless Wi-Fi ®
Link 4965AGN
This equipment
following
is approved to the radio standard by the countries.regions
in the
table.
Donotusethisequipment
except
in thecountries/regions
inthefollowing
table.
NOTE
Anadhocmodeisavailable
in Ch1-Ch11(802.11
b/g),AnInfrastructure
modeis available
inCh1-Ch11
(802.11b/g)
0h36,40,44,48,52,56,60,64,149,153,157,161,165
(802.11
a).
802.1 lb g (2.4 GHz)
]Canada
]USA
802.11 a (5 GHz)
]Canada
]USA
11a, 1lb, 11g and l 1n wireless are based on IEEE 802.11 a, 802.11 b, 802.11 g and
802.11 n respectively.
The IEEE 802.1 in specification
has not bem_ finalized and
is enrrantly in draft release. The TOSHIBA
11a.big n Wireless LAN A@ters
are based on the Draft Release, Version 1.0, of the IEEE 802.11 n specification.
An adapter with 11a&, 11a:'b_, o1"11a,big n can connnunicate
supported formats; the actual connection
which it connects.
Connection
compatibility
on any of its
will be based on the access potht to
with the wireless
equipment
in Draft l in mode is not
guaranteed.
The Draft 1in fimction cannot be used with WEP TKIR Draft 1in mode can be
used only with WPA-PSK(AES)
mode or no security mode.
19
B/uetooth® Wire/ess Techno/ogyInteroperabi/ity
Bluetooth c_Cards from TOSHIBA are designed to be interoperable with any
product with Bluetooth wireless teclmology that is based on Frequency Hopping
Swead Spectrum tTHSS) radio technology, and is compliant to:
•5"
Bhletooth
Specification
as defined and approved by The Bluetooth
Special
Interest (h'oup.
°:"
Logo certification
Bluetooth
with Bluetooth wireless
technology
as defined by The
Special Interest Ch'oup.
B/uetoothwirelesstechnologyis a newinnovativetechnology,andTOSHIBA
hasnotconfirmedcompatibilityof its Bluetoothproductswithall computers
and/orequipmentusing BluetoothwirelesstechnologyotherthanTOSHIBA
portablecomputers.
AlwaysuseBluetoothcardsfrom TOSHIBAin orderto enablewireless
networksovertwoor more(upto atotal of seven)TOSHIBA
portable
computersusingthesecards.PleasecontactTOSHIBAcomputerproduct
supporton Website http://www.toshibaeurope.com/computers/tnt/bluetooth.htm
in Europeor
pcsupport.toshiba.com
inthe UnitedStatesfor moreinformation.
WhenyouuseBluetoothcardsfromTOSHIBAcloseto 2.4 GHzWireless
LANdevices,Bluetoothtransmissions
mightslow downor causeerrors.If
youdetectcertaininterference
whileyouuseBluetoothcardsfromTOSHIBA,
alwayschangethefrequency,moveyourcomputertothe areaoutsideof the
interference
rangeof 2.4 GHzWirelessLANdevices(40meters/43.74yards
or more)or stoptransmittingfromyour computer.PleasecontactTOSHIBA
computerproductsupporton Websitehttp://vvww.toshibaeurope.com/computers/tnt/bluetooth.htm
in Europeor
pcsupport.toshiba.com
inthe UnitedStatesfor moreinformation.
BluetoothandWirelessLANdevicesoperatewithinthesameradiofrequency
rangeandmayinterferewithoneanother.Ifyou useBluetoothandWireless
LANdevicessimultaneously,
you mayoccasionallyexperience
a lessthan
optimalnetworkperformanceor evenloseyour networkconnection.Ifyou
shouldexperience
anysuchproblem,immediatelyturnoff eitheroneofyour
Bluetoothor WirelessLAN.PleasecontactToshibacomputerproduct
supporton Website http://www.toshibaeurope.com/computers/tnt/bluetooth.htm
in Europeor
pcsupport.toshiba.com
inthe UnitedStatesfor moreinformation.
2O
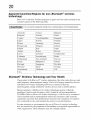
Approved Countries/Regions for use (B/uetooth ® wireless
technology)
Blm, toot/_®Card from Toshiba equipmant
countries
regions in the tbllowmg
is approved to the radio standard by the
table.
Donotusethisequipment
except
inthecountries/regions
inthefollowing
table.
Australia
Austria
Belgium
Bulgaria
Canada
China
Cyprus
Czech Republic
Delmlark
Egypt
Estonia
Finland
France
Germany
C,h-eece
Hong Kong
Hungal T
Iceland
Ireland
Italy
Japan
Jordan
Korea
Kuwait
Latvia
Lebanon
Liechtenstein
Lithuania
Luxembourg
Malta
Netherlands
New Zealand
Norway
(brian
Philippines
Poland
Portugal
Singapore
Slovakia
Slovania
Spain
Sweden
Switzerland
Thailand
UK
USA
B/uetooti_ Wireless Technology and Your Health
The products with Blm'tooth _ wireless
radio li_equeney electromagnetic
with Bluetoofl_ wireless
eleetromaN_etic
technology,
teehi_ology however is nmch less than the
anergy emitted by wireless devices such as mobile phones.
Because products with Bluetoofll wireless
guidelines
like other radio devices, emit
m_ergy. The level of anergy emitted by devices
teehnolo_
operate within the
lbund in radio fi_equency safety standards and reconmlendations,
TOSHIBA believes Bluetooth wireless technology is sal_ lbr use by consumers.
These standards and recommendations
reflect the consansus of the scientific
conmmnity
and result lix_m deliberations
who continually
In some situations
of panels and conmlittees
review and interpret the extansive
or envirolmlants,
of sciantists
research literature.
the use ofBluetooth
wh'eless teclmology
may be restricted by the proprietor of the building or responsible
of the organization. These situations may for example include:
represantatives
21
°.*° Using the equipment with Bluetooth wireless tecMology on board
ah'planes, or
°.*o In any other environment where the risk of interference to other devices or
services is perceived or identified as harmful.
If you are uncertain of the policy that applies on the use of wireless devices in a
specific organization or envh'onment (e.g. airports), you are encouraged to ask lbr
authorization to use the device with Bluetooth wireless technology prior to
mining on the equipment.
Exposureto RadioFrequencyRadiation
Theradiatedoutputpowerof the BluetoothCardfrom TOSHIBAis farbelow
the FCCradiofrequencyexposurelimits. Nevertheless,
the BluetoothCard
fromTOSHIBAshallbeusedin sucha mannerthatthe potentialfor human
contactduringnormaloperationis minimized.
Regulatorystatements
This product complies with any mandatory
product specification
in any
country region where the product is sold. In addition, the product complies with
the _bllowing:
EuropeanUnion(EU) and EFTA
This equipment
provided
complies with the R&TTE
directive
1(
and has been
with the CE mark accordingly.
Canada-- IndustryCanada(IC)
This device complies with RSS 2 l0 of Industry Canada.
Taiwan
Article 14
Unless approved,
for any model accredited
low power radio frequency
electric machinery, any company, trader or user shall not change the
fi_equency, increase the power or change the features and functions of the
original design.
Article l 7
Any use of low power radio li_equency electric machine1 y shall not affect
aviation salEty and interfere with legal conmmnications.
interlkrence
immediately
In the event
is caused, the use of such electric machine1 y shall be
discontinued. Operation of such products can be resumed
only when they are modified
and can no longer cause interference.
22
The legal communications mentioned in the above item refer to radio
conmmnications operated in accordance with teleconmmnication laws and
regulations.
Low power radio frequency electric machine17 shall resist against interference
from legal comnmnications or from industlial, scientific and medical radio
emission electric machinery.
Using this Equipment in Japan
In Japan, the li_equency bandwidth
generation
overlaps
low-power
of 2,400 MHz to 2,483.5 MHz for second
data comnmnication
systems such as this equipment
that of mobile object identification
specified low-power
systems _remises
radio station and
radio station).
i. Sticker
Please put the lbllowing
sticker on devices incorporating
f
this product.
-.,
The frequency
bandwidth
of this equipment
same range as industrial
devices,
scientific
devices,
microwave
ovens,
licensed
radio
specified
systems
low power
radio stations
for mobile
(RFID} used in factory
product
lines
1 Before
using
this equipment,
any of the equipment
2 If this equipment
Contact
caused
listed
causes
promptly
change the
of use, or turn off the
3
may operate
within the
devices,
medical
stations
and non licensed
ensure
object
(Other
that it does
not interfere
with
above
RF interference
to other
frequency
being used,
source of emissions
radio
change
TOSHIBA
Direct PC if you have problems
by this product
to Other Radio Stations
,,..
identification
Radio Stations)
stations,
the location
with
interference
./
2. Indication
The indication
(1)
(2)
shown below appears on this equipment.
(3)
2.4FH1
(4)
1
2.4: This equipment uses a frequency of 2.4 GHz.
2
FH: This equipment uses FH-SS modulation.
3
The interference range of this equipment is less than 10m.
4
This equipment uses a frequency bandwidth from 2,400 MHz to
2,483.5 MHz. It is impossible to avoid the band of mobile object
identification systems.
23
3. TOSHIBA Direct PC
Monday
Friday: 10:00
17:00
Toll Free Tel: 0120-15-1048
Direct Dial: 03-3457-4850
Fax: 03-3457-4868
Device Authorization
This device obtains the Technical Regulation Con_brmity Certification, and it
belongs to the device class of radio equipment of low-power data conmmnication
system radio station stipulated in the Radio Law of Japan.
The Name of the radio equipment: EYXF2CS
TELECOM ENGINEERING CENTER
Approval Number: 01NYDA 1305
The following restrictions apply:
Do not disassemble or modify the device.
+
Do not install the embedded wireless module into other device.
Optical Drive Safety Instructions
TheHDDVD-ROMandmulti-functiondrivesemploya lasersystem.To
ensureproperuseof this product,pleasereadthis instructionmanual
carefullyandretainforfuturereference.
Neveraitempttodisassemble,
adjustor repaira HDDVD,CD/DVDdrive,
CD-RWdrive,Multi-driveor anyotheropticaldrive.Youcoulddamagethedrive.
Youwouldalsobeexposed
to laserlightorothersafetyhazards,
resulting
inserious
injury.Alwayscontactanauthorized
Toshiba
serviceprovider,
if anyrepairor
adjustment
isrequired.
24
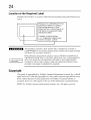
Location of the RequiredLabel
(Sample shown below. Location
of the label and manufacturing
in_bnnation
may
vary.)
PRODUCT IS CERTIFIED BY THE
MANUFACTURER TO COMPLY
WITH DHHS RULES 21 CFR
SUBCHAPTER J APPLICABLE AT
THE DATE OF MANUFACTURE.
MANUFACTURED:
I
o
1-1-1, SHIBAURA, MINATO-KU,
TOKYO 105-8001, JAPAN
TOSHIBA CORPOR_ION
Thisappliance
contains
a lasersystem
andisclassified
asa CLASS
1
LASER
PRODUCT.
Tousethismodelproperly,
readtheuser's
guidecarefully
andkeepitforyourfuturereference.
Never
attempttodisassemble,
adjustorrepaira HDDVD,CD/DVD
drive,
CD-RW
drive,Multi-driveoranyotheropticaldrive.Youcoulddamage
the
drive.Youwouldalsobeexposed
to laserlightor othersafetyhazards,
resultinginseriousinjury.Alwayscontact
anauthorized
Toshiba
service
provider,
if anyrepairoradjustment
is required.
Copyright
This _ide is copyrightedby ToshibaAmericaInformationSystems,Inc.with all
rights reserved.Underthe copyright laws, this guide cannotbe reproduced in any
form withoutthe prior written permission of Toshiba.No patent liability is
assumed, however, with respect to the use of the informationcontainedherein.
©2007by ToshibaAmericaIntbnnation Systems, Inc. All rights reserved.
25
ExportAdministrationRegulation
This document
contains technical data that may be controlled
Export Administration
Regulations,
under the U.S.
and may be subject to the approval of the
U.S. Department
of Connnerce
in contravention
of the U.S. Export Administration
prior to export. Any export, directly or indirectly,
The thfbrmation
contained
Regulations
is prohibited.
Notice
product specifications,
TOSHIBA
in this manual,
including but not limited to any
is subject to change without notice.
CORPORATION
AND TOSHIBA
AMERICA
INFORMATION
SYSTEMS,
INC. (TOSHIBA)
PROVIDES
NO
WARRANTY
WITH REGARD
TO THIS MANUAL
OR ANY
OTHER
INFORMATION
CONTAINED
HEREIN AND HEREBY
EXPRESSLY
DISCLAIMS
MERCHANTABILITY
PURPOSE
WITH
ANY IMPLIED
OR FITNESS
REGARD
TECHNICAL
OR TYPOGRAPHICAL
CONTAINED
HEREIN
PRODUCT
TOSHIBA
CONSEQUENTIAL,
ANY DAMAGES
FROM ANY
ERRORS
OR FOR DISCREPANCIES
AND THE MANUAL.
BE LIABLE
OF
PARTICULAR
TO ANY OF THE FOREGOING.
TOSHIBA
ASSUMES
NO LIABILITY
FOR
INCURRED
DIRECTLY
OR INDIRECTLY
THE
W)kRRANTIES
FOR ANY
OR OMISSIONS
BETWEEN
IN NO EVENT
SHALL
FOR ANY INCIDENTAL,
SPECIAL,
OR EXEMPLARY
DAMAGES,
WHETHER
BASED ON TORT, CONTRACT
OR OTHERWISE,
ARISING
OUT OF OR IN CONNECTION
WITH THIS MANUAL
OR ANY OTHER
USE THEREOE
INFORMATION
CONTAINED
HEREIN
OR THE
26
Trademarks
Satellite is a registered
trademark
of Toshiba America
Infbmlation
Systems, Inc.
and.or Toshiba Corporation.
Microsoft,
Windows,
trademarks
and Windows
of Microsoft
Vista are either registered
Corporation
DirectX, Active Desktop, DirectShow,
trademarks
of Microsoft
ConftgFree
is a trademark
Wi-Fi is a registered
trademark
is a trademark
of the Wi-Fi Alliance.
and Pentium are trademarks
or its subsidiaries
of Synaptics,
are either registered
Systems Incorporated
in the Lnited States andor
Memory
trademarks
is a trademark
or trademarks
of Adobe
other countries.
of PCMCIA.
Stick Memo13z Stick PRO, and i.LINK ,aretrademarks
or registered
of Sony Corporation.
MultiMediaCard
Bluetooth
trademarks
T
Secure Digital and SD are trademarks
xD-Picmre
or registered
in the United States and other
Inc.
Adobe and Photoshop
ExpressCard
Media are registered
of Toshiba Corporation.
of Intel Corporation
TouchPad
and Windows
or
other countries.
Corporation.
Intel, Intel Core, Celeron, Centrino
trademarks
countries.
trademarks
in the United States andor
of SD Card Association.
and MMC are trademarks
Card is a trademark
of MultiMediaCard
of Fuji Photo Fihn, Co., Ltd.
word mark and logos are owned by the Bluetooth
SIG Inc. and any
use of such marks by Toshiba is under license. Other trademarks
are those of theh" respective
and trade names
owners.
All other brand and product names are trademarks
their respective
Association.
or registered trademarks
of
companies.
ComputerDisposalInformation
This product contains mercury. Disposal of this product may be regulated due to
envirolmlental
considerations.
For disposal,
please contact your local govenmlent
v, ww.eiae.org.
reuse or recycling information,
or the Electronic
Industries
Alliance at
Contents
Introduction................................................................................
35
This guide ...............................................................
Safety icons ............................................................
Other icons used ...............................................
Other documentation ..............................................
Service options .......................................................
36
37
37
38
38
Chapter1: GettingStarted.........................................................
39
Selecting a place to work ........................................ 39
Creating a computer-friendly environment ........ 39
Keeping yourself comfortable ........................... 40
Precautions ....................................................... 40
Important information on your computer's
cooling fan .................................................. 41
Setting up your computer ....................................... 42
Setting up your software ................................... 42
Registering your computer with Toshiba ................ 43
Adding optional external devices ............................. 43
Connecting to a power source ................................ 44
Charging the main battery ....................................... 46
27
8
Contents
Using the computer for the first time ...................... 47
Opening the display panel ................................. 47
Your computer's features and specifications ....48
Turning on the power ........................................ 48
Adding memory (optional) ...................................... 49
Installing a memory module ............................. 49
Removing a memory module ............................ 55
Checking total memory ..................................... 56
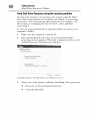
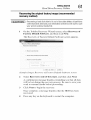
Hard Drive Recovery Utilities .................................. 57
Creating Recovery CDs/DVDs ........................... 58
Hard Disk Drive Recovery options .................... 59
Hard Disk Drive Recovery using the
Recovery media .......................................... 64
Installing drivers and applications ..................... 65
Using the TouchPad TM ............................................. 65
Scrolling with the TouchPad TM .......................... 66
Control buttons ................................................. 66
Disabling or enabling the TouchPad TM .............. 66
Using the Dual Mode Pad ....................................... 67
Using Dual Mode .............................................. 67
Using external display devices ................................ 69
Directing the display output when you
turn on the computer .................................. 70
Adjusting the quality of the external display ...... 71
Using an external keyboard ..................................... 71
Using a mouse ........................................................ 72
Connecting a printer ............................................... 72
Setting up a printer ........................................... 73
Connecting an optional external diskette drive ........ 73
Turning off the computer ........................................ 74
Options for turning off the computer ................ 74
Using the Shut Down command ....................... 77
Using and configuring Hibernation mode ......... 79
Using and configuring Sleep mode ................... 81
Closing the display panel .................................. 84
Customizing your computer's settings .................... 84
29
Caring for your computer ........................................
Cleaning the computer ......................................
Moving the computer ........................................
Using a computer lock ......................................
84
84
84
85
Chapter2: Learningthe Basics.................................................
86
Computing tips ....................................................... 86
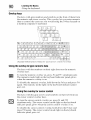
Using the keyboard ................................................. 88
Character keys .................................................. 88
Making your keyboard emulate a full-size
keyboard ..................................................... 88
Ctrl, Fn, and AIt keys ......................................... 89
Function keys .................................................... 89
Special Windows ® keys .................................... 89
Overlay keys ...................................................... 90
Using the overlay to type numeric data ............. 90
Starting a program .................................................. 91
Starting a program from the Start menu ........... 91
Starting a program from Windows ® Explorer ...92
Starting a program using the Start
Search field ................................................. 93
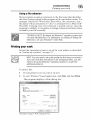
Saving your work .................................................... 93
Printing your work .................................................. 95
Backing up your work ............................................. 96
Restoring your work ......................................... 96
Using the optical drive ............................................ 97
Optical drive components ................................. 97
Media control buttons ....................................... 98
Inserting a compact disc ................................... 99
Playing an audio CD........................................ 100
Playing optical media ...................................... 101
Creating a CD/DVD.......................................... 102
Removing a disc with the computer on ........... 102
Removing a disc with the computer off .......... 103
Caring for CD or DVD discs ............................ 103
Toshiba's online resources ................................... 103
0
Contents
Chapter3: MobileComputing.................................................
104
Toshiba's energy-saver design .............................. 104
Running the computer on battery power .............. 104
Battery Notice ................................................. 105
Power management ........................................ 106
Using additional batteries ............................... 106
Charging batteries ................................................. 106
Charging the main battery ............................... 107
Charging the RTC battery ................................ 107
Monitoring main battery power ............................. 108
Determining remaining battery power ............. 110
What to do when the main battery runs low ...110
Setting battery notifications ............................ 111
Conserving battery power ............................... 112
Power Plans .................................................... 113
Using a hot key to set the Power Plan............. 114
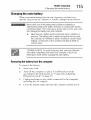
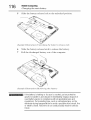
Changing the main battery .................................... 115
Removing the battery from the computer ....... 115
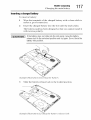
Inserting a charged battery ............................. 117
Taking care of your battery ................................... 118
Safety precautions .......................................... 118
Maintaining your battery ................................. 119
Disposing of used batteries .................................. 120
Traveling tips ........................................................ 121
Chapter4: ExploringYourComputer'sFeatures...................
122
Exploring the desktop ........................................... 122
Finding your way around the desktop ............. 123
Setting up for communications ............................. 125
Connecting a modem to a telephone line ........ 126
Connecting your computer to a network ......... 127
An overview of using the Internet ......................... 129
The Internet .................................................... 130
The World Wide Web ...................................... 130
Internet Service Providers ............................... 130
Connecting to the Internet .............................. 130
31
Surfing the Internet ......................................... 131
Internet features .............................................. 131
Uploading to, and downloading files
from, the Internet ...................................... 132
Exploring audio features ....................................... 132
Recording sounds ........................................... 132
Using external speakers or headphones .......... 133
Web Cam .............................................................. 133
Using PC Cards ..................................................... 134
Inserting a PC Card ......................................... 134
Removing a PC Card ....................................... 135
Setting up a PC Card for your computer ......... 135
Using an ExpressCardTM ........................................ 136
Inserting an ExpressCard TM ............................. 136
Removing an ExpressCard TM ........................... 136
Using the Bridge Media Adapter Slot .................... 137
Inserting memory media ................................. 138
Removing memory media ............................... 138
Using the i.LINK° port .......................................... 139
Chapter5: ToshibaUtilities......................................................
140
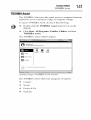
TOSHIBA Assist .................................................... 141
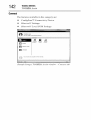
Connect ........................................................... 142
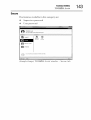
Secure ............................................................. 143
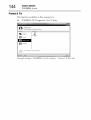
Protect & Fix ................................................... 144
Optimize .......................................................... 145
TOSHIBA Application Installer ............................... 146
Setting passwords ................................................ 147
Using an instant password .............................. 147
Using a supervisor password .......................... 148
Using a user password ................................... 149
Deleting a user password ................................ 150
TOSHIBA PC Diagnostic Tool Utility ...................... 151
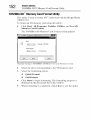
TOSHIBA SDTM Memory Card Format Utility ......... 152
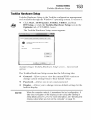
Toshiba Hardware Setup ....................................... 153
TOSHIBA Zooming Utility ...................................... 155
2
Contents
TOSHIBA Button Support ...................................... 156
CD/DVD Drive Acoustic Silencer ........................... 157
TOSHIBA Accessibility ..........................................
Fingerprint Authentication Utility ...........................
Fingerprint utility limitations ...........................
Fingerprint Enrollment ....................................
Fingerprint Logon ...........................................
Power-on Security ..........................................
Control Center .................................................
Password Bank ...............................................
Care and maintenance of your fingerprint
reader .......................................................
158
159
159
159
161
161
161
164
Fingerprint reader limitations ..........................
ConfigFree TM ....................................................
Getting Started ................................................
ConfigFree Utilities ................................................
169
169
170
170
167
Chapter6: If SomethingGoesWrong....................................
173
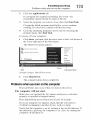
Problems that are easy to fix ................................ 173
Problems when you turn on the computer ............ 174
The Windows ® operating system is not working ..177
Using Startup options to fix problems ............ 177
Internet problems ........................................... 178
The Windows®operating system can
help you .................................................... 179
Resolving a hardware conflict ............................... 179
A plan of action ............................................... 179
Fixing a problem with Device Manager ........... 180
Memory problems .......................................... 181
Power and the batteries .................................. 182
Keyboard problems .........................................
Display problems ............................................
Disk drive problems ........................................
Optical drive problems ....................................
Sound system problems .................................
PC Card problems ...........................................
183
184
186
187
188
189
33
ExpressOardTM problems .................................
Printer problems .............................................
Modem problems ............................................
Wireless networking problems .......................
DVD operating problems .......................................
Develop good computing habits ...........................
Data and system configuration backup in
the Windows ° operating system ...............
If you need further assistance ...............................
Before you contact Toshiba ..................................
Contacting Toshiba ...............................................
Other Toshiba Internet Web sites ..........................
Toshiba's worldwide offices ..................................
191
193
193
194
197
198
199
203
203
204
204
205
AppendixA: Hot Keys/TOSHIBA
Cards.................................
207
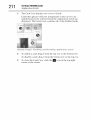
Hot Key Cards .......................................................
Using the Hot Key Cards .................................
Application Cards ..................................................
Using the Application Cards ............................
Card Case........................................................
207
208
209
210
210
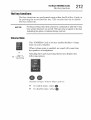
Hot key functions ..................................................
Volume Mute ..................................................
212
212
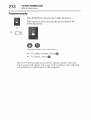
Password security ..........................................
Power plan ......................................................
Sleep mode .....................................................
Hibernation mode ...........................................
213
214
215
216
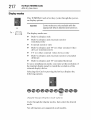
Display modes ................................................ 217
Display brightness .......................................... 218
Disabling or enabling wireless devices ............ 219
Disabling or enabling the TouchPad T'_or
Dual Mode Pad ......................................... 220
Changing screen resolution ............................ 221
Keyboard hot key functions ............................ 222
AppendixB: PowerCord/CableConnectors..........................
223
4
Contents
Glossary....................................................................................
224
Index
..........................................................................................
238
Introduction
Welcome to the world of powerful, portable, multimedia
computing. With your Toshiba notebook computer, your work and
entertainment can accompany you wherever you go.
NOTE
Thisnotebookis compatiblewith EuropeanUnionDirective
2002/95/EC,Restrictionofthe useof certainHazardous
Substances
in electricalandelectronicequipment(RollS),whichrestrictsuseof
lead,cadmium,mercury,hexavalent
chromium,PBB,andPBDE.
Toshibarequiresits notebookcomponentsuppliersto meetRollS
requirements
andverifiesits suppliers'commitmentto meeting
RollSrequirements
byconductingcomponentsamplinginspections
duringthe productdesignapprovalprocess.
NOTE
CertainMicrosoft
®softwareproduct(s)includedwiththiscomputer
mayusetechnological
measures
forcopyprotection.INSUCHEVENT,
YOUWILLNOTBEABLETOUSETHEPRODUCT
IF YOUDONOT
FULLYCOMPLY
WITHTHEPRODUCT
ACTIVATION
PROCEDURES.
Productactivationprocedures
andMicrosoft'sprivacypolicywill be
detailedduringinitiallaunchoftheproduct,or uponcertain
reinstallations
ofthesoftwareproduct(s)or reconfigurations
ofthe
computer,
andmaybecompleted
byInternetor telephone
(tollcharges
mayapply).
Somesoftwaremaydifferfromits retailversion(ifavailable),andmay
notincludeusermanualsorall programfunctionality.
35
6
Introduction
Tlfi_ g_lide
NOTE
Theproductspecifications
andconfiguration
informationaredesigned
foraproductSeries.Yourparticularmodelmaynothaveallthefeatures
andspecifications
listedor illustrated.Formoredetailedinformation
aboutthefeatures
andspecifications
onyourparticularmodel,please
visitToshiba's
Websiteat pcsupport.toshiba.com.
WhileToshibahasmadeeveryeffortatthetimeof publication
to ensure
theaccuracy
oftheinformation
providedherein,productspecifications,
configurations,
prices,system/component/options
availability
areall
subjecttochangewithoutnotice.Forthemostup-to-dateproduct
informationaboutyourcomputer,orto staycurrentwiththevarious
computersoftwareor hardware
options,visitToshiba's
Websiteat
pcsupport.toshiba.com.
Thisguide
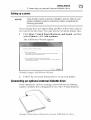
This guide introduces the computer's features. You can:
oto Read the entire guide fiom beginning to end.
oto Skim through and stop when a topic interests you.
oto Use the table of contents and the index to find specific
information.
Introduction
Sd_ , icons
37
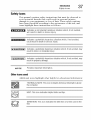
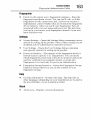
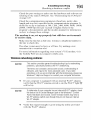
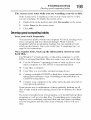
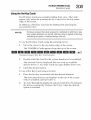
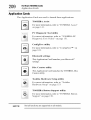
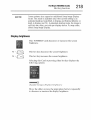
Safetyicons
This manual contains safety instructions that must be observed to
avoid potential hazards that could result in personal injuries,
damage to your equipment, or loss of data. These safety cautions
have been classified according to the seriousness of the risk, and
icons highlight these instructions as follows:
Indicatesan imminentlyhazardous
situationwhich,if notavoided,
will resultin deathor seriousinjury.
Indicatesa potentiallyhazardous
situationwhich,if notavoided,
couldresultin deathor seriousinjury.
[_ _Tio_
1 Indicatesa potentiallyhazardous
situationwhich,if notavoided,may
resultin minoror moderateinjury.
Indicatesa potentiallyhazardous
situationwhich,if notavoided,may
resultin propertydamage.
NOTE
Providesimportantinformation.
Othericonsused
Additional icons highlight other helpful or educational information:
TECHNICAL
NOTE:This iconindicatestechnicalinformationabout
the computer.
HINT:This iconindicateshelpfulhintsandtips.
DEFINITION:
This iconindicatesthedefinitionof aterm usedin the
text.
8
Introduction
Orhe1"
d(_:umentation
Otherdocumentation
Your computer comes with the following documentation:
o:* An electronic version of the user's guide (this document)
o:* It may also contain guides fur other pro_ams
with your system.
that may come
For accessory information, visit Toshiba's Web site at
accessories .toshiba .com.
Serviceoptions
Toshiba offers a full line of optional service programs to
complement its limited warranty. Yoshiba's standard limited
warranty, extended wananty, and service upgrade terms and
conditions are available at warranty.toshiba .com.
To stay current on the most recent sot_vare and hardware options
for your computer, and for other product inforlnation, be sure to
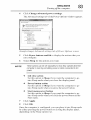
regularly check the Toshiba Web site at pcsupport.toshiba.com.
If you have a problem or need to contact Toshiba, see "If
Something Goes Wrong" on page 173.
Chapter1
GettingStarted
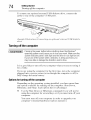
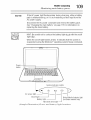
This chapter provides tips for working colnfortably, summarizes
how to connect components, and explains what to do the first time
you use your notebook computer.
Selecting
a placetowork
Your computer is portable and designed to be used in a variety of
circumstances and locations.
Creatinga computer-friendly
environment
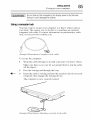
Place the computer on a fiat surthce that is large enough for the
computer and any other items you are using, such as a printer.
Leave enough space around the computer and other equipment to
provide adequate ventilation. Otherwise, they may overheat.
TO keep your computer in prime operating condition, protect your
work area lioln:
o:* Dust, moisture, and direct sunlight.
o:* Equipment that generates a strong electromagnetic field, such
as stereo speakers (other than speakers that are connected to
the computer) or speakerphones.
o:* Rapid changes in temperature or hmnidity and sources of
temperature change such as air conditioner vents or heaters.
39
0
6ettingStarted
Selecting a pku'e to work
o:o Extreme heat, cold, or humidity.
o:o Liquids and corrosive chemicals.
Keepingyourselfcomfortable
The Toshiba Instruction Manual for Safety and Comfort,
that
shipped with your computer, contains helpful int\_rlnation for
setting up your work environlnent and tips for working comfortably
throughout the day.
Precautions
Your computer is desiNled to provide optimuln safety and ease of
use, and to withstand the rigors of travel. You should obselwe
certain precautions to further reduce the risk of personal injury or
damage to the computer.
o:o Avoid prolonged physical contact with the underside or surface
of the computer.
Neverallowanyliquidsto spill into anypartofyourcomputer,and
neverexposethecomputerto rain,water,seawater
or moisture.
Exposureto liquid or moisturecancauseelectricshockor fire,
resultingin damageor seriousinjury. If anyof theseeventualities
shouldaccidentallyoccur,immediately:
1. Turnoff thecomputer.
2. Disconnect
theACadaptorfromthe powerplug socketand
computer.
3. Remove
thebatterypack.
Failureto followtheseinstructionscouldresultin seriousinjuryor
permanentdamageto thecomputer.
Donotturn onthepoweragainuntilyouhavetakenthecomputerto
anauthorizedservicecenter.
Computerbaseandpalmrestcanbecomehot!Avoidprolonged
contactto preventheatinjuryto skin.
ReadtheenclosedInstructionManualforSafetyandComfort.
[ :_:|_
::] Neverplacea heavyobjecton thecomputerandbecarefulnotto
dropa heavyobjectontothecomputer.It coulddamagethe
computeror causesystemfailure.
GettingStarted
Selecling a place 1o work
41
o:o Never turn off the computer ifa drive light indicates a drive is active.
Turning off the computer while it is reading from or writing to
a disk!disc or flash media may damage the disk/disc or flash
media, the drive, or both.
•5. Keep the computer and disks away fiom objects that generate
strong magnetic fields, such as large stereo speakers.
Information on disks is stored ma_leticatly. Placing a magnet
too close to a disk can erase important files.
Handlediscscarefully.Avoidtouchingthesurfaceofthe disc.Grasp
it byits centerholeandedge.If youhandlethedisc incorrectly,you
coulddamagethediscandpossiblylosedata.
•5* Scan all new files t\_rviruses.
This precaution is especially important for files you receive via
email or download tioln the Internet. Occasionally, even new
pro_alns you buy tioln a supplier may contain a computer
virus. You need a special pro_aln to check t\_r viruses. Ask
your dealer to help you.
Importantinformationonyour computer'scoolingfan
Your computer may have a CPU cooling fan that cools the CPU by
drawing outside air into the computer.
Alwaysmakesureyourcomputer
andACadaptorhaveadequate
ventilation
andareprotected
fromoverheating
whenthepoweristurned
onor whenanACadaptorisconnected
toa poweroutlet(evenif your
computer
is in Sleepmode).Inthiscondition,observethefollowing:
¢
Nevercoveryourcomputeror ACadaptorwithanyobject.
¢
Neverplaceyourcomputeror ACadaptorneara heatsource,
suchasanelectricblanketor heater.
°5° Neverblocktheair vents.
°5° Alwaysoperateyourcomputerona hardsurface.Usingyour
computerona carpetor othersoftmaterialcanblockthevents.
Overheating
yourcomputeror ACadaptorcouldcausesystem
failure,computeror ACadaptordamageor a fire, possiblyresulting
in seriousinjury.
NOTE
Thecoolingfanlocationwill varydependingon thecomputer.
2
GettingStarted
Setting up your computer
Settingupyourcomputer
TECHNICAL
NOTE:Youmustcompleteall setupstepsup to and
including"Settingup yoursoftware"on page42 beforeadding
externalor internalcomponentsto yourcomputer.These
componentsinclude,butarenot limitedto, a mouse,keyboard,
printer,memory,andPCCards.
Your computer contains a rechargeable main battery that needs to
be charged before you can use it.
To use external power or to charge the battery you must attach the
AC adaptor. See "Connecting to a power source" on page 44.
Settingupyoursoftware
Whenyouturnonthecomputer
forthefirsttime,donotturnoffthe
poweragainuntiltheoperating
systemhasloadedcompletely.
NOTE
Thenamesofwindowsdisplayed,
andtheorderin whichwindows
appear,
mayvaryaccording
to yoursoftware
setupchoices.
The first time you turn on your computer, the Setup Wizard guides
you through steps to set up your software.
1
From the Welcome screen click Next to enter the Setup
Wizard.
2
Confirm acceptance of Microsoft's End User License
Agreement and click Next.
3
Enter your desired user name and password, choose a picture to
be associated with your user account, and then click Next.
4
Enter the computer name and choose your background and
then click Next.
5
Click the appropriate option from the Help Protect Windows
Automatically screen.
6
Follow the remaining screen prompts to complete the setup
process.
7
Click Start when the Thank You message appears.
The Windows ®operating system checks the system's
pert\_rmance, and then may restart your computer.
GettingStarted
R_istering ),our cmnputer with Toshiba
43
Registering
yourcomputerwithToshiba
Product registration is strongly recommended, and allows Toshiba
to send you periodic updates, announcements, and special offers
applicable to your product. Product registration can be completed
during the initial start up process of your computer. If you decide
not to register at that time, you can either double-click the Toshiba
Registration icon on your desktop or go to the Toshiba Web site at
www.register.toshiba.corn at a later time. Failure to complete
Product Registration wilt not diminish Customer rights under the
Toshiba limited Warranty.
NOTE
Toregisteronline,you mustbeconnectedto theInternet.
Addingoptionalexternaldevices
NOTE
Beforeaddingexternaldevicesor memory,Toshibarecommends
settingup yoursoftware.See"Settingup yoursoftware"on page42.
After starting your computer for the first time you may want to:
+
Add more memory (see "Adding memory (optional)" on
page 49)
+
Connect a mouse (see "Using a mouse" on page 72)
+
Connect a full-size keyboard (see "Using an external
keyboard" on page 71)
o:° Connect an external monitor (see "Using external display
devices" on page 69)
o:° Connect a local printer (see "Connecting a printer" on page 72)
o:° Connect an optional external disk drive (see "Connecting an
optional external diskette drive" on page 73)
+
Install an ExpressCard (see "Using an ExpressCard TM''on
page 136) (available on certain models)
4
GettingStarted
Connecting to a power source
Connecting
toa powersource
Your computer requires power to operate. Use the power cord/cable
and AC adaptor to connect the computer to a live electrical outlet,
or to charge the computer's battery.
Neverpullon apowercord/cable
toremovea plugfromasocket.Always
grasptheplugdirectly.Failure
tofollowthisinstruction
maydamage
the
cord/cable,
and/orresultin a fireorelectric
shock,possiblyresultingin
seriousinjury.
Always
confirmthatthepowerplug(andextension
cableplugif used)has
beenfullyinsertedintothesocket,
toensure
asecureelectrical
connection.
Failure
to dosomayresultina fireor electric
shock,possiblyresultingin
seriousinjury.
Becarefulif youusea multipleconnector.
An overloadon onesocket
couldcausea fireor electricshock,possiblyresultingin serious
injury.
AlwaysusetheTOSHIBA
ACadaptor
thatwasprovided
withyour
computer
andtheTOSHIBA
Battery
Charger
(thatmayhavebeenprovided
withyourcomputer),
or useACadaptors
andbattery
chargers
specified
by
TOSHIBA
toavoidanyriskoffireor otherdamage
tothecomputer.
Useof
anincompatible
ACadaptor
or Battery
Charger
couldcausefireordamage
tothecomputer
possiblyresultingin seriousinjury.TOSHIBA
assumes
no
liabilityforanydamage
caused
byuseofanincompatible
adaptor
or
charger.
Power
cord/cable
(Sample Illustratio_) Power cord/cable aml AC cukq)tor
GettingStarted
C_)_/wcfiri_to d pOWeF
45
SO_I/'ce
To connect AC power to the computer:
1
Connect the power cord/cable to the AC adaptor.
\
{.- .........
f
\\
(Sample Illf_stratio,_) Com_,cti,_g the,pow_,r cord/cabl_, to the,AC
(.M(.q)tor
Handlingthecordon this productwill exposeyouto lead,a
chemicalknownto theStateof Californiato causebirthdefectsor
otherreproductiveharm.Wash hantlsatter hamlling.
042--<9 2
Plug the AC adaptor cord into the DC-IN on the right side of
the computer.
(Sample Illustr(ttio_7) ComTectbTg the AC ad(tptor cord to the
computer
3
:_
Connect the power cord/cable to a live electrical outlet.
The AC power light on the indicator panel glows blue.
Neverattemptto connector disconnecta powerplugwith wethands.
Failureto followthis instructioncouldresultin anelectricshock,
possiblyresultingin seriousinjury.
6
6ettingStarted
Chal_b_gthe main bar/el3,
The computer's main battery light gives you an indication of
the main battery's current charge:
o:* Glows amber while the main battery is being charged (AC
adaptor connected)
o:* Glows blue when the main battery is tully charged
o:* Is unlit when the main battery has dischaiged, the battery
is not charging, or the AC adaptor is not plugged into the
computer or AC outlet
o:* Flashes amber when the main battery charge is low and it is
time to recharge the main battery or plug in the AC adaptor
NOTE
If theACpowerlightflashesamberduringcharging,eitherthemain
batteryis malfunctioning,
or it is notreceivingcorrectinputfromthe
ACpowersupply.
DisconnecttheAC powercord/cableand removethemainbattery
pack.See"Changingthemainbattery"on page115for information
on replacingthemainbattery.
Charging
themainbattery
Your computer came with its battery already installed. Before using
the battery to power the computer, you must charge the battery.
To charge the battery, leave the computer plugged into an AC power
source with the computer turned offuntil the battery light glows
blue. After that, the battery will be completely charged and ready to
power the computer.
Oncethe batteryis chargedfor thefirsttime,avoidleavingthe
computerpluggedin andturnedoff formorethana fewhoursata
time.Continuingto chargea fully chargedbatterycandamagethe
battery.
TECHNICAL
NOTE:Therechargingof thebatterycannotoccurwhen
yourcomputeris usingall of thepowerprovidedbytheACadaptor
to runapplications,features,anddevices.Yourcomputer'sPower
Optionsutility canbeusedto selecta powerlevelsettingthat
reducesthepowerrequiredfor systemoperationandwill allowthe
batteryto recharge.
GettingStarted
U_il_g the comp_llel_fbr rhe firsI Iime
NOTE
47
Batterylifeandchargetime mayvarydependingontheapplications,
powermanagement
settings,andfeaturesused.
Usingthecomputer
forthefirsttime
The computer is now ready t\_r you to turn it on and begin using it.
Openingthedisplaypanel
1
Slide the display latch to the right.
2
Lift the display panel.
(Sdmt_l#Illr_strdtiot;) Op#t;it;gth# di.s'pld3 pdt;el
NOTE
[ _:J_N
Whenopeningor closingthe displaypanel,placeonehandonthe
palmrestto holdthe computerin placeandusetheotherhandto
slowlyopenor closethe displaypanel.
I Toavoiddamaging
thedisplaypanel,do notforceit beyondthepoint
whereit moveseasilyandneverlift thecomputerby thedisplay
panel.
Donotpressor pushonthedisplaypaneland becarefulto remove
anypensor otherobjectsfromthekeyboardareabeforeclosingthe
displaypanel.
Small bright dots may appear on your screen display when you turn
on your computer. Your display contains an extremely large number
of thin-fihn transistors (TFT) and is manufactured using highprecision technology. Any small bright dots that may appear on
your display are an intrinsic characteristic of the TFT
manufacturing technology. Over a period of time, and depending on
the usage of the computer, the brightness of the screen will
deteriorate. This is also an intrinsic characteristic of the screen
technology. When the computer is operated on battery power, the
screen will dim and you may not be able to increase the brightness
of the screen while on battery power.
8
GettingStarted
Using flw compule@_r flT<firsltime
Yourcomputer'sfeaturesand specifications
Certain notebook chassis are desigued to accommodate all possible
configurations for an entire product Series. Your select model may
not have all the features and specifications corresponding to all of
the icons or switches shown on the notebook chassis, unless you
have selected all those features.
This information applies to all the features and icons described in
this guide.
Below are examples of some of the many possible icons used on
your computer:
(Samph_IllustrafiotO S3stcmicot_s
Turningonthepower
To turn on the computer:
c3
1
Make sure any external devices (such as the AC adaptor, if you
plan to use AC power rather than battery power) are properly
connected and ready.
2
Check to ensure that all optical drives are empty.
3
Press and hold the power button in until the on/off light on the
system indicator panel glows blue about one second.
CZZEZZ_
(Sample
IllustratiotO
Turt_it_g ot_ the power
The preinstalled operating system will load automatically.
GettingStarted
Adding memo O, (optional)
[ _A_i_
49
I Whenyouturnon thecomputerforthefirsttime,do notturn offthe
poweragainuntil theoperatingsystemhasloadedcompletely.
Addingmemory(optional)
HINT:Topurchaseadditionalmemorymodules,seetheaccessories
informationpackagedwithyoursystemor visit
accessories.toshiba.com.
Your computer comes with enough memory to run most of today's
popular applications. You may want to increase the computer's
memory if you use complex sotSvare or process large amounts of
data.
NOTE
Beforeaddingexternaldevicesor memory,Toshibarecommends
settingup yoursoftware.See"Settingup yoursoftware"on page42.
Installing
a memorymodule
Memory modules can be installed in the memory module slots on
the base of the computer. You will need a small Phillips screwdriver
for this procedure.
If thecomputerhasbeenrunningrecently,thememorymodulemay
behot. Thesurroundingareamayalsobehot. Allowthemoduleto
coolto roomtemperature
beforereplacingit. Avoidtouchingthe
cover,themodule,andthesurroundingareabeforetheyhavecooled.
Failureto followthesedirectionscouldresultin minorbodilyinjury.
Toavoiddamagingthecomputer'sscrews,usea smallPhillips
screwdriverthatis in goodcondition.
6ettingStarted
Addit_g memoo' (Ol)liomd)
0
Installinga memorymodule with the computer'spoweron may
damagethecomputer,themodule,or both.
The computer has two memory slots
install one or two memory modules.
[ _a_:T|:_:
Slot A and Slot B. You can
] Beforeyouinstallor removea memorymodule,turn offthecomputer
usingtheStartmenu.If youinstallor removea memorymodule
whilethecomputeris in Sleepor Hibernationmode,datawill be lost.
If the computer is on, begin at step 1; otherwise, skip to step 3.
1
Click Start, and then click the arrow next to the lock button in
the lower-right corner of the Start menu.
The Shut Down menu appears.
Arrow
Start
(Sample Image)
Shut Dow_t menu€
2
Down.
Click Shut
ShutDownMenu
The operating system turns off the computer.
3
Unplug and remove any cables connected to the computer,
including the AC adaptor.
4
Remove the main battery. For inforlnation on relnoving the
main battery, see "Removing the battery fiom the computer"
on page 115.
GettingStarted
Adding memo O, (oUional)
5
51
Close the display panel and turn the computer upside down to
locate the memory module slot cover.
Memorymodule
slotcover
J_
(Sam!_le Illustratio*;)
6
Locati*;q
Frontofcomputer
the memory
module
,*lot cover
Using a small Phillips screwdriver, loosen the two screws that
secure the memory module slot cover.
/
Frontofcomputer
(SampleIllustratio,t) Removi,tg the memor_ module ,*lot cover
7
Remove the memo W module slot cover.
8
Place the two screws and the cover in a sate place so that you
can retrieve them later.
2
6ettingStarted
Add it_g memo o' (opfiomd )
Staticelectricitycandamagethememorymodule.Beforeyouhandle
the module,toucha groundedmetalsurfaceto dischargeanystatic
electricityyou mayhavebuilt up.
[ C_UTtO_::J
9
Avoidtouchingtheconnectoron thememorymoduleor on the
computer.Greaseor duston theconnectormaycausememory
accessproblems.
Carefully remove the new memory module from its antistatic
packaging, without touching its connector.
10 Locate an empty memory module slot on the underside of the
computer.
NOTE
If no memoryslot is available,you mustremovea moduleby
performingsteps2-3 of "Removinga memorymodule"on page55.
NOTE
If yoursystemhasthememorymodulesstackedontop of one
another,youmustremovethetop modulefirst before
removing/installing
the bottommodule.
11 Pick up the memory module by its sides, avoiding any contact
with its connector. Position the module toward the socket, aliNling
the connector's notch with the matching key in the socket.
notch\
latch--
GettingStarted
Addfl_g memo O, (opfiotzal)
53
12 Finnty press the memory module into the memory slot's socket
at approximately a 30-demee angle (to the horizontal surthce
of the computer).
(Sample Illustratio_)
I_serti_g
the memorx
module
i_to the socket
13 Once the module's connector is fully inserted into the socket,
press downward on the top edge of the module to seat the
module into the latches at the sides of the socket. These latches
should "snap" into place securely with the corresponding
cutouts in the side of the module. If the latches and cutouts do
not line up correctly, repeat steps 12-13.
latch<__1
q
(Sample Illustration) Pressing down on the nzenzorr nzodule
4
6ettingStarted
Addfl_gmemoo' (opfiomd)
Do not force the memory module into position. The memory
module should be completely inserted into the socket and level
when secured in place.
computer
(Sampl(_ Illustratio_)
I_s(_rtb_g th(_ m(mlor_ modul(_ i_to th(_ s!ot
14 Replace the memory module slot cover and secure it using the
two screws.
15 Re-insert the main battery. For more information on inserting
the main battery, see "Inserting a charged battery" on page 117.
16 Turn the computer right side up.
17 Reconnect the cables.
18 Restart the computer.
TECHNICAL
NOTE:Youmusthaveat leastonememorymodule
installedfor thecomputerto work.
You can now continue setting up the computer. When the operating
system has loaded, you can verify that the computer has recoNlized
the additional memory module.
If you are adding extra memory after setting up the computer, verify
that the computer has recoNlized it correctly as described in
"Checking total memory" on page 56.
GettingStarted
Adding memo O, (oplional)
55
Removing
a memorymodule
If you need to remove a memory module:
1
Complete steps 1 8 in "Installing a memory module" on
page 49 to shut down the computer and open the memory
module slot cover.
Donottryto removea memorymodulewiththecomputerturnedon.
Youcandamagethecomputerandthe memorymodule.
Donotremovethememorymodulewhilethecomputeris in Sleepor
Hibernationmode.Thecomputercouldhangupthenexttime you
turn it on anddatain memorywill be lost. Ineitheroftheabove
cases,theSleepconfigurationwill notbesaved.
NOTE
Thefollowingscreenmayappearwhenyouturnon thepower:
If "StartWindows
® Normally"is highlighted,thenpressEnter.
If oneoftheSafeModeoptionsis highlighted,it is bestto press
Enter
to go intoSafeMode,thenshut downandrestartthesystem,at
whichtimeWindows'_shouldbootbackup normally.
WhenSafeModeis suggested,
this couldbe a signthatyoumay
needto scanyourharddriveforerrorsor defragment
thedrive.If so,
consultWindows
® HelpandSupport.
2
Pull the latches away from the memory module.
The memory module pops up slightly.
NOTE
If yoursystemhasthememorymodulesstackedon top of one
another,youmustremovethetop modulefirst before
removing/installing
the bottommodule.
6
GettingStarted
Adding memo O, (optional)
3
Gently lift the melnory module to a 30-degree angle and slide it
out of the slot.
Frontof computer
(Sample IllustratiolT) RemovilTg the memory module
4
Replace the memol T module slot cover and secure it using the
SCreWs.
5
Re-insert the main battery. For more information on inserting
the main battery, see "Inserting a charged battery" on page 117.
6
Turn the computer right side up.
7
Reconnect the cables.
8
Restart the computer.
TECHNICAL
NOTE:Youmusthaveat leastonememorymodule
installedfor thecomputerto work.
Checkingtotalmemory
When you add or remove a memory module, you can check that the
computer has recognized the change. To do this:
1
Click Start, Control Panel, and then System.
The System window appears.
2
The total memory is displayed below the System heading
under Memory (RAM).
If the computer does not rec%mlize the memory confimlration, turn
off the computer and remove the memory module slot cover
(complete steps 1-8 in "Installing a memory module" on page 49),
and then check that the module is inserted completely into the
socket and lined up squarely with the socket latches.
GettingStarted
Hard Drive Recove O' Utilities
57
g_
NOTE
Fromtimeto time,Windows
® will displaya pop-upthatsays,
"Windows
® needsyourpermissionto continue."This is a security
featureto preventprogramsor peoplefrom doingthingson your
computerwithoutyourpermission,if youweretrying to performthe
action,click Continue;otherwise,clickCancel.If unsure,canceland
try again.
HardDriveRecovery
Utilities
(Available
on certain
models)
Your computer has been confimlred with a hard disk partition
(available on certain models) to allow you to recover your hard disk
drive or reinstall selected applications and software features or
utilities.
NOTE
It is stronglyrecommended
thatyoucreaterecoveryCDs/DVDs
beforeusingyoursystem.Formoreinformationon creating
Recoverymediasee"CreatingRecoveryCBs/DVDs"on page58.
Using the HDD Recovery, you can:
o:o Create Hard Drive Recovery CDs or DVDs using a writable
drive
o:o Recover your hard disk drive to the factory-set default
o:o Recover just your C: drive, leaving any other partitions you
may have created intact, f\_r example, a D: drive
o:o Recover to a custom sized partition, leaving extra space to
create an additional partition later
o:o Erase the hard disk completely
o:o Reinstall drivers and applications which were bundled with
your computer
8
GettingStarted
Hard Drive Recove O' Utilities
Creating RecoveryCOs/DVOs
Depending on your system confimlration, you may be able to copy
the Hard Drive Recovery Utilities to CD or DVD which gives you
the ability to recover your hard disk drive and recover your system
if the hard drive recovery partition has been deleted or the hard disk
has been replaced on your computer.
NOTE
Thesystemwillpromptyoutoinserttheappropriate
numberofblank
CDsor DVDsto copytheHardDriveRecovery
Utilities.Ifyouroptical
discdriveis notwritable,contactToshibaCustomerSupportto obtain
theRecovery
mediaforyoursystem.
TheToshibaGlobalSupportCentrein the UnitedStatesis
(800)457-7777,outsidetheUnitedStatesit is (949) 859-4273.
To create recovery CDs/DVDs:
1
Double-click the Recovery Dise Creator icon on the
Windows '_desktop. You can also launch the application by
clicking Start, All Programs, and then Recovery Dise
Creator.
2
Select CD or DVD (to create Recovery media on CDs or DVDs).
(Sample Image)
Recovet_
Disc Creator screen
GettingStarted
Hard Drive Recove O' Utilities
59
3
Select the items you want to copy by clicking the check box
next to the item's Name recovery files, applications (original
bundled drivers and applications), or both the recovery files
and applications.
4
Click Create.
5
Insert the first blank CD or DVD into your writable optical
drive when prompted.
6
Follow the on-screen prompts _\_rcompleting the copy process.
For more information on using the Recovery media you have
created with the preceding steps see "Hard Disk Drive Recovery
using the Recovery media" on page 64.
HardDiskDriveRecovery
options
The _\_llowing are the available hard disk drive recovery options:
oto Hard Disk Drive Recovery using the recovery partition
oto Recovering the original factory image (recommended recovery
method)
oto Erasing the hard disk
oto Recovering the C: partition of the HDD without changing the
current partition size
oto Recovering the C: partition with a user specified size
oto Hard Disk Drive Recovery using the Recovery media
oto Checking the HDD operating status
0
6ettingStarted
Hard Drive Recove O, Utilities
HardDiskDriveRecovery
usingtherecovery
partition
You have the options of recovering your system using the Hard
Drive Recovery partition to the factory-set default, or recovering
just your C: drive and leaving other partitions (t\_r example, a D:
drive) intact, or changing the size of your C: drive and then
recovering it.
To recover your hard disk drive using the utilities stored on your
computer's HDD:
1
Make sure the computer is turned oft'.
2
Press and hold the 0 (zero) key on your keyboard while
powering on the computer. When the computer powers on, the
Toshiba Recovery Wizard screen displays.
(Sample
3
Image)
Toshiba
Recover_"
Wizalvl
screen
Select one of the options, and then click Next. The options are:
+
Recovery of Factory Default Soft,a-are
+
Erase the hard disk
GettingStarted
Hard DHve Recove O' Utilities
61
Recovering the original factory image (recommended
recovery method)
[: _AOTi_;_:
1
] Recovering
aharddiskdriveto its outofboxstatedeletesall partitions
ontheharddiskdriveandyourinformation
will belost.Besuretosave
yourworkto externalmediafirst.
On the Toshiba Recovery Wizard screen, select Recovery
Factory Default Software,
and then click Next.
The Recovery
(Sample Image)
2
of Factory
Recovery
Select Recover
Default
Software
qf Facto_y D@mlt
to out-of-box-state,
of
screen appears.
Sqftware
screel7
and then click Next.
A confirmation
message displays reminding you that all data
will be lost during the recovery process. Be sure to save your
work to external media before proceeding.
3
Click Next to begin the recovery.
Once complete,
recovered.
4
a message
displays
Press aW key on the keyboard
that the HDD has been
to restart the computer.
2
GettingStarted
tIard Drive Recove O' Utilities
Erasing the hard disk
The Recovery Wizard allows you to delete all data and partitions
fiom the hard disk.
To delete the data and partitions from your hard disk:
1
On the Toshiba Recovery Wizard screen, select Erase the
hard disk, and then click Next.
2
The next screen lists the two methods you can choose:
o.'o Delete all data and partitions from the hard disk This
option deletes all of the data on the hard disk without
overwriting the HDD.
Delete all partitions and overwrite all sectors on the
hard disk
This option deletes all data, then overwrites
the entire HDD for security purposes. This 1glay take
several horns, depending on the size of your HDD.
(Sample Image) Erase the hard disk scr(_ei7
3
Select the desired method, and then click Next.
A confirmation message displays reminding you that all data
will be lost. Be sure you have saved your work to external
media before proceeding.
4
Click Next to begin deleting the HDD.
When the process is completed, a message displays int\_rlning
you that the HDD has been deleted.
5
Press any key on the keyboard to restart the computer.
GettingStarted
Hard Drive Recove O' Utilitie_
63
Recovering the C: partition of the HDD without changing the
current partition size
Recovering
the C: driveto its factorydefaultsettingreformatsyour
driveandyourinformationon therecovereddrivewill be lost.Be
sureto saveyourworkto externalmediafirst, if you havecreated
otherpartitions(forexample,a D: drive)thosepartitionsandany
informationon themwill notbe affectedandwill remainintact.
To recover only your C: drive:
1
On the Toshiba Recovery Wizard Screen, select Recovery of
Factory Default Software, and then click Next.
2
Select Recover without changing the hard drive partitions.
A confirmation message appears, reminding you that all
inf\_rmation on the C: drive will be lost during the recovery
process. Be sure you have saved your work to external media
before proceeding.
3
Click Next to begin the restoration.
Once complete, a message displays that the HDD has been
recovered.
4
Press any key on your keyboard to restart the computer.
Recoveringthe C:partition witha userspecifiedsize
ResizingandrecoveringyourC: driveto its factorydefaultsetting
reformatsall partitionson theHUB(forexample,if youcreateda D:
drive,it will bedeletedduringtherecoveryprocess)andyour
informationwill be lost.Besureto saveyourworktoexternalmedia
first.
To resize and recover your C: drive:
1
On the Toshiba Recovery Wizard screen, select Recovery of
Factory Default Software, and then click Next.
2
Select Recover to a custom size partition.
3
Specit) the size of the C: drive. Click the up/down arrows to
increase/decrease the C: drive size in 1 GB increments.
NOTE
Thesizeof theC: drivewill displayontheprogressbarasyoumake
yourselections.
4
GettingStarted
Hard Drix,e Recovel 3' Utilities
4
Click Next to begin the restoration. Once complete, a message
displays that the HDD has been recovered.
5
Press any key on your keyboard to restart the computer.
Hard DiskDriveRecoveryusingthe Recoverymedia
If you need to recover your computer to its default factory state, you
can rebuild the system using your Hard Drive Recovery Utilities.
To recover your hard disk drive using the utilities burned to CDs or
DVDs (refer to "Creating Recovery CDs/DVDs" on page 58):
1
Insert the first recovery CD or DVD into your optical drive and
power on the computer.
2
When the initial screen displays, press E]2.
The boot menu appears.
3
Using the arrow keys, select the CD/DVD option and press
Enter.The system will boot up to the Toshiba Recovery Wizard
screen.
4
Please refer to "Hard Disk Drive Recovery options" on
page 59, to explain the available recovery options.
(Sample Image)
Toshiba HDD Recover_
Utilit_ scrc,e_
GettingStarted
Using the TouchPad rM
65
Checkingthe HDDoperatingstatus
After restoring your hard disk drive, you can check its status as
follows:
1
Click Start.
2
Right-click Computer.
3
Select Manage.
4
Click Disk Management.
5
Highlight the hard disk drive in the Volume list to display its
status in the lower portion of the screen.
Installingdriversand applications
(Available on certain models)
The TOSHIBA Application Installer (available on certain models)
allows you to reinstall the drivers and applications that were
originally bundled with your computer.
To reinstall drivers and applications:
1
Double-click the TOSHIBA Application
Windows :Rdesktop.
Installer icon on the
2
Click Next.
3
Click the item(s) you want to install.
4
Click Install.
5
Follow the on-scTeen prompts to complete the installation process.
UsingtheTouchPad
TM
The TouchPad
the small, smooth, square cutout located in t?ont of"
the keyboard, is sensitive to touch and enables you to move the
cursor with the stroke of a finger. Simply move your finger on the
TouchPad in the direction you would like to move the cursor:
TM,
o:* To move the cursor to the top of the page, push your finger
f\_rward on the TouchPad.
o:* TO move the cursor to the bottom of the page, drag your finger
toward yourself,
o:* To move the cursor to the right side of the page, slide your
finger across the TouchPad fioln left to right.
o:* TO move it to the left side, slide your finger from right to left.
6
GettingStarted
Using the TouchPad r'_
NOTE
Because
the TouchPad
is muchsmallerthanthedisplayscreen,
movingyourcursoracrossthescreenoftenmeanshavingto move
yourfingerseveraltimesacrosstheTouchPadin thepreferred
direction.
Once you have positioned your cursor, you can click it into place by
either double-tapping the TouchPad or clicking the control buttons.
ScrollingwiththeTouchPad
TM
There are two active regions on the TouchPad that allow you to
scroll as you would with any wheel device on a mouse or trackball.
TM
To scroll vertically, run your finger up or down along the right edge
of the TouchPad. To scroll hoiizontally, run your finger along the
bottom edge of the TouchPad. This feature can be disabled or
changed in the Mouse Properties dialog box.
Controlbuttons
When a step instructs you to click or choose an item, move the
cursor to the item, then press and release the primary (left-hand)
button. To double-click, press the primary button b,vice in rapid
succession. The primary button usually corresponds to the left
mouse button.
The function of the secondary (right-hand) button depends on the
pro_am you are using. It usually corresponds to the right mouse
button ("right-clicking"). Check your program's documentation to
determine whether it uses the right mouse button.
Disabling
orenablingtheTouchPad
TM
The TouchPad is enabled by default. To change the enable/disable
TouchPad setting, press Fn+ F9. This hot key enables/disables the
TouchPad. For more information, see "Disabling or enabling the
TouchPad or Dual Mode Pad" on page 220.
TM
TM
GettingStarted
Using the Dual Mode Pad
67
UsingtheDualModePad
(Available on certain models)
UsingDualNode
The Dual Mode feature allows you to switch between Cursor Mode
(the default mode) and Button Mode.
In Button Mode, you can use the virtual buttons on the Dual Mode
Pad which provide convenient shortcuts to frequently used
applications. You can also use the volume control bar to adjust the
system volume quickly and easily.
UsingtheVirtualButtons
The Dual Mode Pad has six virtual buttons and a volume control
bar. Each virtual button can be confimJred to start an application.
The volume control bar is used to adjust the system volume level.
Virtual
buttons
_
_
.
/ Modeswitch
button
[]@®N
"r'osH|BA
control
Volume
N
Virtual
buttons
(Sample
NOTE
A
I
Illustration)
iI
Virtual
bar
_,
I
buttons
on the Dual
Mode
Pad
ActivatingtheDualModePadwill deactivate
an externalmouse.
The virtual buttons at the top of the Dual Mode Pad have the
following default settings:
[]
-:. Left button: Opens the assi_led email application
-:. Middle button: Opens the ConfigFree utility (see the Toshiba
online Help t\_r more information)
{_
-:. Right button: Opens the Windows _ Photo Gallery
The other three virtual buttons have no dethutt settings. You must
configure these buttons in the Mouse Properties dialog box before
they can be used.
8
6ettingStarted
Using the Dual Mode Pad
In order to use the virtual buttons you must first enable Dual Mode
in the Mouse Properties dialog box. After that, you can use the
virtual buttons as f\)llows:
1
Tap the mode switch button to enable the virtual buttons.
2
Tap the virtual button assigned to the application you wish to
launch, or slide your finger on the volume control bar to adjust
the volume to the desired level.
3
When the operation is complete, the Dual Mode Pad
automatically disables the virtual buttons.
The virtual buttons cannot be used until the mode switch button is
tapped again.
The virtual buttons and Dual Mode can be enabled or changed in
the Mouse Properties dialog box.
EnablingDualMode
To enable Dual Mode:
1
Click Start, and then Control Panel.
The Control Panel window appears.
2
Click Mouse.
The Mouse Properties window appears.
3
Click the Device Settings tab, and then Settings.
The Properties for Synaptics LuxPad window appears.
4
In the left side of the window, select Tapping.
5
Select Dual Mode.
6
Select Switch to Button Mode by tapping in the upper-right
corner.
NOTE
ToforcetheDualModePadtouseButtonModeonlywhenever
anexternal
pointingdevice
suchasamouseispluggedin,select
Alwaysin Button
Modewhenan externaldeviceispluggedin.
GettingStarted
U_ing exlen_d displm' &_'ices
69
Configuringvirtualbuttons
The virtual buttons at the top of the Dual Mode Pad are preconfigured for the Email, ConfigFree, and Print functions. You can
assign different functions to these buttons if you wish.
The virtual buttons on the bottom of the Dual Mode Pad (buttons 4,
5, and 6 in the Properties for Synaptics LuxPad window) are
unassigned by default. In order to use one of these buttons, you
must first configure that button so that it is associated with a
function.
To configure a virtual button:
1
Perform steps 1-5 in "Enabling Dual Mode" on page 68.
2
Select the virtual button you wish to configure.
3
Select the desired options, and then click OK.
4
Click OK.
5
Click OK to close the Mouse Properties window.
Usingexternaldisplaydevices
Your computer comeswith a built-in display, but you can also
connect an external display device to an available video port, as
follows:
°:o An external monitor or projector via the RGB (monitor) port
o:o A TV, VCR, or DVD recorder via the S-video (TV-out) port*
o:o An HDMI-compatible
HDMI Out port*
television or VCR!DVD player via the
*(Available on certain models)
Before connecting an external monitor or video projector, configure
your computer t\_rthe type of device you are connecting. TOdo this,
refer to the documentation for your operating system and devices.
You cannot connect both the S-video Out port and the HDMI Out
port to the same device at the same time.
Connectingan externalmonitoror projector
You can easily attach an external monitor or projector to your
computer if you need a larger screen. To do this:
[]
1
Connect the monitor's video cable to the RGB (monitor) port
on the side of the computer.
2
Connect the dex ice s po,a er cable to a live electrical outlet.
0
GettingStarted
Using external disph O,dtMces
3
Turn on the external device.
Your computer will automatically detect the external display
device and activate a screen with display options.
4
Select the settings you desire and click Apply.
5
Click OK.
Connectingan HDMI-compatible
television
or VCR/DVD
player
(Available on certain models)
To connect an HDMI-compatible
the computer:
1
television or VCWDVD player to
Connect one end of an HDMI cable (not included with your
computer) to the HDMI Out port on the side of your computer,
and then connect the other end of the cable to your television.
Refer to the manual that came with the television t\_rmore
int\_rlnation.
Your computer will automatically detect the external display
device and activate a screen with display options. Choose the
settings you desire and click Apply. Then click OK.
Directingthe displayoutputwhen youturnonthecomputer
Once you have connected an external display device, you can
choose to use the intemat display only, the external device only, or
both simultaneously.
NOTE
Somemodesareonlyavailablewith theappropriate
deviceattached
andturnedon.
The quickest way to change the display output settings is to use the
display hot key (Fn + FS):
1
While holding do,a_ Fn, press F5repeatedly, pausing between
each press, until the setting you want takes effect.
This hot key cycles through the settings in the t\_llowing order:
o:. Built-in display only
o:. Built-in display and external monitor simultaneously
o:. External monitor only
o:. Built-in display and TV (or other external video device)
simultaneously
GettingStarted
U_ing an external hTboard
71
•:.
TV (or other external video device) only
•:.
Built-in display and external monitor (extended desktop)
+
Built-in display and TV (extended desktop)
(Sample Image) Display optiot_s wit_dow
NOTE
2
Theright-mosticonin theaboveillustrationis fortheSwapImage
Displaymode.Thismodeis availableonlyif thecurrentsettingis an
extendeddesktopmode(Built-in DisplayandExternalMonitor,or
Built-inDisplayandTV).In extendeddesktopmode,the imageis
split intotwo sides,onesideper displaydevice.Toswapsides,
selectSwapImageDisplay.
Release the Fnkey.
Adjusting
thequalityof theexternaldisplay
To obtain the best picture quality from your television (or other
video display device), you may need to adjust the video settings.
See the video device documentation tbr additional configuration
steps.
TECHNICAL
NOTE:Touseoneofthesimultaneousmodes,youmust
settheresolutionofthe internaldisplaypanelto matchthe
resolutionoftheexternaldisplaydevice.Theexternaldisplaydevice
mustsupporta resolutionof 800 x 600or higher.
Usinganexternalkeyboard
If you prefer to use a full-size keyboard, you can attach one to your
computer. The computer's USB ports support any USB-colnpatible
keyboard.
2
GettingStarted
Using a mouse
Usinga mouse
You may want to use a mouse instead of the computer's built-in
TouchPad. You can use a USB-compatible mouse.
Connecting
a printer
NOTE
Yourprinterdocumentation
mayrequireyouto installtheprinter
softwarebeforephysicallyconnectingtheprinterto yourcomputer.If
youdo notinstallthesoftwareas instructedbytheprinter
manufacturer,
theprintermaynotfunctioncorrectly.
Readthedocumentation
that camewith yourprinter.Followthe
manufacturer's
instructionswhenconnectinga printer.
You can connect a USB-compatible printer to your computer
through the USB ports. To determine if the printer is USBcompatible, check its documentation.
To make the connection, you need a suitable USB cable which may
come with your printer. Ifa USB cable was not included with your
printer, you can purchase one fioln a computer or electronics store.
If your printer supports Plug and Play, your computer may
automatically recognize the printer; the printer is then ready tbr use.
Refer to your printer documentation for further instructions.
TECHNICAL
NOTE:Todetermineif yourprintersupportsPlugand
Play,checkits documentation.
If your printer does not support Plug and Play, you can set up the
printer as described in "Setting up a printer" on page 73.
To connect a printer to your computer:
,,9
1
Connect the printer cable to the printer and then connect the
other end to one of the computer's USB ports.
2
Plug the printer's power cable into a live AC outlet.
GettingStarted
Connecting an optional exten_tl diskelte drive
73
Settingupa printer
NOTE
Someprintersrequirea specificinstallationprocess.Referto your
printerinstallationguidefor instructionsbeforecompletingthe
followingprocedure.
If your printer does not support Plug and Play, follow these steps to
set it up for the first time. You only need to set up the printer once.
1
Click Start, Control Panel, Hardware
under Printers, click Add a printer.
and Sound, and then
The Add Printer Wizard appears.
Choose
_
a ocal
o_ he[work
p nter
Add a _oca_ printe_
ia_ls
_B #rint_rs w_e_ y_ _Ju9t_,_m m)
Add a network, w recess o B_etooth
printe
M_ke _u,eth_ y_ur _omputer is c_nne_tedto _e _et_,o,k c, t_,a_y_u, _uetocth
(Sample Image) Add Ptitttet
2
Wizard
Follow the on-screen instructions to set up your printer.
Connecting
anoptional
externaldiskettedrive
Some operations, such as creating a password service diskette,
require a diskette drive designed for use with 3.5-inch diskettes.
\
(Sample
Illust_zztiott)
Optiottal
exterttal
USB
diskette
drive
4
GettingStarted
Tumil_g q_flTe computer
To connect an optional external USB diskette drive, connect the
cable to one of the computer's USB ports.
..--y
(Sample Illustration) Connecting an optional external USB diskette
drive
Turningoffthecomputer
PressingthepowerbuttonbeforeshuttingdowntheWindows
'_
operatingsystemcouldcauseyouto loseyourwork.Makesurethe
systemindicatorpanel'sdisk lightandthe drive-in-uselightareoff.
If youturn offthe powerwhilea disk/discis beingaccessed,
you
maylosedataor damagethe disk!discand/ordrive.
It is a good idea to turn offyour computer when you are not using it
for a while.
If you are using the computer t\_r the first time, leave the computer
plugged into a power source (even though the computer is oft) to
fully charge the main battery.
Optionsforturningoffthe computer
Depending on the operating system installed, you have more than
one option available for turning off the computer: Shut Down,
Hibernate, and Sleep. Each option has its advantages.
o:* Use the Shut Down or Hibernate command if you will not be
using the computer for several days or if you must turn offyour
computer.
You must turn off your computer in order to upgrade your
computer's internal hardware (such as memory).
GettingStarted
Turning _ffthe computer
75
TECHNICAL
NOTE:BeforeusingtheShutDownoptiontoturn off
yourcomputer,saveyourfiles andmakesureall disk/discactivity
lightsareoff.
If youchangeyourmindanddecideto continueworkingafterall,
waita fewsecondsbeforeturningthecomputeron again.
Use the Sleep command to save your work, system settings,
and current state of the desktop to memory, so that when you
turn on the computer again, you will quickly and automatically
return to where you left off.
Hibernation
mode
Hibernation mode shuts the computer down completely, but it first
saves the current state of the computer to hard disk. Since
Hibernation mode does not require power to maintain the saved
information, system settings are retained indefinitely.
Factors to consider when choosing Hibernation:
o:o While in Hibernation mode, the computer uses no main battery
power.
o:o Because the state of the system is stored to hard disk, no data is
lost if the main battery discharges.
o:o Restarting tiom Hibernation takes less time and consumes less
main battery power than restarting after turning off the
computer using the Shut down command.
o:o Restarting tiom Hibernation takes a little more time and
consumes more main battery power than restarting fiom Sleep.
o:o When starting up again, the computer returns to the state in
which you left it, including all open programs and files you
were using.
For int\3rlnation on how to use and confimJre Hibernation mode see
"Using and confiNlring Hibernation mode" on page 79.
6
6ettingStarted
Turning qUthe computer
Sleepmode
The Sleep comlnand places the computer into a power-saving
mode. Sleep saves the current state of the computer to memory so
that, when you restart the computer, you can continue working fiom
where you left off.
NOTE
Afteryourcomputersleepsfor anextendedperiodof time,the
Windows'_'operatingsystemmaysaveanyopendocumentsand
programsto yourharddisk,andthenshutsdownthecomputer.
Factors to consider when choosing Sleep:
o:* While in Sleep mode, the computer uses some main battery
power.
o:* Because the state of the system is stored in memory, you will
lose data if the main battery discharges while the computer is
in Sleep mode.
o:* Restarting fiom Sleep takes less time and consumes less main
battery power than restarting after turning off the computer
using the Hibernation or Shut down commands.
o:* When starting up again, the computer returns to the mode in
which you left it, including all open prQmams and files you
were using.
o:* If the battery charge becomes critically low, the computer will
try to enter Hibernation mode.
If you powerdownusingtheSleepcommandandthe mainbattery
dischargesfully,yourunsavedinformationwill be lost.Besureto
saveyourworkfirst.
For information on using Sleep, see "Using and confimlring Sleep
mode" on page 81.
GettingStarted
Turning _t/Te computer
77
Using the Shut Down command
The Shut down comlnand completely shuts down the computer
without saving your work or the current state of the computer. This
command closes all open pro_ams, shuts do,a_ the operating
system, and then turns offyour computer.
Use the following steps to turn offyour computer using the Shut
Down command:
1
Click Start, and then click the arrow next to the Lock button in
the lower-right part of the Start menu.
The Shut Down menu appears.
Arrow
Start
(Sample Image)
2
ShutDownMenu
Shut Down mem¢
Click Shut Down.
The computer closes all open programs, shuts down the
operating system, and then turns off.
Turningoffthecomputer
morequickly
You can also turn off the computer by pressing the power button.
To use this method, you first need to activate it using the Power
Options feature. By default, pressing your computer's power button
puts the computer into Sleep mode.
1
Click Start, Control Panel, System and Maintenance,
then Power Options.
The Power Options window appears.
2
Click Change plan settings under the power plan to be
customized.
The Edit Plan Settings window appears.
and
8
6ettingStarted
Tunfing q_ flu,
compumr
3
Click Change advanced power settings.
The Advanced settings tab of the Power Options window appears.
,advs_s:ed _e_tings ......................
_
_hen
_b_,_
set_ing_ t_a_ re_le_t b_ you Wan_ your
electthep_we_pla_h_y_u_an_c_t_mlz_,_nd
compute_ t_ mana_
p_ver,
On batter)'.
Plugged
5
n:
I
I_[,
P ev_,e_ butt o_ a_i_n
_ Start menu¸po_er
button
(Sample Image) Advanced
settings
4
Click Power buttons
can configure.
and lid to display the actions
5
Select the options
NOTE
tab of'Power
Options scr(,en
you want fiom the drop-down
that you
lists.
Theseoptions can be set separatelyfor how they operate while the
computer is running on batterypower or while connected to AC
power.
o,*o Lid close action
Set this option to Shut down if you want the computer
shut down when you close the display panel.
o:o Power
button
to
action
Set this option to Shut down if you want the computer
shut down when you press the power button.
to
o:o Start menu power button
Set this option to Shut down if you want the computer to shut
down when you click the power button in the Start menu.
6
Click Apply.
7
Click OK.
Once the computer is configured, you can turn it offby either
pressing the power button or closing the display panel, depending
on the options set.
GettingStarted
Turning _t/Te computer
79
Restarting
yourcomputer
To start the computer up again, press the power button until the
on/off light glows blue.
If you turn off the computer by closing the display panel, you can
start it again by opening the display panel.
Usingandconfiguring
Hibernation
mode
To mm off the computer using the Hibernation command:
1
Click Start, and then click the arrow next to the Lock button in
the lower-right part of the Start menu.
The Shut Down menu appears.
:9
Windo_,_ Photo G_Elep/
Start
S_itch U_e_
Arrow
ShutDownMenu
(Sample Image) Shut Down mem¢
2
Click Hibernate.
The computer saves the state of all open programs and files,
turns offthe display, and then rams off.
ConfiguringHibernationmode options
You can place the computer into Hibernation mode by either
pressing the power button or closing the display panel. You can also
specify an amount of time after which the computer automatically
goes into Hibernation mode.
To use any of these methods, you first need to enable them using the
Power Options feature.
1
Click Start, Control Panel, System and Maintenance,
then Power Options.
The Power Options window appears.
and
0
6ettingStarted
Turning q_ flTecompwer
2
Click Change plan settings under the power plan to be
customized.
The Edit Plan Settings window appears.
3
Click Change advanced power settings.
The Advanced settings tab of the Power Options window
appears.
Adv_ced
BeRing8 [
then
elect ch_e
the
_
_ett[_ plan that
how t ¢y_u
you_ enrl
po_er
_h_t re{leer
yo_
wan_
_to w_n_r,_iz_
_omput_r to m_nage p_ _ver,
Po _r
button_
Lid clos_
and
lid
action
On b_ttery:
PFugged h_:
.....
P_we_ bott_n action
On
ba_e
W ,
P_ugged _
_e<q
S_rt menu power b_ton
on
batte_
';_ _p
(Sample Image) Adva,_ced settings mb of Power Options screen
4
Click Power buttons and lid to display the actions that you
can configure.
Select Hibernate
for the options you want.
Theseoptionscanbesetseparately
for howtheyoperatewhilethe
computeris runningon batterypoweror whileconnectedto AC
power.
NOT_
o.*o Lid close action
Set this option to Hibernate if you want the computer to go
into Hibernation mode when you close the display panel.
•:.
Power button action
Set this option to Hibernate if you want the computer to go
into Hibernation mode when you press the power button.
•:.
Start menu power button
Set this option to Hibernate if you want the computer to
go into Hibernation mode when you click the power
button in the Start menu.
GettingStarted
Turning _ff the computer
6
Click Apply.
7
Click OK.
81
Once the computer is configured, you can place it into Hibernation
mode by either pressing the power button or closing the display
panel, depending on the Hibernation options set.
Starting
againfromHibernation
mode
To start up the computer from Hibemation mode, press the power
button until the on/offlight glows blue. The computer returns to the
screen(s) you were using.
If you put the computer in Hibernation mode by closing the display
panel, you can start it again by opening the display panel.
Usingandconfiguring
Sleepmode
To turn off the computer using the Sleep command:
1
Click Start, and then click the arrow next to the Lock button in
the lower-right part of the Start menu.
The Shut Down menu appears.
kV]ndc_
5w_h
Photo Gallery
U_r
_t_'_" W ndewz U_ima_ E_as
Sta_
Arrow
ShutDownMenu
(Sample Image) Shut Down mem¢
Click Sleep.
The computer saves the status of all open programs and files to
the memory, turns offthe display, and enters into a low-power
mode. The on/offtight blinks amber indicating the computer is
in Sleep mode.
2
GettingStarted
Turning q_the computer
Configuring Sleep mode options
You can place the computer into Sleep mode by either pressing the
power button or closing the display panel. You can also specify an
amount of time after which the computer automatically goes into
Sleep mode.
To use any of these methods, you first need to enable them using the
Power Options feature.
1
Click Start, Control
then Power Options.
Panel, System
and Maintenance,
and
The Power Options window appears.
2
Click Change plan settings under the power plan to be
customized.
The Edit Plan Settings window appears.
(Sample Image) Edit Plan S_tting s scr__n
TO change the amount of time after which the computer enters
Sleep mode:
•:o Under Put the computer to sleep, select the desired
amount of time in both the On battery and Plugged in
categories.
o:* To disable the computer from automatically entering Sleep
mode, select Never.
GettingStarted
Turning q_flw compuwr
4
Click Change
advanced
The Advanced
settings tab of the Power Options window
then
[
Power
choose
buttons
Pk gged
_ings
P_ugged
how
you
_,ant
settings.
appears.
yo_t
_ncr rid
i_r; S_ ,-t_
o# b_er_
S_art menu
_ha_ rdlect
power
83
in
s
_
S!,,
p_e_
On battery: ',
burro#
p
(Sampk, Imam,e) Advanced settinqs tab of Power Options screen
Click Power buttons and lid to display the actions that you
can configure.
6
NOTE
Select Sleep tbr the options you want.
Theseoptionscanbesetseparately
for howtheyoperatewhilethe
computeris runningon batterypoweror whileconnected
to AC
power.
o:. Lid close action
Set this option to Sleep if you want the computer to go
into Sleep mode when you close the display panel.
•:o Power button action
Set this option to Sleep if you want the computer to go
into Sleep mode when you press the power button.
•:o Start menu power button
Set this option to Sleep if you want the computer to go
into Sleep mode when you click the power button in the
Start menu.
7
Click Apply.
8
Click OK.
Once the computer is confimJred, you can place it into Sleep mode
by either pressing the power button or closing the display panel,
depending on the Sleep options set.
4
GettingStarted
CustomiZing _our computer s settings
StartingagainfromSleep mode
To start up the computer from Sleep mode, press the power button
until the on/offlight glows blue. The computer returns to the
screen(s) you were using.
If you place the computer in Sleep mode by closing the display
panel, you can start it again by opening the display panel.
Closingthedisplaypanel
After you have turned off the computer, close the display panel to
keep dust and dirt out of the computer.
Customizing
yourcomputer's
settings
There are several ways in which you can customize your computer
to suit your particular requirements. Refer to your operating system
documentation or Help and Support for details.
You may also wish to customize your power usage settings. For
more infonnation, see "Power Plans" on page 113. There are
additional custom settings you can choose. See "Toshiba Utilities"
on page 140.
Caringforyourcomputer
This section gives tips on cleaning and moving your computer. For
information about taking care of your computer's battery, see
"Taking care of your battery" on page 118.
Cleaningthecomputer
[ C:_U_iO_
:] Keepliquids,includingcleaningfluid, out ofthecomputer's
keyboard,speaker,
andotheropenings.Neverspraycleanerdirectly
ontothecomputerand/ordisplay.Neveruseharshor caustic
chemicalproductsto cleanthecomputer.
To keep your computer clean, gently wipe the display panel and
exterior case with a lightly dampened cloth.
Movingthecomputer
Bet\_re moving your computer, even across the room, make sure all
disk activity has ended (the drive indicator light stops glowing) and
all external peripheral cables are disconnected.
GettingStarted
85
Caring f!_r your compuwr
M_
[ _i_
I Do not pick up the computer by its display panel or by the back.
Doing so could damagethe system.
Usinga computerlock
You may want to secure your computer to a heaxT object such as
your desk. The easiest way to do this is to purchase an optional
computer lock cable. For more inforlnation on purchasing a cable
lock, visit accessories.toshiba.com.
(Sample IllustratiotU
Coml)uter
lock cable
To secure the computer:
1
Wrap the cable through
or around
some part of a heavy object.
Make sure there is no way t\_r a potential
off the object.
2
Pass the locking
3
Insert the cable's locking end into the security
computer, then engage the locking device.
The computer
(Sample Illustration)
end through
thief to slip the cable
the loop.
is now securely
AttachilTg
locked.
security
lock cable
lock slot on your
Chapter2
Learning
theBasics
This chapter gives some computing tips and provides important
int\mnation about basic features.
Computing
tips
oto Save your work fiequently.
Your work stays in the computer's temporary memory until
you save it to the disk. If the network you are using goes down
and you must restart your computer to reconnect, or your
battery runs out of charge while you are working, you will lose
all work since you last saved.
See "Saving your work" on page 93 for further inforlnation.
activated.
Thisfeaturesavesyourfileto
the
harddisk atpreset
HINT:Someprograms
havean automatic
savefeature
thatcanbe
intervals.Seeyoursoftwaredocumentation
for details.
86
LearningtheBasics
Coml)uling Iips
_'7
o:* Back up your files to disks (or other removable media) on a
regular basis. Label the backup copies clearly and store them in
a sate place.
It is easy to put offbacking up because it takes time. However,
if your hard disk suddenly fails, you will lose all the data on it
unless you have a separate backup copy. For more information,
see "Data and system configuration backup in the Windows <
operating system" on page 199.
o:* Use Error-checking and Disk Detiagmenter regularly to
conserve disk space and improve performance.
o:* Scan all new files t\_rviruses.
This precaution is especially important for tiles you receive via
diskette, emait, or download from the Intemet.
o:* Take frequent breaks to avoid repetitive-motion
eyestrain.
injuries and
o:* Do not turn offthe computer if a drive indicator light indicates
a drive is active.
Turning offthe computer while it is reading from or writing to
a disk may damage the disk, the drive, or both.
o:* Before turning offthe computer, use the Shut Down command
or Sleep command. See "Using and configuring Sleep mode"
on page 81 to learn more about Sleep.
NOTE
TheWindows_R:
operatingsystemrecordsinformation,suchasyour
desktopsetup,duringits shutdownprocedure.If youdo not letthe
Windows_R_
operatingsystemshut downnormally,detailssuchas
newiconpositionsmaybe lost.
8
LearningtheBasics
Using flw h3'board
Usingthekeyboard
Your computer's keyboard contains character keys, control keys,
function keys, and special Windows ® keys, providing all the
functionality of a full-size keyboard.
(Sample IllustratiotO
Keyboard
Character
keys
Typing with the character keys is very much like typing on a
type,aTiter, except that:
•:.
The space bar creates a space character instead of just passing
over an area of the page.
•:.
The lowercase letter 1 (el) and the number 1 are not
interchangeable.
•:.
The uppercase letter O and the number 0 are not
interchangeable.
Makingyourkeyboard
emulateafull-sizekeyboard
Although your computer's keyboard layout is compatible with a
standard full-size keyboard, it has fewer keys.
A standard full-size keyboard has two Enter, CtrLand Altkeys;
editing keys; cursor positioning keys; and a nmneric keypad.
Pressing the Fn key simultaneously in combination with one of the
specially marked keys allows you to emulate a full-size keyboard.
Your computer's keyboard has only one Enterkey. Most of the time,
this does not matter. However, some programs assiN_ separate
functions to the regular and numeric pad Enterkeys on the full-sized
keyboard. Using the Fn key, you can simulate the Enter key. Press Fn
and Entersimultaneously to simulate the Enter key on the numeric
pad of the enhanced keyboard.
LearningtheBasics
Using the h3'board
_Q
Ctrl,Fn, andAItkeys
(Sample Illustratio_) Ctrl, F< aml Aft ke3s
The Ctrl, Fn, and AItkeys do different things depending on the
pro_am you are using. For more infi_rlnation, see your program
documentation.
Function
keys
The function keys (not to be confused with the Fnkey) are the 12
keys at the top of the keyboard.
(Sample Illustratiot_ ) Fut_ctiot_ ke3 s
F1through F12are called function keys because they execute
pro_ammed functions when pressed. Used in combination with the
Fnkey, function keys marked with icons execute specific functions
on the computer. For example, Fn+F9turns offthe TouchPad. For
more inforlnation, see "Hot key functions" on page 212.
SpecialWindows® keys
Windows® button
_
(Sample lllustratio_)
Applicationkey
Special
Wi_Mows ¢)kms
Your computer's keyboard has one key and one button that have
.....
R
specml tunctmns m Windows :
•:.
Windows C'_
button
•:.
Application key
mouse button
Opens the Start menu
Has a similar function as the secondary
0
LearningtheBasics
Using the h3'board
Overlaykeys
The keys with _ay numbers and symbols on the fiont of them form
the numeric and cursor overlay. This overlay lets you enter numeric
data or control the cursor as you would using the 10-key keypad on
a desktop computer's keyboard.
(Sample Illustration) Numeric and cursor conttvl overlm
Usingtheoverlayto typenumericdata
The keys with the numbers on their right fiont are the numeric
overlay keys.
To mm the numeric overlay on, press Fnand F11 simultaneously.
The numeric mode light on the keyboard indicator panel glows
when the nmneric overlay is on.
To disable the numeric overlay, hold down the Fnkey and press F11
again. The numeric mode light on the keyboard indicator panel
goes out.
Usingtheoverlayforcursorcontrol
The keys with the gray anows and symbols on their left front are
the cursor control overlay keys.
To mm the cursor control overlay on, press Fnand FIO
simultaneously. The cursor control mode light on the keyboard
indicator panel glows when the cursor control overlay is on.
To disable the cursor control overlay, hold down the Fn key and
press F]0 again. The cursor control mode light on the keyboard
indicator panel goes out.
LearningtheBasics
Starting
apr(_ram
Q1
_j !
Starting
a program
The easiest way to start a program is to double-click the name of
the file that contains the int\_rlnation you want to work on. To find
the file, use the Start menu or Windows :R:
Explorer.
If you prefer to open the progrmn first, you have t;_ur options. You can:
o:* Double-click the icon for the program on your desktop
o:* Use the Start menu
o:* Use Windows _ Explorer or the Start menu to locate the
program file
o:* Use the Search or Start Search field in the Start menu
The next three sections explain how to start a program from the
Start menu, Windows _ Explorer and the Start Search field.
Startinga programfromtheStartmenu
When you install a program, the operating system usually puts an
icon in the All Programs menu. To start a program that has an icon
in the All Programs menu, follow these steps, which use the
Windows _ W_rdPad program as an example:
1
Click Start, and then All Programs.
The Windows _ operating system displays the All Programs
menu, which lists programs and program groups. If your
program is listed, go to step 3, otherwise, continue with step 2.
NOTE
2
If youpausewith yourmouseonAll Programs,it will openit up.You
mayneedto scroll up or downto seethecompletelist.
Click the program group, in this example, Accessories.
The Accessories menu is displayed.
3
Click the program, in this example, WordPad.
W\)rdPad opens.
To close the program, click the Close button in the upper-right
corner of the program's window.
2
LearningtheBasics
Sla/¢ing a pr(_ram
Startinga programfromWindows®Explorer
Ifa program is not listed in the All Pro mams menu, you can start it
fiom Windows ®Explorer. Windows _ Explorer gives you a view of
your computer's contents as a hierarchy or "tree." You can easily
see the contents of each drive and folder on your computer. To use
this method, you should know the file name and location of the
prograln's executable file (this file ends with .exe).
This example opens WordPad using Windows ®Explorer.
1
NOTE
Click Start, and then All Programs.
If youpausewith yourmouseonAll Programs,it will openit up.You
mayneedto scroll up or downto seethecompletelist.
2
Click Accessories.
3
Click Windows Explorer.
4
In the left part of'the window, double-click Computer
expand the window.
5
In the left part of"the window, click the line that ends in "Local
Disk (C:)."
6
In the left part of the window, under the Local Disk C: icon,
double-click the folder containing the progam, in this case
Program Files.
to
Windows "_Explorer shows the contents of the Program Files
folder on the right side of the window. The left side of the
window shows all the folders contained within the Program
Files folder.
7
In the left part of the window,
double-click
Windows
8
In the left part of the window,
double-click
Accessories.
Windows '_ Explorer shows the contents
folder on the right side of the window.
9
In the right part of the window,
The operating
NT.
of the Accessories
double-click
wordpad.
system opens WordPad.
To close the program, click the Close button in the upper-right
comer of the program's window.
LearningtheBasics
Saving yourwork
Q_
Starting
a programusingtheStartSearchfield
This example uses the Start menu's Start Search field to start
WordPad:
1
Click Start to display the Start menu.
The Start Search field appears at the bottom of the Start menu.
Start
Search
field
All Programs
Start typing the program's name (wordpad)in the Start Search
field.
As you type, all matching files and programs are displayed in
the Start menu.
3
Click WordPad under Programs at the top left of the Start
menu.
Savingyourwork
Before you turn off the computer using the Shut Down command,
save your work on the hard disk drive, diskette, flash media, or CD.
This is one of the most important rules of computing.
When you turn offthe computer using the Sleep or Hibernate
commands, your work should be there when you resume.
Many prQmams offer a feature that saves documents at re mllar
intervals. Check your pro_am's documentation to see if it has an
automatic save feature.
4
LearningtheBasics
Savfl_gyour work
Savingfiles
1
In your Windows:R:-based application, click File, and then Save.
2
Click Browse folders.
If you are working with a document that already has a file
name, this is all you need to do. If you created a new docmnent,
your program displays a Save As dialog box.
Use this dialog box to specit}¢ where to store the document and
to give it a file name.
Name
Date t_ke_
Tag_
Size
P,_t,txg
_ow_
F_nt_,
_IM_
p,;tur_
F,F_m_
(Saml)l(, Ima+g,e)Sin'("A s dialog box
3
Choose the drive and folder where you want your tile to be
stored.
4
Type a tile name, then click Save.
HINT:Tomakeanothercopy ofthefile youarecurrentlyworking
with,clickFile, andthenSave As, andgivethe newfilea different
name.
Filenames
The Windows > operating system supports long file names that can
contain up to 260 characters and can include spaces. Some
applications do not support long tile names and require file names
limited to no more than eight characters.
You may use all the letters, nmnbers, and other characters on the
keyboard, except for these characters: \ / ? : * " > < I. File names
are not case-sensitive.
LearningtheBasics
Printing your work
Q_
Usinga file extension
Most pro mams assign an extension to the file name that identifies
the file as being created in the program with a particular format. For
example, Microsoft '_ Word saves files with a .doc extension. Any
file name with an extension of".doc" is assumed to be a Microsoft '*
Word file. Creating your o,a_ extension is usually unwise, since the
program is unlikely to recognize a strange extension and may refuse
to handle your file correctly.
TECHNICAL
NOTE:Bydefault,theWindows
® operatingsystemdoes
notshowfileextensions.Forinformationon showingor hidingfile
extensions,
seeyourWindows
® onlineHelp.
Printing
yourwork
Ensure the operating system is set up for your printer as described
in "Setting up a printer" on page 73.
HINT:Youonlyneedto setup theprinterthefirsttimeyouconnectit.
If youusemorethanoneprinteror arechangingprinters,youwill
needto set up theWindows
® operatingsystemto runwiththe
additionalprinter(s).
To print a file:
1
If your printer is not on, turn it on now.
2
In your Windo_ s"-based application, click File, and then Print.
The program displays a Print dialog box.
....
Gene_r
i
...........................
S_,lect Panter
_Adg
pd_ter
¢_ Fax
Page Range
_A_[
(Sample Image)
Number
of c_,_ie_
Print dialog box
}
LearningtheBasics
Backing up yourwork
6
3
Specify the print parameters. For example, the range of pages
and number of copies to print.
4
Click Print.
Backing
upyourwork
Back up all the tiles you create in case something happens to your
computer. You can back up your tiles to different types of media
such as CDs, DVDs, diskettes, or to a network, if available.
To back up several files at one time, use the Microsoft * Windows "*
backup pro_am preinstalled on the computer's hard disk. Also see
"Backing up your data or your entire computer with the Windows _
operating system" on page 201.
considerable
aup
mountoftime
Youmay
HINT:Backing
all thefilesandmultipleCBs/DVDs.
on your harddisk maytake
a
preferto usea high-capacitybackupsystem,suchasanexternal
harddrive.
Small tiles can be backed up on diskettes if an optional external
diskette drive is available.
Restoring
yourwork
To restore information from your backup media to your hard disk,
use the Restore page in the backup program. Look in the online
Help or your operating system documentation for information on
restoring files.
TECHNICAL
NOTE:Whenrestoringfiles,the backupprogram
promptsyouif youtry to overwritea filethatalreadyexistson the
harddisk.Makesurethebackupversionis the oneyouwantbefore
overwritingtheexistingfile.
LearningtheBasics
Using the optical drive
97
Usingtheopticaldrive
Optical storage has become the preferred medium for software,
music, and video. Digital versatile discs (DVDs) provide a
significant increase in data storage and support features that are not
available on any other video platform. These features include widescreen movies, multiple lanmmge tracks, digital surround sound,
multiple camera angles, and interactive menus.
For these reasons, your computer may come with an optical drive.
TECHNICAL
NOTE:Youropticaldriveis setto playregion1 (North
America)DVD-ROMs.
If youplaya DVDdiscfromanotherregion,
the drivewill automaticallychangeto playin theformatoftheother
region.Thedrivewill allowyoutochangeregionsfourtimes.Onthe
fourthchange,the regionwill be"lockedin." Thatis, thedrivewill
onlyplayUVUsfromthatlastregion.Notethatchangingfrom region
1 to region2 andbackto region1 is countedastwo changes.
NOTE
ForoptimumDVDperformance,
it is recommended
that youplay
UVUswhilerunningthecomputeron ACpower.
Opticaldrivecomponents
The optical drive is located on the side of the computer.
Your optical drive may look like this:
i 0,0 ,vi0H
in II l
Manual
ejecthole
(SampleIllustration) Optical drive
Drive in-use indicator
Eject
button
light
Press to release
Indicates
when the drive is in use.
the disc tray.
LearningtheBasics
Using the optical drive
8
K_
Donotpresstheejectbuttonorturn offthecomputerwhilethedrive
in-useindicatorlight is glowing.Doingsocoulddamagethediscor
the drive.
Whenthedisctrayis open,be carefulnotto touchthelensor the
areaaroundit. Doingso couldcausethe driveto malfunction.
Manual eject hole
Use if you need to release the disc tray when
the power is off. Use a straightened paper clip or other narrow
object to press the manual eject button located inside the hole.
Neverusea pencilto pressthemanualejectbutton.Pencilleadcan
breakoff insidethecomputeranddamageit.
Media controlbuttons
(Available
on certain
models)
The media control buttons located above the keyboard let you
access the Internet when the computer is on and play audio CDs or
DVD movies.
Stopbutton*
Play/Pause
button*
Mediabutton*.
button*
Nexttrack
button*
-Previous
track
Internet
browser
/
button*
/
,o
II
II :o
I
*Availableon certainmodels
(Sampl_ lllustratio_O
M_dia Co_tttol butto_ts
The Internet browser button lets you access the Internet when the
computer is powered on.
The Media button activates a media playing application that can
play audio CDs or DVD movies.
The Play/Pause button starts playing the disc or makes it pause if
currently playing.
LearningtheBasics
Using the oplical drive
QQ
The Stop button stops a disc that is currently playing.
The Previous track button returns to the preceding track on the
disc.
The Next track button skips to the tbltowing track on the disc.
Inserting
a compactdisc
To insert a compact disc into the drive:
1
Make sure the computer is turned on.
The drive wilt not open if the computer's power is oft'.
2
Make sure the drive's in-use indicator light is off.
3
Press the drive's eject button.
The disc tray slides partially out of the drive (about 1 inch).
4
Grasp the tray and pull it fully open.
(Sample Illustration) Drive tray,fidly ext_,ml_,d
5
Hold the disc by its edges and check that it is ti'ee of dust.
If the disc is dusty, clean it as described in "Caring for CD or
DVD discs" on page 103.
1 O0
LearningtheBasics
Using flw optical drive
6
Place the disc carefully in the disc tray, label side up.
(Sample Illustratio_)
7
Positio_i_g
the disc i_ the driYe
Gently press the disc onto the center spindle until it clicks into
place.
HandleDVDsandCDscarefully,makingcontactonlywiththecenter
holeandedge.Do nottouchthesurfaceof thedisc.Donotstack
discs.If youincorrectlyhandlethediscs,youcouldlosedata.
8
Make sure the disc is completely on the spindle and is lying flat
on the tray.
If youinsertthediscincorrectly,it mayjamthedrive.If this happens,
contactToshibasupportfor assistance.
9
Push the disc tray in by pressing gently on the center of the tray
until it clicks into place.
You are ready to use the disc.
Playing an audioCD
Insert an audio CD and close the disc tray.
If the computer is turned on, Windows Media ®Player opens and the
CD begins to play. You can use the Windows Media :R:Player
pro_am to control the CD.
To access the Windows Media ® Player, you can open it through the
Start menu.
LearningtheBasics
Using the optical drive
NOTE
101
WhenusingWindowsMedia® Player,yoursystemmaynot beable
to activateSleepor Hibernationmodes.Topreventthis from
occurring,closeWindowsMedia®PlayerbeforeyouselectSleepor
Hibernationmode.
Stopbutton
Play/Pause
button
(SampleImage) Wi_MowsMedia _ Plmer scree_t
The Windows Media s Player control panel works much like an
ordinary compact disc player:
o:o To play the CD or to pause, click the Play/Pause button.
°:o TO stop the CD, click the Stop button.
Beforeputtingon headphones
to listen,turnthevolumedown.Do
notsetthevolumetoohigh whenusingheadphones.
Continuous
exposureto loudsoundcanharmyourhearing.
Playing opticalmedia
If you insert a CD/DVD into the optical drive and the Auto-Run
feature does not automatically start your disc, try launching the
CD/DVD manually. To do this, follow these steps:
1
Click Start, and then Computer.
2
Click the optical drive icon.
The disc drive will run the CD/DVD.
102
LearningtheBasics
Using the optical drive
If your disc does not run using this method, try using an application
that is associated with the media on the disc. For example, if it is a
music CD, open Windows Media '_Player and use it to select and
then play the CD. For other types of media, use the associated
software to open the files on the disc.
Creatinga CD/DVD
Depending on the configuration, your computer may come with a
multi-function drive that allows you to:
o:o Play pre-recorded DVDs
o:o Play pre-recorded CDs
o:o Read and write data (depending on your system confimJration)
and music files to CD-Recordable (CD-R) and CD-Rewritable
(CD-RW) discs; and DVD+R/+RW or DVD RAM discs.
NOTE
Dueto manufacturing
andqualityvariationsin third partyoptical
media(e.g.,CD or DVD)or opticalmediaplayers/recorders,
in
certaincases,yourToshibaopticaldrivemaynotrecordoncertain
opticalmediathat beartheapplicablelogo,or playbackoptical
mediarecordedbyothercomputersor opticalmediarecorders.
Additionally,certainopticalmediarecordedonyouropticaldrive
maynotplaybackor operateproperlyon othercomputersor optical
mediaplayers.Theseproblemsarenotdueto anydefectin your
Toshibacomputeror opticaldrive.Pleasereferto yourcomputer's
productspecificationfor listingof specificformatcompatibilities.
Copyprotectiontechnologymayalsopreventor limit recordingor
viewingofcertainopticalmedia.
For details on how to use the software, please refer to the respective
Online Help menus.
Removinga discwiththecomputeron
To remove a disc (CD or DVD) with the computer turned on:
1
Press the eject button on the drive.
Donot presstheejectbuttonwhilethe in-useindicatorlightis
glowing.Doingso coulddamagethediscor the drive.
Also,if thediscis still spinningwhenyouopenthedisctray,waitfor
it to stopspinningbeforeyouremoveit.
LearningtheBasics
Toshiba_ online resources
103
2
Pull the tray out until it is fully open, remove the disc, and
place it in its protective cover.
3
Gently press the tray in to close it.
Removinga discwiththecomputeroff
To remove a disc with the computer turned off:
1
Insert a slender object, such as a straightened paper clip, into
the manual eject hole.
The disc tray slides partially out of the drive (about 1 inch).
oN j Neverusea pencilto pressthe manualejectbutton.Pencilleadcan
breakoff insidethecomputeranddamageit.
2
Pull the tray out until it is fully open, remove the disc, and
place it in its protective cover.
3
Gently press the tray in to close it.
CaringforCDor DVDdiscs
o:o Store your discs in their original containers to protect them
from scratches and keep them clean.
o:o Do not bend a disc or place heaxT objects on top of it.
o:o Do not apply a label to, or otherwise mar the surface o_; a disc.
o:o Hold a disc by its outside edge. Fingerprints on the surface can
prevent the optical drive from reading the data properly.
o:o Do not expose discs to direct sunlight or extreme heat or cold.
o:o To clean a disc that is dirty, wipe it with a clean, dry cloth. The
most efficient method to clean it is to start tiom the center of
the disc and wipe toward the outward edge (not in a circle). If
necessary, moisten the cloth with water or a neutral cleaner
(not benzine or rubbing alcohol). Let the disc dry completely
before inserting it in the drive.
Toshiba's
onlineresources
Toshiba maintains a number of online sites to which you can
connect. These sites provide information about Toshiba products,
give help with technical questions and keep you up to date with
future upgrades. For more int\_rlnation, see "Contacting Toshiba,
on page 204.
Chapter3
MobileComputing
This chapter covers all aspects of using your computer while
traveling.
Toshiba's
energy-saver
design
Your computer enters a low-power suspension mode when it is not
being used, thereby conserving energy and saving money in the
process. It has a number of other features that enhance its energy
efficiency.
Many of these energy-saving features have been set. We
recommend you leave these features active, allowing your computer
to operate at its maximum energy efficiency, so that you can use it
t\_rlonger periods while traveling.
Running
thecomputer
onbatterypower
The computer contains a removable Lithium-Ion (Li-Ion) battery
that provides power when you are away from an AC outlet. You can
recharge it many times.
104
MobileComputing
Running the computer on batte O'p_'er
105
BatteryNotice
Battery life may vary considerably from specifications depending
on product model, configuration, applications, power managelnent
settings and features utilized, as well as the natural perforlnance
variations produced by the desiN1 of individual components.
Published battery life numbers are achieved on select models and
confimlrations tested by Toshiba at the time of publication.
Recharge time varies depending on usage. Battery may not charge
while the computer is consuming full power.
After a period of time, the battery will lose its ability to perform at
maximum capacity and will need to be replaced. This is normal t\_r
all batteries. To purchase a new battery pack, see the accessories
inforlnation that shipped with your computer or visit the Toshiba
Web site at accessories.toshiba.com. Use only batteries desiNled to
work with your Toshiba notebook computer.
To ensure that the battery maintains its maximum capacity, operate
the computer on battery power at least once a month. The LithiumIon battery has no memory effect so it is not necessary to let the
battery tully discharge each time. However, for better accuracy of
the battery meter, it is helpful to fully discharge the battery
periodically. Please see "Maintaining your battery" on page 119 t\_r
procedures. If the computer is contilmously operated on AC power,
either through an AC adaptor or a port replicator (if applicable to
your system), for an extended period (more than a month), the
battery may tail to retain a charge. This may shorten the life of the
battery, and may cause the battery meter to be inaccurate.
NOTE
ForoptimumDVDperformance,
it is recommended
that youplay
UVUswhilerunningthecomputeron ACpower.Formore
@
informationaboutWindows powerplans,see PowerPlans"on
page113.
The computer also has an internal real-time-clock
(RTC) battery.
The RTC battery powers the RTC memory that stores your system
confimlration settings and the current time and date inforlnation. It
maintains this information for up to a month while the computer is
turned ot'£
TECHNICAL
NOTE:TheRTCbatterydoesnotchargewhilethe
computeris turnedoff,evenwhenACpoweris attached.
TheRTCbatterychargesonlywhilethecomputeris poweredon.
106
MobileComputing
Chal_ing balleries
Powermanagement
Your computer ships with the power management options preset to
a configuration that will provide the most stable operating
environment and optimum system performance for both AC power
and battery modes.
L _:_Ti_
] Changesto thesesettingsmayresultin systemperformance
or
stabilityissues.Userswhoarenotcompletelyfamiliarwiththepower
management
componentofthesystemshouldusethepreset
configuration.Forassistance
with setupchanges,contactToshiba's
GlobalSupportCentre.
Usingadditionalbatteries
In addition to the main battery, you may also have an optional
secondary battery (not included with your computer). If you travel
and need to work for many hours without an AC power source, you
may purchase a battery module for use in the computer, or c_ry
additional charged battery packs with you. You can then replace a
discharged battery and continue working.
For more intbnnation on batteries and accessories, see
accessories .toshiba .com.
Charging
batteries
The battery needs to be charged betbre you can use it to power the
computer.
Neverleavebatteriesin thebatterychargerfor morethana weekata
time. Doingsomayreducethepotentialchargeofthe battery.
AlwaysusethebatterychargerspecifiedbyToshiba.Youcanordera
ToshibabatterychargerfromToshiba'sWebsite at
accessories.toshiba.com.
NOTE
Batterychargetime mayvarydependingon theapplications,power
management
settings,andfeaturesused.
MobileComputing
Chal_ing balleries
107
Charging the main battery
To charge the main battery while it is in your computer, plug the
computer into a live electrical outlet. The battery charges whether
the computer is on or ofl,
TECHNICAL
NOTE:Therecharging
ofthebatterycannotoccurwhen
yourcomputeris usingall ofthepowerprovidedbytheACadaptorto
runapplications,
features,
anddevices.Yourcomputer's
PowerOptions
utilitycanbeusedto selecta powerlevelsettingthatreducesthepower
requiredforsystemoperation
andwill allowthebatteryto recharge.
The battery may not start charging immediately under the following
conditions:
o:o The battery is extremely hot or cold.
To ensure that the battery charges to its full capacity, wait until
it reaches room temperature (50 to 80 degrees Fahrenheit, 10 to
26 degrees Celsius).
o:o The battery is ahnost completely discharged.
Leave the power connected and the battery should begin
charging after a few minutes.
HINT:Oncethebatteryis fully charged,werecommend
thatyou
operateyourcomputeron batterypoweruntilthebatterydischarges
completely.
Doingthis extendsbatterylife andhelpsensureaccurate
monitoringof batterycapacity.
Chargingthe RTCbattery
Your computer has an internal real-time clock (RTC) battery. The
RTC battery powers the System Time Clock and BIOS memory
used to store your computer's configuration settings. When tully
charged, it maintains this information for up to a month when the
computer is powered off.
The RTC battery may have become completely discharged while
your computer was shipped, resulting in the following error
message during startup:
BADRTCBATTERY
BADCHECKSUM
(CMOS)
CHECK
SYSTEM
108
MobileComputing
Monitoring main batte O,p_m,er
NOTE
Theaboveerror message
mayvarybycomputermodel.
TheRTCbatterydoesnotchargewhilethe computeristurnedoff
evenwhentheACadaptoris chargingthecomputer.TheRTCbattery
chargeswhenthecomputeris poweredon.
If the RTC battery is low, the real-time clock and calendar may
display the incorrect time and date, or stop working.
To recharge the RTC battery, plug the computer into a live electrical
outlet and leave the computer powered on for 24 hours.
NOTE
It is seldomnecessary
to chargethe RTCbatterybecauseit charges
whilethecomputeris on.If theRTCbatteryis low,thereal-time
clockandcalendarmaydisplaythe incorrecttime anddateor stop
working.
WhenHibernationmodeis enabledandtheRTCbatteryis
completelydischarged,
a warningpromptsyouto resetthereal-time
clock.
The computer can be used while the RTC battery is being charged,
although the charging status of the RTC battery cannot be
monitored.
Monitoring
mainbatterypower
The computer s main battery light gi_es you an indication of the
main battery's current charge. The following also applies to the
secondary battery (available on certain models) if installed.
o:o Glows amber while the main battery is being charged (AC
adaptor connected).
o:o Glows blue when the main battery is fully charged.
o:o Is unlit when the battery has discharged, the battery is not
charging, or the AC adaptor is not plugged into the computer or
AC outlet.
NOTE
Batterylifeandchargetime mayvary,dependinguponpower
management
settings,applicationsandfeaturesused.
o:o Flashes amber when the main battery charge is low and it is
time to rechaige the main battery or plug in the AC adaptor.
MobileComputing
Monitoring main bafle O'p_m,er
NOTE
109
If theACpowerlightflashesamberduringcharging,eithera battery
packis malfunctioning,
or it is notreceivingcorrectinputfromthe
ACpowersupply.
Disconnect
theAC powercord/cableandremovethebatterypack.
See"Changingthemainbattery"on page115for informationon
replacingthemainbattery.
light(_).
HINT:Becarefulnotto confusethebatterylight(C3) with theon/off
Whentheon/offlightflashesamber,it indicatesthatthesystemis
suspended(usingtheWindows_ operatingsystemSleepcommand).
Power
button
System
Indicator
Lights
¢
(
ACpowerlight
"1 "_'_'1 _
_
®
O
/
"
/
On/offlight1/ I
Battery
light-J |
Harddiskdrivelight_
(Samt_le
Illustratio_)
Power
BridgeMediaAdapter
light
(oncertain
models
only)
cmd batte O liL, ht location,
s
1 1 0
MobileComputing
Monitoring main batte O,p_m,er
Determining
remaining
batterypower
NOTE
1
Waitat least16 secondsafterturningonthecomputerbeforetrying
to monitortheremainingbatterypower.Thecomputerneedsthis
time to checkthebattery'sremainingcapacityandperformits
calculations.
Highlight the power icon in the Notification Area. A pop-up
message displays the remaining battery power as a percentage.
With repeated discharges and recharges, the battery's capacity
gradually decreases. A tiequently used older battery does not
power the computer for as long as a new battery, even when
both are fully charged.
TECHNICAL
NOTE:Thecomputerdrainsthe batteryfasterat low
temperatures.
Checkyourremainingchargefrequentlyif youare
workingin temperatures
below50 degreesFahrenheit.
Thecomputercalculatesthe remainingbatterychargebasedon your
currentrateof poweruseandotherfactorssuchastheageofthe
battery.
Whattodowhenthemainbatteryrunslow
When the main battery runs low you can:
o:. Plug the computer into an external power source and recharge
the main battery
Place the computer into Hibernation mode and replace the
main battery with a charged spare
Connect the computer to an optional secondary battery (if
available t\_r your computer)
o:* Save your work and turn offthe computer
If you do not manage to do any of these things betbre the main
battery completely runs out of power, the computer automatically
enters Hibernation mode and turns itself off. Hibernation mode
keeps track of where you were, so that when you turn on the power
again, you can continue where you left oft'.
MobileComputing
M(milori_g mab_ baile 0' 1)(m,er
1 1 1
If you have Hibernation mode enabled (the default), the computer
copies the details of your open pro m'ams and files to the hard disk
betbre shutting down. For more int\_rlnation on using Hibernation,
see "Hibernation mode" on page 75.
Settingbatterynotifications
You can set two notifications. Each notification can be set to alert
you when a specified percentage of remaining battery power has
been reached. You can also set the computer to enter Sleep mode or
Hibernation mode or to completely power down when the
notification goes off.
To change the delhult notification settings:
1
Click Start,
Control
Panel, Mobile
PC, and then Power
Options.
The Power Options window appears.
Click Change plan settings under the power plan to be
customized.
The Edit Plan Settings window appears.
Click Change advanced
power settings.
The Advanced settings tab of the Power Options window
appears.
:;
Select
_hen
the
;
130 _ver pl_r_ that
choo_e
computer
t_
setting_
tha{
m_nage
you
efiect
w_r_t
ho_
to c_;t_mize,
you
want
and
yeur
p_wer
Batte#y
c_iti_f
I_at_en/a_tion
£i
Or_ b _¢t.e D'z
P_ugged
in: i{i
'
(£'alplI)lellplage) Advat_ced setti_gs tab f Pow#r ()/)tio*ts ,*cr,,e*t
1 1 2
MobileComputing
Monitoring main batte O'l)(m'er
4
Click Battery to display the battery options.
5
Configure the alarm settings to suit your needs.
Conservingbatterypower
How long a tully charged battery pack lasts when you are using the
computer depends on a nmnber of thctors, such as:
o.*o How the computer is configured
o.*o How much you use the hard disk, optical drive, diskette drives,
or other optional devices
o.*o Where you are working, since operating time decreases at low
temperatures
There are various ways in which you can consela,e power and
extend the operating time of your battery:
o.*o Enable Sleep or Hibernation, which saves power when you mm
offthe computer and turn it back on again
o.*o Use the Windows _ power-saving option plans
These power-saving options control the way in which the computer
is configured. By using them, you can increase the length of time
you can use the computer before you need to recharge the battery.
Microsoft "_"
has combined these options into preset Power Plans.
Using one of these power plans lets you choose between maximum
power savings and peak system pert\_rmance. You may also set
individual power-saving options to suit your o,am needs.
The t\_tlowing sections describe how to choose a Power Plan and
discuss each power-saving option.
MobileComputing
Monitoring main baflely p_m,er
1 13
Power Plans
You can choose a predefined Power Plan or select your own
combination of power options. To do this:
1
Click Start, Control Panel, Mobile PC, and then Power
Options.
The Windows _ Power Options window appears.
(Sample Image)
Windows '_Power Options
window
2
Select an appropriate plan for your work environment
your own custom plan.
3
Click Create
INOTE
4
a Power
Plan to set up a new plan.
Toedit a plan or to edit advancedsettings, continue to the following
steps.
Click Change
edit.
Plan Settings
to choose
This screen allows you to change
5
or create
the plan you want to
basic settings.
Click Change Advanced
Settings to access settings for
battery notification
levels, hard drive power save time, etc.
You can click on the plus simls to expand each item and to see
what settings are available for each item.
6
Click Save Changes
performed.
to save the plan changes
you have
1 1 4
MobileComputing
Monitoring main batte O,p_m,er
By default the three power plans Balanced, Power Saver, and High
Performance are satisfactory for most people and do not need to be
edited. The Power Saver plan is the best used for maximum battery
time. The High Perforlnance plan will give you the shortest battery
time, but the highest performance from your computer. The
Balanced plan is a compromise between battery time and
perforlnance.
Usinga hotkeyto set thePower Plan
You may use a hot key to set the Power Plan.
To set the Power Plan:
1
Press Fn and F2 simultaneously to display the Power Plan hot
key card.
(Sample Image)
2
Power Plcm hot km card
While continuing to press Fn, press F2until you select the
desired Power Plan.
The Power Plan options are: Balanced, Power Saver, and High
Performance.
3
Release the Fn key.
The hot key card disappears. You are now in the selected mode.
MobileComputing
Changing the main ballel_,
1 1 5
Changing
themainbattery
When your main battery has run out of power, you have two
options: plug in the AC adaptor or install a charged main battery.
Nevershortcircuitthebatterypackbyeitheraccidentallyor
intentionallybringingthebatteryterminalsin contactwith another
conductiveobject.Thiscouldcauseseriousinjuryor fire, andcould
alsodamage
the batterypackandcomputer.
o:. Neverexposea batterypackto abnormalshock,vibrationor
pressure.Thebatterypack'sinternalprotectivedevicecould
fail, causingit to overheator ignite,resultingin causticliquid
leakage,or explosionor fire, possiblyresultingin deathor
seriousinjury.
TECHNICAL
NOTE:Toavoidlosinganydata,saveyourfiles and
theneithercompletelyshut downyourcomputeror put it into
Hibernationmodebeforechangingthemainbattery.
Removing
thebatteryfromthecomputer
To remove the battery:
1
Save your work.
2
Turn off the computer or place it in Hibernation mode
according to the instructions in "Using and confimlring
Hiberuation mode" on page 79.
3
Unplug and remove any cables connected to the computer,
including the AC adaptor.
4
Close the display panel and turn the computer upside do,am.
1 1 6
MobileComputing
Changing flTemain balw O,
5
Slide the battery release
lock to the unlocked
position.
(Sample IllustratiotO Ut_lockit_gthe batter_ rdease lock
6
Slide the battery release latch to release the battery.
7
Pull the discharged battery out of the computer.
(Sample IllustratiotO
Removit_g
the batteta
If thebatteryis leakingor its caseis cracked,puton protective
glovesto handleit, anddiscardit immediately.
Alwaysdisposeof
usedbatterypacksin compliancewith all applicablelawsand
regulations.Putinsulatingtape,suchascellophanetape,on the
electrodeduringtransportationto avoida possibleshortcircuit,fire
or electricshock.Failureto doso couldpossiblyresultin serious
injury.
MobileComputing
Changing 1he main ballel T
1 1 7
Inserting
a charged
battery
To insert a battery:
1
Wipe the terminals of the charged battery with a clean cloth to
ensure a good connection.
2
Insert the charged battery into the slot until the latch clicks.
The battery pack has been desiNled so that you cannot install it
with reverse polarity.
If thebatterydoesnotslideintotheslot easily,movethebattery
releaselockto theunlockedpositionandtry again.Donotforcethe
batteryintoposition.
(Sampl_ I/lustratio_O h_s_t'ti_g th_ batt_ r_
3
Slide the battery release lock to the locked position.
(Sample IllustratiotO
Lockit_g the batterx
rdease
lock
1 1 8
MobileComputing
_lking can, (?]')'our bailel 3'
4
Turn the computer right side up.
5
Reconnect any cables that were removed in step 3 of
"Removing the battery from the computer" on page 115.
6
Restart the computer.
Takingcareofyourbattery
The following sections offer tips on how to take care of your battery
and prolong its life.
Safetyprecautions
If the battery pack produces an odor, overheats or changes
color or shape while it is being used or charged, turn off the
computer's
power ilrnnediately
and disconnect the power
cord/cable fiom the power socket. Carefully remove the battery
pack from the computer.
Do not try to disassemble a battery pack.
Do not overcharge or reverse charge a battery. Overcharging
will shorten its life, and reverse charging could damage it.
Avoid touching the metal terminals of the battery with another
metal object. Short-circuiting the battery can cause it to
overheat and may cause damage to the battery or the computer.
Do not incinerate a spent battery, as this could cause it to
explode and release caustic liquid.
If a battery is leaking or damaged, replace it immediately. Use
protective gloves when handling a damaged battery.
To replace the main battery, use an identical battery that you
can purchase through the Toshiba Web site at
accessories.toshiba.com.
A reverse polarity condition should be avoided with all
batteries. The main battery is designed so that it cannot be
installed in reverse polarity.
Charge the battery only in the computer or in a battery charger
designated as an approved option.
When you install the battery pack, you should hear a click
when it is seated properly.
Do not expose the battery pack to fire. The battery pack could
explode.
MobileComputing
Taking care qf your balle O'
1 1 9
Maintaining
yourbattery
Fully discharging your battery pack will allow better accuracy of
the battery meter.
To fully discharge your battery pack:
•t.
Periodically, disconnect the computer from a power source and
operate it on battery power until the battery pack fully
discharges. Bet\ne doing so, follow the steps below:
1
Turn off the computer's power.
2
Disconnect the AC adaptor and turn on the computer's
power. If it does not turn on, go to step 4.
Operate the computer on battery power for five lninutes. If
the battery pack has at least five minutes of operating time,
continue operating until the battery pack is tully
discharged. If the battery light flashes or there is some
other warning to indicate a low battery, go to step 4.
Connect the AC adaptor to the computer and the power
cord/cable to a power outlet. The DC-IN or AC powerlight should glow blue, and the battery light should glow
amber to indicate that the battery pack is being charged. If
the DC-1N or AC power-tight indicator does not gto,a;
power is not being supplied. Check the connections for the
AC adaptor and power cord/cable.
5
Charge the battery pack until the battery light glows blue.
o:o If you have extra battery packs, rotate their use.
o:o If you will not be using the system for an extended period,
more than one month, remove the battery pack.
o:o If you are not going to use the computer for more than eight
hours, disconnect the AC adaptor.
o:o Store spare battery packs in a cool dry place out of direct
sunlight.
120
MobileComputing
Disposing ofused baileries
Disposing
ofusedbatteries
The life of a battery pack depends on usage. When the battery pack
needs replacing, the main battery light flashes amber shortly after
you have fully recharged the battery.
You must discard a battery if it becomes damaged.
Neverattemptto disposeof a batterypackbyburningor bythrowing
it intoa fire,and neverallowexposureto a heatingapparatus(e.g.,
microwaveoven).Heatcancausea batterypackto explodeand/or
releasecausticliquid,bothwhichmaypossiblycauseseriousinjury.
Alwaysdisposeof usedbatterypacksin compliancewithall
applicablelawsandregulations.Putinsulatingtape,suchas
cellophane
tape,ontheelectrodeduringtransportation
to avoida
possibleshortcircuit,fire or electricshock.Failureto doso could
possiblyresultin seriousinjury.
Alwaysusethebatterypacksuppliedasanaccessoryor an
equivalentbatterypackspecifiedin theUser'sManual.Otherbattery
packshavedifferentvoltageandterminalpolarities.Useof nonconformingbatterypackscouldgenerate
smokeor causefireor
rupture,possiblyresultingin seriousinjury.
After repeated use, the batteries will finally lose their ability to hold
a charge and you will need to replace them. Under certain
applicable laws and retaliations, it may be illegal to dispose of old
batteries by placing them in the trash.
Please be kind to our shared environment. Check with your local
government authority for details regarding where to recycle old
batteries or how to dispose of them properly. If you cannot find the
information you need elsewhere, call Toshiba at: (800) 457-7777.
Toshiba is dedicated to preserving the environment by sponsoring
Call2Reeyele TM, a pro_am of the Rechargeable Battery Recycling
Corporation. For more information and for drop-off locations, visit
,a-ww.rbrc.oN or call 1-800-822-8837.
Notice regarding CR coin cell batteries, applicable to California,
U.S.A. only:
Perchlorate Material - special handling may apply.
See http://www.dt sc.ca.gov/hazardouswaste/perchlorate/
MobileComputing
Tr_lveling tips
121
Traveling
tips
The environmental precautions listed in "Selecting a place to work"
on page 39, also apply while traveling.
o:o Never leave your computer on a sunny ledge or in a place
where it could get wet or covered in dust.
Always travel with the computer in a carrying case. Toshiba
offers a choice of carrying cases for the computer. They all
provide plenty of extra space for manuals, power cords, and
compact discs. Contact your authorized Toshiba representative
t\_r more in*bnnation or visit Toshiba's Web site at
accessories.toshiba.com.
TECHNICAL
NOTE:Whentravelingbyair,youmaybe requiredto
passyournotebookthroughairportsecurityequipment.TheX-ray
equipmentwill not harmyourcomputer.
NOTE
Beforeusingyourcomputeraboardanaircraft,makesuretheWi-Fi®
switchis setto the Offpositionif yourcomputerhaswirelessLAN
capability.
Chapter
4
Exploring
YourComputer's
Features
In this chapter, you will explore some of the special features of your
notebook computer.
Exploring
thedesktop
The desktop is the launching pad for everything you can do in the
Windows ®operating system. You use its features to start programs,
find documents, set up system components, and pertbnn most other
computing tasks.
different
fromthescreensdisplayed
Thedifferences
HINT:Theillustratedexamples
in thisbyyoursystem.
guidemayappear
slightly
arenotsignificantanddo notindicateanychangein thefunctionality
ofyoursystem.
122
Exploring
YourComputer'sFeatures
Exploring the desktop
1 23
Findingyourwayaroundthedesktop
Your computer's desktop includes several standard features: icons,
Start button, Taskbar, Notification Area, and background pattern.
Startbutton
I
Taskbar
1
NotificationArea
(Sample Image) Wimlows _ operati,_g s3stem desktop
Icons
An icon represents a tblder, file, or program that can be quickly
activated by double-clicking the icon.
You can create a new desktop icon for any t\dder, file, or program
by dragging the element's icon from its location in a window to the
desktop area.
Various icons are initially displayed on your system desktop
including:
Recycle Bin_olds
files you have deleted. You may be able to
retrieve these files until you empty the Recycle Bin.
TECHNICAL
NOTE:If youdeleteatile froma disketteor flashmedia,
it doesnot go intotheRecycleBin.Formoreinformationon the
RecycleBin,seeWindows® onlineHelp.
Intemet Explorer ® The Microsoft '_browser that provides access
to the Intemet.
1 24
Exploring
YourComputer'sFeatures
Exploring the desktop
NOTE
Ifyou placethecursoroveran icon,a popupdescriptionofthefile
contentsappears.
Your desktop may contain other icons depending on your
confi_ration. See Windows _ online Help for more specific
intbnnation on each icon and how to use it.
Startbutton
You use the Start button to:
oto Start pro mams
oto Open documents
oto Adjust system settings
oto Find files
oto Access Windows _ Help and Support
°:o Suspend system activity and shut do,am the computer
NOTE
Whenevera procedurein this User'sGuideinstructsyouto click
Start,it meansthatyoushouldclicktheStartbutton.
Taskbar
Each time you open a program, a button associated with that
program appears on the Yaskbar. With some prQmams, a button
appears on the Yaskbar t\_r each document or window you open.
You can use these buttons to quickly switch between the programs
or windows.
To make a pro m'am or window the currently active one, click the
associated Taskbar button.
Notification Area
The Notification Area displays icons of tasks or programs that mn
continuously in the background and displays notifications. To learn
more about each task, position the cursor over the icon t\_r a few
moments and a short description of the task appears.
Typical tasks in the Notification Area are Current time, Power
usage mode, Mouse properties, and speaker volume.
To activate a specific task, double-click the appropriate Notification
Area icon.
Exploring
YourComputer'sFeatures
Selling Ul@_rcommunications
1 25
Settingupforcommunications
To connect to the Intemet, use an online service, or communicate
across the telephone lines with another computer, you need:
o:. A modem (available on certain models)
o:. A telephone line
o:. A browser or communications
+
program
An Internet Service Provider (ISP) or online service if you plan
to use the Internet
Determining
the COMport
Your modem (available on certain models) is connected to one of
the computer's COM (communications) ports. The default setting
t\_rthe modem is COM3.
The t\_tlowing procedure is intended to support you if you need to
either upgrade your modem or reset the port to the default settings.
If you are having trouble connecting through the modem, you may
need to determine the current COM port name and possibly change it.
To find out which port your modem is connected to:
1
Click Start, Control Panel, and then Hardware and Sound.
2
Click Phone and Modem Options.
The Location
Information
3
Fill in the Local Information
4
Click the Modems tab.
dialog box displays.
text boxes and click OK.
Your modem should be listed next to one of the computer's
COM ports.
5
Make a note of the COM port number.
6
To verity that the modem is set up properly, select the modem
you wish to check, and then click Properties to bring up the
dialog box with information specific to that modem.
The Windows ®operating system communicates with the
modem and displays identi_ing information reported by the
modem. If the Windows ®operating system cannot
communicate with the modem, it displays an error message.
Consult the troubleshooting sections of your modem and
Windows :Roperating system documentation.
126
Exploring
YourComputer'sFeatures
Selling Ul@)r communications
7
Click OK to close the properties dialog box _\_rthat specific
modem.
8
Click OK to close the Phone and Modem Options dialog box.
9
Close the Control Panel.
Connectinga modemtoa telephoneline
(Available on certain models)
Your computer may come with a built-in modem that can be
connected to a standard voice-_ade telephone line.
The modem allows you to:
o:* Access the Internet
o:* Communicate with your office's local area network (LAN) or
larger corporate wide area network (WAN)
For specific information about connecting to a LAN or WAN,
consult your network administrator.
o:* Send a fax directly fiom your computer
For more detailed int\_rlnation regarding your computer's modem,
visit Toshiba's Web site at accessories.toshiba.com.
Before you can communicate using the modem, you need to
connect it to a telephone line. Your computer's built-in modem port
provides an RJ-11 jack, allowing you to connect the modem to a
standard voice-made telephone line.
1
Plug one end of a telephone cable (prochased separately) into
the modem port on the side of the computer.
(Sample IllustratiotO
port
CotmectilTg
the telephotTe cable to the modem
Exploring
YourComputer'sFeatures
Setting up.fro"communications
2
Connect
the other end to the RJ- 11 wall jack.
(Sample Illustrati(m
NOTE
127
) Cotmectb_ g to a wall jack
Connectthebuilt-in modemonlyto ordinaryanalogphonelines.
Neverconnectthebuilt-in modemto a digital line(iSDN).
Neverconnectthebuilt-in modemto thedigitalconnectorona
publictelephoneor to a digitalprivatebranchexchange(PBX).
Neverconnectthebuilt-in modemto a keytelephonesystemfor
residences
or offices.
Connectionto anycommunicationlineotherthanananalogphone
line couldcausea computersystemfailure.
Now you are ready to send a tax or use the modem to connect to an
online service or the Internet.
Connectingyourcomputer
toa network
You can connect your computer to a network to increase its
capabilities and functionality using one of its communication ports.
Accessing
a network
To access a network:
At the office, connect an Ethernet cable to the RJ45 jack on
your computer. For specific information about connecting to
the network, consult your network administrator. Many hotels,
airports, and offices offer Wi-Fi <R:
access. If your computer has
Wi-Fi '_,ask them for help when connecting to their Wi-Fi '_
network.
While you are at home or traveling, you need a dial-up
connection. Ask your network administrator t\_r the telephone
nmnber of the network.
1 28
Exploring
YourComputer'sFeatures
Selling Ul@)r communications
Setting uptheconnection
To set up an office connection, consult your network administrator
for network settings and additional considerations.
To set up a dial-up connection, use the Connect to the Intemet
Wizard:
1
Click Start, Control Panel, Network and Internet,
Connect to the Internet.
and then
2
Click Dial Up.
3
Enter the phone number and account inforlnation of your
Internet connection.
4
Click Connect and let the program dial the number.
The computer connects to the Internet.
HowtodisabletheEthernetEARport
When your computer starts, the Windows ®operating system
attempts to contact a Dynamic Host Configuration Protocol
(DHCP) selwer. If the computer is not connected to a network, it
may pause a few minutes as it waits for a reply. To avoid this delay,
you can reconfigure the Windows ®operating system to disable the
LAN port.
To disable the LAN port:
1
Click Start, Control Panel, System and Maintenance,
then System.
2
Click Device Manager
window.
3
Double-click Network Adapter.
4
Double-click the appropriate network adapter.
5
Select the Driver tab.
6
Click Disable.
7
Click Yes.
8
Click OK.
and
under Tasks on the left side of the
Yore"LAN port is now disabled.
To enable the Ethernet LAN port, repeat steps 1-4. Select the
Driver tab, then click Enable Device, Next, Finish, and then
Close.
Exploring
YourComputer'sFeatures
An oven, i_' qf using the h_temet
129
UsingWirelessLANconnectivity
NOTE
Wirelessconnectivityandsomefeaturesmayrequireyouto
purchaseadditionalsoftware,externalhardwareor services.
Availabilityof publicwirelessLANaccesspointsmaybe limited.
Your system may come with an optional wireless LAN module.
This is a technolo_ that expands wireless communication beyond
networking equipment, and can connect many different kinds of
electronic devices without the need t\_r cables.
For information on how to set up a wireless connection, refer to
your wireless networking device documentation or your network
administrator.
TO use your wireless communication,
switch to the On position.
NOTE
slide the wireless on/off
WhentheWi-Fi®antennaswitchis on,thewirelessindicatorlight
({_T)))
will be lit.
For help with common Wi-Fi _Rnetworking problems, see "Wireless
networking problems" on page 194.
AnoverviewofusingtheInternet
The tbllowing sections give a quick introduction to the Intemet and
some of its exciting features, under these headings:
o:* The Internet
o:* The World Wide Web
o:* Internet Service Providers
o.*o Connecting to the Internet
o:* Surfing the Internet
o:* Internet features
o:* Uploading to, and downloading files from, the Internet
130
Exploring
YourComputer'sFeatures
An ovel_'i_' ofusing the h_lemet
The Internet
The Internet is an association of thousands of networks and
millions of computers around the world connected by
communications lines. They all work together to share information.
TheWorldWideWeb
The World Wide Web (or "Web") is a subset of the Internet a
collection of interlinked documents (located on computers
connected to the Internet) that work together using a specific
Internet protocol called Hypertext Transfer Protocol (HTTP).
The World Wide Web offers information as text, images, audio, or
video to be referenced fiom anywhere in the world. Special
pro_ams called Web browsers are specifically designed to work
with HTTR They make it easier to connect to a particular network
address and send and receive inI\3rmation.
InternetServiceProviders
To connect a computer directly to the Interact, many people and
businesses use an Internet Service Provider (ISP). An ISP is a
company that has the equipment and the telecommunication lines
necessary to maintain an Interact connection.
You can connect to the Internet by using a telephone and modem or
through other higher-speed communication methods such as Digital
Subscriber Lines (DSL), cable, and satellite links.
Connectingto theInternet
To connect to the Internet, you need:
o:* A modem and telephone line, or a LAN connection
•:" A Web browser
o;, An Internet Service Provider (ISP) account
Once you have established an ISP account, you can connect to the
Internet.
1
Connect your computer's modem (available on certain models)
to a telephone line. For more int\_rmation on connecting a
modeln, see "Connecting a modem to a telephone line" on
page 126.
2
Start your Web browser. Have your modem dial the ISP's
telephone number, and establish a connection with the ISP's
computer.
Exploring
YourComputer'sFeatures
An ove_,i_' qf using flTe lnlemel
1 31
If you are using your computer at the office, then you probably
connect to the Internet through your company's network. See your
network administrator about connecting to the Intemet.
SurfingtheInternet
Once connected to the Imemet, the Web browser displays a home
page, for example, your ISP's home page on the Intemet or your
company's Web site home page.
To visit a desired Web site, type in the Web address. The Web
address, or Uniforln Resource Locator (URL), is a unique identifier
t\)r that computer system linked to the Internet. Web addresses can
also appear within a Web page's text, and are kalown as links.
Clicking a link automatically transfers your Web browser to that
site.
You can also use a Search Engine, a Web site specifically designed
to help you look t\)r int\)rmation.
Internetfeatures
The Internet offers many types of comlnunication
pert\)rln many tasks.
o.'o Internet
tools to help you
email
To send and receive email of your o,am, you need a mailbox on
the Web or an email address.
If you have an account with an ISR you can probably set up an
email address at the same time you siN1 up for the service.
Internet chat rooms
A chat room is a Web site that offers a place where people with
similar interests and ideas comlnunicate in real-time, one-onone or in groups, by typing messages which are instantly
viewed by others on their computer screens.
o:* Intemet news _oups
A news moup is similar to a chat room, but instead of using a
dedicated site to converse about a specialized subject with
others in real-time, it uses a Web site as a clearinghouse where
all the messages are placed, like a gigantic bulletin board.
o:* Online shopping
Many Web sites offer products and sel-vices for sale.
132
ExploringYourComputer's
Features
Exploring audiof!,atuws
Uploading to, and downloading files from, the Internet
Transferring files fiom one computer to another is termed
uploading (transferring data t?om your computer to a site on the
Web), or downloading (transfening data froln a site on the Web to
your computer).
There are several ways to upload or download data. It can be as
simple as attaching a file or document to an email, or you can use
the File Transfer Protocol (FTP) features of your Web browser to
transfer large amounts of data.
Exploring
audioleatures
You can use your computer to record sounds using the computer's
internal microphone (available on certain models) or an optional
external microphone. You can play sound files or audio CDs using
the built-in speakers, headphones, or external speakers.
Recordingsounds
You may record sounds using the computer's internal microphone
(available on certain models) or by connecting an optional external
microphone to the microphone jack.
Using a microphone
l
If you want to use an external microphone, connect it to the
computer.
2
Click Start, All Programs,
Recorder.
L_start
Accessories, and then Sound
Rec0rding/St0p
Recordingbutton
(Sample Mmge) SoulTd Recorder scr(,el7
3
Click the Start Recording
button.
4
Speak normally into the microphone.
5
When you have finished recording, click the Stop Recording
button.
The Save As dialog box appears.
6
To save the file, type a file name, and then click Save.
Exploring
YourComputer'sFeatures
g4,b Cam
133
Usingexternalspeakersor headphones
Your computer is equipped with a full stereo sound system with
internal speakers. Instead of using the internal speakers, you can
connect headphones or a pair of external stereo speakers.
Beforeputtingon headphones
to listen,turnthevolumedown.Do
notsetthevolumetoohigh whenusingheadphones.
Continuous
exposureto loudsoundcanharmyourhearing.
TECHNICAL
NOTE:Whenusingamplifiedspeakers,usespeakers
that requireanexternalpowersource.Othertypesofspeakerswill be
inadequate
to producesoundfromthecomputer.
To play back sound files through external speakers or headphones:
C}
1
Locate the headphone jack on the computer.
2
Using any necessary adapters, plug the cable fiom the
headphones or external speakers into the headphone jack.
The headphone jack requires a 16-ohm stereo mini-jack.
To adjust the volume:
o:o For external speakers, use the volmne controls on each speaker.
o:o For headphones, use the computer's volmne control.
WebCam
(Available on certain models)
Your computer may come with a built-in web cam. With this web
cam you can do the following:
o:o Take pictures and record videos with your notebook computer
o:o Chat with others and have them see you while using instant
messaging (IM) progams
°:o Have video conference calls
NOTE
ToE-mail,instantmessageor videoconference,
you mustbe
connected
to the Internet.
Dependingon yourcomputermodel,theprocessofsendingE-mail,
takingpicturesor recordingvideomessagesmayvary.
134
Exploring
YourComputer'sFeatures
Using PC Cards
UsingPCCards
(Available on certain models)
This section applies if you have a PC Card slot.
TECHNICAL
NOTE:ForPCMCIA-compatible
PCCards,checkthe
packageto makesuretheyconformto thePCMClA2.1standard(or
later).Othercardsmayworkwith yourcomputer,butarelikelyto be
muchmoredifficultto setup anduse.
Your notebook computer comes with a PC Card slot and supports
two types of PC Cards that you can install:
o:* Type I cards
o:* Type II cards
The PC Card slot supports hot swapping, which allows you to
replace one PC Card with another while the computer is on.
Insertinga PCCard
Before you insert a PC Card, refer to the documentation that comes
with the card to see if you need to do anything before you insert it.
To insert a PC Card:
1
Locate the PC Card slot on the side of the computer.
2
Insert the PC Card.
(Sample Illustratiot7)
3
blsertin
_a PC Card
When the card is ahnost all the way into the slot, push finnty
but gently to ensure a finn connection with the computer. Do
not force the card into position.
Exploring
YourComputer'sFeatures
Usfl_g PC CaMs
135
Removing
a PCCard
[ _;UT|_N
NOTE
1
I BesuretodisablethePCCardpriorto removingit. Otherwise,the
systemmaybe damaged.
Beforeremovinga PCCard,makesurethat no applicationsor
systemservicesareusingthecard.
Prepare the card for removal by clicking the Safely Remove
Hardware icon in the Notification
Area and then selecting the
card or device you want to remove.
If the system is unable to prepare the card for sate removal, a
message will tell you to try again later. If the card can be
removed now, the system displays Safe to Remove Hardware.
2
Locate
the PC Card eject button.
3
Press the PC Card eject button once to pop it out slightly, and
push it in to remove the PC Card.
The PC Card ejects slightly from the slot.
4
Grasp the edges of the PC Card and slide it out of the slot.
PC Card
eiectbutton
(Sample Illustratio_t)
RemoH_tg a PC Card
Settingupa PCCardforyourcomputer
Some PC Cards are ready to use as soon as you install them. Others,
such as hard disk cards, network cards, and SCSI adapters, may
need to be set up to work with your computer. To set up your PC
Card, refer to the documentation that came with the card or refer to
your operating system manual or online Help.
136
ExploringYourComputer's
Features
Using an ExpressCaM
rM
UsinganExpressCarff
M
(Available
on certain
This section applies
models)
if you have a ExpressCard
TM
slot.
The ExpressCard
slot supports the use of ExpressCard
media. The
slot also supports hot swapping, which allows you to replace one
ExpressCard
with another while the computer is on.
InsertinganExpressCarff
°
Bet\_re you insert an ExpressCard
refer to the documentation
that
comes with the card to see if you need to do anything before you
insert it.
TM,
To insert an ExpressCard:
1
Locate
the ExpressCard
2
Insert the ExpressCard.
(Sample Illustration)
3
slot on the side of the computer.
Inserting
an E vpressCa_zl
When the card is almost all the way into the slot, push firmly
but gently to ensure a finn connection with the computer. Do
not t\_rce the card into position.
Removing
an Expressearff"
1
Prepare the card f\_r removal by clicking the Safely Remove
Hardware icon in the Notification
Area and then selecting the
card or device you want to remove.
If the system is unable to prepare the card t\)r sate removal, a
message will tell you to try again later. If the card can be
removed now, the system displays Safe to Remove Hardware.
2
Locate
the ExpressCard
TM
eject button.
Exploring
YourComputer'sFeatures
Using the Bridge Media Adapter Slot
3
137
Press the ExpressCard eject button once to pop it out slightly,
and push it in to relnove the ExpressCard.
The ExpressCard ejects slightly f_oln the slot.
4
Grasp the edges of the ExpressCard and slide it out of the slot.
ExpressCard
ejectbutton
(Sample Illustratiot_)
Removit_g at_ Ex!_ressCard
UsingtheBridgeMediaAdapterSlot
(Available
on certain
models)
The Bridge Media Adapter slot (available on certain models)
supports the use of Memory Stick Memory Stick PRO,
Secure Digital (SD'_), MMC (MultiMediaCard'_), or
xD-Picture Card media. These media can be used with a variety of
digital products: digital music players, cellular phones, PDAs,
digital cameras, digital video camcorders, etc.
TM,
TM
TM
TM
TM
The Bridge Media Adapter slot may also support other types of
media. For a complete list of supported media, visit Toshiba's Web
site at accessories.toshiba.com.
NOTE
Donotusethe CopyDiskfunctionfor this typeof media.Tocopy
datafrom onemediato another,usethedrag-and-dropfeatureofthe
Windows®operatingsystem.
138
Exploring
YourComputer'sFeatures
Using the BHdge Media Adapter Slot
Insertingmemorymedia
The following instructions apply to all types of supported media
devices.
1
Turn the media so that the contacts (metal areas) are face down.
2
Push the media into the adapter until it locks in place.
(Sample Illustrati(m ) h_sertit_g metool 3, me dia
Wheninsertingmemorymedia,do nottouchthemetalcontacts.You
couldexposethestorageareato staticelectricity,whichcandestroy
data.
Removing
memorymedia
1
Prepare the media for removal by clicking the Safely Remove
Hardware icon in the Notification Area and then selecting the
card or device you want to remove.
If the system is unable to prepare the media for safe removal, a
message will tell you to try again later. If the media can be
removed now, the system displays Safe to Remove Hardware.
2
Gently press the card inward to release it.
The card pops out slightly.
3
Grasp the card and pull it straight out.
(Sample Illustratio_t)
Removittg
memor_ media
Exploring
YourComputer'sFeatures
Using the i.LINK _ port
[ _u_:i_;_
139
:I Donotremovememorymediawhiledatais beingwrittenor read.
EvenwhentheWindows®message"copying..."disappears,
writing
to the mediamightstill be in progressandyourdatacouldbe
destroyed.Waitfortheindicatorlightto go out.
Usingthei.LINK®port
(Available
on certain
models)
The i.LINK _ port (available on certain models) on the side of the
computer provides an extremely fast data transfer rate.
In addition to high speed, the i.L1NK ®port also supports
isochronous data transfer (the delivery of data at a guaranteed rate).
This makes it ideal for devices that transfer high levels of data in
real-time, such as video devices.
As with USB ports, the i.LINK _ port supports both Plug-and-Play
(automatic configuration) and hot swapping (the ability to connect
and disconnect devices while the computer is on).
Chapter5
Toshiba
Utilities
Your computer includes several utilities designed to help you to
reconfigure your system to best meet your individual needs.
Together, these allow you to ascertain certain system details, set
additional options, or change default options. These utilities are
described in this chapter.
o:° TOSHIBA Assist
o:° TOSHIBA Application Installer
o:* Supervisor password
o:* User password
140
+
TOSHIBA PC Di%mlostic Tool Utility
+
TOSHIBA SD TMMemory Card Format Utility
+
Toshiba Hardware Setup
+
TOSHIBA Zooming Utility
+
TOSHIBA Button Support
+
CD/DVD Drive Acoustic Silencer
+
TOSHIBA Accessibility
+
Fingerprint Authentication l_Rility
+
ConfigFree TM
Toshiba
Utilities
TOSHIBA Assisl
141
TOSHIBAAssist
The TOSHIBA Assist provides quick access to computer functions
and allows you to customize a range of computer settings.
To access TOSHIBA Assist, do one of the following:
oto Double-click the TOSHIBA Assist shortcut icon on the
desktop.
oto Click Start, All Programs,
TOSHIBA Assist.
Toshiba, Utilities, and then
The TOSHIBA Assist window appears.
SECURE
, ,mr_e_v
You _,, co_ect _'_u,c_,_ut_r tonetworkmoreea_®
(Sample Image) TOSHIBA Assist window
The TOSHIBA Assist offers four categories of options:
oto Colmect
oto Secure
oto Protect & Fix
o:o Optimize
142
ToshibaUtilities
TOSHIBA Assist
Connect
The features available in this category are:
o:o ConfigFree
TM
°5°
Bluetoott?
Settings
Connectivity Doctor
°5°
Bluetoott?
Local
(
_[C_jRE
[C°rmeetiv
_ROT_CT
COM
e
£_tootfl
c _!tin_
Settings
Bluetoo_b
Loe_ CO
& F_
_!_i_!_!i_!i_!;!i_!;!i_!;!i_!;!i_!;!i_!;!i_!;!i_!;!i_!;!i_!;!i_i_ii_!_%i_i_i_i_i_i_i_i_i_i_i_i_i_i_i_ii_i!_i%_i_!!!i_
_i!_!i!_!_!!2_i_!_!_!_!_!_!_iii_ii!ii_i_ii_ii!_ii!_ii!_iii
_i_ii;i%!_ili
'i;ii!ii!_i!ii!_i!ii!_i!ii!_i!ii!_i!ii!_!iiiil
_
TMi_!i!i_i_i_i
TMi
TMITMi!_)i_i_%ii_il
TM:i_I!
TMi_iiiii_iiiii_i_iiiiii!ii:i:!i!i!i_i_ii
TMi_i_!_ili_!_ili_!_ili_!_ili_!_ili_!_ili
TMi!ii_ii_i_ii_i_ii!_!ili!!i!ii:i)!ii_ii_ii_i_iffffiiiii_i_!_%ii_%i_:ii_i_%
(Sample
Image)
TOSHIBA
Assist
window
- Connect
tab
Toshiba
Utilities
TOSHIBA Assisl
143
Secure
The features available in this category are:
o:° Supervisor password
o:. User password
CO_CT
iii
_?;i_i_i)_i_i_i)_i_i_i)_i_i_i)_i_i_i)_i_i_i)_i;i_!!_i;i_!%!_i_ii_!iii_%i_%_!_i_i_iii_iiii_i_iii_!i_!ii_!_i_!iiiii_
_i%i_iii_i_i!i_ii_!ii!ii!ii!iii_ilili!!iii_i
_!_%ili_iiii_i_iii_iii_i_iii_iii_iiiiii!i!ii
(Sample
Image)
TOSHIBA
Assist
window
-Secur(,
tab
144
ToshibaUtilities
TOSHIBA Assist
Protect & Fix
The feature available in this category is:
o:o TOSHIBA PC Diagnostic Tool Utility
il
!_
;_iiiiiiiiiiiiiiiiiiiiiiiiiiiiiiiiiiiiiiiiiiiiiiiiiiiiiiiiiiiiiiiiiiiiiiiiiiiiiiiiiiiiiiiiiiiiiiiiiiiiiiiiiiiiiiiiiiii
gECt_RE
_,ii_iii_i_:!ii'ii:
ii_i{i_i!iiii:'
!ii!i:ili_ili!iiiii!iiiii_i!ili!!iiiiii
_ii!i_ii!i_!_i!i!i!_i%_i_%_%_%_%%_;%_:%_%_;_%_!:!_i_!_
_i%:%i!%!i!i%%ii_iliiiii_!il
_!_!_i_i_i!i
_i
_iiii_iiiii!iiii
'i_!i!ii!i!i!ii:ii_i_i:i_i_i_i
_i
_i'%!_!%!!!iiii'ili'iiii!iiiiiiiiiiiiil
_i_ii'iiii!iiii'i{_i,iiiiii!i!i!_i_il
_I_i!
(Sam!_le
Image)
TOSHIBA
Assist
window
- Pl>tect
& Fir tab
Toshiba
Utilities
TOSHIBA AssN
Optimize
The features available in this category are:
o:° Toshiba Hardware Setup
o:° TOSHIBA Zooming Utility
o:° CD/DVD Drive Acoustic Silencer
o:° TOSHIBA Accessibility
o._o TOSHIBA Button Support
N ...........
N
Moue
Aeee
_b_ity
goominc;
UtilRy
p_o*_
ZBSHIBA
Button
grJ]Dv[_
Drve
TO£HI_A
Hardwa
g _ FIX
101..........
(Sample Image)
TOSHIBA
Assist window
- Optimize
tab
145
146
ToshibaUtilities
TOSHIBA A1)plicarion h_sraller
TOSHIBAApplicationInstaller
(Available on certain models)
The TOSHIBA Application Installer allows you to reinstall the
drivers and applications that were originally bundled with your
computer.
To reinstall drivers and applications:
1
Double-click the TOSHIBA Application
Windows "_desktop.
2
Click Next.
Installer icon on the
(Sample Image) TOSHIBA Applicatiot_ h_staller screet_
3
Click the item(s) you want to install. TO select multiple items,
hold down the Ctrl key as you make your selections.
(Sample htlage) TOSHIBA Applicatiot_ h_staller sHectiot_ scr_,c,t_
4
Click Install, then follow the on-screen prompts to complete
the installation process.
147
Toshiba
UUlities
3_,ffit_g
passwmds
Setting passwords
Setting a password lets you walk away fiom your computer,
providing additional protection for your files. When you set a
password, you must enter the password before you can work on
your computer again.
Toshiba supports several types of passwords on your computer:
+
NOTE
An instant password
Secures your open pro_ams
when leaving the computer temporarily.
and files
Youneedto havecreateda passwordfor yourWindowsRaccountto
usean instantpassword.
o:o A power-on password
Prevents unauthorized users from
starting or restarting the computer.
o:o A supervisor password
Prohibits unauthorized users fiom
accessing certain functions such as Toshiba Hardware Setup.
This is useful if more than one person uses the computer.
When setting up passwords, keep the t\_tlowing in mind:
o:o The user password can be set up under the supervisor
password.
+
The supervisor password must be set before the user password,
or the user password must be deleted and then re-entered after
the supervisor password is set.
Usingan instantpassword
An instant password secures your system with a single keystroke.
Use this feature when you leave your desk for a few minutes and do
not want to turn offthe computer.
To use an instant password, press Fn+ F1.
To unlock your system, press any key or touch the pointing device
and the Windo,a s : Logon screen ,aill appear. Select your user name
and enter your password, if any.
148
ToshibaUtilities
Se_ing paxswor&
Usinga supervisor
password
A supervisor password prevents other users from changing
hardware configuration options.
Settinga supervisor
password
If youchooseto seta supervisoror userpassword,Toshibastrongly
recommends
thatyousaveyourpasswordin a locationwhereyou
canlateraccessit shouldyou notrememberit.
Toshibais notresponsible
foranylossesthatmayoccurto you,your
organization
or othersasa resultoftheinabilityto accessyour
computer.
To set a supervisor password:
1
Click Start, All Programs, Toshiba, Utilities, and then
TOSHIBA Assist.
The TOSHIBA Assist window appears.
2
On the left side, click the Secure tab.
3
Click the Supervisor
Password
icon.
The Supervisor Password Utility window appears.
'1"Ii117
Supelviso[
P_s wold -No_Regi[efed
Reg{_ered
-U _r Pa*swc,rd
}4ode......................................................................................
LJ{ _i,<
r
=
,, S,
f:
(SgmyUe Img_ge) Supem'isor P(_ssword tab
4
Select Registered,
A pop-up
5
then click OK.
screen appears
Enter your password,
asking
for a password.
and then enter it again to verify.
Toshiba
UUlities
Setting lXtS_swoMs
6
149
Click OK.
A pop-up screen appears asking for the User Password Mode.
7
Select whether the user password allows the user to change the
hardware configuration:
+
Able to run HwSetup_Yser
configuration
can change the hardware
8
•:o Unable to run HwSetup_Yser
cannot change the
hardware configuration (supel_,isor password is required)
Click OK.
9
Shut down the system to complete the process.
Deletinga supervisor
password
To delete a supervisor password:
1
Click Start, All Programs,
TOSHIBA Assist.
Toshiba, Utilities, and then
The TOSHIBA Assist window appears.
2
On the left side, click the Secure tab.
3
Click the Supervisor
Password icon.
The Supervisor Password Utility window appears.
4
Select Not Registered,
then click OK.
A pop-up screen appears asking for a password.
5
Enter the supervisor password, then click OK.
6
Click OK to exit.
Usinga userpassword
A user password provides power-on password protection.
Settinga userpassword
If youchooseto seta supervisoror userpassword,Toshibastrongly
recommends
that yousaveyourpasswordin a locationwhereyou
canlateraccessit shouldyounotrememberit.
Toshibais notresponsible
foranylossesthatmayoccurto you,your
organization
or othersasa resultoftheinabilityto accessyour
computer.
150
ToshibaUtilities
Selling 1)as_words
To register a password for the power-on password functions:
1
Click Start All Programs, Toshiba, Utilities, and then
TOSHIBA Assist.
The TOSHIBA Assist window appears.
2
On the left side, click the Secure tab.
3
Click the User Password icon.
The Password
appears.
tab of the Toshiba Hardware Setup window
lilr_rz
8o_,tPr orits'
I
k_l_,_d
F_
General
I hi
tab al[a_
_ord
1
t
US_
1
LAN
Di pla_
I
CPLE
_ou to eL or ree_ Lhe _
p_
_Td
lot po_
on
_. No[ F_egi_er_d
(Sample Image) Password mb qf Hardware Setup wimlow
4
Select Registered,
then click OK.
5
Enter your password, and then enter it again to verify.
6
Click OK to exit.
Deletinga userpassword
To cancel the power-on password function:
1
Click Start, All Programs,
TOSHIBA Assist.
Toshiba, Utilities, and then
The TOSHIBA Assist window appears.
2
On the left side, click the Secure tab.
3
Click the User Password icon.
The Password
appears.
tab of the Toshiba Hardware Setup window
Toshiba
UUlities
TOSHIBA PC"Diagnostic Tool UtiliO,
4
151
Click Not Registered.
A pop-up screen appears asking for a password.
5
Enter the user password, then click OK.
TOSHIBAPCDiagnosticToolUtility
This utility can help diagnose problems with devices in your
computer. Refer to the online Help documentation within the
application for additional help.
NOTE
TheTOSHIBA
PCDiagnosticToolUtility mayshowtestsfor features
youdo nothave.Thisis normalanddoesnotindicatea problem.
TO use the TOSHIBA PC Diagnostic Tool utility:
1
Click Start, All Programs,
Toshiba, Utilities, and then
PC
Diagnostic
Tool,
the PCAssist.
Diagnostic Tool icon in
the Protect
& Fix
taborof click
TOSHIBA
The TOSHIBA PC Diagnostic Tool window appears.
2
Click the Diagnostic
Tool tab.
(Sample Ima_,,e) TOSHIBA PC Diaqnostic Tool window
3
NOTE
4
Select the devices that you would like to test by clicking the
check box that appears to the left of the device.
Clickthe+ (plus)and- (minus)symbolsto expandandcollapsethe
categories.
Click Start
Diagnostics
when you are ready to begin the tests.
152
ToshibaUtilities
TOSHIBA SD rMMemo O, CaM Fore,at UtiliO,
TOSHIBA
SD MemoryCardFormatUtility
TM
This utility is used to format SD cards used with the Bridge Media
Adapter slot.
TM
To format an SD memory card using this utility:
1
Click Start, All Programs,
Memory
Card
Toshiba, Utilities, and then SD
Format.
The TOSHIBA SD Memory Card Format screen appears.
Drive
Capacity: 253.0MB
Format 0 plion
_) 13uck Fo ma
(Sample hnage)
{)_Fu
TOSHIBA
FQma
SD Memory
2
Select the drive corresponding
3
Select the formatting
•:o
Quick
•:.
Full Format
Card Format screet_
to the SD memory
card
option:
Format
4
Click Start to begin formatting. The formatting progress is
displayed in the horizontal bar in the window.
5
When formatting is completed, click Close to exit the utility.
Toshiba
UUlities
Toshiba Hardware Setup
153
Toshiba
HardwareSetup
Toshiba Hardware Setup is the Toshiba configuration management
tool available through the Windows '_operating system. To access it:
Click Start, All Programs, Toshiba, Utilities, and then
HWSetup, or click the Toshiba Hardware Setup icon in the
Optimize tab of TOSHIBA Assist.
The Toshiba Hardware Setup screen appears.
TOSHI£A HW S_4uppmg_1 a[_ewsyou to cor_gure
Setup
(Sample Image) Toshiba Hardware Set_q) scree*_- Get_eral tab
optiot_.q
The Toshiba Hardware Setup screen has the _\_llowing tabs:
•:.
General
Allows you to view the current BIOS version or
change certain settings back to their default values
o:o Password
Allows you to set a user password
o:o Display
Allows you to change various default settings for the
built-in display
NOT£
Whenthecomputerrestarts,it remembers
the lastconfiguration.If
datadoesnotappearon thedisplayyouareusingafterstartingin
SleepMode,pressFn+ F5.Formoreinformation,see"Directingthe
displayoutputwhenyouturnon thecomputer"on page70.
1 54
Toshiba
Utilities
Toshiba Han/waw Selup
•:,
Boot Priority_llows
you to change the sequence in which
your computer searches the drives tbr the operating system
You can also manually choose the Boot Priority by pressing the
power button, then quickly pressing the F12 key, or the right or
left arrow keys.
Select the boot device icon by pressing the right or left arrow
keys, then pressing the Enter key.
NOTE
Sincethesystemis a quick-bootingsystem,youmustpressthe
arrowkeysimmediatelyafterpressingthepowerbutton.
•:.
Keyboard
Allows you to configure an external keyboard to
emulate the Fn function key and access the wake-on keyboard
function
•:.
USB_ltows
Emulation
•:.
LAN
you to enable or disable USB Legacy
Allows you to set networking functions
By changing any of the options that appear in the dialog boxes and
clicking Apply, you can reconfigure that function. Any options that
you change will become default settings when you restart your
system.
Toshiba
UUlities
TOSHIBA Zooming Utility
155
TOSHIBAZoomingUtility
This utility allows you to select which applications will work with
the zoom in!out hot keys (see "'Changing screen resolution" on
page 221). You may select all applications or any subset of the
following:
olo Microsoft _ Internet Explorer*
•:.
Microsoft R Office
•:o Windows Media _"Player
•:o Adobe _ Acrobat RReader _
o:* Icons on the desktop
To access the TOSHIBA
1
Zooming Utility:
Click Start, All Programs,
Toshiba Zooming Utility.
Toshiba, Utilities, and then
The TOSHIBA Zooming Utility Properties screen appears.
Iliff
,_Wn
W_Ed Ez_e P_rPor
RI O_J_
PubJ_
Or 0n
Ab_at
j
L
oN
_
:
(Sample Image) TOSHIBA Zoomi_g Utility Prop#_ies s('ree_
2
Select the desired option(s).
3
Click OK.
The zoom in and zoom out hot keys will now work with the
applications you selected.
To zoom in, hold down the Fnkey and press 2; to zoom out, hold
down the Fn key and press 1.
156
ToshibaUtilities
TOSHIBA Button Support
For more information about how to use the TOSHIBA Zooming
utility, right-click the [] icon in the Notification Area and then
click Help.
TOSHIBAButtonSupport
TOSHIBA Button Support allows you to customize the Internet
browser button and the Media button. These buttons are located
above the keyboard.
To access TOSHIBA Button Support:
1
Click the TOSHIBA Button Support icon in the Optimize
tab of TOSHIBA Assist.
The TOSHIBA Button Support window appears.
[li'{
(Sample Image)
TOSHIBA
2
Under Button
customized.
Name,
3
Make the desired
4
Click Close.
Buttot7 Su!)port screel7
select the button whose
selections.
function
is to be
Toshiba
UUlities
CD/DVD Drive Acoustic Silencer
157
CD/DVDDriveAcousticSilencer
This utility can slow the speed of your optical drive to make it run
more quietly. You can use this utility to make listening to music
CDs more enjoyable.
NOTE
Whenyouchangetheopticaldriveto "Quiet"mode,the settingis
onlyvalidforthecurrentWindows
® session,if youshutdown,
restart,log off, or resumefromHibernation,
the settingwill revert
backtoNormalspeed.Thesettingcanalsobe changedbyCD
burningsoftwareor otherapplicationsthatcansetthe drivespeed.
C_d<h_e to return to g'_*_) Speed in tl_s Veindo,_ss_ssion, for
ins_llin_ _pN_c_t_c,n_
or t__nsf_rr_g 4ate,
,__,_qTIONr TB_ dr_ve speed wi_[return t_ _ormal speed ff ,f_ rebait _ re_ume
from _ta_t_y or Nbernat,:q_,11_e_e_e tt_N_,ma!ta_o be d_anoed b_ r,_er
a_licat_s,
(Samph, Imam,(,)CD/DVD [)ri_'(,Acoustic Sih, nc(,r scr(,(,n
To access the utility:
1
Double-click the icon in the Notification Area, or click the
CD/DVD Drive Acoustic Silencer icon in the Optimize tab of
TOSHIBA Assist.
The CD/DVD Drive Acoustic Silencer screen appears.
2
Click Set Quiet Mode to make the drive run more slowly and
quietly for listening to music or audio files on a CD.
3
Click Set Normal Mode to run the drive at normal speed for
transferring data.
1 58
ToshibaUtilities
TOSHIBA Accessibili O,
TOSHIBAAccessibility
The TOSHIBA Accessibility utility allows you to use the Fnkey to
create a hot key combination with one of the function keys without
pressing the two keys simultaneously as is usually required. Using
Accessibility lets you make the Fnkey a sticky key, meaning you can
press it once, release it, and then press a function key to activate the
hot key function.
SettFr_fo[ Fn,Shcky_,e$,
J:_ Fn Stlck_y[U
(Sample Image) TOSHIBA Accessibility wimlow
To use TOSHIBA Accessibility:
1
Click Start, All Programs, Toshiba, Utilities, and then
Accessibility, or click the Accessibility icon in the Optimize
tab of TOSHIBA Assist.
The TOSHIBA Accessibility window appears.
2
Check the Use Fn-StickyKey
box.
3
Put a check mark next to the desired option.
4
Click OK.
Toshiba
UUlities
Fingeq)rint Authentication UtiliO,
159
Fingerprint
Authentication
Utility
(Available
on certain
models)
The fingerprint authentication utility (available on certain models)
can be used to replace the keyboard-based user/BIOS password
authentication system when booting up.
The fingerprint authentication utility can also be used for user
logon. The user's fingerprint is read; if the system recoNfizes the
fingerprint, the user is automatically logged on.
Fingerprintutilitylimitations
Toshiba does not guarantee that the fingerprint utility technology
will be completely secure or enor-fiee. Toshiba does not _arantee
that the fingerprint utility will accurately screen out unauthorized
users at all times. Toshiba is not liable tbr any failure or damage
that might arise out of the use of the fingerprint software or utility.
Fingerprint
Enrollment
Use the Enroll or Edit Fingerprints wizard to enroll new
fingerprints or to update existing fingerprint samples.
NOTE
It is recommended
thatyoucompletethe Fingerprinttutorialbefore
startingfingerprintenrollment.TheFingerprinttutorialshowshowto
achievethehighestqualityfingerprintsamples.
To enroll a new fingerprint:
1
Click Start, All Programs,
Control Center.
2
Click the Fingerprints
topic in the Control
Enroll or Edit Fingerprints
wizard.
NOTE
Protector
Suite QL, and then
Center. Click the
WhenControlCenteris openedfor thefirsttime,youmustclick
"Elevateadministrative
privileges"onthemainControlCenter
windowbeforeyoucanaccessmostofthesystemsettingsin the
ControlCenter(see"ElevateAdministrative
Privilegesfor User"on
page164).Otherwise,thesettingsremaingrayandunavailable.
3
Enter your credentials.
4
Complete the Fingerprint tutorial.
5
Click the button above the finger you want to enroll.
160
ToshibaUtilities
Fingerl)rint Authentication UtiliO,
6
Swipe your finger on the reader.
A sample will be created and indicated by a Fingerprint icon.
7
Repeat the previous step. Swipe the same finger on the reader
two more times to create two more samples.
8
The final template will be created from these three samples.
NOTE
If you do notusea Windows
® password,youwill bepromptedto
definea new(non-empty)one.Thisis notnecessary,
buta password
improvesthesecurityofyoursoftware.
If your system supports power-on security, a Power-on button is
also displayed above each enrolled fingerprint. This button is
shown pressed by dethult, indicating that your fingerprint is
automatically added for power-on authentication.
During fingerprint enrolhnent, the system displays icons as
prompts, notifications, and warnings. These icons and their
meanings are as follows:
o:* Reader ready
the reader is waiting to read your fingerprint.
Swipe your finger when you are ready.
°:* Reader busy
wait for the reader to complete its operation.
o:* Problem with operatio_the
reader could not read your
fingerprint. Swipe your finger again.
°:* Operation succeede_the
your fingerprint.
reader successfully read or verified
°:* Failed to verify the use_the
fingerprint could not be matched.
°:.
Error reading fingerprint_he
finger was too far to the left or
right. Center your finger and swipe it again.
°:.
Error reading fingerprin_the
your finger again in a straight
°:.
Error reading fingerprint
the movement
your finger again at a slower speed.
was too fast. Swipe
o:.
Error reading fingerprin_the
movement
your finger again using a longer motion.
was too short. Swipe
movement
line.
was skewed.
Swipe
161
Toshiba
UUlities
Fingeq)rint Authentication UtiliO'
Fingerprint
Logon
The fingerprint utility enables logon to your computer using
fingerprints. During user enrollment, fingerprint samples are saved
and associated with the user's Windows Ruser account. When the
user attempts to log on again, the user's fingerprint is read and
compared with the user's enrolled fingerprints; if the fingerprint is
recoguized, user logon is completed.
The Fast User Switching feature of the Windows :Roperating system
is also supported. If user A is logged on and the fingerprint utility
verifes the fingerprint of user B (who is already enrolled), the
utility recognizes the fingerprint and switches the users.
If your system supports power-on security, existing fingerprint
samples can be used also for power-on authentication.
Power-onSecurity
The power-on security feature prevents unauthorized access to your
computer when it is mined offby requiring the user to pass
fingerprint authentication. If fingerprint authentication tails, the
user will not be able to start the computer.
When power-on security is enabled, the system asks you to
authenticate your fingerprint. You have 40 seconds to swipe your
fingerprint.
If the authentication fails, the system tries again up to vvvomore
times. If authentication fails after the third attempt, the system shuts
down.
EnablingPower-onSecurity
Options for power-on security are displayed only if your computer
supports this feature. In most configurations, power-on security is
enabled automatically after the first user fingerprints are enrolled.
To disable/enable power-on security:
1
Open the Control Center and go to Settings - Power-on
Security. (This wizard is displayed only if your system
supports power-on security.)
2
Check the option Replace the power-on
passwords
with the fingerprint
reader.
and hard
drive
Power-on security can be configured to operate with the fingerprint
logon feature. Ifa fingerprint used tbr power-on security matches a
fingerprint in an existing passport, the corresponding user is logged
on automatically without having to enter the Windows :_:logon
password.
162
ToshibaUtilities
FingerpHnt Authentication UtiliO,
H_
NOTE
YourhardwaremustsupportPower-onsecurityto usethesingle
Iogonfeature.Youmusthaveadministrative
privilegesto change
settings.
To enable power-on security single logon:
1
Open the Control Center and go to Settings - System
Settings.
2
Check the Allow power-on security single sign-on check box.
(Logon support must be enabled for this option to be
accessible.)
Fingerprint
Management
Fingerprints are stored in memory during enrothnent. After a
fingerprint is enrolled, it is displayed with a power-on button above
it. The button appears "pressed in" by de*:autt, indicating that the
corresponding finger will be used t\_r power-on security. If you do
not want to use a fingerprint for power-on security but only for
logon, click the Boot button to delete the fingerprint fiom the
fingerprint device memory.
The fingerprint device memory can typically hold up to 21
fingerprints. The number of slots remaining is displayed in the
enrolhnent wizard.
ControlCenter
The Control Center contains various functions tbr fingerprint
management and for setting up your fingerprint sot_vare. Available
options depend on the software status, used hardware, and installed
applications.
Fingerprint ¢ontro| Center
Toshiba
UUlities
Fingelprint Authentication UtiliO'
163
Fingerprints
Enroll or edit current user's fingerprint templates
Runs the
fingerprint enrolhnent wizard. You can enroll, edit, or delete
fingerprints for the current user and, if power-on security is
implemented, control whether they are stored in the fingerprint
device melnory. After you enroll your fingerprints, they are
associated with your user name and password. The next time
you log in, you can use your fingerprints instead of your user
name and password.
Settings
o:o System Settings Opens the Settings dialog containing various
options t\_r setting up the product. Most of these settings can be
modified only by administrators and affect all users.
o:o User Settings Opens the User Settings dialog containing
user-specific options for setting up the product.
Power-on Securit_The
memory of the fingerprint device is
limited (typical capacity is 21 fingerprints). You can decide
which fingerprints are present in the device memory and can be
used for verification on computer starmp, or create new
fingerprints to be used only for power-on authentication.
o:o Fingerprint Storage Inspector
Opens the Fingerprint Storage
Inspector dialog where you can see the contents of your
fingerprint storage.
Help
o:o Get help infonnation_isplays
this help. The help files in
other langmages (depending on your installation) are located in
the mui subfolder of your installation folder.
About
o:o About icon_isplays
version inforlnation.
64
ToshibaUtilities
Fingerprint Authentication UtiliO,
ElevateAdministrative
Privilegesfor User
Elevate administrative privileges for user._y
default, the
operating system assumes you are a user and not an
administrator, and renders most of the system settings in the
Control Center gray and unavailable. To access these system
settings, click "Elevate administrative privileges" on the main
Fingerprint Control Center window. Clicking this option
elevates your account tiom that of a standard user to an
administrator, and allows you to access all of the system
settings in the Control Center. It also removes this option tiom
the main Fingerprint Control Center window.
Password Bank
The Password Bank stores registration and logon information for
Web sites and dialogs, helping to automate the task of entering this
information.
You enter the required information only once, during Web page or
dialog registration. When the window is displayed again, all the
data is entered automatically when you scan your fingerprint on the
reader. Registered Web pages can also be accessed directly from the
Biomenu.
Biomenu
Biomenu provides access to the utility's features and settings. It is
available in several variants or skins. To view or select other
Biomenu skins, open the Control Center and select Settings, User
Settings.
Swipe your finger to open Biomenu. If fingerprint verification is
configured to invoke another action (e.g., display a registered
page), press and hold the Shilt key while swiping your finger.
The Biomenu contains the following menu options:
o:* Lock computer
Locks your computer. Use the reader to
unlock the computer again.
o:* Registered Sites Displays a list of your Web pages registered
by Password Bank. To display and fill in a registered page in
your default Web browser, click it in the list.
o:* Register
Registers a new window (dialog or Web page).
o:* Lock/unlock My Sate
o:* Control Center
o:* Help_isplays
Opens or closes My Sate folder.
Displays Control Center.
this help file.
Toshiba
UUlities
Fingerprint Aurhemicalion UliliO'
165
Registering
a newWebpageor dialog
You are logged on to the computer and want to register a new Web
page.
To create a new registration:
1
Display a Web page you want to register.
2
Fill in the data you want to replay the next time you access this
Web page.
3
Use the reader to display the Biomenu.
4
Select Register.
Password Bank recoNlizes pages containing a password field and
displays a hint that the page can be registered. These hints can be
turned off in the Settings dialog.
A wizard will assist you through your first registration.
Replaying
aregistered
Webpageor dialog
You are logged on to the computer and want to replay a registered
Web page.
To replay a registration:
1
Swipe your enrolled finger to display the Biomenu.
2
Select Registered
3
Select a page you want to display and replay, or simply verity
your fingerprint if the page is already displayed.
Sites.
If you directly access a registered page from your browser without
using the Biomenu's Registered Sites option, Password Bank
displays a hint that the page is registered and can be replayed.
These hints can be turned offin the Password bank tab of the User
Settings dialog.
Replayingregistrationswithmultipleforms
Password Bank registers forms, not pages. Ifa page contains
several forms, each tbnn requires a separate registration. Ifa page
contains several tbrms, replaying works as follows:
•:.
If only one form is registered tbr the page (regardless of how
many t\3rms the page has), that registration is replayed.
•:.
If the page has multiple registered forms, and one of the
registered forms is active, the active form is replayed.
166
ToshibaUtilities
Fingerprint Authentication UtiliO,
o_o If the page has multiple registered folans, but there is no active
form, all existing registered forms _\_rthe page are displayed.
You then select the one to be replayed.
Replaying
aregistered
dialog
You are logged on to the computer and want to replay a registered
dialog.
To replay a registration:
1
Display the dialog to be replayed.
2
Use the reader.
3
Optional_f
the hint for replaying dialogs is displayed,
confirm that you want to replay the registration.
4
The registration is replayed.
Editingan existing
registration
Sometimes it is useful to edit an existing registration. For example,
your company's address may have changed and you want to update
your registrations.
To edit an existing registration:
1
Click the Settings topic in the Control Center.
2
Click User Settings. Veril_ your fingerprint.
3
Select Registrations.
4
Select a registration.
5
Click Edit.
6
Change the value of an item or delete the item.
7
Select the Auto submit check box to submit the selected
registration automatically after replaying the registration. A
warning is displayed if you attempt to register a form or dialog
that may be incompatible or not work properly with automatic
submittal.
Deletinga registration
You are logged on to the computer and want to delete an existing
registration.
To delete an existing registration:
1
Click the Settings topic in the Control Center.
2
Click User Settings. Verify your fingeI2arint.
Toshiba
UUlities
FingelT_rim Aurhenricalion UliliO'
3
Select Registrations.
4
Select a registration.
5
Click Delete.
167
Howto Deletethe FingerprintData
Fingerprint data is stored in the non-volatile memory. If the
computer changes ownership, Toshiba recommends the following
procedure:
1
Click Start, All Programs, Protector Suite QL, and then
Control Center.
The Protector Suite Software screen is displayed.
2
Click Fingerprints
then Delete.
3
Click Settings then Fingerprint
Storage Inspector.
The Fingerprint Storage Inspector screen is displayed.
4
If other fingerprint data is still displayed on the list, hold down
the Ctrl key and select each fingerprint until they are all
selected, then click Remove.
5
Click OK to make the changes permanent.
6
Check that all Fingerprint data was deleted on the Fingerprint
Storage Inspector screen.
Careandmaintenance
ofyourfingerprintreader
Failure to follow these guidelines and/or procedures might result in
damage to the reader or cause reader failure, finger recognition
problems, or lower finger recognition success rate.
•:.
Do not scratch or poke the reader with your nails or any hard or
sharp objects.
•:.
Do not press the reader with too much pressure.
•:.
Do not touch the reader with a wet finger or a W wet objects.
Keep reader surface dry and free of water vapor.
•:.
Do not touch the reader with a soiled finger. Minute foreiml
particles on a soiled or dirty finger may scratch the reader.
•:.
Do not paste stickers or write on the reader.
•:.
Do not touch the reader with a finger or a W object with builtup static electricity.
168
ToshibaUtilities
Fingerprint Authentication UtiliO,
Obselwe the following before you swipe your finger on the reader,
whether £_r fingerprint enrolhnent/registration or recognition.
o:* Wash and dry your hands thoroughly.
o:* Remove static electricity fioln your fingers by touching any
metal surface. Static electricity is a common cause of reader
failures, especially during dry seasons such as winter.
o:* Clean the reader with a lint-free cloth. Do not use detergent to
clean the reader.
o:* Avoid the following finger conditions for enrolhnent or
recognition as they may result in fingerprint enrolhnent errors
or a drop in the fingerprint recognition success rate.
o:* Soaked or swollen finger (e.g., after taking bath)
o:. Injured finger
o:* Wet finger
+
Soiled or oily finger
+
Extremely dry skin condition on finger
Obselwe the tbllowing to ilnprove the fingerprint recognition
success rate.
•:. Enroll two or more fingers.
•:.
Enroll additional fingers if recognition failure occurs often
using enrolled fingers.
•:.
Check your finger condition. Changed conditions, such as
injured, rough, extremely dry, wet, soiled, dirty, oily, soaked or
swollen fingers, may lower the recognition success rate. Also if
the fingerpiint is worn down or the finger becomes thinner or
fatter, the recognition success rate may be lowered.
•:.
The fingerprint tbr each finger is different and unique. Please
ensure that only the registered or enrolled fingerprint or
fingerprints are used tbr identification.
•:.
Check sliding position (see illustration below).
(Sample Illustration) Aligning the fhTger on the reader
Toshiba
UUlities
Cor_ig FreerM
169
Fingerprint
readerlimitations
The fingerprint reader compares and analyzes the unique
characteristics in a fingerprint. However, there may be
instances where certain users are unable to register their
fingerprints due to insufficiently unique characteristics in their
fingerprints.
A warning message will be displayed when recognition is
abnormal or recognition is not successful within a fxed
duration.
The recognition success rate may differ from user to user.
Toshiba does not guarantee that this fingerprint recognition
technology will be enor-ffee.
Toshiba does not gnarantee that the fingerprint reader wilt
recognize the enrolled user or accurately screen out
unauthorized users at all times. Toshiba is not liable for any
failure or damage that might arise out of the use of this
fingerprint recognition sot_vare or utility.
ConfigFree
TM
NOTE
All references
to BluetootlPin this sectionareapplicableonlyif
BluetootlPis availableonyoursystem.
ConfigFree is a set of utilities that makes it easy to control
communication devices and network connections. ConfigFree also
lets you identii_ communication problems and create profiles for
easy switching between locations and communication networks.
TM
NOTE
Formoreinformationon usingConfigFree,
seetheConfigFree
onlineHelp.
The ConfigFree utilities include the following:
o:. Connectivity Doctor The Connectivity Doctor utility is used
to analyze network connections and fix networking problems
with your notebook computer. For more information, see
"Connectivity Doctor" on page 170.
Profile Settings The Profiles utility lets you switch between
network configurations. For more information, see "Profile
Settings" on page 171.
1 70
ToshibaUtilities
Co_figFree TM
GettingStarted
This section contains information about the ConfigFree main
screen, and how to start and set up ConfigFree.
For more detailed information on setting up and using ConfigFree,
see the Help File included in the application.
StartingConfigFree
To start ConfigFree, be sure the computer has a wired or wireless
connection. Then perform any of the f\_llowing steps:
•:.
Click Start, All Programs,
ConfigFree.
Toshiba, Networking,
•:.
Double-click the ConfigFree icon _
and then
in the Notification Area.
o:. Press the TOSHIBA Assist button (if applicable to your system)
to open the TOSHIBA Assist, and then click the ConfigFree icon.
°:. Click the ConfigFree icon _
then click the desired utility.
NOTE
in the Notification Area, and
If yourcomputeris notconnected
to a network,theConfigFreeicon
in the NotificationAreais displayedwith an "X."
ConfigFreeUtilities
ConnectivityDoctor
The Connectivity Doctor lets you analyze your network
connections and fix network connection problems. Using
Connectivity Doctor, you can view detailed network information by
simply moving the mouse pointer.
The Connectivity Doctor works with the following network
devices:
°:. Wired and wireless network devices
°:. Access points
The Connectivity Doctor displays the following information:
°:.
Status of the PC Network Connections
°:.
Status of wired and wireless connections
°:. Wireless Connection band (a/b/g etc.)
Toshiba
UUlities
Cor_ig FreerM
171
o:* Status of Wireless Connection switch
(Sanq)le Image)
Co,mectivit_
Doctor
scree*_
ProfileSettings
The Profile Settings utility lets you save network settings in
"profiles." ConfigFree profiles are useful for easily switching
network settings and devices.You can switch network settings
simply by selecting the profile with the desired settings.
If you visit a client company occasionally, t\_r example, you can set
up a profile to match that environment and connect to the network.
Similarly, users who access networks in the office and at home can
set up profiles to handle these networking environments.
A profile contains the currently confiLmred network settings on the
computer, as well as information about any network devices. The
t\_tlowing settings can be saved (or "captured") in a profile:
•:.
Internet settings
includes LAN settings (proxy server
settings) and the address of a home page that opens
automatically when Intemet Explorer_ starts
Devices lets you enable or disable settings of wired and
wireless network devices, infiared devices, and set the power
status of Bluetooth _ antennas
TCP/IP settings
includes DHCR IP address, subnet mask,
default gateway, DNS server, and WINS server settings
Personal firewall settings for Internet connections
B/uetooth _ Security Level (for example, high or medium)
Enable UAC (User Account Control) setting
1 72
ToshibaUtilities
Cot_figFree
TM
To create a profile:
1
Click the _
icon in the Notification
2
Move the pointer
3
Click Open
Area.
to Profile.
Settings.
The ConfigFree
Profile
Settings
window
appears.
...................................
N@@
(Sample Image)
4
Cot_figFree
Pr@'le Settit_gs witulow
Click Add to start the Create
Profile Wizard.
Chapter6
IfSomethingGoesWrong
Some problems you may encounter when using your computer are
relatively easy to identify and solve. Others may require help fiom
your network administrator or the manufacturer of the software
program.
This chapter aims to help you solve ma W problems by yourseH2 It
covers the problems you are most likely to encounter.
If all else fails, contact Toshiba. You will find information on
Toshiba's support services at the end of this chapter.
Problemsthatareeasytofix
Your program
stops responding.
If you are working with a pro mam that suddenly fieezes all
operations, chances are the prQmam has stopped responding. You
can exit the failed program without shutting down the operating
system or closing other programs.
To close a pr%m'am that has stopped responding:
1
Press Ctrl,AIt,and Del simultaneously (once), then click Start
Task Manager.
The Windows ®Task Manager window appears.
173
If SomethingGoesWrong
Problems when you mm on the computer
2
Click the Applications
174
tab.
If a program has stopped responding, the words "not
responding" appear beside its name in the list.
3
Select the program you want to close, then click End Task.
Closing the failed program should allow you to continue
working. If it does not, continue with the next step.
4
Close the remaining programs one by one by selecting the
pro_am name, then End Task.
To power offyour computer:
1
Click Start, and then click the arrow next to the Lock button in
the lower-right part of the Start menu.
The Shut Do,a_ menu appears.
S_v_chU_er
Arrow
Start
(Sample
2
ShutDownMenu
ImaL, e) Shut Dowl7
mem_
Click Shut Down.
The computer shuts down completely.
Problemswhenyouturnonthecomputer
These problems may occur when you turn on the pov,-er.
The computer
will not start.
Make sure you attached the AC adaptor and power cord/cable
properly or installed a charged battery.
Press and hold the power button for at least 10 seconds.
If you are using the AC adaptor, check that the wall outlet is
working by plugging in another device, such as a lamp.
VeriPy that the computer is on by looking at the on!oft'indicator. If
the indicator is glowing, the computer is on. Also, try turning the
computer off and then on.
1 75
IfSomething
GoesWrong
Pwblems when you turn on the computer
If you are using an AC adaptor, verify that the computer is receiving
power from the external power source by looking at the AC power
light. If the indicator is glowing, the computer is connected to a live
external power source.
The computer
happens.
starts
but when you press a key nothing
Verii_ that the active program accepts text input. Try clicking your
mouse on an area where you can type text and try typing again.
Your computer may be in Sleep mode and have a sot_vare or
resource conflict. When this happens turning the power on returns
you to the problem instead of restarting the system. To clear the
condition, press Ctrl,AIt,and Del simultaneously. Then shut down the
computer via software, or follow the steps if your program stops
responding (see "Problems that are easy to fix" on page 173).
Clearing the condition may get the computer running, but it will not
solve a resource conflict. Read the documentation that came with
the conflicting device and "Resolving a hardware conflict" on
page 179.
The computer
is not accessing
external diskette drive.
the hard
disk or the optional
Your computer norlnally loads the operating system from the hard
disk. If you have a hard disk problem, you will not be able to start
the computer. Insert a system diskette into the optional external
diskette drive and press F12 when the machine starts and use the
arrow keys to select the boot-up device. (You may need to press F]2
several times.)
The computer
displays
the WARNINGRESUMEFAILURE/WindowsError
Recovery- Windows did not shut down successfully message,
To continue, select Start Windows normally.
This can happen if
the computer was put into Sleep mode and the battery has
discharged. If you performed a shutdown before this message was
displayed, a progrmn or driver may have prevented Windows" froln
shutting down.
Data stored in the computer's memory has been lost. Data stored in
the computer's hard drive may not be affected.
Always save your data even when you are using Sleep mode. If
your battery tully discharges, information that has not been saved
will be lost. Your computer can be configured to warn you when the
battery is running tow see "What to do when the main battery runs
low" on page 110.
If SomethingGoesWrong
Problems when you mm on the computer
176
If you are running on battery power, it is recommended that you do
not leave the computer in Sleep mode t\_r long periods of time.
To charge the battery, leave the computer plugged into a live wall
outlet for several hours. For more information see "Charging
batteries" on page 106.
The computer
displays
the Non-Systemdisk or disk error message.
Make sure there is no diskette in the optional external diskette
drive. If there is a diskette in the drive, remove it and press any key
to continue. If pressing any key does not work, press Ctrl,Alt,and Del
to restart the computer. For more information see "The computer is
not accessing the hard disk or the optional external diskette drive."
on page 175.
The AC power light is blinking.
If the AC power light is blinking, try the following steps:
1
Cut offpower to the computer by disconnecting the AC adaptor
and removing the battery. The error condition will be
interrupted, and the AC power light will stop flashing.
2
Put the battery back into the computer. Do not connect the AC
adaptor. Try mining the computer on again.
If the computer starts normally, the AC adaptor may be
detective and will need to be replaced (see the Toshiba Web
site at accessories.toshiba.com).
If the AC power light starts flashing, remove the battery, and
continue with the steps below.
3
Connect the AC adaptor to the computer. Leave the battery out
of the computer. Try turning the computer on again.
If the computer starts normally, the battery may need charging,
may be depleted, or may be defective. Turn the computer on,
insert the battery, and then leave the computer running for
several hours, which will deliver a slo,a; steady "tricklecharge" to the battery. Once the battery has been tricklecharged, it may begin working correctly again.
If the trickle-charging does not prove effective, visit the
Toshiba Web site at pcsupport.toshiba.com and see the Support
Bulletin Step-Charging the computer's battery (click the
Ask Iris '* link and search for the support bulletin by name).
Connect the AC adaptor to a different power outlet, preferably
in a different room. If the computer starts normally, there may
be a problem with the AC outlet itset£ or the voltage level
available from it.
177
IfSomething
GoesWrong
The Whd_'s ®operating system is not working
Verity that the AC adaptor is the correct unit for your computer
model. The computer may not be able to start from an AC
adaptor that is rated t\_r less current (amperage) than the
computer requires, even if the rated voltage is correct, and the
plug tits correctly in the DC-IN socket. The labels on the
bottom of the computer and the AC adaptor show the
specifications tbr voltage ("V") and current ("A") t\_r each
device. The voltage level must match exactly. The amperage
rating of the AC adaptor must be equal to or _eater than that
required by the computer.
TheWindows®operatingsystemisnotworking
Once you are familiar with the desktop and used to the way the
operating system responds to your work routine, you can easily
detect if the operating system is not working correctly. For
example:
o:* The operating system tails to start after the initial startup
appears.
o:* The operating system takes a long time to start.
o:* The operating system responds differently froln the normal
routine.
o.*o The screen does not look right.
Unless a hardware device has tailed, problems usually occur when
you change the system in some way such as installing a new
program or adding a device.
If you experience aW of these problems, use the options in the
Startup menu to fix the problem.
UsingStartupoptionsto fixproblems
If the operating system fails to start properly, you may have to
change your system's configuration or verily the startup procedure
to fix the problem. To do this, use the options in the Startup menu.
To open the Startup menu:
1
Restart your computer.
2
Press F8when your computer starts and before Windows Rstarts
loading.
The Windows ®Advanced Boot Options menu displays these
options:
•:,
Sale Mode
•:,
Sale Mode with Networking
If Something
GoesWrong
The Windows _ operating system is not working
178
o:* Sale Mode with Command Prompt
o:* Enable Boot Logging
o:* Enable low-resolution video (640x480)
o:* Last Known Good Configuration (advanced)
o:* Directory Services Restore Mode
o:* Debugging Mode
o:* Disable automatic restart on system failure
o:* Disable Driver Signature Enforcement
o:* Start Windows :_normally
When you highlight each option using the arrow keys, Windows >
displays information about each option at the bottom after
Description.
See your Windows _ documentation for further explanation.
NOTE
If yourcomputeris connected
to a network,theStartupmenumay
displaydifferentversionsof Safemode.
Internetproblems
My Internet
connection
is very
slow.
Many factors contribute to the speed with which you can surf the
Internet. They include: network speed, network conditions, time of
day (when everyone else is surfing, your access can be slow) and
popularity of the sites you are trying to access. If accessing a
particular site is very slow, try later.
My browser
cannot find the URL address
I typed in.
Make sure you separated the domain names of the address with the
I\3rward slash (/). Check the spelling of each name and the syntax of
the address carefully. A single incorrect letter or missed character
will make it impossible for your browser to locate the site.
My browser
cannot
find
a site I bookmarked.
The World Wide Web is constantly changing. A site you
bookanarked yesterday may not be available today or its seltzer may
be down for temporary repair. Try again later.
1 79
IfSomething
GoesWrong
ResoA, ing a hardwarecot!flier
The Windows®operatingsystemcanhelpyou
If the operating system has started properly but you still have a
problem using your computer, the online Help can assist you in
troubleshooting the problem.
To access the Windows _ operating system Help and Support:
1
Click Start, then click Help and Support,
or press F1.
The Help and Support window appears.
2
Then do one or both of the following:
o:* In the search field, type in the topic for which you need
help and t\_llow the on-screen instructions.
o:* Click one of the options listed in the window and then
follow the on-screen instructions.
You can connect to Support Online by clicking Microsoft
Customer Support or by going to Toshiba support at
pcsupport .toshiba .com.
Resolving
a hardwareconflict
If you receive an error message telling you there is a device driver
conflict or a general hardware problem, try using Windows R Help
and Support to troubleshoot the problem first.
For help on hardware conflicts:
1
Click Start, then click Help and Support,
2
Click Troubleshooting
or press F1.
in the Find an answer section.
A list of category links appears.
3
Click a topic under Hardware
steps.
and drivers and follow the
If there is still a problem, the operating system should display a
message that explains what the conflict is.
A plan of action
The smooth operation of the system depends on the interaction of
all devices, pro_ams, and features. If the system or one of its
attached devices is not working, resolving the problem can be timeconsuming and fiustrating.
The recommended procedure t\_r getting multiple devices to work
together is to add and set up one device at a time. After you add
each device, test it to make sure it and all previously connected
devices work.
If Something
GoesWrong
Resolving a hardwan, coflflicl
180
The device most recently connected to the system is the one most
likely to be causing a conflict.
Resolving
conflicts
There are several things you can do to resolve hardware conflicts:
o:o Get the most recent drivers from the manufacturer.
o:o Disable the device.
For an older device, remove it fiom the computer.
o:o Disable another system component and use its resources for the
new device. See "Fixing a problem with Device Manager" on
page 180.
o:o Reconfigure the device so that its requirements do not conflict.
Refer to the device's documentation f\_r instructions about
changing settings on the device.
Fixinga problemwithDeviceManager
Device Manager provides a way to check and change the
configuration of a device.
ChangingthedefaultsettingsusingDeviceManagercancauseother
conflictsthatmakeoneor moredevicesunusable.DeviceManager
is a configurationtool for advanceduserswhounderstand
configurationparameters
andtheramificationsofchangingthem.
Checkingdeviceproperties
Device Manager provides a way to view the properties of a device.
Properties include the name of the manufacturer, the type of device,
the drivers installed, and the system resources assigned to the
device.
To check a device's properties:
1
Click Start, Control Panel, System and Maintenance,
System, and then Device Manager.
2
To view the device(s) installed, double-click the device type.
3
To view the properties, double-click the device.
The operating system displays the Device Properties dialog
box, which provides an array of tabs. They may include:
•:o The General tab, which provides basic information about
the device.
1 81
IfSomethingGoesWrong
ResoA, ing a haMware cot_licl
o:. The Resources tab, which lists resources assigned to the
monitor, optional external optical drive, optional external
diskette drive, and other power-using functions. This tab
does not appear if the device is not using resources.
•:.
The Driver tab, which displays the drivers being used by
the device. This tab also provides options for updating the
driver or rolling back the driver in case the new version is
causing a problem.
The tabs that appear in the dialog box vary fiom one device to
another.
For more information about Device Manager, refer to Windows ®
online Help.
Memoryproblems
Incorrectly connected or thulty memory modules may cause errors
that seem to be hardware or even sol,rare related. It is worthwhile
checking for these first:
1
2
Click Start, and then click the arrow next to the Lock button in
the lower-right part of the Start menu.
The Shut Down menu appears.
Click Shut Down.
The computer shuts down completely.
3
Remove the memory module, following the instructions in
"Removing a memory module" on page 55.
4
Reinstall the memory module, following the instructions in
"Installing a memory module" on page 49, and making sure the
module is seated properly.
5
Check for the error again.
6
If the error recurs, remove the memory module entirely and
check for the error again.
If removing the memory module eliminates the error, the
memory module may be faulty. If the error recurs without the
memory module installed, the error is not caused by the
memory module.
TECHNICAL
NOTE:
Youmusthaveatleastonememory
module
installedfor thecomputerto work.
If Something
GoesWrong
Resolving a hard_'an_ cot_flicl
182
Powerandthebatteries
Your computer receives its power through the AC adaptor and
power cord/cable or from the system batteries (battery, optional
secondary battery, and real-time clock (RTC) battery). Power
problems are interrelated. For example, a faulty AC adaptor or
power cord/cable wilt neither power the computer nor rechaNe the
batteries.
Here are some typical problems and how to solve them:
The AC power light does not come on when you plug in the
AC adaptor and power cord/cable.
Make sure the AC adaptor and power cord/cable are firmly plugged
into both the wall outlet and the computer.
If the AC power light still does not come on, check that the wall
outlet is working properly by plugging in a lamp or other appliance.
The AC adaptor and power cord/cable
battery will not charge.
work correctly,
but the
The battery does not charge while the computer is consuming full
power. Try mining off the computer.
The battery may not be inserted correctly in the computer. Turn off
the computer, remove the battery, clean the contacts with a soft dry
cloth (if necessary) and replace the battery. See "Removing the
battery from the computer" on page 115.
The battery may be too hot or too cold to charge properly. If you
think this is the probable cause, let the battery reach room
temperature and try again.
If the battery has completely discharged, it will not begin charging
immediately. Leave the AC adaptor and power cord/cable
connected, wait 20 minutes and see if the battery is charging.
If the battery light is glowing after 20 minutes, let the computer
continue charging the battery for at least another 20 minutes before
you turn on the computer.
If the battery light does not glow after 20 minutes, the battery may
have reached the end of its useful life. Try replacing it.
The battery appears
it usually does.
not to power the computer
for as long as
If you frequently repeat shallow charge and discharge, the battery
meter may become inaccurate. Let the battery discharge
completely, then try charging it again.
1 83
IfSomething
GoesWrong
Resolving a hardware cot_fiicl
Check the power options via your Power Plans (see "Power Plans"
on page 113). Have you added a device, such as a PC Card or
memory module, that takes its power from the battery? Is your
software using the hard disk more? Is the display power set to turn
off automatically? Was the battery tully charged to begin with? All
these conditions affect how long the charge lasts.
After a period of time, the battery will lose its ability to perform at
maxilnum capacity and will need to be replaced. This is normal for
all batteries. To purchase a new battery pack, see your accessories
information that shipped with your computer, or visit the Toshiba
Web site at accessories.toshiba.com. Refer to this site often to stay
current on the most recent software and hardware options tbr your
computer, and for other product in_brmation.
For more information on maintaining battery power, see "Charging
batteries" on page 106.
Keyboard
problems
It; when you type, strange things happen or nothing happens, the
problem may be related to the keyboard itselI,
The keyboard
produces
unexpected
characters.
A keypad overlay may be on. If the nmntock light or cursor control
mode light is on, press Fn + fl0 to turn offthe cursor control mode
light, or Fn + F11 to turn offthe nmntock light.
If the problem occurs when both the keypad overlays are off; make
sure the sot%rare you are using is not remapping the keyboard.
Refer to the sot%rare documentation and check that the program
does not assign different meanings to any of the keys.
You have connected an external keyboard
and the operating
system displays one or more keyboard error messages.
The keyboard you connected may be defective or incompatible with
the computer. Try using a different make of keyboard.
Nothing happens
keyboard.
when you press the keys on the external
You may have plugged the external keyboard in while the computer
was turned on. Using the computer's TouchPad:
1
Click Start, and then click the arrow next to the Lock button in
the lower-right part of the Start menu.
The Shut Do,a_ menu appears.
2
Click Restart.
The computer will restart and recognize the device.
If Something
GoesWrong
Resolving a hardwan_ coflflicl
184
Displayproblems
Here are some typical display problems and their solutions:
The screen
is blank.
Display Auto Offmay have gone into effect. Press any key to
activate the screen.
You may have activated the instant password feature by pressing
Fnand F1 simultaneously. If you have registered a password, press
any key, type the password and press Enter. If no password is
registered, press any key. The screen reactivates and allows you to
continue working.
If you are using the built-in screen, make sure the display priority is
not set tbr an external monitor. To do this, press Fn and F5
simultaneously (once). If this does not correct the problem, press Fn
and F5simultaneously again to return the display priority to its
previous setting.
HINT:Holdingthe FnkeyandpressingtheF5keyseveraltimeswill
advanceyouthroughthe displayoptions.
If you are using an external monitor:
o:° Check that the monitor is turned on.
o:° Check that the monitor's power cord/cable is firmly plugged
into a working power outlet.
o:° Check that the cable connecting the external monitor to the
computer is firmly attached.
o:° Try adjusting the contrast and brighmess controls on the
external monitor.
o:° Press Fn and F5 simultaneously to make sure the display
priority is not set for the built-in screen.
The
screen
does
not look
right.
You can change the display settings by clicking a blank area of the
desktop with the secondary control button, then clicking
Personalize.
This opens the Personalization
window. Click
Windows
Color and Appearance
to choose the colors for the
screen. Click Display settings to choose the screen resolution.
1 85
IfSomething
GoesWrong
Resolving a hard.,are cot_lict
The built-in
screen
flickers.
Some flickering is a normal result of the way the screen produces
colors. To reduce the amount of flickering, try using fewer colors.
To change the number of colors displayed:
1
Right-click in a blank area of the Windows:R desktop.
2
Click Personalize,
3
Change the Colors option and click OK.
and then Display Settings.
For more information see Windows _ Help.
A message displays saying that there is a problem with your
display settings and that the adapter type is incorrect or the
current settings do not work with your hardware.
Reduce the size of the color palette to one that is supported by the
computer's internal display.
To change the display properties:
1
Right-click in a blank area of the Windows:R desktop.
2
Click Personalize,
3
Adjust the screen resolution and/or color quality.
4
Click OK.
and then Display Settings.
The display mode is set to Simultaneous
display device does not work.
and the external
Make sure the external monitor is capable of displaying at
resolutions of 800 x 600 or higher. Devices that do not support this
resolution will only work in Internal/External mode, and not
simultaneous mode.
Small bright dots appear on your TFT display when you turn
on your computer.
Small bright dots may appear on your screen display when you turn
on your computer. Your display contains an extremely large number
of thin-film transistors (TFT) and is manufactured using highprecision technolow. Any small bright dots that may appear on
your display are an intrinsic characteristic of the TFT
manufacturing technolo_. Over a period of time, and depending on
the usage of the computer, the brighmess of the screen will
deteriorate. This is also an intrinsic characteristic of the screen
technology. When the computer is operated on battery power, the
screen wilt dim and you may not be able to increase the brighmess
of the screen while on battery power.
If Something
GoesWrong
Resolving a hardwan, coflflicl
186
Diskdriveproblems
Problems with the hard disk or with a diskette drive usually show
up as an inability to access the disk or as sector errors. Sometimes a
disk problem may cause one or more files to appear to have garbage
in them. Typical disk problelns are:
You are having trouble
appear to be missing.
accessing
a disk, or one or more files
Make sure you are identifying the drive by its correct name
(A: or C:).
Error-checking
Run Error-checking, which analyzes the directories, files and File
Allocation Table (FAT) on the disk and repairs any damage it finds.
To run Error-checking:
1
Click Start, and then Computer.
2
Right-click the drive you want to check.
3
On the pop-up menu, click Properties.
The drive's Properties box appears.
NOTE
Thisfeatureis notavailablefor opticaldrives.
4
Click the Tools tab.
5
Click the Check now button.
The Check Disk box appears.
6
You can choose one or both options:
•:o Automatically fix file system errors
•:o
7
Scan for and attempt recovery of bad sectors
Click Start.
Error-checking tests and repairs the disk.
Your hard
disk seems very slow.
If you have been using your computer for a tong time, your files
may have become fiagmented. Run Disk Deframnenter.
To do this, click Start, All Programs, Accessories, System Tools,
and then Disk Defragmenter. After it opens, click Defragment
now.
187
IfSomething
GoesWrong
Resolving a hardware cot_licl
Your
data
files are
damaged
or corrupted.
Refer to your sot_vare documentation
Many software packages automatically
for file recovery procedures.
create backup fles.
You may also be able to recover lost data using utility software.
Consult your network administrator.
Some programs
run correctly
but others
do not.
This is probably a confguration problem. Ifa program does not run
properly, refer to its documentation and check that the hardware
configuration meets its needs.
A diskette
will not go into the optional
external
diskette
drive.
You may already have a diskette in the drive. Make sure the drive is
empty.
You may be inserting the diskette incorrectly. Hold the diskette with
the hub side facing down, and insert it so that the metal head
window cover goes into the drive first.
The metal cover or a loose label may be obstructing the path into
the drive. Carefully inspect the diskette. If the metal cover is loose,
replace the diskette. If the label is loose, replace the label and try
inserting the diskette again.
The drive cannot
read a diskette.
Try another diskette. If you can access the second diskette, the first
diskette (not the drive) is probably causing the problem. Run Errorchecking on the faulty diskette (for instructions see "Disk drive
problems" on page 186).
Opticaldriveproblems
You cannot
access a disc in the drive.
If the optical drive is an external drive, make sure that the drive's
cable is properly connected to the computer.
Make sure the tray that holds the CD or DVD is closed properly.
Press gently until it clicks into place.
Open the tray and remove the disc. Make sure the tray is clean. Any
dirt or _\_reign object can interfere with the laser beam.
Examine the disc to see if it is dirty. If necessary, wipe it with a
clean cloth dipped in water or a neutral cleaner.
Replace the disc in the tray. Make sure that the disc is lying flat,
label side up. Close the tray carefully, making sure it has shut
completely.
If Something
GoesWrong
Resolving a hard_,an_ cot_flicl
You press the disc eject button,
slide out.
188
but the drive tray does not
Make sure the computer is connected to a power source and turned
on. The optical drive eject mechanism requires power to operate.
Make sure a program is not accessing the drive and preventing it
from ejecting.
If you need to remove a disc and cannot turn on the computer (for
example, if the battery is completely discharged), use a narrow
object, such as a straightened paper clip, to press the manual eject
button. This button is in the small hole next to the optical drive eject
button on the face of the optical drive tray.
Neverusea pencilto pressthe manualejectbutton.Pencilleadcan
breakoff insidethecomputeranddamageit.
Some discs run correctly
but others
do not.
Check the type of disc you are using. The optical drive supports the
Digital Versatile Disc (DVD) formats DVD±R, DVD±RW, and
DVD RAM, plus the CD formats CD-Recordable (CD-R) and
CD-Rewritabte (CD-RW).
If the problem is with a data CD or DVD, refer to the software's
documentation and check that the hardware configuration meets the
program's needs.
The disc will not come out of the drive when you click the
eject button on the screen.
Press the button on the optical drive itself. For additional
information see "You press the disc eject button, but the drive tray
does not slide out." on page 188.
Soundsystemproblems
No sound is coming
from the computer's
speakers.
Adjust the volume control.
Try pressing Fn + Esc to see if volume mute is disabled.
Check that the volume control on the computer is turned up.
If you are using external headphones or speakers, check that they
are securely connected to your computer.
189
IfSomething
GoesWrong
ResoA, ing a haMware cot_flicl
The computer
emits a loud, high-pitched
noise.
This is feedback between the microphone and the speakers. It
occurs in any sound system when input from a lnicrophone is ted to
the speakers and the speaker volume is too loud. Adjust the volume
control.
PCCardproblems
(Available
on certain
models)
PC Cards (PCMCIA-compatible) include many types of devices,
such as a removable hard disk, additional memory, or a pager.
Most PC Card problems occur during installation and setup of new
cards. If you are having trouble getting one or more of these devices
to work together, several sections in this chapter may apply.
Resource conflicts can cause problems when using PC Cards. See
"Resolving a hardware conflict" on page 179.
If your system does not have built-in drivers for your PC Card and
the card did not come with an operating system driver, it may not
work under the operating system. Contact the manufacturer of the
PC Card for int\mnation about using the card under the operating
system.
PCCardchecklist
•:.
Make sure the card is inserted properly into the slot.
•:.
Make sure all cables are securely connected.
•:.
Occasionally a detective PC Card slips through quality control.
If another computer with a PC Card slot is available, try the
card in that machine. If the card malfunctions again, it may be
detective.
Resolving
PCCardproblems
Here are some common problems and their solutions:
The slot appears
longer work.
to be dead. PC Cards
that used to work no
Check the PC Card status:
1
Click Start, Control Panel, System and Maintenance,
then Device Manager.
2
Double-click the PCMCIA adapter.
and
If Something
GoesWrong
Resolving a hardwan_ coflflicl
3
190
Double-click the appropriate PC Card.
The operating system displays your PC Card's Properties
dialog box, which contains information about your PC Card
confimJration and status.
The computer
Card.
stops working
(hangs)
when you insert
a PC
The probleln may be caused by an I/O (i@ut/output) conflict
between the PCMCIA socket and another device in the system. Use
Device Manager to make sure each device has its own I/O base
address. See "Fixing a problem with Device Manager" on page 180
for more int\_rlnation.
Since all PC Cards share the same socket, each card is not required
to have its own address.
Hot swapping (removing
one PC Card and inserting
without turning the computer
off) fails.
another
Follow this procedme before you remove a PC Card:
1
Click the Safely Remove Hardware
Area.
icon in the Notification
The Safely Remove Hardware screen appears.
2
Click Safely remove for the device you want to swap.
3
Select the item you wish to remove and click OK.
4
Remove the device when told it is sate to do so.
Neverswapmoduleswhenthecomputeris in Hibernationor Sleep
mode.This is knownas "warmswapping"and is notsupported.For
moreinformationon HibernationandSleepmodessee"Hibernation
mode"on page75 and"Sleepmode"on page76.
The system
does not recognize
your PC Card.
Refer to the PC Card documentation.
Removing a malfunctioning
many problems.
A PC Card error
card and reinstalling it can correct
occurs.
Reinsert the card to make sure it is properly connected.
If the card is attached to an external device, check that the
connection is secure.
Refer to the card's docmnentation,
troubleshooting section.
which should contain a
1 91
IfSomethingGoesWrong
ResoA, ing a haM.,are cot_licl
ExpressCard
TM problems
(Available on certain models)
ExpressCards TM (PCMCIA-compatible) include many types of
devices, such as a removable hard disk, additional memory, or a
pager.
Most ExpressCard problems occur during installation and setup of
new cards. If you are having trouble getting one or more of these
devices to work together, several sections in this chapter may apply.
Resource conflicts can cause problems when using ExpressCards.
See "Resolving a hardware conflict" on page 179.
If your system does not have built-in drivers for your ExpressCard
and the card did not come with an operating system driver, it may
not work under the operating system. Contact the manufacturer of
the ExpressCard for information about using the card under the
operating system.
ExpressCard
TM checklist
•:.
Make sure the card is inserted properly into the slot.
o:* Make sure all cables are securely connected.
o:* Occasionally a defective ExpressCard TM slips through quality
control. If another computer with an ExpressCards slot is
available, try the card in that machine. If the card malfunctions
again, it may be defective.
Resolving
ExpressCard
TM problems
Here are some common problems and their solutions:
The slot appears to be dead. ExpressCards
work no longer work.
TM
that used to
Check the ExpressCard status:
1
Click Start, Control Panel, System and Maintenance, and
then Device Manager.
2
Double-click the PCMCIA adapter.
3
Double-click the appropriate ExpressCard.
The operating system displays your ExpressCard's Properties
dialog box, which contains infonnation about your
ExpressCard configuration and status.
192
If Something
GoesWrong
Resolving a hard.,am coqflk't
The computer
ExpressCard.
stops working
(hangs)
when you insert
an
The probleln may be caused by an I/O (i@ut/output) conflict
between the PCMCIA socket and another device in the system. Use
Device Manager to make sure each device has its own I/O base
address. See "Fixing a problem with Device Manager" on page 180
for more information.
Since all ExpressCards share the same socket, each card is not
required to have its own address.
Hot swapping (removing
another without turning
one ExpressCard
and inserting
the computer
off) fails.
Follow this procedure before you remove a ExpressCard:
1
Click the Safely
Area.
Remove
Hardware
icon in the Notification
The Safely Remove Hardware screen appears.
2
Click Safely remove for the device you want to swap.
3
Select the item you wish to remove and click OK.
4
Remove the device when told it is sate to do so.
[ e_:U_i_
:] Neverswapmoduleswhenthecomputeris in Hibernationor Sleep
mode.This is knownas "warmswapping"and is notsupported.For
moreinformationon HibernationandSleepmodessee"Hibernation
mode"on page75 and"Sleepmode"on page76.
The system
does not recognize
your ExpressCard.
Refer to the ExpressCard docmnentation.
Removing a malfunctioning
many problems.
An ExpressCard
error
card and reinstalling it can correct
occurs.
Reinsert the card to make sure it is properly connected.
If the card is attached to an external device, check that the
connection is secure.
Refer to the card's docmnentation,
troubleshooting section.
which should contain a
1 93
IfSomething
GoesWrong
Resolving a hardware cot_lict
Printerproblems
This section lists some of the most common printer problems.
The printer
will not print.
Check that the printer is connected to a working power outlet,
turned on and ready (on line).
Check that the printer has plenty of paper. Some printers will not
start printing when there are just two or three sheets of paper left in
the tray.
Make sure the printer cable is firmly attached to the computer and
the printer.
Run the printer's self-test to check for any problem with the printer
itself.
Make sure you installed the proper printer drivers as shown in
"Setting up a printer" on page 73 or in the instructions that came
with the printer.
You may have connected the printer while the computer is on.
Disable Sleep mode, turn off the computer, and turn offthe printer.
Turn the printer back on, make sure it is online, and then turn the
computer back on.
Try printing another file. For example, you could create and attempt
to print a short test file using Notepad. Ifa Notepad file prints
correctly, the problem may be in your original tile.
If you cannot resolve the problem, contact the printer's
manufacturer.
The printer
will not print what you see on the screen.
Many programs display information on the screen differently from
the way they print it. See if your program has a print preview mode.
This mode lets you see your work exactly as it will print. Contact
the software manufacturer for more int\_nnation.
Modemproblems
(Available on certain models)
This section lists common modem problems.
The modem will not receive or transmit properly.
Make sure the cable tiom the modem to the telephone line is firmly
connected to the computer's modem port and the telephone line
.jack.
If Something
GoesWrong
Resolving a haMwan, cot_flM
194
Check the port settings to make sure the hardware and software are
referring to the same COM port. See "Determining the COM port"
on page 125.
Check the comlnunications parameters (baud rate, parity, data
length and stop bits) specified in the comlnunications pro_am. It
should be set up to transmit at 300, 1200, 2400, 4800, 9600, 14400,
28800, 33600 bps (bits per second) or higher. Refer to the
pro_am's docmnentation and the modem manual for inforlnation
on how to change these settings.
The modem is on, set up properly
or receive data.
but still does not transmit
Make sure the line has a dial tone. Connect a telephone handset to
the line to check this.
The other system may be busy or off line. Try making a test
transmission to someone else.
For more information regarding your system's M92 modem, visit
the Toshiba Web site at pcsupport.toshiba.com.
Wirelessnetworking
problems
NOT£
Thissectionprovidesgeneraltroubleshooting
tips for networking
®
problems,specificallywireless(Wi-Fi) networking.
Thetermsandconceptsusedassumea basicunderstandingof
networks,and maybefor moreadvancedusers.If youneed
assistance
or if youarenotfamiliarwith theterminology,pleasesee
Windows®HelpandSupportor contactyourcomputertechnician.
o:o If your computer is equipped with an internal Wi-Fi '_adapter,
verify that the Wi-Fi <_antenna switch is on (the Wi-Fi _ light (¢T
_)
will be lit).
NOTE
Todetermineif yourcomputerhasaninternalWi-Fi®adapter,check
the devicelist in DeviceManager(partof theWindows
® Control
Panel,HardwareandSound).SomeToshibamodelsmayhavea
Wi-Fi®antennaswitcheventhoughtheydo nothavean internal
Wi-Fi®adapter.
o:o Verify that siNml strength is good using the utility provided
with the Wi-Fi _ adapter.
1 95
IfSomething
GoesWrong
ResoA, ing a hardware cot_fiicl
If another computer is on the same network, verify that it has
network access, and can connect to the Imernet. It; for
example, the other computer cannot browse to a public Web
site, the ISP's (Internet Service Provider) selaTicemay be
disrupted.
Verity that the Service Set Identifier (SSID), or network name,
is correct i.e., that it matches the SSID assigned to the access
point you are attempting to connect through. SSIDs are casesensitive. Toshiba provides a Client Manager utility tbr setting
and managing SSIDs.
Check the Control Panel's Hardware and Sound Device
Manager to verify that the Wi-Fi ® adapter is recognized by the
Windows "*operating system, and that the driver is loaded.
Carefully note any error messages
these will be very helpful
if you should confer with a support technician at a later time.
Verity that the network connection is configured to obtain its
Internet Protocol (IP) address dynamically:
1
Click Start, and then Network.
2
Click View Status.
3
Click Details.
4
Verify that the DHCP Enabled setting is set to Yes.
5
Click Close.
•:o Use IPCONFIG to verify that the computer has a useful IP
address one other than the private address of
169.254.xxx.xxx assigned by Windows :R.
1
Click Start to open the Start menu.
2
Type grad in the search field.
3
At the top-left of the Start menu, click cmd.exe to open the
command prompt.
4
Enter IPCONFIG/ALL
and press Enter.
The IP address for each active network adapter wilt be
displayed.
o:o Connect your computer directly to your router or broadband
modem, by plugging a standard CAT5 Ethemet patch cable
(sold separately) into your computer's RJ45 Ethemet port. If
your connection problem disappears, the problem lies in the
Wi-Fi _ part of your network.
If Something
GoesWrong
Resolving a hard.'am cot_flict
O
196
Use the PING comlnand to veril_ a connection to the gateway
at 192.168.1.1 (a default gateway t\_rmost wireless routers).
1
Click Start to open the Start menu.
2
Type Cmd in the search field.
3
At the top-left of the Start menu, click cmd.exe.
4
Enter PING192.168.1.1 at the comlnand prompt, and press
Enter.
5
If"Request Timed Out" or another error message appears
in response, then the problem is probably Wi-Fi®-related.
If you have enabled any security provisions (closed system,
MAC address filtering, Wired Equivalent Privacy [WEP], etc.),
check the access point vendor's Web site _\_rrecent firlnware
upgrades. Problems with WEP keys, in particular, are
fiequently addressed in new firlnware releases.
Specialconsiderations
fortheWindows
®operatingsystem
Wired Equivalent
Privacy (WEP)
on the wireless access point.
encryption
is not enabled
When you install a wireless access point device, the Windows R
operating system checks whether WEP encryption is enabled on the
device. If it is not enabled, the Windows ®operating system adds the
device to its list of available wireless networks, but does not create a
wireless connection using the device, since the connection would
not be secure. You can still, however, use the access point. To use an
access point without WEP encryption, t\_llow these steps:
1
Double-click the Wireless Network icon in the Notification
Area (far-right portion of the Windows _ Taskbar).
2
Click Connect
3
Select the desired network fiom the list and click Connect.
to a network.
A message informs you that the selected network is not secure.
4
Click Connect Anyway.
5
The Windows ®operating system wilt now try to establish a
wireless connection.
1 97
IfSomething
GoesWrong
DVD operating problems
The Windows ® operating
facility does not work.
system wireless
management
If you are using an external Wi-Fi ®adapter (a PC Card, USB
adapter, or other variety), check if the adapter comes with its own
managelnent utility. If it does, the utility may be disabling the
Windows ®operating system wireless managelnent facility, in which
case you must use the adapter's management utility. If the
documentation that accompanies the adapter does not provide
enough inforlnation to determine if this is the case, contact that
vendor's support moup for further advice.
DVDoperatingproblems
If you experience a probteln playing DVDs, you may be able to fix
the problem yourself.
For general problelns playing a DVD title, try the following steps:
1
Verify that the disc is in a format that the drive supports.
2
Ensure that the disc is properly inserted in the drive tray.
3
Clean the disc and try again.
A dirty drive can also cause audio problelns. If you have tried
several discs and all fail, consider sending your drive to an
authorized selwice provider to get it cleaned.
4
Verity that your computer recoNlizes your optical drive by
clicking Start, and then Computer. The optical drive should
appear in the list.
5
See "Checking device properties" on page 180 for instructions
on using Device Manager to view the optical drive properties.
6
Check the Toshiba Web site for new information on optical
drives and their operation.
A blank
or title.
screen
appears
while watching
a DVD-ROM
movie
Change the setting for when to turn off the display using the
following steps:
1
Click Start, Control Panel, System and Maintenance,
then Power Options.
2
Click Choose when to turn off the display.
3
Select Never on When to turn off the display.
4
Click Save changes.
and
If SomethingGoesWrong
Develop good computing habits
The screen
saver runs while you are watching
198
a movie or title.
If the screen saver is enabled, it runs on top of any movie or title
you are watching. To disable the screen saver:
1
Right-click on the desktop and click Personalize
2
Select None for the screen saver.
3
Click OK.
in the menu.
Developgoodcomputing
habits
Save your work frequently.
You can never predict when your computer will lock, forcing you to
close a program and lose unsaved changes. Many software
pro malns build in an automatic backup, but you should not rely
solely on this feature. Save your work! See "Computing tips" on
page 86 t\_r instructions.
On a regular
hard disk.
basis, back up the information
stored
on your
Use Windows :Rto back up files, or the entire computer, to a CD,
DVD, or external hard disk. Here are some ways you can do this:
o:o Use the Windows "_operating system to back up files or your
entire computer to a CD, DVD, or external hard disk.
o:o Copy files to diskette.
o:o Copy files to a rewritable external storage device.
o:o Connect a writable CD/DVD or hard drive to the system and use
specialized software to copy everything on the hard disk to a
CD/DVD or hard drive.
o:o Connect your computer to the office network and copy files to
your network partition.
Some people use a combination of these methods, backing up all
files to tape weekly and copying critical files to diskette on a daily
basis.
If you have installed your o,am pro_alns, you should back up these
programs as well as your data files. If something goes wrong that
requires you to reforlnat your hard disk and start again, reloading
all your programs and data files from a backup source will save
time.
1 99
IfSomething
GoesWrong
Develop good computing habits
Read
the user's
guides.
It is very difficult to provide a fail-sate set of steps you can follow
every time you experience a problem with the computer. Your
ability to solve problems will improve as you learn about how the
computer and its software work together.
Get familiar with all the user's guides provided with your computer,
as well as the manuals that come with the programs and devices you
purchase.
Your local computer store or book store sells a variety of self-help
books you can use to supplement the int\3rlnation in the manuals.
Dataand systemconfigurationbackupin theWindows® operating
system
The Windows _ operating system offers some easy-to-use features
for backing up your Windows ®settings and your data_ocuments
and other important files. Take advantage of these features to
protect yourself from much more difficult and tilne-consuming
restoration procedures, and to safeguard your valuable data fiom
loss.
SavingsystemconfigurationwithRestorePoints
The System Restore feature of the Windows _ operating system
quickly creates Restore Points 'snapshots' of your Windows '_
operating system configuratio_and
saves them for later recall. If
you experience problelns after installing some new hardware or
software, you can easily select a previously established Control
Point to 'turn back the clock,' restoring the Windows _ operating
system to the state it was in just prior to the installation. This is
much easier and more effective than uninstalling the hardware or
software, which often leaves behind unwanted files and settings. It
is also easy to undo a Restore Point selection, if you change your
mind.
Follow these steps to create a Restore Point using the System
Restore utility:
1
Click Start, All Programs, Accessories, System Tools, and
then System Restore.
2
Clickopen
3
The System Protection tab of the System Properties window
appears.
Click Create.
System Protection.
If Something
GoesWrong
Develop good comlmting habits
200
4
In the input field, enter a name that is descriptive enough to be
easily understood in the future, such as "Betbre installing
Brand X Accounting app." Then click Create.
5
The Windows ®operating system creates the Restore Point,
automatically stamps it with the current date and time, and
displays a message that the restore point was successfully
created.
6
Click OK.
Then, at a later time, you can re-establish your Windows "*
configuration using the saved Restore Point. To do this:
1
Click Start, All Programs,
then System Restore.
2
Click Next.
3
A list of previously created Restore Points displays, showing
the timestalnp and description of each Restore Point.
NOTE
4
Accessories, System Tools, and
Thislist maycontainRestorePointsthatyoudid notcreate.Restore
PointslabeledSystemCheckpointwereautomatically
createdbythe
Windows®operatingsystem.OtherRestorePointsmayhavebeen
createdautomaticallybyapplicationswhentheywereinstalled.
Select the Restore Point you want to use, and then click Next.
The utility displays the timestamp and description of the
selected Restore Point.
5
Verity that the Restore Point you selected is the correct one. If
it is not, click Back to return to step 4.
6
Close all programs and save all open files.
7
Click Finish, and then Yes to begin the system restore.
8
Your Windows ®operating system confimlration will now be
restored to the state it was in when the chosen Restore Point
was created, and then the computer will be automatically
restarted.
201
IfSomething
GoesWrong
Develop good computing habits
Backing
upyourdataoryourentirecomputer
withthe
Windows
®operatingsystem
The most valuable component of your computer system is the data
you create and store on its hard drive. Since problems with either
hardware or software can make the data inaccessible or even
destroy it, the next most valuable component of your computer
system may be a recent backup of your data.
Fortunately, the Windows ®operating system offers a convenient
way to back up your computer or just your important files to CDs,
DVDs, or hard drives. An external hard drive is recommended in
case the internal hard drive fails. No additional software is required.
Most of the CD and DVD drives built into recent Toshiba portable
computer models can ,aTite to (or 'burn') as well as read from CDs.
External CD and DVD writers are also widely available.
Follow these steps to back up your computer or files to CDs, DVDs,
or a hard drive:
NOTE
Youcannotbackupthecomputerwhilerunningon batterypower.
Connectthe ACadaptorbeforecontinuing.
1
Prepare your backup target by connecting it and/or inserting a
blank CD or DVD in the drive.
2
Click Start.
3
Click Control
Panel.
4
Click System
and Maintenance.
5
Click Backup
and Restore
6
You can choose to back up some files or the entire computer.
Click either Back up files or Back up computer.
NOTE
7
Center.
If youchooseto backup yourentirecomputer,youwill besettingup
a scheduledbackupthatwill beperformedperiodically,andwill only
includethechangesmadesincethelastbackup.
Follow the on-screen help to complete your backup.
For more help, click Start, Help and Support,
"back up."
and search for
If SomethingGoesWrong
Develop good computing habits
202
General tips for installing hardware and software
Here are a few tips to help ensure sate and easy installation of new
hardware (printers, pointing devices, external hard drives, DVD
writers, scanners, etc.) and software (applications like Microsoft "_"
Office and Adobe _ Photoshop '_,or utility software such as special
toolbars for your web browser).
Create a Restore Point (refer to "Saving system confiNlration
with Restore Points" on page 199). Before installing anything,
use the System Restore utility to set a Restore Point (see the
section titled Restore Points). If anything goes wrong, you will
then be able to easily restore the Windows "_operating system to
the state it was in prior to the installation, undoing any changes
that the installation process introduced.
o:. Back up your critical data (see "Backing up your data or your
entire computer with the Windows _'operating system" on
page 201).
o:. Have your thctory Restore/Reconfiguration CD(s) on hand in
case you need any files fiom them (available on certain
models).
o:. Do not guess t\_tlow directions carefully! It is often necessary
to run an installation utility first before connecting a new
hardware item to the computer. If the device is connected first,
it may be very difficuh to complete the installation
successfully. Always carefully follow the installation
instructions that accompany the hardware or software.
o:. Restart the Windows :R:operating system. Always restart the
Windows :Roperating system after each installation, even if the
installation utility does not prompt you to do so. This will
ensure that the installation is completed, and will clean up
anything that the installation utility left behind.
Do one installation at a time. If you have several new items to
add to your computer system, install just one at a time, creating
Restore Points immediately before each successive installation.
This will make it much easier to determine the origin of any
new problems. For best results, follow this sequence:
1
Back up critical data.
2
Create a Restore Point.
3
Install one item of hardware or software.
203
ItSomething
GoesWrong
!f you need till_her assistance
4
Restart the Windows ®operating system.
Use the new hardware or sofwvare t\_r a while, noting any
new problems. Make sure that your critical applications
(e-mail, business applications, etc.) are working correctly,
and verify that important devices are still functioning.
For each additional hardware or software item, repeat
these steps, starting at step 1if any of your critical data has
changed, or starting at step 2 if no critical data has
changed.
If youneedfurtherassistance
If you have followed the recommendations in this chapter and are
still having problems, you may need additional technical assistance.
This section contains the steps to take to ask t\_r help.
Beforeyou contactToshiba
Since some problems may be related to the operating system or the
program you are using, it is important to investigate other sources
of assistance first.
Try the t\_ltowing before you contact Toshiba:
o:* Review the troubleshooting inforlnation in your operating
system documentation.
o:* If the problem occurs while you are running a program, consult
the program's documentation for troubleshooting suggestions.
Contact the sot_vare company's technical support _oup t\_r
their assistance.
o**oConsult the dealer fiom whom you purchased your computer
and/or program. Your dealer is your best source t\_r current
int\_rmation.
For the complete detailed specifications for your computer, visit
pcsupport.toshiba.com. Go to the Yech Support Center, select your
particular model from the list and go to the Detailed Specifications
for that model.
For the number of a Toshiba dealer near you in the United States,
call: (800) 457-7777.
If Something
GoesWrong
Oflwr Toshiba/nwmel Web siWs
204
ContactingToshiba
If you still need help and suspect that the problem is hardwarerelated, Toshiba offers a variety of resources to help you.
Toshiba'sTechnicalSupportWeb site
For technical support, oi to stay current on the most recent sot_vare
and hardware options for your computer, and for other product
information, be sure to regularly check the Toshiba Web site at
pcsupport.toshiba.com.
Toshibavoicecontact
Before calling Toshiba, make sure you have:
o:. Your computer's serial number
oto The computer and any optional devices related to the problem
oto Backup copies of your Windows "*operating system and all
other preloaded software on your choice of media
•:.
Name and version of the prQmam involved in the problem
along with its installation media
oto Information about what you were doing when the problem
occurred
oto Exact error messages and when they occurred
For technical support, call the Toshiba Global Support Centre:
Within the United States at (800) 457-7777
Outside the United States at (949) 859-4273
OtherToshibaInternetWebsites
toshiba.corn
Worldwide Toshiba corporate site
computers.toshiba.corn
Marketing and product in_bnnation in
the USA
accessories.toshiba.corn
Accessories information in the USA
www.toshiba.ca
Canada
www.toshiba-Europe.com
Europe
www.toshiba.co.jp/index.htm
Japan
http://servicio.toshiba.com
Mexico and all of Latin America
205
IfSomethingGoesWrong
Toshiba _ worldwide q_ices
Toshiba's
worldwideoffices
Australia
Toshiba (Australia) Pty. Limited
84-92 Talavera Road
North Ryde NSW 2113
Sydney
Australia
Canada
Toshiba Canada Ltd.
191 McNabb Street
Markham, Ontario
L3R - 8H2
Canada
France
Toshiba Systhnes (France) S.A.
7, Rue Amp4re; B.P 131
92800 Puteaux C4dex
France
Germany
Toshiba Europe GlnbH
LeibnizstraBe 2
D-93055 RegensbuN
Germany
It'fly
Centro Direzionale Colteoni
Palalzo Perseo
Via Paracelso 10
20041, Agate Brianza
Milano, Italy
Japan
Toshiba Corporation, PCO-IO
1-1, Shibaura 1-Chome
Minato-Ku, Tolcyo, 105-8001
Japaal
Latin America and Caribbean
Toshiba America Information
Systems
9740 Irvine Blvd.
Irvine, California 92618
USA
Mexico
Toshiba de M4xico S.A. de C.V
Sierra Candela No. 111, 6to. Piso
Col. Lomas de Chapultepec.
CP 11000 Mexico, DE
800-457-7777 (within the US)
949-859-4273 (outside of the US this call may incur long-distance
&rages)
Spain
Toshiba Information Systems
(Espafia) S.A.
Parque Empresarial San Femando
Editicio Europa, la Planta
Escalera A
28831 (Madrid) San Femando de
Henares
Spain
United
Kingdom
Toshiba Information Systems
(U.K) Ltd.
Toshiba Court
Weybridge Business Park
Addlestone Road
Weybridge, Surrey KT15 2UL
United Kingdoln
,,_o.,°,,,.°.o°,
w,°.° 206
•
"
9
"
Toshtba
s world_ ld_
c_i_e,_
United States
Toshiba America Information
Systems, Inc.
9740 Irvine Boulevard
Irvine, California 92618
United States
The Rest of Europe
Toshiba Europe (I.E.) GlnbH
Hmrnnfelddalrnn 8
D-4-1460 Neuss
Germany
For more information on additional Toshiba worldwide locations,
please visit: w_ww.toshiba.co.jp/index.htm.
AppendixA
HotKeys/TOSHIBA
Cards
Hot keys and TOSHIBA Cards provide a quick way to modify
selected system functions and to launch applications.
There are two types of TOSHIBA Cards: Hot Key Cards and
Application Cards.
HotKeyCards
The Hot Key Cards are used to modil_ the following system
functions:
oto Mute
oto Password security
oto Power Plan
oto Sleep
oto Hibernation
oto Display switch
oto Brightness control
oto Wireless communication
oto TouchPad switch
oto Display resolution switch
207
switch
HotKeys/I'OSHIBA
Cards
208
Hot K_' Cmds
Usingthe HotKeyCards
The Hot Key Cards are normally hidden from view. The Cards
appear only when the pointing device is moved to the top center
edge of the screen.
In addition, a Hot Key Card can be displayed
associated hot key.
NOTE
Move the cursor to the top center
The TOSHIBA
(Sample Image)
2
the
Hot keys arekeysthat, when pressed in combination with the en key,
turn systemfunctions on and off. Hot keys havea legend on the key
indicating the option or featurethe keycontrols.
To use the Hot Key Cards using the pointing
1
by pressing
Double-click
device:
edge of the screen.
Cards appear along the top of the screen.
Hot Key Card di._7_lay
the Card for the system function
to be modified.
The selected Card is displayed full-size with its available
options below it. All other Cards are again hidden from view.
3
Click the desired option.
To use a Hot Key Card using a hot key:
1
Press the hot key associated
with the desired
The associated hot key card appears
with its available options below it.
2
function.
at the top of the screen
To cycle through the displayed options, hold down Fn and press
the hot key repeatedly. Release the Fn key when the desired
option is selected.
209
HotKeys/TOSHIBA
Cards
Application Cards
Application
Cards
The Application Cards are used to launch these applications:
TOSHIBA
Assist
For more information, rel_r to "TOSHIBA Assist"
on page 141.
.......
PC Diagnostic
Tool utility
For more information, refer to "TOSHIBA PC
Diamlostic Tool Utility" on page 151.
ConfigFree
utility
For more information, rel_r to "ConfigFree xM'' on
page 169.
Bluetooth settings
This Application Card launches your B/uetooth :R_
setthlgs.
N
Disc Creator
utility
This Application Card launches the TOSHIBA Disc
Creator utility.
Toshiba Hardware
Setup utility
For more information, refer to "Toshiba
Hardware Setup" on page 153.
TOSHIBA
Button
Support
utility
For more inlbnnation, retbr to "TOSHIBA
Support" on page 156.
NOTE
Notall functionsaresupportedon all models.
Button
HotKeys/fOSHIBA
Cards
A1)plication Cards
210
Using the Application Cards
To launch an application using the Application Cards:
1
Move the cursor to the top center edge of the screen.
The TOSHIBA Cards display at the top of the screen.
!
"stacked"Card
(Sample Image) TOSHIBA Card dis!)lay
2
Click the "stacked" card on the tar right of the display. The
Application Cards are hidden under this card.
The Application Cards appear, and the Hot Key Cards are
stacked under the Card on the fiat left.
0
(Sample Image) Ap!)lication Card display
3
Double-click the Card t\_r the application to be launched.
The associated application is launched.
CardCase
The Card Case feature allows you to choose which cards appear in
the Application Card display (see "Using the Application Cards" on
page 210). To use the Card Case:
1
Move the cursor to the top center edge of the screen.
The TOSHIBA Cards appear at the top of the screen. An icon
_ appears momentarily in the top-right corner.
2
Click the _
(Sample Image)
icon.
Starting
Card Case
21
1
HotKeys/TOSHIBA
Cards
Al_plication Cards
3
The Card Case displays two rows of Cards.
Cards that appear solid (not transparent) in the top row are
enabled and can be selected when the Application Cards are
displayed. The bottom row contains all of the disabled cards.
i
i
(Sample Mzage)
4
5
i
ii
Etmbling
and Disabling
Application
Cards
To enable
a card, drag it from the top row to the bottom
To disable
a card, drag it from the bottom
To close the Card Case, click the []
corner of the screen.
row.
row to the top row.
icon in the top-right
HotKeys/TOSHIBA
Cards
Holk'Tflmcfiom
212
Hotkeyfunctions
Hot key functions are pert\_rlned using either the Hot Key Cards oi
by pressing the associated hot key. This section lists the available
Hot key functions.
NOTE
Hotkeysarekeysthat,whenpressedin combinationwith theFnkey,
turn systemfunctionson andoff.Hot keyshavea legendonthekey
indicatingtheoptionor featurethe keycontrols.
VolumeMute
This TOSHIBA Card or hot key enables/disables volume
mute on your computer.
When volume mute is enabled, no sound wilt come from
the speakers or headphones.
or
Fn+_
Selecting this Card or pressing the hot key displays the
_dtowing options:
(Sample Image) Volume Mute options
•:.
To enable mute, select _.
•:.
To disable mute, select _.
21 3
HotKeys/TOSHIBA
Cards
Password security
This TOSHIBA Card or hot key blanks tile display.
Selecting this Card or pressing the hot key displays the
tbllowing options:
or
Fn+
(.S'mp_plehpmge) _%c_¢rit
3 optio,_s
o:o TO enable security, select O
o:o TO cancel, select _.
The Fn+ F1hot key function activates instant security. The user
logon screen will appear and a user with a valid account will need
to log back on to gain access to the computer.
HotKeys/TOSHIBA
Cards
214
Power plan
This TOSHIBA Card or hot key displays the power plans
and cycles through the power plans.
The properties of each power plan, and the power plans that
are displayed by this function, are set in the Power Options
window.
Selecting this Card or pressing the hot key displays the
currently selectable power plans:
(Sample Image) Power Pkm optiom,
Cycle through the pouter plans, then select the desired
power plan.
21 5
HotKeys/TOSHIBA
Cards
Sleepmode
This TOSHIBA Card or hot key places the computer into
Sleep mode.
For more hlfonnation about Sleep mode, please see "Ushlg
mid COlOr]miring
Sleep mode" on page 81.
or
Selecting this Card or pressing the hot key displays the
tbllowing options:
Fn÷
(Sample Image) Sleep optiom*
o.*o To enable Sleep mode, select _.
o.*o To cancel, select _.
HotKeys/TOSHIBA
Cards
Holk'Tfimcrions
216
Hibernation
mode
This TOSHIBA Card or hot key places the computer into
Hibernation mode.
O[
Fn+
If Hibemation mode is disabled, this hot key will not
respond. For more information on Hibernation mode, see
"Usthg and COlOr]miring
Hibernation mode" on page 79.
Selecting this Card or pressing the hot key displays the
_bllowing options:
(Sample Image) Hiber,mtio,_ optio,_s
o:* To enable Hibernation mode, select _.
o:* To cancel, select _.
21 7
HotKeys/TOSHIBA
Cards
Displaymodes
Tiffs TOSHIBA Card or hot key cycles through the poweron display options.
NOTE
or
Fn÷ ÷
Somemodesareonlyavailablewiththe
appropriatedeviceattachedandturnedon.
The display modes are:
o:* Built-in display only
o:* Built-in display and external monitor
simultaneously
o:* External monitor only
o:* Built-in display and TV (or other external video
device) simultaneously
o:* TV (or other external video device) only
o:* Built-in display and external monitor (extended
desktop)
o:* Built-in display and TV (extended desktop)
To use a simultaneous mode, you must set the resolution of
the internal display pmlel to match the resolution of the
external display device.
Selecting this Card or pressing the hot key displays the
tbllowing options:
÷®÷÷÷÷÷@÷÷÷
(SamI)le h'm_£,e)Dis/)la 3 mode optiom_
Cycle through the display modes, then select the desired
mode.
Not all functions are supported on all models.
HotKeys/TOSHIBA
Cards
Hol k<_,flmcrioi_s
NOTE
218
SomesystemsalsosupportanadditionalSwapImageDisplay
mode.Thismodeis availableonlyif thecurrentsettingis an
extendeddesktopmode(Built-inDisplayandExternalMonitor,or
Built-inDisplayandTV).Inextendeddesktopmode,the imageis
split intotwo sides,onesideperdisplaydevice.Toswapsides,
selectSwapImageDisplay.
Displaybrightness
This TOSHIBA Card decreases or increases the screen
brightness.
Fn÷÷
This hot key decTeases the scTeenbrightness.
Fn+
This hot key increases the screen brightness.
Selecting this Card or pressing either hot key displays the
tbllowing options:
(Sample Image) Di,Ypla) brighmess
Move the slider or press the appropriate hot key repeatedly
to decrease or increase the display brightness.
21 9
HotKeys/TOSHIBA
Cards
Hot/_'.fWzctiom
Disabling
or enablingwirelessdevices
This TOSHIBA Card or hot key enables/disables the
optional wkeless devices installed in your computer.
The wireless modes are:
or
Fn÷
o:. Wi-Fi ®enable_Enables
just the Wi-Fi ®module.
•5* Bluetooth "_*enabte_Enables
Bluetooth "_*module.
.just the
+
All disabled
modules.
Disables tJle Bluetootl{R*and Wi-Fi'_
+
All enabled
modules.
Enables the Bluetooth "_*and Wi-Fi'_
Selecting this Card or pressing the hot key displays the
tbltowing options:
(Sample
hpmge) Wireless commw_icatio,_
o:. To enable Wi-Fi ®, select _.
o**oTo enable Bluemoth "_*,select _.
o:* To enable all, select _.
o:* To disable all, select _.
o:* To cancel, select _.
*Available on certain models.
optiom,
220
HotKeys/I"OSHIBA
Cards
Hot kg_'flu_'tion_
Disabling or enabling the TouchPad" or Dual Mode Pad
This TOSHIBA Card or hot key enables/disables either the
TouchPad or the Dual Mode Pad.
or
Fn+
For more information on using the YouchPad or Dual Mode
Pad, see "Using the TouchPadT_'r'on page 65 or "Using the
Dtual Mode Pad" on page 67.
Selecting this Card or pressing the hot key displays the
_bltowing options:
(Sample Image) Disable
Mode Pad optiot_s
or Em_ble TouchPad
or Dual
o:o To enable the TouchPad or DualMode Pad,
selectS.
o:o To disable the TouchPad or DualMode
selectS.
Pad,
221
HotKeys/TOSHIBA
Cards
Hol/_Tf!_lzcliom
Changingscreenresolution
This TOSHIBA Card or hot key switches screen resolution.
Selecting this Card or pressing the hot key displays the
I[_llowingoptions:
or
[Spacebar]
(Sample hpmge) Scr(,e_t r(<,olutio,t optio,ts
Cycle through the screen resolutions, tJlen select the desired
resolution.
HotKeys/TOSHIBA
Cards
HoIk'Tflmcfions
222
Keyboardhotkeyfunctions
Fn÷_
This hot key rams the cursor control overlay on and off
Fn÷
This hot key rams the numeric overlay on and off
Fn+
This hot key rams the scroll lock t}amre on and off"
Fn+_
This hot key rams the Zooming utility to zoom-out.
Fn+
This hot key rams the Zoomhlg utility to zoom-in.
AppendixB
PowerCord/Cable
Connectors
Your notebook computer features a universal power supply you can
use worldwide. This appendix shows the shapes of the typical AC
power cord/cable connectors for various parts of the world.
USAandCanada
UnitedKingdom
UL approved
CSA approved
BS approved
Australia
Europe
AS approved
VDA approved
NEMKO approved
223
Glossary
TECHNICAL
NOTE:Somefeaturesdefinedin this glossarymaynot
beavailableon yourcomputer.
Acronyms
The t\_ltowing acronyms may appear in this user's mJide.
AC
alternating current
BIOS
basic input/output system
bps
bits per second
CD
compact disc
CD-ROM
compact disc read-only memory
CD-RW
compact disc rewrite memory
CMOS
complementary
COM1
communications
port 1 (serial port)
COM2
communications
port 2 (serial port)
CPU
central processing unit
DC
direct current
DMA
direct memory access
DIMM
dual inline memory module
metal-oxide semiconductor
224
225
DOS
disk operating system
DPI
dots per inch
DSTN
dual supertwist nematic
DVD
digital versatile (or video) disc
DVD-ROM
digital versatile (or video) disc read-only memory
ECP
enhanced capabilities port
EPROM
erasable pro_ammable
FAT
tile allocation table
FCC
Federal Communications
GB
gigabyte
HDD
hard disk drive
HTML
Hypertext Markup Language
IEEE
Institute of Electrical and Electronics Engineers
I/O
input/output
IRQ
interrupt request
ISP
Internet service provider
KB
kilobyte
LAN
local area network
LCD
liquid crystal display
LPT1
line printer port 1 (parallel port)
LSI
large-scale integration
MB
megabyte
MIDI
Musical Instrument Digital Interface
PC
personal computer
PCI
Peripheral Component Interconnect
PCMCIA
Personal Computer Memory Card International
Association
RAM
random access lrlelrlOry
RFI
radio flequency interference
ROM
read-only memory
RTC
real-time clock
SCSI
small computer system intedhce
read-only memory
Cmrnnission
G,o
SDRAM
synchronous dynamic random access memory
SRAM
static random access melnory
SVGA
super video graphics adapter
TFT
thin fihn transistor
USB
universal serial bus
URL
uniforln resource locator
WAN
wide area network
WWW
World Wide Web
ary
226
Terms
The tbtlowing terms may appear in this user's guide.
A
active-matrix display
A liquid crystal display (LCD) made fiom ml
array of liquid crystal cells using active-lnatrix technology. Also
kno,an as a "TFT display," in its simplest form there is one thin fihn
trmlsistor (TFT) tbr each cell. This type of display works well with
notebook computers because of its shallow depth and high-quality
color. Active-lnatrix displays are viewable tiom wider mlgles than
most passive-lnatrix displays.
adapter
A device that provides a compatible connection between two
units. For exmnple, the computer's intemal display adapter receives
information fiom the sotgvare and trmlslates it into images on the
scaeen. An adapter can take a number of forlns, fiom a
micaoprocessor to a simple connector. An intelligent adapter (one
that is capable of doing some processing) may also be called a
controllei:
alternating current (AC)
The type of power usually supplied to
residential mid comlnercial wall outlets. AC reverses its direction at
regular intervals. Colnpare direct current (DC).
application
A computer program that you use to perforln tasks of a
specific type. Applications include word processors, spreadsheets,
and database mmmgelnent systems. See also pn_,,ram.
backup
A copy of a file, usually on a relnovable disk, kept in case the
original file is lost or dmnaged.
basic input/output
system (BIOS)
See BIOS.
227
G,o .,y
baud rate
The speed at which a colranunication device, such as a
printer or modeln, translnits intL)nnation.Baud rate is the number of
siNlal changes per second (not necessm_ilythe same as bits per
second). See also bits per second.
BIOS (basic input/output system)
Basic inst_uctions, stored in readonly memory (ROM), containing the information the colnputer
needs to check hardware and bad the operating system when you
start up the computer.
bits per second (bps)
A way oflneasurthg the speed at wNch
information is passed between two devices. This is the basic unit of
measure used in modeln comlnunications, and is similar, but not
identical, to the baud rate. See also baud raw.
boot
To start the computer. The tenn"boot" originates fiom bootstrap
pro marn (as in "pulling itself up by its bootstraps"), a pro m'am that
loads and thifiatizes the operating system. See also reboot.
boot disk
See system disk.
boot priority (startup sequence)
The order in which the computer
accesses its disk drives to locate the starmp files. Under the dethult
starmp sequence, the computer looks for the starmp files in the
diskette drive before checking the hard disk.
bus
An electrical chcuit that connects the central processing unit
(CPU) with other parts of the compute1; such as the video adapter,
disk drives, and ports. It is the pathway through which data flows
fiom one device to another. See also bus speed, fi'on_idc bus.
bus speed
The speed at wNch the central processthg unit (CNJ)
comlnunicates with the other parts of the colnputer.
cache
A section of very thst melnory th which fiequentty used
information is duplicated for quick access. Accessing data fioln
cache is thster than accessing it fiom the colnputer's main melnory.
See also CPU cache, L1 cache, L2 caclw.
CD
An thdividuat compact disc. See also CD-ROM.
CD-ROM (compact disc read-only memory)
A forln of highcapacity storage that uses laser optics thstead ofmagnefic means tbr
reading data. See also CD. Colnpare DVD-ROM.
228
central processing unit (CPU)
The chip that functions as the "brain"
of the computer. It takes information fiom outside sources, such as
melnory or keyboard input, processes the intbnnation, and sends the
results to another device that uses the ilRbnnation.
character
Any letter, number, or symbol you can use on the
compute1: Solne characters are non-printing characters, such as a
paramaph break in a word-processing pro m'mn. A character
occupies one byte of computer storage.
chip
A small piece of silicon containing computer loNc and circuits
for processing, melnory, input/output, and/or conuol functions.
Chips are mounted on printed chcuit boards.
click
To press and release the pointing device's primary button
without moving the pointing device. In the Windows®operating
system, this refers to the pothting device's left button, unless
otherwise stated. See also double-click.
color palette
A set of specified colors that establishes the colors that
can be displayed on the screen at a particular time.
compatibility
The extent to which computers, pro mmns, or devices
can work together harmoniously, using the same comlnands,
formats, or language as another.
configuration
(1) The collection of components that make up a single
computer systeln. (2) How parts of the system are set up (that is,
conl]_red).
controller
A device that controls the transfer of data fiom a computer
to a peripheral device and vice versa. For example, disk drives,
monhors, keyboards, and printers all require controllers.
CPU
See (z_ntrulprocessing unit (CPU).
CPU cache
A section of very fhst melnory residing between the CPU
and the computer's main melnory that telnporarily stores data and
instructions the CPU will need to execute colnlnands and pro_alns.
See also cache, L1 (zMw, L2 (zlche.
cu_or
A symbol that indicates the current position on the screen. The
shape of the cursor varies, depending on the progrmn you are using
and what you are doing.
D
default
The setting selected by a pro maln when the user does not
specify an alternative setting.
229
G,o .,y
device
A component attached to the computer. Devices may be
extemal (outside the computer's case) or internal (inside the
computer's case). Printers, disk drives, and lnodems are exmnples of
devices.
device driver
A prograln (called a "driver") that permits a computer
to colrnnunicate with a device.
dialog box
An on-scTeenwindow displayed by the operating system
or a program giving a direction or requesting input tiom the user.
direct current (DC)
The type of power usually supplied by batteries.
DC flows in one direction. Compare alternating _nvnt (kC).
direct memory access (DMA)
A dedicated chalmel, bypassing the
CPU, that enables direct data trans*_rbetween lnemory and a
device.
directory
disable
See fi_Mer.
To mm a computer option olt_ See also enable.
disc
A round, flat piece of material, desimled to be read fiom and
written to by optical (laser) technolow, and used in the production
of optical discs, such as CDs and DVDs. Compare disk.
disk
A round, flat piece of material that can be magnetically
influenced to hold thtbnnation in digital tbnn, and used in the
production ofmamqetic disks, such as diskettes and hard disks.
Colnpare disc See also diskette, hard disk.
disk drive
The device that reads and writes information and programs
on a diskette or hard disk. It rotates the disk at high speed past one or
more read/write heads.
diskette
A thin, flexible disk in a protective jacket that stores
magnetically encoded data. Diskettes can be relnoved from the
computer and come in two sizes: 5.25-inch and 3.5-inch. Yore
computer uses 3.5-inch diskettes. See also double-densiO, disketw,
high-densi O"diskefle.
document
Any file created with an application and, if saved to disk,
given a nmne by which it can be retrieved. See alsofi/e.
double-click
To press and release the pointing device's primary
button rapidly twice without moving the pointing device. In the
Windows®operating system, this re*_rsto the pointing device's left
button, unless otherwise stated.
230
double-density diskette
A 3.5-inch diskette that can hold up to
720 KB of information (half the capacity of a high-density diskette).
See also diskette, high-densi O"diskette.
download
(1) In comlnunications,
to receive a file from another
computer throu_l a lnodeln or newvork. (2) To send tbm data fiOlT1
the COlnputer to a printer. See also upload.
drag
To hold do,a_ the lnouse button while lnoving the cursor to drag
a selected object. In the Windows :"operating systelT1, this refers to
the left mouse button, unless otherwise stated.
driver
See &_'ke drivel_
DVD
An individual digital versatile (or video) disc. See also DVDROM.
DVD-ROM (digital ve_atile [or video] disc read-only memory)
A
very high-capacity storage lnedium that uses laser optics for readthg
data. Each DVD-ROM can hold as much data as several CD-ROMs.
Colnpare CD-ROM.
emulation -- A technique in which a device or pro mmn hnitates another
device or prograln.
enable
To turn on a colnputer option. See also disable.
executable file
A computer progrmn that is ready to ran. Application
progrmns and batch tiles are exmnples of executable files. Names of
executable files usually end with a .bat or .exe extension.
expansion device
A device that connects to a computer to expand its
capabilities. Other names tbr an expansion device axeport expander,
port replicator, docking station, or network adapter.
extension
See file retension.
external device
file
See devi(z'.
A collection of related information, saved on disk with a unique
nmne. A file may be a pro mmn, information used by a progrmn, or a
document. See also do{_lment.
file allocation table (FAT)
The section of a disk that keeps track of
the location of files stored on the disk.
file name
A set of characters that uniquely identifies a file withth a
particular tbtder. It consists of two parts: the actual nmne and the file
nmne extension. See alsof!le extension.
231
file exlension
The three ch_wactersfollowthg the period (pronounced
"dot") at the end of a file naane. The extension indicates the type of
file. Examples are .exe for pro_am files aald .hlp for help files. See
atso file name.
folder
Also called directory. A container for orgmlizing files saved to
a disk. A folder is s3anbolized on screen by a graphical image (icon)
of a file I[4der. A I[_idercan contain files and other folders.
format
(verb) To prepare a blank disk for use with the colnputer's
operating system. Formatting creates a structure on the disk so the
operating sTstem can write inIbnnation to the disk or read
infonnation fiom it.
frontside bus
The prhnary pathway (bus) between the CPU and the
computer's main memory. Also called "system bus." See also bus.
function keys
The keys labeled F 1 through F 12, typically located on
the keyboard. Their function is determined by the operating system
and/or iMividual programs.
6
ground
A conductor to which all components of an electric circuit are
connected. It has a potential of zero O) volts, is connected to the
earth, and is the point of reference for voltages in the circuit.
[t
hard disk
A storage device composed of a rind platter or platters that
can be magnetically coded with data. Hard disks hold much more
inlbnnation than diskettes and are used *brlong-term storage of
pro_mns and data. The primary (or only) hard disk in a computer is
usually fixed, but some computers have secondary hard disks that
are relnovable. By de*hult,the hard disk is re*hTed to as drive C.
hardware
The physical components of a computer system. Compare
Hibernation
A feature of many Toshiba notebook computers that
saves to the hard disk the current state of your work, including all
open files and pro mmns, when you turn the computer off When
you turn on the computer again, your work is returned to the same
state it was when the computer was turned off See also Sleep,
Suspend
high-densiiy diskeiie
See also diskette.
A 3.5-inch diskette that holds 1.44 MB of data.
232
hot key
(1) A feature in which certain keys in combination with the
Fn key can set system options or contxol system paraaneters, such as
the battery save mode. (2) A key or combination of keys that
activates a lnelnory resident program.
hot swapping
The ability to add or relnove devices fiom a colnputer
while the computer is running and have the operating system
automatically recomnizethe change.
icon
A small image displayed on the screen that represents a function,
file, or prograln.
interlaced
A method of refieshing a computer scaeen, in which only
every other line ofpixels is refieshed. Interlaced lnonltors take two
passes to create a complete screen hnage. Compare non-irlWrlaced
internal device
See devi_ _.
Intemet
The decentzalized, world-wide network of computers that
provides electronic mail, the World Wide Web, and other smices.
See also World g/Me Web.
I(
keyboard shortcut
A key or combination of keys that you use to
pertbnn a task instead of using a pointing device such as a 1house.
L
L1 (level one) cache
Melnory cache built into the processor to help
ilnprove processing speed. See also cache, CPU cache, L2 _zMw.
L2 (level two) cache
Memory cache installed on the motherboard to
help ilnprove processing speed. It is slower than L 1cache and ihster
than 1Tiffin
111e1Tlory.
See also (zMw, CPU cache, L1 (zMw.
LAN (local area network)
A _oup of computers or other devices
dispersed over a relatively lhnited area and connected by a
COlrnnunicationslink that enables any device to interact with any
other on the network.
liquid crystal display (LCD)
A type of display that uses a liquid
substance between two transparent electrode panels. When an
electric cunent passes through the electrodes, the molecules in the
liquid tbnn a crystalline pattern that polarizes the light passing
through it. A tilter over the electrodes permits only non-polarized
light to pass to the surthce of the display, ereating light and dark
pLxels.
load
To move inlbnnation tiom a storage device (such as a hard disk)
into melnory for processing.
233
local area network
See !AN.
logical drive
A section of a disk that is recognized by the operating
system as a separate disk drive. A system's logical drives may differ
tioln its physical drives. For exmnple, a single hard disk drive may
be partitioned into two or more bgical drives.
M
memory
Typically re*h's to the computer's main melnory, where
pro_mns are mn and data is telnporm_itystored and processed.
Melnory can be volatile and hold data temporarily, such as RAM, or
it can be nonvolatile and hold data permanently, such as ROM. A
computer's main melnory is RAM. See RAM, ROM.
microprocessor
See _ntral
processing
un# (CPU).
MIDI (Musical Instrument Digital Interface)
A standard _br
connecting musical instruments, synthesizers, and computers. The
MIDI standard provides a way of translating music into a _bnn
computers can use, and vice versa.
modem
Short for "modulator/delnodulator."
A device that converts
infbnnation fiom digital to analog, and back to digital, enabling
information to pass back and tbrth between digital computers and
analog telephone lines.
motherboard
The computer's main circuit board that contains the
processor, melnory, and other primary components.
MS-DOS
prompt
multi-function
drive
DVD media.
See s):_tem prompt.
A DVD drive that can read and write to CD and
multimedia
A colnbination of two or more media, such as sound,
animation, and video in a computer pro mmn or presentation.
Musical Instrument
N
Digital Interface
See MIDL
network
A collection of computers and associated devices that are
connected by comlnunications thcilities. A newvork allows you to
share data and peripheral devices, such as printers, with other users
and to exchange electronic mail.
non-interlaced
A method of refreshing a colnputer screen, in which
each pLxeIof every line is refieshed as the electron bemn scans
across and down the screen. Colnpare illwrla_,d
234
non-system disk
A disk for storing pro m'ams and data that cmmot be
used to start the colnputer. Compare ,s?'swmdisk.
0
online
Available through the compute1: Online may refer to
information being read fiom your o,a_ computer's hard disk, such
as online documentation or online Help, or to inlbnnation coming
fioln another colnpany on a company network or the Internet.
operating system
A set ofprogralns that controls how the computer
works. Examples of operating systems axethe Windows Vista"
Utthnate and Windows Vista Holne Basic operating systems.
TM
optical drive
A drive which reads plastic coated discs on which
inlbnnation is recorded digitally, and uses a laser to read data,
music, or videos.
palette
See color palette.
parallel
Processes that occur simultaneously. In colrnnunications, it
means the txanslnission of more than one bit ofintbnnation at a
time. On yore computer, the parallel port provides a paralM
comlnunications interthce bewveen the computer and an appropriate
device. Most modern printers are parallel. Compare serial
password
A unique string of characters entered by a user to verify his
or her identity to the computer or the network.
PC Card
A credit-card-sized expansion card desimled to increase the
capabilities of notebook computers. PC Cards provide fanctions
such as modeln, thx/modeln, hard disk drive, network adaptm;
sound card, or SCSI adaptei:
peripherM
Any device, such as a printer or joystick, that is attached
to the computer and controlled by the computer's CPU.
pixel
Short tbr "picture element." The smallest dot that can be
produced on a screen oi printer.
Plug and Play
Generally, re*}rsto the computer's ability to
automatically configure itself to work with peripheral devices.
When capitalized, re*}rs to a standard that, when tbllowed by a
device manufacturer, albws a computer to confi_re itself
automatically to work with the device.
pointing device
Any device, such as the TouchPad or a mouse, that
enables you to 1hove the cursor on the screen.
235
G,o=.,y
port
A socket on the computer where you plug in a cable for
connection to a newvork or a peripheral device.
processor
See {z,ntral pm{z,ssing unfl (CPU).
program
A set of instructions that can be executed by a computer.
The general classes ofprogmns (also called soNvare) are operating
system, application, and utility. See also ol)eratil_g Ustem,
a/)plication, utilit)'.
properties
The attributes of an object or device. For exmnple, the
properties of a file include the file's type, size, and creation date.
R
RAM (random access memory)
Volatilemelnory that can be
written to as well as read. Volatile here means that infbnnation in
RAM is lost when you turn offyour computer. This type ofmelnory
is used fT3ryour computer's main memory. See also memo U.
Compare ROM.
random
access memory
See RAM.
read-only
memory
See ROM.
reboot
See boot, restart.
removable disk
A disk that can be relnoved fiom a disk drive. A
diskette is one example ofa relnovable disk.
resolution
produced
resolution
expressed
vertically.
A measure of the sharpness of the images that can be
by a printer or displayed on a screen. For a printer,
is expressed in dots per inch (dpi). For a screen, it is
as the number of pixels available hoi_ontalty and
restart
Synonymous with reboot. To reset the computer by reloading
the operating system without turning the computer off See also
boot.
RJll
A modular connector used on most U.S. telephone systems and
direct-connect modems. The RJ11 connector is a 6-wire connector.
ROM (read-only memory)
Non-volatile melnory that can be read
but not written to.Non-volatile here means that infbnnation in ROM
remains whether or not the computer is receiving power. This type
of memory is used to store your computer's BIOS, which is
essential instructions the computer reads when you start it up. See
also BIOS, memo O" Compare RAM.
236
S
select
To highlight or otherwise specil_ text, data, or gaphlcs with the
intent to pert;)nn solne operation on it.
scrim
Processes that occur one at a time. In comlnunications, it means
the translnission of one bit at a time sequentially over a single
channel. On your computer, the serial port provides a serial interface
between the computer and an appropriate device. Compare parallel.
shortcut
See keyboaM shortcut.
Sleep
A feature of some Wthdows ®operating systems that allows you
to turn offthe computer without exiting your open applications and
to contilme from where you left offwhen you tum the computer on
again.
software
See program. Colnpare hardware.
Suspend
A t}ature of some Windows :"operating systems that allows
you to turn off the computer without exiting your open applications
and to continue ffoln where you left offwhen you tum the colnputer
on again.
system disk
A diskette that contains the operating system files needed
to start the computer. Any diskette can be formatted as a system
disk. A system disk is also called a "bootable disk" or a "starmp
disk." Compare non-system disk.
system prompt
The symbol (in the MS-DOS" operating system,
generally a drive letter followed by a "re'eater than" sign) indicating
where users are to enter COlnlnands.
T
U
TFT display
See active-matrix
dispho,.
universal serial bus (USB)
USB is a serial bus that supports a data
transt_r rate of up to 480 Mbps (480 lnitlion bits per second). USB
can connect up to 127 peripheral devices thlough a single allpurpose USB port. USB allows hot swapping of peripherals. See
also bus, hot swal)l)irlg, serial
upload
To send a file to another computer through a modeln or
network. See also dowrdoad.
USB
See univel_al serial bus (USB).
utility
A computer prograln designed to pertbnn a narrowly focused
operation or solve a specific probleln, l_Nlities are often related to
computer system managelnent.
237
W
G,o .,y
Web
See World Wide Web.
Wi-Fi <'_ A re_stered trademark term of the Wi-Fi Alliance that st,ands
for Wireless Fidelity, and is another term for the communication
protocol to permit ml Ethemet connection using wireless
colrnnunication components.
World Wide Web (www)
The worldwide network of Web sites
linked together over the Internet. A user of the Web can jump tioln
site to site regardless of the location of the colnputer hosting the site.
See also Ir_temet.
Index
A
AC adaptor 44
AC power
connecting adaptor 45
accessories
melnory 49
adding melnory 49
Att keys 89
Application Cards 209
audio
tiles 132
audio *_amres 132
B
backing up files 87
battery
changing 115
chmge indicator light 46, 108
chaNe not lasting 182
chaiging 44, 46
consm:ing power 112
disposal 120
low charge 110
monitoring power 46, 108
not charging 182
notification 111
power plan 214
power plaalhot key 114
real-time clock (RTC) 105
relnm4ng 115
BIOS Setup
see Toshiba Hardware Setup
Bridge Media Adapter
inserting memory media 138
relnoving memory media 138
button
power 48, 58
start 124
c
CD
c_eating 102
playing an audio 100
CD, using 97
character keys 88
charging the battery 46
checking device properties 180
click 66
colrnnunications
network connection 127
238
239
I.,o,
setup 125
compact disc positioning 100
compact discs
handling 100
inserting 99
removing 102, 103
compact disk drive
using 97
computer
caring for 84
cleaning 84
moving 84
non-systeln disk oi disk error
message 176
not accessing disk drives 175
running on battery power 104
setting up 42, 50
waming resume failure message
175
computer lock 85
colnputing tips 86
connecting to a power source 44
connection
setup 128
control buttons 66
Ctxl keys 89
O
desktop
creating new icon 123
major features 123
desktop exploration 122
desktop icons 123
Device Manager 180
checking properties 180
devices
keyboard 71
mouse 72
Disk Deliamnenter 186
disk drive
corrupted/damaged data files 187
missing files/trouble accessing a
disk 186
running slow 186
diskette drive
cannot insert a diskette 187
cannot read a diskette 187
connecting 73
external, connecting 73
display
does not look normal/flickers 184
external monitor not working 185
screen is blank 184
display device
external 69
display output settings 70
display, external
adjusting 71
disposal inlbnnation 26
disposing of used batteries 120
double-click 66
DVD
creating 102
DVD player
general problems 197
DVD, using 97
E
enviropanent
computer-fiiendly 39
error messages
device driver coNlict 179
general hardware problmn 179
non-systeln disk or disk reor 176
problmn with display settings/
current settings not working
with hardware 185
warning resallne Ihilure 175
Error-checking 186
Ethemet LAN port 128
expansion melnory slot 51
exploring the desktop 122
Index
ExpressCmd
inserting 136
relnoving 136
external
monitor
not working 185
mouse 72
external diskette drive
connecting 73
external display, adjusting 71
F
FAT (File Allocation Table) 186
file extensions 95
file,backing up 87
files
backing up 96
printing 95
restoring
96
saving 93
fingerprint
authentication 159
epaolhnent 159
Fn keys 89
funcfion keys 89
H
hardware conflicts 179
resolving 180
headphones
using 133
Help aald Support
Windows,_r9operating system 179
Hibernation mode 75
conliguring 79
starting again fiom 81
hot key
display bri_ltness 218
display modes 217
Hibernation mode 216
keyboard overlays 222
password security 213
power plan 214
240
Sleep mode 215
volume mute 212
zooming 222
Hot Key Cards 207
hot key power plan 114
http 130
I
i.LINK port 139
icon 123
desktop 123
Intemet Explorel<r9123
moving to desktop 123
recycle bin 123
safety 37
installation
memory module 49
installing
memory modules 49
mouse 72
instmlt passwords, using 147
Internet
bookanarked site not found 178
connecting to 130
features 131
slow connection 178
Sulfmg 131
uploading and downloading files
132
URL address not found 178
using 129
Internet Explorer,_r9icon 123
Internet Smice Providers 130
ISPs 130
J
jack
RJ-11 127
K
keyboard
chm'acter keys 88
function keys 89
241
Index
hot keys 222
not working 175
overlay keys 90
special WiMows(_ keys 89
troubleshooting 183
using 88
keyboard, external 71
keyboard, thll-size 88
l
lock
computer, using 85
N
main battery
relnoving 115
melnory
adding 49
probleln solving 181
relnoving expansion slot cover 51
melnory module
inserting 52
installation 49
relnoving 56
microphone 132
modem
connecting to telephone line 126
determining COM port 125
probleln solving 193, 194
resetting port to deihult settings
125
up mading 125
monitor 69
connecting 69
not working 184
mouse
installing 72
sm_ial72
N
network
accessing 127
Dial-Up Net_x_rking Wizard 127
networking
wireless 129
Notification Area 124
0
opening the display panel 47
optical drive
problelns 187
troubleshooting 187
other documentation 38
overlay keys 90
P
password
deleting a supm:isor 149
disabling a user 150
setting auser 149
supmisor
setup 148
types 147
passwords
instant, using 147
setting 147
PC Card
checklist 189, 191
computer stops working 190,
192
configuring 135
errors 190, 192
hot swapping _hits 190, 192
inserting 134
not recoguized 190, 192
probleln solving 189, 191
relnoving 135
setting up 135
port
COM 125
Ethemet LAN 128
RGB 69
power
computer will not start 174
connecting cable to AC adaptor
45
Index
cord/cable connectors 223
energy-saving t_atures 104
problem solving 182
turning on 48
power button 48, 58
power plml
hot key 114
power plmls 112
power source 44
connecting 45
powering down
using Hibernation 79
using Shut Down 77
using Sleep 81
precautions 40
primary button 66
printer
connecting 72
problem solving 193
printing a file 95
probleln soNing
AC power 182
accessing disk drives 175
battery charge does not last 182
battery not charrang 182
cannot insert diskette in drive 187
cannot read a diskette 187
chanNng display properties 185
checking device properties 180
computer hangs when PC Card
inserted 190, 192
computer will not power up 174
contacting Toshiba 203,204
corrupted/dmnaged data files 187
Device Manager 180
disk drive is slow 186
display is blank 184
extemal display not working 185
external monitor 184
thulty memory 181
hardware conllict 179
high-pitched noise 189
242
Intemet bookanarked site not
fouM 178
Intemet connection is slow 178
keyboard
not responding 175
missing files/trouble accessing a
disk 186
modem not receiving or
transmitting 193, 194
no sound 188
non-system disk oi disk error 176
PCCard 189, 191
checklist 189, 191
error occurs 190, 192
hot swapping thils 190, 192
not recognized 190, 192
slot appears dead 189, 191
power and batteries 182
printer 193
progrmn not responding 173
progmn not working properly
187
screen does not look right/flickers
184
Startup options 177
URL address not tbund 178
warning resume thilure 175
Windows® operating system not
working 178
pro_am, starting 91
progralns
not running correctly 187
projector 69
connecting 69
R
real-time clock (RIC) battery 105
recording
sounds 132
recording sounds 132
recycle bin icon 123
registering computer 43
removing
243
Index
main battery 115
RJ-11 jack 127
running the computer on battery power
104
s
saI_ty
computer 121
disposing of batteries 120
icons 37
precautions 40
saving files 93
screen
blank 184
does not look normal/flickers 184
secondary button 66
setup colrnnunications 125
setting up
adding melnory 49
computer 42, 50
setting up a connection 128
Sleep mode 76
hot key 215
starting again fiom 84
sound
probleln solving 188
sounds
recording 132
speakers
using external 133
start button 124
Start Search field 93
starting a progrmn 91
Start Search field 93
Windows® Explorer 92
WSMows® Start menu 91
starting up the computer
fiom Shut down 79
fiom Sleep 84
Startup menu
problem solving 177
supervisor password, deleting 149
supervisor password, setup 148
1
Taskbar 124
telephone line
connecting to modem 126
television
adjusting display 71
Toshiba
re_stering computer 43
worldwide offices 205
TOSHIBA Assist 141
Toshiba Hardware Setup 153
Toshiba online resources 103
Toshiba utilities 140
traveling tips 121
troubleshooting
DVD player
general problmns 197
external keyboard 183
keyboard 183
keypad overlay 183
optical drive 187
turning on the computer 48
turning on the power 48
u
user password, disabling 150
user password, setting 149
using a file extension 95
v
video projector
adjusting display 71
w
'vValTanty
limited warranty 38
Web 130
Web Cmn 133
Web sites 204
Wi-Fi®
wireless networking 129
Windows Media(a) Player 100
Index
Windows€) Explorer 92
Windows(R)operating system
Help and Support 179
problem solving 177
Windows€) operating system desktop
122
Windows€) Start menu 91
wireless newvorking 129
Wizards
Dial-Up Networking Wizard 127
World Wide W?b 130
'a_w 130
244